Ensuring that the coolant is in good shape is crucial in keeping your ATV engine from overheating. Sometimes, a regular coolant change is not enough; you need to perform what is known as a coolant flush.
This post aims to provide the information you need about flushing the cooling system on an ATV, what it is, how to know when your ATV needs one, and a step-by-step guide on how to do a coolant flush.
Engine coolant systems vary in design, but the main principles remain the same. A basic ATV cooling system consists of a few key components:
The coolant’s primary task is to transfer heat away from the engine to the radiator. The coolant heats up while inside the engine and cools down when passing down through the radiator.
After cooling down, the coolant is sent back into the engine, and the cycle repeats itself. A pump ensures a continuous coolant stream from the engine to the radiator and back.
Coolant consists of distilled water, chemicals such as glycol or ethylene, and various additives. The chemicals do not carry heat effectively, so we dilute them with water. But why do we use coolant and not plain water?
Anti-corrosive. Using plain water as a coolant would cause internal corrosion in the radiator and engine, reducing the cooling capacity over time. Coolant contains anti-corrosive additives.
Increasing the boiling point. Coolant contains chemicals that raise the boiling point, allowing the cooling system to function at higher temperatures without boiling and overheating.
Decreases the freezing point. The chemicals in the coolant ensure that the fluid stays liquid at sub-zero temperatures.
Prevents deposits and foaming. Additives in the coolant avoid deposits of limestone and others that would reduce the cooling system’s efficiency. They also contain the liquid from foaming, which would reduce their efficiency.
Coolant does not last forever. Over time, the coolant breaks down, becomes less effective, and eventually turns acidic, potentially causing damage to the engine and radiator.
That is why regular coolant changes are required as a part of a proper ATV maintenance schedule.
Some manufacturers, like Yamaha, recommend replacing the coolant every two years, while others, such as Polaris and Can-Am, operate with five-year coolant replacement intervals.
A typical maintenance checklist for the cooling system on an ATV includes the following:
Flushing the cooling system, however, is usually not a part of your regular maintenance routine.
A coolant flush is like a service to the cooling system’s internals. After draining the coolant, a mixture of flushing medium and water is washed through the entire system to clean out rust, dirt, sludge, and any remaining old coolant.
Note that a coolant flush is slightly more comprehensive than a regular coolant change, as it adds a few more steps to the process. The flushing procedure happens after draining out the old and used coolant but before adding new.
Please refer to the How-to-guide below for details on how to perform a coolant flush on your ATV.
As long as you keep up regular coolant changes and only use the correct type of coolant, you may never need to flush the cooling system on your ATV.
However, there are several situations where a proper coolant flush is beneficial or even necessary.
Coolant is one of those things that is often neglected. Before you know it, a coolant change is long overdue.
Over time, the corrosion inhibitors in the engine coolant will break down, increasing the risk of engine or radiator internal corrosion.
When a coolant change is long overdue, the breakdown process may have gone too far, and you are better off performing a complete flush to ensure you only use fresh coolant.
The typical water-to-coolant ratio is 50/50 or 40/60. The mix becomes overly diluted if there is too much water relative to the coolant. This reduces the strength of the coolant, meaning its freezing point is too high. Adding too much coolant to water has the same effect.
The Minimum recommended coolant strength is typical -30ºC (-22ºF). Check the coolant’s strength (specific gravity) using an antifreeze tester (coolant hydrometer).
However, the test will not tell you the cause when the coolant does not carry the required strength. If you’re confident that the coolant is healthy but the mix is off, you could adjust by adding more coolant or water.
Otherwise, it’s better to do a complete flush and start with a new coolant. Choosing a pre-diluted mix helps eliminate any risk of messing up the mixing ratio.
As a bonus, when testing the coolant strength, you get to see if the coolant shows any discoloration or signs of contamination.
New coolant to the left, old coolant to the right.Fresh coolant should have a transparent, bright-colored appearance. When it’s turned brown and cloudy, you know the coolant breakdown and corrosion have gone too far.
In that case, you should always perform a complete coolant flush to eliminate all the old and degraded coolant.
Coolants come in various colors, from pink, red, orange, yellow, and blue to green. You used to be able to determine the type of coolant and what chemicals it was composed of by its color.
Nowadays, there is no way of knowing for sure. While some manufacturers apply traditional color coding, there is no guarantee the ingredients will go along.
Different coolant types do not mix well and may cause harm to your engine. If you bought your ATV used and don’t know for sure what coolant is on the ATV, you should flush all the old coolant to eliminate the risk of mixing two different types.
Flushing the coolant can help restore proper cooling in an ATV that suffers from overheating issues.
If your ATV is boiling or the temp light goes off, a coolant flush should be one of the first things to try.
A coolant flush may or may not solve the problem on your bike, but it’s a relatively cheap thing to try before looking into more serious causes.
Even if there are no evident signs indicating a coolant flush is in place, you might choose to do one as a preventative measure.
Debris may have started to build up even if the cooling system performs as expected.
A coolant flush to keep the system clean and clear of unwanted debris is a relatively affordable service that helps reduce the risk of engine damage and other more costly issues down the line.
Some manufacturer service manuals ask you to see a dealer do a coolant flush. However, the procedure is relatively straightforward and is something most people can do at home.
This step-by-step guide explains, in general terms, the whole process of an ATV cooling system flush. From draining out the old coolant, flushing the cooling system, filling the new coolant, and bleeding out the air.
None of the various ATV service manuals operate with precisely the same procedures, but the main principles are much the same.
A basic coolant change includes the following steps:
When performing a coolant flush, you add a few more steps, but the basic procedures for draining, filling, and bleeding remains the same.
Caution! Escaping steam or hot water can cause severe burns. Never remove the pressure cap (radiator cap) or the cap on a pressurized reservoir tank while the engine is warm or hot. Coolant draining should be performed when the engine is cold.
Notice: Before you begin, ensure you’re not voiding any remaining warranties and understand the potential hazards.
This will ensure the coolant drains entirely and that the levels are correct when it’s time to fill the new coolant.
When doing a coolant flush, you’ll get the best results if you start with a completely drained cooling system. The steps involved vary depending on the ATV’s design. The key is to get as much of the used coolant out of the system as possible.
This procedure also applies when draining out the flushing medium and water according to the “Flushing procedure. ”
”
Removing the radiator cap will make draining easier by allowing air into the system as the fluid drains out.
The radiator cap is on top of the radiator, usually located in front of your ATV. You may need to remove a few plastic covers or the front rack for access.
With a cold engine, turn the pressure cap anti-clockwise for about half a turn to open it. Remove it carefully to release any pressure in the cooling system.
Prepare a suitable container to collect the used coolant. The chemicals used in most coolants are poisonous and must be disposed of properly.
Most ATVs have a coolant drain bolt located on the lower part of the water pump assembly. Follow the radiator hose to find the pump on your bike.
The water pump on my Polaris is hidden behind a plastic side cover and does not have a drain bolt or bleed bolt.
Notice: If the water pump is not accessible or it has no drain bolt, go to step 4 below.
To access the water pump and drain bolt, you may have to remove some components, such as plastic side covers, parts of the footwell, CVT duct, or exhaust shield.
Look for markings on the pump housing indicating the drain bolt’s location. Use the correct size socket to loosen the bolt without removing it.
The coolant comes out with a fair amount of pressure. Don’t remove the bolt entirely until you have positioned the container.
Release the drain bolt and copper washer from the water pump housing swiftly, trying not to make too much of a mess.
Allow the coolant to drain completely. Don’t re-install the drain bolt yet.
Notice: If you’ve successfully drained the coolant through the water pump as outlined in step 3 above, you can likely skip this step as the water pump is usually placed lower than the bottom of the radiator. But there is no harm in performing this as well as a precaution.
On some ATVs, the water pump is inconveniently placed, so it’s better to drain the coolant through the bottom of the radiator.
Some radiators have a dedicated drain bolt, while on others, you have to disconnect the bottom radiator hose.
Tip: Take note of the hose clamp position before loosening it. When re-installing the hose, the clamp should be in the same place for a good seal.
Disconnect the lower radiator hose by the radiator and allow the coolant to drain into a container for proper disposal.
At this point, most of the fluid should be drained, but there is likely some still left in the coolant overflow or pressure tank, usually located near the radiator at the top front end of the ATV.
Your ATV will either have a non-pressurized overflow tank (also known as a recovery tank) or a remote coolant pressure tank. You can tell them apart by what type of cap they have.
An overflow tank is not under pressure and has a simple snap-on cap. A pressure tank is under pressure when the engine is hot and has a more robust tank design and a screw-on style cap.
When performing a coolant flush, the main difference is to remember not to open the pressure tank while the engine is hot, just like you should never open a radiator pressure cap while the engine is hot.
Disconnect the hose at the bottom of the tank to drain any remaining fluid in a container for proper disposal. Re-install the hose when all of the liquid is drained.
After all the fluid is drained, re-install the drain Bolt with a NEW sealing washer. Tighten to spec, typically 10Nm +/- 1Nm of torque.
Also, re-install the lower radiator hose to the radiator. Try to place the clamp in the same position as it was.
This procedure applies when filling the cooling system with a mix of water and flushing medium or new coolant after you’re done flushing.
Some ATVs have bleed screws on the water pump and thermostat housing to help bleed out trapped air.
Others apply a method for bleeding the air through the top of the radiator. The procedure for filling and bleeding varies slightly between the two.
If your ATV has bleed screws, your best option is to choose this method.
Ensure the radiator is cool to the touch, so there is no pressure built up in the cooling system before carefully removing the radiator pressure cap.
The air bleed bolt is located on the top of the water pump housing. Loosen the bolt without removing it. This will allow air to escape as you fill the system with fluid.

Tip: If the radiator does not have a cap, fill through the pressure tank. Use a funnel to avoid spills and fill fluid through the radiator’s neck.
Tip: While filling, squeeze the coolant lines to aid fluid flow and help purge the system of air. This is known as burping the cooling system.
Leave the pressure cap off for now.
On most ATVs, the coolant should be between the MIN and MAX lines when the fluid is cool. In that case, fill to the MAX level. Some ATVs use terms such as the lower lever and upper level or cold fill and warm fill.
Note that some ATVs should be only at the MIN-line when the fluid is cool. Please refer to your service manual to ensure you don’t overfill.
Some ATVs have a bleed bolt on the thermostat housing near the cylinder head.
Release this bolt without removing it to bleed out any air. When there is no more air but only fluid coming out of the bolt hole, tighten the bolt to spec.
Install any components you’ve removed to access the bleed bolts.
With the pressure cap off, start the engine and let it idle for 5-10 minutes to warm up. The radiator fan should cycle on and of at least two times. Leaving the cap off allows air to bleed out and will enable you to add more fluid if necessary.
The level will drop as soon as you start the engine and once more as the thermostat opens, allowing fluid into the system.
With the engine still idling, top off the radiator with fluid when required.
When the engine has warmed up, snap/rev the throttle five times to release any remaining air.
Before shutting down the engine, install the pressure cap to avoid fluid spitting.
Notice: If you leave the engine running for too long after the thermostat opens, fluid may begin seeping through the top of the radiator. If this happens, it is time to stop the engine to prevent further spillage.
Tip: If you’re having difficulty bleeding the system of air, try elevating the front end of the ATV one to two feet while the engine idles. This helps trapped air to flow to the front of the ATV and out through the radiator filler neck. A safe and easy way to raise the front end is to drive the front wheels one or two steps into a set of outdoor stairs—lower the front of the ATV before topping it off with fluid to ensure correct levels.
Allow the engine to cool completely. You should be able to touch the radiator with your bare hands.
The filling procedure is now complete. Any air remaining in the system should continue to bleed through the recovery bottle. Keep an eye on the fluid level the next few times you ride.
Please refer to the “Draining procedure.”
Note that you do not need to install the drain bolt and bottom radiator hose for now (step 6).
With the drain bolt out, or the bottom radiator hose disconnected, pour a gallon or so of regular tap water into the radiator filler neck. Collect the fluid in a container for proper disposal.
Flushing solution, also known as radiator flush, can be bought at most automotive stores. Any brand will work; just ensure the fluid is compatible with aluminum radiators.
Notice: Make sure to follow the instructions provided with the flushing solutions, as they may be slightly different from this guide.
With the drain bolt out, or the bottom radiator hose disconnected, pour a mix of water solution and tap water into the radiator filler neck. Collect the fluid in a container for proper disposal.
Make sure you save enough flushing solution to fill the entire cooling system once more.
Please refer to step 6 in the “Draining procedure.”
Please refer to the “Filling and bleeding procedure. ” This includes running the ATV through a heat cycle.
Please refer to the “Draining procedure.”
Repeat steps 4 through 7, now only using regular tap water.
The flushing procedure is now done, and you are ready to fill fresh coolant into the system according to the “Filling and bleeding procedure.”
Some of the ways to ruin your quad take some work (like crashing), but some of the easiest ways to ruin your quad are quite simple (and you might be doing them right now!). From neglecting minor maintenance issues to learning the hard way that your quad isn’t a great swimmer or immune to the laws of gravity, here are 10 quick and easy ways to ruin your quad. And, of course, how to fix them.
Raise your hand if you’ve ever said, “I never change the air filter on my quad because I have better things to do like losing horsepower and quietly ruining my ATV’s engine! Maintenance is for suckers!”
Your quad’s air filter needs to be cleaned regularly.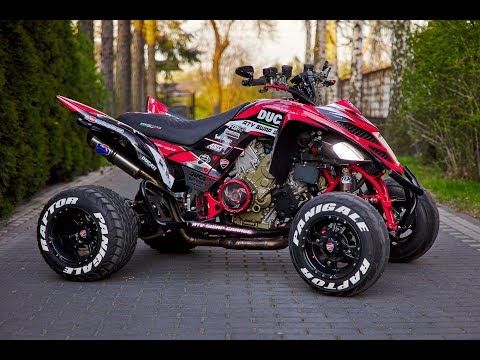 Why? Because running an engine with a dirty air filter is one of the easiest ways to ruin your machine. Sucking dirt particles into the engine will, over time, wear out the engine and can do some serious damage. Here’s the basic break down: an engine needs both fuel and air to produce power. When the air filter is dirty, it can no longer keep dirt from getting sucked into the engine. When dirt particles start invading the inner chambers of your quad’s powerplant, it won’t run as well as it should, which results in horsepower loss and interior damage to the engine, which can easily be fixed by buying a new engine (if that’s what you’re into).
Clean the air filter before riding season begins if you’re a casual rider, and clean it after a really nasty dirty ride if you’re a frequent off-roader. If you ride in the dunes, you might have to clean the air filter more than ONCE A DAY. Did you hear that? ‘Cause we’re yelling it! Here’s a good rule of thumb: if you face has dirt on it after a ride, check the air filter in your quad. If it’s dirty, clean it!
Maybe right now is a good time to turn off the computer and get so cleaning or replacing your quad’s air filter. Something so simple (it takes all of 10 minutes and not a whole lot of money) makes a big difference in how your quad runs, and for how long it’ll keep running in the years to come.
Smack yourself if you’ve ever said: “Changing oil is for jerks, and I always say that if there’s oil in the engine it’s all good. I know for a fact that a magical grease monkey visits my quad in the garage and cleans the goop out of the oil so I never have to change it.”
This works much like the air filter tip, and because we love to yell, we’re going to scream this: CHANGE YOUR QUAD’S OIL ONCE IN A WHILE, WOULD YA? Sheesh. Just like the air filter, oil collects junk and gunk. From little metal shavings from engine wear to dirt and debris, the oil is a breeding ground for a break down. And if you’re playing in puddles with your quad, you might have a nice little water and oil mixture going on there, and you know what they say about oil and water: they don’t mix. So, at the end of your riding season (if you’re a seasonal rider), replace the oil. Or, you can do it in the spring (but we prefer our quads to have fresh oil in their bellies while they wait out winter). If you ride your machine in the cold months, change the oil to the appropriate weight for colder temperatures. And in the heat of the riding season, change the oil if you get in too deep with a body of water or a mud pit. If you’re racing your quad, it’s not unreasonable to change the oil after every race. Basically, the point we’re trying to get across here is change the oil in your quad at least once a year, and do it more frequently if you’re a frequent rider.
The good news is that putting fresh, clean oil in your quad is one of the easiest maintenance routines to perform. Get a few quarts of ATV engine oil, drain the old stuff, and put new oil in. See? It’s so easy it took us only one sentence to explain what to do. But please, for the love of all things good and great, don’t dump the contaminated old oil down a drain, a sewer, or into your yard. If you do, we’ll be forced to come to your house with a rolled up newspaper and smack you on the nose. Take the old oil to a recycling center, like a repair shop. Most places will take your dirty oil and recycle it for free! The environment will thank you, and you’ll save yourself a swat with a rolled up newspaper and the embarrassment of us publishing photos of you getting scolded. DON’T MAKE US COME OVER THERE.
Holler if you’ve ever stated, “If bolts need a written invitation to stay where they’re supposed to, then I don’t really need ’em! Let them fall off!”
We know a lot of riders who live by the motto, “Run it ’til the wheels fall off.” And you know what? It’s more likely than you think! You can’t “pin it to win it” if stuff (especially important stuff like a wheel) is separating from your machine. Would it kill you to grab a torque wrench or a socket once in a while and check that all the bolts on your machine are tight? We asked a few doctors, and the consensus is no, in fact, it will not kill you to tighten a couple of bolts. No more excuses.
Here is a list of bolts you should be touching, tightening, and torquing on a regular basis:
* Lug nuts: They need to be properly torqued. You don’t want your four-wheeler turning into an impromptu three- or two-wheeler.
* Pivot bolt: This bolt holds the swingarm to the frame, so if even with a basic understanding of mechanics, you’ll know that it is important. A loose pivot bolt can wear out the frame and also ruin the bearings.
* Axle nut: Make sure the axle nut is properly tightened; a loose axle will wear out bearings and possibly destroy the axle carrier.
* Wheel hubs: Loose front hubs will wear out your quad’s bearings. Loose rear hubs will eventually strip axle and hub splines. This all will create more down time and work for you.
* Skid plate bolts: If you have a skid plate on your machine, check the bolts that hold it in place. Constant battering almost always loosens these bolts (and you don’t want to lose a $100-plus skid plate).
* Sprocket bolt: Constant chain torque eventually will loosen this bolt.
Water is important for the life of most things, but it could shorten the life of your quad; especially if you decide to try your quad out as a submarine (which it most definitely is not). Sinking, submerging, and sucking moisture (whether water or mud) is a quick way get water in the engine, gasoline, and oil, which will do wonders for your quad…like “I wonder why it’s not working?” Are you confused as to what to do if your quad has spent more time floating than rolling lately? Here are a few hints.
First of all, if you’ve sucked water, get your machine onto dry land and don’t try to start it! Tip your quad on its back end (on the grab bar) to drain some of the excess water out of the exhaust pipe. Then pull the spark plug out and crank it over with plug out to blow water out of the cylinder. If you have a belt-driven transmission (a quad without a chain), there should a plug at the bottom of the belt cover that you can pull to drain the water out once the quad is back down on its wheels.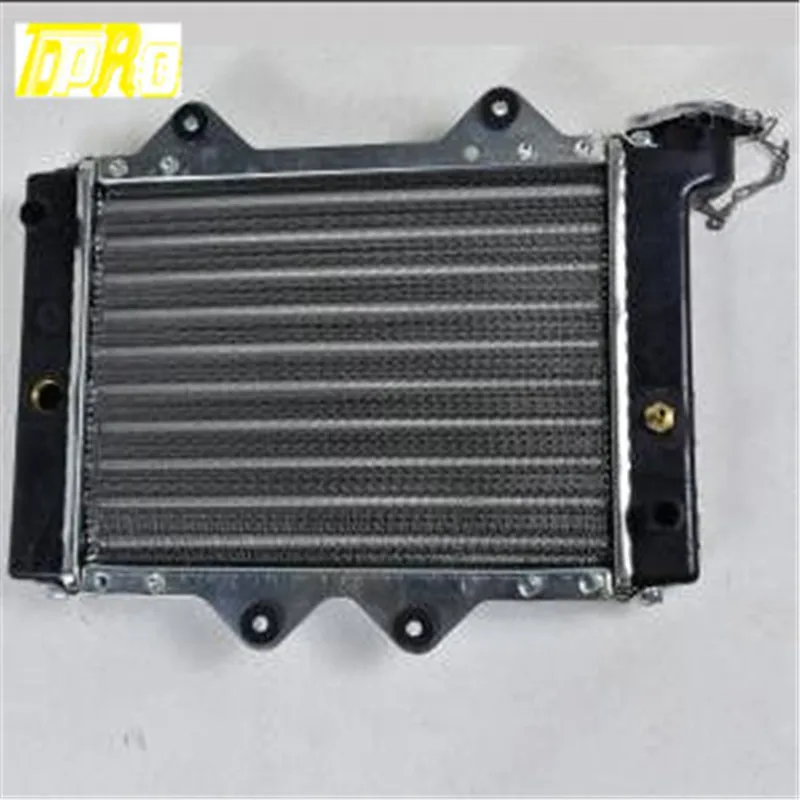 Also, open the air box (if it’s located behind the carburetor) and then pull the filter out. If it’s wet, do your best to dry it out.
If you can get your machine running again, don’t push your luck by keeping the ride alive. Your day of riding is over, man! It’s important to get it back home to the garage as soon as possible after a “bath.” When you get back to your garage, you’ll have to clean the airboot, change the oil, clean the air filter, and clean the carburetor out. Water sloshing around in any of these parts will mean certain doom for your machine in the near future. Regrease the zirks and anything else that needs attention (use waterproof grease if you liked dunking your quad so much the first time that you’re considering doing it again). Another great tool for cleaning up after a water landing is WD-40. The WD stands for “water displacement (for real!) and it will push water out of the machine.
There are two rules we’ve tested time and time again: gravity and Murphy’s Law. We haven’t beaten either one yet. Trying to climb a steep hill, flipping your machine over, running your quad into a tree or rock, bending stuff that’s not supposed to be bent, puncturing things that aren’t supposed to be punctured, and breaking stuff in general does not bode well for the longevity of your quad. Surprised? Really? If you’ve crashed your machine, there are a few basics you should check out before riding again. First of all, make sure all your limbs work. Then check all the controls on your quad: make sure the throttle, brake, clutch, and shifter all work without binding. Next check out the tires and wheels: If there’s dirt in the bead or punctures in the tires that you can’t patch, then you know you’ll have to get back to your truck or trailer ASAP. If everything looks OK so far, straddle each tire with your legs and hold them tight while you twist the handlebars. This will tell you if there’s too much slop in the steering, and if there is, you need to ride very carefully back to your base camp.
 All those tests show no problems? Then start it up and make sure the throttle operates properly before taking off.
When you get back home, you’ll have to do a more in-depth checkup on your quad. While cracked plastics might not look great, they’re not essential to the function of your quad…but, if you’ve got a leaking gas tank, well, that’s another story. Check for obvious cracks or stress or paint chips where the frame was stressed. These could be the start of a bigger problem. Riding a quad with a broken frame is really not fun, so keep an eye on stress spots. Next up, check to see if anything is obviously bent, and make sure the quad rides straight. And now’s probably a good time to check all the bolts that we mention in #3, as well.
A dirty quad is a playground for lurking problems. Regardless of the amount and/or the velocity of the precipitation falling from the sky, rain is not an appropriate substitute for a good wash with some soap and water at the local car wash or in your back yard.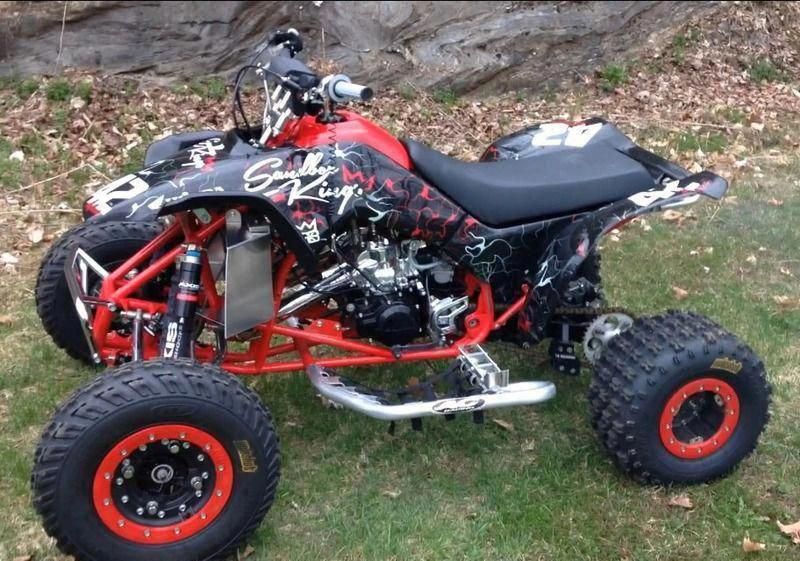 And we’re not talking about just washing the parts of your quad that everyone can see. We’re talking about the deep-down, hidden, machine-eroding dirt that cakes underneath, in between, and everywhere it shouldn’t be. You may ask yourself how leaving dirt on your quad can ruin it, but trust us, it can and will!
Scrub the top, the sides, and don’t be afraid to reach underneath and clean that undercarriage. If it helps, you can roll your quad halfway up onto the ramps you use to load it into your truck bed
Repeat after us: Grease is good. Grease is great. Grease is better on your quad than on your plate. Well, they’re both equally good, but different kinds of grease. After you’ve put down that chicken wing, let’s get down to business greasing the pivots and bearings on your quad. They like grease even more that you do (if that’s possible!).
Grease:
Pivot bolt
Carrier bearings (axle)
Steering stem bushing
A-arm bushings or bearings
Front hub bearings
 Let the Fuel Go Bad
Think of gasoline like a gallon of milk. The same way milk will last a couple of weeks in the fridge, fuel will stay fresh in your quad for a couple of weeks. But, you wouldn’t let a jug of milk sit for six months and then try to have a bowl of cereal with it, would you? The same principal applies to gasoline. Fuel goes bad. It really does! This is not just some scare tactic employed by the oil companies to get more money out of you. Gasoline breaks down over time and it can take your quad down with it. It can clog up carburetors and fuel lines, and you’ll be left with a sputtering mess that konks out every time you blip the throttle. That doesn’t sound like fun, does it?
If you’re going to leave your quad to rest peacefully in the winter months, or if you’re just going to be too busy to ride your machine for a while, prep the gasoline in your quad’s tank. Either drain the tank completely (run it ’til it’s dry if it’s got a carburetor) or put a fuel additive in the tank to keep the fuel from going bad.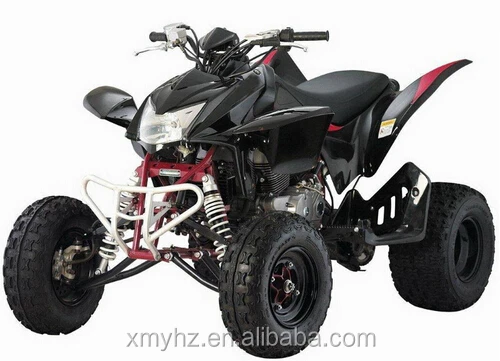 If you choose to put an additive in the tank, make sure you clean out the fuel from the line and the carburetor. The easiest way to do that is turn the fuel tank selector to “off” and let your quad run. This will use all the fuel in the fuel line and in the float bowls of the carburetor, making sure there’s not fuel left over that can go bad and gum up your machine. Make sure you do this out in the open though…trying this in a closed-off garage could equal one mean headache and a unplanned trip to the hospital.
Been mudding? Been riding in the woods? The sand? Anywhere at all? A lot of different types of terrain can be rough on your quad’s radiator. And if the radiator isn’t working correctly, shortly thereafter your engine won’t be working too swiftly either. Here’s a simple equation to demonstrate what we mean: crud (crap and mud) + radiator = overheated engine. How many rides are you going to get in with an overheated engine? Exactly zero.
If you’ve been mudding, splashing in puddles, or riding through wet terrain (even if it doesn’t seem that treacherous), your quad’s radiator could be operating at a diminished capacity. You need to clean that crap out! To fully clean your radiator, go ahead and make your pressure washer put some pressure on it. A good rule of thumb we’ve learned from our mud-bogging friends is if you pressure wash the radiator and water splashes back at you, then the radiator isn’t clean yet. The water should flow through the radiator without splashing back when it’s clean. And when it’s clean, it’s keeping your engine cool. And when you’re engine’s cool, you’re in business.
Dude, seriously? Did you just put a pipe on your quad and not rejet it? Lame! There are a lot of things you can accomplish in life by half-assing it, but mods to your machine are not among those things. Do it right the first time, and you won’t have to worry about it again. So, anything you add or change on your quad that affects the power it produces or the way it runs should be done properly (duh) and with the right adjustments.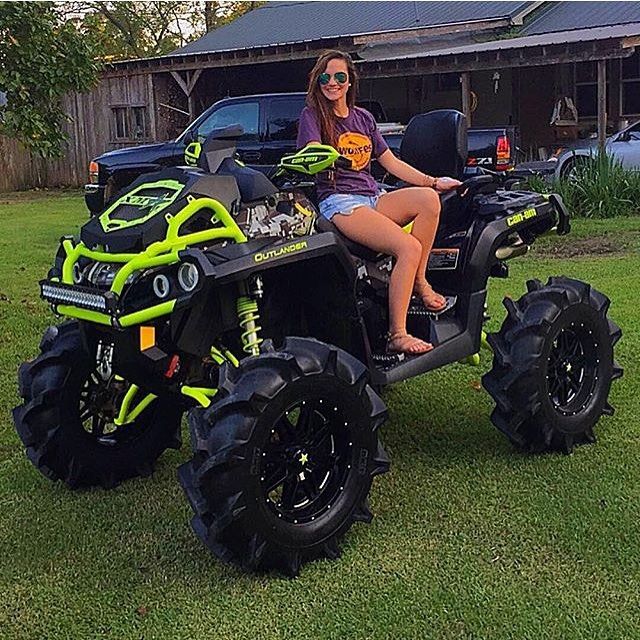 For instance, if you’re outfitting your quad with a new pipe, you need to make allowances for the added horsepower by either rejetting it (if you have a carbureted machine) or getting a new fuel map (if you have a fuel-injected quad). ––Cassandra
Once you’ve spent your hard-earned money on an ATV or SXS, you want to be sure you take care of it. Here are a few random tips to help you preserve your investment. Getting to know every part of your hunting rig is important, and even if you’re not the one doing the maintenance on your machine, you need to know how the terrain and riding conditions impact the health of your ride.
The air filter on your machine is the breathing inlet for the motor. If the air filter gets clogged, the amount of air is reduced and the machine will run rich. This means more fuel than air is entering the engine and you stand a chance of fouling the spark plug. The sealing surface of your air filter is subject to leaking, and making sure the filter is properly seated in the housing is critical to clean air entering the engine. Even fine dust can wear on the engine’s internals and will eventually kill your investment.
Belt driven machines are more common today than in years past. The belt that puts the power from the motor to the transmission needs to stay dry and cool. If you ride in deep water and the transmission slips, be sure to first remove the machine from the water and then drain the CVT box. Most newer belt drives have drains on the bottom rear of the CVT box. A wet belt slips and will burn wear spots on the sides of the belt. This will eventually lead to belt failure.
CV axle boots are subject to many obstacles along the trail. These boots protect the constant velocity joints for the front and rear axles on independent suspension machines. If these boots get torn, you will eventually ruin the joint.-%D0%A1%D0%95%D0%A0%D0%98%D0%AF-6,-PANTERA-250-%D0%92%D0%9E%D0%94%D0%AF%D0%9D%D0%9A%D0%90--1.jpg) Mud, water, and trail trash will find their way into the joint and grind it to pieces. Always keep an eye on the axles and boots to prevent unexpected damage. ––Rick Sosebee
Mud, water, and trail trash will find their way into the joint and grind it to pieces. Always keep an eye on the axles and boots to prevent unexpected damage. ––Rick Sosebee
We've ridden enough off-road, driven through swamps, but what to do next? Now you are waiting for one of the most unpleasant procedures for a rider - washing an ATV. But when cleaning, you can easily damage parts, so you need to be extremely careful. How to properly clean so as not to harm the equipment? Consider the process algorithm, decide which sink should be used.
An important rule to remember is that the ATV must be washed after every off-road ride. If you do not do this in time, then the frame and components of the equipment will become covered with corrosion, which will eat the ATV, and you will have to repair the damaged elements.
Before any kind of washing, the equipment must be carefully prepared. To do this:
Remember not to use household chemicals to clean the body of your ATV. Buy only special car cleaners. They do not act so aggressively on plastic, rubber parts of equipment.
The effect of a manual wash is much lower than that of a non-contact one. With a sponge, you will not be able to remove all the dirt. You can not rub the body of the ATV hard, because of which the efficiency will be lower.
For appliances with thin plastic, it is better to use a hand wash. We recommend:
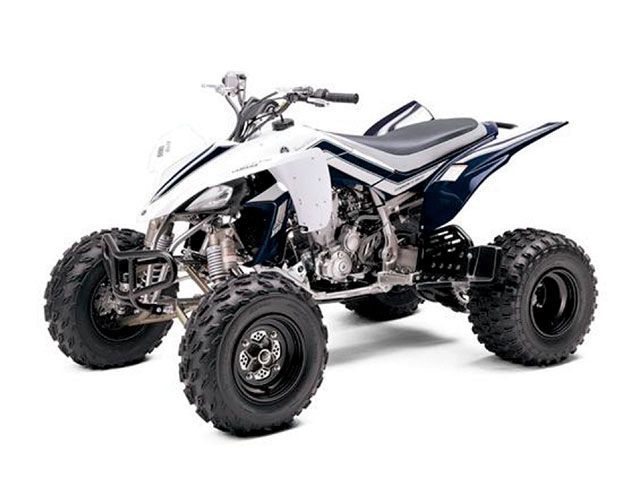
Use a jack or trestle to access hard to reach places.
Touchless ATV Washing uses high pressure. Therefore, you should be careful not to damage your own motorcycles. Think in advance about protecting the battery, radiator, optics, filters, electronics. We do not recommend aiming the jet at these elements.
A watering hose is perfect for a touchless car wash. With it, you can get rid of small particles of dirt and do not damage the components of the equipment.
Here are some of the most useful rules for different cleaning methods.
Before washing, cover the battery with the exhaust pipe with foil. Washing in both cases starts from the top. Manually remove dirt stuck in the ATV nodes. Use warm water to remove large dirt. First, dirt is knocked off, then chemistry is applied, which is then washed off. After the process, the equipment must be started so that, while idling, it allows the nodes to dry.
Depending on the expected result, the nature of the process, each method has advantages. Manual is suitable for daily use when the ATV has small dirt or a lot of dust that needs to be quickly disposed of. Use a low pressure garden hose.
If you need a thorough cleaning, or you are not afraid to damage the body, then use household pressure washers.
Photo by streetmusclemag.com
In February, spring suddenly came to central Russia, which means that the summer season will start earlier. "Snowdrops" - motorists who prefer not to drive in winter - will also soon appear on the roads along with motorcyclists. The load on the highways will increase, traffic jams and the first “boiled” ones will appear. How not to stand on the track with an overheated engine, the AvtoVzglyad portal will tell.
Eduard Raskin
Every experienced motorist knows that the cooling radiator, on the operation of which the health and well-being of the engine directly depends, must be washed periodically. Disassemble the system, flush the cells of the “cooler” itself and change the coolant. Anyone who encounters this process for the first time will be unpleasantly surprised by the amount of dirt that fills up in the radiator in a couple of years: there is poplar fluff - heat, July - and road dirt, and remnants of reagents, and insects. The “fur coat” that grows on the radiator simply does not allow the engine to receive vital cooling. And problems begin that are much more expensive to solve than washing the radiator.
However, not everyone knows that the dirt in the radiator accumulates not only on the outer, visible part, but also inside. No matter how modern and high-tech - read, expensive - antifreeze is, no matter how stunning additive packages the manufacturer equips it with, the sediment continues to fall out. Rust appears in the system, especially if car owners save on coolant. Various breakdowns and breakdowns of hoses, bursting expansion tanks and other road adventures guarantee the ingress of oxygen, which, in turn, contributes to the appearance of oxides and other delights. Over time, the system becomes saturated with dirt that remains in the radiator.
Photo 74vag.ru
Outwardly, the "cooler" can be completely clean and whole - which is most important in its operation, but the motor continues to overheat. You can, of course, just replace the part. But the cost of a new radiator will quickly put the car owner's thoughts in order: it turns out that this is a very expensive purchase. Especially considering that in some cars there are three radiators: for the engine, for the air conditioner, and for the box. How to be?
The radiator can even be cleaned from the inside, and no special knowledge and tools are needed for this: some distilled water, a pack of soda - just take it at home under the sink, no one will notice the loss - or a bag of citric acid, as well as two plastic one and a half liter bottles and a cut of a simple hose, suitable in diameter for the inlet and outlet. The hose is most likely lying around in the garage. In the next - definitely there.
After removing and thoroughly washing the radiator, at the same time examining it for leaks, which are clearly visible due to the bright color of antifreeze, you can begin internal cleaning. We connect the hoses, clog the remaining holes with a rag and fill the bottles with about a liter of distillate, after mixing it with soda or citric acid. Having attached the bottles to the hoses - electrical tape will be enough, especially if it is blue - we begin to alternately press the bottles with the palm of our hand, dispersing the resulting “brine” along the radiator.
634073
Photo yandex.ua
Progress will be noticeable in a few minutes: the water will become rusty, the remains of unknown clots and other dirt will appear. In about half an hour of active work, the "composition" will become brown and opaque. So, it's time to change to clean and repeat the procedure to fix. After - be sure to rinse with clean, preferably distilled, water.