Motorcycles, cars, and even bicycle tires all attach themselves to the wheel in the same way. The tire locks into place on the rim by a tire bead. So, what exactly is a tire bead?
The tire bead is a section of the tire that is reinforced and is used to keep the tire on the wheel once inflated. When you look at the construction of a tire off the wheel, you’ll see the bead as a kind of lip.
The bead locks into a channel on the inside edge of the wheel and keeps the tire securely in place, and ensures that no air escapes, keeping the tire inflated. The bead is an essential part of the tire’s construction and needs to be inspected before tire installation. A tire with a damaged bead should not be used.
When your tire is properly inflated, the bead is securely locked into the groove on the wheel. You want this interface between tire and wheel to be as strong and secure as possible because this is the only force keeping your tire on your wheel.
The good news is that tires are extremely reliable, and unless damaged or severely underinflated, your tire’s bead will do its job and keep that tire on the rim.
The bad news is that because tire beads are so good at what they do when it comes time to change your tire, getting the wheel off can be a real chore.
Breaking the bead refers to separating the tire from the wheel. You are literally breaking the seal that the tire has with the wheel. Doing so requires a lot of force and a bit of prep work. With the right tools, however, this task is rendered much easier.
The first steps to changing the tire on your motorcycle are getting the wheel off the bike and then getting the tire off the wheel. I’m going to assume at this stage that you’ve already got the wheel off the bike, and you’re ready to tackle getting the tire off the rim.
Searching the internet, you will find all kinds of do-it-yourself instructions on breaking the bead on your tires. Many involve two-by-fours and jumping on them to apply enough force to break the tire bead. I’ve seen enough videos online to know this can end in wrecked shins and lots of frustration.
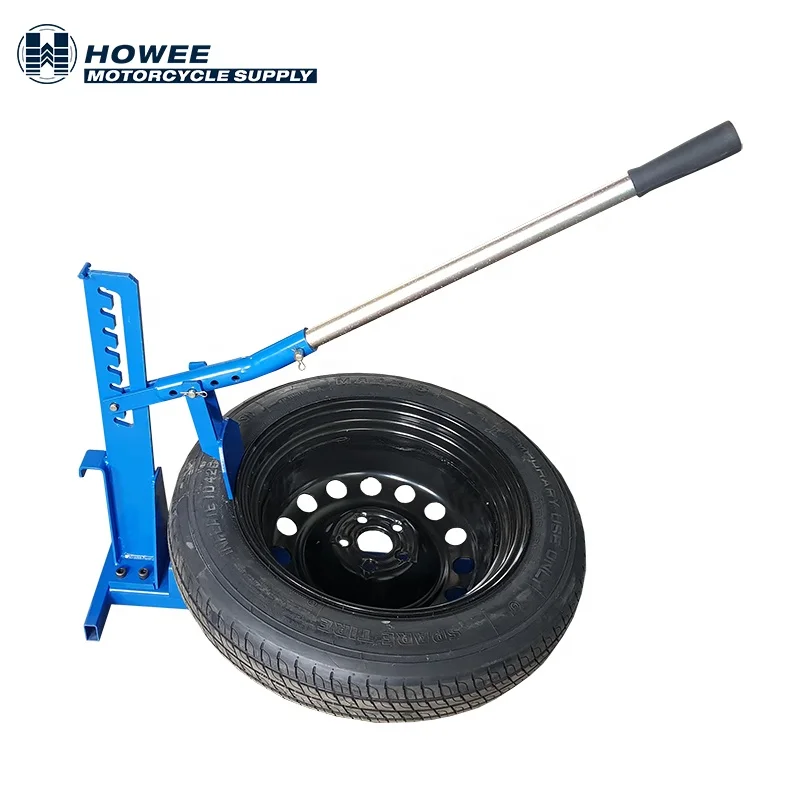
We, as humans, have evolved to use tools, and for this job, there are a couple of tools you’ll need that will make breaking the bead on your motorcycle tires super easy and save you the trouble of fabricating a two-by-four contraption.
All you need to break the bead on your tires is two tools, and one could hardly be defined as a tool. The first is a set of tire spoons that double as a dedicated bead-breaker. The second is a bottle of Windex or a soapy water mixture; this is the lubricant to help break the bead and dismount the tire.
Also called tire spoons. If you’ve ever changed a bicycle tire, you’re probably already familiar with its construction. Unlike bicycle tire levers, these are much larger and constructed of very strong metal.
The tire levers I have are made by Motion Pro and can be purchased here. The reason I like these so much is that they are actually two tools in one. They have one end that is a dedicated bead breaker, and the other end is like any other tire spoon.
A single set is all you need to break the bead on your tire, take the tire off the rim, and put the new tire on. I keep a set in my toolbox, ready to go.
With your wheel off your bike, you will want to place it on a soft surface that will not scratch the metal. You can use an old piece of carpet, a kitchen mat, or a piece of cardboard. You’ll set your tire down on this with the rotor side up.
You want the rotor up because you’re going to be applying a lot of downward pressure on this first part, and you don’t want to inadvertently be pressing down on your rotor, potentially damaging it.
Remove the valve core from the valve stem and depressurize the tire. Now is when you want to lubricate the tire using your Windex or soapy mixture. What this does is allow the tool to get under the rim easier and will ultimately allow you to make more purchases with the tool.
Using the bead breaker side of your tire levers, you will insert the forked end between the tire and the rim with the curved end pointed down. The other side of the tool will slot in place with the single hooked end pointing up.
When you squeeze the tools together, visualize the tools leveraging against one another to push the tire away from the rim. If you’ve done it correctly, the forked end should push the bead away from the rim and out of the groove.
Breaking the first section of the bead is the hardest part; once one section is free, the rest becomes much easier. With the first section of the bead broken, I work around the tire's diameter, pressing down with my hands or knees to break the rest of the bead free.
With the bead free, you can move on to removing the tire from the wheel and putting your new one on.
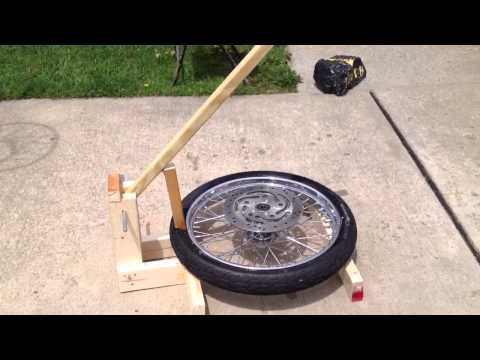
The “Poor Man’s” motorcycle tire bead breaker works like a charm!
Here it is: the world’s cheapest (and most effective) motorcycle tire bead breaker!
This method has not failed me yet; it works on bias or radial ply tires, old or new style rims, spoke or cast wheels.
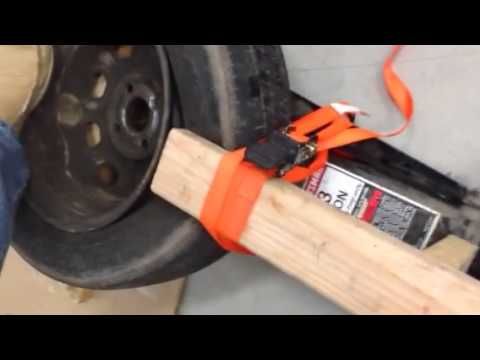
The only materials that are needed for this device are a couple of pieces of 2×4 lumber: One 2×4 (or 2×3), about 7 or 8 feet long, and a smaller piece, maybe a foot long or so.
Place the wheel on the ground about 1 meter from a parked car. Make sure you lay a couple of pieces of 2×4 (or 2×3, as shown in photo left) under the rim to protect the brake disk rotor and rim from damage.
Slip the long 2×4 under the door sill of the car, and place the shorter piece on the edge of the tire, right up next to the rim.
You can get fancy if you’d like and put a hinge on the longer piece so that the shorter piece hangs down, but I find it more challenging (and easier) to simply hold the shorter piece and put a bit of pressure on it to keep it in place.
Place one foot over the opposite side of the rim, and lever away! Most tires will pop right off the rim with a bit o’ pressure, but you may find that some tires need a sharp push to get the bead to break.
In any case, this is the fastest, simplest and most effective method of bead breaking I’ve ever tried. It doesn’t make levering the tire on and off the rim any easier, but it sure makes breaking the bead a piece of cake. Forget about all those expensive dedicated bead breaking tools — you don’t need ’em!
Please send comments to [email protected].
Comments are ordered from most recent to oldest.
See details on submitting comments.
From “D.W.B.” (August 2011): “Been doing this method of breaking motorcycle loose for years. Last week, it met its match and the 2×4 method failed to break the bead of a Bridgestone tire on a BMW K1200LT wheel. Had to break down and run it to a dealer with a hydraulic unit — he still had trouble. Ah well. Most of the time, this works just fine.”
From “D.S.” (4/10): “Hey, it works great. The only thing to add… I put a piece of duct tape on each side of the wheel bearings to keep dirt etc. out of them.”
From “M.W.” (11/09): “Just tried the method of breaking my motorcycle tire beads this weekend with the fulcrum boards and it worked just like explained.
No problem except I used a 4 X 4 instead of a 2 X 4 after reading about the 2 X 4 breaking and I used my truck trailer hitch as a pry point.
I had someone else put a foot on the rim so I could get control of the 4 X 4, a lighter 2 X 4 may be easier to handle by yourself.
The rear tire was a little more stubborn than the front but I just had to let the pressure stay on the bead for a while and it slowly broke then I just worked it around and it came right off.
Thanks for the tip.”
From “M.Y.” (9/09): “I had to check the date on your article to make sure it wasn’t published (April 1). After considerable effort I have 1 dented fender, 1 broken 2x4x8′ and one firmly mounted bead…
Seemed like a good idea though…”
See also
From “E.C.” (4/09): “This is genius. I’ve built-a-thing-in-my-garage, C-clamped, almost-bought-the-harbor-freight-thing. Just moved to San Francisco [away from my garage] and used your piece-of-cake bead breaker idea to swap my own tires with a 2×4, two tire irons, and a gas station compressor.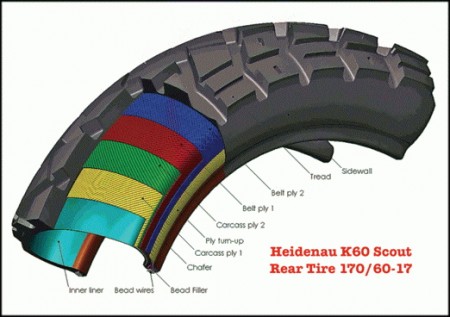 Very obvious in retrospect. Thanks! ”
From “MNF” (2/09): “Wow it really worked. I was shocked!!!! THANKS”
From “M.D.”: “I just wanted to let you know how jazzed I am this morning. I have always changed my own tires on my street bikes, but breaking the bead has always been a hit-or-miss deal for me. I stumbled across, however, your article on the 2 x 4 bead breaker, and got to try it out last night. WOW!!! It worked exactly as advertised, and changing the tire on my PC800 took less than 20 minutes, from the time I put it on the center stand to putting it away.
And they say that pron is the only good thing on the internet…”
wBW Articles Info
Well, for starters, we ignore the advertising descriptions of a wonderful “hold” on any surface (“universality” of rubber is a myth, and a highway declared as such holds much worse than a special one in difficult conditions). The principle of “taking the most expensive and popular one” is also not suitable for choosing motorcycle tires: if you choose the wrong type or profile, the same advantages can turn into a serious problem, therefore, we carefully study the characteristics. And here it is important that you know about the types, tire design, features of the choice of operation (oddly enough) and the timing of changing tires. Let's fill in the thematic gaps together. nine0003
Each class of motorcycle has its own type of “shoe”, designed for efficient transmission of torque, better grip, stability when maneuvering in the conditions in which a particular bike is most of its life. Conventionally, motorcycle tires can be divided into road, off-road and racing. Within the class, tires are divided according to tasks: road, slick, rain, cross (endur), mud, studded, and dual-use. Diameter and width - depend on the class and dimensions of the equipment. By class, we will consider it. nine0003
In this category, most of the products are designed for limited use and have an extremely small resource - just one race or training session. Provides the best grip on asphalt. Their profile allows you to lay the bike almost parallel to the ground in the turn, however, only after warming up.

These motorcycles mostly "live" on the track, observing the primer only from a distance, from the height of the main road, so their "shoes" are designed for asphalt: the most durable, designed for the heavy weight of the motorcycle (passenger + luggage), and "all-weather".
 To the characteristics of sports - do not hold out. nine0019
 The scatter of equipment in this category is very large - from "evil" tuned fifty dollars for mini-cross to light enduro for travel, so there are a lot of models here. You can combine them into classes according to their purpose: purely sports, amateur and rally:
For medium-sized classics, small-capacity, retro and custom motorcycles, various road tires are produced with a low semicircular profile, moderately developed tread, revealing working properties at temperatures below 80 about C. There are a lot of options, as well as specifics (all-season, rain, universal).
Motor tires are designed for high side loads. Its profile - even for the widest models - is more rounded than that of an automobile, consists of a working part responsible for traction, and a side part that “works” only when tilted in a turn. Parts not in contact with asphalt are also very important. It depends on them how much the tire will weigh, how much it will be washed under the weight of the bike, how long it will last. nine0003
Hidden part between the inner and outer layers of rubber, which gives rigidity and takes on the load. The structure of the cord is multi-layered. Steel wire, or threads made of polyamide, aramid fibers (Kevlar), or polyamide are arranged in dense rows either across the tire, or - intersect at an angle of 30–40 degrees in the direction of its rotation.
The edge of the tire, going inward, into the grooves of the edges of the rim, having an annular metal (internal) reinforcement. The reliability of its fixation in the rim determines the life of a motorcycle tire, and sometimes a motorcycle with a driver. nine0003
The working part, covered with an intricate pattern, the size, shape and depth of the grooves of which depend on the purpose of the product. A larger high tread is typical for off-road and cross-country motor tires, a lower, smooth one - for road and racing.
A zone connecting the tread and the bead that is not inferior to them in strength, but does not work with either the road surface or the rim. It is on it that “letters” are applied that reveal the properties and characteristics of the tire. nine0003
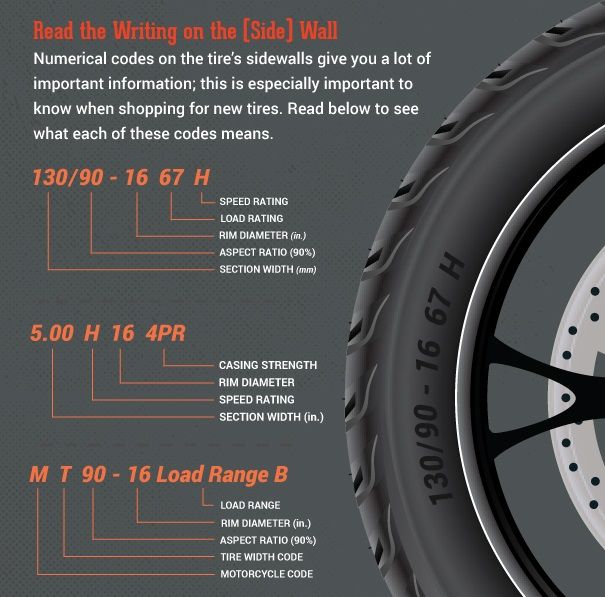
The three main indicators of motor rubber - width, profile (height), seat diameter (internal) - are measured in millimeters and inches. There are about a dozen markings adopted in different countries, but only four systems are widely used: Metric, Alpha, Standard (inch), Low profile (inch). For each of them, corresponding tables are available. For our market, more characteristically - Metric. nine0003
The name of the manufacturer (brand) and the name of the model are written in the largest letters on the product. The next in size is a "sausage" of numbers and Latin letters, indicating the width, height of the profile, the diameter of the rim for which the tire is intended, the weight limit per axle (rear / front), and the speed to which you can accelerate on this rubber. A little smaller - the country of origin, certificate, information about the material, design. Further, “small print” indicates no less important properties, which we will also consider separately. nine0003
I’ll immediately note the most common mistake in reading the rubber size index: the letter R is not a “radius”, as some motorcycle and car owners believe. This letter means "radial" model and indicates the radial direction of the inner carcass reinforcing layers of this tire. There are two main designs - radial - when the cord layers run across the tire, and diagonal - when they cross. nine0003
You don’t see the letter “R” in the index, but you see a gap, or “B” - it means the rubber is diagonal, and if “reinforced” or “reinf” is written nearby, it is also reinforced with an additional layer of cord.
"Sausage of letters and numbers", for example, 120/70 ZR17 (73W) TL, stands for:
The arrow with the words "wheel rotation" strictly regulates where the tire should rotate during operation. If there are letters ND (non directional) on board, it can be placed in any direction.
If the manufacturer clearly limits the installation location of the tire, he writes “Front” on it for the front or “Rear” for the rear. Without this marking, rubber can be placed on either side. nine0003
TL or tube less - as we have already deciphered earlier - tubeless. TT stands for tube type, or "suitable for camera use."

All manufacturers unanimously recommend “not wearing” rubber for more than five years, and if the equipment has been “shod” in it for ten years, even mothballed, urgently change the “bagels” without hesitation. A couple of decades ago, the resource of tires was regulated only by their external condition and the courage of the driver, but this was even before the mass “epidemic of planned obsolescence of goods”. Now, two years are taken into account in the calculation of the service life, and five years is the allowable storage period for rubber in a warehouse, as a result of which it should not be sold, but disposed of. The release date is marked with two two-digit numbers enclosed in a circle or oval. The first is the week number from the beginning of the year, the second is the year of production itself. nine0003
It is a common practice to buy lightly worn race slicks or cuts - only makes sense for training on the "ring" or karting track, but not on the DOP. In addition to poor handling, longer stopping distances on slippery surfaces, and increased risk of blown tires at high speeds, riding old tires carries legal risks. When passing a technical inspection, a cracked or worn protector (hypothetically) can cause a refusal to issue a diagnostic card. In fact, this is the same malfunction as badly worn brake pads. Also, in the event of an accident, due to the unsatisfactory condition of the rubber, the insurance company may refuse to pay you, referring to your favorite excuse - speeding (based on the increased stopping distance). nine0003
"From the factory" modern motorcycle tires are covered with a preservative silicone impregnation that prevents drying out during storage. It is slippery and penetrates deep into the pores of the rubber. Until you wipe it on the asphalt - do not count on a good "hold" and "sharp" brakes. It is not necessary to wash off the grease with gasoline or other solvent (it is useless), just ride measuredly for the first couple of hundred kilometers. By the way, after long-term storage of used road motor rubber, it is also recommended to “run in” it in order to remove a layer of coarsened material from the surface. nine0003
Even if you provide ideal storage conditions, motor rubber still ages over time, becoming covered with microcracks. If the "age" of tires has exceeded 10 years or more - do not buy them, despite their attractive appearance.
Signs of critical wear:
The principle of evaluating the residual depth of the tread grooves is now outdated - most manufacturers add an integrated tire wear indicator to the options, which is worth focusing on.
Let's start with what happens if you put a wider tire back without changing the "native" rim. This question worries many inexperienced motorcyclists who want to look more "sporty".
Firstly, you will not wait for the expected increase in traction due to the increased area of \u200b\u200b"support". Wider rubber, squeezed by the edges of the rim not in size, will tend to “up”, so the calculated wheel profile will be violated. It will be higher, respectively, the contact patch will not increase. Secondly, the controllability in corners will worsen, the speedometer will “lie”, the weight distribution will change due to the rear of the motorcycle raised.
This is highly discouraged for most modern sportbikes that hit the track, but many classic models, nakeds and cruisers are often fitted from the factory with a combination of radial front and diagonal rear tires. Unlike the radial, the diagonal one is a little “softer”, allows for moderate overload, is sold a little cheaper, so why not?
The choice of how much to inflate the wheels to is a constant compromise between the loads on the rubber and its capabilities. On most motorcycles, the recommended pressure for each axle is indicated on a sticker (on the fork and swingarm), but this value is only relevant for the rubber model that was supplied from the factory. On a new model, look for a designation on the tire (next to the max load load) indicating the maximum allowable cold pressure. Do not take a tire if this value is lower than recommended for your motorcycle. nine0003
Let's say your bike has a sticker with the recommended 2.25 bar for the front and 2.5 bar for the rear wheel. If you ride mainly with a passenger, with luggage, making long “flights” along the track, your motorcycle weighs 200 or more kilograms, and its volume is close to a liter, keep the pressure in the rear wheel at least 2.8–3.0 bar, and in the front 2.5 bar. If you ride around the city, alone, with almost no luggage, and are not fond of “flights”, it would be optimal to set equal pressure in both wheels at 2.2 bar. nine0003
For lightly loaded medium-sized engines, the interval varies from 2.0 to 2.3 bar, and for slender "Chinese" 2.1 bar - in the front, 1.9 bar - in the rear cylinder (especially if the tires are also Chinese). The pressure in road tires must not be lowered below 1.9 so that the motorcycle does not start to “float” in corners or on bumps - this is dangerous.
The more we inflate the closed volume of the wheel, the more “round” it becomes and the smaller the area in contact with the asphalt.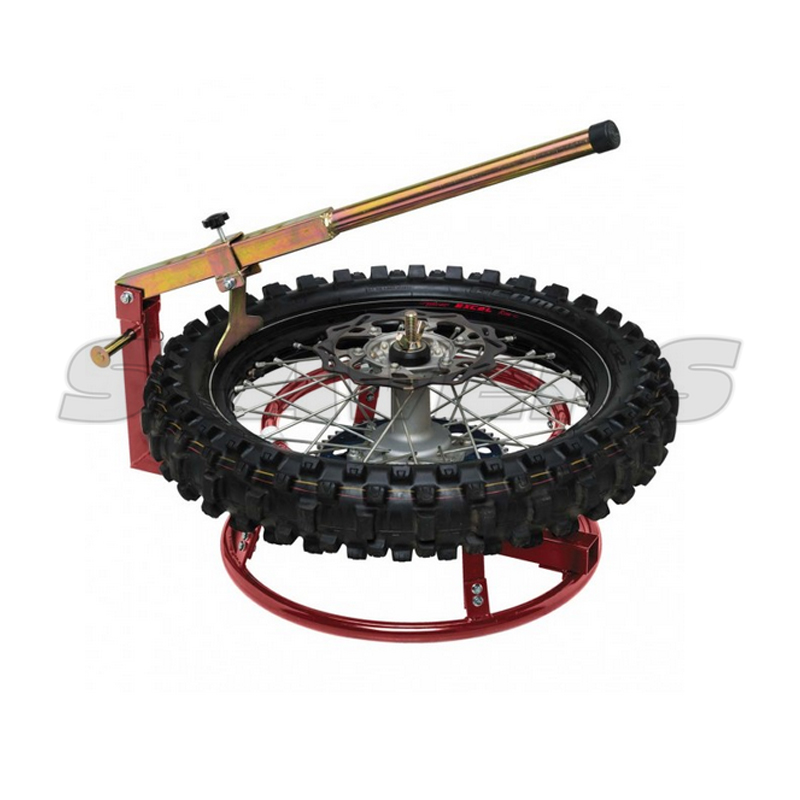 A larger contact patch means greater rolling resistance and accelerated tire wear, a smaller one means worse stability, lower braking and acceleration efficiency. Up to a certain point, these nuances are compensated by the tread, so on motocross and enduro bikes, the wheels can be lowered to 1.2 bar - front and 0.8 bar - rear. However, air is an unreliable business, therefore, in hard enduro and trials, a gel filler is now more often used, which allows maintaining a pressure of 0.4 and 0.9bar. Such a set will not live long, but this is a sport in which, as we remember, rubber consumption is not considered.
Definitely yes. The older the cylinder, the harder its surface and the lower the residual tread height, the worse the bike “holds” the road. Bald or improperly matched tires increase the braking distance, and can cause an unexpected “leaving” the track into a ditch. On an over-inflated tire, the fork or pendulum will “beat” hard, and on a flat tire, the motorcycle will become less predictable in corners and “gobble up” more gasoline than in a normal ride. nine0003
No, because their rims are not sealed and you simply cannot inflate the tire. Not all alloy wheels are suitable for tubeless, so always check what type of rubber was on the bike before. In addition, the hole in the rim designed for the camera nipple may not match the size of the new nipple.
Only if the damage to the wheel does not allow you to inflate the tire, and you still need to get to the “repair”. In all other cases, the idea is controversial. The inner surface of a tubeless rim is not designed for other rubber to constantly rub against it, creating additional heating, and the inner part of a tubeless rim may have protrusions that injure the chamber. It is possible to get a “beautiful” wheel by putting a tubeless tube on a spoked rim, but objectively, this will increase its weight (remember the unsprung masses), and reduce the life of the camera.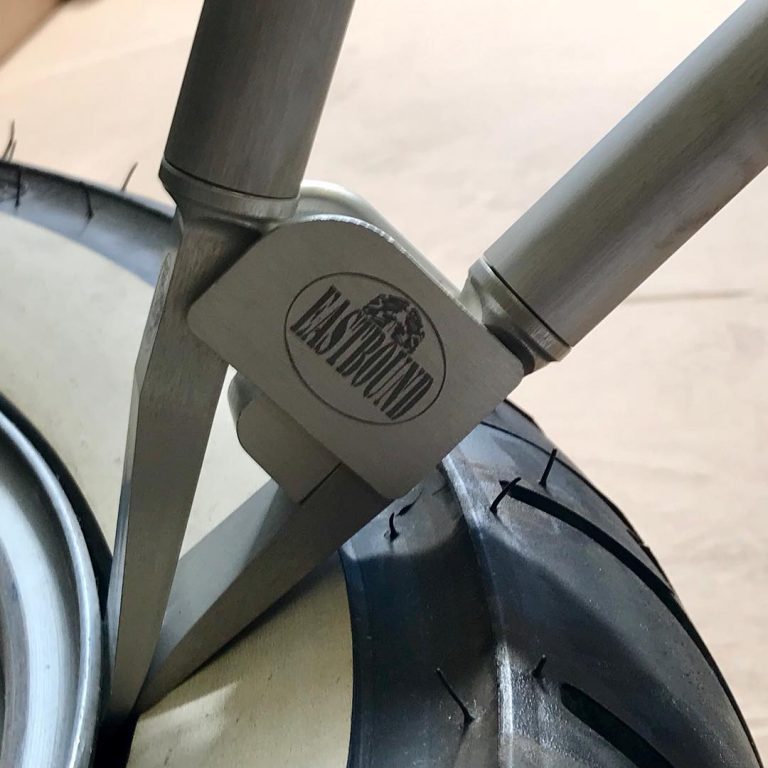 About when it frays to break - you will know already on a flat tire. You can repair a puncture of a tubeless tire without removing the wheel, but you will have to remove and patch the tube with its disassembly. nine0003
Undesirable. Even if it does not look worn yet, its resource is already less, from frequent “heating-cooling” cycles, it becomes rougher than new, frays or cracks faster. The old tube may not fully expand and fold if the new rubber has a lower profile (and internal volume) than the previous one.
If it belongs to the Racing Street or Street Legal class, this is a completely justified choice for the owner of a sport, street, naked or classic with claims to “aggressiveness”. In other cases, it is not recommended. Firstly, the use of racing slicks or cross-country tires is not allowed on the DOP. Secondly, sports tires are designed for intensive work with a certain warm-up.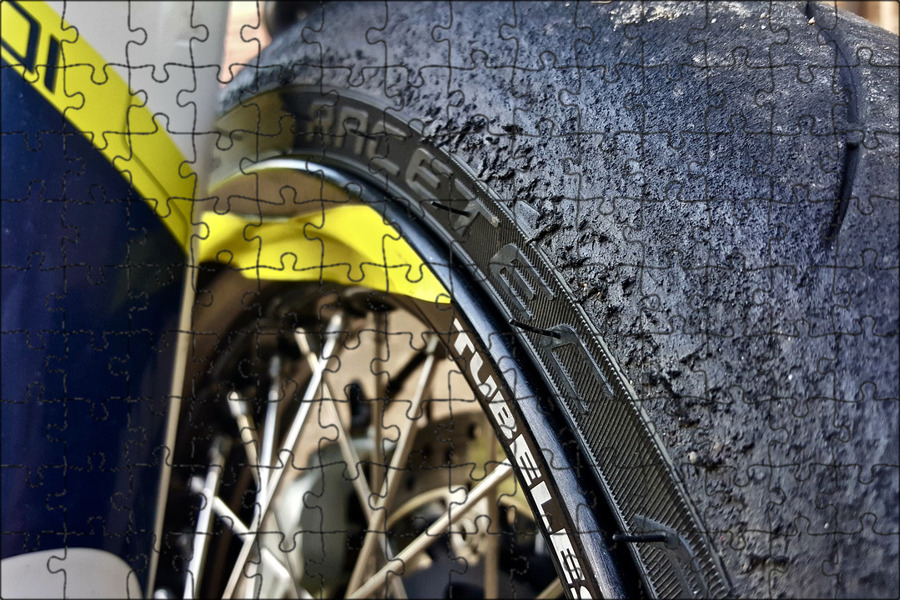 At competitions, before the race, they are warmed up in special covers, and then they are “given” one warm-up lap so that from the first seconds of the test race they can provide the bike with good contact with the asphalt (sticking). nine0003
In the city, even if you ride aggressively, the slick simply does not have time to warm up to operating temperature (more than 80 about C). Or even before it does not heat up for the whole trip, given the ragged rhythm of traffic lights and possible "toffees". Accordingly, it will not give adequate grip when trying to “give a corner”, the wheels will be demolished during braking, and instead of an energetic start, the bike will “grind” on the spot.
Ideally, pre-washed, treated with a silicone spray, complete with a disk and in special cases. Naturally - in a dry, dark place with a constant temperature, away from fire, children and animals. nine0003
Change your shoes for the winter, or find and set aside good rubber in reserve - make sure that during storage it:
Few people can provide all these conditions, so remember at least the main thing: protect the motor rubber from drying out and deformation - do not hang it, but lay it horizontally, wrapped in waterproof fabric. nine0003
This is only the main part of the answers to popular questions about motorcycle tires, collected in one material. Without "deepening" in the topic - a little about everything. If any of your questions still remain unanswered - ask it in the comments, we will definitely analyze it.
They say a motorcycle is only as good as its tires, and for good reason: your tires are the only point of contact between your ripper and the road. nine0003
Maintaining the correct PSI of a tire is critical to engine and suspension performance, as well as protecting the wheel rim from the road surface and cushioning for a comfortable ride.
But moto ripping throws variables at the rider, some of which do so your motorcycle tire won't take on air; we've listed six of the most common reasons why!
If you are inflating a motorcycle tire and it doesn't seem to be getting any air, listen for a hissing sound.
If you hear hissing or air escaping from the valve area, check that the compressor or air pump is properly connected to the tire valve. If the inflation device is not at the level of your tire valve, air can escape from the pump valve, causing your bicycle tires to not inflate.
Not only does the compressor valve need to sit flat on the valve, it also needs to sit as low as possible on the tire valve so that air is drawn into your tire rather than being sucked in through the vacuum created by a broken valve. seal. nine0003
Normally the two valves are not aligned when the tire is filled at significantly low psi pressure.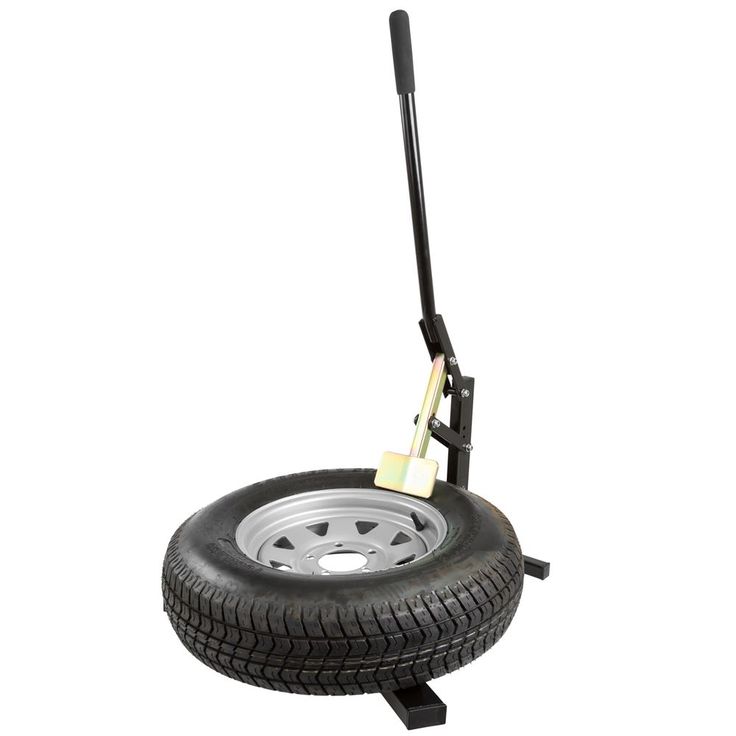
Primarily flat tires do not support valve position as partially inflated tires do, making it easier for the pump to slide off the valve.
Try to hold the tire valve in place by hand long enough for the air compressor valve to seat correctly, seal securely, and prevent air leakage. nine0003
Another possible cause of your motorcycle's tires not inflating is a damaged valve stem on the tire.
Like a disconnected air compressor valve, a broken tire valve makes a hissing sound as air escapes through a break in the rubber stem.
If the rubber valve body is broken, special tools and mechanical knowledge are required to remove the tire, remove the valve from the tire, and replace the rubber valve body. nine0268
If the valve itself is leaking, or if just dirt is interfering with the air charging process, it is sometimes possible to clean the valve with an air compressor.
In addition, the valve removal tool can remove and clean or replace the valve as needed.
In some cases, home mechanics find that their motorcycle tires are not getting air, not because the tire is defective, but because the device they use to inflate tires, faulty. nine0003
To find out if a malfunctioning air compressor is causing your motorcycle tires to not inflate, disconnect the compressor from the tire, put your hand on the compressor hose, turn on the compressor and see if you can feel the air being pumped out.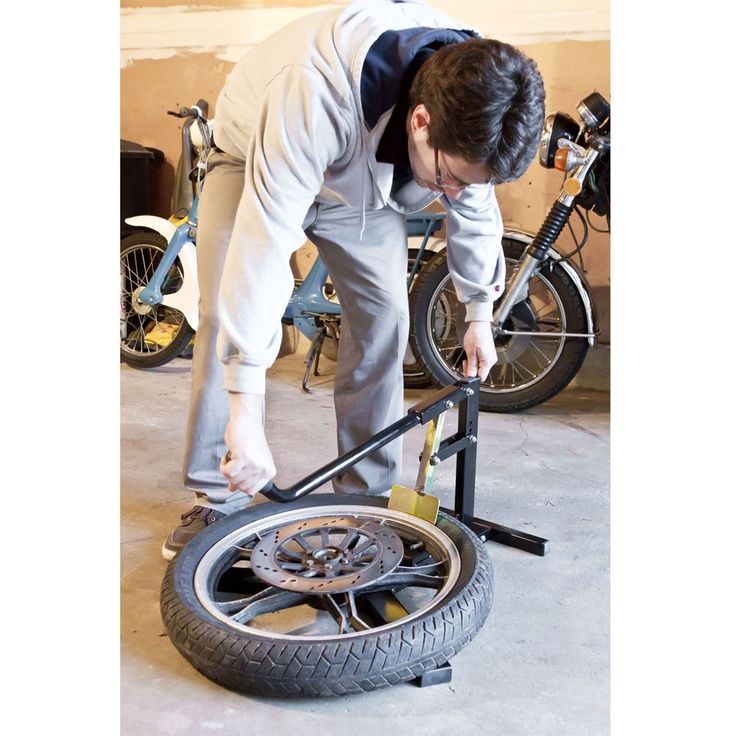
Air compressor malfunction symptoms:
The bead is the seal between the tire rubber and the metal alloy of the wheel.
One of the most common reasons riders find their motorcycle tire won't inflate is a tire bead seal failure, whether it's road debris lodged between the tire and wheel, or a tire not fitting properly during installation. nine0268
If the cause is a broken bead seal, you will need to remove the tire from the wheel and thoroughly clean the tire, wheel rim and lip before reinstalling the tire.
The bead seal can also be removed during tire retreading or custom wheel painting.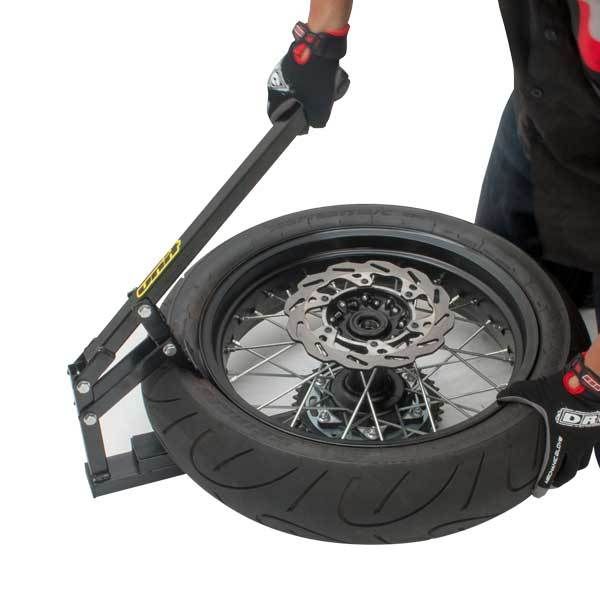
If the wheel surface is not properly prepared for the paint application process, paint chips can flake off and become lodged in the bead seal. The paint flakes are not thick enough to break the tire bead seal and throw the tire off. nine0003
However, the penetration of paint chips can be significant enough to allow air to escape when your bike tires are inflated.
The most common reason a motorcycle tire does not inflate is a punctured, torn or ruptured tire rubber.
Tire damage most commonly occurs when hitting a sharp object such as uneven pavement, sharp metal, glass, nails, screws, etc.
A hole created by a sharp object allows air to escape from the motorcycle tire while riding. Then, when you try to inflate the bike's tires, nothing happens; his PSI level never rises.
 nine0019
 But although tire punctures are the most common cause of improper tire inflation, they are not the most obvious cause to detect.
One popular method is to wet your suspect bike tire with soapy water before trying to inflate it, watching for air bubbles as you inflate.
A tear or tear in the rubber sidewall of a tire is another matter entirely.
Sometimes a bumpy gouge caused by sharp rocks and foreign objects can be enough to break the rubber wall that connects the tread to the wheel rim. nine0003
While tears and rips in your motorcycle tires are easier to spot than punctures, there is no patch or sealant strong enough to repair a punctured tire well enough to inflate; the tire will have to be replaced before the trip.
If there are no cuts or punctures on the tire itself, it could be a damaged wheel rim that is preventing your motorcycle tire from inflating.
Motorcycle tires are particularly susceptible to bending and warping due to pothole damage, falling off invisible curbs, and riding on badly damaged concrete.
Some more sporty bike designs use alloy wheels to improve aerodynamics and reduce overall weight.
If your rims or any part of your wheel is damaged, the only safe solution is to replace the damaged wheel.
Note: If you have problems with motorcycle tires that do not inflate, you should diagnose the problem before riding. If it's not a problem with the air compressor or one of the valves involved, it's either a problem with the rubber tire or the metal wheel; Driving with damaged tires and wheels is dangerous and increases the risk of a collision.