“A tire only loses air if it’s punctured.” This is a common misconception that we have all had or heard and yet the reality is quite different. Indeed, a tire can lose air even without a puncture, as for example in the case of a crack in the valve that is used to inflate your tires. A punctured valve is difficult to detect, and not taking care of it in time can have real consequences for your tire, but also (and above all!) for your safety. Blackcircles Canada, your online tire specialist, offers below a complete guide to the causes and consequences of a punctured valve, and how to repair a leaking valve stem.
A valve is a pin located on the outside of the tire, through which the tire can be inflated/deflated. It has a mechanism consisting of a spring-mounted valve that closes tightly with the air pressure inside the tire. Over time, the stem valve may become brittle and cracked, which may increase the risk of air leaking through it.
When the stem valve leaks, the affected tire is no longer able to retain air. Depending on the extent of the damage, the air will leak out slowly or more quickly. In both cases, the valve must be replaced.
If the air leakage is slow, you will be subject to the problems encountered by drivers driving with underinflated tires. Internal damage that can shorten the service life of the tire by up to a quarter, increased fuel consumption due to higher rolling resistance: the tire will damage faster, and your energy-efficiency will be significantly lower. The tire will also have poorer traction and the stability of your car will be reduced when cornering, not to mention the more pronounced deformation of the tire that increases its internal temperature, which can cause it to burst. Finally, an under-inflated tire increases the risk of hydroplaning. Tire pressure is thus very important!
 Here’s how to do it!Step 1: Make sure it’s your valve stem that’s leaking.
First of all, make sure it is the tire valve stem that is leaking. To do so, there’s a very simple trick! Apply a mixture of water and dishwashing soap to the valve with the cap removed. If bubbles start to appear, your valve is leaking. If this is not the case, and there is a definite air leak, it will be located elsewhere on the tire.
Step 2: Gather the right tools before you start!Before you begin, make sure you have all the necessary equipment to complete the replacement of the faulty valve stem.
For this, you will need the following:
You are now ready to start the process!
Step 3: Loosen the nuts on the wheel you are going to work on.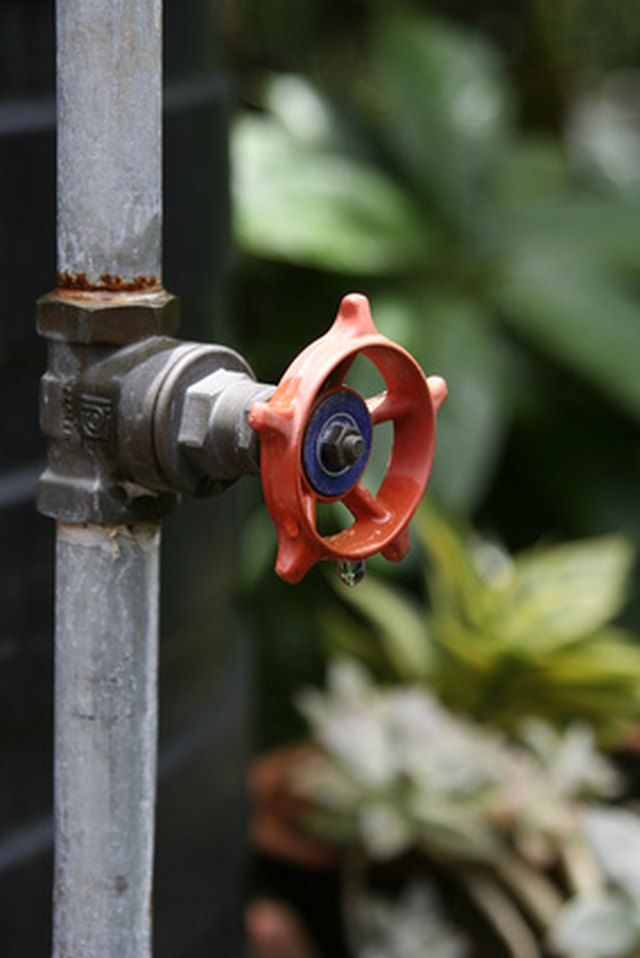
To do so, use the wrench mentioned in the previous step to loosen each of the lug nuts holding your wheel in place. Do this while the car is still on the ground.
However, for certain models of vehicles, it is possible that the wheel nuts have an anti-theft ring. If this is the case, you’ll have to use the appropriate special key to remove the locking nut(s).
Step 4: Raise your vehicle with the jack and then remove the wheel.First and foremost, make sure the handbrake is applied so that your vehicle is completely immobilized. Then, use your jack to lift your car. Be sure to position it on the right part of the chassis so that the car is properly supported. This will prevent any damage to the car and any bodily injury. Once your car is lifted, secure it on jack stands. Unscrew the wheel bolts completely, then remove the wheel. Finally, place the wheel on the ground flat, with the outside of the wheel facing up.
Step 5: Remove the valve stem core with the removal tool and let the tire deflate.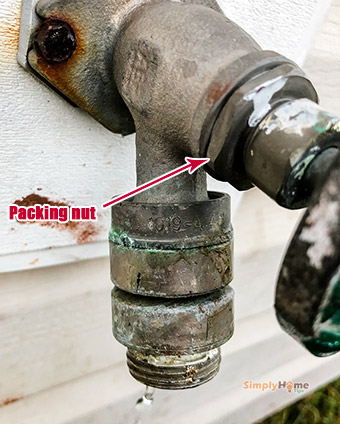
If you have not already done so, remove the valve cap. Then remove the valve stem core using the valve stem removal tool to release the air from the wheel, which should normally deflate completely on its own.
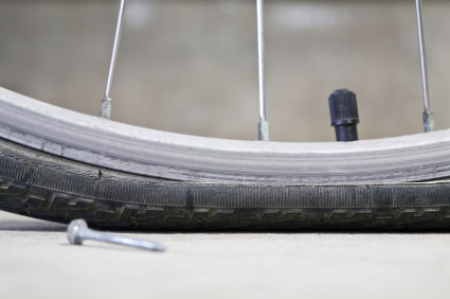
Step 6: Separate the tire’s bead from the wheel.For this step, use the sledgehammer in the following way: hit the tire sidewall with the sledgehammer in the same spot until you hear a crack or popping sound, and see the inside lip of the tire visibly break loose from the rim. This means that the tire has been successfully detached from the lip of the wheel.
Once the tire bead has been broken, continue hitting with the sledgehammer around the tire to detach the sidewall around the entire circumference of the wheel.
Step 7: Remove the tire from the rim.Once the sidewall of the tire is separated from the outer edge of the rim around the entire circumference of the wheel, insert your tire iron between the edge of the rim and the inside lip of the tire, and then pry upward to pull the lip of the tire over the edge of the wheel.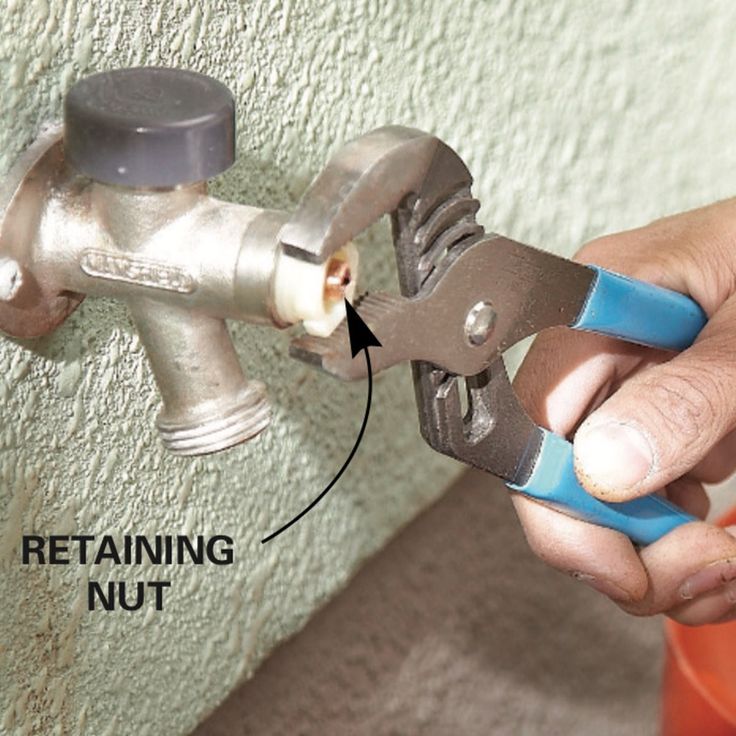 Once you have pulled the lip of the tire over the edge of the wheel, work the tire iron around the rim until the entire lip of the tire is off the rim.
Once the sidewall of the tire is completely above the wheel, grab it by its removed lip and pull it upward so that the opposite lip that was at the bottom of the wheel is now touching the top edge of the rim. Use your tire iron again by inserting it between the tire’s lip and the edge of the wheel and pry upwards to pull the lip over the edge of the rim. As before, work the tire iron around the edge of the wheel until the tire is removed from the wheel.
Step 8: Remove the defective valve stem and replace it with the new one.Once the tire is separated from the rim, it is time to remove the valve stem. To do this, first pull out the valve stem free from the wheel using the needle-nose pliers. Once this has been done, install the replacement valve stem from the inside of the wheel. Once it is in position, use the needle-nose pliers again to pull it through into its right place on the wheel.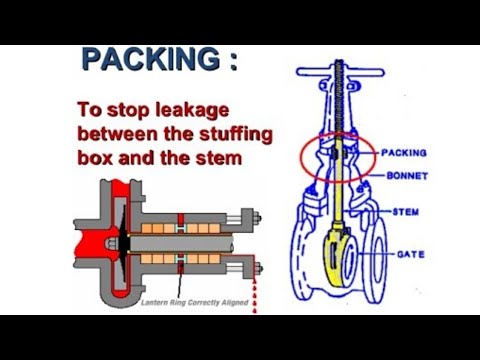
Once the stem is in place, it is time to put the tire back on its rim. To do this, start by pressing the tire down over the rim until the bottom bead clears the edge of the rim. The aim here is to return the lower sidewall of the tire to its original position on the wheel.
Then press the upper sidewall of the tire down underneath the edge of the wheel. Then tuck your tire iron between the tire sidewall and the rim edge and use it to make the opposite movement to the one you used to pull the tire sidewall out of the rim. Once the bead clears the lip of the wheel, use the tire iron to work your way round the entire wheel until the tire is completely installed on the wheel. Then inflate it to the correct pressure using the air compressor.
Step 10: Make sure there are no other leaks, and mount your wheel back on!Once the tire is inflated to the correct pressure, check for other leaks.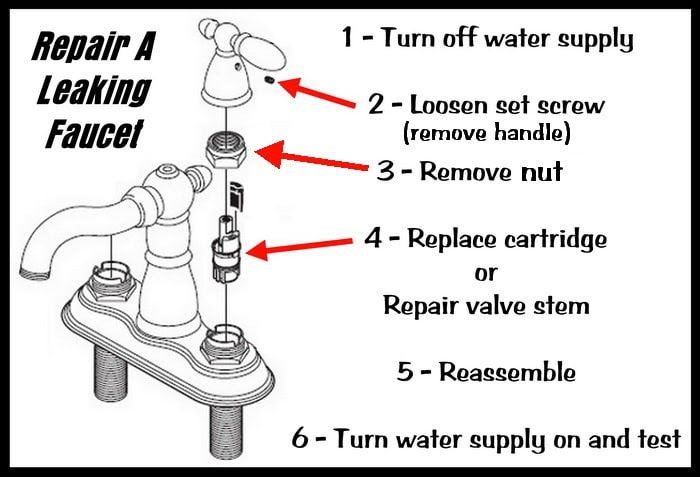 If all is well, mount the wheel on your vehicle and bring it down by lowering the level of the jack stands until the repaired wheel touches the ground and you can safely remove them.
Ultimately, it is very important to make sure your tires are free of air leaks to maintain proper air pressure at all times. In the case of a slow air leak, the consequences can be dramatic. If the air leak is due to a faulty tire valve, you will definitely need to replace it. You can either follow the above procedure on how to repair a leaking tire valve or take it directly to a specialist. If, on the other hand, you need to change the entire tire, consult our selection of tires adapted for your car directly online on our website!
Tire Installation 101: When and how to change your tires?
Posted on by hls_admin
A valve stem is commonly found in an automobile or bicycle wheels.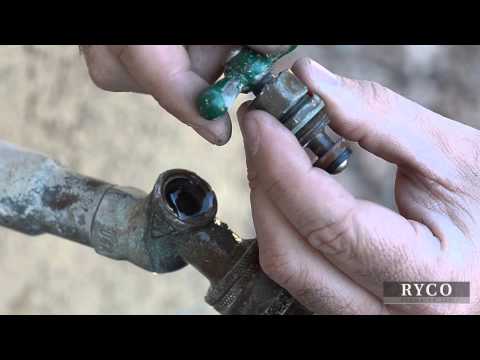 It is a self-contained valve that opens in order to let gas enter a chamber (e.g. air used to inflate a tire). The valve then closes automatically and is kept sealed using pressure in the chamber (sometimes, a spring or both is used to prevent the gas from escaping). Although a valve stem is mostly found in automobiles or the wheels of bicycles, they can also be used for other applications.
There are different kinds of stem valves, and these are:
Schrader Valve – Consists of a valve stem where a poppet valve is threaded with a spring attached. This kind of valve is used on almost all automobiles and motorbike tires as well as wider rimmed bicycle tires. Also, these types of valves come in different diameters which are used in refrigeration and air conditioning systems, SCUBA regulators, engine fuel injection, plumbing and suspension systems.
Presta Valve – This is also called Sclaverand valves or French valves. This kind of valve is commonly used in bicycles and they have a narrower diameter than the narrowest Schrader valve stem.
Dunlop – Also called Woods valves or English valves. This was once popular in Great Britain but it still is used in a lot of bicycle tires in several countries.
These valves are prone to leak, especially when the weather is cold. Although only a small amount of air is released, continually doing so can lead you to have a flat tire. Sometimes, air inside the tire will try to get out of its pressurized compartment. The good news regarding a leaking valve stem is that it doesn’t take long to diagnose the problem and fix it.
It’s always best to practice safety no matter what you do. When removing the old core, debris could hit you when air is released. Sometimes, even the old core can hit you. So to avoid any danger to yourself, make sure to wear safety glasses.
Parking on a flat surface makes you see the problem much clearer. Also, make sure that you have the brakes on (this is another safety precaution that you have to keep in mind).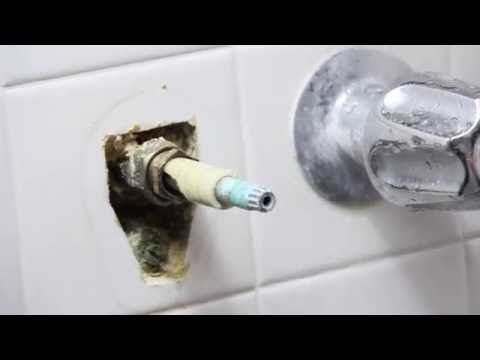
Let’s say you just topped off the air in your tires but you notice that it is low again after a few days. Before you take your car to the garage, it’s best to see where the problem is. Although the problem may be because your tire has a hole in it, you can always check for a leaky valve stem first. If that is your problem, then it is quite an easy problem to fix. The tools you will need to fix such a leak are a valve core tool and a package of new valve cores.
But first, you need to locate where the leak is. To do this, you can squirt soapy water onto the valve. When bubbles form after doing so then you have a slow leak.
The valve core tool you need is actually four tools in one. You install and remove valve cores using the forked end. Cleaning and restoring the interior threads can be done using the tapping end. Also, the die end is used to clean and restore cap threads.
To remove the old core, you will need to jack up the wheel.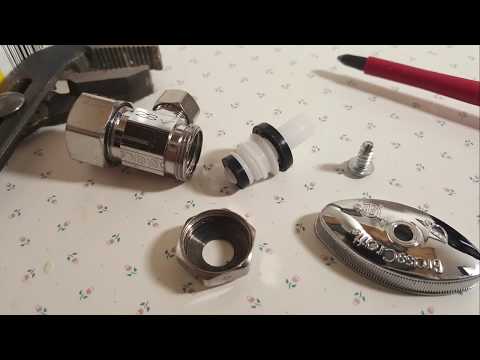 But before you do so, use a lug wrench to loosen the lugs of the wheel. Then, use a floor jack to lift the vehicle off the ground.
Remove all the loosened lug nuts by hand then pull the wheel of the axle. Make sure you have an open area or workbench where you can work on the tire. Use a nail to release the pressurized air inside the tire. The valve needle inside the valve stem needs to be depressed using the nail so that air can be released.
Use the valve core tool to remove the old one then use the same tool to screw in the new one. After doing all this, refill the tire using an air pump (use the settings you normally use).
To make sure that the problem has been resolved, you have to perform a test on the valve stem. The test you will be doing is similar to finding out whether you have a leaky valve or not. So after you’ve done everything, squirt a bit of soapy water into the valve. If the fix you did was successful, you will no longer see bubbles after you’ve squirted soapy water.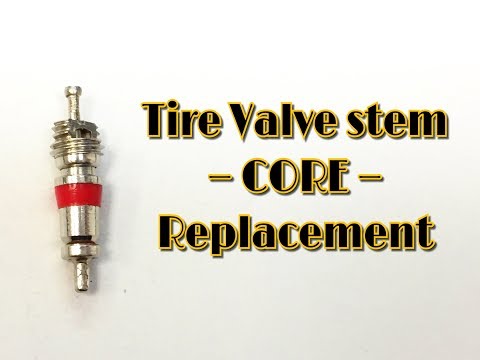
Put the wheel back into the car then use the lug wrench to reinstall the lug nuts. Use the floor jack to lower the vehicle of the jack stand.
One sign of trouble could be the beginning of another. This is why you have to regularly check the components of your automobile (or any other kind of vehicle you own). In this case, when you check or fix a leak, try to check the old core threads too. If these show signs of corrosion, you can use the tap end of the valve core tool to clean the interior threads of the valve stem.
Also, don’t forget to get dirt out using a valve stem cap. After all, getting dirt around the core can also be the cause of the problem in the first place.
When air inside the tire has escaped from a leaky valve stem, the problem may have been present for a while. Since this may lead to running on a flat tire, you need to stop the escape of pressurized air. And you also need to do this as soon as possible because the last thing you want is to drive a car with an under-inflated tire or leave your car and then come back to one with a flat tire. Luckily, it isn’t that hard to find where the leak is and fix it.
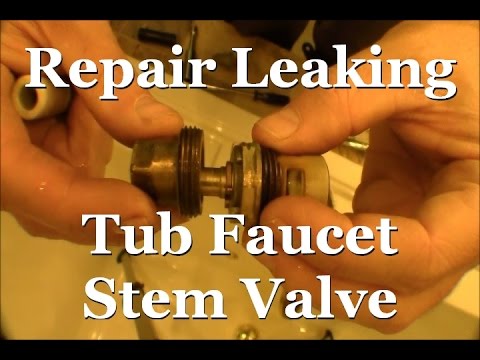
The supplies you will need to repair a leaking valve stem depend on the type of valve stem leak. If the leak is from a seal around the valve stem, you will need sealant and some tools to remove and replace the seal. If the leak is from the valve itself you will need a replacement valve.
There are several easy ways to identify a valve stem leak. First, you need to look for fluid leaking from the valve stem area in large quantities. allows fluid to flow out. Another way to check for a leak is to turn off the engine and then turn it back on while pressing the valve stem with your hand. leaking valve stem, you will need to find and fix the source of the leak.
If the valve stem is leaking, it is usually necessary to replace the entire stem. However, there are a few exceptions to this rule. If the leak is small and can be repaired with sealant or a patch, then the leak can be repaired without replacing the entire stem. If the leak is severe or shows signs of damage valve train, it is usually necessary to replace the entire stem.
If your valve stem is leaking, there are several ways to fix the problem. The first step is to determine where the leak is coming from. You can do this by checking for fluid leaks around the valve stem, looking for cracks in the plastic or metal housing, and listening for bubbling or gurgling sounds .Once you know where the leak is, you can start fixing it.
To remove a leaking valve stem, begin by removing any debris or obstruction that may be blocking the stem port. Use a screwdriver or other tool to pry up both sides of the obstruction until it is free. If there is corrosion on the outside of the valve stem, clean it with a wire brush before reattaching it to the bike.
If, however, your leak seems to be coming from one of the separate housings that make up your valve system (for example, in the area near where water enters your bike), you will need to use a special tool called an assist screw pump piston. (PPAS). PPAS are small tools that help remove these individual housings and fix a leak without having to drink acid or other tools that could damage the tubing used in the system (for more information on PPAS and how to use them when repairing/replacing your bike). valve systems, visit www.dpasincolorado.com).
There are several ways to clean the area around a leaking valve stem. One is to use a vacuum cleaner with a hose attachment. Another is to pour boiling water over the affected area and wait for it to cool before wiping it off.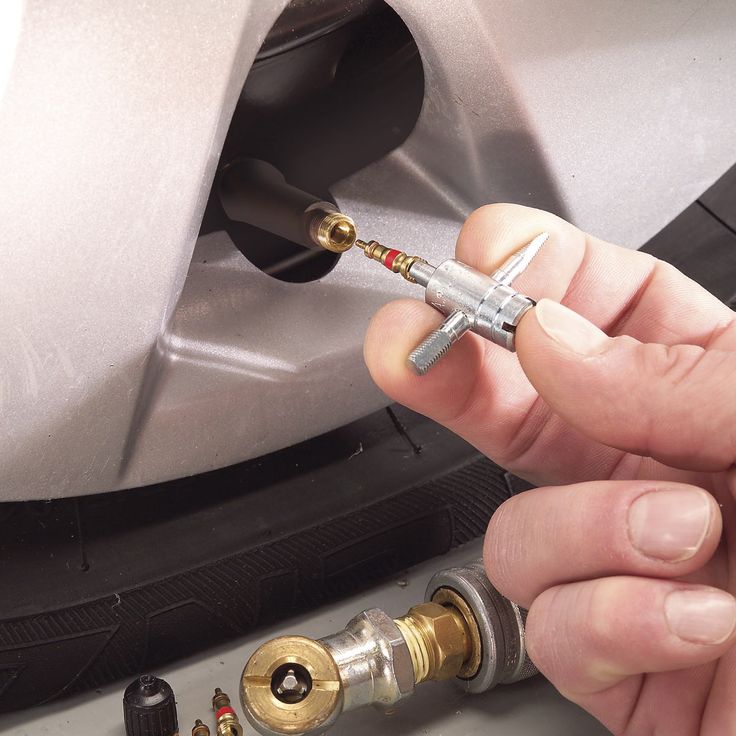 piston on the leak and push and pull until the leak stops.
Fixing a leaking valve stem can be frustrating, but with the right tools and instructions, it's not that hard. Here are some tips to fix a leaking valve stem:
There are several different types of sealant that can be used to fix a leaking valve stem. One option is to use silicone sealant. This type of sealant is often used on water valves and other plumbing fixtures that can leak. Another option is to use a hot glue gun and adhesive tape. This type of sealant can be used to fix leaks on plastic pipes. Finally, you can also use a sealant gun and sealant to fix leaks on metal pipes. Each option has its own advantages and disadvantages, so it is important to choose the best solution for a particular situation .
If the valve stem is leaking, the sealant is most likely already lost. The sealant may take several hours to completely dry, but it usually dries within an hour or two. If the leak persists after the sealant has been applied, the valve may need to be replaced.
There are several ways to repair a leaking valve stem without removing it from the tire. One option is to use caulk or glue to temporarily hold the stem in place. If the leak is small and random, you can wait until it clears up on its own. If the leak is more permanent, you may need to remove the valve stem and replace it with a new one.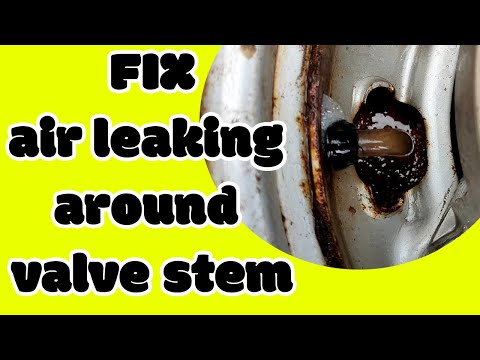
A leaking valve stem can cause many problems, including: * Leaks that allow water to enter your home * Water damage to your floors, walls, and ceilings * Loss of water pressure in your home A leaking valve stem can also lead to costly repairs. If you do not repair or replace the valve stem soon, it may become unrepairable and will need to be replaced. Here are some tips on how to fix a leaking valve stem: 1. Check for obvious signs of leakage. Look for wet spots on the floor, ceiling or walls; puddles on the ground; or water seeping through cracks in the flooring. to prevent flooding). 3. Remove any objects that may block the full opening of the valves (eg furniture). 4. Try to tighten both valves at the same time by hand. If that doesn't work, use a wrench or pliers. valves.* Do not overtighten - just enough so that you can easily move them.* If using a wrench or pliers doesn't work, try using an adjustable wrench instead.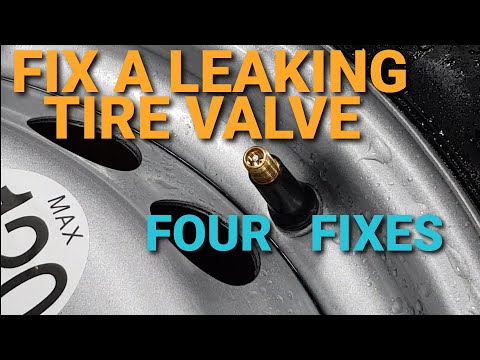 * Once both valves are as tight as possible and still does not work properly, they may need to be completely replaced. - Be careful when working with plumbing - leaks can occur at any time and without warning. - Make sure that there is someone nearby who knows how to handle plumbing. emergency plumbing in case something goes wrong.
There are some safety concerns associated with repairing or replacing a leaking valve stem. First, it is important to note that any type of repair or replacement of a leaking valve stem should only be done by a qualified mechanic. Second, always wear protective gear when working on the vehicle , including gloves, goggles, and a dust mask. Finally, be sure to thoroughly clean the area around the valve before proceeding with the repair.
If you are experiencing a seat valve leak, there are several things you can do to try and fix the problem. First, make sure the valve is properly seated in the pipe. If it is not, you may need to replace the valve. second, check for debris or obstructions in the piping that could be causing the leak. Finally, use a sealant or patch kit to seal any leaks.
There are several different ways to fix a leaking seat valve.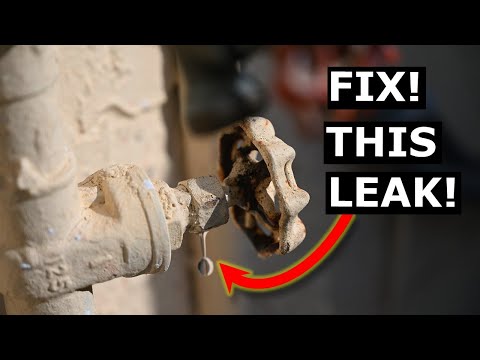 The most common way is to replace the valve. However, you can also fix a leaking seat by tightening the screws or bolts holding it in place, or by replacing the gasket. If the leak is small and does not require repair , you can try using sealant or patching the hole with epoxy. To find out which repair is best for your particular situation, consult with a specialist.
There are a few things you can do to try and fix a leaking seat valve. First, make sure the valve is properly seated and tight. If the valve is loose, it will leak. Second, check for blockages in the system. If there are any obstructions, water will pass through them and into the valve, causing it to leak. Finally, replace the seat if it is worn or damaged. This will help prevent further leakage. If all these measures fail to stop the leak, you may need to completely replace the seat valve. There are many different types of valves available on the market; choose the one that best suits your needs and budget.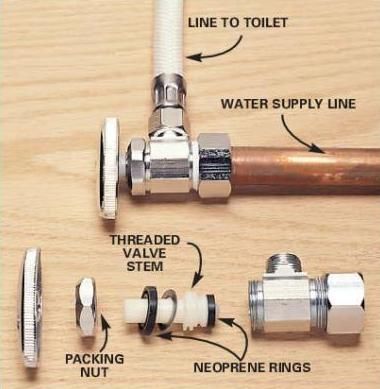
The seat valve is a small metal fitting that controls the flow of fluid from your bike's reservoir to your bike's engine. When it leaks, this valve can cause excess fluid to seep into your bike's frame and eventually damage it. There are a few things you can do to try and fix a leaking seat valve: 1. Check for obvious signs of damage or leakage. If there is visible damage, replace the seat valve immediately. you may need to replace the entire assembly (leaking or not). 2. Remove the seat valve and inspect its sealant for wear or cracks. Replace damaged or worn seals 3. Clean all components in and around the seat valve with a mixture of degreaser and water 4. Apply new sealant around the seat with a syringe 5. Replace the seat valve
There are a few things you can do to prevent seat valve leakage in the future. First, make sure the valve is properly seated and tightened. Second, check for cracks or tears in the rubber seal around the valve stem. Finally, replace seat if it starts to leak.
If your seat valve is leaking, it may need to be repaired or replaced. To determine if your seat valve needs repair, first inspect it for obvious signs of damage. it needs to be replaced. To check if the seat valve needs to be replaced, fill a pot with water and put the pot on the stove. coming out from under the seat valve when performing this test, this means that the valve is defective and needs to be replaced. If you do not see bubbles during this test, your seat valve may need some adjustment or cleaning. In any case, contact a specialist for further advice on fixing a leaking seat valve.
How can a seat valve leak be repaired? What steps must be taken to repair a seat valve leak?
When it comes to your horse's health and well being, nothing is more important than keeping his saddles in good condition.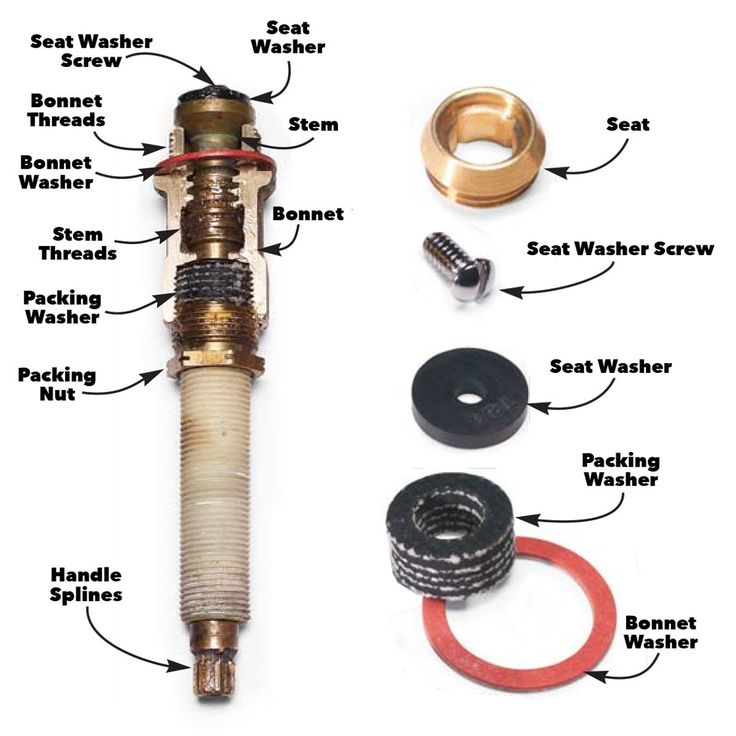 Saddle valves are an important component of these saddles, and if not properly maintained, they can easily start to leak. This guide will teach you identify and repair common globe valve leaks.
First things first: what are globe valves?
The saddle valve is a small piece of metal that is attached to the horse's spine just below the withers. It is responsible for controlling the flow of air in and out of the horse's back, which is critical to his comfort and health. can cause serious problems for your horse, including back pain, difficulty breathing, and even pneumonia.
So what causes seat valves to leak?
There are several common causes of saddle valve leaks: age (the metal inside these valves wears out over time), improper maintenance (you don't clean them often enough or replace them when they start to wear out), genetics (some horses are prone to leaks) , accidents (when something falls or hits a valve), and illness (such as laminitis).
How do you know if your seat has a leaky valve?
If you notice any signs that one or more of your horse's saddles may be leaking, such as increased back sweating, difficulty breathing, or coughing up mucus, it may be time to take action. To check if your valve seat is leaking, first try to check for obvious signs such as water droplets coming from the vents on the sides of the seat, or wet spots on the ground nearby. If not, you still think there may be a problem with one of your saddles , you will need to take some additional steps before fully diagnosing the problem. Here are four tips for checking for possible leaks: 1) Look for moisture buildup around seams at joints; 2) Check under each sidebar; 3) Pinch each sidebar between your fingers; 4) Try applying pressure to either end of each side panel while holding both ends at the same time - if it opens slightly under pressure, it could be a problem with that particular seat's sealant/sealant system). Once you've identified one or more potential leak sources in one or a few of your horses' saddles, it's time to act! There are several different ways you can repair/repair a leaking seat valve: 1) Replace the entire valve assembly - this is usually recommended if there is significant damage beyond light wear; 2) Repair/replacement of damaged parts using specialized sealant/sealant systems - this is usually necessary if only minor damage has been caused; 3) Use Repair Materials and Methods - This is commonly used when repairs are not possible due to structural damage, etc.