ATVs offer unique off-road capabilities and can handle some of the roughest and most unforgiven terrains you can imagine. However, there might come a time where you need to cross a body of deep water out of necessity (if it’s on your path) or simply because the daredevil in you thinks it could be fun.
But before you plunge your ATV into the water, you should know how it’s going to fare when submerged.
A stock ATV is designed to cross small rivers and streams that are not deeper than up to the bottom of the footrests. You should never drive an ATV in deep or fast-flowing water as this may cause engine damage and involve a risk of being swept away with the current.
As a general rule, you should never take your stock ATV in water that is deep enough to go past the footrests or footboards of your vehicle. When applying this guideline, you can be reasonably confident that the water will not damage your machine.
If you submerge the ATV beyond this level, you face a list of potentially harmful issues, as outlined further down in this post.
In reality, most ATVs can go somewhat deeper than the footrests safely, as long as you drive at a slow pace and there are no strong currents. How deep your specific ATV can go depends on the location of the air intake and the location of the vent ports for the belt housing. It’s a good idea to identify where these ports are located so that you know your vehicle’s limit.
If you decide to go in water deeper than the bottom of the footrests, make sure to go as slow and steady as possible with no sudden movements as this can cause water to splash higher up on the vehicle than necessary.
Also, check the water depth and current before you attempt the crossing to avoid unexpected surprises. Look out for hidden rocks or other obstacles. See if you can find a crossing that has gradual inclines on both sides for a smooth transfer from land to water and back up on dry land.
When a stock ATV goes in deep water, quite a few things may go wrong. In the best case, you only get stuck and need recovery. In the worst case, the water may cause major engine damage or damaged electrical components. You also face the risk of flipping or getting swept away from strong currents.
Riding in deep water may cause the engine of your ATV to flood. This happens when water gets sucked in through the air intake and enters the combustion chamber and may cause the engine to hydro lock or water lock. This phenomenon may cause severe dame to the engine.
Typically, the piston moves up and down inside the cylinder and compresses the air trapped between the cylinder head and the piston. The air is then released through the exhaust ports.
However, water does not compress as air does. If water gets trapped where there’s only supposed to be air mixed with gas, the water has nowhere to go as the piston moves up.
If you’re lucky, the engine only stops without any further damage. If you’re not so fortunate, hydro locking can cause significant engine damage to an extent where you may need a major engine rebuild or replace the engine altogether.
Typical damage from hydro locking bent connecting rod, cracked crankshaft, fractures in the cylinder walls, blown oil seals in the cylinder head, and blown valves.
Engine damage is more likely to occur if the engine stops from hydro-locking at a higher engine speed (RPM) than from driving at a slow pace at a low RPM. If hydro locking occurs when the engine is running at full tilt, a connecting rod can snap right off and blow straight through the engine block.
Attempting to start an engine that has stopped from being submerged can also cause engine damage. That is why you mustn’t try to start the engine that before it’s thoroughly inspected.
Please refer to your user manual for vehicle-specific guidelines on what to do before you start an ATV immersed in water. If you don’t have your user manual at hand, you can head over to our guide with general guidelines on repairing a submerged ATV.
This issue only affects ATVs with a drive belt; most recreational and utility ATVs, and some youth ATVs on the market, except Hondas.
The drive clutch, connected to the engine, uses friction to transfer engine power via the drive belt out to the driven clutch connected to the wheels via drive shafts.
The clutch and belt assembly is located inside a protective casing known as the clutch or belt housing. The friction between the belt and clutches that occur from regular operation generates a lot of heat the needs to be removed to prevent belt overheating and consequently belt slippage.
The belt housing has two ports to keep the system cool, one that sucks cool air in and another that blows warm air out from the case.
If the intake port ends up below water, it will suck water instead of air into the case, effectively soaking the belt and clutches in water.
When the belt and clutches get wet, they lose almost all friction causing the clutches only to spin. The wheels will not turn when this happens, regardless of what gear you use or how much throttle you apply.
The only way to get the ATV moving again is to remove it from the water and drain the casing by removing the drain plug at the bottom.
Recovering a stuck riding buddy is just one way to use your winch; here are 28 other cool ideas for ATV winch uses.
Stock ATVs don’t float, but buoyancy will cause the ATV to get top-heavy and more likely tip when you drive in deep water. ATVs with bigger tires are more prone to tipping than bikes with stock tires, as bigger tires with more air equal more buoyancy.
You’s be surprised how little water it takes to sweep away an ATV, as long as the current is strong enough. Even waters depts that don’t reach the footboards can cause a potential hazard after heavy rainfall when water speeds are higher.
It’s not a fun experience when you lose control of the ATV, being swept uncontrollably out into potentially deeper waters.
Keep in mind that wet brake pads and brake discs provide reduced stopping power. After submerging them in water, you should dry them by driving slowly and applying the brakes lightly several times until you feel regular braking action is restored.
As you may know, electronics and water does not go well together. While most electric components such as the ECU and other control units are designed to be waterproof, there is no need to push your luck. Just a tiny amount of water can cause these expensive units to short circuit beyond repair.
Electrical connectors do not short circuit from being submerged in water, but corrosion may cause a bad connection in time.
A stock ATV can be modified to better cope with being submerged in deep water. Here is a list of the most common mods to achieve deep water or mudding capabilities.
A snorkel kit shifts the air intake or exhaust ports to a higher position on the ATV to prevent water from entering the engine and belt housing. The three ports that need to be snorkeled are:
Some snorkel kits even include an exhaust snorkel to prevent water from entering the engine through the exhaust system.
Other parts you may consider snorkeling are the crankcase breather tube, differential vents, or carburetor vent tubes.
Submerging the radiator will not cause damage to your ATV. But the stock location of a radiator is prone to get packed with mud and debris if you plan on going mudding regularly.
Relocating the radiator up to the top of your front cargo rack ensures easy access for cleaning and may avoid overheating issues and potential engine damage down the line.
A cheap but efficient way of protecting electrical connectors from water and corrosion is packing them with di-electric grease before submerging them in water.
Disconnect all connectors and pack them with grease before reinstalling them. Only use di-electric grease as it’s non-conductive and won’t cause a short.
Related: 26 Essential ATV mudding mods.
If you’ve already ridden your stock ATV in deep mud or water, there are consequences you need to attend to, but all is not lost. I’ve structured the somewhat tedious process of repairing a submerged ATV in my guide 16 Steps to Repair an ATV Submerged in Mud or Water
The purpose of installing a snorkel to an ATV is to relocate the engine air intake, clutch housing vent intake, and clutch housing exhaust port to a higher position on the ATV. This allows the ATV to go in deep water without causing damage to the engine or belt slipping from a wet drive belt.
ATVs can pretty much go anywhere. I’ve gotten plenty stuck in mucky ditches. But water always makes me shiver because I’m a mechanic, and I know what water can do to an engine.
ATVs can go in the water, but they must have a special snorkel kit fitted. The snorkel allows the engine to breathe while submerged. Without the snorkel kit, the engine would likely be damaged beyond repair.
In this post, you’ll learn what an ATV snorkel kit is, where it’s fitted and how it’s tested. You’ll also learn about the devastating damage water can do to an ATV engine in 2 seconds flat.
Page Contents
An ATV engine, as you know, needs air and gas to run. The air is forcefully sucked into the engine through the airbox (positioned under the driver’s seat) by the piston as it moves down the cylinder on the intake stroke. Any water in the air or fuel system will shut the engine down immediately. A rider must not allow water to get anywhere, even close to the airbox. To do so risks some expensive repairs. (more on that later)
But deeper water equals more fun, right. So the solution is a snorkel kit. The concept is, as you guessed, the same as a divers snorkel. An extended duct is added to the airbox and positioned as high as possible on the bike. The hood is the usual location for the intake opening. This allows the rider to keep a close eye on the water level in relation to the intake opening.
Before buying a snorkel kit, do your research really well. See what your bike needs and only buy a quality brand from a retailer that will stand over the kit. A cheap poor quality snorkel kit can cost you your engine. You can fit a snorkel kit yourself, but do test it before hitting the drink. The safest method for testing is compressed air and soapy water.
I use a leak-down tester to compress the intake system, and you can use soapy water at connectors to check for escaping air. Even the smallest leak will shut down the engine.
We’re not quite water-ready yet. If your ATV’s transmission runs a CVT system (Belt driven), it will also need to be protected from the water and crap in the water. If the belt gets wet, you’ll lose traction and likely damage the belt and clutches, all expensive repairs.
Your CVT housing has an inlet and outlet to allow for airflow around the components. Snorkeling ducts need to attach to them also and be extended as high as possible. So too for the engine crankcase and a host of other breathers, including front and rear diff, carb vent, gas tank vent, and possibly others, that’s why it’s important to do all the research for your model ATV first.
The electrics on your ATV are pretty durable, and they need to be because they have everything thrown at them. Water, however, is your ATV’s electrical system’s greatest challenge. Mission-critical electrical connectors are engineered to be water-tight.
Rubber seals inside the connectors and on individual pins help keep moisture and dirt out, but problems arise in older bikes. The seals are often missing, perished, or misaligned.
The result is electrical gremlins either as you enter the water or soon afterward.
Water that enters a stalled engine won’t destroy it, but the water that enters a running engine is in serious trouble. Riding an ATV hard into deep water without a proper functioning snorkel will allow water into the air intake box.
From there, the water is sucked on into the engine and fills the cylinder bore. It’s a condition known as hydro-locking.
So what’s the problem with hydro-locking? Water isn’t compressible, and when the piston comes back up the cylinder under force and tries to squeeze the water, something has to give.
The piston con-rod is the usual loser, and repairing this kind of damage isn’t cheap.
You may find the following posts helpful:
The bike won’t start no click
ATV dies when given it gas
ATV only runs on the throttle
ATV makes a popping noise
ATV hard to steer
The crankshaft of the engine is connected to the drive shaft that turns the impeller. The impeller is precisely centered in the housing through which the water sucked in from under the watercraft passes. The water then enters the converging nozzle. At the same time, the flow of water is accelerated, providing traction and moving the watercraft. Pressing the throttle lever causes the engine speed to increase, and therefore the watercraft to accelerate. nine0005
Check the watercraft before operating. Familiarize yourself fully with the purpose and function of the controls. If you do not understand any of the controls or instructions, contact your authorized SEA-DOO dealer.
Before starting the engine, the driver and passengers must take their places on board the watercraft, having previously put on life jackets and the bottom of a light diving suit. nine0006
Keep clear of the water intake grate when the engine is running. Long hair, clothing, and lifejacket buckles can be caught in moving parts and cause serious injury or drowning.
The shift lever must be in forward gear to move the watercraft forward.
To enter Neutral, first engage Reverse and then push the lever back until the watercraft stops. The reverse damper will be in the middle position, throwing some of the water flow towards the front of the watercraft, thereby reducing its speed. nine0005
Never use jet propulsion components as a fulcrum when boarding a watercraft. Operate the shift lever only when the engine is idling and the watercraft has come to a complete stop. When reversing, never increase the engine speed. Do not use reverse gear to stop the watercraft. If possible, drive in reverse for short periods and at low speeds. Always make sure there are no obstacles or people behind you, especially children playing in shallow water. nine0006
When the gear is in neutral, the drive shaft and impeller continue to rotate.
Pull the lever fully out to engage reverse gear. The reverse damper will be in the down position, diverting all water flow to the front of the watercraft.
For maximum control of the watercraft when reversing, slightly increase engine speed. Excessive increase in speed will cause turbulence in the water flow and reduce efficiency. nine0006
When reversing, turn the steering wheel in the direction you want to turn. For example, in order for the rear of the watercraft to turn left, the handlebars must be turned to the left.
Operate the shift lever only when the engine is idling and the watercraft has come to a complete stop. Do not use reverse gear to stop the watercraft.
Steering movements are transmitted to the jet nozzle, which controls the direction of the watercraft. By turning the steering wheel to the right, the watercraft will turn to the right and vice versa. To pass the turn, you must press the accelerator lever. nine0005
To turn on the watercraft, you must turn the steering wheel and press the accelerator lever. Handling depends on the number of passengers, load, water conditions and environmental factors such as wind. Unlike a car, a jet ski requires you to depress the accelerator to turn a corner. Practice turning in a safe environment. This will help you avoid an accident.
When the throttle is released and the engine is stopped, steering efficiency is reduced. Driving a watercraft with a passenger is different from driving alone and requires better driving skills. The passenger should always hold on to the seat belt or handrail. Reduce speed and avoid sharp turns. Avoid choppy waters when traveling with a passenger. nine0005
The Passive Steering System (O.P.A.S.) uses two side flaps to make it easier to turn the watercraft when turning the handlebars with the throttle lever released or the engine stopped. The side flaps, located at the rear of the hull, rotate in the same direction as the steering wheel, making it easier to control the watercraft. At the beginning of operation, carefully familiarize yourself with the operation of this system.
When the engine is running at 75% of rated speed, the side flaps will automatically raise as they are not needed at that speed. When the engine is running at a frequency of 30-75% of the nominal, the side dampers are partially raised. Side flaps in the up position. When the accelerator lever is released and the engine speed drops, the side flaps automatically lower and make the watercraft easier to control. nine0006
ATVs are so popular because they can go where any car gets stuck without getting scratched. How can you prevent your car from rolling over, being damaged or going off the road? By combining engine power with the reliability of machine components: shaft, suspension and tires. It looks like a normal motorcycle. But this car has a powerful engine. In order for it not to fall apart on its own, the designers had to work out each component, as well as how power is supplied from the engine to the wheels. Let's see how it works. nine0006
When you have to deal with rocks and mud, the most important thing is wheel torque. The bigger it is, the better. It all starts with the engine. 950 cubic centimeters sounds impressive, but it's not just about size. Cylinder heads are like a baseball cut in half. This hemisphere design allows more air to enter the combustion chamber, and the shape of the valves speeds up the release and intake of the mixture. This allows you to pass difficult sections at low speeds. You don't need to boost the engine too much. Power under control - just what you need on uneven surfaces. And it gives you better grip in mud and water. nine0006
The key is to give power to the wheels without spinning them. Even with three times more torque than other similar machines. When you start the engine, you can adjust the torque of the wheels in a wide range - from the slowest speed to the fastest. To achieve such controllability, it was necessary to redo the entire transmission. A manual transmission only allows you to choose from a small number of gears. This means that when you shift them under load, the wheels get hit hard with every shift. nine0006
Instead of a bulky transmission, the designers opted for a continuously variable transmission. The drive belt is located in a V-groove on the wheel connected to the engine. As the engine speed increases, the centrifugal force moves the inner wheel towards the groove, moving the belt higher towards the end of the wheel.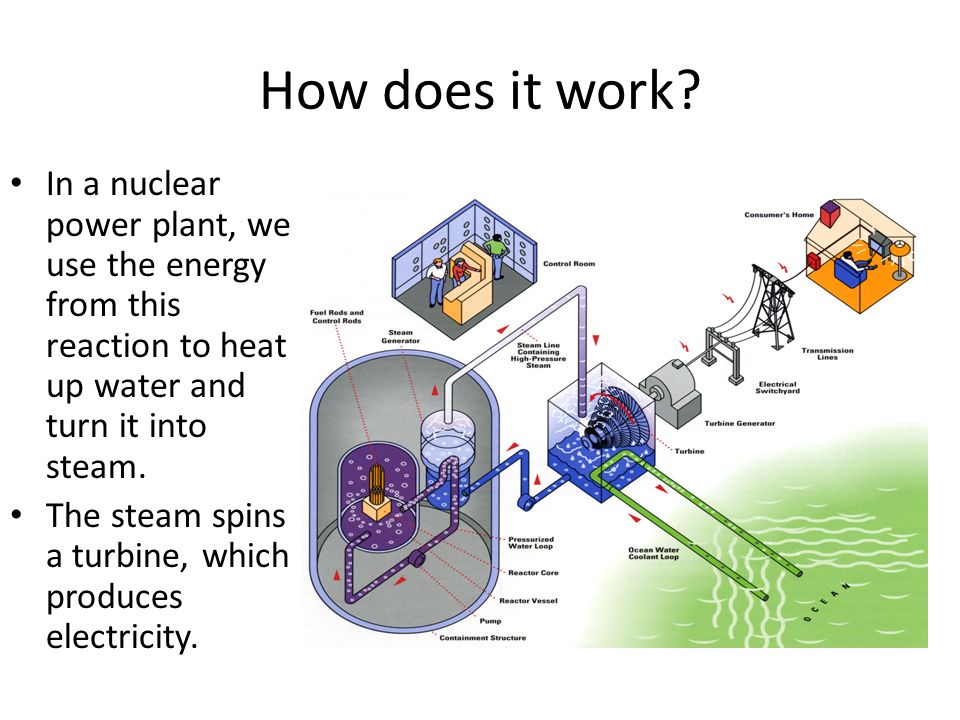 At high revs, a high gear is engaged, at low revs, a low one. Everything is thought out.
To keep the car on course when driving through water or mud, the differential allows all four wheels to quickly adjust and keep the car on the track. This is easy to see when skidding and sharp turns. The outer wheels spin faster than the inner ones to compensate for the distance that needs to be driven. Even if you skid, the wheel that loses contact with the ground continues to spin quickly and takes the load off the other wheel. You're stuck, but on this car, all you have to do is push a switch to disengage the diff and the wheels will spin at the same speed. This gives the stuck wheel enough torque to get out. nine0006
And finally, how to make the suspension in such a way as not to damage the frame and the driver? Put a heavy-duty suspension and remove the stabilizer. Most ATVs have a powerful stabilizer that connects the rear shock absorber. Thus, when turning, one of the shock absorbers cannot go too low, which can lead to a rollover.