Motorcycle tire mounting and balancing prices
The Overage Cost of Mounting and balancing the motorcycle tires (front & rear tire both) is from $40-50 but I will suggest you not give more than $50 for mounting and balancing the motorcycle tires.
If the motorcycle mechanic quotes more than that I will suggest you take the wheels by yourself so this way the charges will become even more down.
I and My friend goes to 21 Shops and quoted the price some of them were quoted $50 but some of them quoted $130-150. (the price also includes a tire disposal fees)
However, some shops will charge zero if you buy a motorcycle tire from them. but again it may charge you a little bit for mounting and balancing but it will be up to $20.
In Some Places, the Shop’s owner will try to charge you more, but they may give you the best price to beat their competition in some areas. Another Fact is That in Large Cities,s the charge for mounting and balancing motorcycles will be way higher than in small towns.
How much will you give for mounting and balancing motorcycle tires if you ask me: I won’t give more than $50. (it depends on my area).
Table of Contents
The Reason Why Shops In Cities Charge More MoneyThere is one reason that shops in cities charge more.
It’s because in the cities there are more customers than in small towns, Therefore, they don’t care if someone goes to another shop or does it themselves. But if someone agrees to pay $150-180 Then the Shops will Earn More Money.
But compared to Small towns where shops didn’t have Many Customers they agree to Mont and balance the Tires for less money.
Who Can/will Mount Motorcycle TiresThe tire shop has a skilled worker who can mount and balance tires.
But what happens if you want to mount and balance your motorcycle tires see below
How You Can Mount and Balance Your Motorcycle TiresAlmost everyone has a motorcycle and all motorcycles come with tires.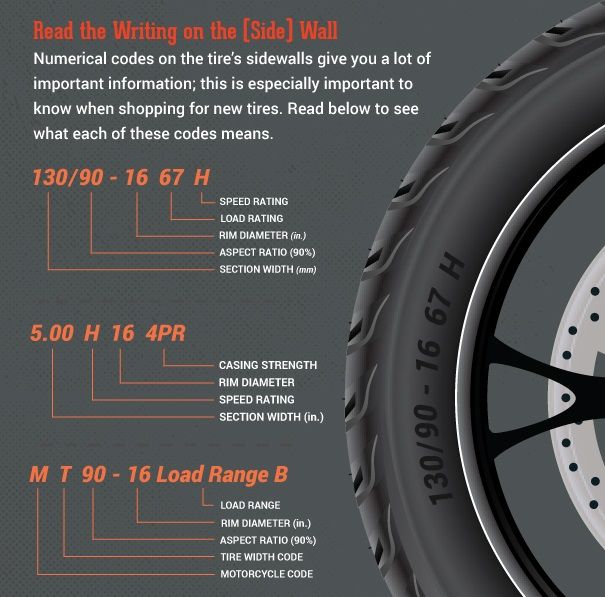 Tires play a crucial part in the comfort of your Motorcycle, if you have even one flat and need to be repaired then you can surely imagine how much discomfort it brings.
Today, our focus is on motorcycle tires, more specifically mounting them and balancing them properly to ensure that they run smooth and last long.
If you happen to be new to mounting motorcycle tires or have not done so before, some things should put you at ease.
All mounting equipment required is readily available from shops. The only challenge might be identifying the information given on the tire sidewalls which will help find the correct matching specifications for mounting and balancing your wheels.
Mounting and balancing motorcycle tires is very easy. If you want to pay someone else it will not good at all. But to do it, you will need some special tools to mount and balance motorcycle tires which is
And to Balance your motorcycle tire you need a Balance Stand And Wheel weights
When mounting motorcycle tires it’s important to let the air inside the tire out. To do this, use a long-bladed screwdriver and insert it into the valve stem hole located at the center of the wheel mounting area.
Push firmly on the tire bead to make sure there is good contact with the mounting surface as you press down on its air chamber. This should cause an audible hissing sound which will alert you that all of its air has been successfully released from inside.
Then spray a little Windex around the tires after doing that remove the tube from the rim while doing this put the tire irons to do it easily remember some tires can be easily removed with two iron tires but some may be removed with the three tire irons
Then remove the tire and repeat this process for the other side of the tire as well.
Once you remove the tire it’s time to put another tire into the rim.
But before doing that I will suggest giving some heat to the tire you can do it in two ways. One is the sun and the second is the hairdryer.
For a more in-depth method, I will suggest watching this video it will help.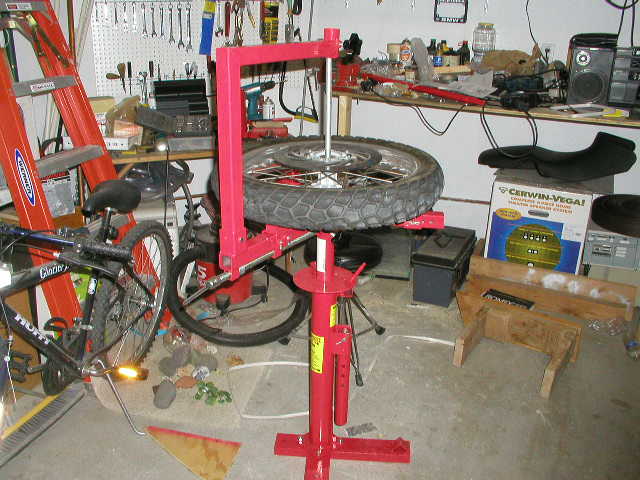
Motorcycles need to be balanced so that they are able to spin smoothly while you are driving. If the tire is not properly aligned, it will shake violently when it spins too fast and throw your entire ride off-balance with its vibrations. This can become dangerous over time as more problems crop up from a poor balance.
Most people don’t know but tires can be very dangerous to have unbalanced. There are many negative aspects of having an unbalanced tire, such as not being able to control your motorcycle properly.
Luckily professionals can come to check on how well-balanced they are for those who need help with these things or just want their ride smoother in general by using weights when needed!
Balancing tires is an important part of keeping yourself safe on the road. From time to time, you may need your tire balanced in order to prevent any problems and make sure that they are not wearing out too quickly.
Manufacturers recommend having them checked every 8,000-10,000 miles depending on factors like driving habits or terrain conditions which can increase wear and tear more than on normal roads.
Tires must be rebalanced periodically because there are many different things that affect their balance such as air pressure changes due to weather fluctuations between seasons but also uneven
Rough roads can quickly unbalance your tires and throw them off track. If you are regularly driving on rough terrain, then it is important to get your tire checked more often than the recommended 10,000-mile interval.
Rough road conditions may be closer to an 8000-mile frequency of balancing for optimal performance that will help avoid any unwanted blowouts
The off-balance signs on a motorcycle are often difficult to detect unless you’re paying close attention. If your bike is making odd noises like an unusual vibration, it’s time for new tires or adjustment of the wheel alignment. (rear-wheel or front wheel)
As long as you keep things in mind and look out for signs that things are off-balance, then life will be easy! Signs such as weird vibrations when accelerating can indicate there might be something wrong with newly installed tires – so don’t forget about them.
Should You Ever Mount and Balance your motorcycle Tires Yourself?Mounting and balancing tires is not a job that you’re going to be able to tackle yourself in most cases.
Unless you’re an expert with access to the proper equipment, it’s best left up for professionals who can do the work and make sure your ride stays safe on all terrain. They’ll have everything necessary from tire changers, rotations machines, mounts/balancers you name it!
ConclusionConclusion paragraph: Today, we’ve learned about the cost of mounting and balancing motorcycle tires.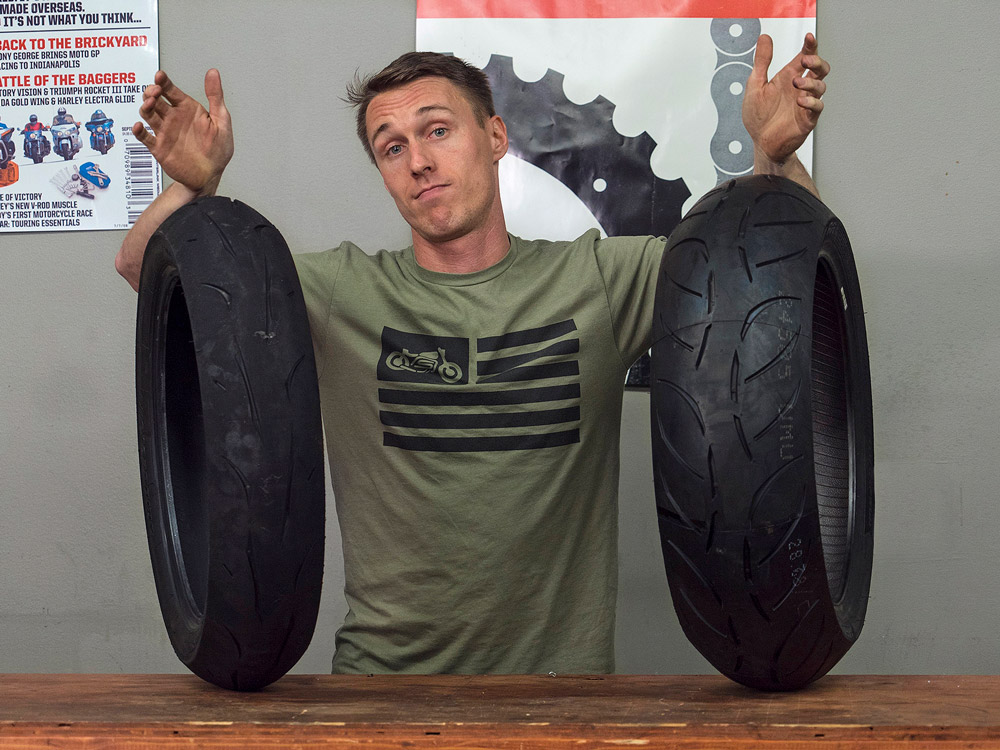 We hope you found this information helpful. If so, please share with your friends on social media or in-person today to help them make informed decisions when it comes time for their next tire purchase. Thank you for reading our blog post have a great day!
As a rule of thumb, it costs about $20-$80 to change a motorcycle tire. If you take off the wheels and bring them into a shop you can expect to pay $20-$40 per wheel. But if you bring the whole bike into the shop be prepared to pay $40-$80 per wheel, in addition to the cost of the tires of course. Some dealerships may quote you much more, but don’t be ripped off!
If you want to learn more about motorcycle tire change costs, you are in the right place.
We at PowerSportsGuide have gathered the average prices as well as the cheapest solutions under one roof!
How much does it cost to change motorcycle tires?It’s safe to say that the cheapest way to change motorcycle tires would be if you do the work yourself. However, as you will see, this is not recommended for security reasons.
A reputable shop can not only professionally mount your tires, but they also balance the wheels with a special rebalancing machine.
Balancing the wheels is very important since only a slight weight difference can lead to vibration. That’s why it’s recommended that you get the tire change done by a professional who can rebalance the wheels along with changing the tires.
Moreover, many shops offer a discount or don’t even charge for the change if you buy the tires from them.
You can also keep your costs low if you pull the wheels off yourself and bring them into the shop. This way it will cost about $40-$80 to change a pair of motorcycle tires.
On the other hand, many riders simply prefer riding to a dealership or a local shop to get the tire change done. This is arguably the most convenient solution, but also the most expensive!
If you are also considering visiting a shop, it’s recommended that you shop around to find the best rates available. The labor costs vary widely depending on the size and location of shop.
As you may assume, you can expect the highest rates at authorized dealerships. It’s not uncommon for dealers to quote $150-$400 to change motorcycle tires!
In contrast, small local shops are significantly cheaper, as they usually charge $80-$160 for the entire job.
It’s also good to know that replacing the tire on the front wheel is always significantly cheaper than the rear, a 50% difference in price between the two wheels is not uncommon.
However, best practice is to replace both tires at the same time!
Can I change a motorcycle tire myself? – we get this question a lot and the answer is that it depends. Although it is possible to change the tires on your motorcycle at home, in most cases this is not recommended. Why?
When it comes to motorcycles, the primary consideration should always be safety.
And improperly mounted tires can be dangerous in many ways, so it’s not worth the risk of gambling with them! Contrary to popular belief, changing tires requires skill as well as some specialized tools.
Even if you can properly mount the tires, you always risk scratching the rims or damaging the new tires.
Additionally, a professional shop not only changes the tires, but their service typically includes the balancing, lining, setting the chains tight, and a test ride as well.
Although you can do all of these tasks yourself, it still takes time and effort. It may take hours just pulling the wheels off, mounting and inflating the tires, and finally balancing and replacing the wheels.
This is why best practice is to get it done by a tire shop. Let’s see where you can find one!
It’s safe to say that the majority of tire shops can change motorcycle tires, even dedicated auto tire shops. In most cases, it makes sense to visit a local shop rather than ride many miles to a dealership. What’s more, local shops are typically much cheaper as well! But to make sure they can handle the change it’s worth a phone call first.
Whether you can change a motorcycle tire on a car tire machine is strictly dependent on its design. While many older machines could change motorcycle tires without any issues, modern machines clamp on the rim and feature a rotating table. This means if you want to change a motorcycle tire on these machines you will likely need an adapter, which holds the wheel higher off the rotating table.
Unfortunately, many of the newest car tire machines can’t be used at all to change motorcycle tires. This is because some manufacturers don’t provide adapters for motorcycle wheels.
If you have access to a tire machine and are considering replacing the tires yourself, make sure to have somebody close by who is familiar with using the machine.
Operating a tire machine is not rocket science, but like any other power tool it can be dangerous in many ways. Doing it wrong can damage the tire or even the surface of the rim!
If you want to change the tires on your motorcycle you have four options:
DIY tire replacement: Even if this is the cheapest way to change the tires unless you’re an experienced mechanic it’s not recommended that you do it yourself. Keep in mind that doing it wrong can damage the tires or even the rims. Keeping safety in mind, best practice is that you leave it for professionals.
Remove the wheels: Many riders prefer pulling the wheels and bring into a local shop or a dealership, so you may want to consider this solution. This way, you can get much better rates while making sure that the tires are professionally replaced and balanced. If you bring the wheels in yourself, changing a pair of motorcycle tires typically costs $40-$80 in most tire shops.
Ride to a tire shop/dealership: The most convenient solution is arguably riding into a tire shop or a dealership to get the job done. The rates of smaller tire shops range from $40 up to $80 while dealerships can even quote $150-$400!
The rates vary widely depending on the size and the location of the shop, so it makes sense to shop around before making a decision!
Tire pressure
Sooner or later, the owner of a motorcycle is faced with the need to replace the rubber on the disks of his steel horse.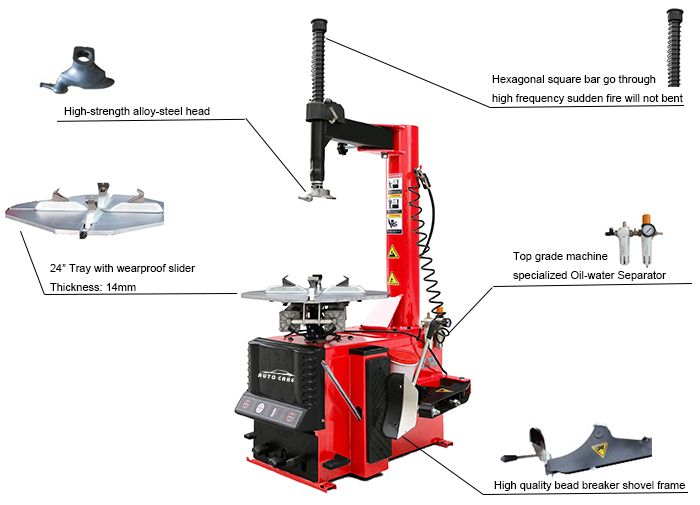 Doing it yourself, even if you have never encountered this problem before, is simple. But one important point should be taken into account - balancing motorcycle wheels, which is almost impossible to do with your own hands. So what to do when you can handle it yourself, and when to resort to the help of specialists?
A motorcycle is a very versatile vehicle, depending on its type, tires with different treads can be used. Rubber for modern two-wheeled vehicles is:
Rubber of this type is purely civil, designed to be able to move at an average speed on public roads. The tread has the necessary number of sipes to ensure reliable grip even in heavy rain.
Road-sport tires warm up quickly, allowing the rider to maintain increased speed with confidence. This comes at the cost of reduced maneuverability in the rain.
Touring motorcycle tires allow you to feel good on the pavement, but not be afraid to move off it if necessary. Here the tread has a clear uniform pattern, the directionality of which is designed to facilitate movement in the mud.
Real off-road tires behave very badly on asphalt, they are “noisy”, uncontrollable in the rain. But the directed grooves of the tread are able to “gnaw” the ground, self-clean from dirt, and allow you to get off the road.
The type of tires is selected based on the conditions of use of the motorcycle, its power, season.
You can learn more about tire marking HERE, and how much to pump according to the motorcycle model HERE!
In the operation of motor vehicles, a characteristic feature is that 99% of their owners do not ride in winter, therefore, with the change of season, tires are not replaced on a motorcycle. Although studded tires for motorcycles are produced, they are not very popular. Based on this, the change of rubber occurs in several cases:
Tire rupture or puncture is especially dangerous if tubeless tires are used on a motorcycle, the wheel may explode, which is fraught with loss of vehicle control.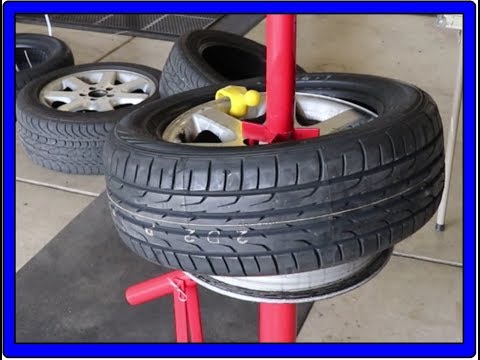 The reason for the appearance of cracks is usually driving on road tires over rough terrain, or driving onto curbs, steps, etc. And regular loads and high mileage contribute to an increase in cracks, which leads to the fact that the tire becomes unusable.
Due to natural aging, tires must be replaced when the motorcycle has not been used for a long time. Such wear of rubber contributes to a long downtime on flat tires, or riding a motorcycle with overload. In the latter case, the tire at the point of contact with the road takes an unnatural shape for it, “breaks”.
Tread wear limits for each tire model are prescribed by the manufacturer. At the same time, for different models, depending on the type of tire, this value can be radically different. Therefore, when choosing wheels for your motorcycle, it is worth making allowances for the likely riding conditions. It must be remembered that traffic rules regulate the minimum allowable limits for the remaining tread. Thus, the height of the tread pattern for legal movement on public roads should not be less than 0.8 mm.
1. To replace tires, you will need a very simple set of tools, tools, which are best purchased once and then used as needed. First of all, in order to pry the rubber, you will need a mount, and preferably two, since it is much more convenient for one, without an assistant, to be controlled by two.
2. A soapy solution will come in handy, it will help put the new rubber on the rim, make it easier to “pull” the old one off it. Without it, you can accidentally break the tire, if the old one deteriorates, then it's okay, it will be a pity for the new one.
Soap and water must be mixed in unequal proportions to form a thick liquid.
Special lubricants can be used instead of a soap solution, but this is not really practical, they are much more expensive, and they are needed every few years.
3. In addition, you will need a special cap to unscrew the nipple, quickly release air from the wheel.
4. You also need the usual set of tools. Replacing wheels on a scooter or motorcycle is more difficult than on a car, where 4-5 bolts need to be unscrewed to remove the tire. Here you have to tinker, it is advisable to get instructions from the manufacturer for the correct analysis of the necessary nodes.
If you briefly go through the tire replacement algorithm, it consists of the following items:
Now, in order. First of all, you need to deal with removing the wheel from the motorcycle, you have to change the rubber on the front and on the rear wheel. It is better to first pay attention to the factory documentation, so as not to spoil something out of ignorance. It must be borne in mind that removing the front disc is easier than the rear one, for this you do not need to dismantle the chain and other drive mechanisms. Let's take a look at the front wheel as an example.
Motorcycle tire replacement.
The first step is to loosen the wheel axles while the vehicle is still on the ground. After that, you need to put the motorcycle on a kind of stand so that the front part is hung above the ground. In this case, the bike must be firmly fixed to prevent it from falling while it is standing without the front wheel. Next, you need to carefully unscrew all the fasteners, dismantle the disk with the tire from the motorcycle.
The next step is to release the air, in order to do this you need a special cap, on the other end of which there is a “fork”. She can unscrew the nipple from the valve of the chamber or tire. After the air is deflated, you can proceed to dismantle the tire from the disk. Separating the flat of the tire from the rim can be tricky. If the rubber is no longer subject to use in the future, you can gently tap it with a heavy hammer, or simply “kick” it with your feet. Doing this is important so as not to damage the rim.
Do-it-yourself disassembly.
After the tire still "unsticks" from the rim, take a pry bar and pry it, but this must be done carefully, otherwise the disc may be damaged. It's ideal here to have a second pry bar so that you can go around and take the tire out. Having done this, carefully remove the camera, try not to damage it. After that, you can again go around the mounts in a circle to finally remove the rubber.
First of all, if the wheels are spoked, check the condition of the rubber that protects the tube from the spokes, replace if necessary. On a new tire, you need to pay attention to the tread of motorcycle tires, find an arrow that indicates the direction of its movement. There is also a mark that shows where the camera nipple should be located. Lubricate the new tire liberally with soapy water, fold one edge over the rim, then insert the tube, lay it down, straighten it and then start the second edge. Now screw the nipple back into the valve, pump up the wheel and assemble in the reverse order. The tire pressure values are usually found somewhere on the motorcycle plates. The final tightening of the fasteners should be done on a motorcycle already installed on the ground, it is absolutely impossible to do this on weight.
Inserting the tube into the tire.
If the wheel has been in use for a very long time, separating the rubber from the rim can be a very difficult task. At home or in the garage, you can try to take any action, use the tool, but what if the repair needs to be done on the road? It is unlikely that there will be a mount for repairs with you, you will have to ask for help from passing cars. If you are traveling not alone, but with a company of motorcyclists, here you can apply a kind of "life hack". You need to open the footboard of another moped, put it on the rubber of the removed wheel, using it instead of a mount.
Alloy motorcycle wheels, especially those with spokes, bend extremely easily when hit by bumps in the road. You need to be aware that a severely deformed rim cannot be repaired, it is better to replace it. And it is generally not recommended to repair spoked motorcycle wheels on your own, because you may encounter such problems:
Non-repairable motorcycle wheel.
If there is a desire to repair spoked wheels on your own, then you should understand that the ideal - "zero" - radial runout may be unattainable, and you need to focus on generally accepted tolerances:
 2 - 2 mm for choppers, enduro and domestic motorcycles ;
 The whole point of the adjustment is to change the position of the rim relative to the wheel hub by shortening or lengthening each spoke. You need to understand which of them are subject to adjustment. To change the length of the spokes, you will need a special wrench and a stand to check the runout. Having fixed the disk in it, you need to place a piece of chalk next to it and turn the wheel. Where the chalk leaves a mark on the rim, this will be the most protruding area, although on a heavily deformed disk the “eight” will be visible to the eye.
Spoked motorcycle wheel.
Now, on the side that does not have a mark, loosen the spokes, and on the opposite side, tighten them. In the central part of the deformed arc of the rim, tighten the spoke by 4-5 turns and, moving in both directions, tighten each of them a quarter of a turn less. After that, you need to check whether those weakened knitting needles have stretched by themselves, on the other hand. If not, the tightening must be repeated in the same sequence.
After all the steps, you will have to put the wheel back into the stand and check how the situation has changed. You probably won't get it right the first time. It should be borne in mind that for such actions you will have to disassemble the wheel, disassemble the motorcycle, all this will take a lot of time. If you need a scooter every day, and you have never encountered such a repair before, then it is definitely better to turn to specialists so as not to waste your time in vain.
DIY needle adjustment.
There are pros and cons both in independent replacement and when contacting specialized motorcycle tire shops. The positive points when replacing with your own hands are:
However, there are obvious disadvantages. Firstly, you will have to spend more time, especially for those who do it for the first time. You also need to buy all the necessary tools. And if there is no garage or other premises, then you will have to do it on the street, which is not very convenient. And the biggest disadvantage is that you don’t have a wheel balancing stand in your garage, and you won’t be able to make a full and high-quality tire replacement. However, there is one important point - unlike a car, a motorcycle does not have a spare tire, and on a long journey, the experience of replacing it yourself will be very useful.
On the other hand, by turning to professionals, you will receive:
Despite the advantages of doing this task on your own, not every motorcycle owner is ready for this. Therefore, it is really easier for many to turn to specialists. Plus "tire fitting" in the presence of equipment and experienced staff. There, the motorcycle is fixed on a special stand, both wheels are immediately removed. The wheel breaking stand makes it easy to remove the tire from the rim, and the wheels can be immediately balanced. But even here there are drawbacks, unlike car workshops, which are everywhere, motorcycle “tire changers” are not so common. In a small town, you still need to try to find such a place. The price is also associated with low prevalence - such services are slightly higher than similar ones for cars.
Which rubber should I choose with spikes or Velcro?
Operation of winter tires
Changing wheels on a car
Repair, replacement of studs on winter tires, studding
How to choose winter tires for crossovers
Replacement of summer tires for winter. Tips
Tire pressure sensors
Which wheel locks to choose?
Truck tire repair
Bicycle tire marking
How to install a tire in the direction of the tread pattern
What is the life of the tires on cars
Wireless charging smartphone holder
Unique in-car smartphone holder with…
↑
Products: brake cleaners, rim cleaner.
Equipment: all modern tire systems are powered by compressed air: pneumatic guns for loosening wheels, tire changer, inflation guns. Therefore, the main tool in tire fitting is a compressor. In 99% of cases, reciprocating compressors with a capacity of 400 lmin are used. These compressors require ISO VG 46 and 100 compressor oils, depending on the compressor manufacturer's recommendations. Oil change, on average, 200-250 hours when using mineral oils, that is, about once a month during the tire season. Using synthetic oils, such as Liqui Moly LM 500, article 4076, you can increase the compressor maintenance period up to two times a year.
The air gun is an essential tool for quick wheel removal. It has a lubricator lubrication system, that is, oil is supplied along with compressed air using a special lubricator-lubricator. In small tire shops, they save money on lubricators and periodically bury the oil directly into the air gun. To lubricate air guns, use Liqui Moly Oil fur Pneumatikgerat, part number 7841.
| Fig 1 | Fig 2 | Fig 3 |
To carry out work, place the vehicle at the place where the brake is to be carried out. work and fix manually Raise the vehicle with a tire jack or scissor lift, unscrew the wheel fasteners and remove the wheel. Wash the wheel in a washing machine, dry it. Using the special tool, unscrew the valve and bleed air from the wheel. Remove balancing weights, if self-adhesive weights are used, then remove the remaining glue from the rim with a rag using Liqui Moly Dichtungs Entferner. It is necessary to carefully inspect the tread for stones stuck in the sipes, since wheel balancing is meaningless with a dirty tread. If you plan to install the tire back after repair, then it is necessary to mark the position of the nipple for inflation on the tire using a special marker or chalk. The tire is installed in the same position in which it was removed from the rim. Install the cleaned wheel on the tire changer and tear off the sidewall of the tire from the rim with a spatula (Fig. 1). Next, center the wheel on the clamps (1) of the machine Fig. 2, (use plastic protective pads when working with light alloy wheels) and completely separate the sidewall of the tire from the hump with a roller (Fig. 3). Before removing the tire from the rim, apply Liqui Moly Reifen Montierenpaste to the parts of the tire adjacent to the rim.
It is recommended to apply the paste with a flute brush, it is not recommended to use fly brushes (Fig. 4). Pry off the sidewall of the tire with a mounting spatula, bring it up by the heel of the machine (Fig. 5) and rotate the tire until the sidewall of the tire completely goes beyond the rim. Do the same with the bottom of the tire and remove the tire from the rim (Fig. 6).
| Figure 4 | Figure 5 | Figure 6 |
| Figure 7 | Figure 8 | Figure 9 |
Before mounting a new or refurbished tire, be sure to replace the valve of the tubeless tire (Fig. 7), clean the tire contact surface with a Reiniger und Ferdunner cleaner (Fig. 8), place the rim in the wheel balancer (Fig. 9) and check the runout of the rim .
To mount the tire, it is necessary to put the disk back into the clamps of the machine (Fig. 2). Before installing the tire, apply mounting paste to the sidewalls of the tire adjacent to the rim (Fig. 10) using a flute brush on both sidewalls of the tire. Put the tire on the disc using the machine's thrust pad (Fig. 5). Orient the tire according to the marks made earlier, in case of using a new tire, align the factory mark (yellow or white) with the tire valve by location. Inflate the tire, allow the sidewall to take the correct position on the hump of the rim, for which give an air pressure of 6-8 bar (when the tire is seated, a loud bang will occur). Check the tightness of the fit by using Leck Such Spray or immersion in a water bath. After checking the tightness, bring the pressure in the wheel to the nominal value and install it in the balancing machine.