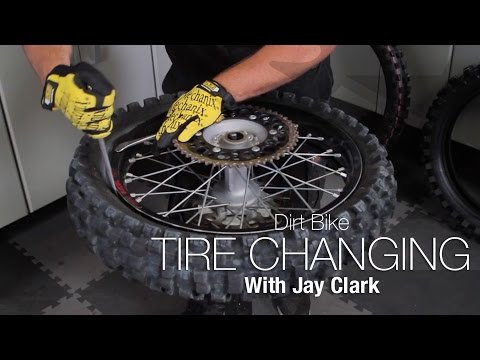
During my last tire change, I decided to make a guide on how to change a dirt bike tire at home. Changing a dirt bike tire can be a pain and is avoided by most riders, but when using the right tools, it can be done with ease and will be no harder than an oil change. For as long as I’ve owned dirt bikes, I’ve always changed my tires. I was too stubborn to pay a shop and I always wanted to work on my bike myself. I remember buying my first set of tire irons and promptly destroying the inner tubes on the first few tire changes and cursing myself as it would have been cheaper if I did bring it to a shop.
Now to change a dirt bike tire takes about 20 minutes and don’t think twice about it. It’s kind of nice to be able to mount your tires as soon as they get to your door or to swap out used tires for different riding or to flip tires around to use the sharp edge on both sides of the knobs. The following is my step by step guide for changing a dirt bike tire, from unmounting to re-installing on my 2014 KTM 450 SXF swapping out a Dunlop Geomax MX32.
Over the years, I’ve accumulated all the tools I need to change a dirt bike tire. I started off with the 2 curved tire irons and then onto the 3 spoon type after learning a couple of tricks to make changing easier. After struggling and thinking “There’s got to be an easier way to do this!,” I found out about using a Bead Buddy, tire stem puller, tire changing lube, and lastly, a dedicated tire stand. Here is a post where I talk about all the tools I use.
The tire I’m swapping out and putting on are both Dunlop Geomax MX32 front tires. I had and extra set laying around that only had a couple of races on them. I’m also reusing my Bridgestone Ultra Heavy Duty Motorcycle Tube.
Some other items are Rim Strip Tape, Baby powder, and tire mounting lube. I ended up using some tire black spray for mounting lube in a pinch, but you can get mounting lube specific for using on tires and also window cleaner can also be used, although it evaporates quick and can dry up on you sometimes.
Rim Tape
The first step to change a dirt bike tire is to unmount it. To unmount the front wheel, put your bike on a stand or a motorcycle lift to lift the front wheel off the ground. Remove the axle nut, and then loosen the 4 axle pinch bolts. To remove the axle, you can use a T-wrench or a ratchet extension to push the axle through the fork lugs.
After setting up the wheel on a tire stand, you will need to deflate the tire and disconnect the inner tube and rim lock. Use the valve core tool to pull out the valve core and keep it out for the rest of the unmounting. Taking out the core lets the inner tube compress completely. If you just deflate the tire by pressing on the valve, the inner tube will still contain some air and will make unmounting the tire harder. After taking out the core, remove the valve stem nut. For the rim lock, you just need to back the nut off but you don’t need to remove it. After loosening it, press down on the rim lock to make sure it moves freely.
Now you are prepared to unmount the tire. The first step is to pop the tire off its bead. What you are trying to do is to drop the bead of the tire into the center of the rim. The rim is U shaped and by dropping the bead into the center, it lets the tire move so you will have a little more room to pull the bead over to the outside of the wheel. Start by loosening the tire near the rim lock. Hold down the rim lock so the tire can drop behind it. You can spray the tire with some tire lube if it’s sticking.
This is the toughest part to change a dirt bike tire. Use plenty of tire lube and take your time and work on small sections at a time. Spray the tire and rim with plenty of tire lube and start at the section of the tire at the rim lock. Insert the tire irons about 4 inches apart from each other and work a small section at a time. Getting the first section of the tire over is the hardest part, but once you get it going, the rest of the tire will slide right over.
With one side off, flip the tire over and repeat. You want to pull both sides of the tire to the outside of the wheel. When both sides of the tire on the outside of the wheel, push the wheel down into the tire and pull the wheel through the middle of the tire.
Check to make sure the rim tape is in good shape and hasn’t broken in any spots, dirt, and dust can get in the tire and acts like sandpaper on the inner tube when riding. With standard tubes, it’s a good idea to replace the inner tube at each tire change. With extra heavy duty inner tubes, you can get a couple of tire changes out of them before they wear thin. I run Bridgestone heavy duty inner tubes and will usually go 3-4 tire changes before replacing them. Inner tubes wear just like tires and start to ball up and thin out after so many hours.
Clean off the inner tube and make sure the tire is free from sand or other debris. If you are mounting a new tire or re-using an old one, one tip is put a little bit of baby powder into the tire before adding the inner tube. The baby powder will act as a dry lubricant between the tire and inner tube and will help with rubbing and friction wearing the inner tube thin. Add a small amount the tire and rotate the tire around to spread it out. Also, you will notice on tires there will be a mark, a yellow circle in this case. This marks the light side of the tire. You should put this marker near the valve stem and rim lock.
Depending on the size of your wheel, you might need to use a valve stem puller to get the valve stem through the hole in the rim. The tool is fairly cheap and will save you some scraped up hands. Once the valve stem is pulled through, tighten the valve stem nut to hold the tube in place. After that, re-insert the valve stem core.
Mounting the tire is a little different then unmounting when you change a dirt bike tire. You can get half the tire on using the 2 long curved tire irons. You’re going to want to set the tire bead between the rim lock and the rim. This allows the tire bead to sit in the lower drop center which helps the tire to be pulled over. You can work most of the tire onto the wheel using a tire stand, but the last section I find easier with the tire on the ground and using your knee to hold the tire in place. Reach through with the curved end of the tire iron and lift the last section over the rim.
This is where having a bead buddy and a good set of tire irons comes in handy. Starting at the rim lock, push the tire down into the drop center of the wheel. Make sure the rim lock is out of the way and hold the tire down with the bead buddy. Work the tire around with the tire irons taking small sections at a time near the end. The last section is always the toughest so use plenty of lube and work it in small sections.
Final steps are to tighten down the valve stem inflate the inner tube to set the bead.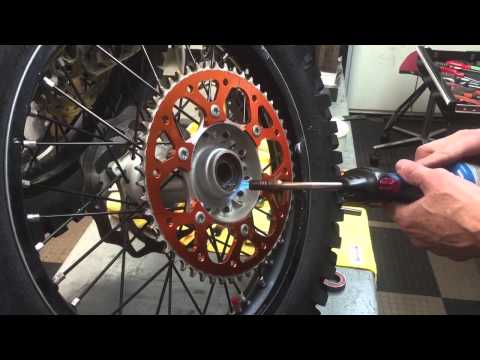 You will have to over-inflate the tire to get the bead to “pop” on. You can run a finger around the rim edge to feel that the tire is fully seated. After the bead sets, deflate the tire to 12-15 psi and tighten the rim lock.
The last step to change a dirt bike tire is mounting the wheel. Pretty straight forward but with one tip. Use a flat blade screwdriver to spread the brake pads. This will help to keep the fork from spinning while you try to get the brake disk lined up.
How To
Tip on how to properly change your tire
By jay clark
February 24, 2009Brian FleckDirt RiderMost riders and racers love having that great traction you get with a new tire but hate changing it. Jay Clark at Dunlop assures us that if you follow his steps, use the proper tools and take your time, you will become the envy of your riding buddies, changing tires with minimal effort and without bloody knuckles. Clark let us know there are many effective ways to change tires; he has found that the professional Dunlop motocross staff have developed an especially efficient method. There is no reason to get worn out before you're even on the bike! The key point of this technique is that you don't try to work a tube into the tire and rim after you have one side of the tire already on. Start with the tube in the tire and with enough air to keep the tube round.
Tools of the trade: A dead-blow hammer, valve stem remover, talc-based baby powder, 12mm wrench or socket (13mm for Euro bikes), tire spoons (two are mandatory, but three are nice to have), Bead Buddy from Motion Pro, tire paste, pressure gauge and, hopefully, a good tire stand.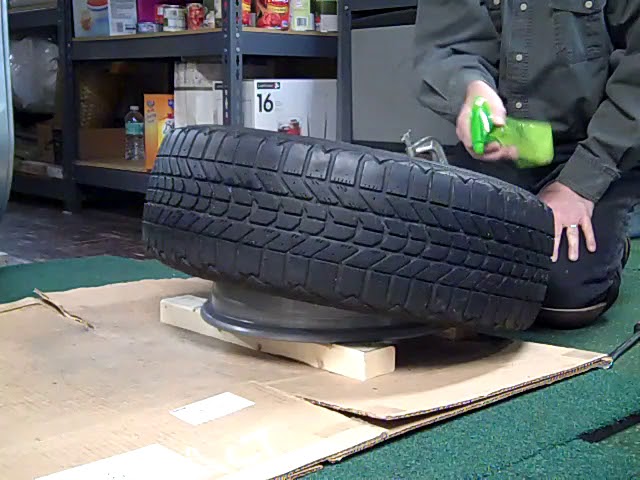 Of course, you don\'t have to have a stand; having one just makes the job a lot easier. Wearing good work gloves will also help your grip and reduce those dreaded bloody knuckles.
 Dirt RiderFlip the wheel to the disc side and break the second bead all the way around the tire. Push on the tire to ensure the bead is completely broken, then push the nut on the top of the lock bolt to force the rim lock into the well of the tire. That will allow you to break the bead loose at the rim lock. The lock may be jammed in place, and a flat tire iron across the top can help work the rim lock down.Dirt RiderWhile you hold the tire bead down off the inner shoulder of the rim with one hand, slide your spoon-style tire iron in and lever a section of the tire edge up and out of the rim. Push the iron under the disc to hold it while you work in the other two levers.Dirt RiderContinue to slowly work your way around the tire, moving the next tire iron the shortest possible distance from the last one-usually about 2 inches apart from each other. Any closer and you will have too much trouble pushing the tire iron in between the tire and the rim. If you have the luxury of three tire levers (I like the Motion Pro spoons), it makes the job easier.
 You don\'t have to fight and pull out irons as much.Dirt RiderOnce one side of the tire is all the way off, pull the valve out of the rim and then pull the tube out of the tire (if you have average strength, it won\'t be hard).Dirt RiderI reinstall the valve core as soon as I remove the tube to ensure it is ready for reinstallation. Plus, I won't lose it.Dirt RiderFlip the wheel to the sprocket side and start dismounting the other side of the tire. You want to end up with the tire on the outside of the rim.Dirt RiderPick the wheel up off the stand and hold it with the rim lock on top. Bump the bottom of the tire/wheel combo on the ground, and the rim should drop deeply into the well of the tire.Dirt RiderThe used tire will now easily push off of the rim. I have a sturdy stand, so I just push the tire off the bottom edge of the rim and let the tire fall around the stand. This technique won\'t work if you are using a bucket or something similar for a stand.Dirt RiderAnother method (shown here) is to set the wheel on the ground, hold the tire with one hand and push on the rim with the other hand.
 Dirt RiderInspect the rubber rim band and the rim lock to ensure no debris or sharp edges are marked into the rim and the threaded ends of spokes do not show above the spoke nipples. Any of these may lead to a tube failure. Some riders discard the rubber rim strip, but most tire technicians prefer to leave it in place and make sure it is in good condition. If you simply must have tape, try to use a special plumbing tape that resembles wide, heavy-duty electrical tape. It is made of plastic and doesn\'t have a cloth weave that can fray like duct tape does.Dirt RiderDrop a bit of talc-based baby powder in the new tire to keep the tire and tube from chafing against each other and wearing out the tube. The powder will also allow the tube to slide as it inflates, and this slipperiness will minimize pinch flats while you air up the tire the first time. Upon the recommendation of pediatricians, many baby powder brands have switched from talc (a powdered, slippery mineral dust) to corn starch. Corn starch just makes a mess and doesn\'t help.
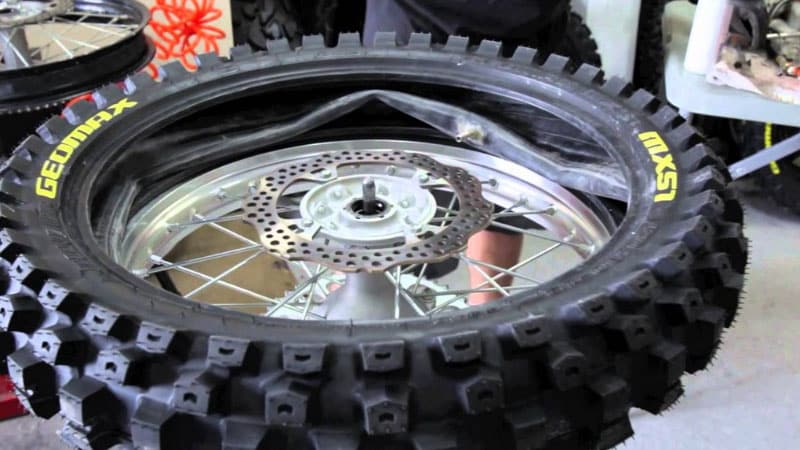 It isn\'t slippery enough. Look for a brand that lists talc as the main ingredient.Dirt RiderHave the rim on the stand with the disc side up. Insert the tube into the tire. Get it in as straight and smooth as possible, with no twists or folds.Dirt RiderAdd a small amount of air (very small) into the tube to allow it to assume its round shape.Dirt RiderApply tire paste with a sponge or use a 50/50 mix of dish soap and water. Don\'t use chemicals, as they can stay slippery and cause the tire to spin once on the bike. (That\'s what Clark says. Some DR staffers use WD-40 and similar penetrating lubes with no problem and claim such products actually stick the tire to the rim. Just keep it away from the brake disc. Others DR editors prefer to do it completely dry so the tire irons don\'t shoot out faster and higher and leave dents in their already ugly heads.)Dirt RiderInsert the valve stem into the rim with a nut to keep the tube in place. If it is located near the valve core, you also want to have the rim lock in place at this time.
 If it is 180 degrees off, don\'t worry about it, we\'ll get to it later. Do leave it in the rim with the nut still lightly threaded.Dirt RiderWith the tube in the tire, work the tire on. If you take small bites with the tire spoons, putting on the first side should be relatively easy. You will find that the tube will end up trapped between the tire iron and the bead of the tire and the rim. Move it out of the way if possible, but at least push delicately on it. You should be able to see if you are pinching the tube hard enough to damage it. Don\'t worry about the rim lock not being inside the tire.Dirt RiderFlip the rim to the sprocket side. The rim lock should be pressed up against the side of the tire. With two spoons, push down the rim lock and work the tire back and forth in a walking motion that lets you ease the tire over the rim lock.Dirt RiderWhile holding the tire off the bead, push up the rim lock inside the tire. You must make sure the shoulders of the lock are above the beads of the tire.
 Let the tire go back into place with the rim lock on the inside of the tire. Make sure the tube is above the rim lock.Dirt RiderFlip the wheel and tire back to the disc side and apply tire paste or soap to this side. Using two tire irons about 4 inches apart, push down and insert your Bead Buddy tool to keep the tire down off the bead. I like to keep this about 2 inches from the valve stem.Dirt RiderStart maneuvering the tire on with small bites, inserting the tire spoons every couple of inches. Keep one hand pushing down on the tire to keep the beads down and off the shoulders of the rim. When you get to the last 6 to 8 inches, you might need to push and pull on the tire to make sure all of the bead is off the rim shoulder. If it ever gets really hard, you need to set the bead down into the well of the rim. If you do this correctly, the last bite you take will be relatively easy. If it is really hard, you might still need to push the tire down more.Dirt RiderThe last few bites with the tire spoons need to be done correctly and with plenty of lube.
 Try to lift the tire irons up until they are parallel with the top edges of the rim and no farther. That will prevent tube pinches. Some riders who prefer a bar-type tire lever grind a notch across the tip of the tire iron between 5 and 10mm back from the tip. The notch will catch on the rim and prevent the iron from slipping in too deeply. The key is to keep the bead pushed down off the rim shoulder so it will not be too hard to finish these last few sections.Dirt RiderRemove your Bead Buddy with a slight pry on the tire.Dirt RiderSet your tire pressure between 12-14 psi. Rocky, ledgy conditions (for off-road or moto), hot weather or a heavy rider are all reasons to consider using a few more psi than the standard.Dirt RiderInstall the valve cap so it stops against the valve stem nut. Don\'t tighten the nut down to the rim as that can cause the stem to rip out of the tube if the tire slips on the rim.Dirt RiderTighten the rim lock nut; however, be careful not to overtighten it as you can damage the rim or pull the bolt right out of the rim lock.
 Now go ride!Dirt Rider
Cycling in winter has long ceased to be something special. Many cyclists ride all year round without much worry.
Of course, in different regions the concept of "winter" is very different from each other. For some, winter is a layer of snow lying on the road and freezing temperatures, while for others it is somewhere around zero and slush, and snow is rare. And with the current weather, it also happens like this: the temperature can even be negative, within -5, but there is still no snow. Except light ice. nine0003
If there is no snow and ice, then, in principle, skiing is not very different from the spring-autumn period: you only need warm clothes, gloves, lubricants, and tire pressure control depending on the ambient temperature.
There is a lot of information on the Internet about how to ride in winter, what to lubricate, how to dress, how to brake, and this article will consider only one question: “ How to increase the grip of a bicycle wheel with snow ?”
In fact, this question is not as simple as it seems and does not have a clear answer. nine0003
It all depends on the surface you ride on. If most often you have to drive on city roads covered with hard trampled snow - this is one thing, if you need to roll along an icy road - another thing, if you like walking on freshly fallen snow in a park, forest - this is already the third.
First of all, I want to say that no one forbids driving in the snow on smooth summer slick tires, but still it is not necessary. I know for sure that some cyclists will object, saying that "I ride all year round on one tire and nothing." Let's leave it up to them. nine0003
In addition, summer tires tan at low temperatures, reducing grip and wearing out faster. Of course, if city services are clearing snow all over the city, and the roads are dry, then everything is fine in terms of grip.
I regularly meet with the opinion that mud tires with high lugs are suitable for winter rides. Like, they will “rake” the snow well, which will not stick to the wheel, since the lugs are not located very often.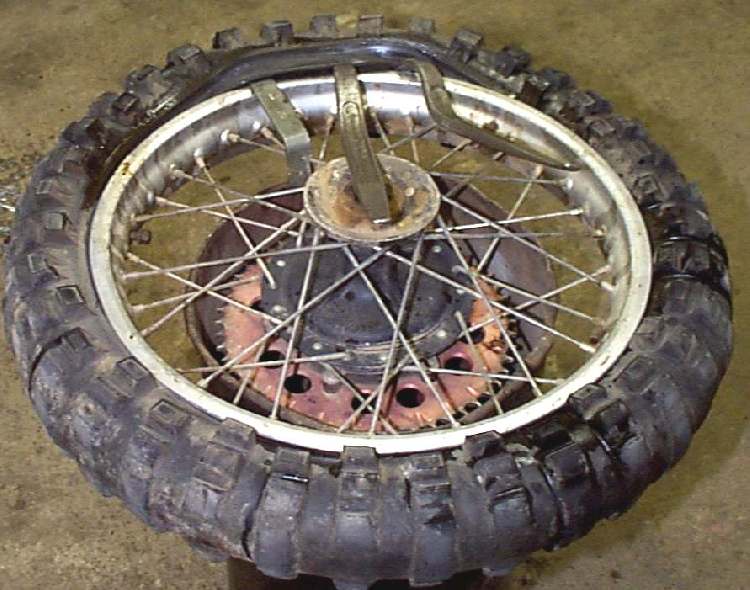 nine0003
In my opinion, this tire is suitable, but not always. It is not recommended to drive on slippery surfaces: on ice, snow rolled to the state of an ice crust, on icy asphalt. Those. in almost all urban pokatushki. But it is perfect for wet ground or mud that has been snowed on and it is not completely frozen yet or for trips on loose snow, on virgin snow.
If the bike rolls on dense, car-packed and pedestrian-trodden snow, but not on ice, then you can roll on almost any tire, except for a smooth slick. nine0003
The problem with a mud tire is that, unlike the others, it has a very small contact patch with the road.
But just the area of contact between the wheel and the road is one of the main criteria for the stability and controllability of a bicycle.
As can be seen from the picture above, the smallest area of a mud tire. The semi-slick rubber gives maximum footprint, and its small lugs on the sides increase stability by biting into the snow. But the best option, of course, is special winter tires. Her lugs are located more often and they are larger in area than on the mud tread. The presence of small metal spikes allows it to bite even more effectively into dense snow and not slip on ice or very dense snow crust. nine0003
One more piece of advice from winter skiers: don't use tires with a tread that has a solid strip of rubber in the center in winter. The tire has nothing to catch on the snow - it slides on a dense crust.
Winter bike tires usually have the words "Winter", "all seasons", or something along those lines. nine0003
If the tread has spikes in the lugs, then it is definitely winter, in summer they are not needed at all.
The tire itself can be painted with a snowflake or written " W ", " Winter ", " All seasons ".
For more information about what the numbers and inscriptions on bicycle tires mean, see .
Very often cyclists in cities move along the carriageway. If you ride there the same a lot, then I highly recommend riding only on studded tires! True, this applies only to those regions of the country where there is snow in winter. nine0003
Why? Yes, everything is very simple:
First. Even if the road is cleared, a thin layer of ice still remains on the asphalt.
Second. On the right side of the road, where cyclists usually ride, there is always dirty and wet snow, ice, ice “porridge”, where there is snow on top and ice on the bottom!
Third.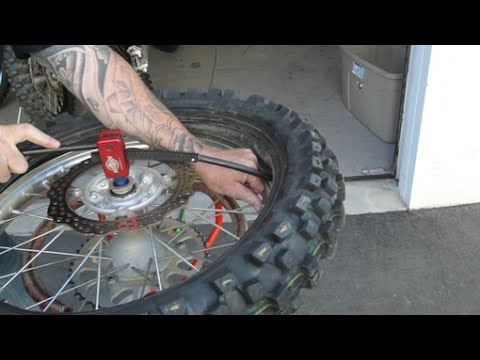 Often all this does not lie solid, but is scattered on the road in torn pieces of different thicknesses and uneven edges.
Therefore, very good grip and handling of the bike is needed here, and only studded tires can provide this. The probability of falling in such conditions increases dramatically, and it can lead, frankly, to fatal consequences. Don't forget to wear a bicycle helmet, in case of a fall, a hat will not save you. nine0003
And one more thing. It is better not to pump up the spike to the maximum pressure, but to ride on slightly flat tires. In this state, the wheel rolls better and grips the road better. But do not lower the pressure below the minimum specified by the manufacturer. Winter tires are made from soft rubber, and at very low pressure, a tire can crack or even burst.
Not everyone can afford to seasonally switch to winter and summer tires for different conditions. nine0003
In some regions snow falls not so often or for a short time, and it becomes a little expensive to buy winter tires separately - they are still often more expensive than summer ones. Well, given the fact that many of our people live by the principle that "we are not looking for easy ways", there are several interesting options for converting summer tires for operation in winter conditions.
The cheapest and easiest way to increase the grip of a wheel on a winter road is to use building ties. True, it is only suitable for bicycle wheels without rim brakes. nine0003
Its advantage is that everything can be done quickly, simply and cheaply. And just as quickly, everything can be removed.
You will need plastic zip ties, a knife, scissors or side cutters.
Each plastic tie should be wrapped around the rim and tire, tightened and snapped in place with the clasp on the side. The locks on the screeds need to be alternated, some locks are located on the side on the right side, others on the left. To orient the even distribution of the ties along the entire circumference of the wheel, it is best to use the spokes. You can put two ties at each spoke: on one side of the spoke - a lock on the left side of the wheel, and on the other side - a lock on the right. nine0003
It is better to take thick ties. Before installing them, you can slightly lower the wheel, and after installation, pump it up again. Then the ties more firmly "sit down" in their places.
No need to put locks on the very center of the tread or close to it - this way the tire will be damaged much faster. Their main task is to prevent the wheel from "breaking into a skid", especially when cornering.
Suitable for all types of wheel brakes. It is done quite simply and quickly. Two old bicycle chains are taken, the circumference of the bicycle wheel is calculated, the wheel is blown off to the state of a very soft tire and, after putting on the chain, it is inflated again. The pressure in the tire, most likely, will have to be kept at maximum so that the chain sits tightly and does not fly off while driving. nine0003
Experience from practical use shows that the bike rolls normally on a rolled road and loose snow - the chain does not allow the wheel to skid. Worse in people, old packed snow and asphalt. Braking on ice and ice is poor - the bike rolls like on skates. Although it cannot be said that it does not slow down at all. On asphalt, it rattles a lot.
If the chain falls off while driving, it will not be lost anywhere, but it will be impossible to go further.
There are different options, from simple homemade ones to professional ones for difficult riding conditions on snow and ice.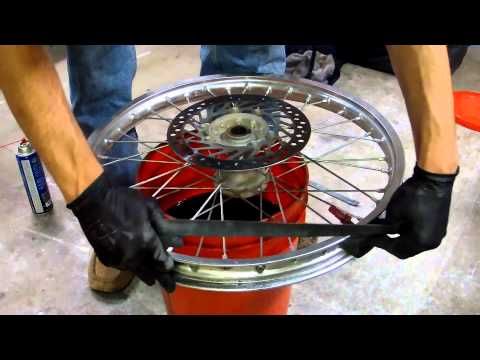 Here everyone chooses for himself, what he wants. nine0003
There is another interesting reTyre overlay tire idea from the Norwegian company Technium AS. It consists of a basic slick tire, which is worn as the main one on a bicycle wheel, and five options for additional casings or linings (“skins”) with different types of protectors, which are fastened with a zipper to the main rubber.
Additional "skins" are purchased separately - as needed. They are fastened very quickly and conveniently. nine0003
The idea is generally interesting, but I can't say anything about the actual operating experience. It raises questions about how lightning will behave after trips through mud and dust.
If you have never worked in a bike shop or workshop, you will be surprised how many cyclists are not aware that the chain is, in fact, a consumable. nine0003
Despite the fact that the chains are made of hardened steel, no matter how hard you try to take care of the chain and look after it, one day it will still have to be thrown away.
And in order to know exactly when it is time to do this, and to avoid damaging the entire transmission with a worn chain, it is recommended to check the chain with a chain wear gauge.
This simple tool just needs to be inserted into the chain links and will show you how worn the chain is at the moment without having to guess anything. nine0003
And to avoid the rapid wear of an old chain on a bike's drivetrain, not to mention bad shifting and slippage under load, read our simple chain replacement tips.
Don't forget: you will need a chain that is compatible with the number of sprockets on your bike. Otherwise, most brand chains, with the exception of Campagnolo, are interchangeable and will fit either Shimano or SRAM drivetrains. Be that as it may, it is better to consult with someone about this - the employees of our store will always select the best option for you. nine0003
Often, chains have a lock (a flat link that can be squeezed from both sides and pulled out), with its help the old chain can be disconnected.
If you have a Shimano chain (most chains will work this way as well), you will need a squeezer to break it. Place the chain link between the squeeze teeth, twist the mechanism, and it will squeeze the pin out.
Now is the time to check and clean the chainrings and cassette on the bike. First, check if all the teeth are symmetrical. In case of severe wear, their shape begins to resemble shark teeth - this is how the chain eats them.
If all components look ok, just go over them with a brush and detergent - don't put a clean new chain on dirty sprockets.
First switch to the small chainrings front and rear. Then thread the new chain through the front derailleur, pull it back around the cassette and rear derailleur top pulley. nine0003
Then pass the chain between the frames of the rear derailleur tab, make sure that it does not cling to the separator between these frames and pass it under the lower roller.
Remember that you will have to shorten the new chain. With the chain on the front and back of the small chainrings, pull the chain ends out so that they meet under the chainstay.
Need the longest possible chain length that can put tension in the rear derailleur so that the chain does not sag. Remember that the links of the chain are different, and you need to connect a wide link to a narrow one. nine0003
Shimano recommends breaking the chain when the open wide link is facing back. When you have outlined the links that need to be opened, it's time to get down to the squeeze again.
Place the chain link you want between the squeeze teeth again. Rotate the handle until the pin reaches the center of the link. Make sure that everything is level, otherwise you can damage the pomace.
Find the sharper end of the pin that comes with the new chain. Then connect the ends of your chain. Insert the pin from the side of the stars so as to connect the chain.
At this point the chain should hold without your help. Now take the pomace again and twist it in the opposite direction a little.
Install the chain link with the new pin into the squeeze. Screw it in to press the pin into place. When the end of the pin is almost flush with the back of the link, it will be easier to turn the squeeze handle. nine0003
Take your time - the pin should end up just flush with the link. When this is done, the pomace can be removed.
Now check if the link you were working with is moving well.