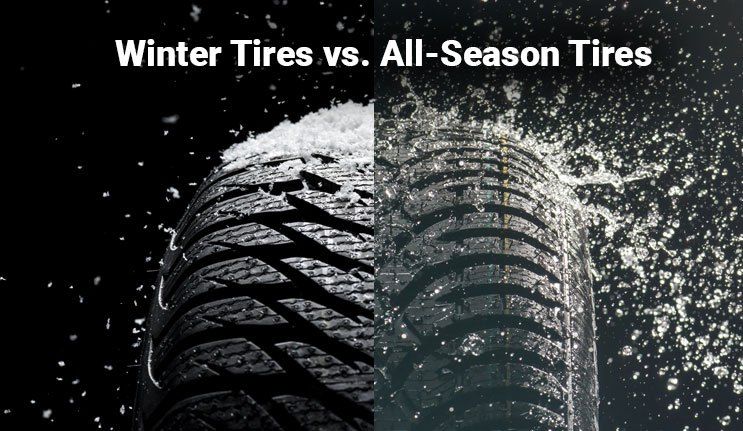
There are ongoing arguments about the relative benefits of winter tires; suffice to say that I’m in the pro-winter camp. I believe that winter tires offer superior cold temperature grip compared to all-season or even all-weather tires, even on dry pavement. Since it seems that you can’t so much as touch two cars together without causing more than $1,500 damage, I look at winter tires as a good investment. If they stop 10 feet shorter just once, they’ll have paid for themselves. Plus, you’re splitting your wear between two sets of tires since your warm-weather rubbers get a four month vacation.
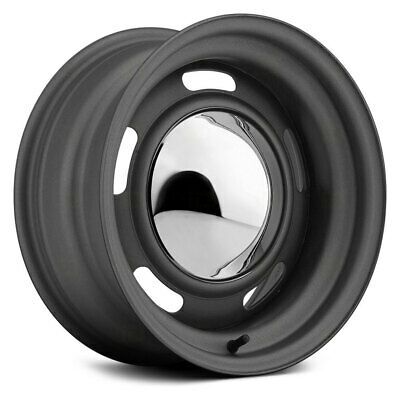
Winter tires should be mounted on a dedicated set of wheels, whether its relatively inexpensive steel or fancy alloy rims. Besides the cost of mounting/dismounting your tires twice per year, each on/off cycle risks damaging the tires or even the wheels. There’s at least a $60 difference in cost at my shop between swapping unmounted tires and exchanging mounted tires, so it only takes a couple of seasonal changes to effectively pay for the wheels.
If you’re among the growing group of people to have winter tires on a dedicated set of wheels, there’s a good chance that you’re still paying someone to do those seasonal changeovers for you. Really though, if you’re comfortable changing a flat tire, you’ve got the skills to do the winter changeover yourself.
While you can get away with using the tire changing tools that came with your car, it’s both easier and far safer to pick up the proper gear - which can be useful for other DIY jobs.
Ideally, you’ll want a service jack, safety stands, lug wrench and/or sockets, a breaker bar, and a compressor to inflate the tires.
Now is a good time to check the tire pressures. Tires that have lost more than 10-15 psi during storage should be inspected for leaks.
One option for winter wheels, as seen with two of these three sets, is to use the factory alloy wheels for the winter rubbers. Winter tires for the original 15-inch wheels on my wife’s Nissan Maxima were relatively inexpensive. I bought more stylish 17-inch wheels and tires to use the rest of the year.
RELATED: Top 10 winter tires for 2016
Secure the area
Once in position and turned off, the car should be placed in gear (manual) or Park (automatic), and the parking brake firmly set. Ideally, wheel chocks or blocks should be placed on either side of the tire at the diagonal opposite side of the wheel that’s being changed.
With this car, I bought 16-inch steel wheels to spare the car’s original 17-inch alloy wheels from salt exposure and corrosion, while reducing the cost of the winter tires themselves.
Loosen the nuts
Even if you have air tools, it may be necessary to crack the wheel nuts free while the tire is still on the ground and has resistance to turning. If you’re using hand tools, this step is required. A quarter- to half-turn is plenty; we only want to loosen them enough to ease their removal once we’ve lifted the tire off the ground.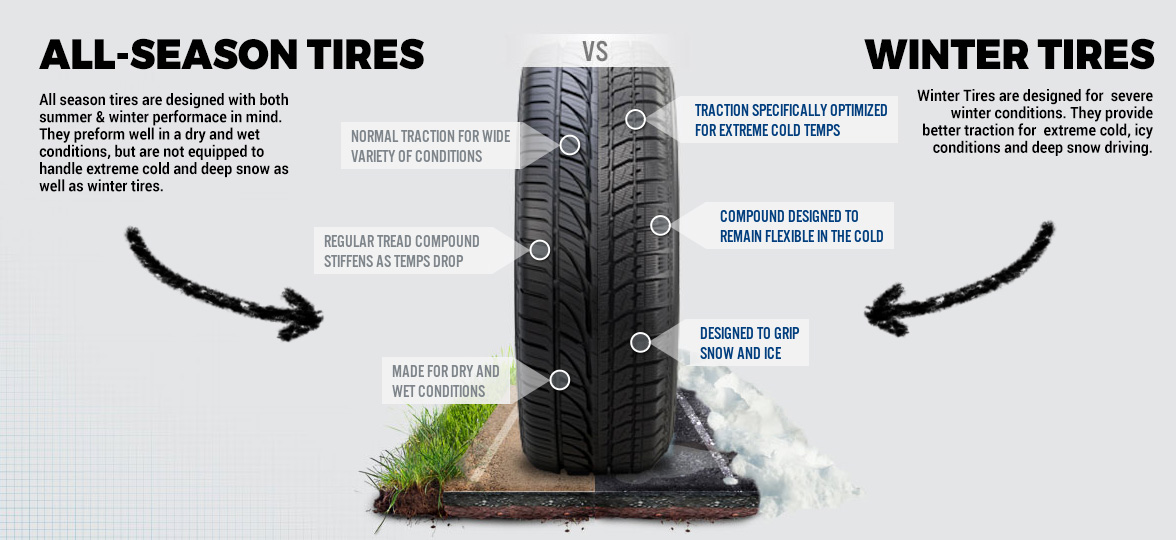
Take extra care with the locking wheel nut, if present. It is distressingly easy to strip or break the keyed portion of these sockets if they’re not perfectly aligned or sitting the entire way on.
Remove the wheel
Now that we’ve lifted the wheel off the ground, we can readily remove the wheel nuts. After you’ve removed the wheel, write down where it was mounted. I like to mark the tire’s position on the inside sidewall with a tire crayon (available from Canadian Tire or most auto parts stores). Chalk will work in a pinch, but may rub off. To eliminate any potential confusion, I use “D” and “P” for driver and passenger sides, and “F” or “B” for front or back.
Inspect the brakes
With the wheels off, take a moment to check out your brakes.
It’s a bit messy, but spraying a lubricant or rust inhibitor like Honey Goo or Krown T40 on the axle nut and centre flange keeps them from corroding – a greater concern with steel wheels, as they’re exposed to the elements.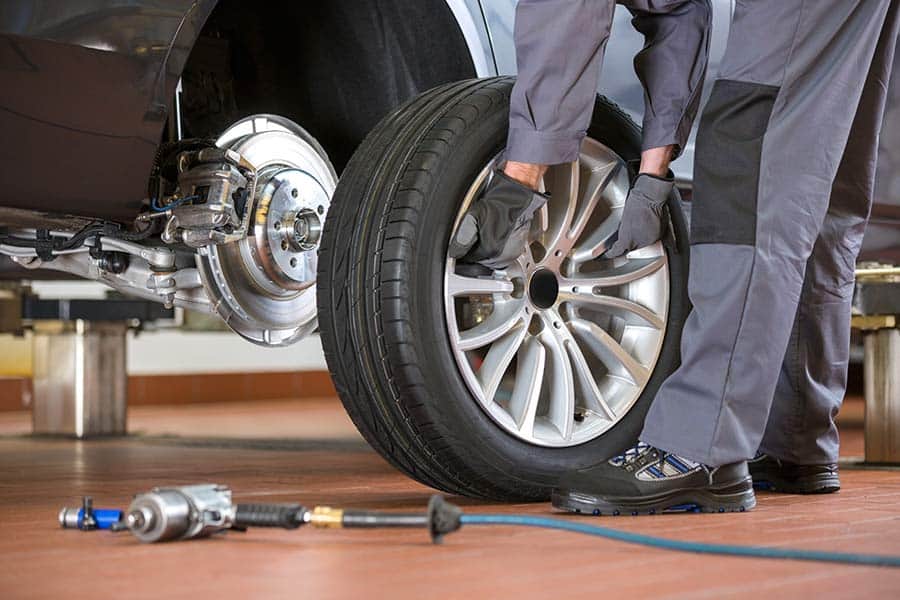 Any dirt or corrosion on the flange itself should be removed. Do not lubricate or put anti-seize on the threads of the wheel studs.
Replace the wheel
When putting the wheels back on, always start tightening the nuts by hand. If aftermarket wheels with oversized centre holes are used, all wheel nuts should be run in sufficiently to centre the wheel before their final tightening.
Whether air or hand tools are used to install the wheel nuts, it’s recommended that a torque wrench be used to ensure that they are tightened to the correct value (it’s normally listed in the owner’s manual). Nuts should always be tightened in the appropriate cross-sequence.
By: Brian Early Special to the Star
SHARE:
REPORT AN ERROR
JOURNALISTIC STANDARDS
ABOUT WHEELS.CA
Changing your own tires is a job you can handle yourself if you already have rims attached to your tires. Anyone can do it, it just takes knowledge, practice and confidence to build the skill.
You can join the many people who have embraced the freedom of not paying mechanics to do the job – and all the booking, travel time to the garage, waiting around, delays, and headaches that go along with it.
Plus, if you’re comfortable changing a flat tire, you’ve got the skills to do the seasonal changeovers yourself (and we believe every driver should be comfortable changing a tire.) It really comes down to jacking up the car and changing the tires on your own, just like if you had a flat and were putting the spare on.
Now if that seems like a daunting task, we’re here to make it doable. This Q&A will help put your doubts to rest.
Doesn’t the job require a professional?Knowing how to change your own tires doesn’t mean you can avoid getting your car serviced regularly. That being said, doing the tire change yourself will save you from paying the mechanics to do that particular job when you do need to visit the auto shop. You’ll only need them to take care of the jobs that are best left to a professional, like balancing and aligning your wheels. If you buy brand new tires then it would be best to get an alignment. Or if you notice your current tires wearing unevenly, it could be due to poor alignment.
With the right tools, it’s absolutely safe to change passenger vehicle tires on your own. The job really isn’t that tough or inherently dangerous. But it does involve getting your car up in the air. And that’s where a little forethought goes a long way.
When your car is jacked, you should never go under the vehicle – it isn’t necessary to do when you’re changing tires. You can jack your car safely if you follow the instructions for jack placement in your vehicle owner’s manual. Many vehicle frames have molded plastic on the bottom with a cleared area of exposed metal specifically for the jack.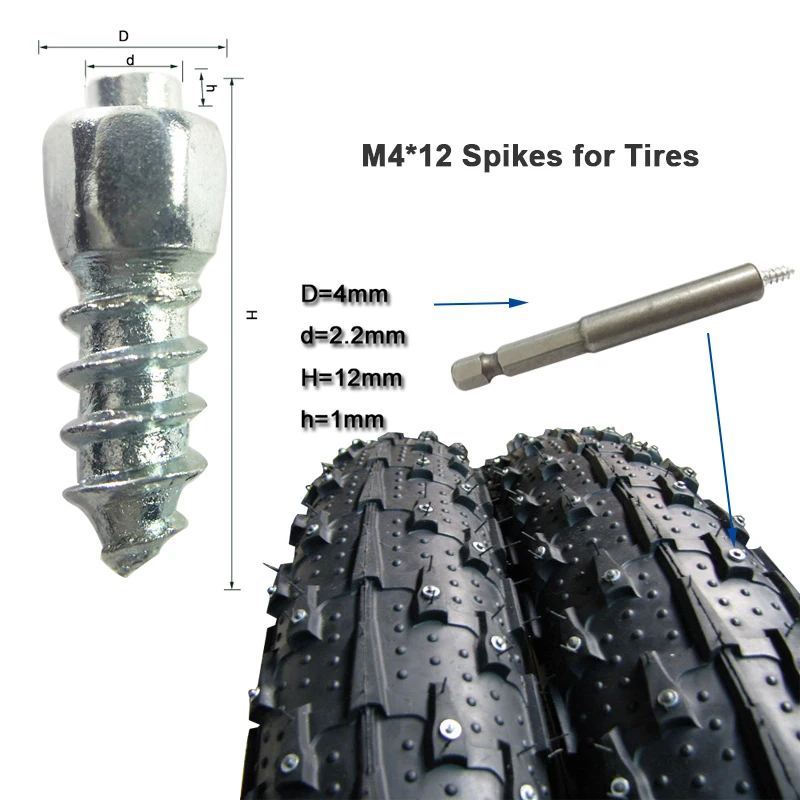 If you have a jack stand, place it under a secure point of the vehicle frame before you remove the wheel.
Your jack will also work correctly if you choose the appropriate place to do your tire change – on pavement. That means concrete, not softer asphalt. A jack stand can actually sink into thin asphalt, especially on a hot day when it gets softer.
Is it safe to drive afterwards? Will the wheels be tight enough?Don’t worry, a wheel can’t just fall off spontaneously! If it really is loose, you will hear loud knocking sounds while driving before anything more serious happens. You’ll have time to pull over immediately to check the wheel nuts and re-tighten them, and see if that solves the problem.
Tip: Ensure that the wheel bolts are always tightened in a criss-cross pattern (our guide will show you how)
Whether you change your own tires or not, knowing how to tighten your wheels is an important skill to have. Even if you had your tires changed at a garage, the wheel bolts will still loosen over time, meaning the wheel is no longer as tight as it should be. You can prevent this by tightening the wheel nuts using a torque wrench whenever necessary. We advise checking the torque specifications in your car’s owner’s manual when tightening to make sure the nuts are tight enough.
Winter tires should be mounted on a dedicated set of wheels, whether its relatively inexpensive steel or fancy alloy rims. Many shops will charge $60 more to change unmounted tires versus swapping tires on wheels, so it only takes a couple of seasonal changes to effectively pay for the rims, and it pays even quicker if you change your tires yourself.
Besides the cost of mounting/dismounting your tires twice per year, and making it possible to change over your tires yourself, having winter tires on rims actually helps them last longer because each on/off cycle risks damaging the tires or even the rims themselves.
“Having tires mounted and demounted semi-annually is quite a strain on the tire itself,” explained automotive professor David Weatherhead to the Globe and Mail. “Especially with lower-profile tires, it stresses the rubber around the bead of the tire and can lead to damaging the rubber, which in turn can lead to tire degradation and, therefore, leaks.”
Once you get past the fear and actually do it, all the questions will evaporate. Changing tires is easier than assembling Swedish bookshelves – just follow the steps. Try it once and you can do it for life!
It’s a mystery at first, but not unsolvable. The right tools make all the difference. Find out more from our Tools You Need guide.
Spring inevitably brings warming. For car enthusiasts, this means the need for such a procedure as replacing tires on a car, the timing of which is regulated by law in some countries.
This necessity is explained by the fact that seasonal tires have specific features that allow them to be operation only for a specific period. The use of car tires This type often leads to unforeseen expenses. It may also cause emergency.
Traditionally, the owner of the car replaces winter tires with tires for the warm season when he considers it necessary, based on his convictions and / or capabilities. The law of the Russian Federation does not regulate the timing of replacing winter tires with summer tires. Formally, this requirement applies only to cases of replacing studded tires with summer tires.
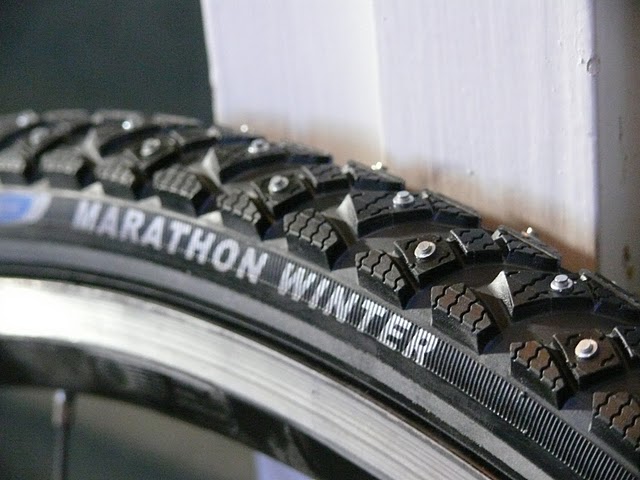
When should winter tires be changed to summer tires? Therefore, there is no exact period in which the mentioned procedure must be carried out. Car owners have the right to engage in seasonal tire changes whenever they want. Those motorists whose cars were shod with studded tires should know that, according to the law, the period for replacing studded tires ends on June 1st. This is the deadline for replacing winter tires with summer tires in the case of tire models with studs.
Despite all of the above, experts recommend changing Velcro when the night temperature remains positive for several weeks. It is these conditions and temperatures that are ideal for replacing rubber.
Changing tires is, in fact, a process that does not cause any particular difficulties. Any service center will cope with a similar task in a matter of minutes. And from a financial point of view, this service is relatively inexpensive. But there is a group of people who prefer not only to independently determine the period for replacing winter tires with summer tires, but also to do it on their own.
An example of correctly lifting a car using a jackIn such a situation, there are two options for resolving the issue:
Obviously, the first option will not require from the car enthusiast of any specific skills or excessive efforts.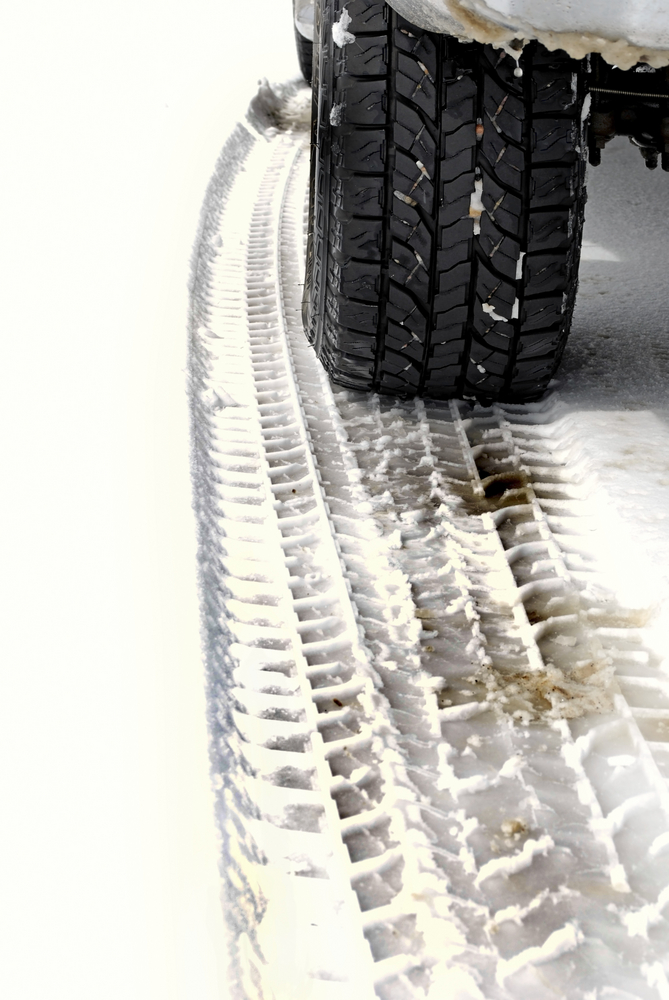 On the such manipulations and time will not be required. Enough have a jack, a pipe wrench and basic motorist skills.
Despite the simplicity of the procedure, even in this case, replacing tires with summer tires on their own must be carried out in compliance with safety rules. According to them, the car must be parked on a flat and firm surface. Before using the jack, the car must be set to the handbrake. The car should also be fixed additionally using special shoes for this purpose.
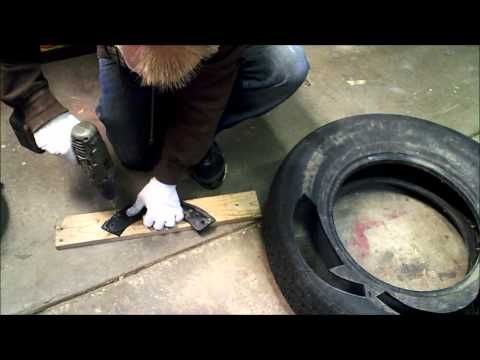
In case the surface is not hard enough, a wide board should be placed under the jack support, which will reduce the load produced by the vehicle, evenly distributing it over a large area.
Spinning up the wheel before jacking upThen the procedure is as follows:
It is obvious that the option of complete wheel replacement is very convenient. However, not all motorists have such a replacement kit, especially in the assembly. Therefore, for them, seasonal tire replacement implies tire fitting.
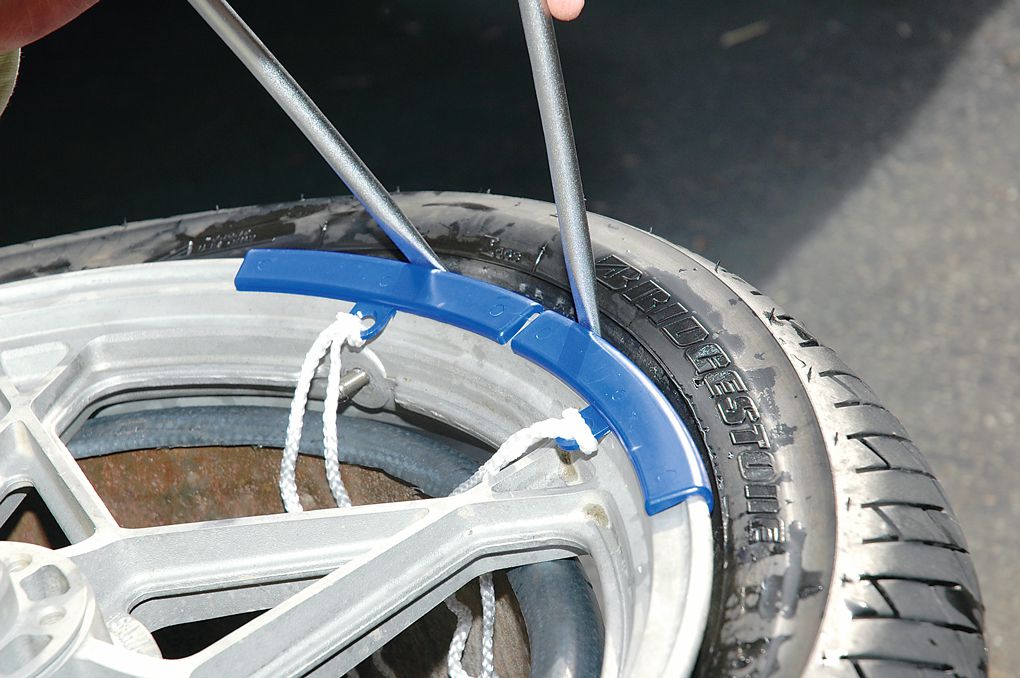
Technically, tire fitting is also not a complicated procedure. But most car owners prefer to do it with the hands of service station masters. For those who are not familiar with wheel beading, we offer a step-by-step description of the process.
Tire fitting of a wheel on a rimWhen the time comes to replace winter tires with summer tires, two blades must be prepared for tire fitting. The further process includes the following steps:
 This process is reversed.
 When replacing tires with summer tires becomes an urgent need, or when the deadlines for replacing tires with winter tires expire according to the law, people begin to rush and make mistakes. The vanity is fraught with serious troubles. So, no matter what, stick to the following rules.
 Otherwise, this discrepancy will have a negative impact on the handling of the vehicle, as well as tire wear.
 How to correctly decipher the markings on car tires is shown in the figures below.
Deciphering the markings on car tires - part 1 Deciphering the markings on car tires - part 2Average daily tire change temperature for winter, traffic rules requirements for the timing of the replacement of rubber and the need to replace winter tires for summer according to the law - these are not all the reasons for changing your “shoes” "iron horse"
Tire wear also requires attention and motorist intervention. Tires wear unevenly. Usually the rubber front wheels suffer more. So some drivers try to replace tires only in front, leaving the rear wheels intact for another 1-2 seasons.
Having decided on such an adventure, it should be understood that driving safety is ensured only if the entire set of wheels has the same tread pattern.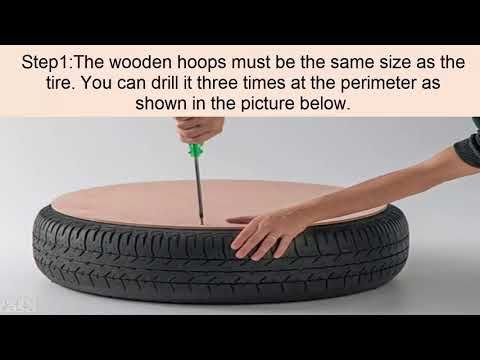 Otherwise, the risk of losing control of the vehicle increases significantly.
Experts say that the greatest driving safety can be achieved only when replacing tires with winter or summer tires according to the rules, when a complete set of four identical tires is installed.
Quality tires are quite expensive and Not everyone can afford to change all four tires at once. Then replacement is recommended to be carried out in two stages. First replace the front pair tires, and then the back. But you shouldn't delay updating the latest ones, because old tires increase the likelihood of skidding.
If the tires of your car have received serious damage, follow the basic rule. It says that the thickness The tread on all wheels must remain the same. In case when retreading a tire is against this rule, a pair of tires should be changed on wheels of one axis, at least.
Normally, changing a single tire is detrimental to vehicle handling.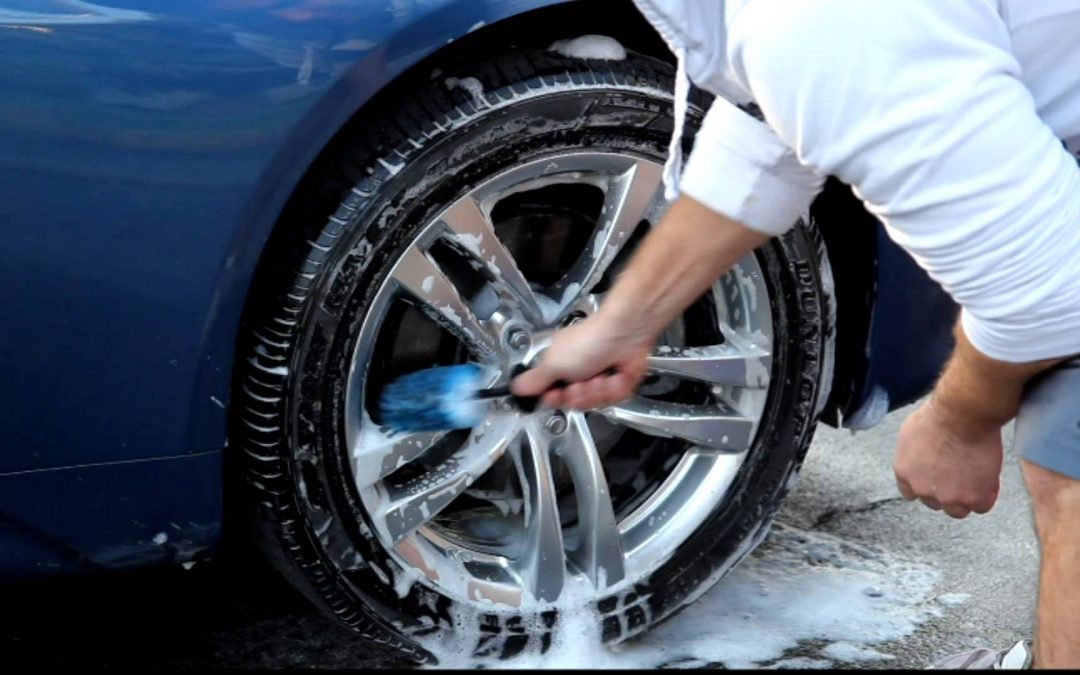 The only exceptions are new tires or tires with low mileage. Having tires without tread wear, you can purchase one similar model and install it instead of a damaged tire.
If the rubber has served a decent time, this solution won't help. The tread thickness on the wheels of one axle will be noticeable vary, dangerously increasing the likelihood of loss of control.
It's not worth the risk, especially since replacing two wheels and throwing away the damaged tire, the second one can be used as spares, or sell.
Related materials
Tire inflation with nitrogen and 7 more wirings at the tire fitting
The tire manufacturer's instructions say to change shoes when the temperature drops below +7°C. In my opinion, it's too early. There are still a lot of cars with summer tires on the roads around. And at this temperature, the braking distance on studded tires may be even longer.
I advise you to change the wheels to winter ones when the temperature drops below zero at night. That's when it really is time, because in the morning an icy area may come across on the roads. At the same time, out of habit, it will seem very slippery.
Precisely in order to do it at the most correct and convenient time. The vagaries of the weather are unpredictable. Residents of the Rostov region, for example, say that sometimes during the winter period they rearrange the wheels from winter to summer and back several times.
Dismantling wheels (that is, dismantling a tire from a rim) at home is a difficult task that requires appropriate skills and knowledge. We will describe a simpler job that, in theory, any average motorist who does not have special tools and experience in tire fitting should be able to handle. And therefore we mean that you have a complete set of serviceable winter tires mounted on disks.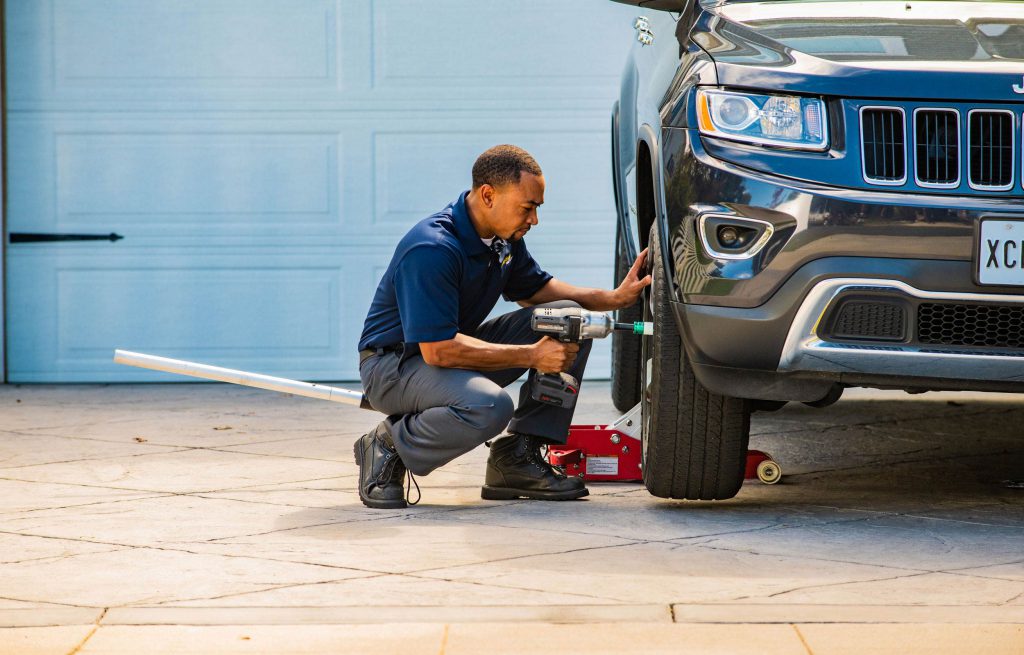 You remember that in the spring they did not lose pressure, there are no cuts on them, and a couple of self-tapping screws do not stick out of the tread in addition to the spikes. And, most importantly, the tread height is more than 4 mm. These are the modern requirements for winter tires. If at least one of the conditions is violated, then it is better to solve the problem before the onset of the hot tire season.
Related materials
If I change wheels, do I need to balance them every season?
There are car owners who meticulously balance tires before each season. In my opinion, this is not justified by anything. I recommend installing the wheels on the car, then drive at different speeds, but not higher than your usual ones. If the imbalance (it is manifested by vibrations on the steering wheel or seat) is not felt, then balancing can be postponed until future seasons. In principle, winter tires can be balanced before being stored for storage: after all, the spring period for changing wheels in tire shops is more extended in time compared to autumn, and therefore the queues are noticeably shorter.
So we take the wheels out of storage. For one, this is the corner of the garage, for the other, a balcony, for the third, the warehouse of the nearest car service that provides a wheel storage service. Depending on storage conditions, tires may have different temperatures. Wheels removed from a warm room, having cooled down by 20 ° C, will lose about 0.2 bar of pressure, and gradually, as they cool down. Well, the cold ones have nothing to lose! Therefore, cold ones can be immediately pumped up to the nominal pressure, well, maybe 0.1–0.2 bar more, given that it will only get colder further. And warm tires must either be inflated with a large margin immediately, or set the pressure at the end of all work, when the air in them cools down.
If you use a regular jack, it is better to place a special stand under the car for insurance. Well, or at least place the spare wheel so that when it falls, the threshold lies on the rim, and not on the tire. Please note that this will most likely damage the disc. Therefore, it is better to use an old unnecessary wheel.
If you use a regular jack, it is better to place a special stand under the car for insurance. Well, or at least place the spare wheel so that when it falls, the threshold rests on the rim, and not on the tire. Please note that this will most likely damage the disc. Therefore, it is better to use an old unnecessary wheel.
Related materials
Which jack is better? — expert examination of the ZR
We find a flat area with a hard surface. If you change wheels yourself twice a year, then I strongly advise you to get a convenient jack. At least small and inexpensive, but rolling. It is noticeably more reliable and durable than the regular one that was equipped with your car. It is advisable to use a balloon wrench with a cruciform or with an extended handle - it is more convenient than the standard one attached to the car.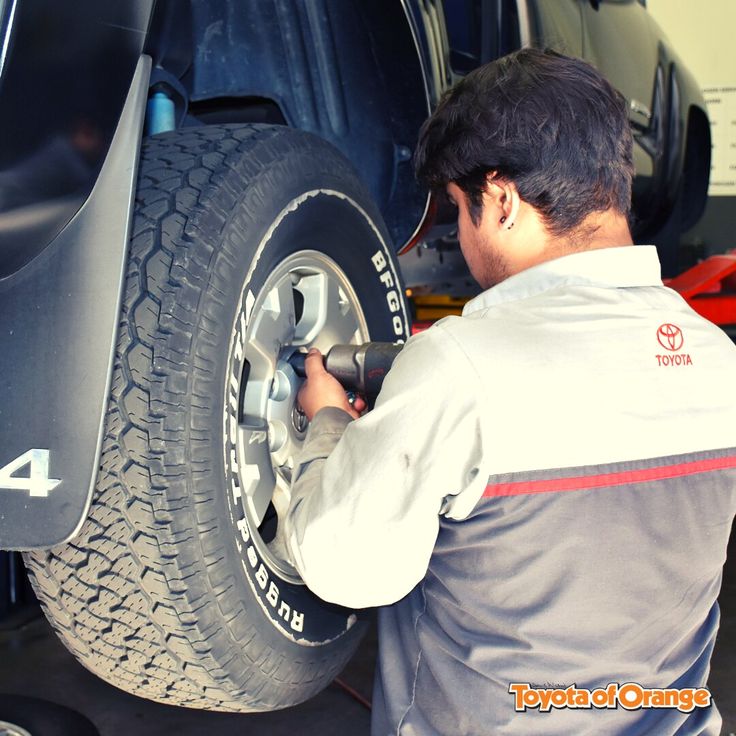
Prepare a wheel stop - yes, at least half a brick. Inspect the secret key for damaged code elements and clean the secret nuts/bolts on all wheels.
If the winter set of wheels has different disc characteristics, remember if spacers are needed between the disc and the hub lug - they should be prepared in advance.
The wheel jack is based on a hydraulic cylinder. Raises quickly, and lowers even faster.
The wheel jack is based on a hydraulic cylinder. Raises quickly, and lowers even faster.
 We put an emphasis under the wheel, located diagonally from the one we are going to shoot.