If your ATV engine is not getting enough fuel, it won’t run properly. You’ll notice it bogging down and just not having the power it used too. If you’re not getting fuel to the engine at all, it won’t even start for you.
The most common reason an ATV engine is not getting fuel usually has to do with the carburetor. Either a stuck needle valve or a loose or cracked vacuum hose are the most common issues. Don’t worry, there are pretty straight forward things you can do to check where your problem is.
There are a few different reasons you may not be getting fuel to your engine. It’s not that hard to check the parts to see if their working properly. I recommend going step by step checking one thing at a time, eliminating possible issues as you go.
If you have a fuel injected engine, you can skip this next part and jump straight to the fuel injectors, fuel pump, and compression check sections.
I would first check the carburetor to help narrow down where you should start your investigation. All you need to do is spray a little carb cleaner or ether down the carb and see if your engine will fire up with that. Or you could pour a little gas in the carb and try to start it up.
If it does start, and then dies right away, at least we know now it’s a problem getting fuel to the carb. We know that now because, when the carb has fuel, the engine will run. You should check to make sure fuel is getting to the carb now.
If it still doesn’t start at all, you may have a problem getting fuel from the carb to the engine. That is telling us the problem is further down the line. It could be an issue with compression if that’s the case.The engine doesn’t have enough compression to pull in the fuel it needs and stay running. I will go over how to do a compression check later in this article.
Another check to do with the carburetor is to adjust the idle mixture screw. I know it sounds too good to be true, but a lot of times this adjustment isn’t set right so the engine isn’t getting the right air/fuel mixture to run properly.
Ok, you sprayed something into the carb and the engine started up for a few seconds. Great, now we need to make sure the carb is getting the fuel it needs for the engine to run. Disconnect the fuel line going into the carb and put that end into a bucket or something to catch the fuel.
You may need to take out any spark plug, or just unplug them, just in case. And try to start the engine and look to see if fuel is coming out of that fuel line. If there is, then you have no problems getting fuel from the gas tank and it is probably a needle valve or float problem.
If there’s no fuel coming from the tank down that fuel line, then you’re problem may be an issue with the fuel pump, if you have one, or an obstruction in the fuel line or shut off valve. I will go over how to diagnose the fuel pump later in this article.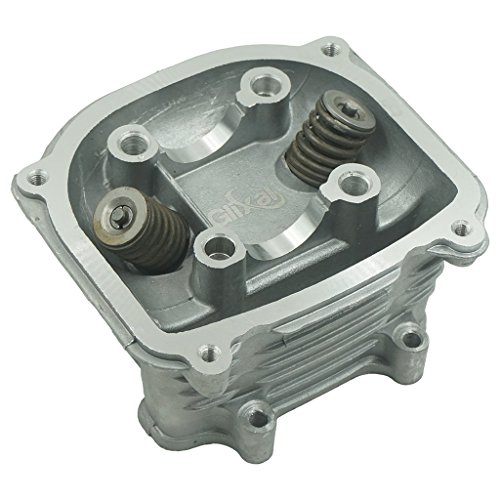
If the needle valve in your carb is corroded, it will not allow fuel to flow to the engine properly. Same thing will happen if your float is getting stuck. You’re going to need to clean the carburetor and possibly replace those parts if they’ve gone bad.
First remove the float bowl to gain access to the carburetor insides. Then you can remove the pin holding the float in place. Before you do that, you can try moving the float up and down with your hands, the float should move freely and have no resistance feeling when moving it.
The needle valve will be attached to the under side of the float, here is a picture of what you’re looking for. You can try cleaning the needle valve using carb cleaner. Just soak the thing and let it sit in carb cleaner for a few hours.
If that didn’t help, or you just don’t want to do it, no big deal. Needle valve are pretty cheap online. Here’s an example of a Carburetor Float Valve Needle on Amazon to give you an idea of what you’re looking for.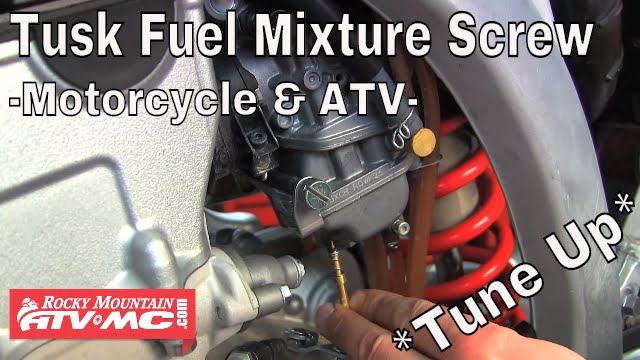
You can also replace the float if you want to, usually you don’t have to but i would give it a good cleaning. Double check all the seals and everything since you’ve got the carb open, and clean out everything really good.
Remove Needle Valve SealCheck the bowl gasket, if this was bad, you would have noticed the carb leaking fuel before. To check and replace the valve seal, you’ll need a pick or something to pull it from the carburetor. I’ve used a sheet rock screw before. Just thread the screw in a little and pull out the seal.
Check out the picture for an idea of what you’re looking at. Once you’ve removed the old seal, insert the new one and make sure it’s seated all the way.
You can do that with a metal punch or something, just make sure you don’t hit too hard because you could break the aluminum frame of the carb. Reassemble with new needle valve and you should be good to go.
Fuel injectors can get gummed up after a while if they aren’t cleaned regularly. The end of the fuel injector has small holes in it that the fuel passes through, creating a spray that enters the cylinder. If those holes get gummed up, the spray will be off, and you’re engine won’t run.
If you think it could be a problem with your fuel injector, I’d recommend trying to clean them first before buying new ones because they can be pretty expensive. First, you’ll have to remove the fuel lines that hook to the fuel injectors.
You could always remove the fuel injectors completely and let them soak in some fuel injector cleaner. I use this B-12 Chemtool Thru-Rail Fuel Injector Cleaner but you can use any carb cleaner / fuel injector cleaner you want to.
If you don’t want to remove the fuel injectors completely you can try another method. You will still need to remove the fuel lines and let all the gas drain out of them. You will then fill the fuel line with fuel injector cleaner, and then reconnect the fuel lines.
Try starting the engine for at least 20 seconds. If it does start, don’t let it run for longer than 20 seconds. Then you want to sit and wait about 10 minutes or so. You need to give the fuel injector cleaner time to do its work. Repeat the process five more times, but only try to start for 10 seconds, and then let sit for ten minutes.
I know it’s not the official way to clean the injectors, but I’ve seen it work, and it can save you from all the work of removing the injectors. Once you get the quad running, you’re going to want to add a fuel additive to your gas to keep the injectors clean.
You should be doing this at least once a year anyway. I do it with my maintenance checks before spring begins every year. I usually just add some of this Gumout Complete Fuel System Cleaner to the gas tank before I start it up for the season.
I would say to try blowing air through the fuel pump to make sure fuel will be able to flow freely through it. But if you have a vacuum operated pump, you won’t be able to do that. There are diaphragms in there that could get damaged.
To make sure you’re vacuum operated fuel pump is working correctly, pull the vacuum line to the fuel pump off and crank the engine. You should feel a good amount of suction at the mouth of the carb.
The engine crates a vacuum pulse to the fuel pump, which in turn creates an amount of pressure that pushes fuel into the carburetor. If you’re not getting good suction, try replacing the diaphragms in your fuel pump and make sure your vacuum lines aren’t cracked.
If you can, try cleaning the fuel line out and replacing the fuel filter to make sure you’re getting fuel to the carburetor. Inspect the fuel pump for wear and loose or cracked hoses. If there is no vacuum in the hose, you’re carb won’t get any fuel. This is most likely caused by a crack in the vacuum fuel lines or a bad fuel pump.
You may find it easier to just replace the fuel pump all together since they aren’t usually very expensive.
The compression check is pretty straight forward, you’re trying to see if you’re engine can handle the right compression to run properly.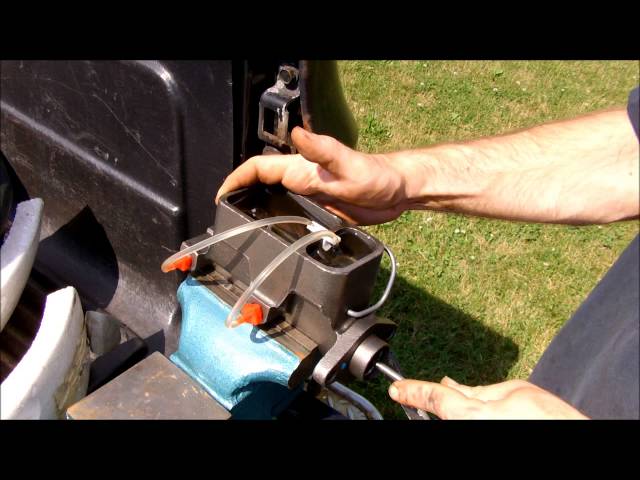 Without compression, you won’t get fuel and your ATV won’t start.
The steps are pretty simple if you have a compression tester kit. Basically, you remove the spark plug, hook up the compression tester and run the test. You just have to make sure your engine is at the down stroke in the compression cycle.
I go over this process in a lot more detail and explain step by step how to perform this test in my article, Top 7 Reasons An ATV Smells Like Burning Oil. If you weren’t getting good compression, but enough that the quad still ran, you would leak oil into the cylinder. Go to that article and scroll down to the leak down test section for a step by step guide on checking for compression.
Sharing is caring!
I’m a mechanic and fuel-related issue is amongst the most common ATV performance issues. You are in the right place for fuel pump testing and diagnosis, very shortly we’ll have this figured out.
There are five common ways to check if an ATV fuel pump is in good working order, they include:
In this post, we’ll cover faulty ATV fuel pump symptoms. We’ll cover the range of fuel pump tests open to you, and how to execute them. We’ll also cover fuel pump replacement.
Page Contents
Because some electric fuel pumps don’t fail completely, the range of symptoms can vary. The most common symptom is as you guessed a no start and in many ways, a no-start is easier to diagnose than a poor performance issue. Anyhow here is a list of the most common symptoms associated with a fuel pump issue:
If you have one or more of these symptoms we’ll suspect a faulty pump. But before we start ordering parts we’ll need to confirm our suspicions and that’s what we’ll do next.
Not all ATVs have a fuel pump fitted some smaller older ATVs employ gravity feed. However, if your bike has a fuel pump then it will be either mechanical or electric.
Mechanical pump – Mechanical fuel pumps are fitted to older carburetor bikes. They usually employ a pulsing engine vacuum and a diaphragm to move gas from the tank to the carburetor.
Electric fuel pump – Most modern ATVs are fuel injected and therefore require higher fuel pressure which means they are fitted with an electric fuel pump. The pump is located inside the gas tank itself.
We will diagnose both mechanical and electric pumps in this post.
An electric pump is as you know submerged inside the gas tank and usually requires tank cover and side shrouds etc removed before we can access the pump, fuel line, or wiring terminal block connector. That’s an investment of time and energy and so we’ll run a simple listening test first to confirm we have a fuel pump issue before pulling our bike apart needlessly.
Obviously, if our pump fails this first test we’ll need to strip a few covers.
This test is simple, but you will need a charged battery and somewhere quiet to perform the test. Most electric fuel pumps emit an audible buzz or hum sound for about 3 seconds when the ignition is turned on initially. The pump does this so as to pressurize the fuel line and prime the fuel injector in preparation for starting.
The first test is simple then, turn the ignition switch on (position 2) and listen.
Two results are possible:
1 You hear a humming sound – Hearing the fuel pump hum, is a good sign, it means the wiring circuit and ECU are all doing their job, it also means the pump is working. and if you are chasing a no-start problem, the fuel pump likely isn’t the root cause.
But a hum from the pump doesn’t necessarily mean the pump is working as it should. The pump may not be supplying enough flow and that’s a common cause of symptoms such as extended crank or poor performance. If that is the type of problem you are chasing, we’ll need to remove some covers and access the pump for some testing.
2 You don’t hear a humming sound – There may be a few reasons you don’t hear the pump. The most common reasons are: the pump may indeed be faulty or the fuel pump fuse may be blown.
Since checking the fuse is a ton easier than pulling covers etc and checking the pump, we’ll check the fuse first.
Fuses commonly blow because:
Some ATV fuses are located under the seat but you may need to consult your manual for fuel pump fuse location and fuse amp rating.
Ok, you already know you’ll need to strip out covers, etc to gain access to the pump terminal block connector. When you have gained access we’ll need a DVOM or test light to check for voltage. If you need tools for the job, check out the tools I use here on the ATV tools page.
The process is as follows:
The power will only be present for 3 sec after ignition in position 2
Two results are possible:
1 You have power at the terminal, if so jump ahead to the resistance test here.
2 No power at the pump terminal, check power and ground independently using a test light.
Test power at the pump using the battery ground as per the picture.
The power will only be present for 3 sec after ignition in position 2
Test ground at the pump using the battery positive as per the picture.
The power will only be present for 3 sec after ignition in position 2
If you are missing either power or ground suspect a wiring break and chase them.
A resistance test is useful as it allows us to ascertain the pump circuit without having to remove it from the tank. When running a resistance test you must isolate the component from the circuit.
When testing resistance the meter sends a small charge down one side of the circuit and the second probe measures its progress.
Test as follows:
Set the DVOM to resistance Ω and probe both sides of the pump terminals.
Two results are possible:
Meter offers a resistance reading – A reading in the region of 6 ohms is typical but all bikes will have their own window of operation. You’ll need to check your reading is within it.
Meter offers an open reading – An open means the pump has an open circuit and is faulty. Pumps can’t be repaired, they are replaced.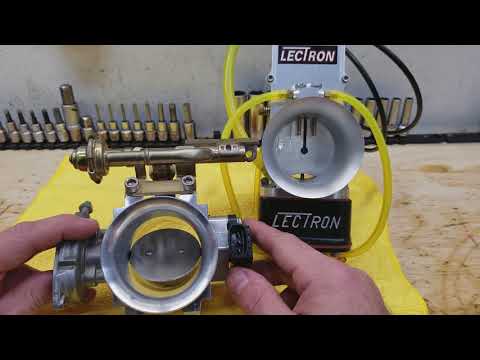 And we cover that below.
For this test, we’ll need an empty water bottle, length of fuel line, and an appropriate small pick to remove the fuel line from the fuel pump. The pump wiring will need to be connected.
The process is as follows:
No fuel flow or a weak flow means the pump needs to be replaced.
A solid flow means it appears the pump is good, that said manufacturers do have a min quantity flow over a given time.
For this test, we’ll need a fuel pressure test kit. Your manufacturer will specify a min fuel pressure and head pressure specs for the pump.
I look for the pressure to be maintained with key on and then when running check the min spec is being maintained when the engine is loaded. Somewhere between 40 to 60 psi is typical.
The process is as follows:
If the pump fails this test, go ahead and replace it.
To fit a fuel pump we’ll need mostly regular hand tools but some models may require a special fuel pump release tool, but a good set of channel locks does the job too.
The process is as follows:
The pump and sender unit are usually removed as one unit, meaning we’ll need to remove the pump from the assembly.
The process is as follows:
Refitting is the reverse. However, some new pump kits may include pump O-ring seals and fuel line length and clips. It depends on the pump type fitted.
Pump fitting tips:
The mechanical fuel pump is a lot easier to locate, test, and work on. The pump is usually small and located close to the gas tank. Following the fuel line from the gas tank will help you locate the pump.
It will employ a fuel line in (from the gas tank) and a fuel line out (to the carburetor) and a pulsing hose that’s connected to the engine crankcase breather system.
Some checks we can run before removing any components include:
With these simple checks out of the way, we can now begin to diagnose. The steps are as follows:
A good pump will pulse a plenty feed of fuel
A bad pump will supply no fuel or poor fuel flow
Replacing a mechanical is an easy task requiring only basic tools. But do check that vacuum line, it is critical to fuel pump operation. Replace fuel line clamps and check for leaks on completion.
You may also find the following posts helpful:
ATV troubleshooting
ATV flooded with gas
ATV won’t start after wash
ATV won’t pull start
Moscow:
1st Varshavsky proezd, 2s8
+7 499 500-97-34 Call me back
Page not found at given address.
Please go to the main page or use the site map.
If a popping sound is heard when starting or operating the ATV, the rider should definitely investigate why the ATV is firing. The fact is that such a problem occurs with various breakdowns, ranging from the carburetor to the ignition. This means that ignoring the “shots” will lead to a number of malfunctions, including: valve burnout, engine overheating, cylinder compression failure, damage to the intake system, etc. Remember that even if you decide to buy a top-brand quadric, it will need to be regularly service.
ATV muffler popping can be caused by a number of problems. Their list includes:
Poor quality fuel (with impurities or water) can also cause the problem. Therefore, before diagnosing an ATV, it is recommended to drain the old gasoline and fill in new fuel.
The most common reason an ATV fires and stalls is an improperly prepared fuel mixture. For example, if the composition is too lean, the rider will hear pops coming in bursts, and their frequency will increase as the rpm increases.
But if there is too much gasoline in the composition (rich mixture), part of the fuel remains on the walls of the muffler, and then explodes. A sharp ignition of the settled mass leads to strong cotton and burnout of the system components.
You can determine the quality of the fuel mixture not only by "shots", but also by the spark plug. If the mixture is poor, the candle will have a pale tint. And with an excessively rich composition, a velvet soot is formed on the component.
A simple reconfiguration of the ATV carburetor will fix the problem. By adjusting the needle valve, the rider can change the ratio of gasoline and oxygen.
Another reason why an ATV shoots in the muffler is a contaminated intake fuel mixture. The cause of the problem may be a clogged filter, damage to the sealing gasket, or a depressurized pipe (a crack or gap has formed). Replacing components and checking the tightness of the system will help solve the problem.
Sometimes pops appear even after replacing or upgrading the muffler. In this case, the owner of the equipment needs:
Popping can also occur due to the high speed of rotation of the crankshaft. For example, with a reduction in the number of flashes at high speeds, the system delivers maximum fuel for some time. This leads to the fact that the mixture enters the muffler and begins to "explode" in bursts. This problem is especially noticeable when decelerating after a long acceleration.
The most common problem with the ignition system is considered to be a weak spark on the candle. It is because of this that the quadric begins to stall or make “pops”. Therefore, the driver must first check:
Sometimes the problem appears after installing a new spark plug. In this case, you need to make sure that the glow number of the component is suitable for a particular motor.
If everything is in order with the spark plugs, you need to check the ignition timing. It may be set incorrectly, due to which the ignition is triggered late. This leads to the fact that part of the fuel mixture burns out in the exhaust manifold, which causes cotton. However, this problem is not limited to one "shots". Late ignition leads to burnout of the exhaust valve, and this is a very serious "disease".
The problem of "shots" in the muffler is relevant both for ATVs with a carburetor and for models with an injector.