« What You Can Expect From the 2020 Nissan Kicks
The 2020 Nissan Rogue Sport Delivers a Bold Design With Matching Performance »
Jun 15, 2020
Do you need new tires? Are you unsure? There is an extremely simple way to check your tire tread depth at home with no special tools! All you need is a quarter and a penny to get started.
Before using the coin, you check your tires for the “wear indicators” as seen in the video above. Look for these rubber notches between the tread of your tires. They are raised to 2/32 of an inch and will tell you when your tires are completely worn to an unsafe level. Once the indicator is flush with the tread, that means it’s time to replace your tires right away.
If your tires do not have these indicators, or if you want to be proactive and get an idea of how much tread you have left before it’s too late, it’s time to use your coins. First, grab your quarter. Insert it in the space between your tire tread, with George Washington’s head facing down. If your tread surpasses the top his head, you are above 4/32 of an inch and are in good shape. Once the tread comes flush with the top of Washington’s head, that means you are at 4/32 of an inch. While still safe, it’s time to start planning ahead. Depending on how much you drive and on what terrain, you’ll need to replace your tires soon.
If you find that your tread is not even touching Washington’s head, you can grab your penny. Insert the penny in the same way, with Lincoln’s head facing down. When your tread is flush with the top of Lincoln’s head that means you are at 2/32 of an inch. As with the wear indicator, this means it’s time to replace your tires. Regardless of season, low tread is unsafe, reducing traction, increasing stopping distance and increasing chances of getting a flat.
Make sure you check your tread on all four tires and in more than one spot. If you find that the center of your tires is wearing more than the outer edges, your tire is likely over inflated. On the other hand, if the edges are wearing more quickly than the center, your tires are likely under inflated. When certain tires are wear more quickly than others, you might need a tire rotation or alignment. In this case, we’d be happy to help you figure out what needs done to ensure even wear to not only increase the lifespan of your tires, but also keep you driving safely!
If you do need new tires, take advantage of our $70 rebate on a set of four eligible tires though July 31, 2020! Start shopping new tires here.
Tags: Colorado, Longmont, new tires, Nissan, tire tread, tires, tread depth
Posted in
Longmont Nissan Service |
No Comments »
 , Longmont, CO 80501 | Sales: 303-586-2862 | Contact Us | Privacy | Sitemap | NissanUSA.com
When it comes to checking tire tread, there are a number of methods that can help you know if it’s time to replace a tire. Heavily worn tread will prevent a tire from performing as designed and can lead to unsafe driving conditions. One of the simplest, most common ways to check tread depth requires nothing more than a penny and a few moments of your time.
In the United States, tire tread depth is measured in 32nds of an inch. New tires typically come with 10/32” or 11/32” tread depths, and some truck, SUV and winter tires may have deeper tread depths than other models. The U.S. Department of Transportation recommends replacing tires when they reach 2/32”, and many states legally require tires to be replaced at this depth.
The idea of the penny test is to check whether you’ve hit the 2/32” threshold. Here’s how it works:
Place a penny between the tread ribs on your tire. A “rib” refers to the raised portion of tread that spans the circumference of your tire. Tire tread is composed of several ribs.
Turn the penny so that Lincoln’s head points down into the tread.
See if the top of his head disappears between the ribs. If it does, your tread is still above 2/32” , If you can see his entire head, it may be time to replace the tire because your tread is no longer deep enough.
When performing the penny tire test, remember not only to check each tire, but to check various places around each tire. Pay special attention to areas that look the most worn. Even if parts of your tread are deeper than 2/32”, you should still replace the tire when any areas fail the penny test.
Consistent wear around the whole tire is normal, but uneven tread wear could be a sign of improper inflation, wheel misalignment, or a variety of other things. If you see uneven tread wear, you should have a technician inspect your vehicle.
A simple way to check your tire tread depth is by using a tread depth gauge. You can find tire tread depth gauges at your local auto parts store. There are many models available, but an inexpensive simple graduated probe gauge will work just fine. All you have to do is stick the probe into a groove in the tread and press the shoulders of the probe flat against the tread block and read the result. All gauges should measure in both 32nds of an inch and millimeters.
Another indicator of worn out tread already lives in your tires themselves. Every performance, light truck, or medium commercial tire comes equipped with indicator bars (or wear bars) embedded between the tread ribs at 2/32”. They’re there to help you monitor tread depth and make decisions about tire replacement. Just look to see if the tread is flush with the indicator bars. If they are, it’s time to replace the tire.
While the penny tire test does deliver on what it promises – indicating whether tread has reached the legal limit – it may not be the best indicator of whether your tires are safe for the road. Tire performance can diminish significantly before your tread hits 2/32”. Even though the law deems fit for safe driving may not prevent you from hydroplaning or losing control in rainy, slushy conditions. If you think your tires may be close to needing replacement, have them checked out by a licensed mechanic.
So, you have a bolt or nut with unknown thread parameters, and apart from a ruler, there is no measuring tool at hand. We will warn you right away that only a rough result can be obtained with a ruler, so if you are going to regularly take such measurements, it is better to purchase a thread gauge or caliper.
Thread pitch - distance between turns
Threads are made according to approved standards, which made it possible to unify all threaded connections. The pitch of a metric thread is the distance between adjacent vertices or troughs of a threaded profile. It is this distance that we have to measure.
Place a ruler on the threaded part of the bolt. If its millimeter divisions coincide with the tops of the threads, then you no doubt have a 1 mm pitch. If not, then count the number of turns n on a certain segment of length L. Do not take the first thread into account, since it is counted from it, and it is zero.
| Number of turns per 2 cm | Thread pitch, mm |
| 9 | 2.5 |
| eleven | 2.0 |
| 12 | 1.75 |
| 14 | 1.5 |
| 17 | 1.25 |
| 21 | 1.0 |
| 26 | 0.8 |
| 29 | 0. 7 7 |
Divide the length of the taken segment in millimeters by the number of turns and get the pitch P.
For example:
P= L/(n-1) = 20 mm / (17-1) turns = 1.25 mm
It is important to take into account that the larger the threaded section you take for measurements, the smaller the error will be. A more accurate result can be obtained using a caliper by aligning the extreme tops of the threads with the tip of the jaws of the tool.
The thread pitch is closely related to the bolt diameter. Data on the correspondence of these two parameters are summarized in the table. We measure the outer diameter of the bolt, in our example we get 10 mm. From the table we see that the M10 bolt can have a thread pitch: 1.5 (main) , 1.25 (fine) , 1.0 (fine) or 0.75 (extra fine) . The calculated number must exactly (or almost exactly) match the reference value. In our case, the metric thread of the second row with a fine pitch of 1.25 mm. Bolt symbol: M10x1.25.
To measure the pitch of an internal thread, the best way is to find a counter bolt that will freely screw into the threaded hole, and then calculate from it. If there are no suitable screws, then you can use the old proven old-fashioned method. To do this, you need a piece of paper and a ruler.
Tear off a small strip of paper and place it in the nut. Press the paper against the thread with your finger so that the imprint of the threaded surface remains on it. For better visibility, you can draw along the edges of the turns with fuel oil or a marker. Attaching a ruler to the print, measure the distance L between the extreme risks and count the number of risks n in this area minus the first (zero). Perform calculations using the formula P = L / (n-1).
For example, the impression gave 6 clear marks on a segment of 10 mm.
P = L/(n-1) = 10 mm / (6-1) turns = 2 mm
Instead of paper, you can get an impression on the edge of a match or pencil. Knowing the inner diameter of the nut (in our case, 14 mm) and the calculated pitch, we compare the data obtained with the table. We find in the threaded row the value M14 and the desired pitch of 2.0 mm (main). Nut designation: M14x2.0.
In addition to metric bolted connections, inch fasteners are widely used in the modern technical world. Read the next article on how to determine the pitch of an inch bolt.
Even an ordinary smartphone can replace a thread gauge in everyday life. To do this, you need to download the Android application "Thread Pitch Meter. Thread gauge" from the developers of the Smart Tools toolkit. Just put a screw on the screen, look for the exact match of the turns and find out the pitch. Various types of threads are available in the mobile application: metric, inch and pipe standards.
Screen Thread Gauge for Android
Helpful Hints Updated: 14.07.2022 15:36:14
Maxim
Specialist in the field of fasteners and rigging products. More than 10 years of work in the field of construction, repair and equipment.
— "We try to convey to you only relevant and reliable information, we will be glad to hear your feedback regarding this article"
The author of the article
Maxim
Specialist in the field of fasteners and rigging products. More than 10 years of work in the field of construction, repair and equipment.
— "We try to convey to you only relevant and reliable information, we will be glad to hear your feedback regarding this article"
The author of the article
Rate
Submitted successfully, Thank you for rating!
Click to rate
home
Articles
Methods for measuring threads in the workplace and at home Methods for measuring threads in production and at home
April 2, 2021
Girin Kirill
measure thread
When measuring a thread, its compliance with such parameters as internal, external and average diameters, pitch and length is clarified. For this purpose, special and universal tools are used. A suitable measuring device is selected taking into account the type of thread and the required measurement accuracy. Initially, the average diameter, pitch and shape of the profile are controlled, after that - the inner and outer diameters.
Thread measurement is performed with different tools
There are two main methods for measuring threads:
Gauges are usually used to measure pipe and tapered threads, which allow you to check the dimensions, shape and relative position of the surfaces of the part.
Inspection of threaded surfaces makes it possible to detect the following joint defects.
Ripped cut . A defect is formed if the diameters of the hole and the rod differ from the nominal ones. The reason may also be insufficient sharpness of the cutting tool. The problem can be prevented by careful control of all diameters and the use of cutting tools of a normal degree of sharpening.
Blunt cut . The defect appears if the nominal diameter is less than the diameter of the hole, but greater than the diameter of the rod. When cutting, the profile becomes incomplete. To avoid a defect, an accurate measurement of diameters before threading will allow.
Thread taper. The defect appears if the cutting tool cuts off excess metal. The problem is solved by correlating the established dimensions of the part and the tool.
Tight cut . If the dimension of the part is not respected, and the tool has a rough thread, cutting is difficult. A defect can be prevented by first measuring the parameters of the workpiece and selecting the cutting tool of the optimal size.
For K integrated control and measurement of external metric threads, rigid limiting ring gauges (GOST 17763-72 and GOST 17764-72) are used, as well as threaded brackets. Internal threads are controlled by threaded plug gauges (GOST 17756-72 and GOST 17759-72). When using threaded plug gauges and rings, a through gauge acts as a complex gauge. A non-going gauge is used to measure the size limit of the average diameter.
Gauge-ring M 1.1x0.25 6h PR for complex control and measurement of external metric threads
With element-by-element control , the outer diameter of the bolt is checked with any device that is usually used to control the diameter of shafts. And the inner diameter of the nut - with devices for controlling holes.
Contact and non-contact methods are used to control the average diameter. The first is based on the use of micrometer inserts or three wires.
A threaded micrometer with inserts measures the average diameter of a triangular thread with profile angles of 60 and 55 degrees. The measurement is carried out in the range from 0 to 350 mm. For each interval of 25 mm, either a separate micrometer or special interchangeable heels are used.
Threaded micrometer MVM-50 GRIFF with inserts for measuring the average diameter
The standard kit includes two inserts: a prismatic one, which is placed instead of the heel of the micrometer, and a conical one, which is installed in the hole of the micrometer screw.
The micrometer can be equipped with one of five sets of inserts, which are selected depending on the pitch of the thread being checked: 0.4–0.5; 0.6–0.8; 1–1.5; 1.75–2.5; 3–4.5 mm.
The thread pitch and profile angle are measured using microscopes and projectors. In this case, the average diameter of the internal thread is controlled by:
It is convenient to measure the dimensions of parts during processing using an indicator device. Due to the special design of the stop bar, this device allows you to install the indicator holder in a convenient place. The fixture is universal and can be used for both boring and turning.
Active Dimension Gauge for Lathe Machining
The use of indicators and setting rings with the nominal size of the machined hole reduces the time for preliminary operations and ensures high accuracy in measuring the internal dimensions of the thread.
When machining holes, the cutter is adjusted according to the indicator to remove the first chip with an allowance of 0. 1–0.2 mm per side. After that, the indicator readings are measured, and the first chip is removed. The resulting hole size is measured with an indicator device adjusted to the setting ring with the nominal hole size. When adjusting, the indicator device is set to zero.
Having measured the hole, it is specified which layer of metal needs to be removed in order to obtain the final size of the hole. Then, according to the indicator, the cutter is set under the boring of the finishing hole. This method of measurement simplifies the boring of holes according to 2 and 3 accuracy classes.
If the batch of parts is large, it is more convenient to first perform a preliminary boring of all products with an allowance of 0.3-0.5 mm per diameter, and then complete the fine boring in one pass with a hard cutter. The use of indicator devices allows you to work confidently and with great accuracy. However, the indicator does not eliminate the need to use limit gauges. Measuring the thread with a gauge is a mandatory procedure that is required for the final control of the size.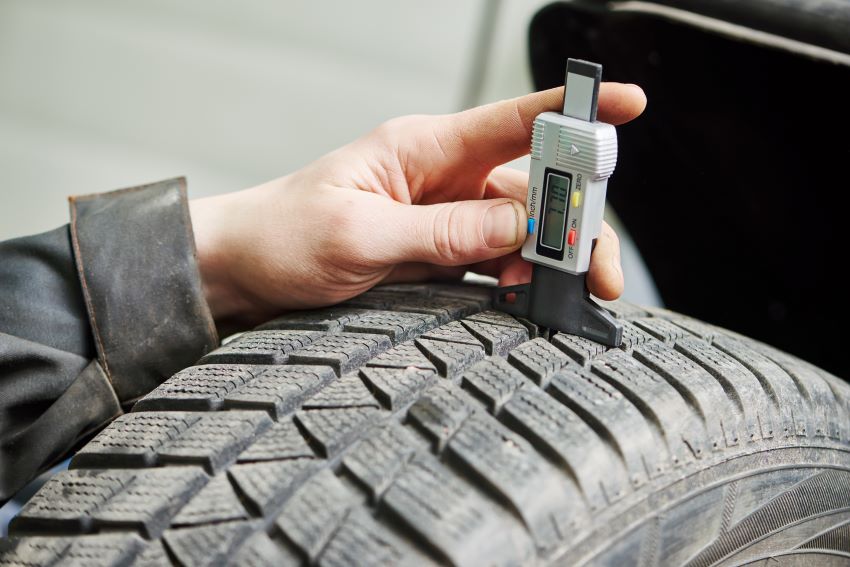
One of the most advanced methods for measuring thread parameters is considered active. It is especially in demand in conditions of mass and large-scale production. Active control devices allow you to automatically control the course of the technological process and provide the necessary accuracy of processing.
Active control devices are usually included in the final processing cycle and, based on the results of the check, give a command to set up the cutting tool. There is a second way - to check the dimensions of the product during processing, in order to immediately control the amount of movement, cutting conditions and other parameters. Active control devices of this type are used on machine tools with numerical control.
For automatic control and adjustment, contact and non-contact devices are used. In the first case, the tip of the device comes into contact with the measured product and can cause errors. To exclude this possibility, the tips of active control devices are made of hard alloys and diamonds.
To measure the average diameter of a thread, the three-wire method is often used. The diameter is determined by applying wires of the same size to the cavities of the threaded connections. The parameters of the resulting structure are measured with a micrometer. The final calculation results are strongly affected by the profile error. To eliminate it, the wires are applied to the profile in such a way that they are connected at the level where the width of the depressions will be equal to the width of the protrusions.
Using the three-wire method to measure threads
In this case, the wires must be arranged in this way:
It is necessary to ensure that during the measurement the part is not deformed, and the wires are not bent.
The size of all three wires used to measure the average thread diameter by this method is selected according to a special table, taking into account the pitch and angle of the thread profile. The diameter d = tg α /2c is considered ideal, where cs is the pitch, and α /2 is the profile angle of the thread being checked.
In addition to the average diameter, the three-wire method measures the diameter of the trapezoidal thread.
To measure the thread pitch, use a caliper or ruler. To do this, determine the length of several steps and divide it by the number of steps. The pitch of the internal and external threads is determined by a thread gauge. Each plate indicates the step size. In this case, the plates are selected in such a way that the teeth fit snugly into the thread. Due to this, the pitch matches the pitch on the insert.
To measure the thread pitch, standard rulers with millimeter and inch divisions and thread gauges are used. The results of calculating the pitch with a ruler are inaccurate, so the main task when measuring is to find the number of turns that fall on a single thread pitch. Let's say if there are 5 turns per 1 inch, the pitch will be 1/5 inch. For convenience, results in inches are converted to millimeters.
To measure the thread pitch correctly, you need to be aware of the following tricks:
The result of the measurements will be the average step value. The error in the calculations depends on how correctly the thread is cut into the part.
The thread gauge provides the most accurate lead measurements for pipe and taper threads because it works with the smallest distances. The design includes plates made of iron alloys. Each insert has notches equal to the cutting profile and its pitch.
To determine the pitch, the thread gauge is applied to the part. In this case, it is necessary to ensure that the plate is parallel to the cutting axis and matches the size of the thread hole.
To measure the average thread diameter, it is necessary to use a thread micrometer complete with different tips (one with a cone, the second with a notch). The measurement limit is usually indicated on the measuring instruments themselves. So, the marking M 3-5 means that the kit allows you to measure the thread in increments of 3; 3.5; 4; 4.5 and 5 mm.
Inserts for thread micrometer
A micrometer is used to measure the average thread diameter. The interchangeable tips of the instrument are inserted into the screw hole and allow you to achieve the most accurate measurements.
If average values are sufficient as a result, a caliper may be used instead of a micrometer. By design, it is a ball lugs, the dimensions of which must match the type and pitch of the threaded connection. To find the average diameter, the caliper tips must be set to the thread gauge. Then the procedure is repeated with the sides of the part. Threaded brackets are used to evaluate the measurement results. And the accuracy of the diameter is checked by comparing the resulting thread with a template.
To control the average diameter of a thread consisting of a maximum of two turns, use the two-wire method. The measurement is carried out as follows: wires are applied to the opposite protrusions and cavities of the thread, the diameter of which coincides with one of the tabular units. In this case, the distance between the ends of the wires shows the average diameter of the part. For each of the accuracy classes, separate wires are created that comply with GOST 2475-88. When deriving final numbers, a possible error is taken into account, because the two-wire method does not allow obtaining exact values.
Another method for measuring the average thread diameter is to use a microscope. The device is applied to the side of the workpiece profile, and the eyepieces are pointed at the profile image from each side to determine its size. The values that were obtained as a result of the measurements are added and divided by the number of sides. The resulting arithmetic mean is the average diameter of the threaded connection.
To measure the external thread, micrometric tools are used, the design of which is based on micro screws. The control is carried out according to this scheme.
Measurement of the internal thread is carried out with a caliper. The tool is installed on the template part according to the threaded gauge, and then compared with the original internal diameter of the threaded connection. To obtain accurate values, the caliper must be placed at an angle to the axis being measured.
Parallel thread gauges can also be used to measure the inside diameter of a thread. This is because the inner diameter has a smooth surface and is ideal for the shape of the tips used in these instruments. The results obtained are checked using stopper gauges.
To measure the thread profile, an instrument such as a microscope is used, and control is carried out using profiles. The procedure is carried out in the following sequence.

You can buy the necessary tools for thread measurement in the Rinkom online store. Always available:
You can place an order with delivery in Russia directly on the website. It is possible to manufacture a measuring tool according to your drawings. The batch size of products is not limited. I
More useful information
Useful reviews and articles
All articles
January 23, 2023
Indexable cutters
January 9, 2023
Tapping
December 23, 2022
Thread defects
December 20, 2022
Subscribe to us
We send discounts for the tool and only useful information!
Didn't find the required item in the catalog?
We are ready to manufacture and supply unique types of tools especially for your order!
Order
Catalog
Basket CompareEntrance
We use cookies.