Don’t let losing or forgetting your ATV key stop you from enjoying your quad. In this article, I’ll show you a few ways to start your ATV or UTV without the key. You can do any of these methods with basic hand tools found in most garages.
Your ignition switch is simply a break in a circuit telling your electrical box when it’s ok to start or not. When there’s no key in the ignition, no power can be sent to the rest of the needed components to start the engine. There are some pretty simple ways to get around this though.
Of course the easiest way is if your machine has a pull start or kick starter on it. A lot of the newer quads being made don’t have this functionality anymore unfortunately. If you do have this option, simply unhook the ignition switch from the cdi or electrical box. That way the engine will start without needing a key inserted, then start the engine.
This method may work without a pull start or kick start if you can push your machine to a good pace and pop it into gear. Your other options are:
This is my preferred method to starting an ATV without the key. Most ignition switches will only have two wires going into it. On wire is sending power in, and the other wire sends power to the electrical box if the key is inserted. Telling the machine that it’s ok to start.
Simply remove the ignition switch from the equation. You can disassemble the switch or just cut the two wires leading to it. Be sure to leave enough slack in the wire just in case you want replace the ignition switch later on.
Now connect the two wires and your electric start should work like always. Remember to connect the wires on the side leading to the engine not the side leading to the ignition.
You have to remember to disconnect the two wires when you’re done riding or you’ll drain the battery dead. I would recommend you put a simple switch here in place of the ignition, a simple on/off switch will work perfect.
Some of the newer quads have more than two wires coming out of the ignition switch, not to worry. A lot of times there will also be a ground wire or something like that. The two wires you should focus on are red and black. Cut those two wires and tape them together. Make sure you tape together the ends of the wire leading to the engine not to the ignition.
You may also see a black with white stripe and green wire. These two wires are shorted together when the key is in the off position. You will need to open that short by cutting the black with white stripe wire and tapping off the end.
Once the black with white stripe is cut and taped, and the red and black wires and spliced together and taped. You should have power to your quad as if the key was turned on. You can use your normal electric start and everything the way it is.
Remember to disconnect the black and red wires when you’re done to avoid killing the battery. You could also tape the black with white stripe wire back together to prevent anyone from easily starting the quad.
This doesn’t work on all ATVs, only machines with an electric start option only. Your solenoid should be near your battery and wiring harness. On some quads you have to remove a side panel to access it.
Your solenoid will have two main wires coming out of it and possibly some other smaller ones, we only care about the two big wires. You need to lay a wrench or something metal across the two connectors of the main wires. Then, you should be able to start the quad.
I don’t use this method myself because you have to be real careful the wrench or piece of metal is not touching anything else that could short it out. If you accidentally touch the frame or something when doing this, you could cause damage to your electrical parts of the engine.
Desperate times call for desperate measures, and that’s what this method is.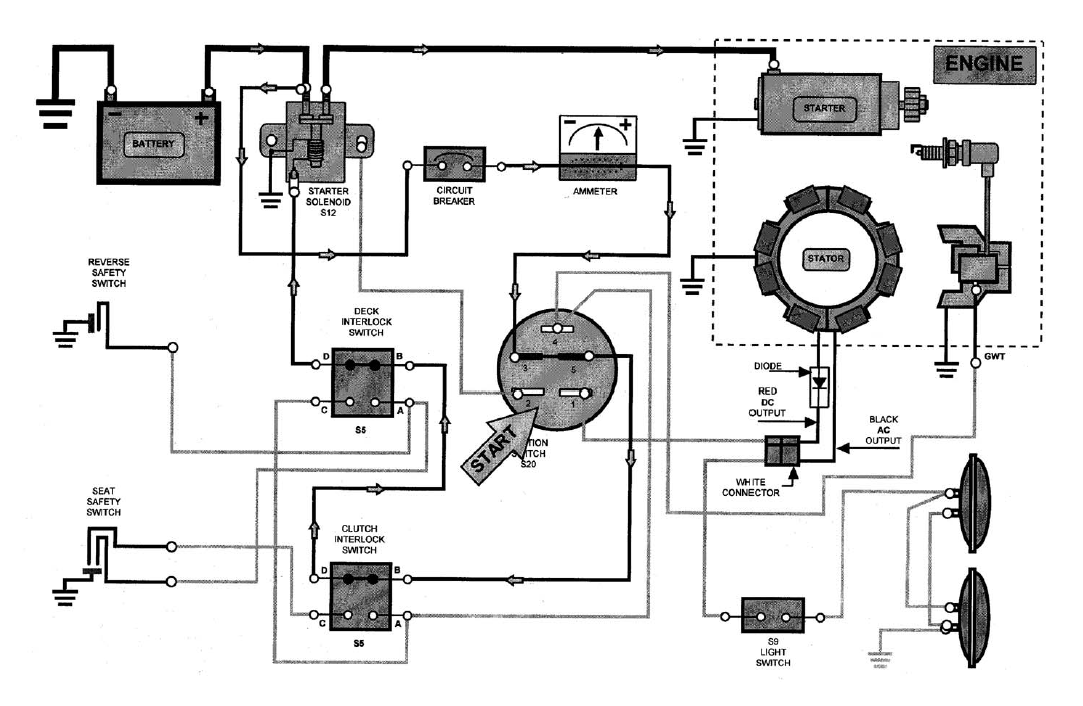 This trick is mostly used by thieves, so if you’re driving around the trails with a screw driver sticking out of the ignition and get stopped by trail enforcement, be ready to get asked some questions.
Basically you just hammer a screwdriver into the ignition and turn it on as if it were the key. The screwdriver will brake the pins in the lock allowing you to turn the ignition on.
I don’t recommend this method because you could damage the ignition and not get the quad to start anyway. And even if you are successful, you’re now riding around with a screwdriver sticking out.
This is obviously the best method in the list. Of course if you forgot your key and you’re already way out on the trail, then there’s no way you can order a part and do the replacement. This is more for someone who lost their key, or broke their ignition trying the screwdriver method.
Here’s a decent Replacement Ignition Switch found on Amazon to help get your search started. If you can find a replacement from the manufacturer for your specific machine, that would be the best route, but probably a lot more expensive.
One thing I want to mention is that it’s always best practice to tape up any wires you cut and exposed. You may have gotten the hotwire job done correctly, but if any of those wires hit the frame and short out you could have bigger problems.
Leave enough slack in the wires to work on them again later on. Try to avoid cutting the wires to the ignition real close to the ignition itself, or somewhere that makes it hard to get to the wires. You may want to work on it later on, like putting in a new ignition switch or on/off switch.
Don’t tell everyone how easy you hot wired your quad and how you did it. Maybe you’ll be safe to do this, but I lean a little more to the cautious side when it comes to my machines.
Sharing is caring!
by
For many of us, our ATVs are a source of freedom.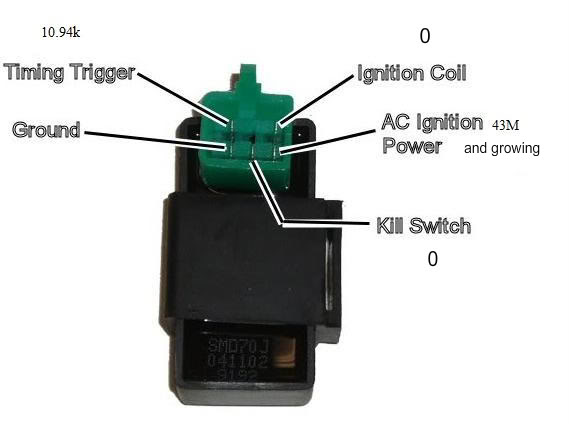 We jump on, ride over hills, mountains, or dunes and feel the wind in our face. The roar of the engine and the fast speeds allow us to feel a million miles away from daily life.
Or, we use them for work, hauling goods across farmland, or transporting equipment if needed. Either way, they are an integral part of our lives, and many of us choose to invest our money and any spare moment into our ATVs.
But sometimes, things don’t go to plan, and we find ourselves with a dodgy or broken ignition switch. The key to starting your ATV and enjoying it fails, and you are left beside it, broken-hearted trying to figure out what went wrong.
You are left wondering, what now? Do I pay to have it replaced? Do I attempt to repair it myself? Do I resign myself to an ATV-less life?
What if we told you there is another way? You can bypass an ignition switch on an ATV to get it up and running and allow you to enjoy riding it again! That’s right, the rumors you heard are true!
How do you ask? Well, we will walk you through how to bypass the ignition switch on your ATV now! There are a few options here, so we will talk you through them all to help find the best option for you and get your ATV up and running again!
Contents
Let’s get straight into it! As we mentioned earlier, there are a few ways you can bypass the ignition switch on your ATV.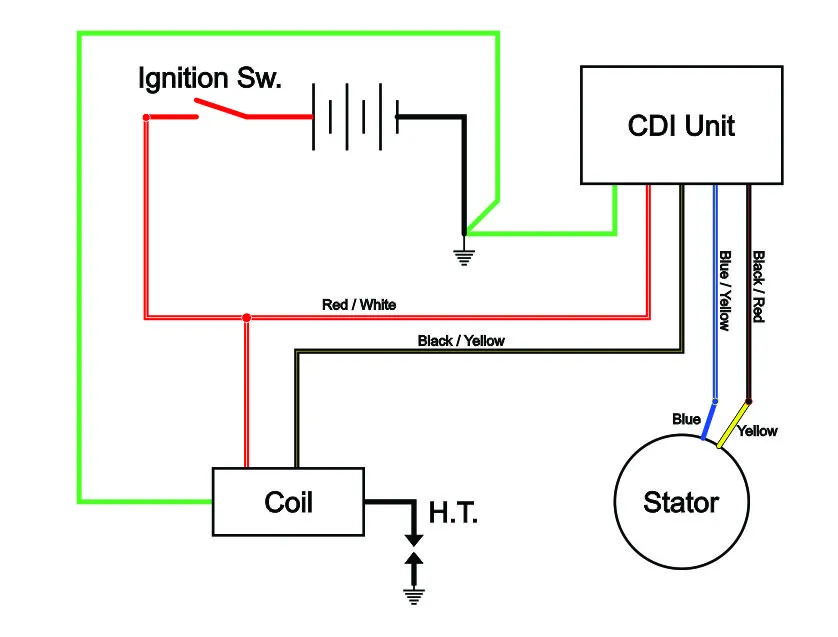 It’s worth noting that these methods can make it look as though you have hot-wired and stolen the ATV. We do not recommend using these methods or any methods to steal an ATV.
Now that we have covered that let’s look at how you can bypass the ignition switch in your ATV!
It avoids any tricky questions and protects you should someone accuse you of stealing the ATV! It’s best to take some documentation or proof that the ATV is yours when driving it after bypassing the ignition switch.
Use the Pull or Kick StartIf your ATV has an alternative start method to the ignition switch, this should be your first attempt at bypassing the switch! These are commonly pull starts or kick starts methods but are not available on all ATVs. Check your user manual or online to see if you can do this on your ATV before attempting it.
The manual will also provide more specific instructions for your model, so it’s best to follow these instructions to avoid causing any damage to your ATV.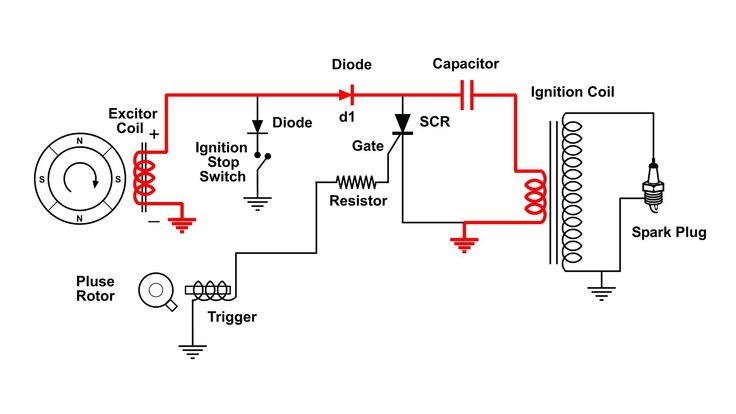 Failing that, you can follow our rough guide below, but be mindful that you might need to adjust the method depending on your ATV.
This method doesn’t work for all ATVs, but those with electric starters and no alternative start method might be in luck! If you don’t have a pull or kick start, as we mentioned earlier, this can be a fantastic alternative method!
We would recommend trying this before attempting any hot wiring (more on this later). You can follow the steps below, but be sure to check in your user manual that this method is appropriate for your ATV!
First, locate your ATVs starter relay or solenoid. It is usually on the outside of the plastic next to or under the battery. Now, if you are unsure, your starter solenoid is a switch that controls a high amp load with a low amp. They come in various shapes and sizes, but usually, they have a round or square body with two larger and two smaller wires.
The larger wires are for the high amp load, and the smaller wires the low amp switch. Your ATVs solenoid might only have one smaller wire if the ground comes from the frame it’s mounted to. There might also be a plastic or rubber cover, or it will be on the outside. You must take your time to locate it correctly.
Once located, you should see two big main wires. Jumping these wires will start your ATV without needing to use the ignition switch! You should be able to jump these two main wires using a wrench.
Here is where your ATV is going to look like it’s been stolen! Remember to take some paperwork out with you to prove the ATV is yours should you get asked. How to hotwire your ATV will depend on the make and model of your ATV, but the end goal is the same: change the wires to bypass the ignition switch, leaving the circuit open so a spark starts your ATVs engine.
There are a few different ways you can do this, so let’s take a look now, and hopefully, one will apply to your ATV.
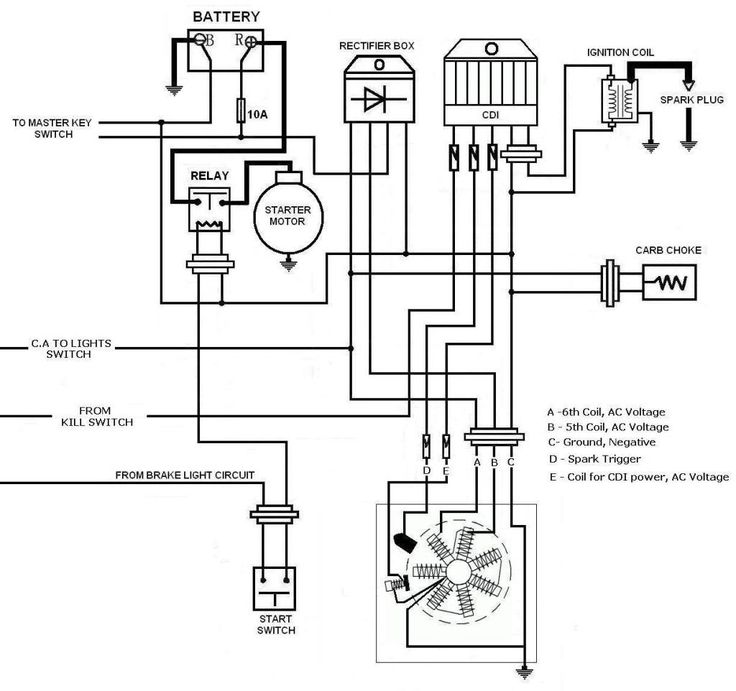
This is the easiest and best option for hot-wiring your ATV. remember to leave some extra wire from your ignition so it can be rewired when you can use your ignition switch again.
You can take the ignition apart to manually trigger it if none of these methods work for you. It’s worth noting that you will need to put the ignition back together or replace it if you intend to use it again. It can be done following these five steps below, and your ignition should act as normal.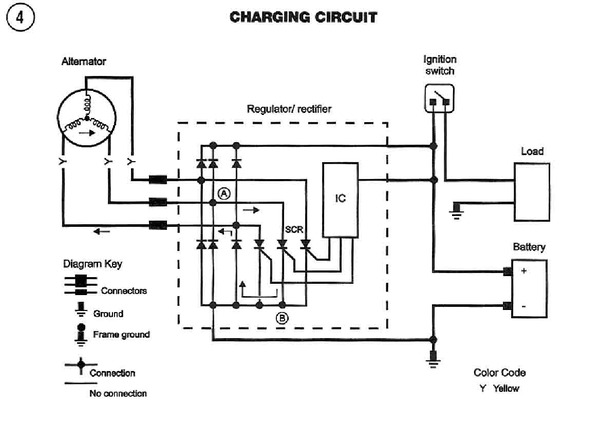
And just like that, we have come to the end of our ATV adventure today! As you can see, there are a few ways you can bypass the ignition switch on an ATV, allowing you to operate it without the key if needed.
Remember that ideally, you should use the ignition switch and have this replaced or repaired as soon as possible to ensure your ATV is safe and secure.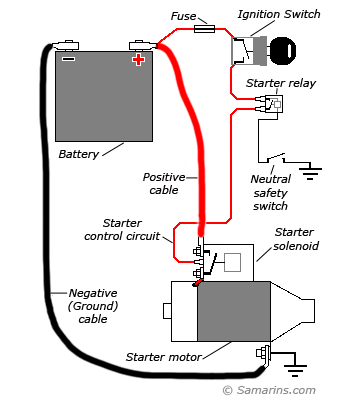 Follow all the necessary safety procedures when carrying out any work on your ATV, and you are sure to enjoy your ATV for years to come.
Why not give one of the methods a go today and bypass your ignition switch on your ATV?
Related Reading:
Patrick Johnson
Hey there! I’m Patrick, and I’m the guy behind ATV Legion. I created this site to share everything I know about ATVs – from repairs and upgrades to riding tips and tricks.
Latest posts by Patrick Johnson (see all)
home
Articles
Articles
Author : Alexander Sapronov
You have bought a new car.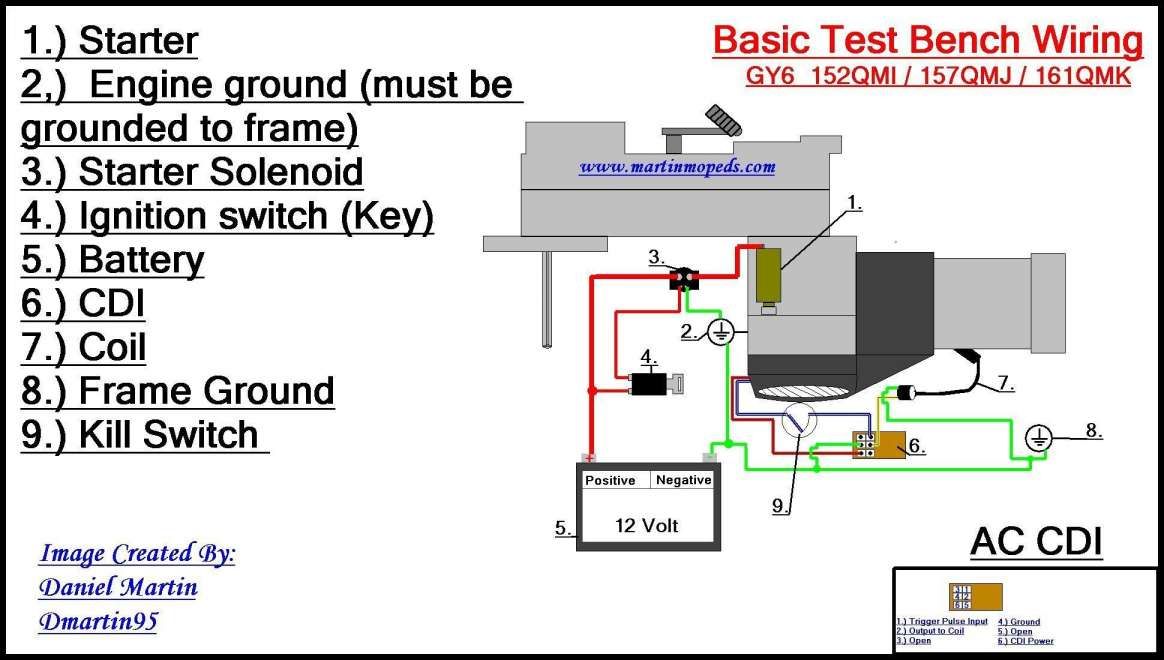 We sat in it, turned the key in the ignition, but nothing happens. This is due to the fact that some models have a lock when there is no pressure on the brake or when the clutch is not released. In other situations, the starter does not respond due to various malfunctions. Let's consider in the article why the ignition does not turn on when the key is turned. nine0003
Contents:
The main assembly of the starting system turns the flywheel to the desired speed for the engine to start. The starter device includes the following elements:
 It is an axle with a core and collector plates. The movement of the armature is provided by two ceramic-metal bushings.
 Let's tell you how the device works. The driver turns on the ignition. The control voltage is applied to the traction relay, the coil of which is magnetized and moves the core. Bendix engages with the flywheel crown. When starting the engine, the freewheel disengages the drive gear from the electric motor. The driver releases the ignition key, and the engine runs. nine0003
Major faults:
Power wiring failures.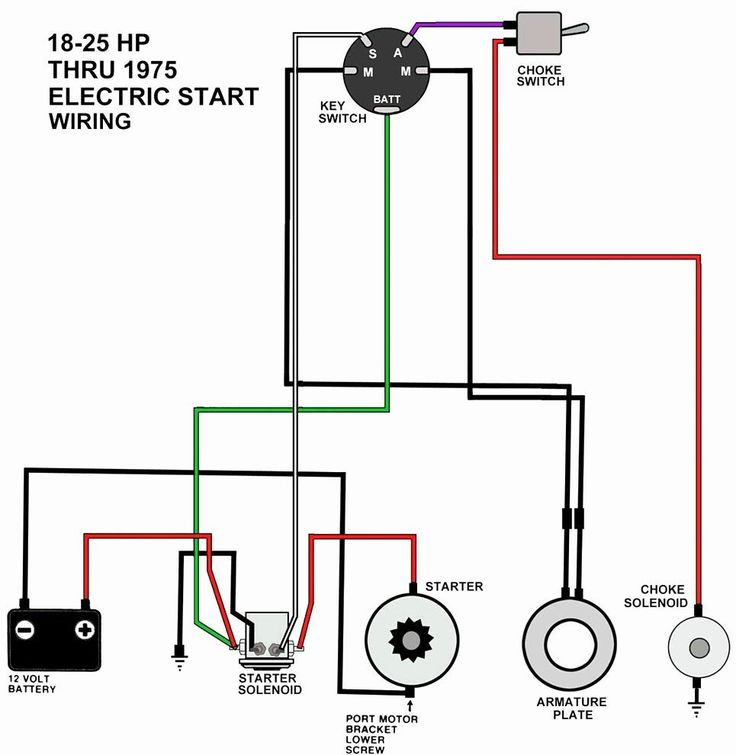
First, pay attention to the battery charge. If he sat down, then there will be not enough supply voltage at the starter terminal. It will be possible to start the vehicle only after the battery is charged. If the battery and alternator are in good condition, the charge will quickly recover after starting the engine. One of the manifestations of such a problem is the dim light of dimensions and bulbs on the instrument panel. You also need to check that the terminals are sufficiently tightened. Oxides should not be present on them and the ground wire. If the starter does not even click, then the relay most likely needs to be replaced. nine0003
If the ignition key does not turn on, then the matter may be in it itself, namely in the contact group. In this case, even the instrument panel often does not work. Other symptoms of a malfunction:
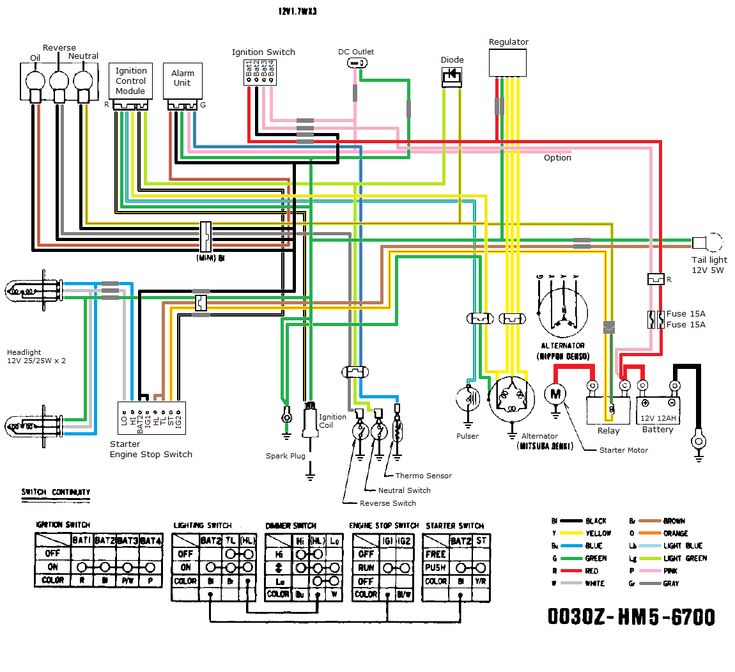
In addition to the wiring, you will also need to check the fuses. Their location depends on the car model. At the same time, not all ignition systems are equipped with fuses, but if they are, you need to make sure that none have blown. nine0003
Faults in the signal circuit.
Check for corrosion on metal or loose wire bolts, starter relay ground. Contacts and tracks can wear out as a result of long operation, overheating, poor quality of metal elements. Often there is a failure in the operation of a whole group of electrical devices: turn signals, reversing lights, high and low beams. Also sometimes there is an overload of the system due to the installation of powerful equipment. nine0003
Before inspecting the electronics, retighten all bolts and reconnect if necessary. To check, connect the control probe with a light bulb between the vehicle ground and the starter terminal of the ignition switch. If it turns out that the ignition on the machine does not turn on as a result of damage to the contact group, then it must be replaced.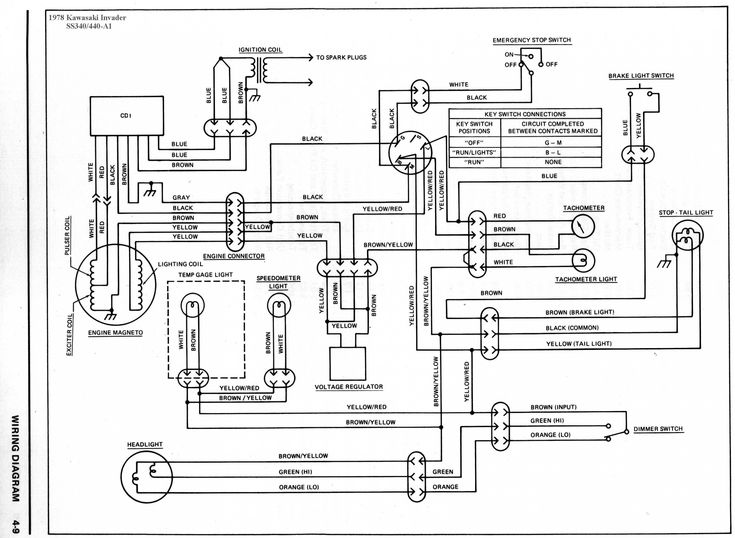
Malfunctions of the starter retractor relay.
One of the reasons why the ignition switch does not turn on is external and internal influences on the traction relay. The component most often fails as a result of natural aging, burning of contact plates or windings, as well as water ingress. The ignition does not turn on even after a characteristic click (the result of retracting the armature and engaging the gear), which indicates that the device is working. But there are other signs of a malfunction: the starter works after starting the engine or idle. nine0003
The starter may not be removed to check the operation of the relay. First make sure the wiring is in order. If there is a click, then take a screwdriver. From the relay, disconnect the terminal that comes from the ignition switch. Next, you need to close the battery terminal with the starter, if the electric motor works, then the breakdown is connected precisely with the relay. At the same time, only the anchor is subject to replacement in it, but for repair it will still be necessary to dismantle the starter, which is quite labor-intensive.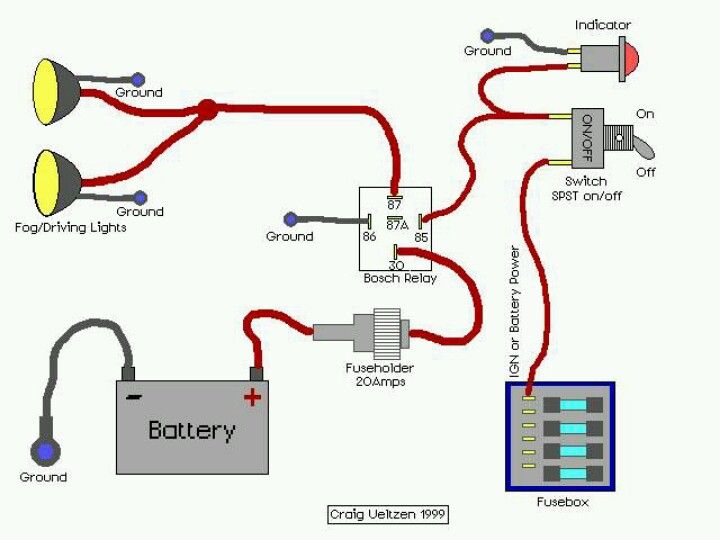
Starter mechanical failure.
Basically, problems of this kind are not manifested by the fact that the ignition switch does not turn on. Most often it functions, but the crankshaft does not rotate. One is the case when the ignition does not turn on. This is due to worn plain bearing shells. The starter stops rotating due to the fact that the gap between the rotor and the stator winding disappears. To determine the breakdown, you need to remove the assembly and check the rotation of the rotor. If it is, but the crankshaft is motionless, then the most common causes:
 In this case, you will have to disassemble the entire mechanism and install a new crown, not forgetting to heat it up before that. nine0026
 Other factors that can affect the performance of the node include low temperature conditions. The internal cavity of the ignition lock can be immobilized due to the fact that it simply froze. Experts do not recommend fixing the problem yourself, especially if your car is under warranty. Also, at low temperatures, the oil in the crankcase, for example, which is out of season, thickens greatly, which immobilizes the crankshaft. In addition, in the cold when starting the engine, you must always squeeze the clutch, then the work of the starter is facilitated. nine0003
Due to frost and due to the rare use of the machine, the battery can be discharged in order, so the ignition also stops turning on, because the starter current is not supplied.
In some cases, failure to start the engine may be associated with its internal breakdowns, but sometimes it is realistic to do without serious repairs.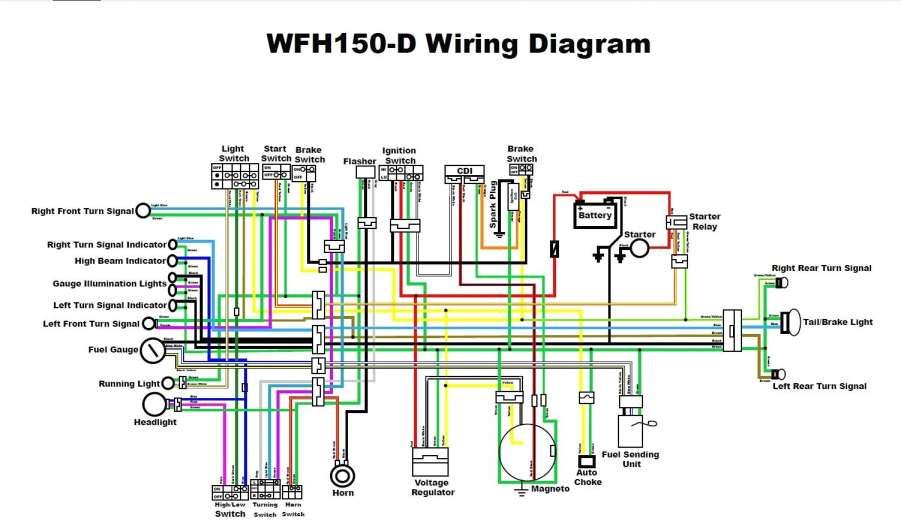 However, if the crankshaft sensor fails, there are problems with the injector or other elements of the fuel system, it is necessary to contact professional craftsmen. They will find out why the ignition switch does not turn on, if necessary, they will carry out diagnostics using modern equipment. The company "LAT" guarantees you the minimum repair time due to the well-established system of supply of spare parts and competent organization of the workflow. We accept applications around the clock by calling 001 or 812 300-10-01. nine0003
September 22, 2022
Back to list
See also
Reasons for loss of tire pressure
How to light a battery from another car?
Turn signals stopped working
What to look for in car sales ads
100410
If the stool motor suddenly stops running, check #1: Is there gas in the tank? There are mines, look for an "ambush" in the ignition system.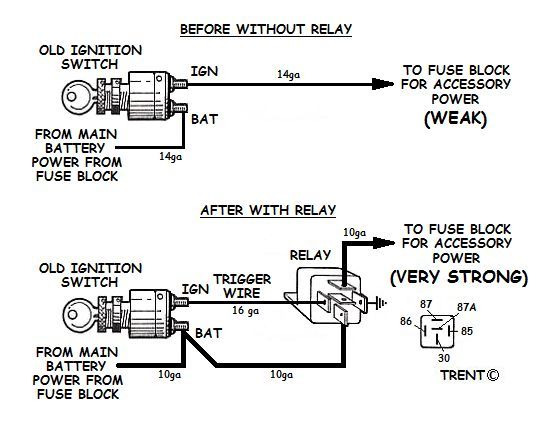 You always want to believe in the simplest thing - the candle “ended”. Hence check number 2: install a known working spark plug, crank the engine with an electric starter or a kick. Has the engine started? She is to blame. Didn't work? Search further.
Let's try to revive the VM Galaxy scooter, its electrical circuit is typical for devices of this class (differences only in Suzuki Sepia). nine0003
○ New Sym scooters in stock with delivery to your region! Big choice. Best price guarantee!
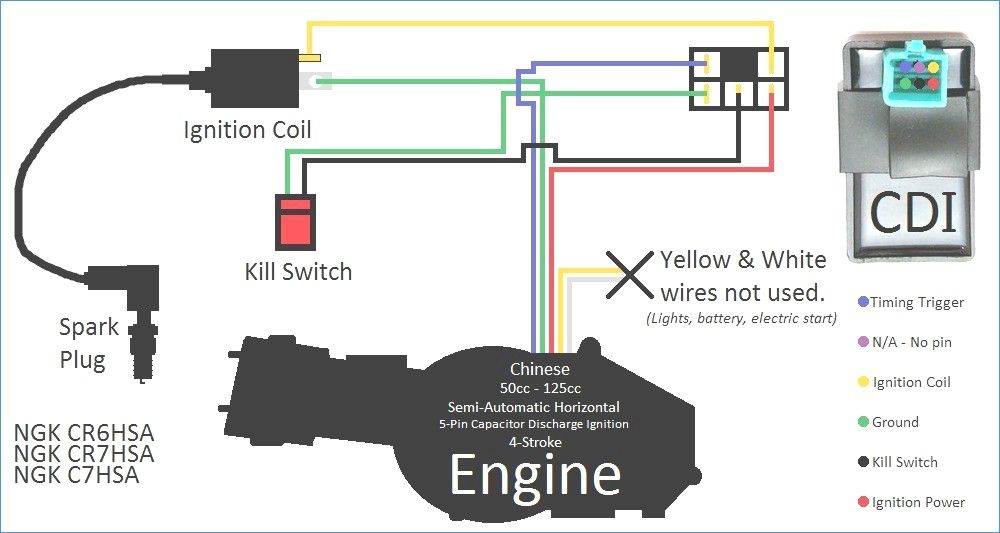
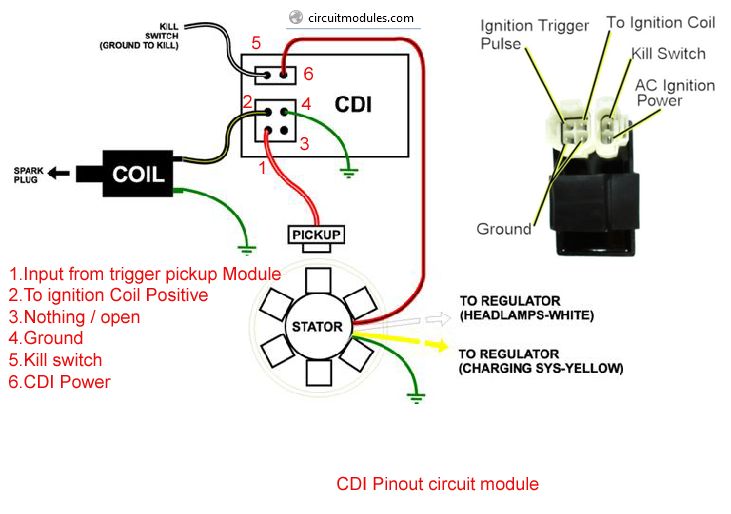
Remove the plastic, look for elements of the ignition system. The switch is easy to find: it is a small plastic box with a connector where 5 or 6 wires with insulation of different colors fit. Finding the ignition coil is even easier: a high-voltage wire leads to it from the spark plug (it is thicker than the others). The electromagnetic sensor and the generator are located in the engine, but you can check their performance without disassembling it. nine0003
Imagine how an electrical system works.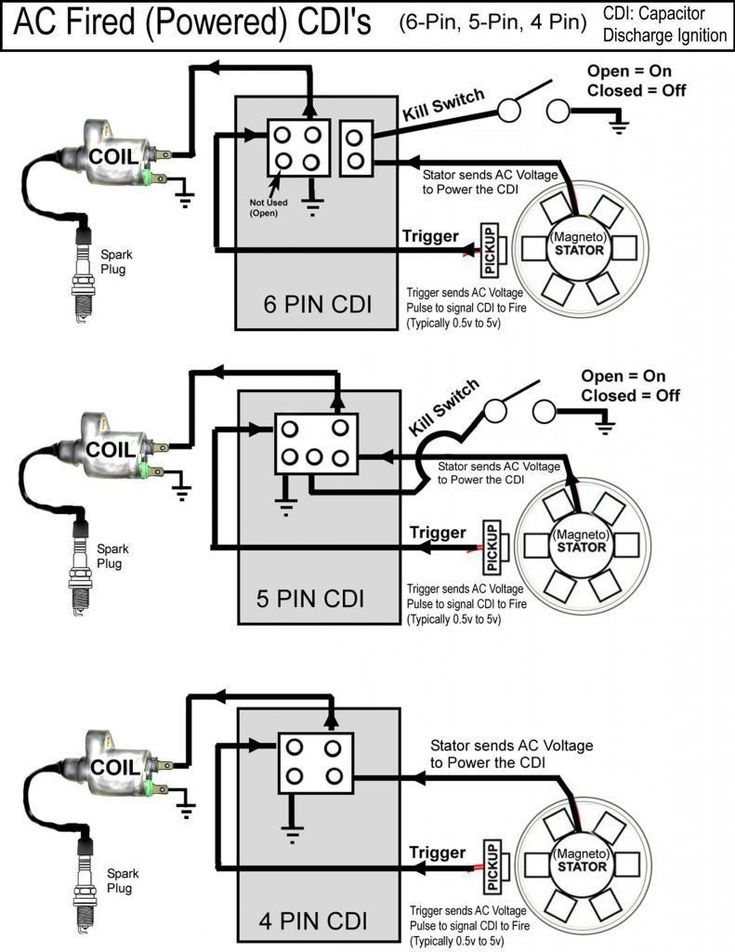 The voltage is supplied from the generator to the switch and accumulates in the capacitor. According to the signal of the electromagnetic sensor, the capacitor is instantly discharged to the ignition coil. In it, the voltage of this pulse rises to several thousand volts and, through a high-voltage wire, through a candle cap, enters the candle. A wire comes from the switch or sensor to the ignition lock - it is to turn off the engine: when the lock is turned off, the wire is shorted to ground. Your task is to check all these chains. nine0003
Arm yourself with a digital multimeter, set it to measure resistance. Make sure the motor is in electrical contact with the scooter frame. Then determine the purpose of the wires that fit the switch connector. Start with the ground wire (usually green) - there should be zero resistance between it and the frame. Two wires fit the ignition coil: one is connected to ground, the other goes to the switch. Look at the color of the “switchboard” (you will find it in the switch connector).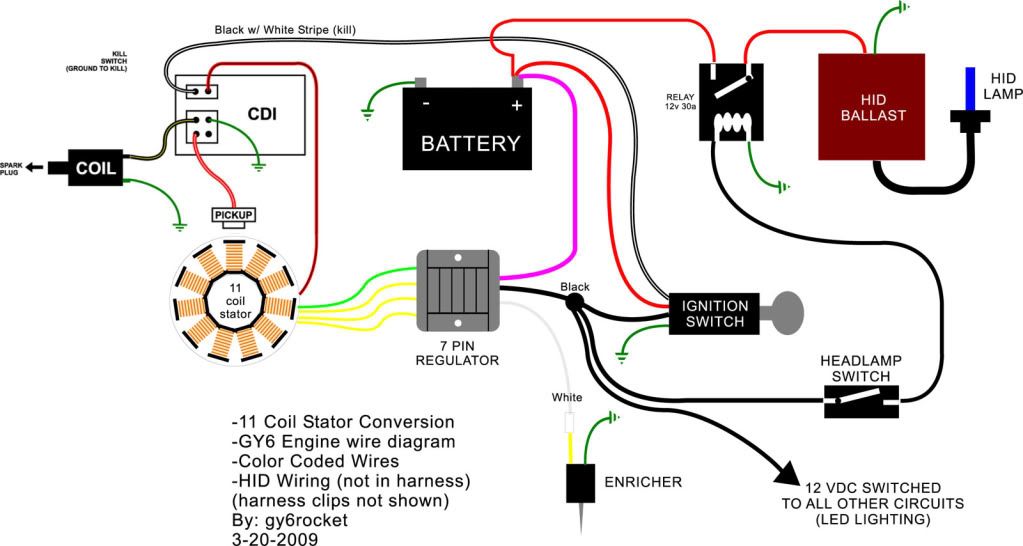 nine0003
Dismantle the beak of the scooter. Release the ignition lock from the protective cap.
Select among the wires those that fit it. The one that matches in color with one of the wires on the switch connector is the “jamming” wire. It remains to determine the purpose of the two wires - from the supply coil of the generator and from the electromagnetic sensor. Black with a red stripe, usually from the pickup, the other from the supply coil. To make sure that you are not mistaken, measure the resistance between them and the "ground": the resistance of the sensor is 2-3 times greater than that of the high-voltage winding of the generator. nine0003
The Suzuki Sepia wiring diagram is different from the one described: it has a switch and an ignition coil combined in one housing. Here you can only check the wires going to it, and the resistance of the generator winding, which is also a sensor.
It is more convenient and reliable to check the nodes if you begin to measure the resistance at the terminals of the wires going to the switch.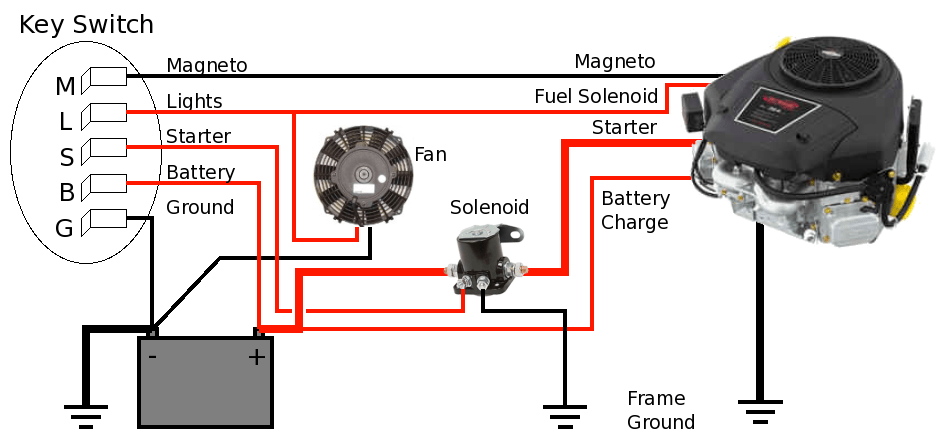 At the same time, check the wiring: it happens that the electrical circuit is broken in it. If the multimeter shows that the resistance of one of them is equal to infinity, then, "moving" along it, you will find a break. nine0003
"Move" start with the spark plug cap. Looking into it, make sure that the spring installed on the contact is not lost, and the cap itself is put on the candle with a noticeable effort (if the mount is unreliable, the engine will work intermittently). This part must be equipped with a rubber o-ring - otherwise, in wet weather, the spark will “run away” to ground.
It is easier to check the secondary winding at the same time as inspecting the high voltage wire and the spark plug cap. Remove the cap from the candle and check the resistance between the terminal that is put on the candle and the ground. We got about 7.5 ohms. Now disconnect the cap from the wire and determine the resistance between the wire conductor and the "ground" - it should be about 2. 5 kOhm. Therefore, the resistance of the noise suppression resistor is 5 kOhm. The wire resistance should be zero. nine0003
If you need to replace the high voltage wire, look only for the one with a metal strand. Automotive high-ohmic, having a carbon-filled wire drawing, is unsuitable here!
Now it's time for the ignition coil. Here you need a digital voltmeter - the resistance of the primary winding is insignificant, and the pointer device will not give accurate data. Check the resistance between the wire that goes to the coil and ground. There is a feature here. If you short-circuit the probes of a digital ohmmeter, its readings are usually greater than zero. Make a note of exactly how much and subtract that amount from the reading when checking the coil. The difference should be equal to 0.2-0.3 ohms - this is the resistance of the primary winding. Is the ignition coil okay? Go ahead. nine0003
The next step is the motor plug circuit. Connect a multimeter to the wire coming from the switch block to the ignition switch. Turn the ignition key: in the "off" position, the device should show zero, in the "start" position - "infinity".
It remains to check the condition of the electromagnetic sensor and the generator supply winding. Find a black wire with a red stripe in the switch connector, measure its resistance to ground with a multimeter: it should be about 500 ohms. This is a sensor. The resistance of the supply winding wire (in our case it is blue with a white stripe) is 150-200 ohms. If the value is noticeably smaller, it is possible that an internal short circuit has occurred in the supply coil. In this case, it will no longer give sufficient voltage for a spark. If you still have doubts about the performance of the part, contact the workshop: special equipment is required to dismantle and diagnose the generator. Try to disassemble the generator on your own - you can break it. nine0003
If all of the above elements of the ignition system are in order, and the "mass" wires are securely connected to the "ground", but there is still no spark, then the switch is faulty. It is impossible to check it in a garage - you will have to contact a technical service or, in order not to fool yourself, buy a new switch. When you look for the cause of the “death” of the replaced one, do not listen to those who say that the accident occurred due to the fact that you were driving without a battery. This is nonsense! The power supply system, which includes the battery and ignition, is completely independent on scooters. nine0003
And now about the easiest way to destroy electrical equipment. Sooner or later, something needs to be welded on an “older” scooter. Remember, if you work with electric welding, even if you just need to “grab” something or “put an end to it”, be sure to disconnect the switch and voltage regulator - otherwise you will kill them. During welding, secure the "ground" of the welding machine as close to the welding point as possible. Please note that the power units of most scooters are attached to the frame through silent blocks - they do not pass current.