Many tyres are scrapped due to bead damage that is often unnecessary and/ or avoidable. So, how can a bead injury be avoided in the first place? What options are there for repair? Is the process different for bias and radial tyres?
This article answers your questions and looks at how Monaflex bead repair systems can help.
Cross section of a tyre beadThe bead area of a tyre can be subject to damage sustained by:
Key steps: optimise and monitor inflation and double check the rim size
Key steps: rigorous cleaning, inspection and maintenance protocols
Key steps: optimising and monitoring tyre inflation
Key steps: ensure load capacities are never breached
Key steps: following tyre manufacturing guidelines for handling tyres, staff training and use of appropriate equipment
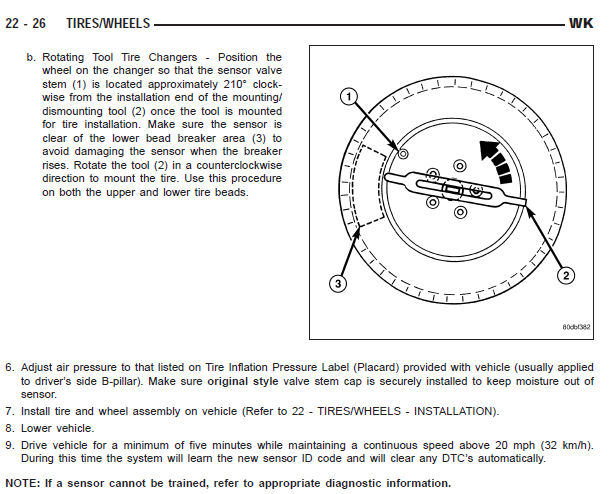
Key steps: lubricate thoroughly and double check inflation guidelines
There are key differences between the construction of radial and bias ply tyres and these differences determine the most appropriate repair method.
A radial tire has cords which run straight across to each bead, perpendicular to the tread face. Furthermore, there are additional plies laid at an angle within the tread face of the tyre only, so a radial tire might only have two layers within the sidewall but five or more in the tread face. Radial tires also usually have steel cords. The construction of a radial tyre is designed to be tough on the tread face but is more vulnerable to impact breaks in the sidewall due to greater flexibility.
The individual cords which make up each ply or layer within the carcass of a bias tyre run at an angle across the body from one bead to another. The angle varies, between 30° and 38° relative to the face of the tyre. Additional plies run at opposing angles, or in bias, hence the term bias ply. The cords that make up the plies in a bias-ply tyre are usually made of nylon, rayon, polyester, or other non-metallic materials. There are typically multiple plies within the carcass of a bias ply tyre, but the number of plies in the tread face is usually the same as the number of plies in the sidewall. The number of plies will have an impact on the load-carrying capacity of the tyre as well as its resistance to impact breaks.
Only damage to the bead rubber which exposes the bead bundle or body cords can be repaired. Injuries generally caused by incorrect handling, mounting or dismounting which impede sealing of the tyre or maintaining recommended inflation pressures.
If any part of the bead bundle, body cords or structural components of the tyre are damaged no attempt should be made to repair the tyre, it should be scrapped.
For repairable bead damage of all types, Monaflex offers a solution for use in both Truck and mid range/ XL OTR tyres.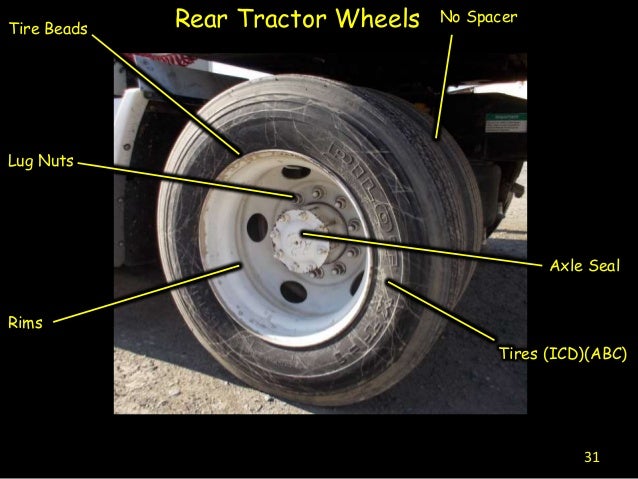
The quick to assemble system uses a single heat pad wrapped around the area to provide uniform temperature whilst the flexible, inflatable airbags ensure perfect conformity to the bead.
Take a look at our systems:
MBRS – mid range OTR bead system for 18.00R25 to 45/65R45
XL BRS – XL OTR bead system for 40.00R57 and 59/85R63
BRS – truck bead system for 8.25 to 12.00R24
Monaflex OTR and Truck bead repair systems have traditionally been used for radial tyres only but can also be used for repairs to the bead of Bias tyres.
By filling the repair using a chemical cure A & B compound, the Monaflex system can be used to exert pressure on the repair and ensure the strongest possible cure. If you’d like to learn more about this methodology, please just get in touch.
The bead area of any tyre is made up of a bead bundle, a bead apex filler and a bead chafer. Each has a separate function, yet each piece must rely on the other to function the way tyre design engineers intended. The main function of bead wire is to hold the tyre on the rim and to resist the action of the inflated pressure. Bead wire is the crucial link through which the vehicle load is transferred from rim to the tyre.
The bead is composed of:
Cross section of a tyreTypically, a bead bundle comprises of numerous large monofilament steel cords. The cord is coated with rubber and then wound into a loop. The loop size is based on the wheel diameter. The resulting bundle is then wrapped with a ribbon of rubber-coated ribbon material. The cords within the bead help the tyre retain its shape and maintain the tyre’s seal as it is subject to distortion and vibration.
At the apex bead filler, a rubber compound, is incorporated within the bead configuration and extends into the sidewall area. The rubber compound used on the outside bead area is usually hard, and durable so as to withstand the rigours of mounting the tyre to the wheel and cut resistance when in service.
Another function of the bead apex filler is to create a smooth contour for the body plies around the bead wire in the lower sidewall area.
The remaining component in the bead area is the bead chafer, or chafer strip. Its function is to protect the bead area from rim chafing, mounting/dismounting damage and to prevent the tyre from rotating on the rim. Chafer strips are made of a hard, durable compound rugged enough to withstand the forces working against it.
Working with OTR tyres for earth-moving machinery is potentially dangerous due to their large size and weight, magnitude of air or gas pressures, and the presence of combustible materials. Uncontrolled release of stored energy has the potential to create serious, even fatal, consequences.
A safety assessment used to identify health and safety hazards to mitigate exposure to hazards and health risks should be carried out prior to any work commencing. For all new or unfamiliar tasks, every employees involved should first complete a Job Safety Analysis. A JSA should be incorporated into an organisation’s Risk Assessment Management system.
PPE should be worn at all times whilst inspecting or working with any type of tyre.
All tyres should be restrained with appropriate devices to ensure they do not fall over during inspection or while repair processes are being carried out.
Any advice given by MVS Ltd. (Monaflex) does not replace instructions supplied by the manufacturer of repair materials, tyres, tools and any other component parts or items in use. It does not replace guidelines, recommendations, usage regulations or any type of requirement stipulated at a company, legislative or any level.
MVS Ltd. accepts no liability for any consequential losses or damage of any kind arising directly or indirectly from the use of its products or services. End users are advised to carry adequate insurance cover in this respect.
A slow tire leak is more than just a nuisance. A leak can lead to low tire pressure. Not to mention, prolonged running on an underinflated tire can lead to more extensive tire damage or even cause a dangerous blowout.
If you’re experiencing a slow leak, here are some things to look for:A tire puncture: It is a common misconception that a puncture will cause the tire to immediately go flat. However, in many cases the object that caused the puncture remains lodged in the tire and prevents the air from leaking out quickly. As with all tire leaks, it is important not to ignore a puncture. Eventually the object will either wear down and/or work its way out of the tire. For more on this read our article How to Repair a Tire with a Safe, Permanent Fix.
Wheel damage: Another common cause for slow tire leaks is damage to the area where the tire bead meets the rim.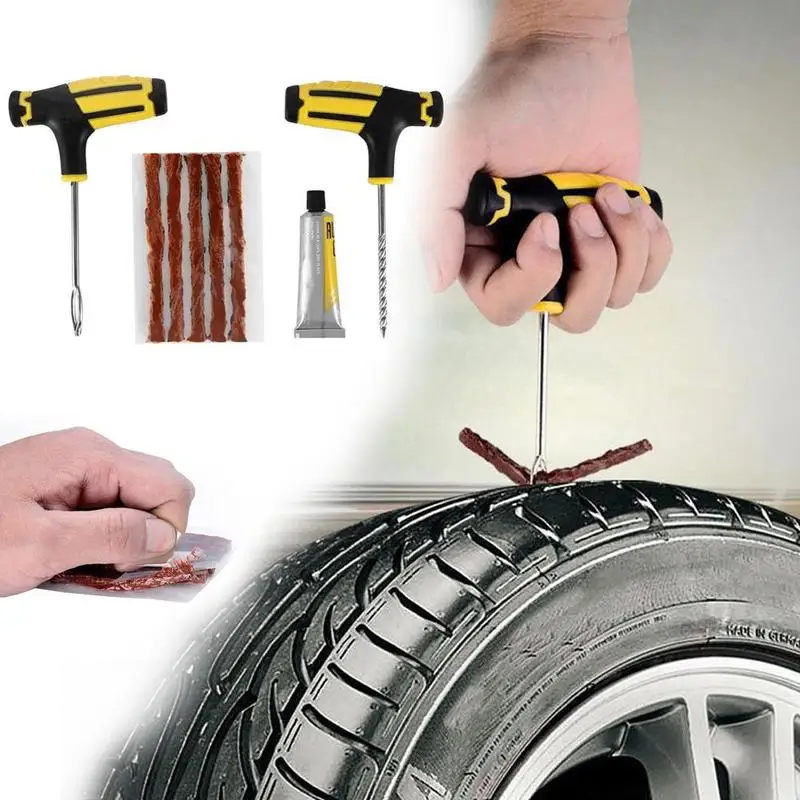 This type of damage is typically cause by the driver hitting the curb, taking a speed bump at high speeds OR those dreaded potholes! The impact deforms the wheel’s metal surface which may cause the tire to pull away from the mounting surface of the wheel.
Valve stem damage: The third most common cause for slow tire leaks is worn out or damaged valve stems. Time, use and exposure to elements can cause your valve stems to wear out and cause leaks.
Diagnosing your tire leak:
If your vehicle is equipped with TPMS, you will know right away if you have a leak. If the sensor light on your dashboard goes off, you inflate all the tires back to proper pressure and the light goes back on a few days later – you likely have a leak. If your vehicle does not have TPMS, its important to check your tire pressure regularly.
Once you’ve identified that you have a leak, use TECH Chek to locate the source of your leak. Simply spray the product all around the tire. Where the surface of the tire begins to bubble is likely the source of your leak.
It’s important to have your tire diagnosed by a professionally trained tire shop or mobile tire repair service as soon as possible. In the case of a puncture, you may want to use a tire repair kit to keep your tire properly inflated until you can have it serviced. The leak should then be permanently fixed using a proper tire repair consisting of a cured rubber stem and repair unit.
If the leak is caused by a damaged valve, a trained tire technician can typically replace the valve at a minimal cost. In some cases, however, the tire may need replaced.
If the leak is caused by a damaged wheel, a tire technician may be able to reseat and seal the tire using a bead sealer. However, if the damage to the wheel is significant, unfortunately that means you may need to replace the wheel itself.
To read more about the types of damage that can and cannot be repaired, click here!
Contents:
A flat tire on a car is always a nuisance, especially if the pressure loss caught the driver not in the garage, but on an empty highway. And it's not always a puncture, because the bleeding of air can occur along the disk. Why the wheel is lowering along the rim and what to do about it, we will analyze in the article.
This problem is quite common with tubeless tires, where the rubber adheres to the disc due to internal pressure. At the junction of the disk and tire, the seal is sometimes broken and air is bled, which ultimately leads to a complete loss of pressure. In chamber tires, the situation is more unambiguous: if the wheel is flat, then look for a puncture.
Deformation is the main reason. Disc geometry is an extremely important thing for full-fledged work, sometimes even a dent in an insignificant place can be fatal. The car drove into the pit - the disk bent, the tightness of the cord was broken and all the air came out. Low temperatures outside the car, which causes the rubber to harden, is a common cause, especially if tightened with a tire change. Also, due to poor maintenance, improper storage of the prefabricated kit, or constant driving on roads sprinkled with reagents, the disc begins to rust, as a result of which corrosion eats away the metal, forming micro-holes through which air will be gradually etched.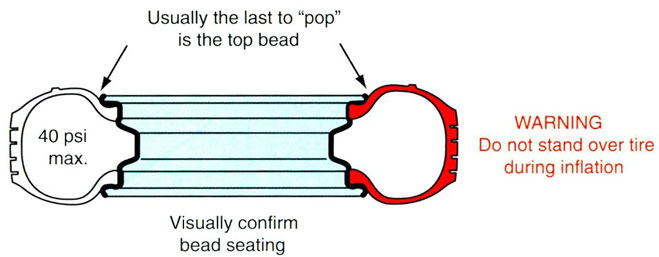 Blowing off the wheel can also occur through a faulty nipple.
In the end, the reason that the wheel is going down is the most banal - the rubber is already old and deformed over time, which means it is physically unable to provide the desired density at the point of contact. There is nothing to prevaricate here: the tire urgently needs to be replaced.
It would seem that since such a disaster does not happen with chamber tires, isn’t it better to give preference to them? Maybe in this sense this is true, but in fact, tubeless has more than one advantage. Here they are:
They have no friction between the tube and rubber, which means that the tire heats up less during long rides.
It is lighter and more reliable, since the chamber version can burst at high speed.
It balances better and holds pressure longer after a puncture.
A hole in the tread may not interfere with the ride at all - a stuck nail will simply not allow air to escape. With a chamber tire, this is impossible, it will be blown away pretty quickly.
Damage to the tread can be urgently repaired with a repair harness. This is quite enough to get to the nearest tire center and change tires.
First, make sure that you do not have a puncture in the wheel or that the cause of the trouble is not in the nipple. It is elementary to notice a protruding nail, but it is not always necessary to pull it out immediately and immediately. As we wrote above, a foreign object can simply get stuck in the tread and the air will have nowhere to go. An open puncture is repaired with a tourniquet.
The valve must be smeared with soapy water or simply slobbered - if there are no bubbles anywhere, then it has nothing to do with it. A defective nipple will have to be replaced with a new one.
If the valve is in order, fully inflate the tire and smear the edges of the cord with soapy water. You can do this with a brush or use a sprayer. Air bubbles will tell you that the source of the trouble is in the detachment of the cord from the disk surface, i.e. in violation of the tightness of the tire seat. Metal edges should also be carefully examined - any cracks and welding defects can be the cause of a pressure drop.
To eliminate the descent from under the rim, you can do this:
We poison all the air and remove the wheel from the car.
It is best to disassemble it, so it will be much more reliable to fix the problem. In order not to do the balancing again after the procedure, it’s a good idea to mark the position of the nipple with chalk first.
The disk edges will have to be properly sanded with fine sandpaper in places of rust damage and covered with a new layer of paint.
After the paintwork has dried, we put the tire back on and spread the rubber on the places where the cord touches the disk with a special sealant or mastic. Or you can use the soap solution again, but this time cook it much thicker so that it resembles glue in viscosity.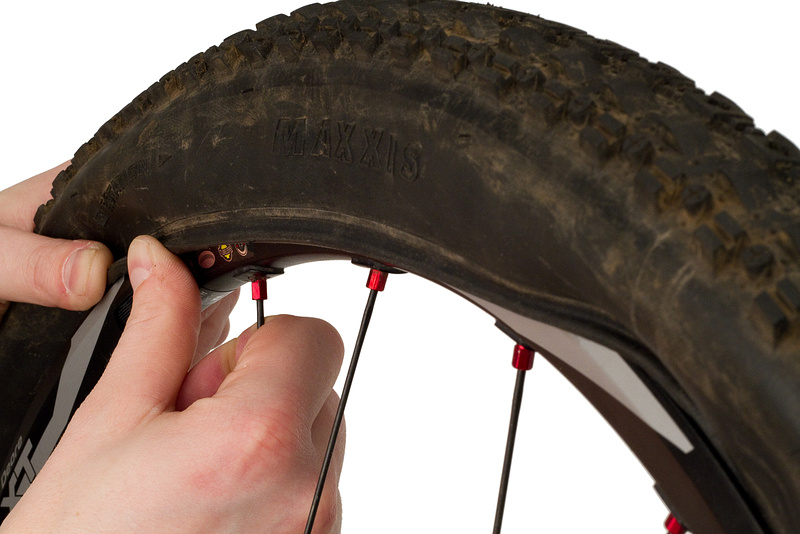 And with the help of a simple brush, we go around the entire circumference of the cord on both sides of the wheel.
We inflate the tire with a compressor, pressing the cord against the disk.
So we will eliminate the damage and provide a tighter fit on the seat. The sealing compound must penetrate all micropores and prevent new bleeding of air.
If there is absolutely no time to remove the wheel, and trouble overtook you on the road, it is enough to bend the edge of the cord and also smear the rubber with sealant or soap. This is quite enough to reach the garage or car service.
The described methods are suitable if there was no serious deformation and there are no cracks in places near the mounting holes or there is no damage to the tire cord. In the worst case, you can’t do without rolling a disk in a tire fitting or replacing it. If you have an alloy wheel, then you can fix it, but this is an extremely expensive business, comparable to buying a new one. However, even when repairing at a tire center, rolling a casting does not always help, and it may soon crack. It’s better not to even think about repairing the wheels yourself. A mistake can be costly. It is often much cheaper to buy one than to repair it. The assortment of the BlackTyres online store includes inexpensive models from Russian and foreign brands. Browse the catalog and choose what you like. If the matter is not only in the disk, but also the rubber fails, spending money on repairing both of them is a waste of time. Now wheel assemblies are extremely popular. One such set will cost you 10% cheaper than a collapsible version. In addition, due to it, you can significantly save on the cost of tire fitting, since mounting and balancing of the complete wheels is not required.
Most often, we ourselves are to blame for the fact that tires become unusable. But this can be avoided.
You have never seen such tires: even the police were surprised
During use, tires can suffer a variety of damages, most of which are the fault of the driver. As a result, rubber is wasted, and since the law prohibits the use of different tire models on the same axle, you have to spend money on replacing the second tire.
The most common damage is puncture . This is the most harmless type of damage, but only if you notice it in time and repair it right away. It is absolutely impossible to drive on a flat tire, even a couple of meters! The damage caused by running on a flat tire or low pressure is catastrophic. This causes the sidewalls to deform more than they should, which is why the tire overheats, delaminates, and the carcass becomes unusable due to broken cords. As a result, the tire will have to be thrown out. In addition, the edge of the rim can also be damaged.
There are two types of punctures: with and without cord damage. To determine this, it is necessary to remove what pierced it. If the edges of the puncture tightly converge, then the cord is not damaged and it will be possible to repair the tire without removing it from the disk. Otherwise, if the edges do not converge, you will have to disassemble the wheel and make repairs to strengthen the frame from the inside. Alternatively, in the field and in the absence of a spare wheel, such a puncture can be repaired without removing the tire from the disk, after which you can carefully drive to a tire fitting or garage and make a full repair.
Is it possible to inflate a wheel without a compressor - the experiment "Behind the wheel"
When repairing, the puncture site must be cleaned and marked. Further, it all depends on what kind of repair kit you have - as a rule, instructions are attached to them. There are sealants that are poured into the tire through the nipple, after which the wheel turns with the puncture down and the substance seals the hole. Repair with a tourniquet or insert is somewhat more complicated, but also more durable: the edges of the hole are polished with a special tool, after which the tourniquet treated with a special compound must be inserted into the tire through a puncture with a special awl, pulled out (not completely) out and cut flush with the surface.
If the cord is damaged by a puncture, the tire must be removed from the rim in order to install a reinforced patch with additional cord on its inner surface. One of the sides of such patches has an adhesive layer that promotes cold vulcanization. After such a repair, wheel balancing will be required. To seal punctures from the inside, patches in the form of a mushroom are also used, with a leg that goes into the puncture. Such patches are also covered with a special adhesive composition for cold vulcanization.
Cuts or holes , unlike punctures, are not repairable, as they violate the integrity of the frame, which can no longer be strengthened. In addition, breakdowns are always sudden and occur on the go: the tire abruptly loses pressure and before the car comes to a complete stop it has time to make several turns "on the rims", which breaks the cord and destroys the layers. It is not recommended to use such a weakened tire, even if it was possible to repair and strengthen the rupture or cut, in the future.
8 tire storage rules - do you follow everything?
Tires may develop cracks due to improper storage . The danger of such damage is that moisture enters the cord through cracks, which renders the frame unusable. In addition, air can escape through cracks. Unfortunately, cracks are not repairable, and tires with them will not last long: sooner or later they will deform, become covered with swellings due to rusted and torn cord or because of driving with pressure below the recommended one.
Blisters or bulges can appear on a tire for a variety of reasons - it always happens due to a broken cord or delamination in the carcass. In the first case, an obstacle was hit and the impact broke the cord or the cord was cut through with a sharp object. In the second case, there is no damage on or near the hernia, which means that it appeared either due to a factory defect, or due to frequent driving with pressure below the recommended one.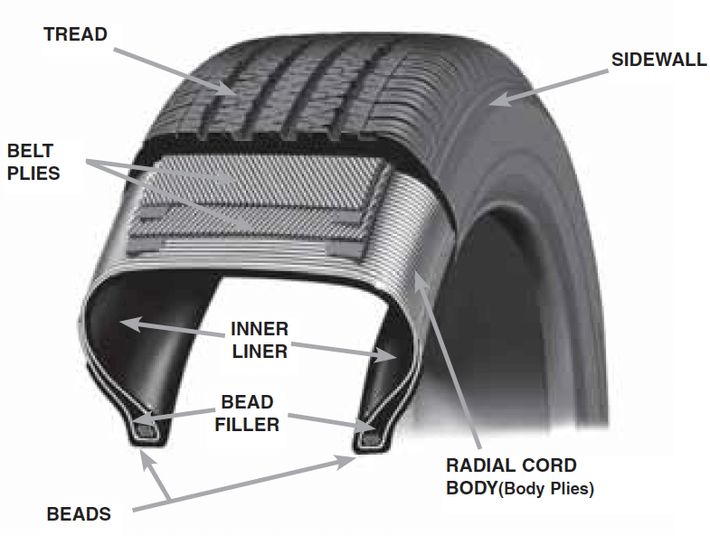 The danger of hernias is that they can explode at any time and provoke a skid, which will lead to an accident. If there is nothing to replace a tire with a hernia, then it is better to rearrange it to the rear axle and drive very carefully. Like fissures, a hernia cannot be repaired. Sometimes small blisters resulting from impacts or cuts are reinforced with reinforced patches, but there is no guarantee that the tire will not explode. Therefore, tires with hernias are recommended to be replaced immediately.
Tire blackening - 6 ways to polish your tires. Inexpensive!
Tire sidewalls can be damaged by rubbing against curbstones or the asphalt edge when driving onto the side of the road. If you are prone to such a driving style, then it is recommended to inspect the inner and outer sidewalls from time to time and, if abrasion is found, swap the wheels in order to prevent the cord from being exposed - the rubber thickness on the sidewalls is small (1. 5-3 mm), and it can be rubbed to the frame very quickly.
Often the cause of tire damage can be poor-quality tire fitting , during which the bead ring was damaged. In this case, the tire loses its geometry and “sits” crookedly on the disk - it writes “eights” during rotation, and lateral vibration appears during the ride. It is impossible to repair such a tire - you need to replace it with a serviceable one as soon as possible, until it damages the suspension: traction, hubs and bearings.
You can find out whether you use tires correctly and what invisible damage they have received by the characteristic wear of the tread, the varieties of which are collected in the table for convenience:
Shoulder wear on both sides
Driving with less than recommended tire pressure.
Inflate the tires to the pressure recommended by the car manufacturer (a plate with recommendations is attached in the driver's door opening) and find the cause of the fall: puncture, cracks, hernia, nipple, rust on the rim of the disc in the place where the tire fits, etc.