Your ATV is a beast of the outdoors, seldom spending much of its life inside. The plastic body of ATVs becomes faded from the sun’s rays, and thrashing around in dirt, mud, snow, and water doesn’t help. Plastics get scuffed by boots or passing debris, and cracks can appear in the body or windshield.
There are a few options for restoring your ATV’s faded plastic so it looks like a showroom model again. These options vary in cost and difficulty. In this guide, we’ll look at all the common ways to restore the luster of your ATV’s plastic body.
Image from www.can-amtalk.com
Linseed oil can restore faded plastic, but it takes ages to dry. You want boiled linseed oil, instead. Note—this doesn’t mean you boil the linseed oil yourself! It means that the linseed oil has been pre-treated to dry faster.
To speed things along, choose boiled linseed oil and mix it with paint thinner. We recommend a 40/60 ratio of linseed oil and paint thinner.
Start by cleaning your ATV thoroughly. For best results, you’ll want to remove the rack and any other parts of the machine that are covering the plastics.
Apply the mixture to your plastics using a dry cloth. You’ll notice the linseed oil will remove the oxidization that’s causing fading. After you’ve applied the mixture to all the plastic, allow it a full day to dry.
If you keep your ATV covered and don’t use it every day, this fix will last for a few months. If you constantly use your ATV outdoors, this treatment may be required to be performed again in 4-6 weeks.
Off-road are the core piece of riding gear for ATV & UTV riders
Find out the best look for you
You’ll need good access to your ATV’s plastics, so remove the skid plates and racks. If they are severely damaged in any way, you may want to replace them completely. To complement your better-looking new plastics, you may want to strip or sand your racks and paint them with a spray-on bedliner.
Next up, give the ATV a good clean overall. A mixture of dishwashing liquid and water will remove all the grease and oils from the surfaces.
Now it’s time to prepare the plastic for waxing. This means sanding the plastic with fine sandpaper, working your way up from the lowest number of sandpaper up to the highest. You can use an oscillating tool to speed up the process. Make sure you’re wearing safe gloves, and finish up by sanding with steel wool.
Apply a vinyl floor liquid wax to the plastic using a car wax applicator. Using thin coats, you can work on one section of the plastic while another section dries. You will need to apply several coats, buffing out the plastic after each application.
After the final coat is complete and bone dry, finish up with an automotive wax for an extra layer of sheen.
This process is more involved than the linseed oil and paint thinner fix, but it typically has a longer-lasting result.
Image from www. atvhonda.com
Instead of a linseed oil and paint thinner mixture or vinyl liquid wax, you can use a dedicated plastic restorer product. While most of these products work very well, they are basically just variations of our above options with slightly different chemical compositions.
Image from Lea Arnold YouTube channel
Using a heat gun does work to make plastics look new, but it has downsides.
To perform the procedure, you use a heat gun set to a low setting and blow it from a few inches above the problem plastic. Voila—the plastic looks as good as new.
But it’s not really an option that we recommend. It works by melting the top layer of the plastic, which in turn makes the plastic more brittle. Every time you perform a heat gun restoration, your plastics lose some strength.
Where we would suggest using a heat gun is to work out small cracks in the plastic. Severe cracks necessitate replacement, though.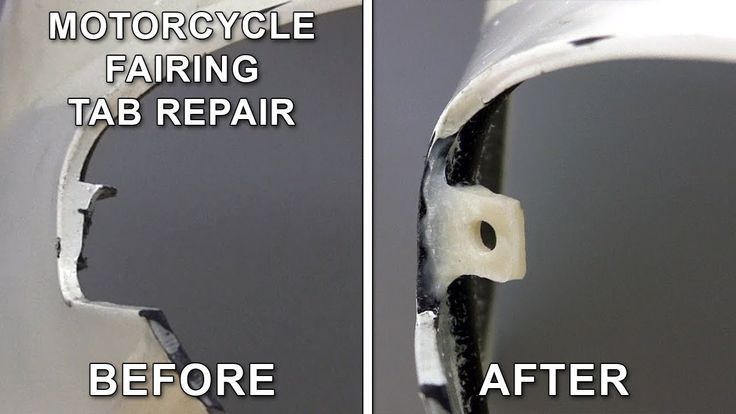
These are the top ways to restore your ATV plastic. Another option is to cover your faded plastic with a new lick of paint from a spray paint that’s specifically suitable for plastic. Whatever option you choose, with just a little bit of elbow grease you can have your ATV back in showroom condition.
SPORTSMAN Black
36 EUR
32.40 EUR
ENDURO LIGHT Graphite
the most durable
458 EUR
ENDURO Camogrey
the most durable
657 EUR
ENDURO Graphite
the most durable
279 EUR
ENDURO Graphite
the most durable
657 EUR
AQUAMASTER-ZIP LIGHT Camogrey
with central zipper
598 EUR
430.40 EUR
ENDURO LIGHT Camogrey
the most durable
458 EUR
AQUAMASTER LIGHT Red
reliability & comfort
438 EUR
386. 20 EUR
NEODRY Black
17 EUR
11.90 EUR
ENDURO Camogrey
the most durable
279 EUR
AQUAMASTER Blue
reliability & comfort
647 EUR
-20%
HIT
AQUAMASTER Red
reliability & comfort
259 EUR
207.20 EUR
-40%
HIT
AQUAMASTER Orange
reliability & comfort
259 EUR
155.40 EUR
AQUAMASTER Red
reliability & comfort
677 EUR
BELT
9 EUR
ENDURO BF Camogrey
bootfoot waders
528 EUR
ALL SEASON Black
62 EUR
ENDURO BF Camogrey
bootfoot waders
329 EUR
MUDWAY Graphite
179 EUR
MUDWAY Camogrey
179 EUR
Explore all
Cracks and scratches on your ATV plastics are bound to happen sooner or later. You could maintain and clean your ATV after every use, and still, you’ll end up with faded or scratched up plastic eventually.
To some people, scuffed up plastic on their quad is not a big deal. I mean, it’s not like it affects performance, handling, or anything important anyways. But there’s just something about the way it makes the machine look that I don’t like. So I went ahead and found the best ways to fix some of the most common ATV plastic damage you’ll encounter.
It’s a good idea to know why plastic fades to help you understand why the methods here work for restoring faded plastic. Basically, plastic starts to look faded because the oils in the plastic evaporate over time. The evaporation of oils in the plastic is sped up when the plastic sits in the sun for long periods of time.
Plastic is made from refined oil, and as the oil in the top layer of the plastic evaporates, the plastic is weakened and looks faded. Your plastics become more prone to cracks too the more you let it fade and weaken.
You could simply sand down the top layer of plastic, until you get to the part where the oil hasn’t evaporated yet. Then buff it out until it looks nice and new. But with this approach, you’re still weakening the plastic because you are actually removing layers of the plastic each time you do this.
Another method I’ve tried, is using a heat gun to help bring the oil in the plastic to the surface. This does work pretty good and makes the plastic look nice. But again, you’re not actually restoring oil to the plastic so over time, the plastic is getting weaker and weaker.
My preferred method, and what I recommend you try first. Is to get this Premium Plastic Restorer From Car Guys found here on Amazon. This way you’re not removing plastic, oil, or anything else from your ATV parts. In fact, this stuff is actually adding additives to the plastic to help get them to the condition they were in when they were brand new. This particular plastic restorer also has some nice UV protection to help keep the plastic from drying out and fading in the future.
Keep in mind, this is not to repair scratches or anything like that. It is specifically to restore dry faded plastic. There are some other brands out there that will do the same thing, I’ve just had the most luck with this one. To be honest, this is way easier than sanding or using a heat gun anyway, and I don’t have to worry about the structural integrity of the plastic being compromised.
There are two types of scratches you’ll encounter most often, light scratches or deep scratches. Light scratches are the ones caused by branches or bushes hitting the plastics and leaving little visible marks. A lot of people don’t even bother with these types of scratches, and just chalk it up to wear and tear. But for someone spending a lot of money on a quad or ATV, I can understand wanting to remove even the littlest of scratches.
The best way I’ve found for removing light scratches is to go with some 1500 Grit Wet Sandpaper. Just use the sand paper over the areas with scratches and buff it out when you’re done. You could finish up with a coat of the plastic restorer I talked about above to make it look brand new.
Using wet sand paper could even work for medium to deep scratches, but I don’t like removing that much plastic from my ATV parts. For the deeper scratches you end up having to start with 400 grit or worse, and work your way up to 1500 grit to get a smooth surface. For me, it’s not worth all the time and energy sanding to just end up compromising the integrity of the plastics. Don’t forget, the more plastic you sand away, the easier they will crack.
So for deeper scratches I’ll use a plastic bonder/filler. My go-to is this JB Weld Plastic Bonder Gap Filler found here on Amazon. I’ll use this to actually just fill the scratches. It’s pretty easy to use, you push out some of the goop from each tube. It’s a 1 to 1 ratio and comes out at the same time. Mix it together and fill the deep scratches with it. The stuff sets in about 15 – 20 mins and you can sand it down after a half hour.
If you use a putty knife to clean off the excess after filling the scratch, it makes the sanding after much easier. This does set in a black color, so if you don’t want to have to paint afterwards, don’t use this method. I don’t paint after, and I don’t mind having the black filler here and there on the plastics. It’s better than having deep gouges in your plastics just asking to be cracked.
If you haven’t taken care of your ATV plastics, they could dry out over time and eventually crack and break. Or the more likely option, you hit something didn’t you? That’s ok, cracked plastics can usually be fixed without too much trouble. If you don’t want to spend the money buying new plastic parts, you’ll need to do it yourself.
For small little cracks you could try using the JB Weld I talked about above, but that only really works for cracks less than a few inches. But, you probably really messed your toy up bad, and for that, you’re gonna need something better.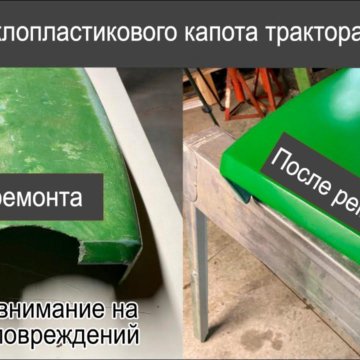
I recommend using what’s called a hot staple gun. Like this Astro 7600 Hot Staple Gun Kit found here on Amazon. This thing is amazing and I’ve used it on more than just my ATV. It works by heating up these specially designed staples it comes with. The staples get set into the plastic making a nice strong bond, but still allowing the plastic to be flexible.
You just line up the pieces you want joined, and use the staple gun to staple them together. The staple is heated to it can sink into the plastic a bit, making a super strong bond. I always do the stapling on the underside of the plastic, that way you don’t see the staples. If you use this method, you will still see the crack on the upper side of the plastics. You can then use the JB Weld to fill in the crack, and then sand away any excess making a nice smooth surface.
Sometimes a piece of plastic from an ATV gets bent but doesn’t crack. That’s good, you don’t have to repair any cracked plastics now. But it can leave a discolored looking area on the plastic that doesn’t look right.
For fixes like this, I like to use a heat gun. It’s really kinda cool how well it works, you can watch the plastic change color as you hold the heat gun to it. Be careful though, too much heat can melt the plastics and there’s no coming back from that. Hold the heat gun a few inches away from the plastic and keep it moving side to side the whole time.
Any old heat gun will work for something like this. Heck, I’ve seen people use a propane torch with success. If you’re unsure what type of heat gun to use, check this Heat Gun from Amazon for starters.
That’s all there is to it. If you want to paint your ATV plastics a new color, check out this article: How To Prep And Paint ATV Plastics.
Sharing is caring!
We assume that we are not advisers to specialists, therefore, below we will give only the basics of repairs that will be useful to ordinary users of boats, boats and yachts.
Many have heard the word "osmosis" , but few people know what it is. Looking ahead, I will say that it is useless for non-specialists to fight it. To imagine the scale of the required work to get rid of osmosis, you need to know how much 1 sq.m. repair, for example, in the USA. This amount is 1500 dollars. Yes, that's exactly how much, just for 1 square meter. The sum reflects well the magnitude of the problem that osmosis can cause. Therefore, I will simply describe what osmosis is. This can be useful, for example, when buying a used case. nine0003
Osmosis appears as a swelling of the gelcoat , which may look like flakes of the gelcoat flaking off. This is due to the hydrolysis process in the laminate (fiberglass) under the gel coat.
No gel coat is completely impervious to water. Water penetrates under the gelcoat, interacting with the polymerized polyester resin (and its unbound particles). The hydrolysis process begins. The products released in this case are larger in volume than the incoming water. As a result, due to a simple conflict of volumes (less came under the gelcoat, more was released), destruction begins, first of all, of the gelcoat and, accordingly, of the laminate (although to a lesser extent). As already mentioned, it is impossible to deal with this process in simple ways. For those who do not feel like it, we will try to explain why. nine0003
Usually, at the sight of external signs of osmosis, the decision to combat it is made easily. Sand, remove the scales or open the bubbles, prime or paint, as an option - cover with a gelcoat (formed even before coating with a gelcoat, a special barrier layer is applied - a primer designed to prevent water from entering the laminate). In fact, this is only a struggle with external signs, and coating with paint or, even worse, with a barrier layer only exacerbates the problem. Because the hydrolysis process is not stopped. And since the hydrolysis products need to go somewhere, blisters will again appear on the surface of the case. The correct approach to repairing an osmosis-damaged hull is to remove the entire gelcoat and damaged laminate layer. Next, restore the plastic (by applying the required number of layers of plastic) and cover the body with a gelcoat. nine0003
Some experts say that when the hull is kept in a dry, warm place for more than 3 years (without operation on water), the hydrolysis process stops. The best result will be with the gelcoat removed beforehand (the gelcoat is removed not by sanding, but by cutting with a special machine).
It is better, of course, not to have such a case. But if you already have, but have no desire to turn your boat into a monument of gold, here are some tips on how to deal with osmosis or extend the life of a damaged hull. nine0003
Remove damaged areas of gelcoat in the fall, immediately after lifting the hull out of the water. Keep the body as long as possible in a dry, warm place (until spring). If part of the laminate has been removed, apply an appropriate layer of plastic (using polyester resin and glass mat), then apply a gel coat. The gelcoat is sanded in several stages, the last of which is the application of sandpaper with a grit of 800, then polished. If your hull has been badly damaged by osmosis, add 10 to 15 percent styrene to the gelcoat (more than the manufacturer's maximum recommended 5%). Styrene, when evaporated from the applied gelcoat, will leave behind micropores (larger in size than the micropores of the gelcoat applied during construction). As a result, you will extend the life of the plastic by creating the possibility of unhindered removal of hydrolysis products from the laminate (in any case, more free than before the repair). Those. when performing a cosmetic repair of a hull affected by osmosis, care must be taken that the hull "breathes" (oddly enough, many, on the contrary, try to caulk the osmosis tightly). nine0003
Now for the simpler things. Almost everyone knows that modern plastic cases are produced by gluing in molds in an open way. The production process is simplified like this. Gelcoat is applied to the mold, then polyester resin is applied, glass material (glass mat, glass roving) is laid, impregnated, then the next layer of glass mat is applied, etc. until the desired thickness is obtained. During the molding process, manufacturers lay glass mat (a web of chopped fibers about 50 mm long, randomly arranged) and woven roving (a canvas formed by a simple weaving of long solid glass strands) in a certain sequence. This is done so that the body receives the required rigidity in the right directions. I described this so that if a large repair is necessary, this will be taken into account. nine0003
Directly about the repair. Typically, the repairs required are patching up scratches, abrasions (often along the keel), small holes, holes, and restoring part of the hull after an attack on a concrete pier or something similar. About everything in order.
Scratches are treated by filling them with gelcoat (hereinafter, it is assumed that the repairer roughly imagines the process of handling the object of repair - that you need to take the skin, clean it, degrease it, etc. ). When applying the gelcoat, remember that the gelcoat does not harden immediately on its own. Before adding a catalyst to it, add a 5% solution of wax (purchased in the same place as the gelcoat). If the gelcoat is properly diluted and applied, the next day you will be able to sand and polish the surface. For small chips, abrasions, cut the damaged area (if restoration of the plastic thickness is required), cut out the patches from the glass mat and apply them to the damaged area, impregnating with polyester resin. Next, apply the gelcoat. nine0003
Holes are a little more difficult. If the thickness allows, cut the damaged area, removing a smaller thickness of plastic outward from the hole and a larger one inward. Restore the plastic with patches cut from glass mat (from the smallest size in the center of the hole to the largest size). Before gluing, make sure that the plastic in the place where you cut it is dry. If the thickness at the site of the hole is small, the hole borders on rigidity inside the case, or the condition of the old laminate is in doubt (soaked with water, oil, diesel fuel, crumbling, etc. ) - proceed as follows. Try to dry, degrease, cut off all the destroyed laminate both outside and inside the case. Cut the hole inside and out (stepping the plastic from the hole outward - usually cut outward from the hole to a size of 7-9plastic thicknesses). Apply the patch first on the inside, then on the outside. It happens that the place of the hole is not accessible from the inside of the case. Then (after external cutting) a small piece of plastic is inserted inside, cut to allow it to be inserted inside (a thin sheet of plastic itself can be obtained by molding it first on glass). It is better if you first coat this piece with polyester resin with some kind of filler (for example, with chalk, aluminum powder or even fine sawdust). Pulling this piece of plastic from the outside, wait for the resin to polymerize. Next, apply an external patch, which will now also adhere to the plastic inserted inside with good adhesion. nine0003
Large holes, as a rule, are repaired with the restoration of part of the hull. A part of the hull is restored either using internal embedded wooden parts, or leading, as described above, plastic plates inside the hull. Here you need to remember that by restoring part of the skin, you restore not only the tightness of the hull, but also the strength. Therefore, when cutting a hole, pay attention to how the layers of glass mat and roving alternate. It is advisable to keep this sequence. nine0003
There are also such damages to fiberglass buildings through which people go inside without bending over. It is better to entrust such repairs to specialists. But it also happens that there are simply no such specialists at the place of operation of the vessel. Then the repair can be done in two ways. The first method consists in making wooden frames inside the hull, possibly connected by longitudinal ties, and closing the hole with thin plywood (not protruding in depth beyond the previous fiberglass skin). Next, fiberglass is applied (with alternating glass mat and glass roving) until the required thickness is restored. The second method is to make a false hull from plywood (plywood sheets are attached from the outside along the edges of the hole with screws to plastic), then on this plywood from the inside (a separating layer of special wax is first applied to the plywood) several layers of plastic are glued. Then the plywood is removed, a plastic part is removed from the plywood, imitating part of the skin. This part is mechanically fixed in place of the hole and then the thickness of the plastic is restored. nine0003
Gelcoat is always the best solution after repairing holes, even though it is more difficult to work with than conventional paint (which also does not require sanding and polishing).
When purchasing repair materials, be sure to consult on their correct application. If you were not able to correctly explain how to dilute and apply polyester resin, gelcoat, what kind of building materials to use for repairs - do not buy them in this place at all. Not in order to show your displeasure to the sellers, but because it will be difficult for you to work with such materials. nine0003
If you have any questions about fiberglass repair, please email us. I hope we will be able to give you useful advice.
Fiberglass is a type of composite material. New generation materials, such as composite materials, enable engineers and architects to obtain almost any physical properties of the final product.
Fiberglass allows you to produce products of any complex shape, and is the best solution in areas such as industrial and residential construction, transport: automotive, railcar building, energy, shipbuilding, engineering, entertainment industry and much more. nine0003
Composite materials are very resistant to external influences, they are ideal for use where resistance to high temperatures, corrosion or heavy loads is needed.
GRP is a combination of glass fibers and a polymer binder. Glass fibers give strength to the composite, and the binder holds the fibers together, distributing loads throughout the structure, protecting it from environmental influences. nine0003
GRP is a composite material with engineered properties. Knowing the operating conditions of the finished fiberglass product, it is thus possible to select the components of the composite material (type of fiberglass-based reinforcing material, type of binder) in order to obtain a finished product with initially specified individual characteristics.
Fiberglass consists of two main components: binding and reinforcing materials - resin and fiberglass. nine0003
We specialize in the repair of fiberglass products, whatever their origin, it may be;
- autotuning
- designer items
- agricultural machinery
- jet skis
- ATVs
- all products made of fiberglass
nine0002 When repairing fiberglass, materials from leading companies in the field of composite materials are used.
We do not save on materials in order to earn a penny more. For , it is more important for us to get the result.
When operating a car in a body kit, as a result of various accidents, delamination, rupture, glass fibers and resins occur. Cracks appear (the so-called cobwebs), which are not so easily removed, neither with putty nor with soil, there is a technology for this. This is a rather long and painstaking process that requires a lot of experience and professionalism to achieve the final goal. nine0059 Also;
- missing tuning elements are restored.
- fastening points and various parts are reinforced in advance to prevent cracking and weakening of the structure.
Knowledge of the material, technology of its use, experience, allows you to embody any desires of a person in the field of fiberglass design!
Fiberglass is inferior to steel in terms of tensile strength, but 3. 5 times lighter and superior to steel in terms of specific strength. If you make equal-strength structures from steel and fiberglass, then fiberglass will be several times lighter. nine0059 Due to this, it acquires unique characteristics that ensure its use in a wide variety of industries: from household appliances and agriculture to aviation and space production.
For the manufacture of fiberglass products from composite materials, the contact molding method is used. This allows you to quickly rebuild the technological process for the manufacture of fiberglass and satisfy any wishes of customers in terms of design and construction. nine0003
The main features and benefits of fiberglass over traditional construction materials are:

All these positive qualities provide the following advantages in application: large overhaul intervals for structures, significantly lower costs for current maintenance and repair, reduction in product weight, increased operational reliability and durability of the structure or product, the ability to install and carry out routine maintenance and repair work without using special lifting mechanisms and equipment, lower costs for transporting structures and their elements to the installation site, and much more...
Aerodynamic body kits and tuning
For many, the external tuning of a car consists in decorative trim. Although in reality this is an excellent opportunity to transform your car beyond recognition, to give the car an individuality, to remake it to your own tastes.
Body kits
Installing an aerodynamic body kit - allows not only to give a stunning appearance to the car, but also to improve the technical data, which will increase the controllability of the car at higher speeds. nine0003
Body kits include elements such as radiator grilles, sills, bumpers and arches that are attached to the body, installation of turbines. With the correct installation of tuning and balancing, attachments allow you to stabilize the suspension along the axes.
Tuning the front bumper allows you to better press the car in the oncoming flow, but the rear - allows you to eliminate the occurrence of turbulence.
Radiator grilles - allow sufficient cooling of the brake mechanism and motor. nine0003
Installing body kits on the sills allows you to virtually eliminate the occurrence of lateral turbulence, as well as protect the sills from corrosion. If you install the air duct in the rear of the body, then they will cool the rear disc brakes.
Spoilers - they are installed on the roof or trunk of a car, thereby increasing aerodynamics and downforce. The rear spoiler helps prevent glass pollution, reduce glare.
But before you start car body kit, think - for what purpose do you need tuning? If the installation of tuning is carried out only on the basis of the desire to stand out, then you can use inexpensive material, but if to improve the running factors of a car, then it is better not to save on material.