Cracks and scratches on your ATV plastics are bound to happen sooner or later. You could maintain and clean your ATV after every use, and still, you’ll end up with faded or scratched up plastic eventually.
To some people, scuffed up plastic on their quad is not a big deal. I mean, it’s not like it affects performance, handling, or anything important anyways. But there’s just something about the way it makes the machine look that I don’t like. So I went ahead and found the best ways to fix some of the most common ATV plastic damage you’ll encounter.
It’s a good idea to know why plastic fades to help you understand why the methods here work for restoring faded plastic. Basically, plastic starts to look faded because the oils in the plastic evaporate over time. The evaporation of oils in the plastic is sped up when the plastic sits in the sun for long periods of time.
Plastic is made from refined oil, and as the oil in the top layer of the plastic evaporates, the plastic is weakened and looks faded. Your plastics become more prone to cracks too the more you let it fade and weaken.
You could simply sand down the top layer of plastic, until you get to the part where the oil hasn’t evaporated yet. Then buff it out until it looks nice and new. But with this approach, you’re still weakening the plastic because you are actually removing layers of the plastic each time you do this.
Another method I’ve tried, is using a heat gun to help bring the oil in the plastic to the surface. This does work pretty good and makes the plastic look nice. But again, you’re not actually restoring oil to the plastic so over time, the plastic is getting weaker and weaker.
My preferred method, and what I recommend you try first. Is to get this Premium Plastic Restorer From Car Guys found here on Amazon. This way you’re not removing plastic, oil, or anything else from your ATV parts. In fact, this stuff is actually adding additives to the plastic to help get them to the condition they were in when they were brand new. This particular plastic restorer also has some nice UV protection to help keep the plastic from drying out and fading in the future.
Keep in mind, this is not to repair scratches or anything like that. It is specifically to restore dry faded plastic. There are some other brands out there that will do the same thing, I’ve just had the most luck with this one. To be honest, this is way easier than sanding or using a heat gun anyway, and I don’t have to worry about the structural integrity of the plastic being compromised.
There are two types of scratches you’ll encounter most often, light scratches or deep scratches. Light scratches are the ones caused by branches or bushes hitting the plastics and leaving little visible marks. A lot of people don’t even bother with these types of scratches, and just chalk it up to wear and tear. But for someone spending a lot of money on a quad or ATV, I can understand wanting to remove even the littlest of scratches.
The best way I’ve found for removing light scratches is to go with some 1500 Grit Wet Sandpaper. Just use the sand paper over the areas with scratches and buff it out when you’re done. You could finish up with a coat of the plastic restorer I talked about above to make it look brand new.
Using wet sand paper could even work for medium to deep scratches, but I don’t like removing that much plastic from my ATV parts. For the deeper scratches you end up having to start with 400 grit or worse, and work your way up to 1500 grit to get a smooth surface. For me, it’s not worth all the time and energy sanding to just end up compromising the integrity of the plastics. Don’t forget, the more plastic you sand away, the easier they will crack.
So for deeper scratches I’ll use a plastic bonder/filler. My go-to is this JB Weld Plastic Bonder Gap Filler found here on Amazon. I’ll use this to actually just fill the scratches. It’s pretty easy to use, you push out some of the goop from each tube. It’s a 1 to 1 ratio and comes out at the same time. Mix it together and fill the deep scratches with it. The stuff sets in about 15 – 20 mins and you can sand it down after a half hour.
If you use a putty knife to clean off the excess after filling the scratch, it makes the sanding after much easier. This does set in a black color, so if you don’t want to have to paint afterwards, don’t use this method. I don’t paint after, and I don’t mind having the black filler here and there on the plastics. It’s better than having deep gouges in your plastics just asking to be cracked.
If you haven’t taken care of your ATV plastics, they could dry out over time and eventually crack and break. Or the more likely option, you hit something didn’t you? That’s ok, cracked plastics can usually be fixed without too much trouble. If you don’t want to spend the money buying new plastic parts, you’ll need to do it yourself.
For small little cracks you could try using the JB Weld I talked about above, but that only really works for cracks less than a few inches.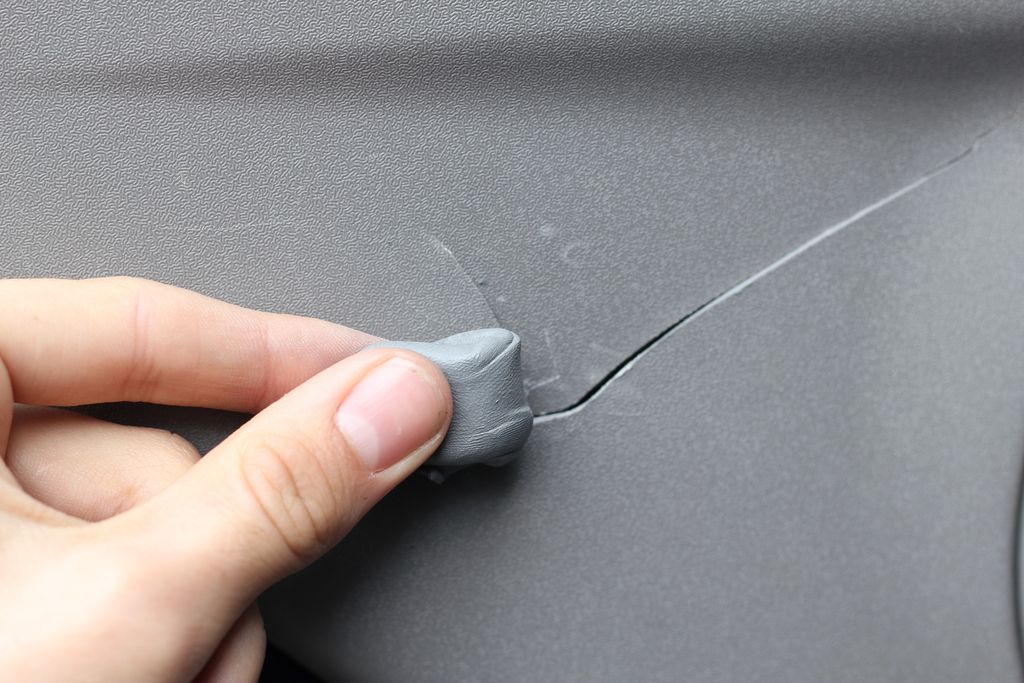 But, you probably really messed your toy up bad, and for that, you’re gonna need something better.
I recommend using what’s called a hot staple gun. Like this Astro 7600 Hot Staple Gun Kit found here on Amazon. This thing is amazing and I’ve used it on more than just my ATV. It works by heating up these specially designed staples it comes with. The staples get set into the plastic making a nice strong bond, but still allowing the plastic to be flexible.
You just line up the pieces you want joined, and use the staple gun to staple them together. The staple is heated to it can sink into the plastic a bit, making a super strong bond. I always do the stapling on the underside of the plastic, that way you don’t see the staples. If you use this method, you will still see the crack on the upper side of the plastics. You can then use the JB Weld to fill in the crack, and then sand away any excess making a nice smooth surface.
Sometimes a piece of plastic from an ATV gets bent but doesn’t crack. That’s good, you don’t have to repair any cracked plastics now. But it can leave a discolored looking area on the plastic that doesn’t look right.
For fixes like this, I like to use a heat gun. It’s really kinda cool how well it works, you can watch the plastic change color as you hold the heat gun to it. Be careful though, too much heat can melt the plastics and there’s no coming back from that. Hold the heat gun a few inches away from the plastic and keep it moving side to side the whole time.
Any old heat gun will work for something like this. Heck, I’ve seen people use a propane torch with success. If you’re unsure what type of heat gun to use, check this Heat Gun from Amazon for starters.
That’s all there is to it. If you want to paint your ATV plastics a new color, check out this article: How To Prep And Paint ATV Plastics.
Sharing is caring!
Your ATV is a beast of the outdoors, seldom spending much of its life inside.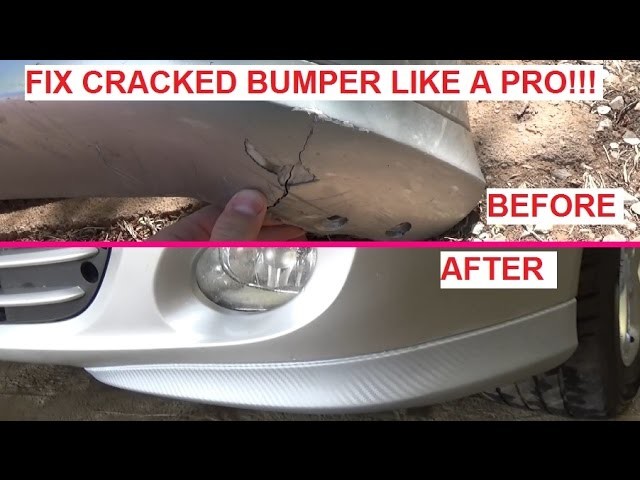 The plastic body of ATVs becomes faded from the sun’s rays, and thrashing around in dirt, mud, snow, and water doesn’t help. Plastics get scuffed by boots or passing debris, and cracks can appear in the body or windshield.
There are a few options for restoring your ATV’s faded plastic so it looks like a showroom model again. These options vary in cost and difficulty. In this guide, we’ll look at all the common ways to restore the luster of your ATV’s plastic body.
Image from www.can-amtalk.com
Linseed oil can restore faded plastic, but it takes ages to dry. You want boiled linseed oil, instead. Note—this doesn’t mean you boil the linseed oil yourself! It means that the linseed oil has been pre-treated to dry faster.
To speed things along, choose boiled linseed oil and mix it with paint thinner. We recommend a 40/60 ratio of linseed oil and paint thinner.
Start by cleaning your ATV thoroughly. For best results, you’ll want to remove the rack and any other parts of the machine that are covering the plastics.
Apply the mixture to your plastics using a dry cloth. You’ll notice the linseed oil will remove the oxidization that’s causing fading. After you’ve applied the mixture to all the plastic, allow it a full day to dry.
If you keep your ATV covered and don’t use it every day, this fix will last for a few months. If you constantly use your ATV outdoors, this treatment may be required to be performed again in 4-6 weeks.
Riding hard? Want to refresh your off-road look? Tune yourself from head to toe with a new top-of-the-line set of heavy-duty waders, wading boots and jacket.
You’ll need good access to your ATV’s plastics, so remove the skid plates and racks. If they are severely damaged in any way, you may want to replace them completely. To complement your better-looking new plastics, you may want to strip or sand your racks and paint them with a spray-on bedliner.
Next up, give the ATV a good clean overall. A mixture of dishwashing liquid and water will remove all the grease and oils from the surfaces.
Now it’s time to prepare the plastic for waxing. This means sanding the plastic with fine sandpaper, working your way up from the lowest number of sandpaper up to the highest. You can use an oscillating tool to speed up the process. Make sure you’re wearing safe gloves, and finish up by sanding with steel wool.
Apply a vinyl floor liquid wax to the plastic using a car wax applicator. Using thin coats, you can work on one section of the plastic while another section dries. You will need to apply several coats, buffing out the plastic after each application.
After the final coat is complete and bone dry, finish up with an automotive wax for an extra layer of sheen.
This process is more involved than the linseed oil and paint thinner fix, but it typically has a longer-lasting result.
Image from www.atvhonda.com
Instead of a linseed oil and paint thinner mixture or vinyl liquid wax, you can use a dedicated plastic restorer product. While most of these products work very well, they are basically just variations of our above options with slightly different chemical compositions.
Image from Lea Arnold YouTube channel
Using a heat gun does work to make plastics look new, but it has downsides.
To perform the procedure, you use a heat gun set to a low setting and blow it from a few inches above the problem plastic. Voila—the plastic looks as good as new.
But it’s not really an option that we recommend. It works by melting the top layer of the plastic, which in turn makes the plastic more brittle. Every time you perform a heat gun restoration, your plastics lose some strength.
Where we would suggest using a heat gun is to work out small cracks in the plastic. Severe cracks necessitate replacement, though.
These are the top ways to restore your ATV plastic. Another option is to cover your faded plastic with a new lick of paint from a spray paint that’s specifically suitable for plastic. Whatever option you choose, with just a little bit of elbow grease you can have your ATV back in showroom condition.
HIT
ENDURO Graphite
the most durable
657 EUR
AQUAMASTER Blue
reliability & comfort
647 EUR
AQUAMASTER Red
reliability & comfort
677 EUR
ENDURO BF Camogrey
bootfoot waders
528 EUR
-3%
WADEMAN Petrol
Lightweight
427 EUR
412.10 EUR
HIT
RACHEL Petrol
for women
577 EUR
HIT
RACHEL Graphite
for women
577 EUR
SPEEDMASTER-ZIP Graphite
with central zipper
857 EUR
-8%
HIT
AQUAMASTER RED
reliability & comfort
637 EUR
585. 20 EUR
Explore all
While riding, a young rider can put a lot of stress on their ATV. As a result, various breakdowns are not ruled out, some parts fail. Each of them is part of a well-functioning mechanism, without which the entire system cannot work correctly. If desired, many breakdowns can be eliminated on their own, without contacting a car service. Your child's ATV may need to be repaired if one of the following parts fails:
These are the most common breakdowns, in the event of which it is necessary to repair a children's gasoline ATV.
The rear axle is subjected to significant loads during driving, especially if there is a second passenger in the seat above it. On children's models, axle failures occur much less frequently than on ATVs for adults. But if a child likes to carry passengers, jump, the likelihood of a rear axle failure increases significantly.
Before the element completely fails, when driving, you can hear a rattle, tapping or hum, sometimes the rear wheels begin to jam, and play appears on the wheelset. The reasons for such a breakdown can be:
To carry out repairs, the ATV must be jacked up. You will need to perform several sequential steps to repair the rear axle:

The rear axle can be fixed with different bolts and nuts. They will need to be unscrewed to free the sprockets. The axis is carefully knocked out, and the seals and bearings remain inside the pendulum housing. After that, it will be possible to replace any part of the rear axle assembly.
First you need to inspect the seals, hubs, brake calipers. All moving parts are generously lubricated with oil recommended by the manufacturer of the ATV model. It is worth considering that when the axle is knocked out of the pendulum, the possibility of its breakage is not ruled out. Also a common mistake during repairs is an overtightened bearing or an incorrectly assembled brake caliper.
To carry out repairs, you do not have to use special equipment, you can get by with improvised tools. You only need to purchase the appropriate parts that require replacement. Do-it-yourself repair of a children's ATV will not be difficult if a breakdown occurs in the area of \u200b\u200bthe rear axle.
Sooner or later the plastic parts of the ATV will have to be changed. If a crack appears in the material, you need to heat it with a 100 W soldering iron. To do this, the part must be carefully removed in order to warm up the deformed place on both sides.
Dents and chips can be repaired with suitable material. To do this, you need to purchase a fine-mesh stainless steel mesh. It is reliably soldered into the structure of the material when heated. The use of a mesh will avoid cracking of the plastic and will help to securely fix the junction on the fault.
Next, you will need to use "liquid plastic" or resin, which is poured into the cavity. The same principle applies when replacing large areas of damaged plastic. But in case of serious damage, the material will have to be taken from the donor ATV. After such work, the surface is treated with sandpaper, and painted in the color of an ATV.
The ATV owner may encounter a situation where, after a long period of inactivity, the engine will not start.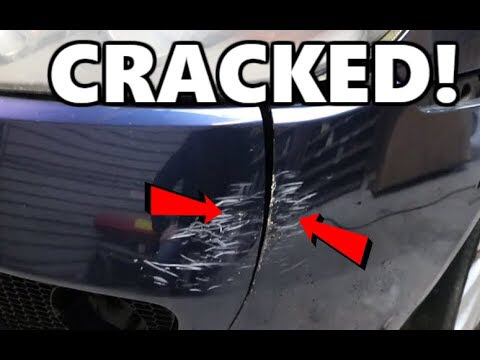 Sometimes this happens after a cross-country race. You might think that an expensive engine repair will be required, but this is not so. You need to pay attention to other systems, for example, the presence of gasoline in the fuel tank. It is also worth checking the battery, it may be discharged.
If there is no petrol in the fuel tank, this is not always the fault of the driver, for example, there may be a leak in the fuel line. The battery may be discharged if the user forgets to turn off the appliance.
If there is fuel in the tank, but it does not enter the engine, then the problem is in the pump. The hardest thing to fix the problem is if the piston system is worn out. There will be no compression in the engine, knocking may appear, and the whole system will not work as it should.
If the speed decreases, there is a smell of burnt rubber, and the variator belt is slipping, it's time to replace the element. The service life of this part is different for models, so it is almost impossible to predict a problem.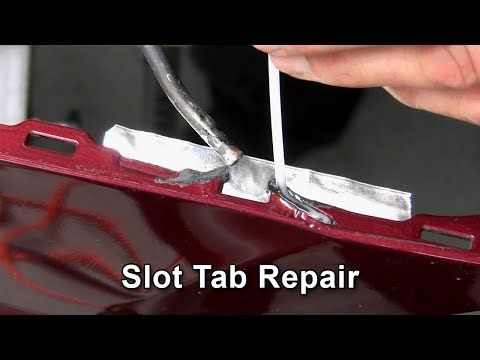 The life of the component depends on the driving style and the load on the equipment.
To get to this part, you will need to remove the cover from the transmission. You should definitely check if all the screws have been removed, if there are any hidden latches on the variator. When the cover can be removed, the tensioned belt will become visible. You need to find the fixing bolt and loosen it. Once the pulleys are apart, the belt can be removed.
It is also recommended to inspect the surface of the transfer device. If it has scuffs in only one area, you need to find a bias in the variator system. To eliminate the imbalance, it is necessary to compare the places where the defect appears with the teeth.
A new belt is installed in its place. It must be well tightened by fully tightening the screw. It is necessary to create the same tension as the belt drive made by the ATV manufacturer. Further assembly is carried out in the reverse order. By starting the engine, it will be possible to evaluate the quality of the work performed.
During maintenance, check the condition of the oil seals, add oil to the system if necessary, and perform other technical tasks. Regular maintenance will improve the performance of the equipment and extend its life.
stop-avto24.ru
A bumper dented in a minor accident is not a reason to immediately contact a car service. If it has not cracked, you can restore its former shape yourself.
Evgeny Banko
A minor accident can happen to anyone. In such incidents, the bumpers of cars are the first to suffer. Moreover, the damage is often limited to not even a crack, but just a dent in the plastic. Even when it seems that the scale of the disaster is too large and practically “inoperable”, you should not despair. If the bumper is not split, has no cracks, but is only crumpled, everyone can restore its shape. And it is not at all necessary to seek help from car service specialists.
Without delving into technological wilds, we will say that most car bumpers are made of thermoplastic materials, that is, substances that become soft when heated and harden again when cooled. To take advantage of this property, first of all, we dismantle the bumper. Then, we prepare a container with boiling water of such a volume that it is possible to immerse the entire crumpled part of this part into it. We wait a couple of minutes until the plastic warms up and becomes soft. Next, putting on thick rubber gloves and trying not to get burned, gently and slowly squeeze the dent into its normal position. Moreover, we begin to straighten it from the edges and gradually get to the central part of the damage. During the editing process, it is advisable not to remove the plastic from the water so that it does not cool down ahead of time.
megasos.com
At the same time, of course, we try not to burn ourselves, because boiling water is a really dangerous thing. When the dent is over, do not relax. Being soft, the plastic may again try to wrinkle again. Therefore, while the bumper cools down to room temperature, it is necessary either by hand or by some suitable object to maintain the required shape of the heated area. To speed up the hardening process, the plastic can be doused with cold water. A more advanced and technically equipped car owner can use an industrial hair dryer instead of hot water (the heating of which also needs to be organized somehow).
It is much easier and faster to heat up a dented bumper area. However, it should be remembered that a hair dryer can heat plastic up to 500º C - this is no longer 90º-100º in boiling water. Therefore, it will no longer be possible to straighten a dent with a hand in a glove, a burn is guaranteed and you will have to give the plastic the desired configuration with the help of some object of a suitable shape - at least the handle of a screwdriver or hammer. It should also be remembered that when using an industrial hair dryer, we run the risk of overheating the place of the dent to such a state that the plastic starts to flow.