ATV Riders Forum > Sport ATV Model Information > Sport Quads under 350cc Sub-Forum > Valve Problems
PDA
View Full Version : Valve Problems
Rusty91o
11-16-2006, 10:54 AM
My 300ex has stuck valves. How do I fix that?
250X_project
11-16-2006, 04:56 PM
well.....first elaborate more. How do you know it is "stuck"? Do you have the covers off?...we will go from there with a little more info.
Also intake or exhaust and how many?
2muchquad
11-16-2006, 06:18 PM
If you had hydraulic lifters like a small block chevy then maybe.A 300ex has rocker arms to open the valves.Unless your lobes are worn completely off your cam.:( You could have a bent valve from piston damage but...
Rusty91o
11-16-2006, 08:35 PM
I'll have to get back to you guys with some more info then.
250X_project
11-16-2006, 09:23 PM
I'll be waiting. The only way I can think of a valve sticking is if you had a 250X instead, with a kick start and decompression on the ex. valves....unless you bumped the piston :(
Rusty91o
11-26-2006, 07:51 PM
Yeah the exhaust valve is stuck I guess, I still haven't looked at it myself. The guy I got it from says If I were to just get a new valve it would be fine. Does any of this make sense? Any advice?
250X_project
11-26-2006, 08:56 PM
Well if you have a stuck valve that must be replaced then it is most likely because the stem is bent, This is probably because it dropped and hit the piston. IF so than you may be able to just replace a valves and be fine.....or you may have head damage, piston damage, cylinder or other damage depending on if pieces of the valve went into the engine. I've seen both.
But until I know for sure what even is the matter I can't tell you for sure....I'm just stabbing in the dark here.
Just take the cover off of the head and take a look and tell us for some better help.
Rusty91o
11-27-2006, 07:52 PM
Ok. I was able to look at it for myself early today. One of the intake valves hit the piston. The piston only has a very small barely noticable scratch in it. The Valve is slightly bent, and the sleeve for it is cracked. It looks like all I will need is a new valve. (what the previous owner said) But, If I get a new valve, what next? Won't I have to figure out the timing, or adjust the valves? I'm just not quite sure what all this involves. (Is this a reasonable do it yourself job, I am a very mechanically inclined person) Please give me as much info as you can. Thanks.
Mud_Slinging
11-27-2006, 08:09 PM
Welp, I don't know a whole lot about 300ex's, but I do all the motor work on my quad. If you change out the bent valve, I would probably recommend putting a new valve seal in if it's worn. Once the valve is in with the valve springs, you have to set the valve with a feeler gauge. Then most likely set the timing again. It's really not that difficult to do. Do you have a Clymer manual or a Service Manual for your quad? If so, the book will tell you exactly what to do, step by step. All in all, if you take your time. It's not a hard thing to fix.
*edit*
Ok...I just looked up a 2000 Honda 300ex for an example. It seems they have 4 valves with one cam. That would be pretty darn easy to do compared to my DOHC 4 valve....
If I'm correct on this quad...here would be my rough step by step help...
1. Remove Cylinder head cover
2. Take out cams, then remove cylinder head.
3. Figure out a way to take off valve springs, I use a socket and c-clamp
4. Remove damaged valve. (And seal if damaged)
5.Clean everything thoroughly
6. If a new seal has been purchased install it as well as the washers underneath the springs.
7. Then install new valve, then install springs
8. Check over everything to make sure it is correct.
9. Install cylinder head
10. Get motor at TDC (Top dead Center)
11. Set cams to manufacturer spec
12. Once cams are set, check valve clearance with a feeler gauge.(One can be purchased at an automotive store for like $5
13. After clearance has been set to manufacturer spec, put cover cylinder head cover back on, and give it a crank....
14. Hope for the best
:)
Rusty91o
11-27-2006, 08:24 PM
Good thanks. Yes I have the Clymer manual for the EX. I'll frobably have to get some of the required tools then. But it looks as if I will be able to do this job myself, and without spending alot of money. BTW, I had a Mojave too. :) But It was stolen :mad: Worst day of my life
Mud_Slinging
11-27-2006, 08:42 PM
:( Thats horrible!!! I don't know what I'd do if someone stole my Mojave....lol
But anywho..about that EX
The clymer will give you step by step guidelines to go by while fixing your quad. The only tools you will most likely need depending on how crafty you are would be ratchet,appropriate sockets, needle nose pliers, feeler gauge, c-clamp, and a lot of patience...
The way I used the c-clamp and socket rigging for removing the springs might require 4 hands...but I manage to do it by myself with patience. What you do is,
1.Position a decent sized socket on the base of the valve you are removing
2.Take the c-clamp and put the solid end on the socket and then take the screwing in part of the c-clamp and press down on the springs to remove them.
3.Take your time, and wear eye protection, if one of those springs flies off and gets you in the eye you're gonna be hurting haha
4. Once you removed the springs and replaced everything, you basically repeat the process, but installing the springs and valves. It's not a very difficult thing to pull off. It is much easier than going out and spending a ridiculous price for a tool you might only use twice. ...lol Just my $.02 on that comment...lol
250X_project
11-27-2006, 08:54 PM
"The Valve is slightly bent, and the sleeve for it is cracked."
What do you mean by this? Is it the valve guide of the actual head? You can not leave it like this.
There is no sense in replacing only one seal. Replace all 4. They come in a good top end kit anyway. $25 off eBay.
SPRING REMOVAL- just hit them with a hammer and socket and don't loose the keeper. :D
ADJUSTING VALVES- you can't exactly do that with the head cover off as the rockers are in the head cover.... :huh .004 is spec for BOTH intake and exhaust.
TIMING- TDC as said, and both lobes on came faces down at about 4 and 8'oclock with lines on cam sprocket flush with the head. ;)
Mud_Slinging
11-27-2006, 09:09 PM
Originally posted by 250X_project
ADJUSTING VALVES- you can't exactly do that with the head cover off as the rockers are in the head cover. ... :huh .004 is spec for BOTH intake and exhaust.
Sorry, I was just going by what I know doing my valves and cams...Like I said, I'm not familiar with the 300ex....:(
Rusty91o
11-27-2006, 09:11 PM
Yes, I believe it is the Valve guide that is a little cracked. When I buy these things off of Ebay, will I have to find a top end kit, then a replacement valve? Or will it all come together. Or... would it actually be much better/easier to get a whole new head, because I found one.
250X_project
11-27-2006, 09:30 PM
Mud_Slinging- What do you have that has the head cover off to adjust the valves??
If you stick with the old head you can find the top end gasket set for about $24shipped w/ seals. Valve guide for $10+shipping. And $24 shipped for the intake, or $35shipped for exhaust. Are you 100% sure of which it is? ...Grand total of $58+guide shipping, if it is intake and all your work or mechanic/machine shop work. How much for the new head. Is it NEW NEW?
Mud_Slinging
11-27-2006, 09:32 PM
I have a 1991 Kawasaki Mojave DOHC 4-Valve
I can take off my cylinder head cover, and have access to my cams,cam chain,rockers,and adjusting valves...
Rusty91o
11-27-2006, 09:35 PM
I have a couple of options. One is slightly used, less than mine. For very cheap, looked good. Total of about 35$ including shipping. Another was absolutely brand spanking new, for 60$ maybe about 75$ with shipping, if I were able to get it. I'd say go for the cheaper one, not to mention there's more of a chance to actually get it. (Ebay we're talking)
And yes Mud is right, on the Mojave you do have access to everything with the cover removed.
250X_project
11-27-2006, 09:43 PM
Yeah, just inquire about the valve faces- that goes for the head you have now too. These engines eat valves.
That's wierd I didn't know the mojo was a dual cam. ...:huh
Rusty91o
11-27-2006, 09:50 PM
Alright, I guess I 'll try to get this whole new head. If I get it, the next problem will be trying to wait until it arrives. lol
I thought Kawasaki did such an awesome job with the Mojave. I was impressed with just about everything about it. (Mine couldn't be killed) I don't think the Lakota had DOHC though. Since the Lakota was the next ring up from the Mojave.
Mud_Slinging
11-27-2006, 10:41 PM
The Lakota was SOHC unfortunately...The Mojave was way ahead of its time, 1987 DOHC 4-Valve 250cc 4-stroke...Can you say a bit advanced for its time?? lol
It's a real shame they quit production of them tho :(
Rusty91o
11-27-2006, 10:43 PM
I know really. Didn't they put electric start on the last 04' models?
Mud_Slinging
11-28-2006, 05:54 AM
Nope, they were kickstart strictly from 87-04....I think if they had the electric start they would still be in production. ..
..
Rusty91o
11-28-2006, 06:00 PM
They should put it back into production. Kawasaki is lacking variety with sport ATVs now. They don't make the KFX 400 anymore. The KFX 450 is yet to come, the KFX 700 is awesome, and will be around for a while I think, and they still make the KFX 50, and 90. But they are styled after the new 450. Bring the Mojave back, restyle it a little, add electric start and whatever else. I'd definitely buy one.
250X_project
11-30-2006, 08:18 PM
Mud_Slinging- I wanted to apologies about the head cover thing. I know what you mean know, I'm working on an XR bike right now with that set up. :D
Mud_Slinging
11-30-2006, 09:17 PM
It's alright man..You didn't know about the Mojave...And I didn't know about the 300ex either...:D
Rusty91o
12-01-2006, 12:43 PM
I'm so glad I found this place. Intelligent people, and ones that can admit mistakes, apologize, and take things simply and lightly. And not act like little kids fighting in a sand box. lol
Rusty91o
12-01-2006, 12:45 PM
Oh yes. And I ordered the new head, and a brand new Gasket Kit as well. Hopefully, (depending on when they parts come in) I should have my EX running in about a week.:D
250X_project
12-01-2006, 12:54 PM
Yes this forum is deffinently my favorite. I love it. Great people!
Powered by vBulletin® Version 4.2.1 Copyright © 2023 vBulletin Solutions, Inc. All rights reserved.
When your ATV loses some of the fire in its belly, and you can’t quite put your finger on it. It may be time to check the valve lash. Your ATV engine is designed with a ton of power, and it’s still there, waiting to be tapped.
The top seven symptoms of poor ATV valve adjustment include:
1 ATV won’t start
2 Engine noisy
3 Engine misfires
4 Bike lacks power
5 Engine runs rough
6 Erratic idle
7 Hard on gas
By the end of this post, you’ll understand and recognize common valve lash symptoms, know which condition your engine suffers from and how to fix it.
This guide covers the more common rocker-style valve train. If your ATV is fitted with an OHC (Over Head Cam), the procedure is a little different.
Page Contents
Valve lash or clearance is a factory-specified gap that must be maintained between rockers (or cams) and valve tips. As an engine wears, the valve clearance usually gets larger and so needs to be adjusted. Unfortunately, on some bikes gaining access to the valves is a bit of a chore and is regularly ignored until it can’t be.
All single cylinder engines will have at least two valves, one inlet, and one exhaust. However, most bikes will have four, two of each.
The valves, as you know, are activated by the rockers (cams in OHC engines), which are driven by the camshaft. The camshaft is driven by the crankshaft, and the whole process is sequenced. The timing of this sequence is mission-critical to the optimum performance of your power plant.
Only four-stroke engines have valves, and valves allow for more accurate, predictable, smoother, and cleaner engine performance. A four-stroke engine is just easier to live with, but because it has more internal moving parts than a two-stroke engine, it needs more maintenance.
1 Intake stroke – Intake valve(s) opens as the piston moves down the cylinder and closes again as the piston bottoms out.
2 Compression stroke – Intake valve(s) now closed as the piston moves up the cylinder, compressing the air/fuel mix into the combustion chamber at the top of the cylinder.
3 Power stroke – The spark plug fires and ignites the compressed mix causing the piston to move down the cylinder under power.
4 Exhaust stroke – Exhaust valve(s) open as the piston moves up the cylinder, pushing the spent gases out. The valve is fully closed as the piston reaches the top of the cylinder, and the cycle starts over.
I’ve covered valve lash adjusting previously and you can check it out here “ATV valve adjusting in 6 steps”
An ATV may not start for many reasons. Incorrect valve lash will certainly be on the list. Hot start problems are often caused by valve lash issues. As the engine reaches operating temperature, lash tolerances change. If the valves are too tight, they may remain open, which will reduce cylinder compression.
An engine without compression won’t start. If the valve lash is excessive, your valves won’t open, and the engine won’t receive fuel and so won’t start.
A noisy engine is a useful clue. The tell-tale ticking noise of an idling engine could very well be miss-adjusted valve lash. Loose rockers, as you can guess, will make a racket if the gap between the rocker and valve tip is excessive. And you already know that excessive lash will cause poor running or no start.
Excessive lash, if neglected, can damage the valves and rockers as they hammer together. Checking the lash is the best test, but I’ll often use a stethoscope to confirm. Especially useful if access to the valve cover is labor-intensive.
A misfiring engine could be caused by miss adjusted valve lash. Excessive lash will cause the engine to run lean (not enough gas) and that will cause the plug to misfire. Running the engine with tight valves can also cause the plug to misfire.
If the valves are not closing fully, the engine mix is lean, and that will, as you know, cause a misfire.
If your engine lacks power, maladjusted valves could be the cause. Incorrect valve lash causes the valves to open for more or less time than needed. Excessive valve lash means the valves open late and for less time than needed. This causes a lack of gas which in turn causes a lack of engine performance.
Tight valves can cause the valves to open early and for too long. This causes (depending on how tight they are) lean running, hot running, misfiring, and a general lack of performance.
A rough-running engine is irritating but worse than that. If it’s caused by maladjusted valves, you could cause lasting damage to the motor. If valves are tight, it may cause the engine to run lean. A common symptom is popping noise from the engine.
Overheating engines, burnt valves, hammered valve tips, blown head-gaskets are all real risks that will cost a packet to fix.
Valve clearance will affect idling big-time. If valves are tight, you might find the engine starts but then dies as it warms up. Or the idling is even rougher when warm. Whatever the symptoms, your engine valve lash should be checked once a year. If I owned a used bike, I’d assume it hasn’t been done recently as it’s commonly overlooked.
Adjusting the valve lash is a bit of a chore on some bikes, but it’s worth it. You will notice the difference right away. The engine will start more easily, quieter, and throttle response will be sharp and more powerful.
Whenever performance suffers, so does gas mileage. It simply takes more gas to do the same work. So anytime you notice gas mileage drop, it’s a big clue that your ATV has a problem.
The problem could be something simple like a dirty spark plug, or more serious altogether. Either way, early diagnosis is always best.
You may find the following posts helpful:
ATV idles up and down
How to tell if ATV jumped time
You left the ATV in the garage on a trip or out of town, and when you return after a few weeks, you can no longer start it. Common situation? Even after adding a spark and fresh fuel, the engine only stops for two to three seconds. What could be the effect? After all, before the ATV, he had no problems: it was enough to pass a periodic thorough inspection.
Don't panic: in this case, you can say with almost 100% certainty that the problem is only in gasoline, and not in ATVs. Like any hydrocarbon gas, petrol mixture is volatile and should not be relied upon for a long time. Some of its fractions evaporate, and the remaining gasoline liquid loses its ability to ignite and is no longer a fuel mixture. So your ATV didn't want to ride after a long break.
No response starter after turning the key
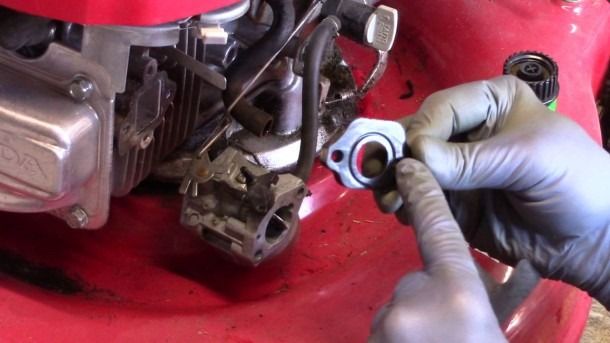 Turn the valve to the PRI or Reserve position.
 nine0022
 ATV stalls : Starter relay clicks but engine does not start
Loose starter cord or short circuit due to broken wire: check connection, remove rust, check current with multimeter.
 nine0022

 nine0022
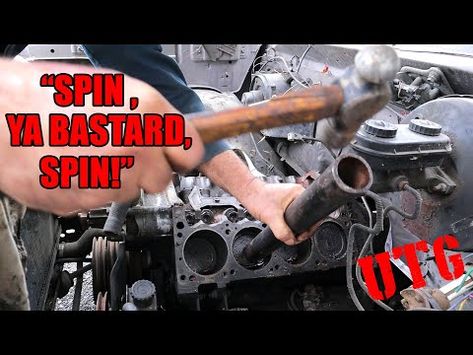
What needs to be done to improve the situation? At the bottom of the carburetor there is a screw that is screwed in horizontally (the guide can serve as a return pipe with a fitting next to it). This screw must be unscrewed so that the old gasoline drains. The liquid will be cloudy, yellowish. As soon as it turns into pure gas, the fuel must be drained. To do this, just tighten the screw. nine0003
Now you can try to start a quad: most likely there will be no problems. Therefore, before leaving the ATV in the garage for a while, you need to drain the gasoline left in the carburetor. When you return, it is filled with fresh fuel, so you can safely continue driving the quad bike.
Installations
Back to search
Cause:
Adjusted clearance in the valve actuator is too small or the maintenance interval has not been observed. nine0003
Consequence:
The valve no longer closes properly. Exhaust gases flowing past the valve seat heat up the valve head. This causes overheating and burning of the valve head in the seat area
.
Cause:
The spring was incorrectly installed during assembly. The misalignment resulted in a lateral bending moment (M) on the valve stem.
Consequence:
The resulting variable bending load resulted in damage to the valve guide and ultimately to failure of the valve stem end.
Cause:
After installing the tappet, the prescribed waiting time before starting the engine (at least 30 minutes) was not observed. Because of this, there was not enough time to remove excess oil from the working area of the pusher.
Consequence:
When the engine starts prematurely, the valves hit the pistons, bend or break.
Cause:
The valve seat or guide was incorrectly centered during rework.
Consequence:
The valve does not close properly, overheats and burns out in the seat area. Due to the one-sided load on the valve head, fatigue fractures in the area of the fillet are also possible. nine0003
Cause:
The clearance in the valve guides is too large, because they are badly worn or have been drilled too wide during repair.
Consequence:
Due to the hot gases escaping, strong deposits can form in the area of the rods and guides. The valve stroke becomes heavy, the valve no longer closes, and this leads to overheating (burning, melting) of the seat surface. nine0003
Cause :
When rebuilding the valve guides, the guide diameter was measured incorrectly and was found to be too small.
Consequence:
Lack of lubrication, heavy stroke and sticking of the valve stem in the guide. As a result, this can also lead to overheating in the area of the valve head or seat.
Cause:
Old, worn valve cotters were used to rebuild the valves.
Consequence:
If worn nuts are reused, the clamp may loosen during operation. Friction corrosion appears on the stem, and the valve in this place loses its strength. Because of this, fatigue fractures from vibrations are possible.
Reason:
The distribution of force from the rocker arm to the surface of the end of the valve stem is non-centric.
Consequence:
This leads to one-sided wear of the rod and its end. Shear load on the valve stem, caused by non-centric force distribution, results in fatigue fractures in the clamping area.
Cause:
Bending of the valve stem causes a one-sided load on the valve seat on the seat ring. nine0003
Consequence:
One-sided loading causes a variable bending load and fatigue fractures in the fillet area, at the transition to the bar.
Cause:
Combustion failure causes significant thermal and pressure loads in the combustion chamber.
Consequence:
The valve head cannot withstand strong thermomechanical loads and bends inwards. It takes the so-called tulip shape and breaks. nine0003
 com nine0327
 Practical tips for replacement and repair
For professional use only. We reserve the right to make changes and inconsistencies in the drawings. Refer to the relevant catalogs or TecAlliance based systems for identification and replacement information.
The Motorservice Group uses cookies on your device to optimize the design and continuous improvement of its web pages, as well as for statistical purposes. Here you will find more information on the use of cookies, our Imprint and the Privacy Policy.
By clicking the "OK" button, you confirm that you have taken note of the cookie information, data protection declaration and imprint. You can change your cookie settings for this website at any time [link] nine0003
We attach great importance to transparency in the protection of personal data. On our pages you will receive precise information about which settings you can select and what functions they perform. You can change the setting you have chosen at any time. Regardless of the setting you choose, we will not identify you personally (unless you have explicitly entered your data, for example in contact forms). You can find information about deleting cookies in your browser help. Further information can be found in the Data Protection Statement. nine0003
Cookies are necessary for the operation of the website to ensure its proper functioning. In the absence of cookies, errors and error messages may occur. nine0003
Cookies make your visit to the website more convenient and comfortable, for example, by storing certain settings so that you do not have to set them again each time you visit the site.