Now that you have taken your new television out of the box, how do you plan to mount it on the wall? Before you immerse yourself in watching your favorite movies and shows, you’ll need to find the right place to mount the tv. But, there’s one tiny problem — you don’t have any studs to work with for the tv mount, or it could be that, if you’re renting an apartment, your landlord insists no drilling is allowed. But there’s no need to panic.
Whether you have a brick or uneven stone facade, or mounting a tv above a fireplace, mounting a tv can be tricky, but even more so when mounting a tv without studs. Even though drywall can support a tv up to 100 lbs, it’s still brittle and the mount can require additional support.
If you want to create the perfect tv-viewing experience but you aren’t sure how to safely mount your tv on a wall without studs, check out these tips and get your tv up on the wall and in the perfect spot today.
Before mounting your tv on any old wall, you should always attempt to locate a stud or inspect the walls’ integrity. But it can be difficult to locate a stud if you don’t know what you’re looking for.
A stud is a vertical framing device often made of wood or metal used to create a frame for a wall. These wooden or metal reinforcements are evenly spaced within a wall and are typically used to create a framework for a wall consisting of drywall. Because many modern home interiors are constructed with drywall, not mason, there’s a good chance that you should be able to locate a stud within your home’s walls.
Keep in mind, if you live in a high rise, you likely have studs made out of metal. Similarly, commercial buildings often have metal framework as well that will require additional care if mounting a tv or appliances into a stud.
Finding studs have a lot of uses beyond simply mounting your tv. For instance, if you want to hang a heavy picture, mount an appliance to the wall, do trim work in your home, or fix electrical outlets, it’s very useful to be aware of the location of the studs in your walls. But how do you accurately locate a stud?
One of the easiest ways to do this is with a stud finder, a small handheld device that measures the density of drywall. The Spruce has a very comprehensive list of great options to buy online or your local hardware store.
To use a stud finder is even more simple than finding the right one. Simply place the stud finder against the drywall and slowly drag it horizontally along the wall until it beeps. Beeping indicates that you’ve found a stud. You can estimate the center of the stud by running the stud finder over the location repeatedly until it stops beeping. Then, once you know where the stud is located in the wall, make a mark with a pencil.
2. Measure 16” from the corner.Don’t have a stud finder? That’s ok! You can also measure 16” from the corner to approximate where studs will be located throughout the room. Keep in mind, studs are typically evenly spaced 16”-24” inches apart, so if you measure the total length of your wall, you should be able to approximate the location of each stud.
Now, not every room is going to evenly divide by 16 or 24, but again, that’s ok. Follow up this effort by knocking on the wall where you suspect the stud to be. Knocking on a stud will create a muffled sound while knocking directly next to the stud will create a hollow sound.
3. Check your trim.If you aren’t handy with a tape measure or you don’t have access to a stud finder, we’ve got another option for you: features like trim nails, electrical outlets, and switches all indicate the location of a stud.
4. Use a powerful magnet.If you’re having trouble locating studs, you may have better luck locating the metal that holds them in place. Commonly, studs are secured with metal fasteners spaced vertically about 12” apart. With a strong magnet, place it against the wall and move it slowly up and down until you feel it stick slightly. This will indicate that you’ve located a metal fastener and therefore, a stud.
If you’ve done your due diligence to locate studs and either you can’t find any, you discover the studs are metal, or there are no studs located in the area where you want to mount your tv, you do have options for mounting your tv with no studs, and we can walk you through it!
1. Mounting a tv with drywall anchors.
Expanding anchors or conical anchors are one of the simplest ways to mount a tv when studs aren’t available. The wing-like grooves lock into place behind the wall when a screw is screwed in and this can provide ample support for things like pictures with a heavy frame or a lightweight tv.
Simply drill a hole accordingly, insert the sleeve, and slide in the anchor piece. You can even pull it close to the wall with the disposable pull tool. This locks the anchor in place, so it won’t loosen while you insert the screw.
2. Mounting a tv with anchors or molly bolts.Toggle anchors and toggle bolts look like regular screws, but they come with a butterfly toggle at the end. When placed in the wall, the toggle anchors work by attaching to the back of the drywall. Pulling at the screw or applying some external force has little impact as the toggle causes the whole sheet of drywall to respond, rather than just the crumbly center. It’s the distinction between pulling the entire wall and removing a single screw.
Mounting a tv with drywall anchors or bolts is a great option if you can’t drill into a stud. You’ll need to use a hollow wall anchor that looks similar to a regular screw, with a butterfly toggle at the end. Once they’re placed in the wall, they’ll attach to the back.
These have proven to be extremely strong on their own when it comes to mounting a tv with no studs, but, as a general rule, it shouldn’t be paired with a full-motion mount. Mounting a tv without studs can be a safe and reliable solution if careful consideration is made about the limits of the wall and the toggles.
Molly bolts are an interesting anchor for a no-studs tv mount. They combine the ease of installation with a lot of strength, a large molly bolt can hold up to 50 lbs. They are a little harder to use over other drywall anchors, but they are sturdy and well-suited for a medium to heavy load. They come in two variations: a pointed molly bolt will have a sharp tip that can be installed with a hammer, whereas a non-pointed molly bolt, which is better to use in plaster walls, requires that you cut out an installation hole first.
Molly bolts stay thin when left untightened, but once tightened in your walls, the sleeves expand, creating an anchor to the back of your wall — a similar mechanism as toggle anchors. Once the molly bolt is securely anchored, you can remove the screw and replace it with the screws for your tv wall mount.
3. Mounting a tv with a mounting plate.A mounting plate is a good choice when it comes to mounting a tv with no studs. Mounting plates help the anchors carry the tv weight with more ease and provide an opportunity to add more anchors, making it a more secure mount.
Although the mounting plate doesn’t look that aesthetically appealing, you can always consider a mounting plate that is smaller than the tv and choose one in a color and style that works well with the look of your room, or paint over it. For instance, both the MantelMount SSB40 Single Stud Wall Adapter and the WPC00 Wall Plate Covers can be used with the MantelMount MM340 Standard Pull Down TV Mount.
Although anchors, toggle bolts, mounting bolts, and mounting plates are effective ways to keep tv wall mounts in place when mounting a tv with no studs, here are some things to keep in mind.
Be Aware of the TV’s Weight and the Condition of the Wall.Whether mounting a tv with drywall anchors or with a mounting plate, or frankly, any other way, ensure that the anchor screws are rated to carry the television’s weight. Tv weights vary from model to model, but an average 32’ television usually weighs about 25 to 30 lbs, which means that a larger screen will weigh more.
If the choice is mounting a tv with drywall anchors, check the load capacity for the selected anchors. It won’t make a difference if the strongest wall anchors are used if the wall is old and crumbling. If the wall appears flimsy, it may bend under the weight of the tv and there is a chance that it could potentially break at some point, wrecking both the wall and your television.
A standard pattern for wall mounts is to ensure that they will fit any tv. However, mounts are rated to fit specific television sizes and weights. A wall mount for a 32’ TV would not be able to support the weight and dimensions of a 40’ tv. Choosing the wrong mount, then, could potentially be dangerous for your TV.
Whether the question is how to mount a tv to a wall without studs or if it’s more to the tune of how high to mount a flat screen tv, most of the anchor options for a studless wall work best with fixed and tilt mounts. Fixed mounts are static and set at a singular position, while pull down and articulating and tilting tv wall mounts allow you to change the angle of the mounted television.
Toggle bolts and other wall anchors should not be used with anything other than fixed mounts. Mounts which have arms and swivels that allow for complete angle adjustments, naturally add more weight. The constant movement that comes with adjusting your mounted TV can cause increased stress on your anchor points and the wall itself.
As TVs have gotten thinner in size but drastically better in image quality, wall mounting has become increasingly popular. Mounting a TV on the wall can help to save space by doing away with large, clunky entertainment consoles, while providing a cleaner, neater, more organized look with no wires, cables or cords in sight. Learn more here on how to hide TV wires.
Most TV mounts are designed for drywall, which makes for easy DIY products, but naturally requires the presence of studs. Wall studs are vertical pieces of wood that make up the frame that supports your walls. Drywall itself is a relatively brittle, so trying to support your mount and TV on drywall alone could mean a hole in the wall and a TV on the floor. The studs provide a sturdy anchor point, ensuring that your mount and TV stay in place.
Unfortunately, depending on your living space and the construction of your home, the wall that you choose for your TV may not have studs. The good news is that you can still mount your TV despite the hollow walls with Mount-It’s No Stud TV Wall Mount that hangs on your wall like a picture frame. Or, you can read on to learn other ways to mount a TV on the wall without studs.
Anchors are some of the easiest ways to hang anything in the walls without a stud. These work in different ways to keep screws from slipping out of their holes or otherwise damaging the drywall.
Toggle AnchorsToggle anchors or toggle bolts look like normal screws but with a butterfly toggle at the end. When placed into the wall, toggle anchors work by anchoring to the back of the drywall. Pulling at the screw or otherwise placing any sort of outward force has no effect as the toggle forces the entire sheet of drywall to resist instead of just the crumbly core. In other words, it’s the difference between pulling at the whole wall and pulling at a single screw.
Molly BoltsThese are a little harder to use than other drywall anchors, but they are extremely sturdy and well-suited for medium and heavy loads. These come in two variations, pointed and non-pointed. Pointed molly bolts have a sharp tip and can be installed with some gentle but forceful taps with a hammer. Non-pointed molly bolts, which are better for plaster walls, require cutting out an installation hole first.
These bolts stay thin when left untightened, but once tightened in your walls, the sleeve expands, creating an anchor to the back of your drywall. This is a similar mechanism as toggle anchors. Once the molly bolt is securely anchored, you can remove the screw and replace it with the screws for your TV wall mount.
2. Mounting PlatesAlong with these drywall anchors, consider using a mounting plate or cleat made from metal or plywood. Mounting plates are placed behind the TV and screwed into the wall using any of the anchor screws above. The base of your TV wall mount can then be screwed into the mounting plate. The idea with a mounting plate is that it adds several more anchor points while creating a larger surface area to carry the weight of the mount and your TV.
If you are worried about aesthetics, cut your mounting plate smaller than the size of your TV so that the monitor hides the plywood or metal. If that’s not possible, you can always paint or stain the mounting plate to camouflage it or add an extra level of sophistication.
3. Ceiling MountsWhile not as common as standard wall mounts, mounting your TV from the ceiling is another option if your walls don’t have studs. This may be a bit more intensive process and not always feasible, but nearly all ceilings have beams or joists, which have the same function as studs. Depending on the design of your home, you may need longer screws to reach joists, and these joists may be more spread out than you think, but they should be there.
 )
)What to Keep in Mind
Anchors and mounting plates are an effective and a generally easy way to keep TV wall mounts in place when your walls don’t have studs. While the process is generally straightforward, here are some things you should keep in mind:
1. Be Aware of Your TV’s Weight
Make sure that the wall anchor screws that you choose are rated to carry your TV’s weight. Weights can vary from model to model, but the average 32-inch television usually weighs about 25 to 30 lbs. That means that a larger screen will weigh more. Always check the load capacity for the anchors that you choose.
Additionally, it is best to exercise caution when lifting your device. Even a flat screen TV can have a significant amount of weight. Therefore, having a friend assist you with the mounting process is highly recommended.
The strongest wall anchors will not make much of a difference if you’re mounting a TV onto drywall or plaster that is old and crumbling. Walls that appear flimsy may actually bow and bend under the weight of your TV, potentially breaking at some point.
3. Use the Right Mount for Your TVThe VESA pattern creates a standard pattern for wall mounts to ensure that they will fit any TV. However, mounts are rated to fit specific TV sizes and weights. For example, a wall mount for a 32-inch TV would not properly support the weight and dimensions of a 40-inch TV. Choosing the wrong mount could potentially lead to your monitor crashing to the floor and a damaged wall. Visit our blog on how to choose a TV wall mount so you can avoid this problem.
Most of the anchor options for a studless wall work best with fixed and tilting mounts. Fixed mounts are static and set at a singular position, while tilting mounts allow you to change the vertical angle of the mounted TV. As a general rule, toggle bolts and other wall anchors should not be used with full-motion mounts. These mounts, which have arms and swivels that allow for complete angle adjustments, naturally add more weight. The constant movement that comes with adjusting your mounted TV can cause increased stress on your anchor points and the wall itself.
If your wall has no studs, don’t worry. You still have plenty of options for mounting your TV. If you are hesitant or not sure about these alternatives, it never hurts to call a professional who knows how to mount a TV on the wall without studs. It’s better to spend a little more money and ask for help than to end up with a broken TV and damaged drywall.
Once you've settled on the right mounting bracket for your TV, you'll need to choose the right location, and position it at the right height. Proper wall positioning is essential when wall-mounting a TV, because your ability to adjust the TV position afterwards will be quite limited, even with an articulated wall mount.
5. Choose the Correct TV PositionFirst step is to pick your ideal wall. Ideally, it will be in a central location with ample seating and space. Even more important than the comfort is making sure the wall has access to all of the power outlets necessary for your TV
From there, you must choose the right mounting height, usually with the center of the TV screen close to eye level when seated. Having a helper here is very useful, as one person can hold the TV, while the other checks the angle and position. From there, you can mark when you want to attach the mount.
Center the TV at the right height, with the center of the screen more or less at eye level. (This is where it helps to have a second helper that can check the comfort and angle as you and another helper hold the actual TV.) You can note the desired position by marking the lower right or left corner with pencil or masking tape.
Sources:
1: https://www.digitaltrends.com/home-theater/how-to-wall-mount-a-tv/
2: https://www.thisoldhouse.com/how-to/how-to-choose-right-hanging-hardware
3: https://itstillworks.com/12351048/how-to-install-a-ceiling-mount-tv
What happens to the engine on an ATV if at least one of the valves does not close completely?! Correctly! The compression in the cylinder will disappear,
, respectively, the engine will stall and will not start again until you replace the failed spare part. But in order to find the cause of the breakdown and repair the ATV, it is necessary to check step by step how the ignition system works, whether fuel enters the ATV carburetor, check the tightness of the fuel system as a whole. All fault diagnostics can be performed at our MOTODOCTOR service center located in Zelenograd. Further, the process of disassembling and repairing the engine is described for service specialists, if you are not one, we recommend that you contact a specialized motorcycle service for the repair of ATVs.
If all of the above systems work properly, then go directly to the engine. We need to measure the compression in the cylinder. This can be done with a car compression tester. The minimum compression in the cylinder of a four-stroke 150 cc ATV must be at least 7 atmospheres. If the arrow of the compression gauge did not rise to the number 7 or did not budge at all, you can safely prepare for disassembling the engine, more precisely, for dismantling the cylinder head. 150cc ATVs usually come with forced air cooling, so removing the cylinder head is no problem. First of all, we remove the carburetor, having previously disconnected all connected pipes, the gas cable and the solenoid valve wire from it. Next, unscrew the nuts securing the exhaust manifold and disconnect the muffler from the cylinder. When the attachment is dismantled, you can remove the plastic casing from the engine (casing). The next step is the disassembly of the cylinder head. Remove the head cover and go to the timing chain. It is necessary to dismantle the chain tensioner located on the left side of the ATV engine, otherwise the chain cannot be removed from the timing sprocket. Well, let's move on to removing the camshaft, it is fastened with four nuts. By unscrewing them, you can remove the timing shaft and, accordingly, the chain from the sprocket. We recommend that before removing the shaft, set the piston at the top dead center, respectively, all marks on the timing sprocket and rotor must correspond to their position set by the manufacturer.
 This is done in order to correctly install the camshaft in place during assembly. After removing the chain from the sprocket, tie it with a piece of copper wire or a coupler so that the chain does not fall into the engine and then it will be very difficult to get it out. Well, after everything is unscrewed, you can pull the head forward, disconnecting it from the cylinder. Not on all ATV 9 models0003
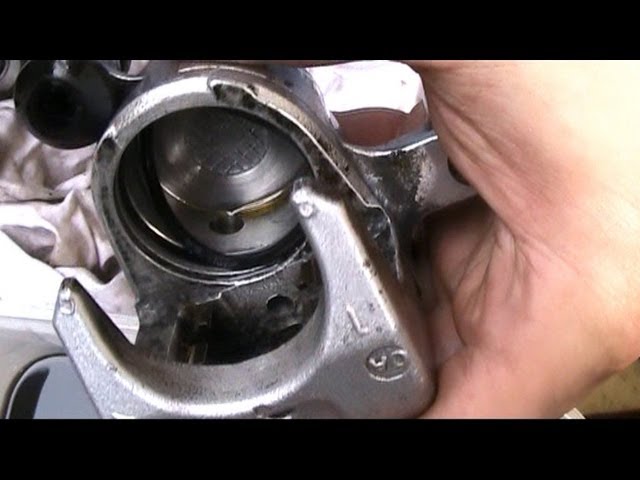
this can be done without removing the engine, somewhere the frame interferes, and somewhere you can get rid of the cylinder studs. In our case, on the Godzilla150 ATV, it is enough to unscrew the lower cylinder studs and the head can be safely pulled out. We carry out an external inspection of the cylinder head. In most cases, if there is a problem with the valve, then this is visible to the naked eye. Either the valve is burned out or it is in a half-closed state. We determine which valve is faulty and dismantle it from the seat. Next, we carefully process the valve seat from carbon deposits, install a new valve and, using a special lapping paste, we grind the new valve to the seat. When installing a new valve, it is advisable to change the oil scraper cap. When the valves are in place and the entire assembly of the head is done, it is necessary to check how tightly the valves fit to the seats. To do this, we install the head with the valves up, pour kerosene into the combustion chamber and hold for 5-7 hours. Kerosene must not seep through the valves. In this case, the cylinder head can be considered serviceable. Insufficient compression or its absence can be not only a malfunction of the cylinder head, but also in the piston group, so we recommend removing the cylinder and inspecting the CPG for abrasions and sticking of the piston rings on the piston. If there are no comments on the piston group, the engine can be assembled. Do not forget the ratio of the marks on the timing shaft with the top dead center of the piston. When all engine elements are installed, it is not advisable to turn the electric starter in order to check the correct assembly and engine performance.
 The fact is that the timing marks, exhibited at the Chinese motorcycle factory, do not always correspond to their technical standards. As a result, you set all the marks according to the requirements, and when you start the engine, the piston meets an open valve for some reason and, accordingly, with the ensuing consequences. So, to be safe, before starting the engine with an electric starter, it is better to scroll the crankshaft several revolutions by hand. This can be done by taking the cooling impeller by hand and twisting it, only the ignition must be turned off, and to make it easier to turn the crankshaft, unscrew the spark plug. If the crankshaft rotates freely, then the assembly order and you can proceed to start the engine. We start the engine, check if there are any oil leaks from under the head cover, if the valves are knocking. We put the elements of the plastic casing on the ATV engine and finish assembling the previously dismantled elements. The engine is in good working order, good luck!
If you have purchased a wall-mounted TV, the question arises: how to hang it on the wall correctly? In general, there is nothing complicated in the installation of the device. If you know how to use a drill, hammer and screwdriver, then you can quite cope with this on your own. In order to mount a Samsung TV receiver or any other on the wall, special devices are used: properly hang the TV on special devices - brackets. They vary in shape, size and functionality.
Content
If after purchase you cannot decide where to place the TV, then think about the advantages of hanging it on the wall.

As with any solution, there are disadvantages to hanging a TV on the wall.
In order to choose the right bracket for your Samsung, LG or any other TV, you should study the characteristics of the device. It is important to know its diagonal, weight and VESA standard. This is the generally accepted distance between mounting holes, predetermined by the manufacturer. It varies from 10 * 10 to 40 * 40 cm. Based on this, a bracket is selected. They differ in the material of execution, the number of knees (their absence), a rotary / inclined / fixed platform, designed for different diagonals.
Important! Most brackets can withstand weight up to 25 kg, and it is extremely difficult to find a modern TV with a weight greater than this value. However, to make sure that the mass of the device is still acceptable, it will not be superfluous.
Let's take a closer look at the design of the brackets.
Before you hang the TV on the wall with your own hands, it is important to determine the height of the unit. According to existing standards, the bottom edge of the device must be at a distance of 0.7 m to 1 m from the floor. If the TV set will be bought for the kitchen, then its location under the ceiling will be the best option. However, there are other options for placing a TV in the kitchen.
Don't worry if the right spot is slightly above eye level - you can adjust the tilt of the using the tilt/swivel bracket. It is best to choose this one: it allows you to adjust the position of the device for maximum viewing comfort, and there will be room for wires in the back.
Start with study wall . It can be concrete, brick, wood or plasterboard. You shouldn’t mount TV on the last option - with a probability of 99% after a while it will tear out a piece of such a wall and break. Knowing the material from which the wall is made is also necessary to understand which drill will be needed to make holes. But you don’t need to worry about fasteners in order to fasten the bracket to the wall, and the TV to it - everything you need is included in the suspension and TV set.
Important! When determining the location of the bracket on the wall, consider the presence of hidden wiring and the distance to the outlets. Also, do not forget that there should not be heaters nearby.
In order not to rack your brains on how to hang the TV on the wall with the bracket, you need to follow some simple steps.
 Then mark from the floor 1 m + the value obtained from the measurements on the TV. You will get the height at which 9 will be drilled0050 bottom fixing holes . Draw a line through this point using a level.
Flat 42” TV panels (and especially larger units) are ready to be mounted without the use of special brackets. Device manufacturers have already provided for how to hang the TV on the wall without a bracket. For this, special “lugs” (grooves) were made on the rear panel of the device . Therefore, installing a TV with “ears” is not much different from hanging a picture or a mirror. The main thing is that the fasteners correspond to the weight of the device. If the ears for hanging are not provided, then you can make the fasteners with your own hands.
Having decided to hang the TV on the wall, the user will certainly think about how to hide the wires. Obviously, if they just stick out, then all the beauty of this installation method is nullified.
Even at the repair stage, it is worth considering a place where the TV will stand in the future. It is advisable to place an electrical outlet and a socket for the antenna at the rear. It is better to do several of the first: you may have to connect a smart set-top box with external power or other equipment. If there is a cabinet under the TV, then some of the sockets can be mounted at a distance of 30 cm from the floor and a couple more directly behind the screen.
Tip! It is quite difficult to predict in advance what exactly will be connected to the TV, so ideally you should take care of having 5-6 outlets. This amount is certainly enough for any devices that may be needed in the future.
If repairs have already been made, the wiring box will come to the rescue. It can be neutral white or decorated in the colors of the interior. If there is a window nearby, then the cable can be hidden behind a curtain, the socket can be raised to the ceiling, and the wire to it can be put behind the eaves.
Below are some interesting wire decorating ideas.
The advice below comes from service professionals who install and set up television equipment. Thanks to these recommendations, the risk of hanging the TV on the wall incorrectly is minimized.
If you are not going to change its position during operation of the telly, then you can make a simple and inexpensive TV mount on the wall with your own hands.
To mount a unit with a 32 or 42 inch screen, you will need to prepare 4 aluminum or steel corners (to be used in the manufacture of a TV bracket) and 1 spoke from a bicycle. It is recommended to use aluminum corner because it is easier to process. The dimensions of the segments are not important, the main thing is that the holes on the body of the device and on the corner match.

Plastic dowels of the desired diameter and length (depending on the weight of the unit) can be used to fasten the parts to the wall.

Before attaching the TV to the wall, you need to determine the width of the corners . It should be such as to ensure normal ventilation between the wall and the TV receiver. Otherwise, your 42 inch TV will overheat, which will affect its lifespan. All wires, electrical and antenna, can be hidden in the cable channel.
There are many opinions on how to hang a TV on a plasterboard wall. Some say that you can use a butterfly dowel, others - that this is not a reliable mount. From practice, it has been noticed that TV sets weighing no more than 15 kg (diagonal 42 inches) can be hung on a “butterfly”. This option can be used for a 32 or 42-inch wall-mounted TV. Otherwise, for TVs with a larger mass, there is a risk of destruction of drywall. For clarity, how to use the butterfly dowel, you can watch the video:
You can hang the TV on a plasterboard wall in a more reliable way: use a strong magnet to find the screws that fasten the sheet to the rails, and then attach the bracket to the metal profile. You can also hang the TV on a plasterboard wall using the stud screw.
This anchor can be used as a fixing element in both concrete and brick walls (pre-drilling a hole of the desired diameter). The length of the stud must be selected taking into account the distance of the drywall sheet from the main wall. The deeper the anchor is screwed into the brick or concrete, the more weight it can withstand, since the entire load will be on the load-bearing wall, and not on the facing sheet.
How to mount the TV on the wall was discussed above. But what if the drywall sheet is used not as a cladding, but as a partition? Attaching an expensive device to such a plane is highly discouraged. In this case, the TV can be installed on the special stand shown in the figure below. A TV hung on a bracket in this way can be rotated in any direction (thanks to the rollers on the stand), that is, the entire structure becomes mobile.
Can be used to mount the TV to a plasterboard wall by screwing pipes to it to install the bracket.