Reading How to Install Beadlock Wheels 13 minutes
Next What Exactly is An Overland Vehicle?Tags
First off, we're going to assume if you're here, you've already read our other post about why you should consider beadlock utv wheels. If not, check out the post here for a 101 class on what makes beadlock wheels a great choice for some riders. Also, we'd like to encourage you to have a professional at a local powersport dealer mount your wheels and tires.
They've done it a 1000x and have the expertise, tools and machines to make the process simple, cost effective and safe. If you're stubborn and want to do it yourself, you must acknowledge the risks involved below:
 These are the rectangular boxes located in the bottom of your Valor Wheels box. Each hardware kit should enclose twenty (24) M8x20mm hardened bolts and twenty (24) 16x1.5mm washers.
The first step is to find a solid, flat piece of ground to start on like a garage or concrete floor. Before you unbox and set your new wheels on the ground, get a thick piece of foam or a blanket to protect the finish of the back lip of your wheels.
You're going to need a good lube to get the tire to mount so grab a squirt bottle and mix water to soap at a 1/1 ratio. You can use almost any soap, however we recommend a car wash soap or something similar which will not hurt the finish of your wheel. If you have an actual tire lube, even better. Spray the soap mixture (lube) extensively over the top lip of your wheel and the tire bead. You only need to slide one side of the tire over the wheel face so only lube one bead (side) of the tire. Don't worry about spraying too much, it's better to have too much rather than trying to force the tire over your wheel.
If you have directional (asymmetric) tires, make sure you're paying attention here so your tires/wheels are facing the right direction. Not sure if your tires are directional? Look for an arrow on your tire sidewall which will point toward the front of your vehicle (or how the tires should rotate in motion). Remember with directional tires that you'll have to mount your passenger side wheels on one side of the tire, and drivers side wheels on the other to maintain true directional. If your tires do not mention a direction, or the lugs do not flow in a particular direction, more than likely you have a non-directional tire and you can mount your wheels on either side of the tire.
After getting the back bead of the tire nice and lubed up, use downward pressure while rotating the tire clockwise. The constant pressure will allow the rear tire bead to eventually slip over the face of the wheel. Because your beadlock wheel has a built in lip, the front bead will hang off of it like picture below.
Once you get the rear bead set, you're going to need to prop the wheel up on a much taller surface so that the tire can freely hang and pull the front tire bead tight on the wheel face. We like to use a five gallon bucket (Home Depot or Lowes) for this step because EVERYONE has these buckets laying around and they provide just the right height to make the job easier.
Some tires have a mark on the sidewall near the bead that refers to the lightest spot on the tire. Make sure this mark (yellow circle on the tire we're using) is lined up directly under the valve stem of the wheel. The yellow circle or dot can help to balance your wheel and tire assembly so that its lightest point of the tire (the yellow circle) is matched up with the wheel's heaviest point (valve stem). The yellow dot indicates where the manufacturer has identified the lightest spot on the tire.
Place the beadlock ring onto the wheel face. Clock the beadlock ring holes with the wheel. We recommend using an anti-sieze or bolt thread lubricant to each bolt to ensure the bolts will never seize in the hole. This is an optional step, however we strongly recommend using because all it takes is one seized bolt and you'll be unable to fix a flat on trail. Simply dip or brush a small amount onto each beadlock bolt and start threading the bolt and washer a few turns to ensure a uniform mount. You never want to wrench down on one bolt before moving to the next, as this can cause the ring and assembly to warp, leak, or worse, fail under load or while in motion. DO NOT use an air gun or impact gun at any point during installation.
Once you have all of your bolts and washers started, you'll want to utilize a star or plus (+) shape pattern as you tighten. Pick one bolt and using a hand ratchet, tighten your first bolt down to snug but not tight. The next bolt you'll tighten is the one directly across from your first. Criss cross your way across the wheel in this patten until all of the bolts are snug. Repeat the pattern again and tighten up all of the bolts/washers using the hand ratchet and 14mm socket. Using the hand ratchet to get everything snug will prevent over tightening any of the bolts, especially when the ring has not been completely set.
Follow the number pattern below to ensure proper ring/tire/wheel seating. Only have a torque wrench? No problem, just lower your initial foot pound setting to 10 pounds for first round of tightening.
Next up, grab your handy torque wrench and set the foot pounds to 15 for the next tightening. By slowly adding pressure to each bolt, your rings will connect with wheel and remain perfectly flat to correctly hold your tire bead in place. The final round of tightening in star pattern should be at 18 foot lbs. DO NOT EXCEED 18!
Follow the star/plus pattern above and tighten your bolts until you hear an audible "click" sound on your torque wrench for each bolt. If you're forgetful, mark every finished bolt with chalk so you know which bolts have been tightened and which ones you have left to do. The final tightening is a double check, making sure each bolt has a clear, audible click from the torque wrench. It's better to be safe so don't fret if you go over each bolt a couple of times to hear that trusty "click" sound.
Heading out right away for a ride? Air up your wheels to the correct tire specification(s) and using your 1/1 soap/water concoction you used to lubricate the tire, spray all over your wheels where ring and tire connect.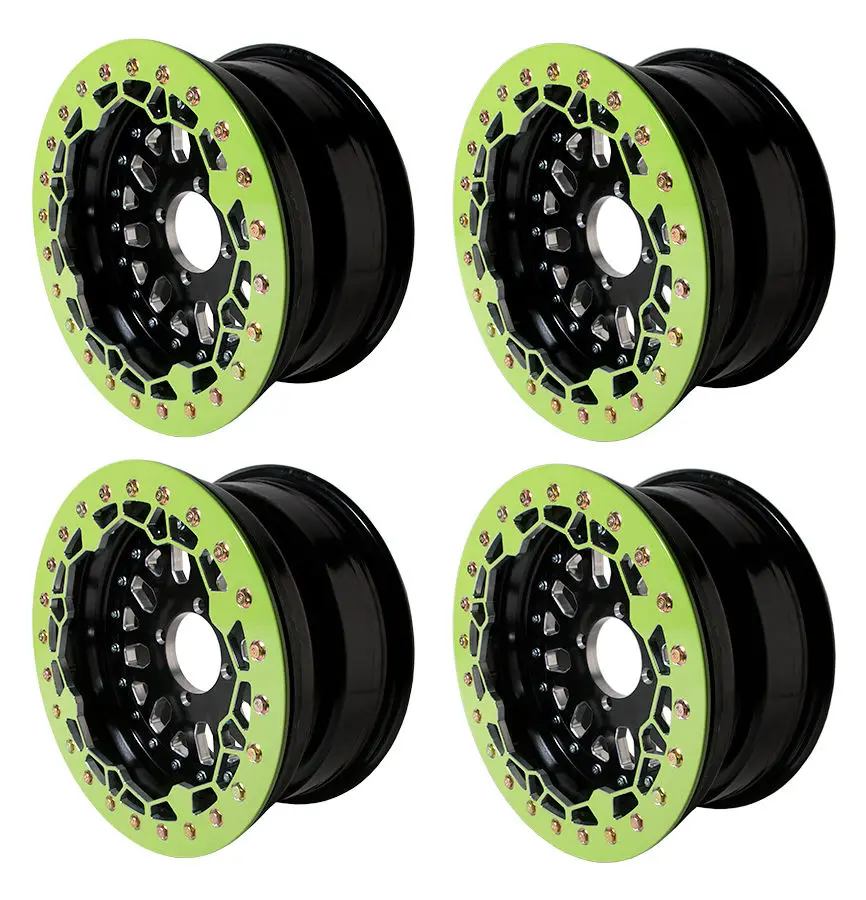 If your wheels are for any reason leaking, you'll immediately see bubbles.

You've assembled your new UTV beadlock wheels, now its time to install them on your machine. We STRONGLY recommend you have a professional install your wheels and/or tires. If you do not know of a reliable dealer or technician near you, call us and we can help locate one for you. If you insist on mounting your own wheels, you MUST follow all steps below to ensure a proper and safe installation:
 Not all lugs are interchangeable and if you're planning to run any Valor Offroad wheels, your OEM stock lugs WILL NOT WORK. You must purchase a spline kit from our Installation Kits. Not sure what kit you need? Check out our Fitment Guide.
You MUST re-torque your lugs to OEM spec after no more than 20 miles. This applies to your daily driver, towing trailer, lawn mower and especially your UTV, SxS or ATV. Want to learn more about what happens when you decide to skip the retightening step? Check out our Why you should tighten your lugs post.
How do I know if my lugs are loose?
 The wobble may be as simple as you threw a tape weight on your truck wheels or that your alignment is out of whack, but it's always better to be safe than sorry.
 Learn
Looking for the best UTV wheel in the industry? What makes one brand different from the next and why is there such a big swing in strength, sizing options, customization and price. Learn why the best UTV wheel may surprise you.
Learn
There is more than meets the eye when you dissect how a tire and wheel combo inflates, stays inflated and why some wheels and tires shouldn't be matched together. We take a deep dive into what makes certain wheel engineering superior when deciding your next combo.
Fitment
A dual drilled wheel is a wheel that is drilled with two sets of bolt holes. With this additional set of holes, dual drill wheels can accept two different bolt patterns. On all dual-drill wheels, the larger hub bore of the two bolt patterns is used to ensure proper fitment.
The Source is your destination for applicable and useful posts, how-tos and recommendations to keep you and your passengers safe and prepared. Have a topic you'd like to know more about? Search the site using top navigation. Have a topic we haven't covered yet? Shoot us an email using our contact form.
When you purchase through links on our site, we may earn a commission at no additional cost to you. Learn More
When you’re out playing with your ATV in the mud, a tire de-beading from the rim will put a quick stop to your weekend fun.
Ordinary wheels rely on tire pressure to keep the tire seated on the rim. But when you are in the mud, you need all the traction you can get.
And as you probably know, your traction, as well as flotation, will improve drastically when you drop the pressure in the tires down to almost nothing.
The problem with this as it increases the risk of your tire de-beading as well. The solution to this problem is upgrading to Beadlock wheels.
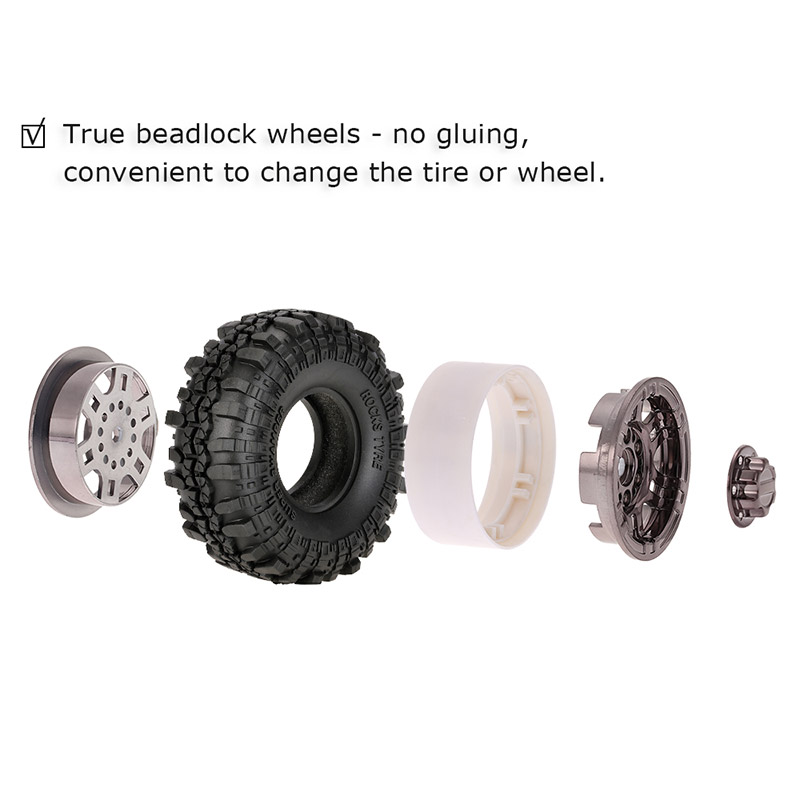
But how does ATV beadlocks work? ATV beadlocks work by clamping the bead of the tire to the wheel. The tire bead is placed between an inner ring welded to the rim and an outer clamp ring. Both of which span the whole circumstance of the wheel. Many small bolts are used to force the two rings together, sandwiching the tire securely in place.
This will prevent the tire from dismounting or spinning on the wheel when you ride with lower tire pressures for better traction.
For most ATV riding, you will be perfectly fine, even if you drop the tire pressure on your stock wheels.
Most ATV tires’ walls are quite stiff, so that they will hold up quite well even with no air in the tire.
At the same time, an ATV is relatively lightweight compared to, let’s say, a Jeep. So for ordinary, “light” off-road riding, you should have no issues.
But as soon as you go a bit more extreme, where you land big jumps or hit rocks and stumps on the sides of the tires, they may not manage to keep the tire in place.
Because as I mentioned, an ordinary wheel relies on air pressure to hold the tire in place on the wheel. The air forces the tire to the outside lip of the wheel, making an airtight seal.
The friction between the tire and the rim, caused by the air pressure forcing the two together, prevents the tire from spinning on the rim when you apply throttle or brake.
When the pressure drops, there will be less force keeping this seal airtight. Therefore, it will require significantly less of an impact to break the seal and dismount the tire from the wheel.
The beadlock wheels come with some extreme benefits, as well as some rather extreme disadvantages. Make sure you consider all of them up against what kind of riding you plan on doing before you run over to the store with your hard-earned cash.
Most off-road applications like riding in mud, sand, snow, or even rocky terrains can benefit a lot from deflating the tires. It’s in situations like these is where beadlocks come to shine.
These wheels do not rely on air pressure to function as the locking rings mechanically hold the tires. You get the benefits of a deflated tire without the added risk of it dismounting from the wheel.
The lower air pressure will increase the tire’s footprint (the area touching the ground), creating both better traction and flotation in the slippery mud or snow.
And when rock-crawling, you also benefit from the sidewall becoming more pliable. This lessens the chance of a sharp rock puncturing the tire’s sidewall as it will rather flex around the rock.
Additionally, you get the bonus of a more comfortable ride when riding on rough terrain. The tires will act more like balloons or bouncing balls as they soak up most of the small bumps and humps you run over.
This is only at low speeds tho. Running with little air pressure at high speeds can be downright dangerous as the bike is dancing around.
In quad racing, beadlocks are often used to keep the tire in place when landing huge jumps and to keep it from spinning during hard acceleration or deceleration.
Beadlocks have their place in quad racing.People in the drag-racing scene are also often seen using beadlocks. However, these riders do not use them because they need to run with low pressure in the tires.
They mainly use them to prevent the tire from spinning on the wheel when the clutch is dropped, and the bike sets into extreme acceleration.
When the engine horsepower gets 2-3 times higher than stock, the air pressure alone is not enough to prevent the tire from spinning on the wheel, even when using higher air pressure levels.
The beadlock will take up some of the hp because of its added weight, but the benefit of getting all of the power down to the ground is what matters in this game.
And then, finally, there is the aesthetic aspect of things. Many riders consider getting these wheels simply because they look so friggin’ cool, without actually needing them for any practical purpose.
Aside from functionality, they sure make the wheel pop!And hey, who am I to judge. Beadlock do lock quite trick, even though looks were probably not what the original inventors had in mind.
That’s why the market of beadlock “look-alike” rims has exploded lately. These wheels have the characteristic outer ring with all the small bolts but do not feature the possibility to clamp the bead in place (locking the bead – hence the name; beadlocks).
So why is not everyone just using beadlock rims then? Well, they do come with some pretty bad downsides, making them not the best option for all riders.
Let’s have a quick look at the most important ones so you can decide if they are something for you after all.
Getting a set will set you back quite a bit more than ordinary rims. The added complexity of manufacturing them combined with a lesser market do put them in the higher price range.
You should expect to pay anything from 1 1/2 to 2 times the price of a conventional set.
The added weight is not always a downside, but you should know that these wheels generally weigh quite a bit more than conventional wheels.
The inner and outer ring combined, plus the small pile of bolts, will add up quite a bit.
The added weight will affect acceleration, deceleration, and general handling of your ATV. It will also put additional strain and wear on the different components of the undercarriage of the bike.
Properly balancing a beadlock wheel is close to impossible, even when the wheels are brand new. You may manage to get them decent, but some vibration is to be expected in any case.
You will also get dirt trapped between and behind the locking rings as you ride, making the ATV pretty much useless on the trails where speeds are higher. The whole bike will vibrate increasingly more violent as you catch speed.
To get the balancing back to an acceptable level, you may need to completely dismount the tire from the wheel for a thorough cleaning before you put it all together again.
Remember to use the specified torque when tightening the bolts on the locking ring. This is crucial to get a good result and a mistake that many new beadlock owners have to learn the hard way.
Related: Do You, Can You, and Should You Balance ATV Tires? Best Way?
Beadlocks do require more maintenance than conventional rims.
Except for cleaning when things get stuffed with debris, you need to make sure the locking bolts are properly tightened to the specified torque at all times. Ideally, you should go over each wheel before every other time you go out to ride.
Failing to do so will result in bolts coming loose and falling off, one by one.
If you lose more than a few bolts, the tire may actually come undone, creating a potentially hazardous situation if this happens at higher speeds.
There are many different variations of the beadlock wheel available on the market today. The most common type is where locking rings are fitted to only the outside of the wheel.
Typical ATV beadlock wheels.This is because the outside bead of the tire is much more prone to involuntary de-beading than the bead on the inside.
For the most extreme applications, you can also get beadlocks that feature locking rings on the outside and inside the wheel.
This makes for a practically bulletproof setup, but you do run disadvantages like additional weight, cost, and maintenance. Also, these dual-sided beadlocks are quite a bit harder to mount than the one-sided type.
For ATV’s the beadlock wheels typically run in the range from 10-16″, where 14″ is most common. For quad racing, the smaller size wheel and tires are typically preferred.
If you’re in the market for new beadlocks, you should look for a set where the bolt heads are lowered into the ring as this greatly reduces the risk of knocking off boltheads when hitting rocks, etc.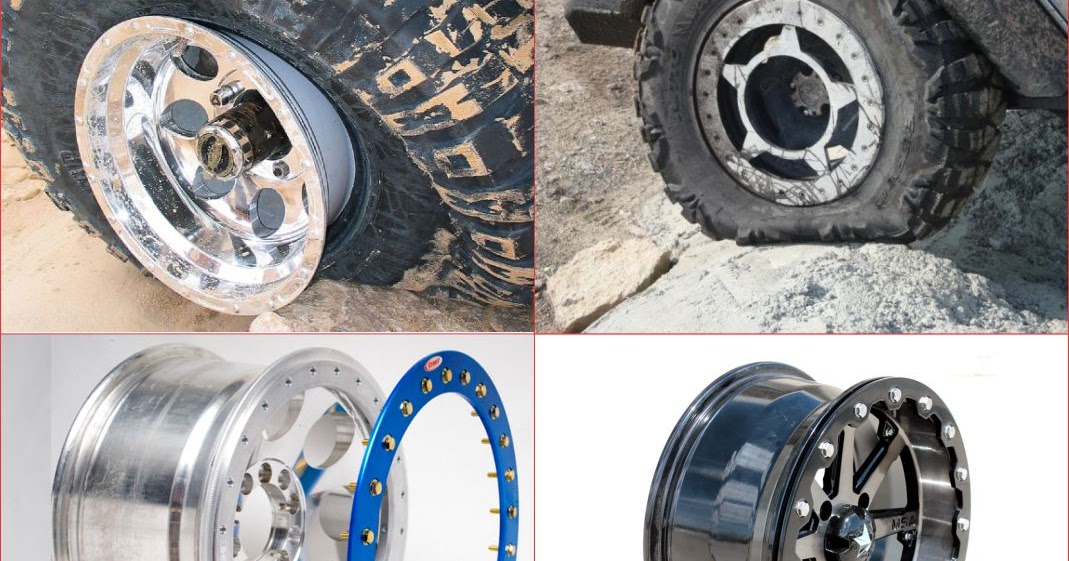
The ring thickness is also a good indicator of the quality of the set you’re looking at. A thicker ring will handle more brutal impacts and are less prone to wearing down prematurely.
Related: Are ATV Tires Tubeless? Tubes vs. Tubeless (Pros and Cons)
Off-road driving can be full of surprises. Often these very surprises happen with the wheels. The fact is that many drivers prefer to drive off-road with low tire pressure (this increases patency through mud), and this can easily lead to disassembly of the wheel at the most inopportune moment. And so we smoothly approach the topic of our article.
Of course, other situations can be the cause of disassembly. For example, a collision with some kind of obstacle or a sharp entry into a turn at high speed. In any case, a dismantled wheel is hardly what you would like to see on your ATV somewhere in the middle of a field or in a dense forest. Therefore, many people want to protect their equipment from such an unfortunate situation, and that is why they came up with beadlocks.
This is the answer to question “Why do we need a bedlock?” . Beadlock will not allow your wheel to be disassembled even under the most severe loads.
This type of accessory gained popularity thanks to SUVs and military equipment. It was on these modes of transport that bedlocks were used. Later, ATVs became widespread and beadlocks for ATVs appeared on the market.
Let's move on to the next question.
The main difference between a beadlock disc and a regular disc is the presence of a plate with special threaded holes in a circle. The tire bead is mounted on this very plate. Then another plate comes to the rescue, which is installed on top of the tire and screwed to the disk.
This creates a kind of "vice" that securely holds the tire. A typical beadlock design for an ATV is shown in the photo below.
With this accessory, you can confidently drive a quadric even on the most difficult off-road without fear of getting a disassembled wheel.
Moving on to the last question.
There is not much to say here. Any person can handle the installation of a beadlock. The procedure is extremely simple and clear:
Done.
The only problem that can arise when installing a beadlock with your own hands is centering. But this is unlikely, because manufacturers mainly produce self-centering models.
So, let's list the benefits of ATV beadlocks:
Whether you need a beadlock disk is up to you. If you drive on the plains at low speed, then most likely you will not need beadlocks. Otherwise, be sure to take note of this accessory.
You can buy wheels with beadlocks for ATV in our store. All products are presented in our catalog.
Video beadlock discs
{source}
allowfullscreen>
{/source}
This entry was posted in Equipment 4x4. Bookmark the permalink.
Our online store has a user-friendly interface that will help you comfortably make purchases via the Internet.
Unfortunately, the browser you are using is outdated and needs to be updated.
In order to open the online store, please upgrade your browser or use another up-to-date browser.
Our webshop supports all latest browsers.
Weekdays from 10:00 to 19:00,
Saturday - from 10:00 to 17:00,
Sunday - closed
Personal account Registration
|
Registration Login to your personal account Connect with us Payment types Delivery methods Quick order Add a review Payment Delivery Order a product Conditions for the purchase of goods "In stock" Conditions for the purchase of goods "Expected" Conditions for the purchase of goods "To order"
Cash payment upon receipt of the order
Along with the goods you will receive the following documents: fiscal receipt, invoice, guarantee (if the product is under warranty), certificate of completion (if shipping is free)
Payment by Visa and MasterCard via the Internet
Payment is made through the authorization system plastic cards E-pay JSC "Kazkommertsbank" Additional commission for payment by this method is not charged, you pay for a specific item.
Payment by bank transfer
All necessary shipping and financial documents are included in the shipment.
Free delivery within the city for orders over 30,000 tenge
| | |
| Name:* | |
| Phone:* | |
| Email mail:* | |
| Order conditions Your order has been successfully placed. | |
By default, a quick order is issued to a Private person with cash payment and pickup from Almaty
Free delivery within the city of Almaty with an order amount of 30,000 tenge or more
m_more_stock