For the average racer, gluing a tubular tyre is a messy ordeal. For pro team mechanics, it’s a part of virtually every day on a Grand Tour. This isn’t just because of punctures. Tyres wear out, pick up glass, wheels break and conditions change. When you have nine riders and each of them has a minimum of four bikes (race, two spare, and TT), that’s 36 bikes. 72 wheels right there. Add to that 10 pairs or more of spare wheels and you have a pile of work on your hands.
Presented here is a visual step-by-step guide on how, in my experience, most pro mechanics guarantee a safe, clean installation of a tubular. Lampre-Merida mechanic Moreno Bacchion was very helpful. Attempts at questions and answers were difficult as Moreno doesn’t speak English and our French didn’t seem to function too well either.
Observation can be a powerful teacher though. Sometimes words only get in the way. If you’re a visual learner, look through the photos and captions. If you prefer words, read below. Best of all would be to both read the guide below, then scroll through the gallery.
Bookmark this page if you only infrequently glue up a tyre for yourself. It shows a pro doing extremely efficient work. For us mortals, gluing a tyre is absolutely doable. It is a multi-day process though. So take your time and if you’re unsure, ask a mechanic you trust.
Also note that these instructions are for a new road tubular tyre and a tubular wheel that has already seen a tyre and glue. Ideally, for a new rim, build up three or more thin layers of glue over the course of several days. Apply a thin layer of glue to the tyre’s base tape as well – more if the tyre’s base is especially absorbent. Let each layer you apply dry overnight. For cyclocross or track racing, you’ll want to take extra steps.
First you need to prepare your new tire. Pro team mechanics will glue up to 80 tires in advance for a race like the Tour. These are glued, stretched and have valve extenders installedNick Legan
If your loving wife or husband isn’t keen on having pre-glued tyres on hand year round, be sure to pre-glue the base tape of your tyre at least two days before installing it. This gives the glue one day to dry completely and another day to stretch it on a spare Fulcrum carbon deep section rim.
You know, all those extra carbon rims you have around? Keep at least one of them to stretch tyres after you’ve put on the initial layer of glue. This makes installation quite a bit easier.
This is Lampre-Merida’s Moreno Bacchion. On a rainy morning before the start of Stage 2 he was busy working, keeping his inventory of race wheels tip top. Graciously he let us photograph him while he worked. Here he scrapes excess dried glue off the rim using a utility knife. He also quickly checked that the wheel was trueNick Legan
Install your wheel in a truing stand. Check that it is true. Without a tyre is the best time to perform adjustments as you can easily verify that the wheel is true and round.
Next, clean the rim using a three-step process. First, scrape excess dried glue using an inexpensive knife/razor blade. Some glue is sure to squeeze out at the edge of the gluing surface if you’re applying sufficient glue.
Next up, Moreno uses a narrow wire brush to remove large pieces of dried glue and roughen up the surface so that it will better adhere to new layer he’ll put on nextNick Legan
Then grab a wire brush to simultaneously roughen the existing glue and knock off any chunks. Be sure to not scratch the braking surface. You’re only applying the brush to the gluing surface.
Last step in prepping the rim is a wiping the rim bed with a clean, solvent-soaked rag. This removes any debris and reactivates the existing glue on the rimNick Legan
Using a clean rag, apply a bit of solvent to clean off dried pieces and to re-activate the existing glue. Acetone works well here. Be sure to go easy with the solvent though.
And anytime you’re gluing a tyre or working with solvent, do it outside or in a very well ventilated space. Also try not to touch any decals or paint with the solvent. The colors can run when using acetone.
A coffee break is always a good idea, especially before the can of glue is openedNick Legan
While some contend that beer helps when gluing tyres, I prefer a stimulant. In a most Italian move, Moreno’s colleague delivered him an espresso. He took five minutes to discuss the wet weather with his directeur sportif then got back to work.
Moreno uses a narrow paintbrush to apply a thin layer of glue to the rimNick Legan
Carefully, lovingly even, apply a thin layer of tubular glue to the rim. Moreno is using Continental. I like Vittoria Mastik. While the large can of Continental glue has a brush built into it, Moreno quickly threw that away.
Instead he used a small paintbrush that is a tad narrower than the width of the rim. He keeps it in a bottle with solvent in it to keep the glue from hardening.
Before moving on, Bacchion wipes any excess glue that may have gotten onto the brake trackNick Legan
After coating the entire gluing surface, Moreno then took his solvent rag and wiped off any excess glue that he may have accidentally applied to the braking surface.
While I don’t personally perform this step, Bacchion wipes the pre-glued tire with a bit of solventNick Legan
Take your tyre off the stretching rim and, using the same solvent rag, wipe the base tape of the tyre. This clears debris and “wakes up” the dried glue a bit. Set it aside in a clean spot. Make sure you have your valve extender installed if you need one for your rim.
A front wheel tray for a turbo trainer is a handy tool when installing a tubular. You can also use a piece of woodNick Legan
A few big deep breaths are always helpful when psyching up for the physicality of installing a tubular on a rim. I like to think strong thoughts, visualizing an Olympic clean and jerk competitor. Then I look in the mirror, come back to reality and hope that my emaciated cyclist arms can get the job done.
Moreno does this every day, so he took a moment and yawned instead. The savvy Italian then got out an Elite trainer front wheel tray to hold his wheel, carefully putting the valve hole at top dead center.
After putting the rim in the tray with the valve hole at top dead center, Bacchion begins to quickly and evenly stretch the tire onto the rimNick Legan
With enough air in the tyre to give it shape, put valve into the valve hole. From here the going gets tough. It’s important to put even tension on the tyre as you install it. Too much pressure on one side can make for a crooked valve stem and for spots that don’t adhere well and tick while riding.
He works his way down both sides simultaneously, applying even pressure as he goesNick Legan
There are no tricks here. It takes some grunt and strong wrists. Work your way around the rim, doing your best to center the tread of the tyre as you go. When you near the end, lift the wheel off the stand (or a piece of wood to keep the rim from collecting dirt) and try to pop the rest of the tyre onto the rim without smearing the glue.
Bacchion places the last section of tire on the rim, straightening it in the processNick Legan
With the tyre now on the rim, give the wheel a spin. You need to act quickly to get the tyre as straight as possible. A good place to start is with equal parts of the base tape showing on both sides and consistently around the circumference of the tire. If you’re using a high quality tyre, this should be enough. Sometimes you’ll need to adjust for a slightly wobbly tread.
Once you’re happy with your straight-as-an-arrow tyre placement, pump it up.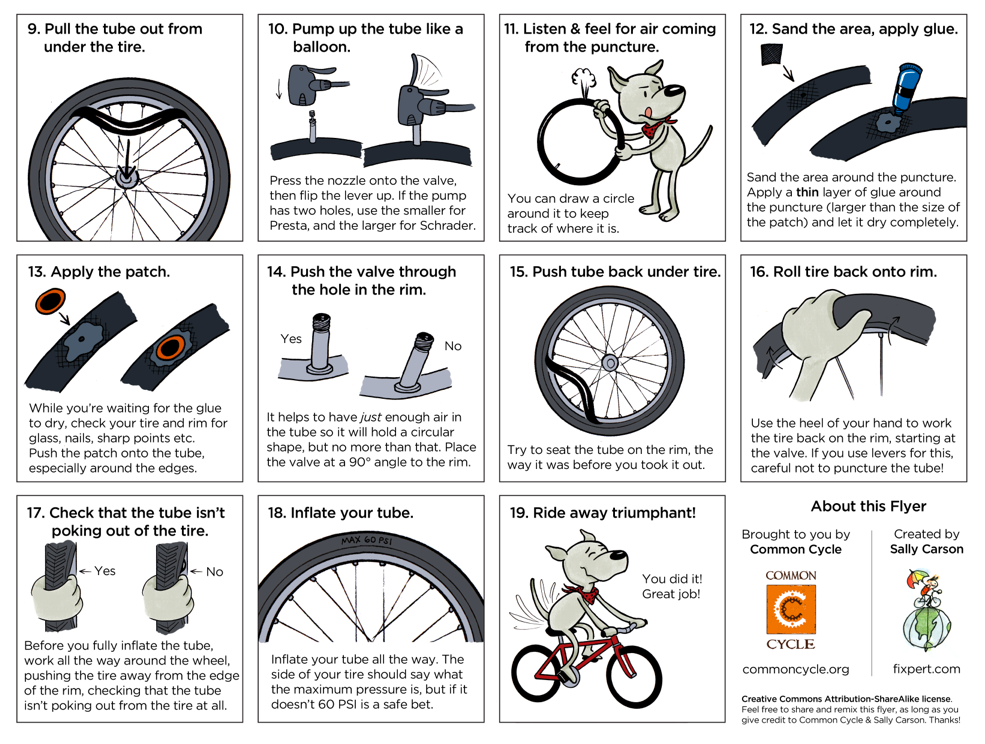 Go to 100 psi or so (7 bars). Give it another quick spin to verify how awesome you are, then roll the wheel on the ground, pushing the tyreinto the gluing surface using your body weight. Start at the valve stem and roll it back and forth before making your way around the tire.
After inflating the tire and giving it a quick spin to ensure the tread is straight, Bacchion pushes the tire into the gluing surface, forcing the tire into the rim bedNick Legan
Continental tyres are among the tightest tubulars produced. They require a lot of strength to install in a single go. Stretching your tyre on a clean rim after you’ve allowed the base tape glue to dry is the single best thing you can do to make this process easier.
Inflate it to 100 psi and leave it overnight before you need to stick it to your rim. Vittoria and other tyres made in the same factory are quite a bit looser and don’t always need to be stretched.
Lastly, the Italian mechanic wiped off any glue that seeped out after he pressed the tire into the rim. DoneNick Legan
Nothing says professional like an expertly glued tubular tyre. Nothing says amateur like globs of glue at the top of the brake track. So grab that solvent rag from before and make your way around the wheel. Again, be careful to avoid rim stickers.
Set the results of your labor aside overnight to dry before riding, at least 12 hours! Now it’s time for that beer.
Tubular, or sew-up, tires used for road, track, and cyclocross racing consist of an inner tube enclosed in a casing, which is then taped to the rim or glued on with a special contact cement. This bond is critical because if a tubular comes off the rim, a crash is almost guaranteed. Here's our four-step guide for securely gluing a tubular—plus a primer on how to repair one after a flat.
RELATED: It's Time for Tubulars
1. Pre-Stretch
For a new tubular, it's best to first put it on a rim without cement, inflate it, and let it sit. This stretches the tire and makes mounting easier when you're gluing it on. Start by putting a bit of air in the tire so it has a shape, but no extra tire pressure. Then set the wheel vertically on the ground in front of you, with the valve hole on top for easy access. Insert the valve through the hole and grasp the tire on either side with your hands. Place each section onto the rim and advance down the sides, lifting each section of the tire onto the rim.
Bending over the wheel, continue to mount the tire while watching the valve to see that it remains straight. If it becomes crooked, pull the tire harder with one hand to correct. As your hands near the bottom of the wheel, the tire will become tight. Use your body weight to stretch the tire into place. Pop on the last difficult section by lifting the wheel off the ground and rolling that tire section away and then onto the rim with your thumbs.
Move your hands around the wheel, straightening the tire, and then add full tire pressure. Let the tire sit for a while—preferably overnight, but at least 10 or 15 minutes—to give it time to stretch. (The longer you wait, the easier it'll be to mount after gluing.)
2. Prepare the Rim
Sand the rim lightly with emery cloth to scuff up the surface and give the glue a little more purchase. Using acetone or alcohol, clean the rim of any oil or other contaminants.
Working with a used bike rim? It's not necessary to remove the old glue, but it's important to have a smooth surface for the tire, or it won't sit properly when installed. You also don't want any loose bits of dried glue that can prevent the new glue from holding the tire to the rim.
To prepare the rim, place the wheel in the bike frame (the tire should already be removed) and turn it while scraping with a tool that fits the shape of the tire seat on the rim.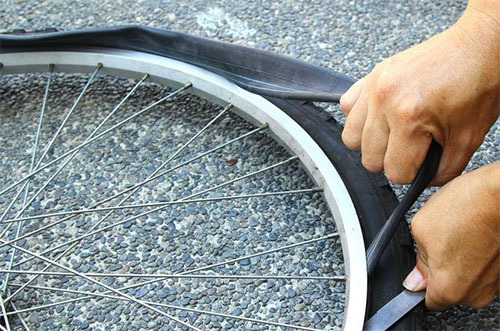 Cone wrenches often fit nicely here, but anything that fits the rim's shape and has a good scraping edge will work. Spin the wheel while you hold the scraper's edge against the rim to chip off the loose glue and smooth the rim's surface. It doesn't have to be perfect, just smooth and flat enough for a good glue purchase and for the tire to sit properly on the rim. When the rim is prepared, glue it as directed and mount the tire.
3. Smear the Glue
When the tire has stretched, remove it from the rim. Place the wheel in the bike, suspend the bike, and dab the tubular cement between each spoke hole on the rim. Put your index finger inside a plastic Baggie, then hold it on the rim as you slowly turn the wheel with your free hand and smear the glue to create an even coat that reaches from sidewall to sidewall. Then apply a bead of glue to the centerline of the tire's base tape. Spread this glue to cover the entire base tape, using an old toothbrush or an inexpensive acid brush (found in almost any hardware store)—something that you don't mind tossing out afterward.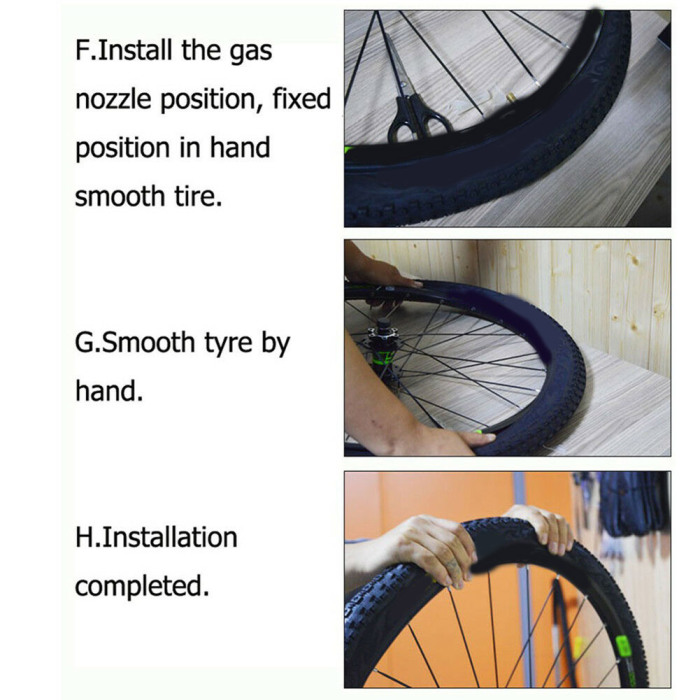
4. Remount the Tire
Allow the first glue coat to dry for an hour, and then add a second coat. Wait about 15 minutes for this coat to get tacky. Then mount the tire exactly as before. Work carefully so you don't get glue all over the sidewalls of the tires. You'll know you did a good job of gluing if, when eventually punctured, the tire is nearly impossible to remove from the rim.
RELATED: Do You Need to Replace Your Carbon Rims?
Patching Tubulars
Repairing tubulars is slow but fairly easy work. When possible, locate the puncture while the tire is still on the rim. Inflate the tire and listen for leaks. If you don't hear air escaping, hold the tire near your face and turn it, trying to feel the air (this sounds nutty, but the skin on your face is very sensitive). Look closely for a hole or cut in the casing that is the point of the puncture. Once you locate it, mark the spot so you can find it again quickly after you get the tire off the rim.
Unfortunately, some leaks are difficult to pinpoint. If you can't locate the precise point of the problem by one of the above methods, pull the tire off the rim and try another method.
If you have a slow leak, try pumping up the tire and immersing it in water, watching for bubbles. Unfortunately, air bubbles sometimes travel inside the tire casing before emerging into the water, so this method isn't foolproof.
The most certain way of pinpointing the tire leak is to isolate one section of the tire at a time and see if any air escapes from the rest of the tire. If not, the problem lies in the isolated section. Try blocking off a section of tire by squeezing it between your hands. A more elaborate method is to clamp a couple of short two-by-four-inch blocks around the tire, section by section. Once you've located the source of the problem, begin your repair.
RELATED: Five Tricks for Preventing a Flat Tire
1. A tubular tire has protective tape called base tape over the stitching that holds it together. This tape is bonded to the tire with liquid latex, not rim cement. Cut the tape and pull it back to expose about six inches of stitching at the location of the puncture. Mark the stitches with a permanent marker so you can tell which holes line up across from each other after the thread has been removed.
2. Use a sewing seam ripper or a knife to cut the stitching threads. Pull the tire open and remove the thread remnants. Carefully pull aside any protective gauze or tape to expose the tube. Lift out the tube and look for the leak.
3. Patch the leak using the same methods used for ordinary bike tubes. If it's a latex tube (very thin and pale brown), it's possible to patch it with a piece of latex cut from a discarded tubular tube. Just apply glue to both the tube and the patch, wait for the glue to dry, and press them together.
RELATED: Effetto Mariposa’s Carogna Tubular Gluing Tape Makes Regular Glue Look Bad
4. While you have the tire open, look inside to see if any pieces of the object that caused the puncture are embedded in the casing. Remove any offending material. Usually there'll be a visible black mark if an object has penetrated the casing, and it's easy to see because the casing is light-colored. Also check to see if any casing threads are cut. Reinforce any damage with a casing patch. Cut your own patch out of a piece of old tire or strong canvas or nylon. A generous size is best; overlaps of two inches or more are suitable. Sheer tire pressure will keep the casing patch (or "boot") in place, so there is no need to cement it.
RELATED: The Definitive Guide to Pumping Your Tires
5. Sprinkle a little talc into the casing to help the tube slide back into place. If necessary, wiggle the tire to help the tube position itself properly, then straighten the inner gauze or tape. You're now ready to restitch the tire around the tube, but take special care to use the exact same holes as were originally used for this. You don't want to weaken the casing by poking new holes through it. A simple overhand stitch works fine, or use a sewing awl of the type used by leather workers to reconstruct the original cross pattern. Use strong thread or, in a pinch, dental floss, overlapping generously at the ends to prevent unraveling.
It's very important not to pull the thread too tight as you stitch. Doing so can pinch the two edges of the tire casing together, creating a ridge on the bottom of the tire, which causes a problem. The bottom of the tire must retain a flat profile so the base tape will stick and the tire will sit flat when reinstalled on the rim. If the casing edges are pinched, they will form a ridge that prevents the tire from sitting flat on the rim.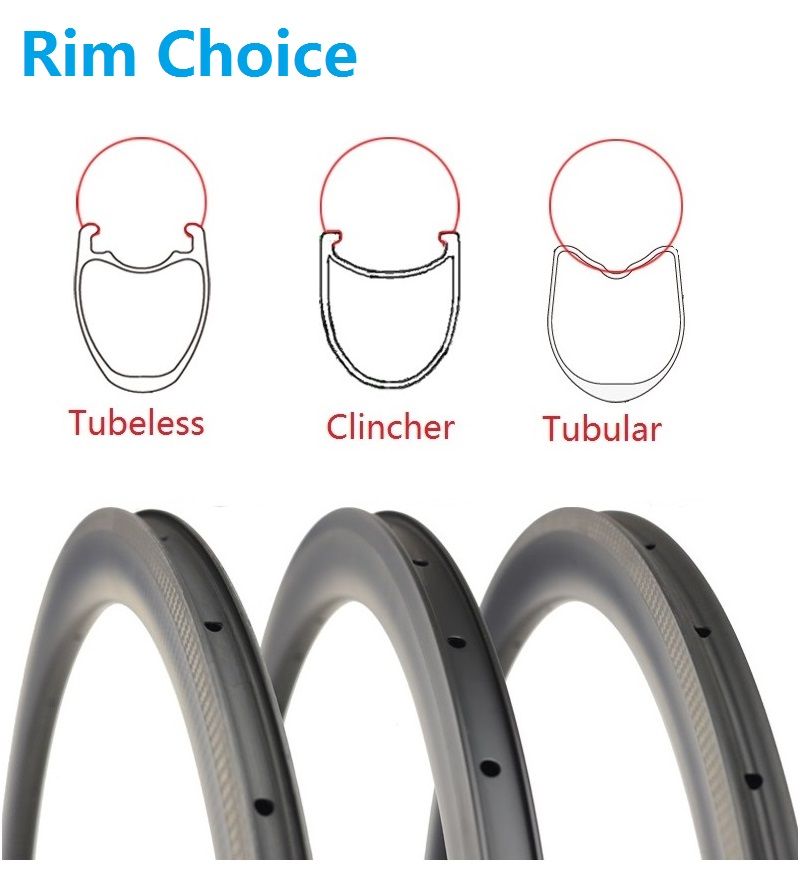 To ensure this doesn't happen, while stitching pull the thread just tight enough to bring the two edges of the casing together. Check the tire while stitching occasionally to make sure the finished seam will lie flat when you're done.
Another common problem is stitching the tire using the wrong holes. This is possible even if you mark the holes and are very careful. If you make this mistake, you'll end up with an S-shape in the tread of the tire, so check for this after resewing tubulars. If you find that the tread now has an S in it, cut the threads you just put in and restitch the tire using the correct holes. Anytime you cut a tire for surgery, mark the holes in such a way that you can't possibly stitch the tire back up with the wrong ones.
RELATED: Favorite Tools of Tour de France Mechanics
6. Glue the rim strip back in place with liquid latex. This is the same material used to coat and protect the tire's sidewalls after extended use dries them out.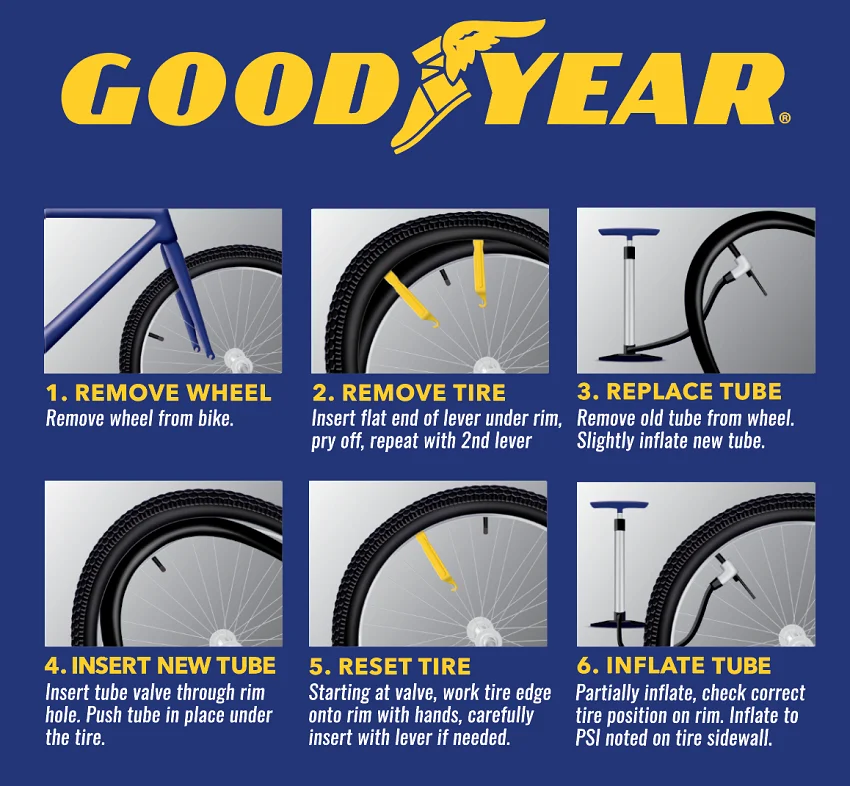 Now you have a perfect spare tire.
Repaired vs. Brand-New
The residue of rim cement left on the tire means it will achieve a decent bond with the rim when installed on the road. A brand-new, never-cemented spare tire is dangerous, so use a repaired tire as your spare. Or, if you must use a new tire as a spare, put a proper layer of glue on the base tape first. It's best to fold the spare four or five times and keep it in a simple pouch or old sock to protect it from wear and tear and exposure.
This article originally appeared in The Bicycling Guide to Complete Bicycle Maintenance and Repair.
TIRE SIDEWALL MARKING
Indicates the type of rim the tire is compatible with. Unless otherwise noted, should be used on rims with hooks.
Nominal profile width and suitable wheel diameter in millimeters according to ETRTO.
Country of manufacture. nine0007
Minimum and maximum pressure in bar and psi. inch.
Specifies the direction in which the tread pattern should be directed when the wheel is rotated forward.
Specifies that the tire should be installed with an inner tube only, not tubeless or otherwise.
TIRE TYPES
TUBE TYPE: A tire for use with an inner tube only.
TUBELESS: A tire for use on tubeless rims only, which can be fitted without an inner tube. Can be used with internal chamber.
TUBELESS READY: A special type of tubeless tire that requires a sealant inside to maintain pressure. Can be used with internal chamber. nine0007
TUBULAR: A fully enclosed, stitched or vulcanised, tire construction (tube) that requires a special tubular rim and is glued to it when mounted.
TIRE INFLATION RECOMMENDATIONS
Never exceed the recommended tire pressure.
Proper pressure affects the load, speed and handling of a bike and is vital to performance and safety performance such as braking, maximum traction and tire life. nine0007
Inflate tires "cold", that is, not warmed up on the road.
Do not exceed the maximum pressure indicated on the tire sidewall.
Insufficient tire pressure causes excessive creasing and rapid wear.
Excessive pressure causes discomfort when driving and reduces the contact area of the tire with the road surface, which impairs handling and traction. nine0007
Before every ride, it is essential to check and maintain the correct tire pressure (while the tires are “cold”), especially on tubeless systems, which are more prone to sudden pressure loss.
WARNING: Driving on tires with improper air pressure is dangerous! This can lead to an accident, accident, serious injury or even death.
nine0007
TIRE CHECK
The condition of the tires and the air pressure in them should be checked before each trip, and also, and even more carefully, after hitting any object on the road. If the tread is worn and the body material (cord) becomes visible, bulges, cracks, cuts, holes, uneven wear appear on the tire, or the tire shows signs of any other damage, it is recommended to replace it immediately.
Over time, the condition of the tire will in any case deteriorate under the influence of external forces, such as contact with the road, punctures, improper repairs, mounting-dismantling, inflation-deflation, heating-cooling, excessive exposure to ozone, improper storage conditions, etc., etc. . To reduce the impact, tire manufacturers add anti-ozonants and antioxidants to their products.
Since it is not possible to accurately predict what external forces a tire will be subjected to, there are no scientifically based limits on the life that a tire can be given. It is recommended that the condition of the tires (as well as tubes and rim tapes) be checked regularly by a bicycle specialist who can assess their suitability for further use. nine0007
As for tubeless systems with liquid sealant inside, it is necessary to check the condition of the sealant itself and change it regularly in accordance with the instructions.
To avoid cosmetic damage, use low-pressure tap water to clean and wash the tire sidewalls. Never use cleaners to improve the appearance of the sidewall, otherwise you will remove antioxidants, which can degrade the quality of the rubber and lead to cracking of the sidewalls. Using hydraulic sprayers with high water pressure can also cause damage to the sidewall. nine0007
Avoid excessive mechanical stress on tires and tubes (for example, do not brake by blocking the wheel, do not run into sharp objects, do not drive with insufficient or excessive tire pressure, etc.).
If your bike has rim brakes, the rim is subject to constant wear and tear, which over time can lead to tube failure and puncture. In any case, if you have any doubts about the condition of the tires, consult a bicycle specialist. nine0007
High tire pressure can damage the rim, so check the maximum pressure allowed for the specific rim before installing the tire (check with the wheel dealer or rim manufacturer for information on whether the rim can withstand tire pressure).
CHANGING TIRES
PREPARATION
1. Before installing or removing a wheel, read the bike manufacturer's instructions and make sure you know how to handle the wheel mounting mechanism.
2. Verify that the rim, tire, and tube are compatible with each other by checking the instructions for each component manufacturer. A mismatch between tire and rim can cause the tire bead to come off the rim or damage to the inner tube, resulting in a rapid loss of air pressure. If you're unsure, be sure to check with a bike specialist. nine0007
3. Make sure that the mounting area of the tire is clean and that foreign objects do not get into the tire, as they can damage the tube, rim tape, the tire itself, or contaminate the sealant (in the case of a tubeless tire).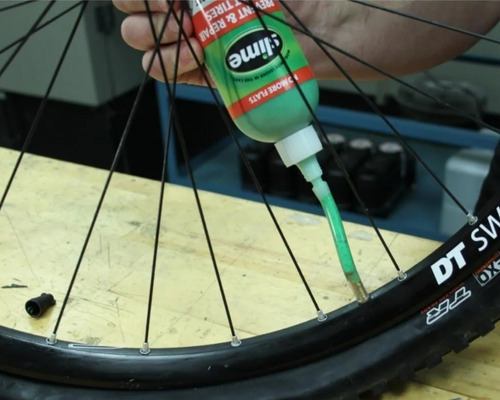
4. Make sure the rim is in good condition. If it is damaged, then it must be replaced.
5. Check the condition of the rim tape, if used. If it is damaged or does not completely cover the spoke holes in the rim, it must be replaced. Poor quality rim tape is very often the cause of a sudden loss of air pressure. nine0007
6. Check the maximum allowable pressure for the given rim type. It must be equal to or higher than the tire. Tires that allow a pressure reduction equal to or greater than 3 bar (43 psi) must be mounted on lug rims.
7. A tire capable of inflating more than 5 bar (73 psi) must be mounted on a lug rim. Hooked rims are marked with a "C" in the size label. If you have any questions, please contact a bicycle specialist. nine0007
8. In the case of installing a tire with a tube, talc helps to properly place it in the tire. For latex cameras, its use is mandatory, but it is also recommended for butyl cameras.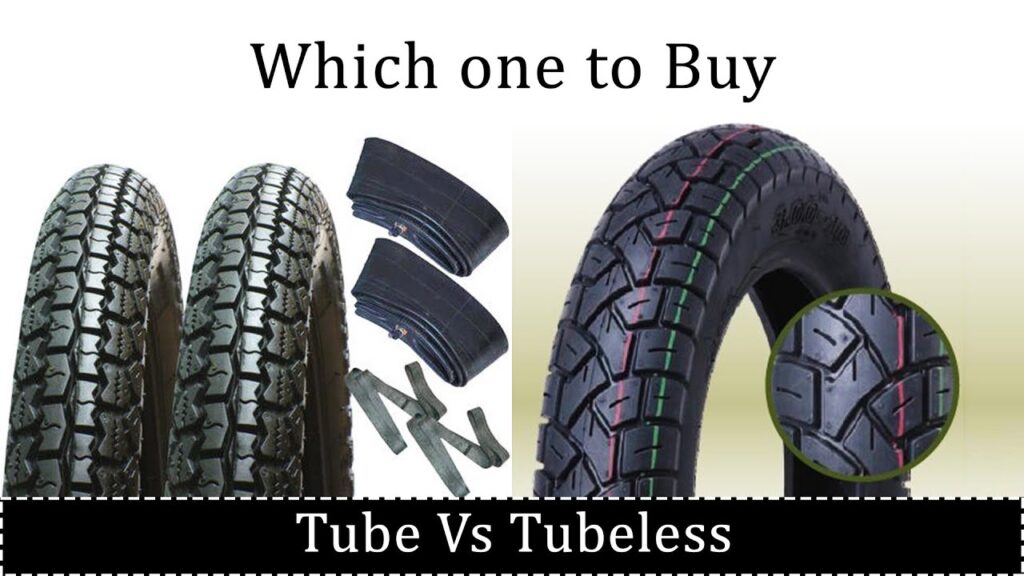 It is also recommended to install a new tube each time a new tire is fitted or after a puncture.
9. When installing a tubeless tire (Tubless), always check the condition of the valve (nipple) and change it if it looks damaged or if air pressure is lost. nine0007
10. When installing a Tubeless Ready tire, always check the sealant and change it if it is dry. Also read the sealant manufacturer's instructions carefully to make sure it's right for your tire.
TIRE REMOVAL PROCEDURE
1. Unscrew the valve cap (nipple) and locknut, completely deflate the tire.
nine0007
2. Peel off one side of the tire all around from the edge of the rim by applying pressure starting from the area opposite the valve. Tubeless tires may require more effort for this.
3. Position the tire pryer next to the valve and carefully insert it between the tire and rim, being careful not to pinch the inner tube (if any). Then, using a lever, lift the sidewall of the tire off the rim. To make the job easier, always make sure that the other bead is in the rim bed. nine0007
4. While holding the first rig in this position, insert the second rig about 10 cm from the first and repeat the above operation. Then run the pliers around the circumference of the tire to completely separate one bead from the rim.
5. Remove the inner tube, if present, or liquid sealant, if present and still liquid, and then remove the second tire bead from the rim with your hands.
TIRE INSTALLATION PROCEDURE
1. If installing a tubeless tyre, make sure the rim is sealed, tubeless tyre-compatible, or tubeless-compatible. If the rim is tubeless compatible, you will also need a tubeless rim tape that will completely cover the spoke holes. It is possible to lubricate the entire circumference of the rim with a special tubeless lubricant (do not use oil or grease) - this will facilitate the installation procedure and the correct positioning of the tire on the rim.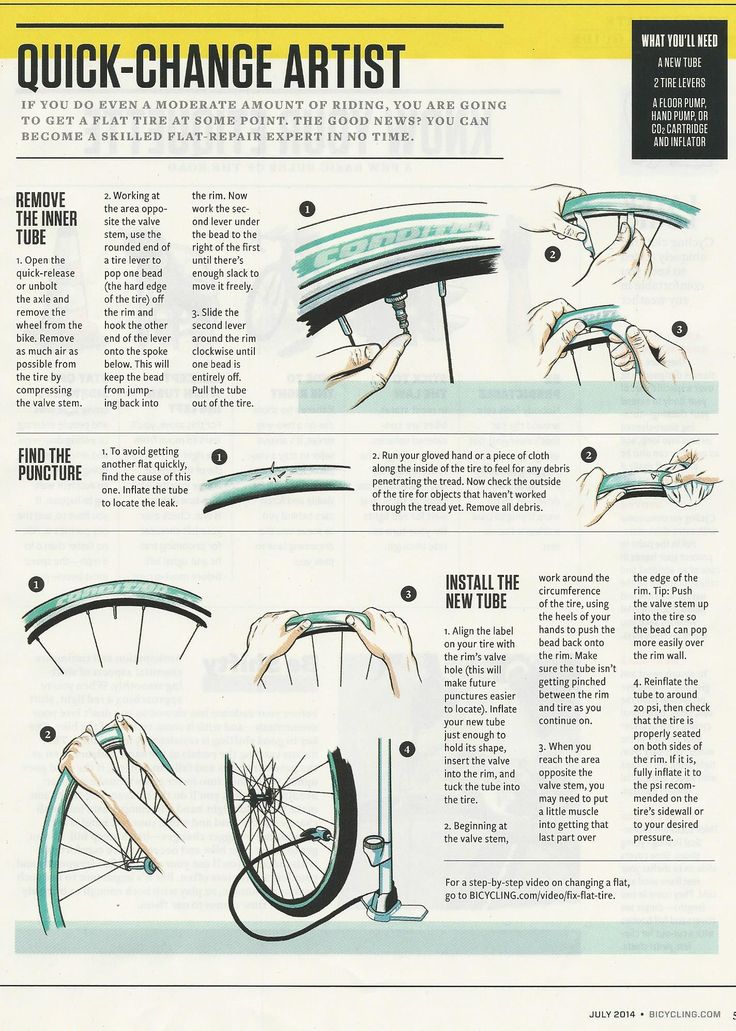 nine0007
2. Insert the first bead of the tire into the rim, observing the direction of rotation of the tire indicated on its sidewall, starting opposite the valve.
3. If installing a tire with a tube, slightly inflate the tube, but only so that it becomes rounded, and gently insert into the tire, starting at the valve and completely carefully placing it in the rim.
4. Starting on the side opposite the valve, press the other bead of the tire into the rim and push it around the rim in both directions until it fits properly in the rim. For tubeless installations, add the recommended amount of sealant before inserting the last bead piece. If the tire bead becomes difficult to push into the rim, or the last part of the bead does not snap into place, make sure that the bead around the entire circumference of the rim is in place. If necessary, squeeze the sidewalls of the tire into the rim with your hands. nine0007
5. If fitted with a tube, make sure it is not pinched between the tire and the rim or valve, and then secure the valve to the rim with a locknut.
6. Inflate the tire to the maximum allowable pressure using a pressure gauge pump so that the beads are properly seated on the rim. Tubeless tires click into place with a characteristic popping sound. Rotate the wheel by hand at low speed and at an angle to check that the beads are correctly positioned and also that the liquid sealant is spread inside (if the installation is tubeless). nine0007
7. The tire is properly seated when the thin line above the side of the rim is equidistant from the edge of the rim all around. Then reduce the pressure to your preference (within the markings on the sidewall of the tire) and close the valve. Do not exceed the manufacturer's maximum pressure for tire, rim and rim tape.
8. When inflating a tubeless tire for the first time, a strong jet of air is required, so you may need a compressor. nine0007
9. Before each ride, check the air pressure, tire bead fit, wheel-to-hub attachment, and brake pads (disc or rim).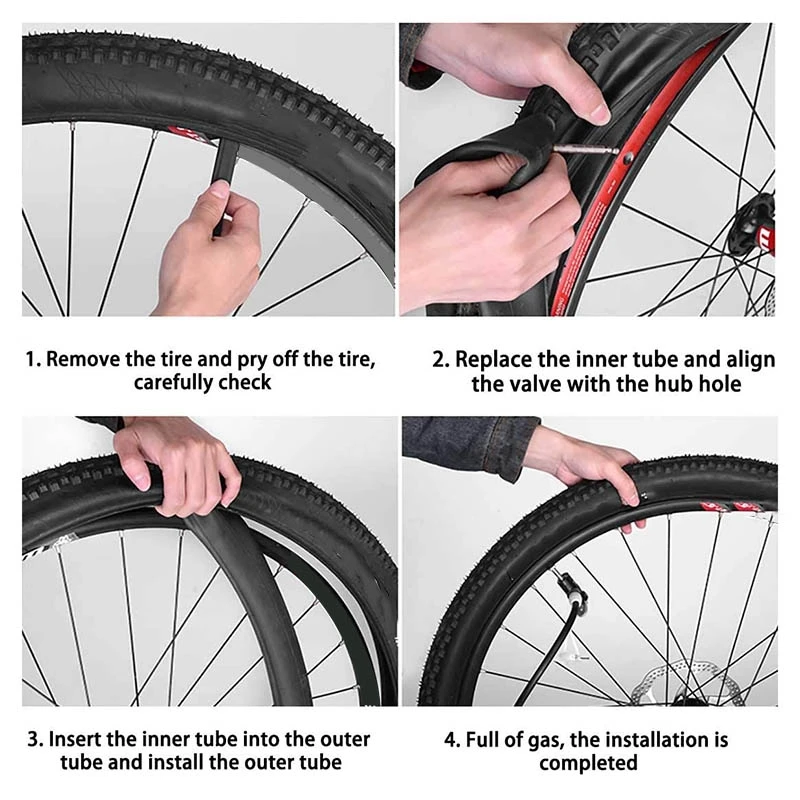
10. Before using newly installed tires, be sure to first brake test and do a few test maneuvers.
USING TIRES ON FULLY SEALED CARBON AND ALUMINUM CLINCHER RIM WITHOUT RIM TAPE
Fully sealed carbon and aluminum rims, such as tubeless rims, usually don't have spoke holes in the rim, so manufacturers don't mandate the use of rim tape.
However, keep in mind that in the case of bikes equipped with rim brakes, the heat generated during braking directly enters the tire system, significantly increasing the thermal load on all components, such as the tire, the inner tube (if any) and the rim itself. In the event of prolonged braking, riding without a rim tape can cause the tires to deflate quickly, with the risk of losing control of the bike. nine0007
This becomes even more relevant in the case of latex and lightweight tubes, as well as tubeless installations. In order to minimize the chance of failure due to overheating, it is recommended to use rim tape for any installation, and to avoid continuous, prolonged braking when descending a mountain, if possible.
USING CLINCHER TIRES WITH CARBON RIM
Carbon rims sometimes pose a risk of tire edge damage due to sharp rim edges. Therefore, before mounting the tire, it is recommended to make sure that there are no sharp edges on the rim hooks. To verify this, carefully run your finger along both edges of the rim - there should be no nicks, sharp protrusions or excessive roughness on it. If there are, then the rim needs to be replaced.
If in doubt, please consult a bicycle specialist. nine0007
TIRE STORAGE
Tires should be stored in a cool, dry place at 10°C - 21°C, avoiding contact with heaters.
Storage temperatures that are too low are not harmful in and of themselves, but can cause tire stiffness. In this case, before unfolding the folded tire and mounting, it is necessary to keep it for several hours at a temperature of about 16°C.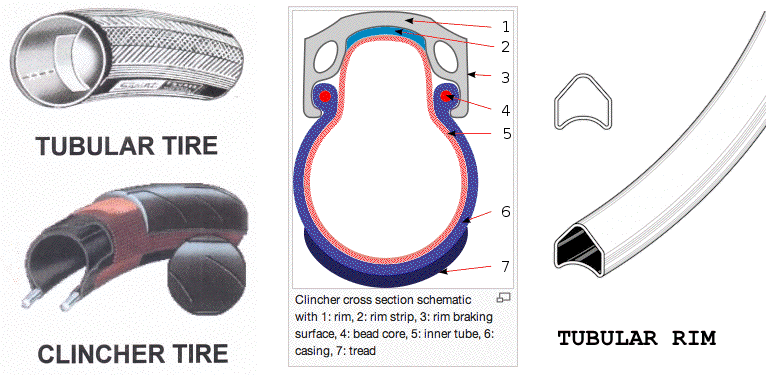 nine0007
Do not park your bike in direct sunlight or in very hot places for a long time.
When the bike is not in use and is on wheels, keep the tires inflated and rotate the wheels periodically to avoid flat spots, especially if tubeless tires with liquid sealant are installed.
TIRE AND RIM COMPATIBILITY ISO 5775-1
Skip to content
Search for:
Quite often you have to change winter tires just because a large number of studs have fallen out of them. The car loses control, there is minimal traction with the roadway. Today, many motorists prefer to install spikes on their own, and if necessary, repeat such an operation. nine0007
This technology has several advantages. First of all, this is due to those manufacturers who sculpt tires from low quality rubber. As a result, the spikes become unusable, they begin to fly out quickly.
Self-studding is carried out taking into account the conditions in which the car will be operated. Secondary studding prolongs the life of the tire.
Contents
To install studs on rubber that has no holes, you need to prepare an electric drill, as well as a tubular drill. When drilling with such a drill takes place, the chips hide inside, the drilled places can not be blown.
To ensure that the protrusion of the studs above the surface of the tire is always the same, a special depth gauge is installed. They should not be too deeply recessed, otherwise they will simply lose their functionality. nine0007
To stud your wheels yourself, you need to use an air gun that works in conjunction with an air compressor. The steel paws of the gun under a strong air flow expand the hole, the spike is driven inside. For wheel studding you will need:
Helpful advice. To carry out fine adjustment of the protrusion of the spikes, it is enough to have a hammer and a steel plate. nine0007
Most drivers find that the design of the studs makes no difference. They all have the same look. This is absolutely not true. Today, the industry produces several types of claws, which have characteristic differences.
They are made of different materials, it can be steel, plastic, aluminum. Each piece is different in shape:
Depending on the design, they are divided into two groups - single-flanged and double-flanged, designed for racing cars.
The stud core is mainly of two types:
Claws are not made universal, so they are selected for specific vehicle operating conditions. At the same time, driving speed, tire hardness, and tread pattern are taken into account.
Very important! The value of the protrusion of the spike should not exceed 1.3 mm. When choosing, you need to consider the length of the product. nine0007
When installing studs, remember the number of studs. In Russia, there are no restrictions on this. However, motorists strive to meet European standards. They set a specific number of studs for a specific tire diameter:
Studding should be done before winter arrives. After installing new claws, the wheels should be left alone for a couple of months. They will stick much stronger in the rubber. nine0007
Studded wheels require special break-in. The car should not drive at high speed, there should not be any jerks, and sharp braking should not be carried out.
There are only three of them:
The most time-consuming process is manual, requiring considerable physical effort. You will have to work not only with a screwdriver, but also with a hammer.
The electric screwdriver equipped with a special nozzle makes the process much easier. With its help, the spikes easily go into the hole intended for them. However, it is necessary to ensure that their position is always strictly vertical. nine0007
The air gun securely fixes the spike. This device greatly speeds up the work. The only drawback is the cost of such equipment.
Briefly, the process is as follows:
