There will come a time in your ATV ownership life that you will really want to take a look at something under the hood, or rather under the machine. It may be because something is leaking or you went on a run on a particularly dirty run and need to make sure that your machine is still ready to run. When this happens it is best to take a look with the comfort of a little more height than at the floor level. When this is you, know that you have a few choices when it comes to jacking up an ATV.
How do you jack up or lift an ATV? The best and safest way to lift or jack up an ATV is to use a car jack with an additional jack or stand, or by using an ATV jack or using a a lift table. Each of these have their own advantages and disadvantages, but all should provide a safe and secure way to work on your ATV.
As I was scouring the internet and talking with fellow riders for all the best possible solutions for jacking up an ATV, I realized one thing: there are a lot of really bad ideas out there. If you are looking for the best way to get underneath your ATV, please remember that you are trying to get under a machine that weighs hundreds of pounds and could do serious damage if something were to go wrong. Safety is the number one thing you want to consider anytime you talk about putting your ATV or yourself in a precarious situation. There are a few ways to make sure that you are protecting yourself and your machine.
Firstly, recognize how much security you will need for the job you are doing. If you are looking at the tires or want a little extra clearance to check the body of the vehicle you may not need to have the ATV as secure as you will need to have an ATV that you are planning to get under to install a skid pad. It is important to keep in mind that even if you are just inspecting the tires, you will still want to secure your machine safely because it can still slip and fall on you.
Secondly, regardless of your motivations, do not rest your entire ATV on a single point. If you are jacking up your ATV, you want to make sure that it is secured with more than one place. This may mean putting cinder blocks underneath the tires or using more than one jack on the frame, even though both of those do not guarantee that you will be safe because ATV’s can slip from cinder blocks and two jacks can fail. Check the security of your ATV by giving it a little shake. If the ATV is super wobbly, it is probably best to think of another way to secure it before doing any additional work.
When jacking up your ATV, there are a lot of ways to get the job done, but these ways are what we recommend as the safest.
Using a Basic Car JackMost people have a car jack on hand, whether or not they realize it. This makes it a really easy way to lift your ATV up to 18 inches off the ground and get a better look. If you decide to use a car jack you will want to place it on either the front or rear part of the frame. Making sure it is lined up with the frame will help prevent any damage to the undercarriage of your ATV. When it is all lined up, you can manually begin to jack up the ATV.
The biggest con of using an car jack is that these are one of the least secure ways to get your ATV off the ground. Using a car jack only provides a single point of security for your entire ATV. This increases the potential of it failing substantially. If you are working on a tire that may need some pushing or pulling to coax into coming off, you can easily put too much pressure on the jack one way or another, which can topple the ATV on top of you or cause damage to the machine. This is when using a second jack on the same frame or possibly putting the tires on cinder blocks can add a little extra security and help you feel better about how safe you and your ATV are.
Using an ATV JackIf you find yourself wanting to get into the nitty gritty of your ATV more and more, then it may be a good time to consider purchasing an ATV jack. There are several different types of ATV jacks that are specifically designed to safely and securely lift an ATV (this is our favorite). These jacks are usually designed to work for multiple types of vehicles and will serve a dual purpose as an atv/motorcycle, ATV/watercraft, or ATV/Lawnmower jack. It will really depend on what type of lift you are hoping to achieve for you to really know which jack you will want to invest in.
The two most common jacks are the ATV/motorcycle and the ATV/lawn mower. The big difference is where the ATV is lifted from and where it will give you the most access to. The ATV/motorcycle jack lifts from the center of the ATV which means that all four tires will be elevated at the same time. An ATV/lawn mower jack lifts the ATV from tires. This means that either the front or back tires will be elevated while leaving the other tires on the ground. Obviously, this is great if you are hoping to have access to the undercarriage, but it wouldn’t be great if you are planning to work a lot with the tires.
When looking at these types of jacks, you want to make sure they are rated to carry 1.5x the weight of your ATV to make sure that there is very little chance of it failing. If your ATV is 800 pounds, a jack rated to carry 1000 pounds leaves too little buffer for failure. Most likely it would work fine, but when the cost difference between the different jacks is so little, it is always wise to be safer. If you are a casual rider, then you should be able to invest $100-$200 dollars and purchase an ATV jack that will do everything you need it to do. If you are looking for more bells and whistles, such as an electric lifting device, you will expect to pay a bit more. One feature you want to make sure your lift has is a way to strap your ATV to the jack, securing it in case something did happen. Our personal favorite is a really good hydraulic jack that comes with an affordable price tag. See the current price on Amazon here.
When using these jacks, you will really need to follow the instructions provided in the manual as to how they are lifted properly, but I will provide a basic overview on what to expect. Typically, with an ATV/Motorcycle jack, you will position the jack at the side of the ATV and slide it completely under the ATV. There will be two smaller “feet” or one large plate that will extend to both sides of the frame. From there, you will begin lifting the ATV, either manually or with an air compressor. This is also a great way to store your ATV if you are trying to save the suspension on your ATV during the times you are not riding it. As mentioned above, our favorite ATV jack fits this class, and is a really great value.
An ATV/lawn mower jack will be positioned at either the front or rear of the ATV with the two feet on the ground in front of the wheels. You will then roll the ATV on the space provided on the feet. Once the wheels are fully on (or in) the feet, you will lift the ATV until it is the height you need. This is a great way to get a good look at what is happening underneath your ATV or to do some cleaning after a particularly muddy ride. If you are going to go this route, we recommend getting the highest capacity you can find, like this lift that can do 550 pounds.
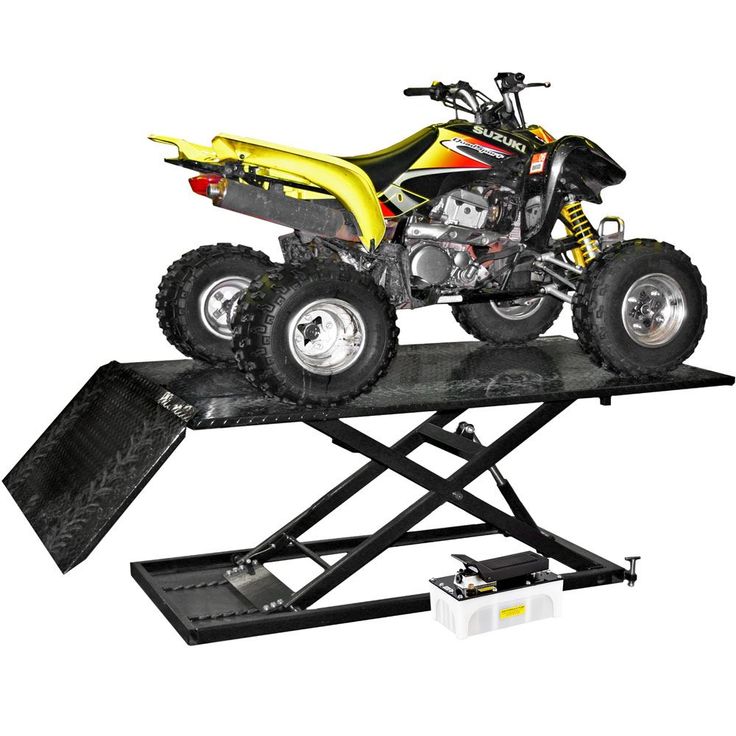
Using a lift table is really only for those who are getting serious about taking care of their ATV. A lift table is a large plate in which the ATV basically sits on an elevated floor. These are not necessarily cost effect for the casual rider, but they can be very convenient for those people who are invested in consistently improving, upgrading and taking care of their ATV. A lift table is used by rolling the ATV onto the lift plate and then raising it into the air. For the best combination of quality and value, we recommend this lift table, which will work for all but the biggest ATVS. For those riding bigger quads, you will need something like this lift table.
Have you ever strapped something down on a truck using the straps that you ratchet to tighten and provide a secure load? Since you have an ATV, my guess is that yes, you have.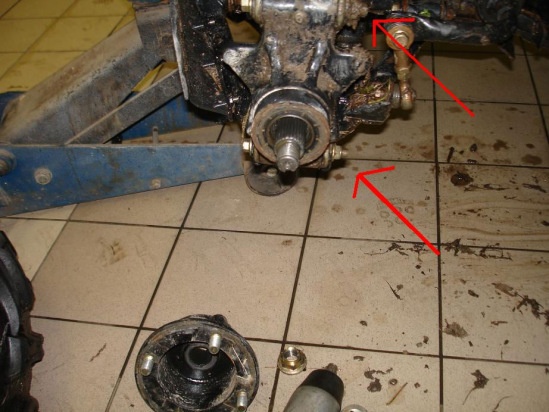 One lifting idea I found while scouring the web was using these straps to lift your ATV. It is not something we have ever tried, but it was quite intriguing. The creator of this idea added hooks to the ceiling of his garage, looped the straps through the hooks and then used one strap on the front of the frame and a second strap on the back of the ATV frame. He then ratcheted the straps until the ATV was about 24 inches off the ground hanging from the ceiling. This allowed him access to the full undercarriage and tires of the ATV all at the same time.
I thought this idea was so ingenious I had to share it. I would not recommend trying this method haphazardly because it could end up causing damage to your ATV and garage if you do it incorrectly. Firstly, if the hooks you install in your ceiling are not properly weighted to carry the weight of an ATV or if the beam you put the hooks into is not able to carry the weight of a nearly 1000 pound machine. Finally, you need to be absolutely sure that the straps are properly secured on your ATV so that you are not at risk of having it fall.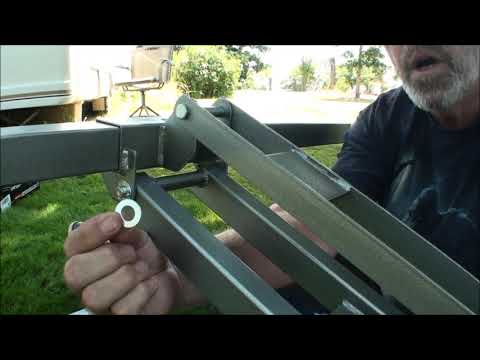 This is a lot of risk but for such an affordable, convenient and accessible way of lifting your ATV, I had to include it. If this method seems to add the most useful way of working on your ATV, it is worth examining the way to do it safely and securely in your home.
Lifting your ATV can be a little intimidating until you have tried it. Regardless of what method you decide to use, you will want to make sure safety for you and safety for your ATV are always your first priorities. When you are trying to save a little money by doing the repairs, maintenance or cleaning on your own, risking a costly accident to the ATV or yourself just isn’t worth it. Let us know what other lifting methods have worked for you!
Any work you do on your ATV, beyond routine maintenance, will require you to lift the ATV. In this article I’ll show you the most useful and most common ways to jack up an ATV. Including where to place the jack, and some useful safety tips when lifting an ATV.
There are tons of reasons to lift an ATV and tons of ways to go about doing it. Use this as a guide to give you some ideas on how you could do it yourself. You don’t always need expensive equipment to lift an ATV either.
The best way to lift up an ATV is to use an ATV lift. They’re specifically designed to jack the ATV up for maintenance and it’s one of the safest ways to do it. Jack stands or blocks is another safe alternative.
Of course you would want to lift the ATV on flat sturdy ground, but you also need to know where to position the jack on the ATV as to not damage the machine. This is mostly needed information if you plan on using a car jack, jack stands, or cement blocks. If you use an ATV jack or a scissor lift, the jack points are much less of a concern.
Lets start by telling you where to avoid lifting the ATV from. Definitely do not lift the ATV from the A-Arms, the rotors, the rear sprocket, or the bottom of the engine. Using any of those as ATV lift points could result in damaging the machine.
Try to get the jack or jack stand onto the frame, really anywhere on the frame itself will work but you also want the ATV to be securely balanced while up on the jacks. I like to use the frame right under the front bumper and the frame or axle near the rear tires.
Here are some pictures of different ATVs and their lift points to give you a better idea of where to jack up your ATV.
ATV Lift PointsTo make it easier, you could always run a 2×4 under the ATV and jack up the 2×4 from the sides of the machine. If you notice the bottoms of these quads near the centers all have some type of frame. Lay the 2×4 across the frame and jack up that way.
If your ATV is light enough, you could just lift the front and then the rear up onto cement blocks or jack stands, just be careful of these jack points and do not set the ATV onto parts that could be damaged.
If you don’t want to deal with ATV lift points or where to position the jack to lift an ATV, you could always get a scissor lift, an ATV jack, or use ramps.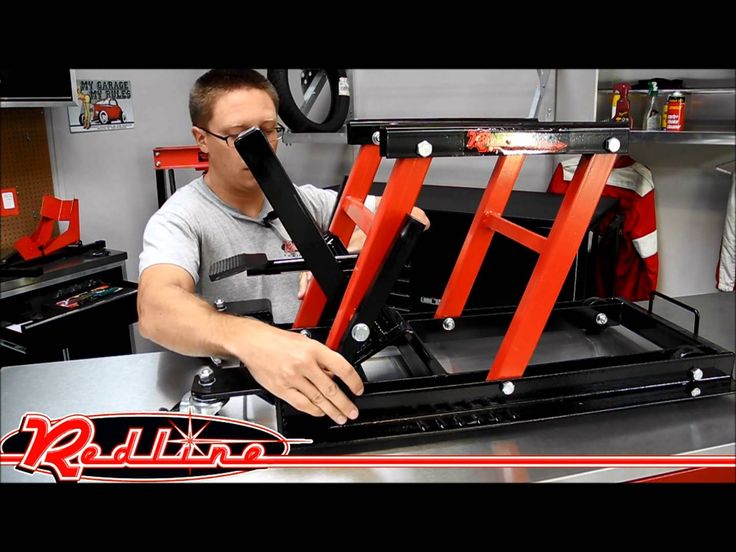
These can get quite pricey but are by far the easiest and safest way to lift an ATV. They will also require a bit of space in your garage to own one. We’re talking around $1000 or more for a decent table lift.
If you’re looking for one of these, I recommend you check out this APlusLift MT1500 1,500LB Air Operated 24″ Width ATV Motorcycle Lift Table. They offer a 2 year warranty and have some of the highest ratings of any ATV scissor lift found online.
This is the most practical option in my opinion. Maybe that’s because I also have a motorcycle I use this lift to work on. But for around 100 bucks, this has been the best purchase for working on my machines.
I like the GoPlus Motorcycle ATV Hydraulic Scissor Lift Jack Stand on Amazon because it has wheels and a handle that allow you to roll it around and under the machine pretty easily. It’s also hydraulic so you don’t have to worry about needing an air compressor or any other special tools to use it.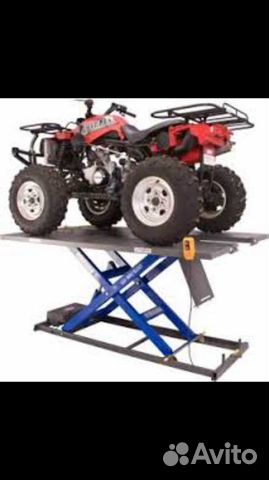
I don’t like using ramps because if I ever need to get the ATV off the ground to work on it, I will most likely need to remove the wheels. When the quad is on ramps, you can’t do that. But they are nice to give you a little space when doing oil changes and things like that.
Here’s a link to the RhinoGear 11909ABMI RhinoRamps Vehicle Ramp from Amazon. These are actually made for cars and trucks, but will work for an ATV as well. I use these to give me some extra space when changing the oil in my truck, I hardly ever use them for the quad (I use the ATV Scissor Jack), but you definitely could if you wanted too.
If you’re going to be working on your ATV, check out the maintenance tools I use in the Recommended Gear Section of this site.
Sharing is caring!
Even experienced motorists fall and drop bikes.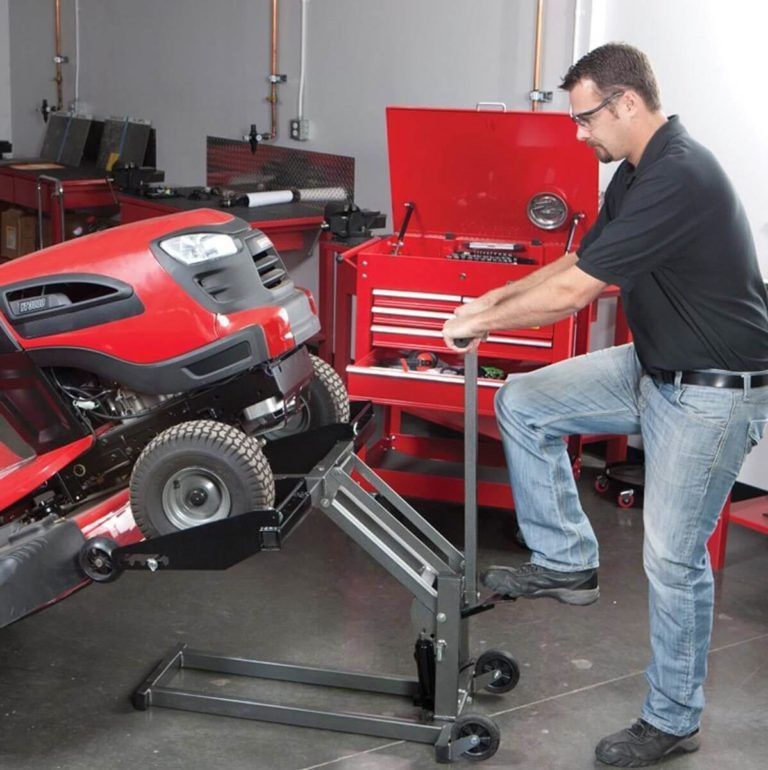 And at first glance, this is a minor problem, because the rider just needs to raise the device. But imagine that you decide to buy a motorcycle for tourism or sports, which weighs more than 120 kg. Returning such a colossus to a vertical position is another task. Therefore, a beginner rider needs to learn how to lift the motorcycle off the ground, put it on the rear wheel, etc.
To return a two wheeler to a vertical position, you need to use knowledge from the field of physics (leverage). This is the simplest method by which even a fragile girl can lift a heavy motorcycle.
Rider needs:
 But if the technique is on the left side, then do the whole operation as carefully as possible and track the position of the bike.
 This is one of the most effective techniques for getting your motorcycle off the ground.
It happens that when lifting the bike, the rider puts it on the wheels, but cannot “squeeze” a little and return it to a vertical position. This situation usually occurs with high or low two-wheelers.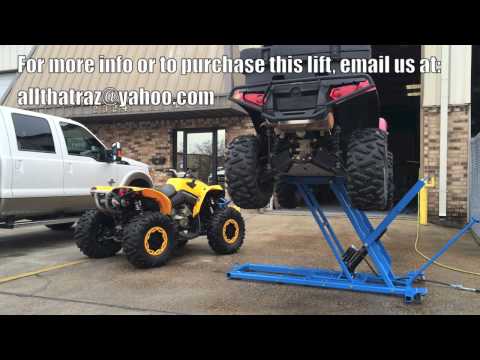 In this case, after lifting the equipment on wheels, you should slightly move out of the seat and continue to push it.
Also, experienced motorists do not advise starting the engine immediately after lifting the vehicle. This can lead to water hammer in the cylinders (if oil gets into them). After the accident, the two-wheeler should stand for 20-30 minutes.
To hang the bike wheel, the rider will need a tackle. This is a special device for lifting the front or rear of the motorcycle. Using the device is quite simple: place the device on the footboard, fix the device, press the lever.
You can also use a standard jack to lift the two-wheeler. It needs to be placed under the engine and adjust the height. It is important not to install the lift under pipes or other components that could break off.
So, you need to hang the front or rear wheel of the bike.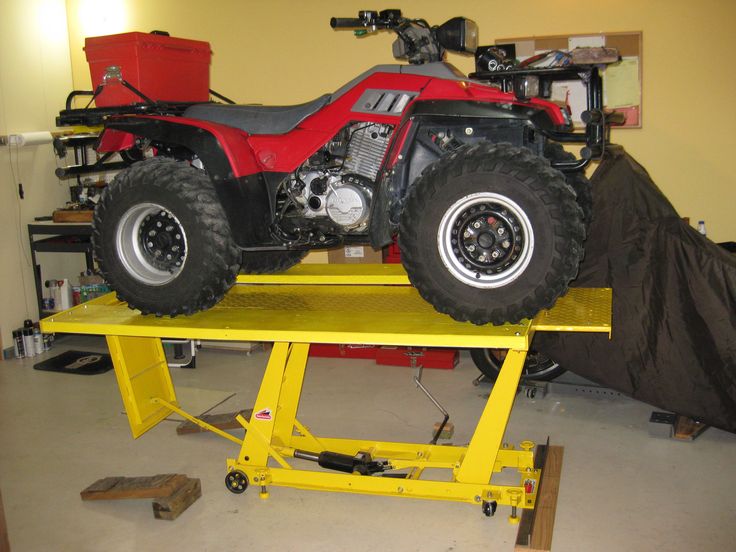 But what if there is no tackle or jack? Here again the system of levers will help us. To lift the bike, we need a thick board with a length of 1-1.5 m and a steel bar (1-1.2 m).
To raise the machine:
In this way, you can lift the motorcycle on the rear or front wheel. Where you place the board will determine which part of the apparatus you lift.
Important : This procedure is only suitable for two-wheelers that have a protection or tubular structure on the bottom.
Another way to hang your bike is to use stands. To do this, you will need two small sturdy chairs or drawers. For hanging, you need to put the bike on the footboard and tilt it to one side. In this case, the footrest should catch on the stand. After that, we raise the other side of the vehicle and move the chair. However, this option is only suitable for light road workers or mopeds.
In general, these hacks are only suitable for minor or emergency repairs. In case of a serious breakdown, it is better to contact the workshop of the Dvako motorcycle dealership, where there are professional tackles and equipment.
05/29/2021 1375
Inadvertently stepping on the accelerator can cause the ATV to flip or fall off, such as on a steep slope or when making a sharp turn. Due to the high center of gravity, small width and short wheelbase, the equipment easily stands on 2 wheels. At the same time, a fall, even at low speed, threatens with fractures. Therefore, after buying an ATV, you need to familiarize yourself with the basics of control.
To start the engine with an electric start, turn the key in the ignition switch to the "ON" position, press the brake and press the green button of the electric starter, holding it for no longer than 5 seconds.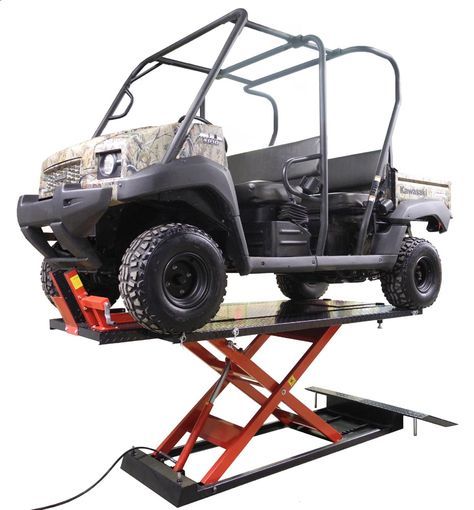
Typically, ATV gear shifts are automatic - the shift lever is needed to select high, low, neutral or reverse gears, as well as select the parking mode.
To start or increase speed, you need to press the thumb of your right hand on the throttle. The gearbox must be in the “H” or “L” position. The middle finger of the right hand rests on the front brake lever while driving, and the middle and index fingers of the left hand rest on the rear brake lever.
Also on the steering wheel there are buttons for turning on the four-wheel drive and locking the differential. Four-wheel drive will be needed when driving off-road, slippery roads, transporting goods and towing. A differential lock is needed so that the wheels of the ATV spin synchronously - for example, it will help to drive out if one of the wheels is stuck in the mud, and the second remains on a stable surface. When the lock is off, in such a situation, only the wheel that is stuck will spin.
Whether it is possible to turn on the four-wheel drive and blocking on the go and at what speed - should be indicated in the instruction manual.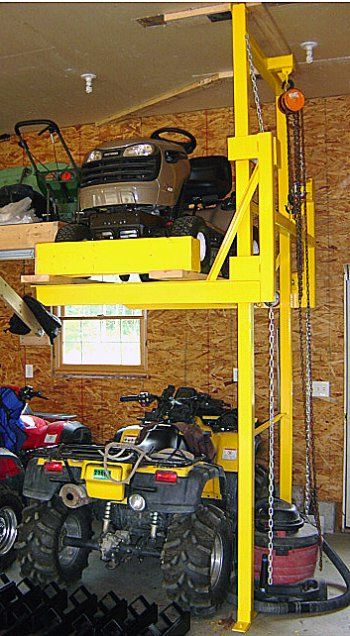 At the same time, regardless of the model of the ATV, the lock cannot be turned on after a jam, since the differential gears must engage without load.
1 - ignition key. 2 - starter button. 3 - light switch. 4 - signal.
1 - throttle lever. 2 - switch 2WD / 4WD. 4 - fuse.
1 - throttle lever. 3 - 4WD / LOCK differential lock switch. 4 - fuse.
Standing up makes it easier to avoid tipping the ATV by shifting your body weight. There are 3 main racks:
 The body is maximally shifted back, arms and legs are extended, the head is tilted towards the steering wheel.
 The worst stance is when the back is tense, the person leans on his hands, and his legs are straight. In this case, the body does not absorb shocks and shocks, and the bones, intervertebral discs and joints experience a strong load. In addition, control over technique worsens and fatigue increases.
middle rack
A-pillar
rear pillar
To climb, you need to shift into a low gear, take the front stand and drive at medium engine speeds. It is impossible to sharply press the gas when driving up a slope or mountain - there is a risk of rolling over.
When stopping in the middle of a hill, drive off carefully, as a sudden start will be followed by tipping over. If the ATV rolls backwards, you need to press the front brake lever, and after stopping, turn off the engine, put the equipment on the handbrake, turn around manually, slide down and try again.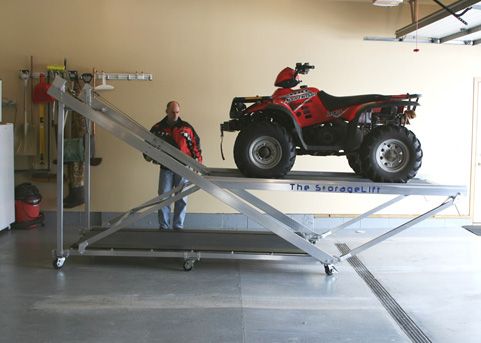
To descend, you need to take the rear rack and shift into a lower gear. In order not to roll over, brake should be simultaneously front and rear brakes. To avoid skidding, you can not change the trajectory of movement and speed abruptly, as well as brake too hard. It is better not to touch the gas lever when descending.
To drive downhill, shift into low gear and shift your body weight towards the top. Don't hit the gas hard and don't brake hard. You can also fall when making a sharp turn. If the slope is steep and the ground on it is slippery, it is better not to risk it.
To enter a tight turn, lean on the outside footrest and tilt your upper body inward. On slippery surfaces, shifting forward will improve handling, and shifting back will improve the grip of the drive wheels with the road.
Before driving into deep mud, you need to make sure that there are no logs, large stones and other obstacles in it, and the soil is not marshy.