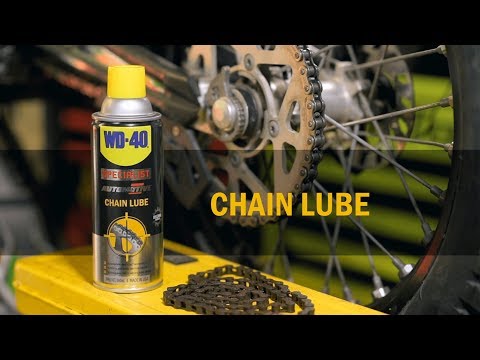
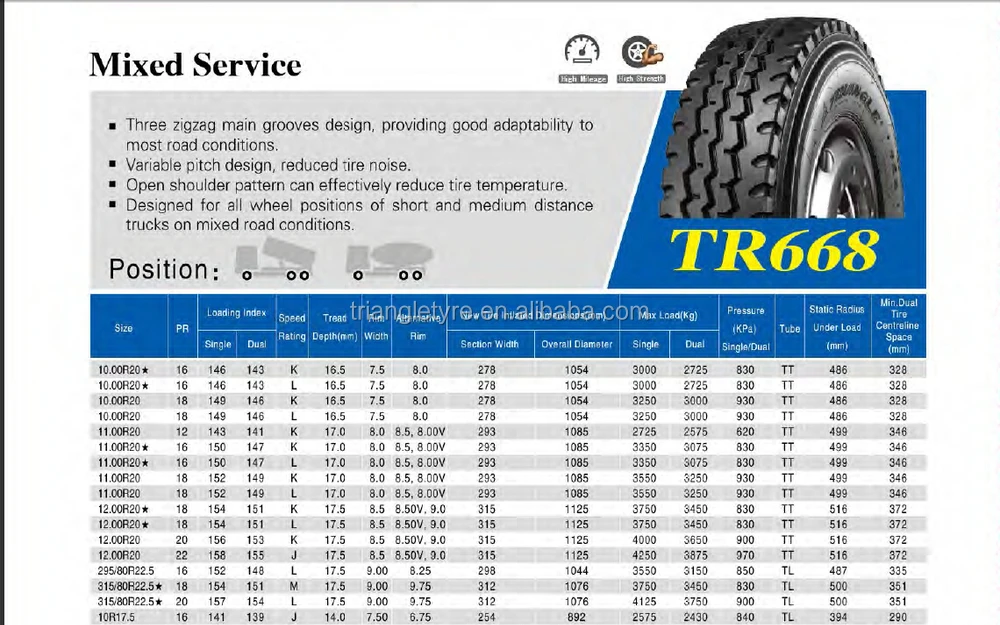
Four wheeler chains take abuse from riding in mud, dirt, and dusty conditions. Ask 10 riders what the best ATV chain lube is and you will get 10 different answers.
It is impossible to say one lube is better than the other without standardized laboratory tests by a third party — otherwise it is highly subjective and anecdotal.
Read customer reviews of the best ATV chain lube in 2023 on Amazon.
In my mind, it may be more important to just keep the chain clean and lubed according to your owners manual and local riding conditions.
That said, I recently needed chain lubricant. I pulled together a list of eight chain lubes for ATVs, dirt bikes, and motorcycles I found on Amazon.
This is not a comprehensive list of lubricants. It lists lubes I have used and ones mentioned and recommended on various Internet forums — in no particular order:
Liquid Wrench L711 Chain and Cable Lubricant
Lucas Oil 10393
DuPont Chain Saver Self Cleaning Lubricant
Pit Posse
Permatex 80075
Motul Care Road Chain Lube
PJ1 Blue Label Motorcycle Chain Lube
Bel-Ray Motorcycle Chain Lubricant
The repair manual for my Suzuki DL-650 says to use kerosene to clean the chain and heavy weight motor oil as lubricant.
Kerosene is great for cleaning, but it is flammable and is not a substance I keep around the garage.
As much as I would like to follow the dealers recommendations for motorcycle chain maintenance, I do not in this instance.
The extra time spent cleaning a chain (and mess involved) is not worth the extra thousand or so miles of chain life, in my opinion.
I normally lube the chain with a Teflon chain lubricant and skip cleaning. (I have been using Liquid Wrench L711, which works well but can be a bit messy.)
Affiliate links / Images from Amazon Product Advertising API
Sticky lubes make a mess and require constant cleaning. They attract dirt, which will stick to the chain.
In turn, the dirt will work its way into the chain and causes a gritty, grinding pasty mess — causing the chain to wear prematurely. Dirt is the enemy.
I avoid anything that’s sticky and has the possibility of attracting dirt, which is why I am not a fan of motor oil.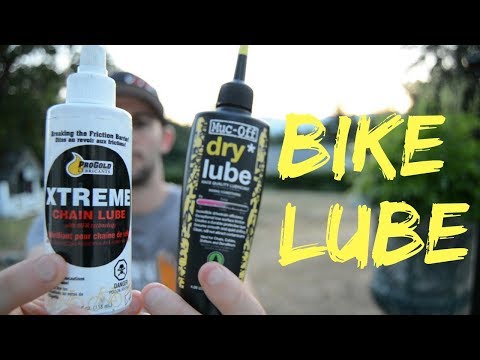 Also, motor oil may be flung off the chain at speed.
I have read where people won’t even use lube. Some argue that the x-rings or o-rings have enough grease in them to last until the chain is worn. I have never tried it and do not know how true it is.
I have never used WD-40 multi-use product on chains. But, I have also read where people use it.
To me, WD40 is more of a solvent, which evaporates quickly and does not leave enough lubrication behind to be effective. I am not sure how effective it would be on motorcycle chains with O or X rings because it is not a true lubricant.
Some folks swear by self-lubing systems on their bikes.
An automated system provides a constant drip of lubrication when the bike is operating. It keeps the chain lubricated and any built up lube is cast off.
A few thoughts about reading chain lube reviews
As mentioned, chain lube is highly subjective; however, here are a few items to think about when reading motorcycle chain lubricant reviews.
The owners manual provides the frequency at when to lube. Location and riding conditions may dictate when to clean and lube, as well.
For my bike, I have been doing it every 300-500 miles — about every couple tanks of gas.
Before spraying my bike down with lube, I warm the chain up by going for a short ride, which helps with better penetration.
Read customer reviews of the best ATV chain lube in 2023 on Amazon.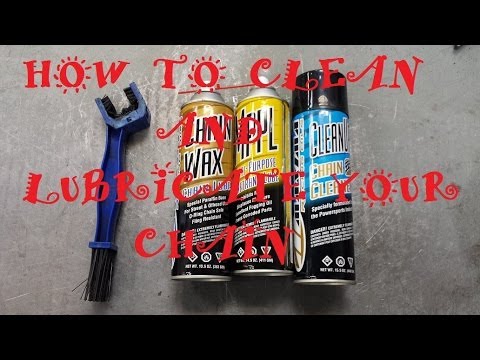
The task of cleaning and lubricating your throttle and clutch cables is really simple. But quite often, it gets overlooked. If you let it go for too long, you could be creating a dangerous situation where a cable gets stuck or even breaks.
You see, after a while, a bunch of junk will build up inside the cables protective sheathing. This can cause the cable to stick, or it could wear the cable down over time until it breaks. The build up comes from mud, dust, and other dirt or debris. Normal wear and tear also plays a factor here, you’re using the controls a lot while riding. Every throttle movement and every gear shift adds up over time wearing at the cables.
How often you should clean your throttle and clutch cables depends a lot on how often you ride and in what conditions. For example: I always ride my motorcycle on dry roads during nice sunny days. Because of that, I only really need to clean my cables every couple years or so. The ATV is a different story. I sometimes clean the throttle and clutch cables twice a year. For the average rider taking their quad out on weekends here and there, you’ll probably be fine doing it once a year at the beginning of the riding season.
You should be able to tell by the feel of the clutch and throttle if they need to be cleaned. You will notice the clutch feeling a little stiffer than usual, and maybe the throttle is a little tougher to work than it used to be. Those are signs that it’s time for a good cleaning. If you let it go for too long like that, the throttle cable could get so gummed that it sticks. That could be a dangerous run-away ATV situation that you’ll want to avoid.
The cables themselves should last you a fairly long time if you keep them cleaned and lubricated properly. I have sets of cables that have lasted me almost ten years now.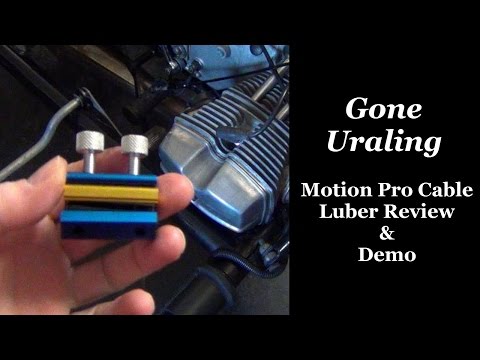
You do want to inspect them for wear and tear though. If the cable seems to be worn or even fraying a little, it’s time to replace them. If you notice any of the fittings have been damaged or worn too much, you should replace them. It doesn’t matter if you’re replacing or cleaning the cables, you’ll need to remove them either way.
It’s best to start by removing the cables to see if they need to be replaced or simply just cleaned and put back together. You could always check your factory service manual for your ATV to see how the manufacturer recommends doing this. I will explain how to remove the cables here, but not all ATV’s are the same, you might have slightly different steps to take than me.
First you’ll need a couple T-Handles, like this set I use from Amazon. You’ll probably only need the 8mm or 10mm for this job. You’ll also need a Cable Luber Tool like this one by Motion Pro, and of course, some Cable Lube.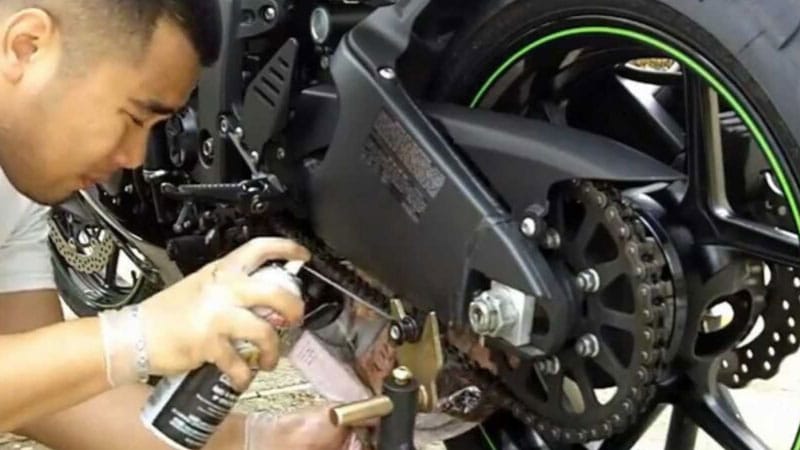
To start removing the clutch cable, you’ll want to line the notch in the adjuster wheel up with gap you’ll see where the cable sits. This is found by the clutch lever. You could try loosening the clutch cable enough so that you have slack to get the cable out.
But I prefer to just remove the clutch lever itself, this is where those t-handle wrenches come in handy. Simply pull back the rubber guard to access the clutch lever bolt and remove with a wrench. When the bolt is out, the lever will simply pivot off of the clutch cable.
Now you want to remove the other end of the clutch cable where it connects to the actuating arm. This is usually found down on the engine near where your left foot rest is. This part is usually as easy as removing a couple nuts, giving the cable enough slack to pivot off of the actuating arm. If your cable is in a housing like the one in the picture, that’s ok, you can remove the housing from the actuating arm while it’s still attached to the cable.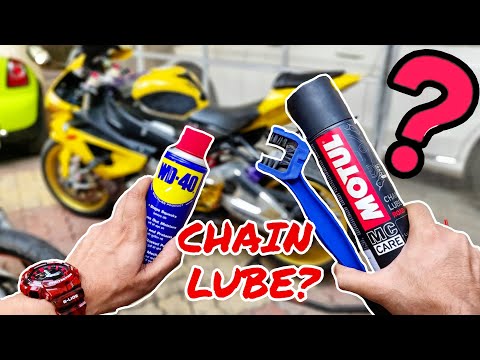
That’s it, you can now remove the cable from the ATV. It is not entirely necessary to remove the cable completely from the machine if you are just going to be cleaning and lubricating the cable. You can use the cable luber tool with the clutch cable still wound through the ATV.
The throttle cable is a little more difficult to remove. You start by removing the cover that protects the throttle cables on the throttle body. You may need to remove the seat and gas tank for this step depending on your model ATV.
There are usually a couple of nuts to loosen before you can remove the throttle cable from the throttle body.
Then you can remove the throttle cable from the throttle lever up on the right side of the handle bars. This step is similar to removing the clutch cable from the clutch lever.
There that’s it, now you can remove the cable from the ATV. This is just like the clutch cable though, you don’t need to entirely remove the cable from the machine if you’re just going to clean and lubricate it with the cable luber tool.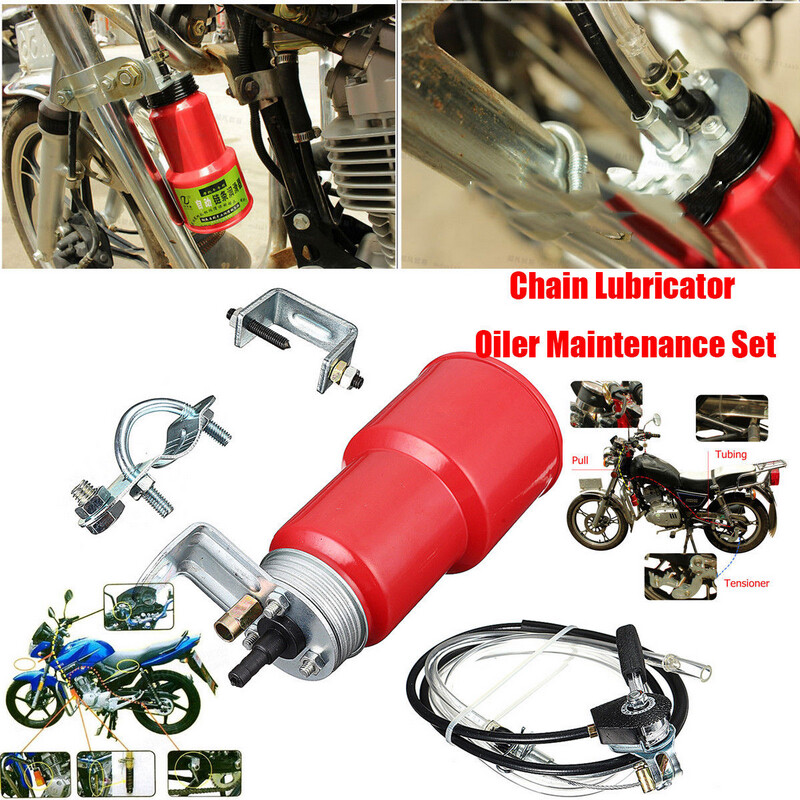
The method for cleaning the cables themselves will be the same for both the throttle cable and the clutch cable. The cable luber tool makes this job 10 times easier so I highly recommend using the tool if you can. If you don’t have the tool, and don’t want to get one. You could do your best to spray the cable lube in one side of the cables protective housing and hope you see the dirt and junk leaking out the other end.
If you do have the tool. Or want to buy one from Amazon here, Cable Luber Tool. The job becomes a lot easier. You simply insert the top end of the cable into the cable luber tool. Make sure the tool covers part of the protective sheathing and part of the bare cable.
With the cable held vertical so the lube can flow down with the help of gravity, you’re ready to clean and lubricate the cable. You will notice on the tool there is an opening where you can spray the lube into the cable luber tool.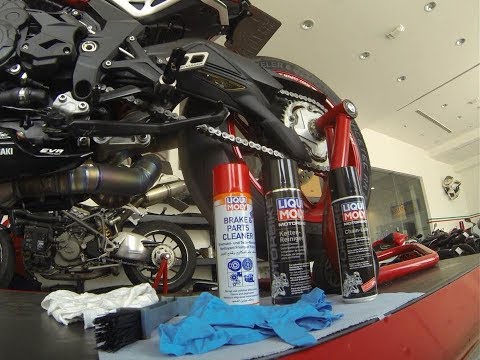 This will force the lubricant down through the protective sheathing and clean the cable. I suggest using a rag to hold the tool when you do this because the tool may leak a little.
Give it a few quick burst from the can of lube (you could also use WD-40) until you see the lubricant leaking out the other end of the cable. A long continual burst may send lube spraying about everywhere. Just small quick bursts should do the trick. Move the cable back and forth inside the protective sheathing every here and there to help move the liquid through the cable.
Once the cable has been cleaned and lubricated, you can re-install it back onto the ATV. This may not even need an explanation. You simply put the cable back onto the machine in the reverse order you removed them.
Connect the clutch cable (and housing if there is one) back to the actuating arm and tighten the nuts. Then hook the cable back up to the clutch lever and bolt the lever back onto the handle bars.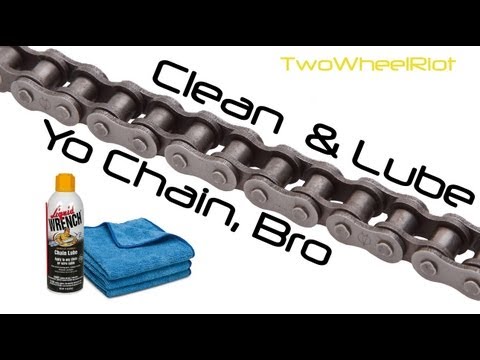 Now you can tighten the adjuster wheel to where the slack in the cable feels comfortable to use. If the clutch cable is too tight (has no slack) the clutch could slip more often. If it is too loose, it can make it harder to shift.
Re-attach the throttle cable to the throttle lever on the handle bars and re-connect the other end of the cable to the throttle body. Some throttle cables have two threaded ends that connect together to adjust the slack in the cable up by the throttle lever. This is mostly for fine tuned adjustments. The bigger adjustments should be made down at the engine where the cable connects to the throttle body. If you didn’t make any changes to either of these adjusters, you should be fine to re-assemble the way it is.
If you tighten the throttle cable too tight, it could cause your engine to rev when turning the handle bars all the way. Try to get it back to where it was when you removed it. You could always check with your manufacturers service manual for exact specifications. But this is usually pretty easy to figure out when your actually putting the cable back on the ATV.
Sharing is caring!
Photo avtovzglyad.ru
gearboxes suspects even the most irresponsible ATV owner. But what to do with the undercarriage of an all-terrain vehicle, so that it faithfully serves for many, many seasons, even hardened lovers of mud are not always known. The portal "AutoVzglyad" will help to understand the problem. nine0009
Dmitry Zlenko
The running gear of an ATV can, by and large, be considered a consumable item. Some manufacturers make parts and assemblies with a large margin of safety (for example, to make a hodovka on a Yamaha Grizzly, you need to really try), others deliberately underestimate the resource life in order to force brand fans to visit dealer service centers as often as possible.
Chinese, Russian and some American manufacturers especially sin with such a "customer-oriented" approach. Meanwhile, in order to extend the service life of even a not very hardy walker, it is enough to regularly service it even with inexpensive, but extremely effective means. nine0009
Photo avtovzglyad.ru
Let's start with the suspension arms. If there are silent blocks in them - levers, then nothing needs to be serviced here, we just ride until the silent blocks are "tired". But much more often, quadric levers work on pressed plastic bushings, inside of which there are spacer metal bushings.
When driving through mud, water with small fractions of sand inevitably gets inside this structure, and the plastic bushings begin to wear out, and the metal bushings begin to rust. To prolong the life of the suspension arms and knuckles, after each ride, these components must be injected with grease. And best of all, as practice shows, this should be done with the help of high-temperature grease for LM 50 Litho HT bearing hubs.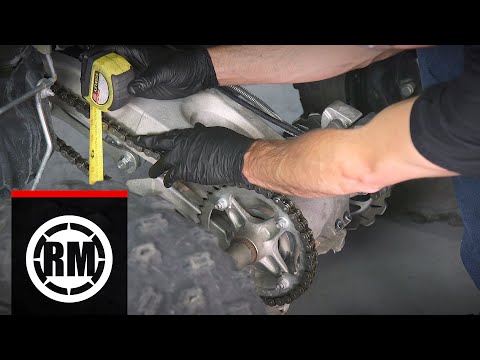 It is clear that temperature anomalies do not occur in the bushings of the suspension arms, but the beauty of the drug is that it is universal: that is, this “gel” can process both bushings of fists and suspension arms, as well as driveshaft crosses and wheel bearings. nine0009
It should be noted that LM 50 Litho HT absorbs shock loads well, adheres excellently to the surface, and is highly resistant to water. The temperature range of its use is from −30°С to +140°С. And do not forget that regular maintenance of the walker not only prolongs its service life, but also guarantees your safety. After all, a wheel that has fallen off at speed or a wheel bearing that has become wedged is not such a rare occurrence for ATVs.
Photo avtovzglyad.ru
Photo avtovzglyad.ru
True, to do this simple procedure is oh how difficult. Since bolts with a nut tend to rust, sometimes the threaded connection will turn sour so that the wrench will break rather than the nut will break off. Another product from Liqui Moly will relieve such torment - a rust solvent with molybdenum disulfide MoS2-Rostloser. nine0009
This spray is specially designed to remove rust and facilitate the subsequent dismantling of threaded connections in cases where the threads are damaged by corrosion. The agent perfectly dissolves iron oxides and has a high penetrating power. And a special substance, molybdenum disulphide (MoS2), provides lubrication to the threads, which levels the presence of damage caused by corrosion on it. To unscrew the soured rusty nut, just pop on the connection, wait a few minutes and take the keys. By the way, MoS2-Rostloser, among other things, protects the parts treated with it from corrosion. A very useful tool for any country garage, because it is useful not only for the repair and maintenance of an ATV. nine0009
There are such components in ATVs and UTVs that, on the one hand, need care and lubrication, but on the other hand, the use of “greasy”, non-drying compounds is not allowed, since this will stain riders' clothes. For example, ATV seat locks, buggy door hinges, UTV pedal assemblies. But for knowledgeable people, this, frankly, is not a problem.
Photo avtovzglyad.ru
Photo avtovzglyad.ru
So, in the Liqui Moly product line there is a dirt-repellent white grease Wartungs-Spray weiss. The agent forms a lubricating layer to which dirt, dust and moisture do not stick. And what's more: it prevents the formation of rust in the places of application, prevents the formation of so-called frictional corrosion. The resulting soft layer of non-sticky lubricant tightly “clings” to the contact point, reducing the friction of parts and protecting, among other things, from freezing of parts.
A logical question: is it possible to treat ignition locks with this lubricant, because, after all, moisture also gets into them and the larva eventually becomes completely unusable. In principle, nothing bad will happen to the castle, but white stains around will hardly please.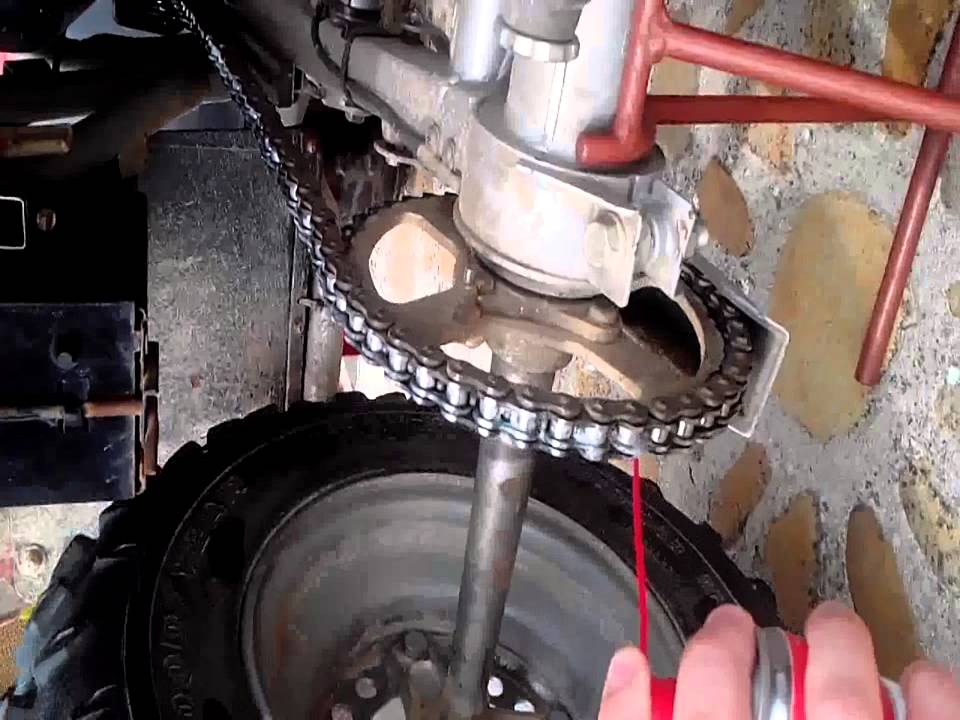 And if you consider the ignition locks of BRP ATVs, into which keys with chips are inserted, then the use of such a composition can, in theory, prevent normal reading of the code. nine0009
In fact, for the maintenance of ignition locks and other contact areas where a non-tacky lubricant is needed and oil or silicone compounds cannot be used, Liqui Moly has developed a PTFE-Pulver-Spray Teflon Spray. It forms a dry, transparent and at the same time water-repellent layer on rubbing surfaces, to which dirt and dust do not stick at all. PTFE-Pulver-Spray is free from oils, fats and silicones and is neutral even to sensitive plastics and rubber. It's a little expensive, but the investment, as they say, is worth it ...
Photo avtovzglyad.ru
Photo avtovzglyad.ru
Another chemical composition useful for a country garage is a colorless silicone grease Silicon-Spray. Used to lubricate contact areas containing plastic or rubber parts.
Liqui Moly Silicon-Spray eliminates plastic squeaks (especially true for quadrics, because all of their bodies are made of plastic, which eventually begins to make extraneous sounds as a result of friction of one part articulated with another. In addition, the product protects rubber and plastic parts from drying and exposure to ultraviolet light.
Photo avtovzglyad.ru
Photo avtovzglyad.ru
... Timely maintenance of ATV components, which rarely care about, with the help of the right high-tech compounds, definitely extends the life of equipment. And most importantly, a relatively small investment in the purchase of various sprays and lubricants allows in the future to significantly save on the repair of an ATV.
How to avoid electrician glitches on a used ATV
9793
How to avoid electrics in an ATV 9000
9793Sprinkle:
 Zen
Zen quad bikes, off-road, car service, repair, maintenance, car chemistry, life hack
ATV suspension injection. Why is this needed? How is it done and how often? What is required for such a service? We will try to answer these questions in this article.
Try to spray your ATV's suspension as often as possible, especially after mud and water treatments, the lubricant in the suspension units tends to wash out. Timely extrusion will keep the suspension working much longer. nine0009
During the procedure, ATV owners have a lot of questions like this:
So, let's proceed directly to the topic.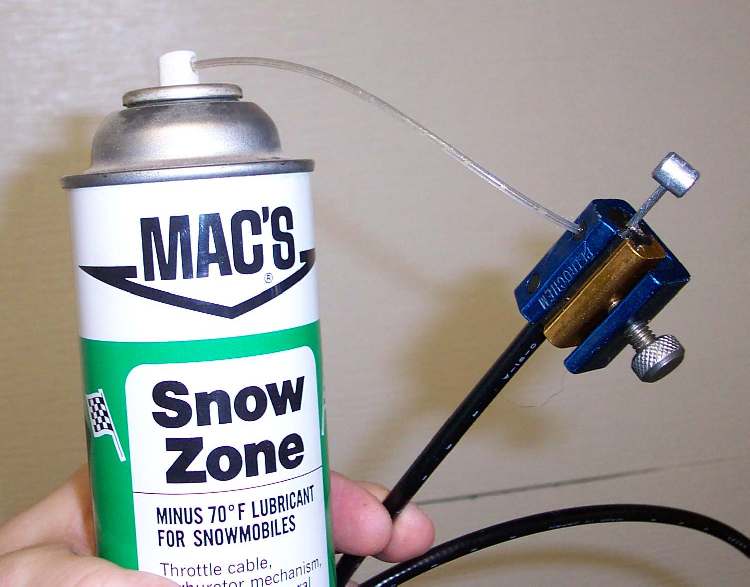
You will need a special syringe (sold at any auto shop), lube (we will not advertise any specific lubricant, any lube will do), 40 minutes of free time.
Choosing a syringe.
It is better to choose a syringe not with 3 petals (Guano), but with a four-lobed tip, there will be less problems with it. Inside the tip there should be a rubber seal with a hole for the oiler (without it, grease will drive between the tip and the oiler). nine0009
Find injection points.
In order to find the injection points, you will have to contact the seller, the manual or conduct a visual inspection of the suspension yourself. What are we even looking for? And we are looking for oilers (grease makers), most often they are in movable suspension units, they look like this:
The tip is put on the oiler quite tightly, with a characteristic click. It comes off hard.
Check the body of the syringe tip is not untwisted, tighten the tip if necessary to avoid leakage of grease. There are tips with an adjustable effort to put on the oiler.
If you correctly put the tip on the oiler, you will hear a characteristic click - the tip sits on the oiler, does not fly off, but swings and rotates, then we press the tip to the oiler (preferably parallel to the axis of the oiler), and pump - the lubricant should flow into the oiler. Enough 3-4 strokes with a syringe. Then we remove the tip from the oiler (with effort, shaking from side to side). nine0009
Lubrication may not flow due to a soured ball in the oiler. Therefore, before injection, you can unscrew the oilers and pump them with a syringe. One more thing - grease may not enter the oiler if you do not slightly loosen the tightening of the assembly that you are lubricating (for example, the lever axis). Remember to re-tighten the knots after injection.
When you feel sorry for the money for a syringe.
You can unscrew the grease gun and with a simple medical syringe (take a larger cubic capacity), inject lubricant into the hole until it starts to come out, then screw the grease gun back into place.