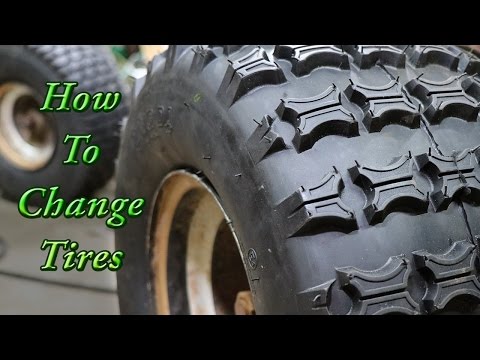
Changing the tire on your ATV or side by side is a pretty straight forward process. There are some specialty tools that can make the job easier, but you can also accomplish a tire change on your own with some cool little tricks.
The hardest part about mounting a tire is getting the old tire off the rim and the new tires on. There’s a couple ways to go about this and some tips to make your life easier. Balancing the ATV tire is really only necessary if you’ll be getting up to speeds over 45 – 50 mph.
Here’s the steps you’ll use to remove the old tire and mount the new tire, don’t worry I’ll go into more detail on how to do each of these step by step.
Always start with safety when performing maintenance on your machine. It’s best practice to wear gloves and eye protection when working on your quad.
First off, get the wheel off the quad and deflate the tire. It’s easier is loosen the lugs a little bit before you jack the quad up. Loosen and remove the lugs in a criss-cross pattern, the same way you would install them. Once you have the wheel off the ATV it’s time to deflate the tire for removal.
To deflate the tire, remove the cap and release all the air in the tire. Most tire pressure gauges will have a little notch on one side, that you can use to push in on the valve stem to release the air in the tire.
Or you could always use a screw driver or punch tool, basically you just need to push down on the valve stem to release the air somehow. Once all the air is released from the tire, you can use a valve remover tool to get the valve cores out.
Here is a link to a Tire Valve Stem Tool Remover & Installation Kit on Amazon. This kit has everything you need to deal with the valve cores of the tires. I highly recommend getting a tool like this if you ever plan on doing any type of maintenance to your tires.
You can try to remove the cores yourself with a wrench or something similar, but that option usually leads to damaging the valve cores beyond reuse. In fact, I’ve never seen this done successfully without a valve stem removal tool.
Once the tire has been deflated, it’s time to break the bead seal. This is sometimes the most difficult part of the entire process because the bead is set into the rim a lot more firmly on off-road tires than it is on car tires.
And to top it off, a lot of times there is some sort of bead sealer on the bead to keep the tire from popping off.
If you plan on changing a lot of tires, I suggest looking into getting a tire changer tool. This PowerLift Manual Tire Changer Base on Amazon is only about 55 bucks and makes this step so much easier. If you don’t want to spend the money, that’s ok, this can be done with basic garage tools as well.
A popular option to break the bead is to put the tire on a piece of plywood, or something so the tire doesn’t dig into the dirt.
Then place a jack on the tire near the bead, then simply jack up into something heavy like a truck bumper or hitch.
Repeat this process around the tire on both sides in places where the bead is till set.
Or you could build your own homemade bead breaker with a couple 2x4s like in this picture here.
I would use a chain or something connecting to a piece of wood underneath the tire instead of a car as leverage, but that’s the fun of doing it yourself, use your imagination.
The whole goal of this step is to get the bead off the rim so you can remove the tire.
However inventive you’d like to get is up to you. I’ve seen people use a giant clamp to pop the bead off the rim before. You could use two pieces of 2×4 on each side of the tire and a ratchet strap to pull them together to press the tire off the rim.
Now that you’ve got the bead of the tire unseated from the rim, it’s time to get the whole tire off the rim. This is sometimes called peeling the tire off the rim.
You’re going to want to take extra special care to peel the tire off the short side of the rim.
You can find the short side of the rim by looking at the depth on both sides of the wheel. The short side has a shallower depth and will be the easiest side to pull the tire off on.
The best tool for this step is a set of tire spoons or a tire changing tool set, like this Fasmov Tire Iron Tire Changing Tool Set. If you don’t have one of these, not to worry, they’re pretty cheap to buy a set, or you could just use a couple pry bars or something similar instead.
I would advise against a screw driver though, the larger ones may work pretty good, but be extra careful not to damage the tire or rim. Well, I guess you can damage your old throw away tires, but you need to do this later on to put the new tires on too.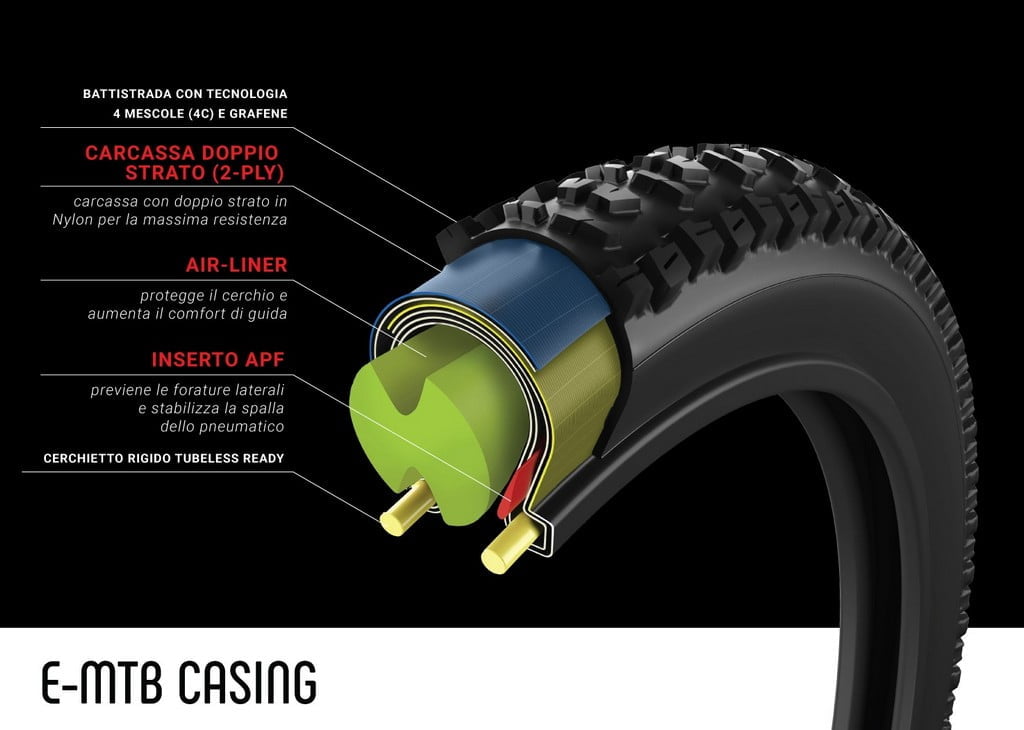
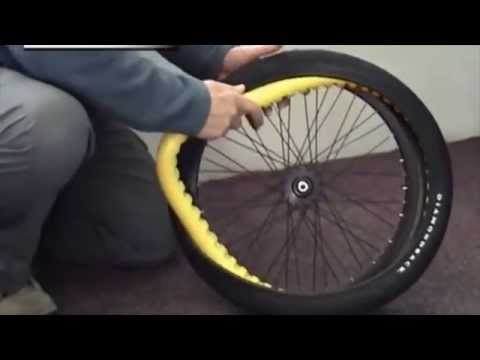
Start by pushing the tire down into the open area near the rim. Use your tire tool or pry bar to pull the tire up over the rim. It’s best to use the the tool like a lever, sticking the tool down so that just a piece is under the tire and pressing down to pop it over the rim.
Hold that piece of tire over the rim and use the tire tool piece with a lip to work your way around popping the rest of the tire over the rim. Like you see in the picture above. It’s easiest when you use all three tools in the kit because the middle tool will get freed up with each new section of tire you pop over the rim.
Eventually you’ll get to a point where you can just pull the tire off by hand. Then you’ll use one of the tire tools to simply pop the tire off the other side of the rim.
Now that you’ve got the old tire off, you’re going to want to clean the lip of the rim where new tire bead will sit. It’s important to clean this area really well to be sure you get a good fit with the new tire.
You won’t always need to use a bead sealer, but will always want to clean the lip of the rim. You will only need to use a bead sealer if you think the tire bead won’t seal well enough on the rim on it’s own.
This is usually only a concern if the tire is real beat up around the bead or if the rim is bent up and gashed to the point where the tire won’t seal on the rim.
If you can get away with not using a bead sealer, than I wouldn’t use it. It makes it harder to remove the tires next time you do a tire change anyways.
You will have to clean and lube the tire bead to help with mounting the tire on the rim. To clean it, just make sure the bead is free of debris and gunk. Usually a new tire won’t have dried up sealer or other stuff in the bead yet.
After you’ve made sure the tire bead is clean, it’s time to lube it up and put the tire on the rim. They do sell nice and fancy expensive tire lubes, but I’ve found that some soapy water works just as good. Lube both sides of the bead, inner and outer, if you don’t, it’s going to be really hard to get the tire on the rim.
Now’s a good time to check tire direction. Most ATV and UTV tires will not be directional, but they do make tires that should only be put on a certain way. This is because the tires is designed with groves facing a certain direction to help with traction.
You could look at the side wall of the tire for an arrow, or just decide for yourself by looking at the tread which direction you want the tire to be mounted on the rim.
Now to get the tire on the rim, remember to start with the shallow side of the rim. Place the rim on the ground, on something that will keep it from sliding away from you, with the shallow side facing up. Now poke the bead part of the tire into the shallow side of the rim and press down on the tire until it pops onto the rim.
Ok, you’ve popped the tire onto the rim, now you need to get it seated and the bead lined up correctly.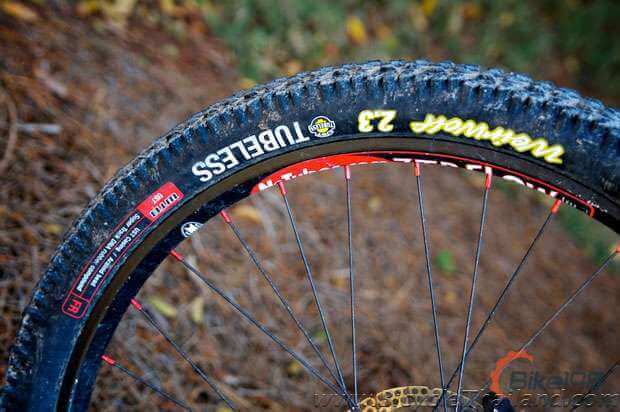 You can kneel down on one section of the tire and use the tire tool or pry bar to seat the rest of the tire into place, as you can see in the picture.
Try using your knee to keep the tire from popping back up on the other end, your free hand will help with this as well. After you get to a little more than half of the tire pryed onto the rim, it will be easy to just push it the rest of the way on.
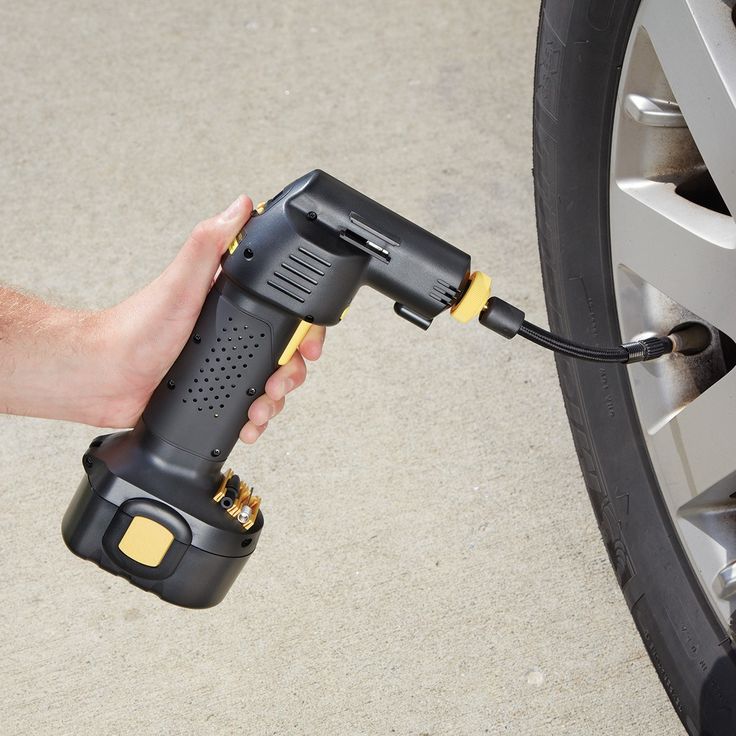
Now that the new tire is on the rim, it’s time to set the beads on both sides of the tire. If you have a small portable air compressor for airing up tires, that might not be enough to seat the beads.
You can try inflating the tire with the core out, to help you get more air in the tire more quickly to seat the beads. Then once the beads are seated, put the cores, or valve stems in and inflate the tire.
You will usually need a higher powered air compressor to seat the beads. The even make special designed Tire Seating Blaster Inflator Air Compressors made specifically with enough power to seat the bead of the tire. That’s because a compact portable air compressor doesn’t have enough power to do it.
Another popular option you could try is to spray starter fluid into the tire and light it with a lighter. The starter fluid burns all the air out of the tire and pulls the bead into place. To legally cover myself I am going to say to never do that. But, I’ve used this method plenty of times and it works like a charm.
Then once the bead is set, put the core back in and inflate the tire like you normally would using any air compressor you have. If you plan on riding at speeds over 35 mph, it’s a good idea to balance the tires at this point.
Check out my How To Balance ATV Tires article for the step by step instructions on how to balance your tires.
Sharing is caring!
How to Mount ATV Tires
Mounting ATV Tires at Home
If you’ve been thinking about changing ATV tires or UTV tires at home, know that while it can be tricky the first few times because these tires tend to have stronger beads than on-road tires, it’s a pretty straight-forward process as long as you have the proper tools, and follow this step-by-step tutorial from the tire experts at Treadworld.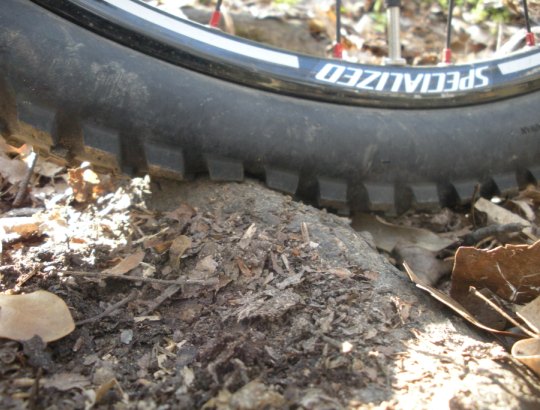 Also keep in mind that air under pressure is potentially dangerous so take any necessary precautions. Balancing your ATV tires can be difficult and is likely not necessary unless you’re racing or engaging in high-speed ATV and UTV activities.
The Tools You Will Need to Change ATV Tires
Remove the wheel from the ATV
When mounting ATV tires at home, it’s best to start with your ATV on a hard floor like a garage. Loosen the lug nuts a little to make them easier to get off, then jack up your four-wheeler so you can remove the wheel. Consider getting the bolts off using a hand tool rather than an impact wrench, which can on occasion be powerful enough to snap a bolt.
Deflate the ATV tire
Remove the cap from the valve stem and release all the air in the tire using either a valve stem core removal tool which will remove the stem and is the quickest method, or a tire pressure gauge that has a notch on the side used to push in on the valve stem or a screwdriver, which will take longer.
Break the bead on both sides of the ATV tire
This is likely the toughest part of changing an ATV or UTV tire because the bead is set to the rim a lot more firmly with off-road tires, than with on-road tires. That’s because off-road tires are asked to do things on-road tires don’t, like ride steep slopes, travel rocky terrain and land jumps. First, here are a few details. The bead retainer is a small ridge that goes all the way around on both edges of the wheel rim. It is intended to keep the tire in place so that aggressive riding won’t result in it sliding and losing the air seal. The tire bead is on the edge of each tire. Essentially, it’s a strong steel reinforced loop around both edges of the tire. Many times, a bead sealer is used on the bead to further keep it from popping off. In a nutshell, with this step, you’re getting the bead off the rim so you can remove the tire.
3 options for breaking the bead on ATV tires at home
There are essentially three ways to break the bead on an ATV tire.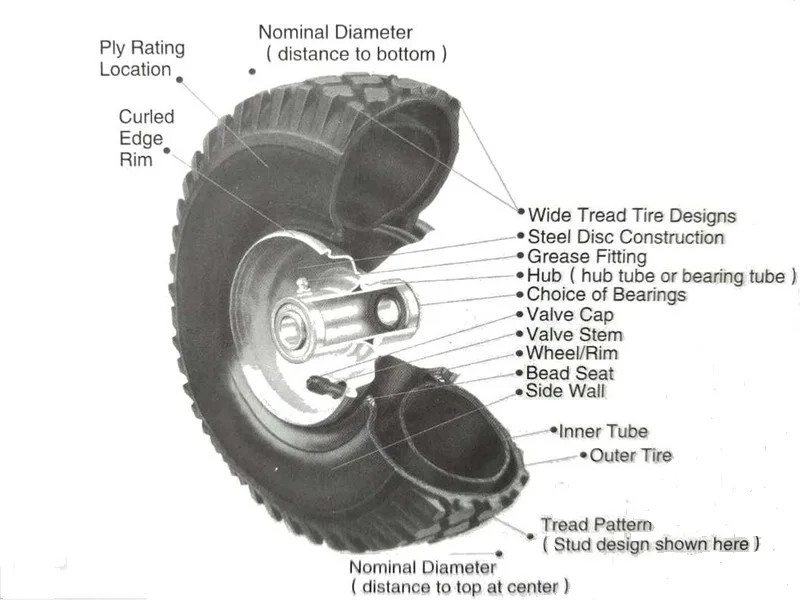 Likely the easiest method is with a BeadBuster, a tool designed for the job that clamps onto the rim and forces a wedge between the rim and the tire. BeadBusters are quick, simple and offer less chance for damaging the tire than other methods. A quick look shows they currently sell for around $100 at online shops. A cheaper alternative is using another of the several available portable tire-changing tools, generally available at any hardware store or auto supply shop. Most models need to be bolted to the floor, or some other heavy object. If you go with this alternative, you’ll want to leave 3-5 PSI air in the tire to facilitate success. Finally, there is the DIY method, which involves your inventiveness. Start by putting soapy water on the bead to help it slide. Devise the best way to get the tire in position so you’ll be able to force the tire to break free of the bead. You may want to use a 2×4 set as close to the rim as possible to push the tire edge away from the bead. Then flip the tire and do the other side.
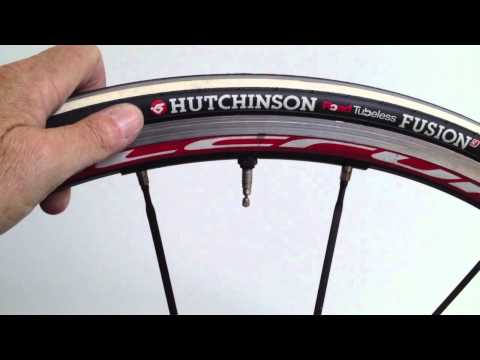 Again, it may help to have 3-5 PSI of air left in the tire with this method.
Peeling the ATV tire off the rim
You’ll want to use tire spoons or large screwdrivers for this step. Place one of the irons between the tire and the rim, and lift a section of the tire over the rim. Using one tool, hold that section away from the rim, and use the other tool to edge the rest of the tire over the side of the rim. Continue with this process until the full tire is from the rim, then remove the tire from the wheel rim completely.
Clean the lip rim on both sides and consider a sealer
The better you clean the lip rim on both sides, the better your new tire will fit. Wash off any dirt and debris. Use a stiff brush if necessary. Remove any rust. To get a good airtight seal, you need the surface to be smooth. If your rim shows any signs of pitting, nicks or other damage, you’ll likely want to apply a bead sealer, which is a rubber product designed to aid in bead seating. You may want to skip the bead sealer if you don’t need it in order to make changing the tire in the future easier.
Clean and lube the tire bead on the new ATV or UTV tire
So that the rubber will slide easier, put commercial tire lube or some soapy water on the bead retainer on both sides of the wheel rim. You can also use a light coating of baby powder, but stay away from WD40 as it can deteriorate rubber.
Check to see if your ATV tire is directional
Tires can be directional or multi-directional. Directional ATV tires should be mounted in a certain way for best traction and optimal performance and safety, while multi-directional tires work in either direction. Some types of four wheeler tires are directional depending on usage, like ATV mud tires for example. Look on the tire sidewall for an arrow, which indicates the tire is directional and should be mounted with the arrow facing the direction of the forward rotation. Another way to tell is by looking at the tread. A tire with an aggressive V-tread is likely a directional tire and should be mounted so the tip of the V hits the ground first. Directional tires can be mounted on either side.
Pop the new tire on the rim and get it seated correctly
The next step is to get the tire seated and the bead lined up correctly. Start by putting soapy water or lube onto the wheel rim. With stiffer walled tires, place the tire on the garage floor then push the wheel into position. With tires that have a less-stiff wall, placing the wheel on the floor and positioning the tire may be easier. Push straight down with both hands to slip the bead of the tire over the lip of the wheel. To get the second bead pried over the lip of the wheel, you’ll need to use your tire spoons, working your way around the tire until you have the entire bead pried over the wheel. To hold air, the tire needs to be firmly seated on the bead. At this point, be sure the tire is lubed up and begin using your higher-powered air compressor to put air in the tire.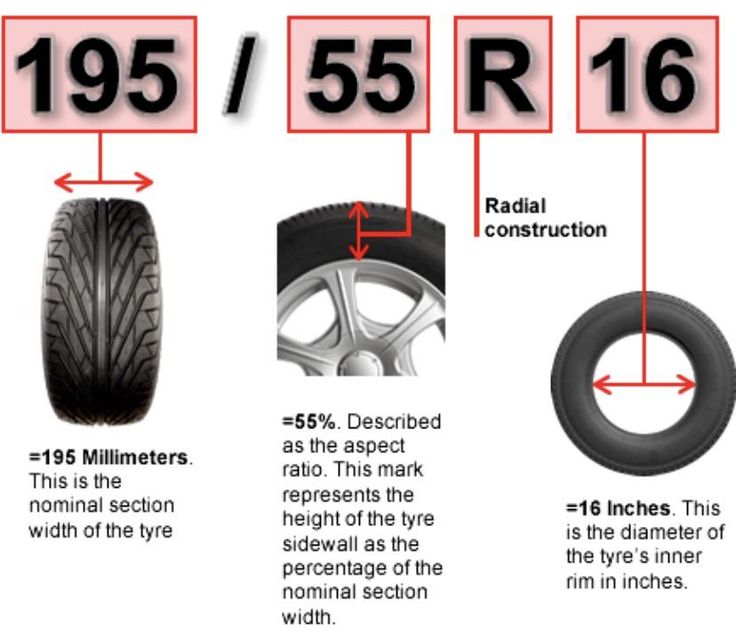 Don’t over inflate. The maximum inflation pressure should be stamped on the sidewall of the tire. The expectation is that as the tire inflates, both beads will seat themselves, as indicated by a loud “pop”, which should happen at a fairly low air pressure, 7-8 PSI. Once that occurs, let the air out of the tire. The beads will remain seated.
You may have difficulty getting the air into the tire fast enough to get the beads seated. That’s due to the gap that still exists between tire and rim. A good way to solve that issue is to tighten a ratchet strap around the middle of the tire, pushing the tire walls out towards the lip of the wheel on each side. Stop tightening as soon as the tire touches the tip of the rim. Then the tire should hold air because the gap has been closed.
Reinstall the valve stem and inflate the tire
Use your valve stem tool to reinstall the valve stem, then inflate the tire before capping the valve stem to keep it free of debris. Now you’re ready to reinstall the tire on your ATV, having solved the problem of how to mount ATV tires at home.
Find Master ATV Tires here. Big selection, fast shipping and guaranteed quality.
Here at Treadworld, we have the ATV tires you need for wherever your adventures take you. Our wide selection of Master ATV Tires and Master UTV Tires are the high performance tires you want, made from top quality rubber compounds, triple-tested for quality before being X-rayed to be sure they’re perfect, and covered by our Ultimate Advantage Warranty. Don’t hesitate to contact our tire experts via live chat or email with any questions you may have, and to get the ideal Master ATV tires for you.
2. Use of tube and tubeless tires
3. Pros and cons of tube tires
 Features of installation of tube and tubeless tires
 6. How to distinguish a tubed tire from a tubeless one?
A couple of decades ago, tube tires ruled the roost and were on almost every car. However, since the 2000s, tubeless tires began to confidently conquer the market, and today it is almost impossible to meet a passenger car on tube tires. What is the main difference between tube and tubeless tires? Why is one better than the other and what are the disadvantages of both? We understand.
1. Construction of tubeless and tube tires
As is obvious from the name of the tires, their main difference lies in the design itself. The tube tire consists of a tire and a special chamber with a valve, which is inflated with compressed air. The tire is the upper (outer) part of the tire, it comes into contact with the road while driving, has a tread and all the characteristics we are used to. And the chamber is a sealed internal circuit, which is a rubber tube closed by a ring, pumped up with compressed air.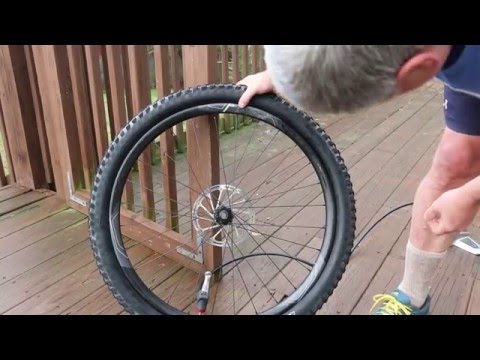 The camera is inserted into the tire, and the whole structure, in turn, is put on the disk. Due to this structure, the tire of a tube tire does not fit very tightly to the disk, and the main burden of maintaining pressure in the tire falls on the tube. In turn, the camera does not have great mechanical strength, and therefore needs protection from external influences, punctures and impacts, which is what the tire provides. Such is the symbiosis. nine0003
A tubeless tire is both a tire and a tube in itself. The device of a tubeless tire is such that it does not have a separate chamber, its role is played by an internal sealing layer a couple of millimeters thick, which is “welded” to the tire from the inside even at the vulcanization stage. This elastic layer made of a mixture of synthetic and natural rubbers retains compressed air well and at the same time fits snugly to the disc - which is why the device of a tubeless tire does not require any additional internal contours, it is put on directly to the disc. The inner sealing layer also helps with punctures: if a small sharp object (a piece of wire, a nail, etc.) is stuck in the tire, it will get stuck in the inner layer and will not fall out, preventing air from leaking through the puncture. nine0003
The tubeless tire device, by the way, requires a more complex disk. In particular, such a disk has special humps - annular protrusions on the landing shelves of the rim, with the help of which tubeless tires are securely fixed. The sides of tubeless tires are sealed with an additional rubber layer, due to which tightness is ensured at the point of landing of the tire on the rim.
2. Use of tube and tubeless tires
nine0002 Tubeless tires have now taken over all cars and many trucks, but there is still a place for tube tires. Tires with a tube are installed on motorcycles, scooters, ATVs, scooters and bicycles - on the so-called spoked wheels, which, as a rule, do not hold a tubeless tire with the required tightness.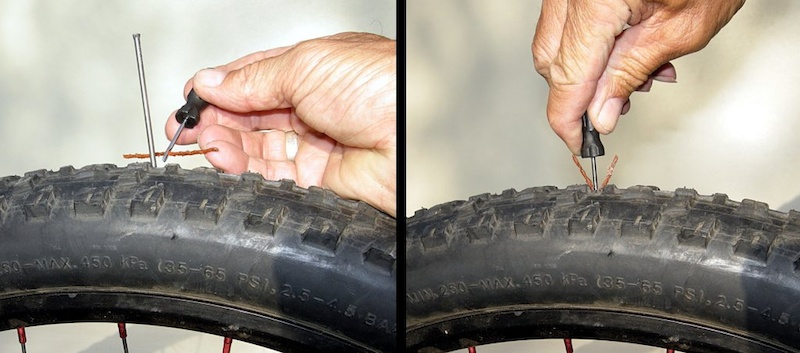 In addition, tubeless tires are still used in trucks and light trucks - tubeless tires are just beginning to gain popularity here. Tube tires are also used by some "Old Believers", who consider the main advantage the ability to replace a punctured tube without changing the tire, as well as the ease of repairing the tube with their own hands. nine0003
 3. Pros and cons of tube tires
Advantages:
- tube tires are more affordable than tubeless ones;
- in case of lateral damage, it is enough to replace only the punctured tube, and not the entire tire;
- tube tires do not require special disks and can "sit down" on any.
Flaws:
- a tube tire is much heavier than a tubeless one; nine0003
- a punctured tube tire will go down almost instantly and will need to be replaced right on the road, it will not work to get to the service station;
- high probability of internal puncture of the chamber by broken or worn cords;
- repair of even small punctures requires disassembly of the wheel.
4. Pros and cons of tubeless tires:
Advantages: nine0003
- slow depressurization and the ability to keep normal pressure for a long time after a puncture, which increases traffic safety and allows you to drive on a punctured tire to the place of repair;
- a tubeless tire is much lighter than a tubed one, which reduces the load on the car's suspension;
- tubeless tires have greater durability, because they are less prone to overheating, have a stable internal pressure, and also do not suffer from friction of the tube against the tire; nine0003
- driving comfort on a tubeless tire is much higher, since its sidewall is softer.
Flaws:
- installation and overhaul of tubeless tires requires complex manipulations, which will be performed only by a specialist using the necessary equipment; independent repair and installation of tires is impossible;
- damage or deformation of the rim at the point of connection with the tire bead will lead to depressurization and deflation of the wheel; nine0003
- Riding on a flat tubeless tire is fraught with the destruction of both the sealing layer and the tire as a whole.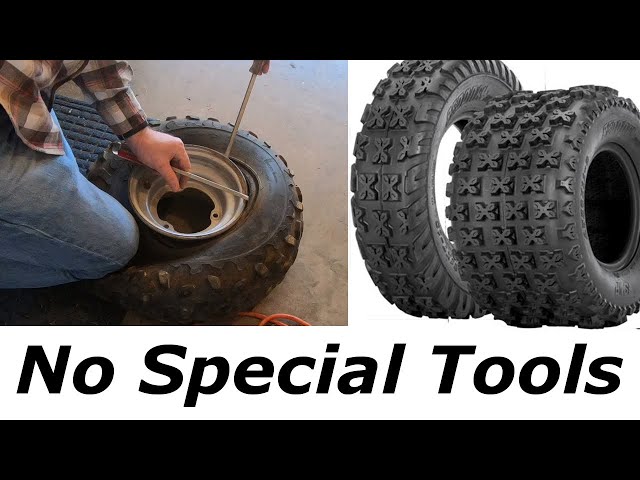
5. Installation features for tube and tubeless tires
1. In a tube tire, the size of the tube must necessarily match the size of the tire. Trying to fit a larger tube into a smaller tire will cause wrinkling as the tube fills with air, and any wrinkle is a potential weak spot. nine0003
2. A tube is not installed in a tubeless tire. At all. Even if it's damaged. It would seem that this should increase the strength of the damaged tubeless, but in reality it is simply dangerous. Between the chamber and the sealing layer in a tubeless tire, an air cushion is formed, which can lead to tire damage, especially with a sharp increase in the load on the wheel when cornering and when braking.
3. Of course, tires of the same construction must be installed on all four wheels. But that doesn't even need further mention. nine0003
6. How to tell a tubeless tire from a tubeless one?
This question often arises among buyers of used cars that are already equipped with tires.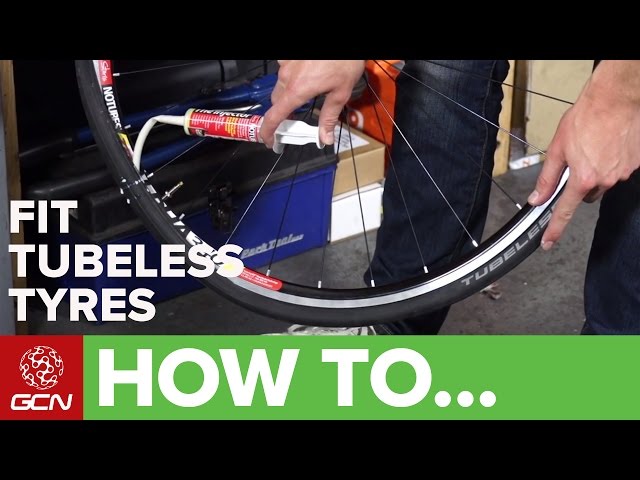 How to determine if you got tube or tubeless tires? Doubts may also arise when contacting an unreliable tire fitting: did you install the right rubber? Outwardly, chambered and tubeless tires already placed on disks do not differ from each other - all the difference is hidden inside, but we do not see the insides. Most nine0003
the obvious and indisputable way, of course, is to strip the tires: this way you will be able to visually assess the inside of the tire.
If this option is not suitable, we turn to the markings on the sidewall:
TT - marking tube tires, short for Tube Type - "tube type"
TL or single T - tubeless tire marking, from Tubeless - "without a tube" nine0003
The marking option may be doubtful if all the inscriptions on the tires have been erased during use and no longer help to determine whether the tire is tube or tubeless. On very old tires, the Tube Type or TT inscription may be completely absent, since at that time there were no options, all tires were chambered and did not need marking. But do you need such old tires?
The last option on how to distinguish a tubed tire from a tubeless one is to carefully examine the nipple. On a tube tire, it is longer and smoother, on a tubeless tire it is short, with a small bead. If you lower the wheel and try to press in the nipple, then the tubeless tire will not allow it to sink, since the nipple is firmly attached to the surface. But on a tube tire, the nipple can fall almost to its entire height. nine0003
The motorcycle gives a feeling of freedom, allowing you to discover new routes. However, in reality, this freedom can turn into a trap in an instant if you are unlucky enough to puncture a tire somewhere in the middle of the road. The feeling of annoyance will be ten times stronger if there is no way to fix a punctured wheel. At this point, it remains only to hope for cellular communication and help from other drivers on the road. Therefore, consider the basic recommendations for repairing a motorcycle tire on the road. nine0003
Always keep a rubber band or tire repair insert in the trunk. This simple tool will add peace of mind on the road. It will be much better if you learn how to use it in advance. You don't want to be the guy who has the right tool but lacks the skills to fix a problem, even something as simple as fixing a tire, do you?
The repair technology for tube and tubeless tires is different, but both types are subject to restoration (at least to such a state as to get home). Repairing a tubeless tire is easier. Repairing a tubed tire requires removing the wheel, removing the tire, and removing the tube to install the patch. nine0003
So you run over a nail, screw, glass or that damned sharp stone and punctured a motorcycle tire. If the object that caused the damage is still in the rubber, the first step is to remove it. Pliers are great for this. Therefore, you should always keep this tool in the trunk: with it, you need to grab an object sticking out of the tire.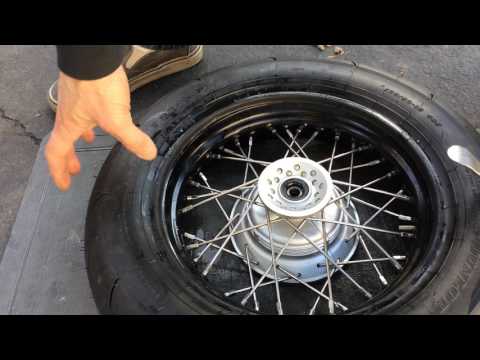 Try to pull it out along the same path that it entered the tire so that the puncture does not increase and become torn. nine0003
After removing the object, clean the edges of the pierced hole. To do this, the repair kit must have a special tool - a tool for cleaning holes. All debris and rough edges must be removed to create a surface for patching.
Then you need to install a patch. Different kits offer different types of patches, so you should read the kit's manual to complete this step correctly. However, there are two main types of patches: long cord patches and fungus patches. Some kits may include adhesive to bond the patch to the tire rubber. nine0003
Patches or cord inserts are supplied with an awl for installation. It is necessary to bend the cord in half, and thread one half into the tool. This is necessary for a tight fit of the material. Next, bring the cord into the hole until it protrudes above the tire by about 1 centimeter. Then you can pull it out of the awl and put the tool aside.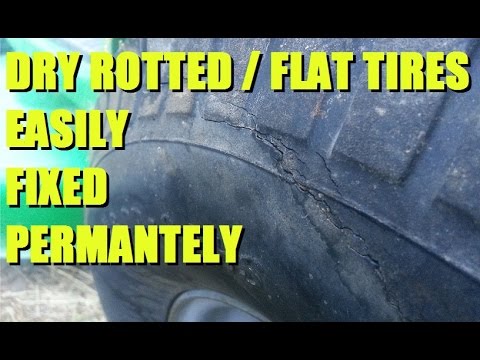 Take a knife and cut off the excess patch material by about 0.5 centimeter.
Fungus patches (plug and play type) require the use of a special tool for installation. Again, you must follow the instructions for the specific repair kit. Then stretch the patch material with pliers. When the puncture is closed, you can cut the patch over the tire. nine0003
After installing the patch, the tire needs to be inflated. For repairs on the road, you will need either a 12V electric compressor that can be connected to the motorcycle's electrical system, or a CO bottle 2 . Carrying a compressor with you is not always convenient. A more compact and more portable option is to use the small cans of CO 2 in combination with the tire inflator. This is the fastest way to inflate tires on the road.
If possible, apply some soapy water to the patch to make sure it is airtight. If there is a leak, you will see tiny air bubbles around the repaired area.
On-road retreading of tube tires is a more labor-intensive process. If your motorcycle is equipped with such tires, then you will need a few more tools to repair them. In most models, you will have to remove and disassemble the wheel in order to get to the camera. The vehicle owner's manual should describe how to do this and what tools to pack in your luggage. In addition, you will need a tire removal tool. It makes the job easier. nine0003
Once the inner tube has been removed from the wheel, the remaining air must be completely bled out. The next step is to prepare the camera for patching. The repair kit should include a special scraper to roughen the surface around the punctured hole. This treatment is necessary to ensure adhesion of the patch to the chamber material.
After completing the preparation, you can start installing the patch. Follow the instructions in the repair kit manual. Some patches come pre-applied with adhesive, while others require the use of the included adhesive.