1A Auto Team 1A Auto Blog Home
A stripped lug nut can be one of the most frustrating problems you will come across while doing vehicle repairs. Most of the time, lug nuts become stuck when someone goes a bit too far while tightening. In this post and the video below we’ll show you 3 ways you can try to remove a stripped lug nut.
A typical lug nut has a cap. When torqued beyond the manufacturer’s specification, the cap separates from the lug nut and allows moisture to get in. This then causes the nut to rust and stick to the hub assembly.
If you ever find yourself stuck with a stripped lug nut that won’t come off, you’ll need to have an extra set of tools nearby. We’ll take a look at some of the most effective ways you can easily remove a stripped lug nut that’s stuck to the wheel.
Normally a stuck lug nut will have smaller corners, and this makes it hard to remove it using the original-sized socket. You may need a smaller socket to provide the grip needed. If you experience difficulty lining the socket, use a hammer to tap on it until it fits.
Once the socket is lined up, connect a breaker bar and try to remove the nut. You can place a pipe at the end of the bar for extra leverage. If the lug nut is too stuck and won’t turn, don’t keep turning the bar to keep it from breaking.
If you try the breaker bar and socket method and still find that the lug nut won’t come off, get your hands on a powerful impact wrench. Impact wrenches are designed to tighten or loosen various nuts, bolts, and screws, and use torque and short jolting blows to deliver the necessary power needed to loosen a lug nut.
The most powerful variants deliver up to 250 foot-pounds of torque or more. This is enough muscle to bust a rusty and stuck lug nut. If your impact wrench doesn’t get the job done, try a drill.
A drill bit is a much safer tool to use when removing a stripped lug nut compared to an air hammer, an air chisel, or a torch, which can cause serious damage to the wheel easily if handled the wrong way.
When using your drill, start with smaller-sized drill bits and work your way up. Aim for the center of the lug nut. You can start by making an indentation at the center using a center punch to prevent the drill bit from slipping. You could also use a burr attachment with a die grinder.
Drilling can often be a long and tedious process. For safety purposes and to prevent the drill bit from dulling, have a cup of oil nearby. Dip the drill bit every once in a while into the oil to cool it down before drilling any further.
As you move from the smaller-sized drill bit to the larger ones, keep checking to confirm that you’re still aiming for the center of the lug nut. You can use a parts cleaner to remove the chips that may be filling the hole as you do the job. If by any chance you happen to drill off-center, use the burr tool with the die grinder to correct the hole.
After a decent amount of drilling, the wheel should slide out easily. You may find the lug nut remains stuck to the wheel sometimes. You can remove it using a pair of channel lock pliers, a torch, or an air hammer.
 com
com Remember to shop for new lug nuts at 1A Auto when replacing your wheel. If you penetrated the other side of the lug nut while drilling, you may need to replace the wheel stud as well in the case it’s damaged.
Summary
04th Feb,2022
Car repairs aren’t always fun. They can turn ugly when you least expect it, even if you’re trying to remove a stripped nut that just won’t come off. It’s one of the most frustrating malfunctions you’ll have to deal with in order to be able to safely drive your car again.
Even the most experienced mechanics can sometimes have issues removing this tiny little part. But while getting a stripped lug nut off is a pain in the neck for many, it can actually be a pretty smooth process if done correctly.
By the end of this article, you should have a good idea about why lug nuts get stripped, what tools do you need to get them out, how to remove them, and what to do once you’ve removed them. And in case you still have some questions about lug nut removal, we’ve prepared a detailed FAQ section for you at the end of the guide that answers the questions most people ask.
So, how do you remove a stubborn stripped lug nut? Read on to find out!
Table of Contents
There are three main reasons that can make it hard for your lug nut to come off:
One of the most common reasons lug nuts won’t come out is that the hex shape of the fastener has been stripped off due to using an impact wrench or the incorrect size socket during the installation of a lug nut.
Or maybe your lug nut is seized, and trying to take it out using a lug wrench has rounded the lug off.
Whatever the case is, you can’t grip the fastener in a way that allows you to remove it.
Metal lug nuts are typically designed in a way that keeps them from rusting. They may, however, rust overtime when their protective coatings wear off. The fastener may also be stripped and refuse to turn in this situation.
A seized lug nut can be due to one of your car’s lug nuts that has been overtightened by an overly eager mechanic holding an impact wrench. The lug wrench that came with a spare tire will not be able to remove it.
Pro tip: Before buying new tires, make sure the tire company you choose only installs the wheels using a torque wrench. Using a torque wrench correctly ensures that you adequately tighten the wheel fastener.
Odds are your not a beginner if you are going to tackle removing a stubborn lug nut but if this is your first time check out this separate article on how long it takes to change a tire.
Step-by-step Guide: How to Remove A Stripped Lug Nut that Won’t Come off[1]
Stripped lug nut removal isn’t rocket science. When using the right tools and following the right steps, you should be able to get your lug nuts off in no time.
We’ll concentrate on issues with traditional lug nuts, which are screwed onto wheel studs, as opposed to lug bolts. But several Europe-based car brands employ lug bolts that screw into the wheel hub, including BMW, Volkswagen, and Audi.
Tools You’ll NeedYou can find all of these tools in the automotive section on Amazon.
Check Today’s Price
Step 1: Ensure Your Car is Parked in A Level and Safe PlaceBefore starting the process of removing a lug nut, you want to ensure that you have adequate room to move about freely. It’s fine if you’re working in the garage.
If you’re changing a flat tire on the roadside and discover a stripped lug nut, we strongly recommend that you push or tow your car to a gas station or an empty parking lot before attempting to remove it.
Set the car to Neutral if it’s a manual, or Park if it’s an automatic, and pull the handbrake, especially if it’s parked uphill or downhill. You want to make sure that the car is anchored properly, as you’ll be applying a high level of force when trying to remove your seized lug nut.
Step 2: Apply Penetrating Oil and DrillIn order to start the process of removing lug nuts, you’ll need to first soak the nut and stud in penetrating oil.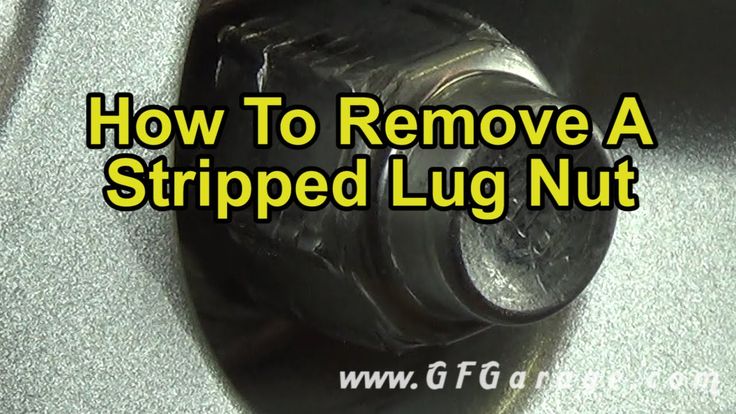 You can drill the closed head of the nut to allow the oil to penetrate into the threads.
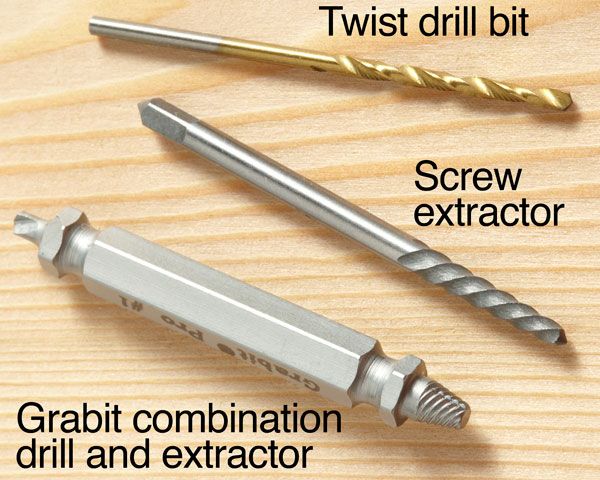
We suggest that you use good-quality drill bits, cobalt alloy steel drills with diameters of 5/64′′ and 7/64′′ will do the job. And since these little drills are so easy to break, we suggest that you get two of each.
Lubricant will make the drilling much easier. Keep some cool water available in case anything overheats. Now, just put a pair of safety glasses on and dimple the middle of the lug nut with a center punch and hammer.
Drill with the smallest drill bit first and use oil to wet its tip. Using both of your hands, keep the drill motor steady. You want to drill really slowly and carefully. Try to stop drilling from time to time since the oil will start smoking if the drilling heats it up. To cool the bit, place it in the water. Reapply penetration oil to the hole and bit after wiping away chips. Repeat until you see the bit break through the stud’s top.
Repeat the drilling process with the 7/64′′ bit in the drill motor. You want to hold your drill motor securely in place since the bit might get lodged into the hole, making the drill rotate. Drill to the top part of the stud once again.
If you have ever removed or installed snow studs, you will see this is a very similar process.
There’s now a reservoir in which you can soak the stud and nut in WD-40. To catch any back spray, place the WD-40 tube in the hole and start wrapping it with a paper towel or shop towel at the surface of the nut. Using this lube, squirt a small amount inside the hole.
WD-40 should also be sprayed around the lug nut’s base. And if you have the time, let the lube soak overnight, making it more effective. Squirt more lube to the base and hole of the nut the next morning. If you don’t have enough time, though, you can just let it soak for 5-10 minutes.
Note: The application of WD-40 on corroded lug bolts won’t help.
Step 3: Use A Lug Nut Extractor or A “Snug” SocketChoose a 6-point socket with a ½ inch drive that fits on the nut.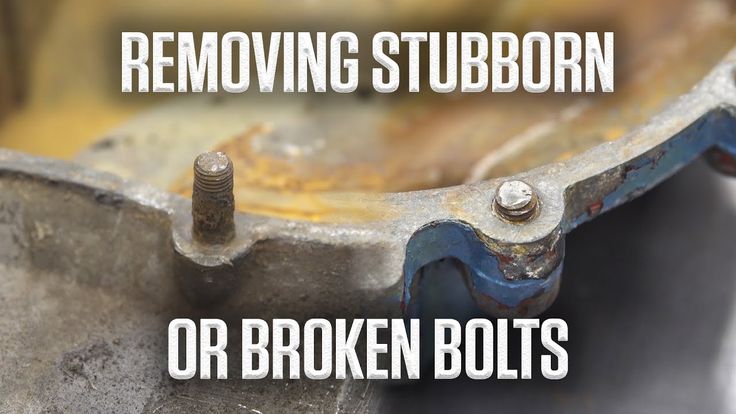 It’s possible that you’ll need a deep socket.
A very rusty fastener might be worn out to the point that you can tap it on with a hammer with a socket that’s one size smaller. A 12-point socket can sometimes be secured around a rusted hex-shaped nut and still have a decent grip.
An extractor socket may be required if the nut head won’t accept a regular socket. You’ll need a socket size that fits the shape snugly and start hammering it into place.
Step 4: Use A Breaker Bar to Loosen ItYou want to use a ½ inch drive breaker bar with a length of 18-24 inches. Install it such that your handle is in a horizontal position and can be raised upward in order to make the nut loose or pressed downward to make it tight.
Warning: Always stand back while doing this since the bar will bend and try to spring off the lug nut or the floor jack’s lift pad.
If a floor jack isn’t available, slide a pipe over the handle to apply force to the breaker bar. To fit tightly, the pipe must be a little bit bigger than the breaker bar, so 3 ft is an ideal pipe length in this case.
Place the breaker bar 10° to the left of the nut and at an upward angle of roughly 10°. To make the nut loose, you’ll need to push downward. Step gently onto your pipe to apply force using your weight. You can always grab the side of the car to keep your balance.
Step 5: Remove the Wheel as You Normally Would
Once you’ve removed the stubborn lug nut, start loosening the other ones. Now, it’ll be easier to jack up the car, keep it supported, and remove the wheel as you normally would.
Step 6: Install New Fasteners for the Whole Bolt PatternYou’ll need to buy and install new fasteners for the whole bolt pattern after removing the rusted or seized lug nut, as replacing only the broken fastener may result in some imbalances. You should inspect wheel studs that have rusted or seized lug nuts.
To begin, clean the threads with a little wire brush.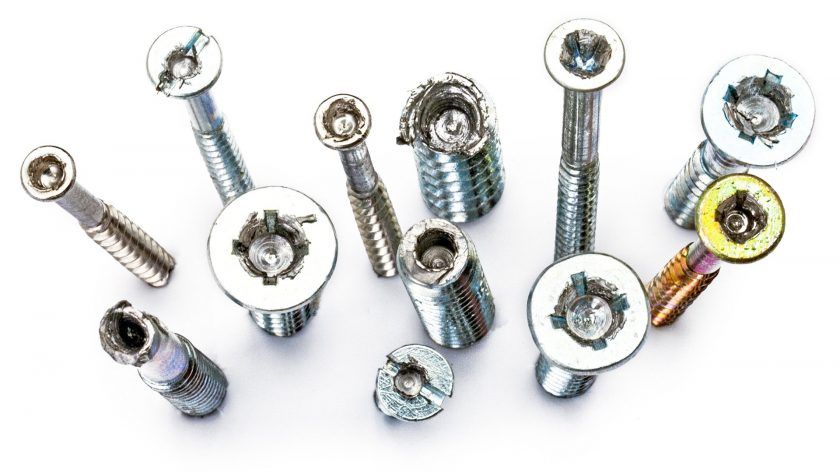 Then, visually inspect the threads with a bright light; they should look clean and smooth. Place a new lug nut on the threads all the way.
Any stud that shows signs of wear or fails the inspection mentioned above should be replaced. If you’re unsure about the condition of a stud, replacing it will be the best option.
Also, make sure to inspect your tire and check the air pressure.
The Bottom LineAlthough it seems impossible to remove a stripped lug nut, it really isn’t, no? If it seems too hard, though, remember that the process of removing a stripped lug nut can be very difficult even to experts, so don’t be too hard on yourself and give up on the very first try.
As long as you have the proper equipment, and as long as you stick to the steps in our guide, you should be able to knock those pesky lug nuts out of your wheel in no time!
In case you can’t take them off, seeking the help of an expert is a great option that will both be safer and save you the headache of trying to deal with this problem yourself.
Make sure to check out our other article on how to remove paint from your tire.
FAQsIs there a tool to remove stripped lug nuts?The preceding fastener removal process can fail to remove a lug nut. If this happens, a Lug Ripper can be used to get the job done.
To use this tool effectively, you must carefully follow the manufacturer’s instructions, or else the tool may end up being unusable.
Keep in mind, though, that this tool can get pretty expensive. However, it may be cheaper than taking the car to a tire shop for repairs. You can resell the Lug Ripper in a local marketplace after successfully removing the stripped lug nut to recoup some of the high cost.
How do I keep lug nuts from stripping?Typically, you want to keep your lugs dry and clean. Before trying to reinstall your wheel, clean the threads and mounting bolts of any dirt, rust, or water. You may want to get a new set if they’re worn out.
Careless mechanics might also over-tighten the lug nuts. Before they begin working on your car, consult with a mechanic to ensure that the proper torque will be applied. Torque between 60 and 100 ft-lbs is typical for most cars, but the requirement may vary from car to car. Torque requirements for larger vehicles might reach 300 ft-lbs.
Can I drive with a stripped lug nut?The brake rotor may warp as a result of the uneven torque. If your lug nut is loose, you should replace the stripped nut as quickly as possible and only drive it if it’s absolutely necessary. We recommend having a skilled mechanic check your car to see whether or not the lug nut needs to be replaced and to prevent installing parts that aren’t essential.
Sooner or later, any owner is faced with a situation where a nut, bolt or self-tapping screw does not want to get out. There are several reasons for this: poor quality metal, violation of technology (overheated self-tapping screws), rust, time, too much effort applied when tightening the connection. Nevertheless, it is possible to unscrew a bolt with torn edges, a licked nut, a rusted connection. In this article, we'll talk about how to do it.
"Licked" edges on bolt heads or nuts are not uncommon. Excessive forces that are applied when tightening, and then when loosening, often lead to the fact that the boundary between the faces of the bolt is erased. If the bolt does not unscrew - ordinary keys are powerless in this case - they simply scroll, and the fasteners remain in place.
Torn or licked edges on a nut or bolt do not allow it to be unscrewedThere are several ways to unscrew shear bolts and nuts:
If there is a plastic or rubber gasket under the bolt, remove it and try one of the suggested methods again. If you cannot unscrew the bolt with torn edges in all these ways, there is only one thing left: cut / cut off the hat and drill out the pin.
Another problem that is familiar to car enthusiasts (and not only) is a rusted nut and / or thread. In this case, you should not make heroic efforts to unscrew the fasteners. Your faces will simply “merge” and another problem will be added to the boiled thread. If after a couple of attempts, you can’t unscrew it, try the following methods one by one:
Rust can also be treated with grease. Try filling the joint with fluid multipurpose grease (available in WD40 cans). After waiting a couple of hours, we try to work with the key. Didn't work - try other ways one by one.
If the hardened self-tapping screws are unscrewed / twisted a couple of times, their edges lose their sharpness, the screwdriver scrolls, and the screw itself remains in place. If he "sits" in wood, plaster, chipboard or other similar, not too hard materials, you can put a thin elastic band under the screwdriver (for example, for hair). Due to the force of elasticity, they achieve a tighter fit to the remaining faces, which helps to move the self-tapping screw from its place. Other methods are more "traumatic":
The remains of a bolt or stud without a head can be unscrewed as follows: cut a left-hand thread in the remaining body, drip glue "torque", screw in the left tap, leave for an hour. Apply oil to the main thread and leave for an hour as well. When the glue sets, twist it out. If the remains of a self-tapping screw are stuck in the wood, it is easier to close this hole and install other fasteners nearby.
Repairing a car is not the easiest job, a car, regardless of the country of manufacture and the name of the manufacturer, is constantly subjected to stress, so it is not surprising that it is prone to breakdowns.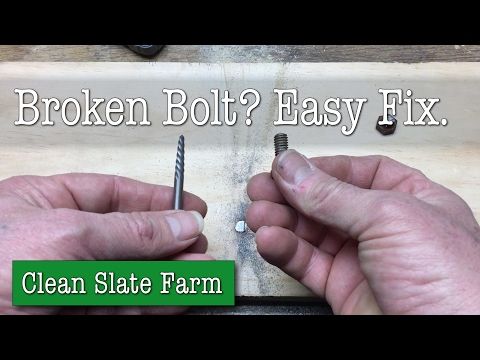 However, it often happens that a particular malfunction is complicated by the appearance of a new one. Such situations include the situation when you, while repairing your car, while unscrewing the bolt, tore off the thread or completely broke it. A lot of questions immediately arise: what to do in such a situation, how to continue the repair, and most importantly, how to unscrew the broken bolt t ? You will find the answers to these questions in our today's article. Let's move on...
Most often, the bolt breaks when you are a "hefty guy", and your bolt, well, the one that you broke, is very stuck or rusty. As you understand, we are not talking about cars that "just" came off the assembly line. Typically, this problem is faced by ancient cars or those whose storage or operation left much to be desired. More specifically, we are talking about threaded connections that often came into contact with moisture. For example, the undercarriage of a car regularly comes into contact with moisture (snow, rain, washing), so it is not surprising that something has rusted somewhere.
Bolts can break in different ways, the most unpleasant "bolt break" is when it is cut flush, in such a situation it is simply impossible to unscrew it without special tools (drill, welding, etc.). It will be more lucky if the bolt breaks already at the exit of the thread and a little "body" remains on the surface. Firstly, in this case, you have already “torn off” the bolt, which means it will get out, which is important, and secondly, such a torn off bolt can be acted upon, for example, using pliers, a screwdriver, welding, etc.
There are several ways to remove a broken bolt, however, before starting work, you must do the preparatory work. Such works include:
Treat the threaded connection with WD-40 or at least machine oil. Alternatively, you can hit the wreckage with a hammer a couple of times or heat the bolt with a soldering iron or lamp, provided that this is possible and other important parts (rubber, plastic, fabric, etc. ) do not suffer from heating.
1. If you have already managed to “break” the thread of the bolt even a little, that is, if it has already begun to unscrew, you can try to unscrew the broken bolt using pliers or a good adjustable wrench.
2. The second option will require you to have a hacksaw or grinder (depending on the size of the bolt), sometimes a chisel also helps, the main thing is not to overdo it. The principle is as follows - make a transverse hole for a screwdriver and try to unscrew the bolt with a screwdriver.
3. The third option is welding. As you understand, this method requires a welding machine, everything is done as follows - take a bolt with a hat of approximately the same diameter, and weld it to the fragment, then using the key, carefully without applying excessive force, we try to unscrew the broken bolt. Rumor has it that there are so-called "aggressive adhesives" that supposedly can perform the role of welding. However, this method has not been personally tested, so we will not argue about its effectiveness.

The principle is as follows - you need to drill a hole exactly in the center using a thin drill, after that a thicker drill is installed, and the procedure is repeated. The most important thing is to drill the first hole exactly in the center. When the "body" of the broken bolt is almost gone, and the walls are thin enough to break, try very carefully to break off the remaining threads using fine, sharpened wire or tweezers. If you do everything right, you won't have to cut new threads or "chase" the old one. If you have an "extractor" with a left hand thread, you can use it to unscrew the rest of the debris, see the view at the end of the article for more details.
And finally, if after several attempts you notice that something doesn’t work out for you, you don’t need to act in haste, because you will only complicate everything, it is better to entrust this work to someone who has already repeatedly encountered this problem.