Skip to content
Products
Steel makes for better boot grip and superior protection.
By Kristi Hopp
April 6, 2022Do away with those stock plastic footwells by installing a set of Quad Logic’s all-steel-construction footwell floorboards.Quad LogicIf you’ve kept up on our ATV Rider Buyer’s Guides and reviews of Polaris ATVs, then you’ve probably noticed there is one area that we just can’t quit complaining about—the stock plastic footwells. To be more specific, the integrated plastic footpegs wear out over time and can become slippery in wet conditions. A steel serrated footpeg would offer more durability and optimal boot grip.
Quad Logic, out of Ramsey, Minnesota, created the fix we’ve been asking for, and took it even further with its all-steel footwell floorboards for the Polaris Sportsman 450 and 570. Manufactured from lasered sheet steel, these footwells contour to the shape of your fenders. Steel serrated footpegs run from side to side for better grip and extended wear protection. The floorboards are finished with a textured powdercoat finish that not only looks great but further enhances boot grip.
The kit includes both the left and right floorboards. Most original hardware can be used as the Quad Logic floorboards fit like the stock floorboards. This particular kit fits all 2014 and newer standard-chassis Sportsman 450/570 models, including EPS and SP editions. Quad Logic also makes similar kits for older Polaris Sportsman models and Can-Am Renegade and Outlander ATVs.
This particular kit runs $359.95. Pricing varies for other models. For more information and online purchase, check out Quad Logic online with this link.
Want to stay up to date on the latest ATV Rider news and reviews? Sign up for our weekly newsletter!
Products
Top 7 Soft Rack Bags for ATVs
Products
Titan Ramps Raised ATV Rack Makes Space in Your Truck
Products
Manufactured in the USA!
Products
Diamondback HD Truck Bed Cover Review
Products
Product: Antigravity Re-Start Lithium-Ion Battery
Latest
News
Huevos Pro Invitational Race Photo Gallery
Buyers Guide
2023 Arctic Cat Alterra 600 EPS/XT/LTD/SE/Mud Pro/Black Hills Edition
Buyers Guide
2023 Arctic Cat Alterra 600 TRV EPS/XT/LTD
News
Bryce Ford Wins $10,000 Huevos Pro Invitational
News
Cyberquad for Kids “Youth ATV” Recalled by Radio Flyer
News
Yamaha’s Elite bLU cRU Athletes Win Big in 2022
Products
Top 7 Soft Rack Bags for ATVs
Buyers Guide
2023 Argo Xplorer XR 700 EPS/LE
ATVs
A Blast From the Past—GasGas Wild HP 300 Two-Stroke
Buyers Guide
2023 Argo Xplorer XR 700 EPS/LE
Buyers Guide
2023 Arctic Cat Alterra 600 TRV EPS/XT/LTD
Yamaha’s Elite bLU cRU Athletes Win Big in 2022
A Blast From the Past—GasGas Wild HP 300 Two-Stroke
STOLEN: National Motocross Champion Joel Hetrick’s YFZ450R
“Don’t Count Me Out:” Rookie Claims 2022 WMX Championship
Buyers Guide
2023 Polaris Sportsman 570/EPS/Premium/Trail
Reviews
2022 Ford F-150 Lightning Review Gallery
ATVs use plastic materials in just about every component that isn’t metal or rubber.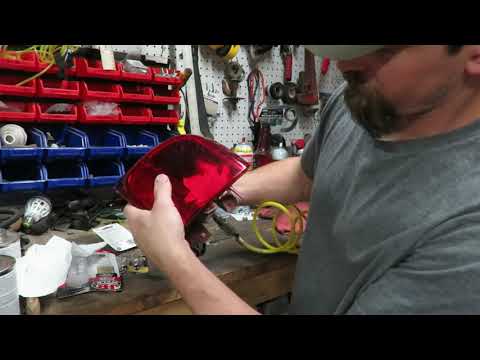 Any time you need to repair cracked or damaged plastics, such as fenders or body panels, you must know what type of plastic the part is made of for a durable result.
ATV fenders and body panels are typically made of thermoplastics such as polyethylene (PE), polypropylene (PP), or thermoplastic olefins (TPO). Components such as footwells, fender flares, inner fender panels, and other black plastic trim are often made of ABS (Acrylonitrile Butadiene Styrene).
To determine what type of plastic a specific part of your ATV is made of, you need to do some investigation. This post covers several methods that hopefully will lead you to a definite answer.
Most people don’t give what type of plastic is used in their ATV a second thought before facing a damaged plastic component that needs to be repaired.
Cracks and holes in the fenders or other exposed plastic components are bound to happen sooner or later if you take your ATV off-road. Cracked plastics are the most common damage in ATVs by far.
The easiest way to repair damaged plastics would be to buy a new part. But if your budget doesn’t allow it, and function matter more to you than aesthetics, you may want to repair the damage at home or a body shop.
Any time you want to repair damaged plastic, you need to know what type of plastic the components are made from to ensure a sturdy and durable result.
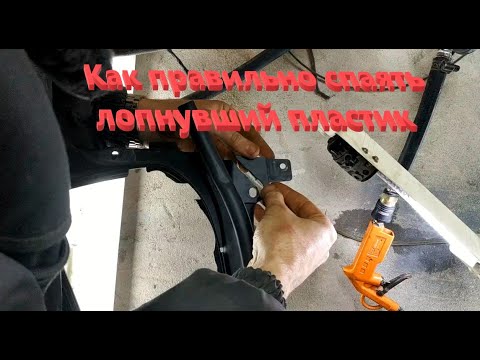
If you consider welding the crack, you must ensure you get welding rods of the same plastic type as the component you are repairing.
Welding plastics use heat and a strip of fresh plastic material to melt the crack back together. Using different materials will create a more brittle weld that will likely break again.
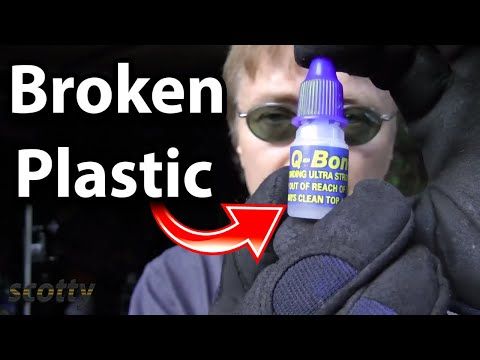
And if you’re looking to use glue, you must choose the right type of glue and apply the correct procedure.
ATV plastics are chemically resistant, meaning they are unaffected by most chemicals. That is why you need glue designed to bond to your specific type of plastic.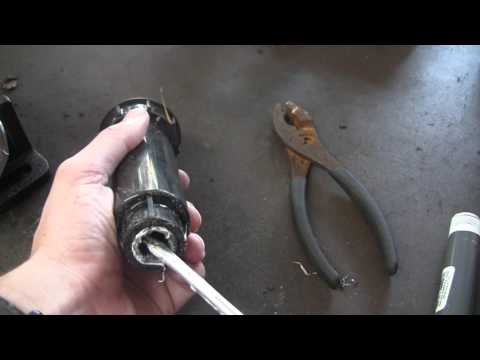 Generic adhesives or glue intended for a different kind of plastic may not adhere correctly.
Also, some plastics, such as PE, cannot glue without preparations such as flame treatment before gluing.
ATV manufacturers and their engineers choose plastic-type depending on a range of factors.
Cost: Some plastics are cheaper to buy and manufacture while still offering the required quality and properties. Some manufacturers cut costs more than others that focus more on quality.
Material properties: Some plastic parts, such as those more exposed to impacts and flying debris, need to be of a more rugged and impact-resistant type of plastic. Less exposed parts that are more visible still need to be tough while also being flexible and offering prettier visuals.
Raw material availability: Markets go up and down, and manufacturers may choose a plastic type depending on what is available.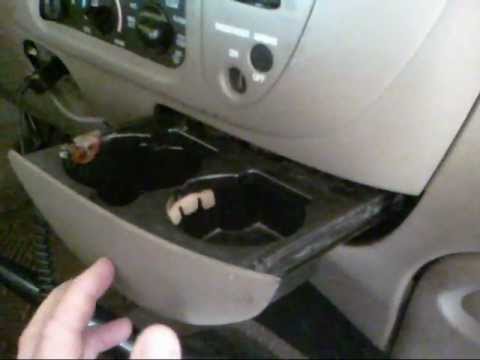
Manufacturing equipment: Some manufacturers may choose plastic-type depending on their existing equipment. Buying a new production line of machinery to use a different type of plastic may not be profitable.
There is more to plastics than most people first come to realize. In fact, the science around plastics has its subject field that you need an education in material technology to comprehend fully.
Back when I got my degree in engineering, there was a subject called “material theory.” While I’m no expert in plastics, I decided to look at some key properties that make thermoplastics ideal for ATVs. The overview also shows us the practical differences between the most common types.
With a few exceptions, most plastics used in ATVs are a form of thermoplastic.
A thermoplastic is a general term that covers any plastic polymer that becomes pliable or moldable when heat is applied and solidifies when it cools back down.
Thermoplastics are an excellent material for making ATV components because they can be molded into almost any shape and form using various methods, including:
Thermoplastics are versatile materials that are relatively easy to fabricate. They are recyclable, some easier than others.
ATV plastics are exposed to regular gasoline or oil spills and must withstand these chemicals. That is why plastics such as polyurethane (PU) that break down or get soft from gasoline exposure are not common in ATVs.
Polyethylene is the most widely produced plastic in the world. You’ll find it in everything from plastic shopping bags and plastic bottles to ATV fenders.
The term “polyethylene” is an umbrella term that includes several sub-categories of PE plastics that all use polyethylene as a base.
The type of polyethylene used in ATV fenders is high-density polyethylene (HDPE). As the name implies, it’s a more dense type compared to other available grades of PE.
When someone says their ATV fenders are PE, they probably mean HDPE, as no other type of PE is suitable as fender material.
Why HDPE is an excellent choice for ATV fenders and body panels:

Disadvantages of HDPE:
Typical uses of PE or, more specifically, HDPE in ATVs:
Polypropylene is also a thermoplastic and is the second most widely produced plastic worldwide.
Polypropylene (PP) has many similar properties to pole ethylene (PE) but is slightly different in some aspects.
PP vs PE plastics in ATVs:

Typical uses of PP in ATVs:
Thermo Plastic Olefin (TPO) is a generic name for more complex thermoplastic forms that are becoming increasingly popular in exposed plastics such as ATV fenders and automobile bumpers.
TPO plastics are blends of several components added to improve material properties over conventional thermoplastics further. TPOs typically contain fractions of three primary components:
TPO also goes by Thermo elastic olefin (TEO), where olefin is just a term that refers to polymer plastics such as PP, PE, and others.
Please note that TPO and TEO are only generic names, so you cannot be sure what the properties and the various components are just by knowing it’s a TPO.
Other benefits of TPOs:
Typical uses of TPO or Teo in ATVs:
ABS is a thermoplastic made of different base materials than the other plastic types in this post.
Acrylonitrile and styrene offer strength and rigidity, while polybutadiene rubber adds toughness and flexibility.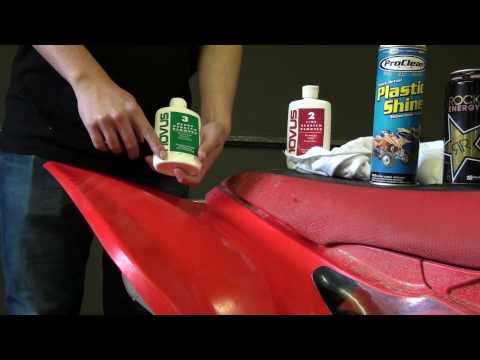 Additives such as fiberglass are used to improve toughness further.
Benefits of ABS plastics in ATVs:
Disadvantages of ABS plastic:
Typical uses of ABS plastics in ATVs:
Polyacrylic Acids (PAA) and Poly Methyl Methacrylate PMMA are acrylic plastics often used in ATV headlights and rear lights.
Acrylic plastics offer a sturdy, lightweight, and impact-resistant substitute for glass. It is much harder than the other plastic types.
TPE, sometimes called thermoplastic rubbers, is a mix of plastic and rubber commonly used in the tracks on ATV belt kits.
Now that you know the most common plastic types in ATVs, how do you know what plastics your ATV is made of?
Plastic parts may or may not have imprints or markings that indicate the plastic type for recycling purposes.
What the symbol looks like depends on when and where the part was manufactured.
The most common markings to look for are the recycling symbols created by the Plastics Industry Association.
The symbol consists of a triangle formed by three circling arrows with a number inside the triangle that indicates the plastic type. Underneath the triangle is an abbreviation for the plastic type (HDPE, PP, etc.)
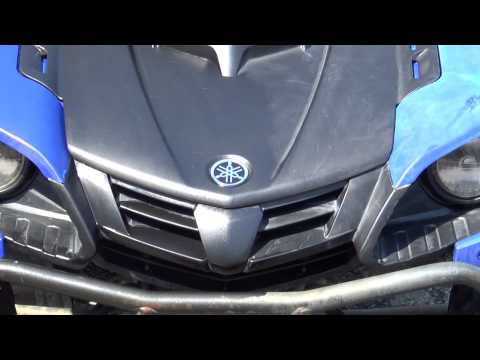
On older ATVs or some Chinese models, you may find markings that only contain abbreviations, like the fenders on this youth ATV.
The markings are usually placed somewhere out of sight inside the wheel wells, inside the airbox lid, or behind body panels.
You might have to remove the part to find the symbol, but you need to remove it anyways if you plan to repair it.
Usually, you will find information about body panels and fender plastics in the manuals. However, the data is generally not easy to find and may require too much searching for some people’s liking.
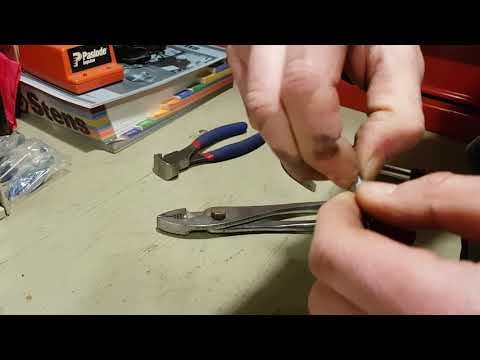
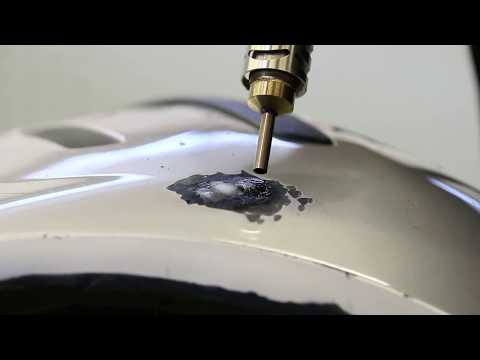
If you can cut off a piece of plastic, you can perform what is known as a flame test. Make sure you do this outdoors somewhere fireproof.
Cut off a small plastic sample and light it on fire. Do NOT breathe in the smoke, as it can be highly toxic.
Observe the color of the flame, the scent, and how the plastic burns.
Cut off a piece of the plastic and place it in a solvent like acetone. If it dissolves or goes softer over a few hours, you know it is ABS plastic.
They may or may not know the answer, but they should be able to send a request to the manufacturer directly.
Diagnostics and repair of ATVs are important areas in the maintenance of motorcycles and all-terrain vehicles. It is important. So that the vehicle constantly remains on the move, does not have problems with movement and safety for the driver and passengers. Therefore, it is necessary to undergo technical inspection constantly, in time to change broken or failed spare parts and assemblies, to undergo an inspection of the condition of the machine, technical fluids.
We offer repair of ATVs in Krasnoyarsk and on favorable terms. There are low prices, promotions and discounts are constantly held. It is possible to order spare parts and accessories for tuning for any brands of all-terrain vehicles, snowmobiles and motorcycles. The employees of our workshop have extensive experience in servicing Yamaha, BRP, Suzuki, Honda and other brands, they immediately identify breakdowns and their causes. The use of modern computer equipment will allow you to detect problems in time and eliminate them. Departure to the client is possible.
When an ATV arrives at the service station, a complex diagnostic must first be carried out in order to identify all possible problems. It usually includes the following steps:
Every machine needs regular maintenance. Especially for ATVs, which often work in intensive operating conditions, which is called "wear and tear". therefore, attention to the technical side of their work needs a lot. Off-road can lead to frequent breakdowns, even if the car drives well and is not noisy - this does not mean that you can not visit the service.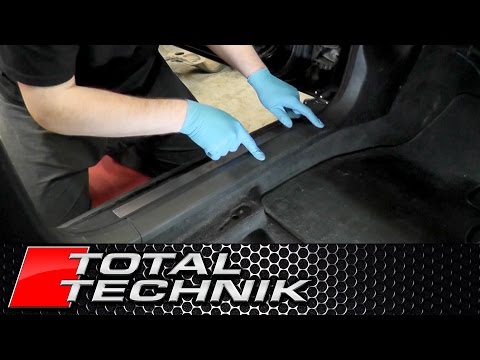 On the contrary, regular inspections will allow the iron horse to serve longer.
This should be especially remembered by beginners who pay more attention to tuning than repair. Unfortunately, all equipment is subject to wear and tear. When contacting a motorcycle service, you must have a service book with you, it also indicates the frequency of visiting the service station. If your equipment is older than 3 years, then it is better to undergo repairs a little more often. And you definitely shouldn't repair an ATV yourself, especially if you don't understand how it works. The risk of harm is much greater, and savings are unlikely to succeed. Recommendations of experts: contacting the service at least twice a year - in preparation for the active summer season and winter.
We offer quality service and competitive prices. The standard check includes:
Experienced technicians available for a wide range of repairs. You won't have to wait long - a large warehouse of spare parts and the necessary equipment will allow you to carry out repairs quickly. Qualified masters use modern equipment, including computer programs. Quality repairs are guaranteed - you can contact us with any problems and brands of ATVs and motorcycles.
The heart of the machine requires careful attention. To extend its service life, it is better to use fuels and lubricants that have been tested and recommended by the manufacturer, and regularly conduct diagnostics. The main areas of repair:
It is subjected to crazy loads, so it can quickly fail. Breakage is better not to allow, because the equipment can fail at any time. Therefore, the load must be uniform. When repairing, specialists can replace bearings, hubs, levers, shock absorbers, bushings of levers and shock absorbers, ball bases. After that, alignment-adjustment is required.
Also an important part of the machine that needs attention. Among the main works, one can single out the replacement of the variator, its belt and cover, cardan and its cross, drive, CV joint and its anther, gearbox oil seals.
Electronics can fail in any technique. But our experts will quickly carry out maintenance of the battery, replace the ignition locks, starter, alternator and repair the wiring.
Alas, no one is immune from accidents, especially if the ATV is constantly used in extreme conditions. Customers may face problems with damage to the body, plastic, attachments, frame geometry. Therefore, after an accident, it is worth contacting professionals who can carry out serious work, including sawing and overcooking the frame.
Repair begins with a visual inspection, determining the degree of damage, the complexity of the work. Plastic parts and steering gear require the least time to eliminate shortcomings, most of all - the chassis and frame.
In addition to repair, we can carry out ATV tuning. We offer customers a large list of additional accessories and equipment that will help make your vehicle stand out, increase its efficiency and extend its life. You can modify the nodes, install additional devices, tune the engine, or even paste over the entire body with a protective or carbon film. In the basic equipment, not all cars will be able to overcome deep fords, move through fallen trees, move through impenetrable swamps and ruts. But tuning will help to do this. Also among the useful additions is equipping cars with trailers, snow plows, devices for clearing the territory and even plowing the land.
A full range of services for diagnostics, repair, replacement of parts and tuning in the company includes:
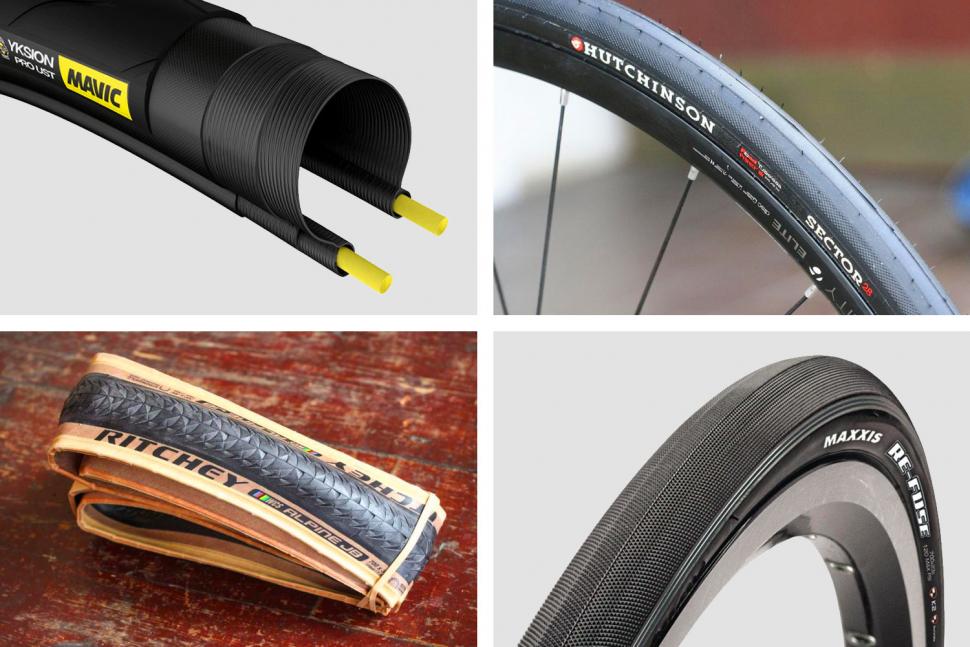
Tire fitting is also important in repair, because tires need to be changed constantly, they need to be balanced and changed when changing driving style or type of road. When changing tires, it is important to take into account the pressure, because it is different from a car. Therefore, when choosing any repair work, contact the professionals in their field. Recently, for the repair and tuning of ATVs, the service of pasting with a film - carbon, vinyl or ordinary protective film - has become popular. It can be glued to the entire body, individual parts, imitate textures and airbrushing, give a metallic sheen or camouflage vehicles. The transparent film will protect the surface from fading. Headlights can be glued with armored film so that they do not break or chip. For those who like to stand out, there is the option of pasting the body with matte carbon - it looks stylish, makes it easier to wash and clean.
To prolong machine life, keep rubber and plastic parts clean, change consumables and oil regularly, and lubricate suspension arms regularly.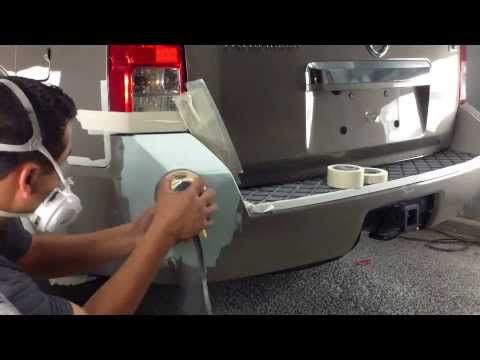 According to reviews, this will help to operate all-terrain vehicles longer.
| No. | WORKS | BRP |
| 1 | Rewind winch | 500 |
| 2 | Winch repair with removal and rewind | from 3000 |
| 3 | Installing tracks on an ATV | 10000 |
| 4 | Installing the backrest | 100 |
| 5 | Installing the windshield | 3000 |
| 6 | Arm and footpeg bottom protection installation | 3500 |
| 7 | Case installation | 600 |
| 8 | Installation of a wardrobe trunk with additional electrical elements | 1500 |
| 9 | Installing the winch in a regular place + wiring layout | 1500 |
| 10 | Installation of a non-standard winch + wiring layout | 3500 |
| 11 | Front/rear kengurin installation | 1000 |
| 12 | Installing heated handles | 2000 |
| 13 | Installing Heated Handles with Trigger | 2500 |
| 14 | Power body kit installation | from 2000 |
| 15 | Snow plow installation | from 2000 |
| 16 | Radiator extension installation | from 3500 |
| 17 | Installation of additional lighting | from 1500 |
| 18 | Handlebar guard installation | 300 |
| 19 | Installation of arch extensions | 1000 |
| 20 | Installing snorkels | from 4000 |
| 21 | Alarm setting | 3000 |
| 22 | Installation, activation of GPS/GSM tags | 500 |
| 23 | Seat heating installation | 2000 |
| 24 | Installing footrests for a second passenger | 2000 |
| 25 | ATV wash | 300 |
| 26 | Frame geometry restoration | from 20000 |
| 27 | Locksmith work | 500 |
| 28 | Cylinder head cover replacement | 500 |
| 29 | Oil change in internal combustion engine | 600 |
| 30 | Replacing the Recoil Starter | |
| 31 | Replacing the oil seal from the right crankcase cover | |
| 32 | Replacing the CPG without removing the engine | 10000 |
| 33 | Overhaul (ICE) with removal | 40000 |
| 34 | Overhaul (gearbox) with the removal of the internal combustion engine | |
| 35 | Overhaul (checkpoint) with removal | 15000 |
| 36 | ICE valve adjustment | 2500 |
| 37 | Repair work with the removal of the left engine cover | from 1500 |
| 38 | Repair work with the removal of the right cover (semi-crankcase) | from 1500 |
| 39 | ICE diagnostics | 1500 |
| 40 | Diagnostics of the fuel system carburetor, injection | 500 |
| 41 | Chassis and transmission diagnostics | 1000 |
| 42 | Electrical diagnostics | 500 |
| 43 | Rear gear oil change | 300 |
| 44 | Front gear oil change | 300 |
| 45 | Flushing the internal combustion engine when changing the oil | 300 |
| 46 | Grease packing oiler press | 100 |
| 47 | Complex | |
| 48 | Maintenance | 8500 |
| 49 | Plastic replacement 1 element | from 1000 |
| 50 | Plastic repair 1 element | from 1000 |
| 51 | Cooling fan replacement | 3500 |
| 52 | Air filter assembly replacement | 400 |
| 53 | Carburetor replacement + adjustment without add. | |
| 54 | Fuel hose replacement | 200 |
| 55 | Fuel tank replacement | from 2000 |
| 56 | Fuel cock replacement | |
| 57 | Fuel filter replacement | |
| 58 | Replacing the accelerator cable | 600 |
| 59 | Replacing the filter element | 100 |
| 60 | Flushing the gas tank (with removal) + cleaning, injectors | 3500 |
| 61 | Flushing + carburetor adjustment + removal and installation | |
| 62 | Shock absorber replacement (front or rear 1 pc) | 500 |
| 63 | Variator Weight Replacement | 1200 |
| 64 | Replacing the rear brake pads on the drum | |
| 65 | Replacing the cardan shaft | 1100 |
| 66 | Replacing front brake pads on one caliper | 400 |
| 67 | Replacement of the steering knuckle with complete disassembly and adjustment of the steering rods | 2500 |
| 68 | Hub bearing replacement (with hub removal) left/right | 1500 |
| 69 | Replacing the anther of the cardan rear gear | 1500 |
| 70 | Replacing the cooling system radiator | 3500 |
| 71 | Replacing the rear gearbox | 2000 |
| 72 | Replacing the front gearbox | 1500 |
| 73 | Variator Belt Replacement | 1500 |
| 74 | Tie rod replacement | 700 |
| 75 | Transmission oil seal replacement | from 600 |
| 76 | Drive removal | 1600 |
| 77 | Clutch replacement (drum, clutch plate) | |
| 78 | Brake caliper replacement | 800 |
| 79 | Replacement of brake pads (all) + brake adjustment | 1000 |
| 80 | Replacing the clamp on the CV joint boot | 200 |
| 81 | Ball joint replacement | from 500 |
| 82 | Gearbox overhaul (removed) | 5000 |
| 83 | Overhaul of the front gearbox with removal and installation | 7000 |
| 84 | Overhaul of the rear gearbox with removal and installation | 7000 |
| 85 | Hydraulic brake bleeding with brake fluid replacement 1 circuit | 200 |
| 86 | Mechanical brake adjustment | 100 |
| 87 | C/U rear upper arm | from 900 |
| 88 | C/U rear lower arm | from 900 |
| 89 | C/U front upper lever | from 900 |
| 90 | C / U lever front lower | from 900 |
| 91 | One wheel tire fitting + removal and installation | 200 |
| 92 | Rear CV joint removal installation (CV joint cover) | 1600 |
| 93 | Front CV joint removal installation (CV joint boot) | 1600 |
| 94 | ECM Computer Diagnostics | 4000 |
| 95 | Ignition coil replacement | 300 |
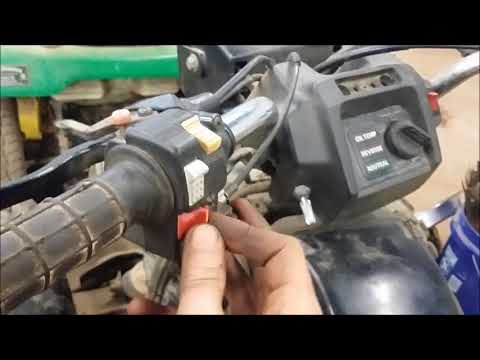
| 96 | Switch replacement | 300 |
| 97 | Starter Relay Replacement | 300 |
| 98 | Spark plug replacement | 200 |
| 99 | Servo Replacement | from 800 |
| 100 | Replacement of electronic parts (electro block, relay) | 400 |
| 101 | Electric starter replacement | 1500 |
| 102 | Battery charging and diagnostics | 200 |
| 103 | Generator repair (replacement) with partial disassembly of the internal combustion engine | from 3500 |
| 104 | S/U battery | 200 |
| 105 | S / U Steering switch block, left | 300 |
| 106 | S/U Steering switch block, right | 300 |
| 107 | C/U instrument panel | 600 |
| 108 | Installing the battery in a wrong place | from 1500 |
This is covered in the plump volumes of the Repair Manual, which can be found in specialist shops or on the Internet. However, the paradox lies in the fact that an ordinary user, even with stable auto mechanic skills, in most cases will not be able to repair a modern ATV. Of course, he can fasten a piece of plastic that has flown off, replace a rear-view mirror or a burned-out light bulb. The pinnacle of home repair will be the replacement of brake pads, and even then, you need to carefully remember the disassembly sequence so that at the end there are no “extra” parts. A more complex repair is impossible without special tools, pullers and torque wrenches - a modern ATV is a high-tech unit with many adjustments, and in the old fashioned way, with a sledgehammer and a wrench, something cannot be changed.
So you are the proud owner of a brand new BRP snowmobile. How to make it please you with long and reliable work without breakdowns? The following text should not be considered as operating instructions under any circumstances! Each model has its own unique features.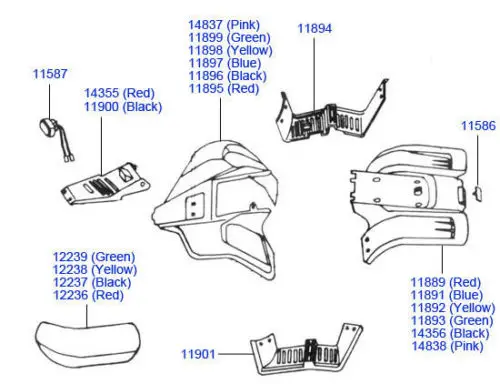 We have collected here only the main recommendations, the reading of which cannot replace a close study of the instructions!
There are three rules for proper snowmobile operation:
The third point is the most important. Without a second snowmobile (and its driver), there is a great risk of losing a lot of time, health, and, God forbid, lose your life if a sudden breakdown (or just your mistake in driving, and the subsequent accident) finds you in a deserted area, far from human housing in extreme cold weather. A partner will help turn the snowmobile over, free it from captivity, and in extreme cases, simply evacuate you to people.
Before you hit the road, you need to check: the throttle stick (does it stick), the brakes are working, visually check the variator belt for the absence of protruding threads (this is the first sign of an imminent break), use a rubber mallet to beat off the ice from the suspension elements, caterpillars and front skis, so that nothing can block the moving parts.
Be sure to warm up the engine before you start, especially on 2-stroke engines. Riding on a cold engine is fraught with the fact that when you sharply press the gas, an unlubricated piston can scuff the surface of the cylinder. Ski Doo and Lynx snowmobiles have a special “warm-up” function that provides ideal conditions for this procedure.
BRP snowmobiles are protected from overheating. If you drive on packed snow or ice for a long time, the temperature may rise due to the fact that the cooling is produced by snow dust. The driver must periodically bring the device to loose snow so that dust enters the radiator tunnel. If the movement goes on coasting for a long time, then you need to use special scrapers that raise dust. In addition to cooling the radiator, snow dust also lubricates the entire rear suspension. But, even if the temperature reaches a critical level, the motor will simply stop - its protection will work.
After stopping, the suspension and footboards must be cleared of ice. Inspect the snowmobile for damage, check the tightness of the connections, and wait for the next ride.
Alas, the snowmobile will have to be repaired mainly in service centers. Yes, you can change a broken trim panel, add oil, change light bulbs. In extreme cases, tighten the caterpillar and change the torn variator belt. But it’s better not to get into the engine or transmission without the skills of a locksmith and large tools - there may well be subtleties of tuning that only specialists know about. The snowmobile owner's manual details all the maintenance you can do.
The modern trike BRP Spyder is a high-tech product and one of the masterpieces of engineering in recent years, a bunch of electronics and precision parts. Devices that make life easier for the driver, making the trip safe, are interconnected by a single electronic information system, human intervention in which is highly undesirable.

 plastic disassembly