Apr 16, 2019
Last Updated on November 16, 2021 by allprotrailersuperstore
As the proud owner of a trailer, you know it requires diligent upkeep. And although you can do some of the necessary care and maintenance tasks yourself, in the comfort of your lot or driveway, others require a professional touch and call for you to bring your trailer into the mechanics to get it checked out.
While there’s certainly a time and an occasion for the professionals to get involved, however, there are several tasks responsible trailer owners should know how to perform themselves. One such task is knowing how to change a trailer tire. If you’ve never done that before, don’t worry. It’s more straightforward than it sounds, and is something anyone can quickly learn how to do.
Today, to help you learn this new skill, we want to walk you through the process from start to finish, as well as discussing how to recognize when to change a trailer tire and realizing when it’s time to call for a little professional assistance.
The most common reason you might need to replace a trailer tire is when you get a flat. Flat tires happen to all of us at one time or another, and there isn’t always a way to prevent them. Maybe you caused the flat by making a mistake somewhere along the line, but it might also result from circumstances beyond your control. The most common reasons for flat and damaged tires include the following.
Sometimes, it’s easy to know when you need to change a trailer tire. For example, if you’ve broken down on the side of the road with a flat tire, there’s usually no mistaking the problem. If it hasn’t quite come to this yet, however, you can still realize your tires need changing by looking for the following.
So you’ve determined you need to replace your tires. The next step? Figuring out how to find new ones. Here are some of our best tips for completing this process.
The easiest solution is to write down the details about the tires you already have on your trailer, or take a picture of the tire designation. Then, head to your nearest tire center or online store and search for this same model. By doing this, you’ll ensure you get the right tire for your trailer, since you’ll be getting the same ones you had on it before. The only drawback to this technique is that it isn’t the best choice for situations where you didn’t like your last pair of tires, and you’d prefer to get a different brand.
Everyone will have differing opinions about which tires are the best. However, as long as you’re choosing designated trailer tires instead of passenger car tires, you’ll be in good shape.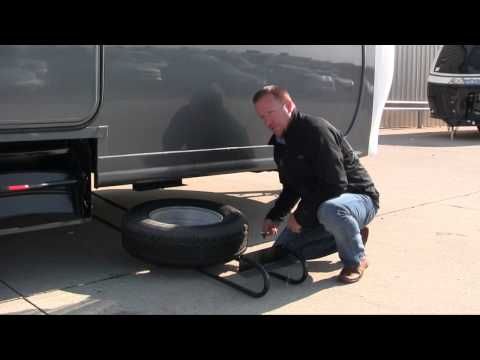 To make sure you buy the correct type of tire, always look for the ST designation. If the tire in question has this mark on it, you can be sure you’re on the right track.
Do you have any friends who use trailers like yours? Ask them what tire make and model they prefer. Call up your mechanic and ask what they’d recommend. You might even ask the tire company what tires they recommend for your specific trailer. You shouldn’t feel the need to follow these recommendations to the letter, but they can be a great jumping-off point for you to decide.
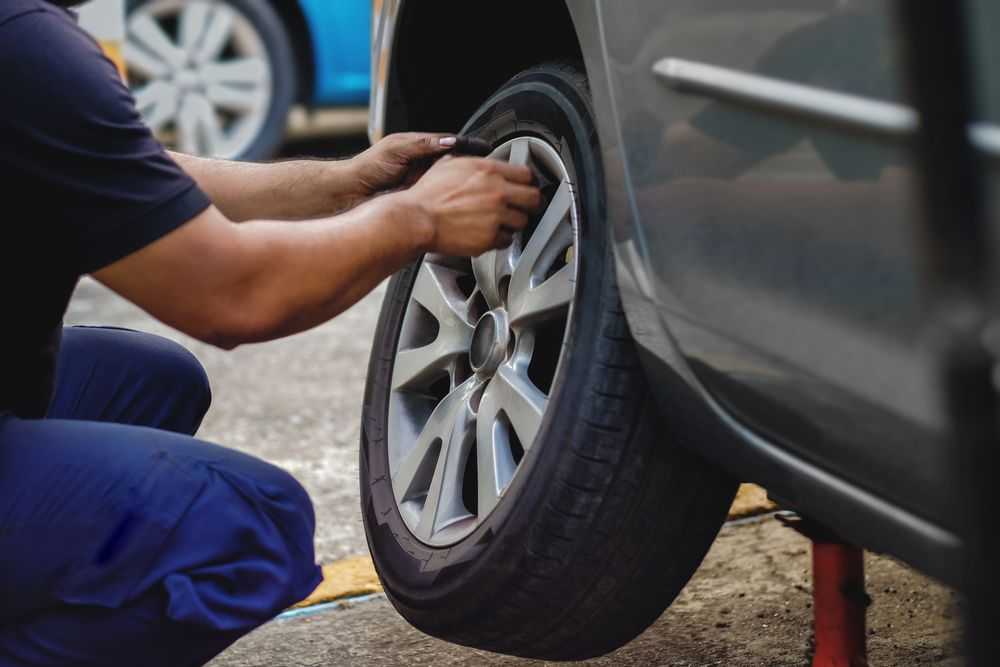
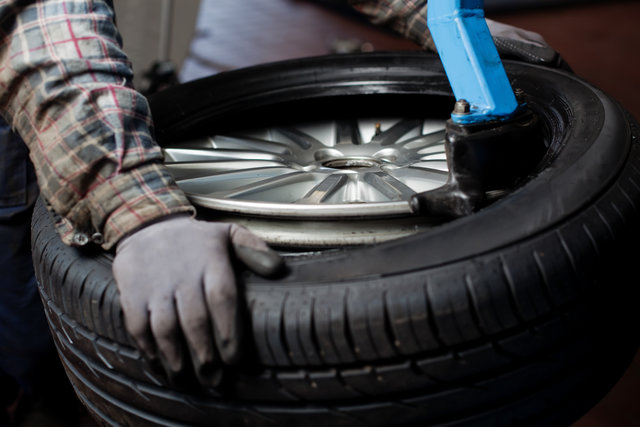
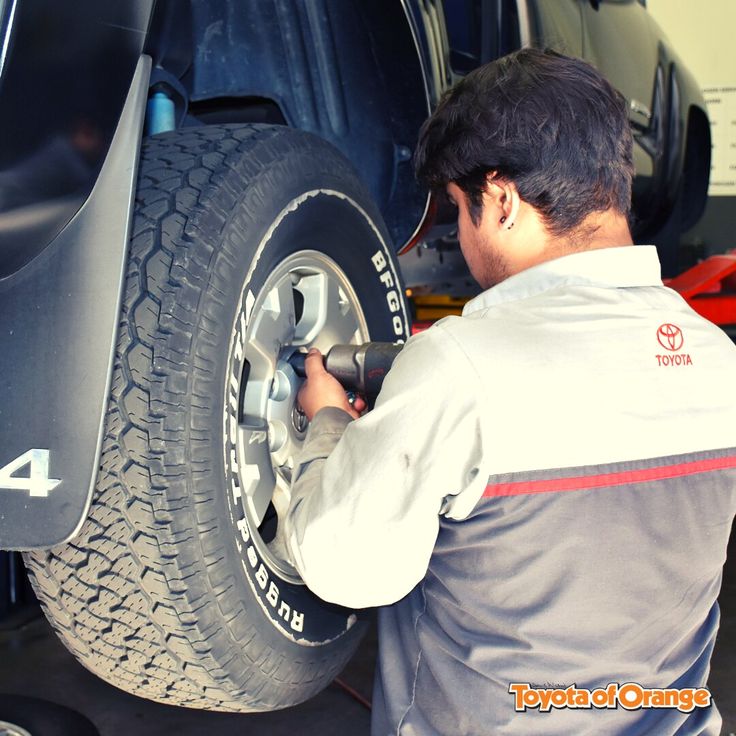
Once you’re armed with your replacement tire, jacking up the trailer is your first step in the process of how to change trailer tires. Before doing this, however, take the precaution of loosening the lugs ahead of time.
You can also loosen the lugs after you have the wheel jacked up, but doing so will leave the tire free to spin while you try to unscrew the nuts. By completing this step while the tire is on the ground, you ensure the tire will stay still. Use a lug wrench to partially unscrew the lug nuts, but don’t remove them yet. Leave them in the wheel, loosened to the point where they’ll be easy to remove once you’re ready.
When you’re finished loosening the lugs, place the jack under the trailer’s frame, at the back side of the damaged tire. On the other side of the trailer, slide a wheel chock under one of the tires to keep it from sliding around. Then, steadily jack up the trailer until there’s enough room to take the tire off the bolts and get a new tire on again. Keep in mind that if the old tire is flat, you’ll need to jack the trailer higher than you might think. A flat tire doesn’t need much room to slide off the bolts. A new tire will be larger and need more space.
Once you’ve safely jacked up your trailer and you have all your tools ready to go, it’s time to get started on the process of changing the tire itself. Follow these steps, and you can’t go wrong.
 Remove the Tire
With the tire safely in the air, reach in and remove the lug nuts you loosened earlier. These should come out easily, after which it will be a simple matter to slide the used tire off the lug bolts. Keep the nuts nearby, as you’ll need them again. You can now put the old tire aside, as it has served its purpose.
Once you’ve removed the tire and the wheel hub is bare, this is a perfect time to glance at it and make sure everything still looks normal and functional. Check that the studs and bearings are in good working condition, and reassure yourself that nothing is cracking or buckling. This inspection isn’t necessary to the changing of the tire, but it is a rare opportunity to see the wheel hubs laid bare, so it makes sense to give them a quick once-over while you’re at it.
It’s time to grab that shiny new tire and lower it into place on the lug bolts. If you see anything that seems off — maybe you somehow bought the wrong size or type — now’s the time to notice that and head out to buy the correct tire this time. Give the tire a thorough look to ensure everything seems ordinary before proceeding.
Grab those lug nuts you removed earlier and put them back on to secure the new tire in place. You can do the first few turns by hand. You won’t be able to tighten them all the way yet, since you’re only using your hands and the wheel is probably trying to spin in circles. For now, get them as tight as you can, to make sure the tire isn’t going to fall off.
Once the lug nuts are as tight as you can get them with your hands, it’s time to lower the jack until the tire rests flat on the ground. Pull this out from under the trailer and set it aside, and don’t forget to remove the wheel chock from the other side of the trailer as well.
With the added pressure of the tire against the ground, you should have the resistance you need to finish tightening the lug nuts the rest of the way. Grab your lug wrench again, and use this to tighten the lugs to the fullest extent, until they positively won’t move anymore.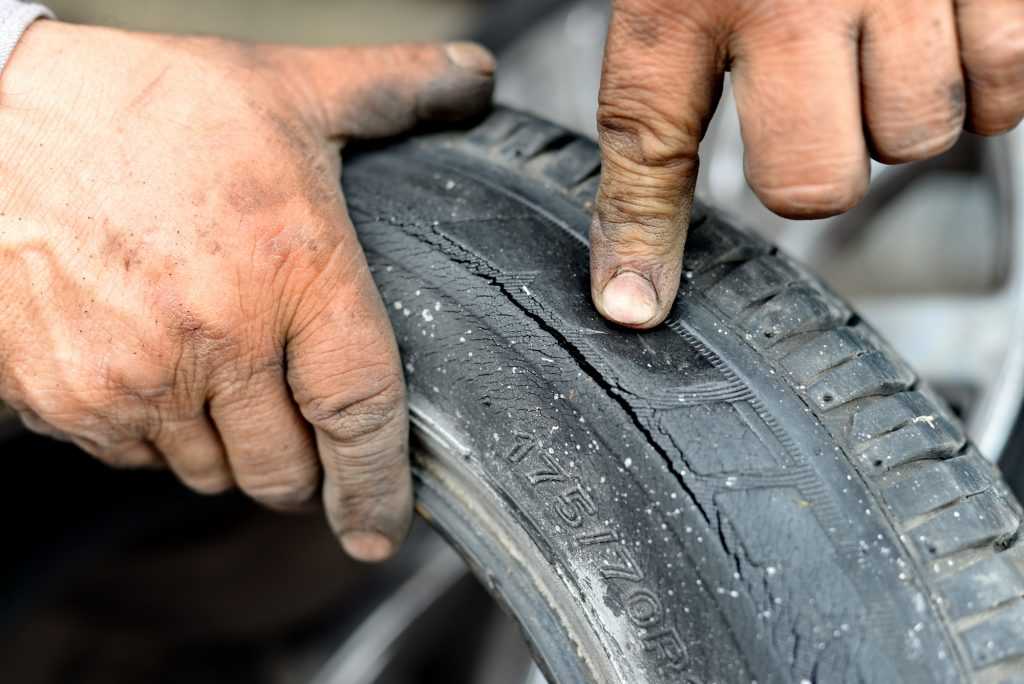 The last thing you want is for the lug nuts to come loose and the tire to go flying off as you’re driving down the road.
Congratulations, you finished the job. The new tire should be securely in place, and shouldn’t need any more maintenance for a long while. All that’s left to do is clean up the tools scattered around and dispose of the old tire. To get rid of a used tire, wait for a bulk trash collecting event in your community and dispose of it then. You might also visit your local mechanic’s shop and ask if they recycle tires. You can even recycle your tire yourself by turning it into a tire swing, a garden planter or even a compost bin.
If you do decide to recycle your tire yourself, make sure to remove the rim and wheel weights before you put your tire to its new use. Cutting the rim away from the tire can be dangerous, however, so don’t attempt this unless you have experience with power tools and feel confident you know what you’re doing.
Sometimes, no matter how many tutorials you read, you may not have the confidence and skill to change a trailer tire yourself. This is entirely natural, and nothing to feel awkward about. Plenty of people seek professional help with their tire replacements every day, and if you choose to do the same, you’ll be in good company. If you’re ready for new tires and you don’t feel up to replacing them on your own, we want to help. Our team here at All Pro Trailer Superstore has years of experience in replacing tires on all kinds of trailers, and we’d be delighted to work with you on your trailer.
Tire replacement isn’t the only service we offer, either. Whether your trailer needs inspecting, repairs or some extra customization, we’re glad to help. What if you don’t yet have a trailer, but are thinking of taking the plunge and buying one? We sell trailers as well. Although our headquarters is in Pennsylvania, we’re proud to serve trailer owners, renters and buyers across the Mid-Atlantic and New England area.
Are you ready to get your tires fixed and prepared for your upcoming trip? Bring your trailer into Trailer Superstore today and learn why so many people trust us with their trailer maintenance needs.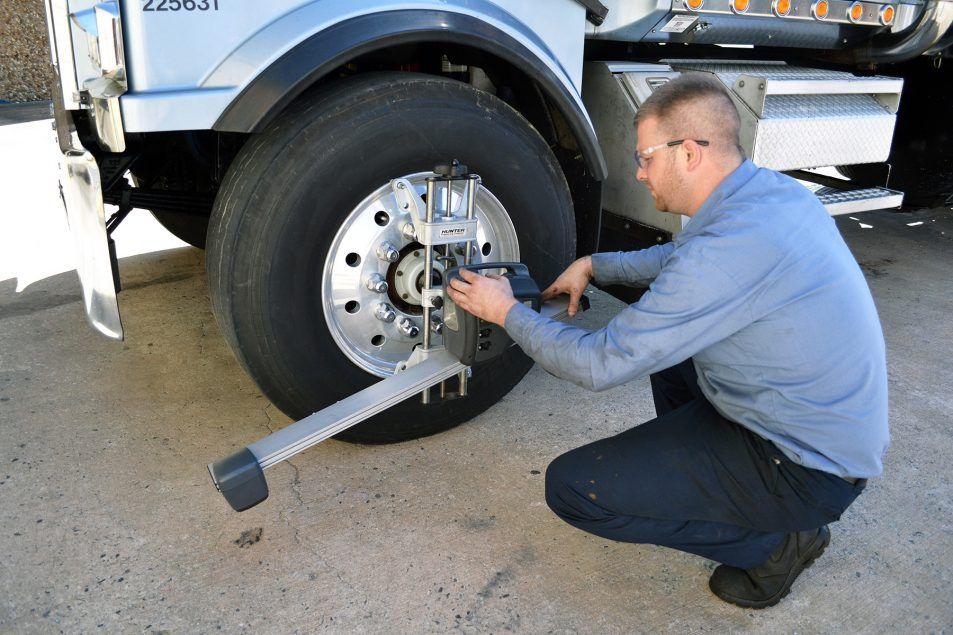
Nothing can interrupt a road trip quite like a flat tire, especially if it's on your trailer. But how do you change the tire on a dual axle trailer? We've done the research and have the answer you're looking for.
To change a tire on a dual axle trailer, follow these steps:
In this article, we'll take a closer look at all of these steps so you can change your tires confidently. We'll also look at a tool that allows you to change a dual-axle tire without a jack and other related topics. Read on to learn all about it!
Before you continue reading, let us say we hope you find the links here useful. If you purchase something through a link on this page, we may get a commission, so thank you!
Now that you know the steps to change a dual-axle tire, let's take a look at each one in more detail.
Before proceeding, you'll want to make sure your trailer is as secure as possible.
Make sure your trailer is on the most level ground possible. Ideally, your trailer will be connected to your towing vehicle with the parking breaks on.
You can also change the tire on your trailer
The first thing you'll want to do is loosen the lug nuts while the tire is still on the ground.
The lug nuts should be tight, so you'll want to use a wrench to loosen them. Just get them loose enough that you can finish the job by hand.
But why loosen the lug nuts while the tire is still on the ground?
These lug nuts are on the tire tight, and if you try to loosen them once the tire is off the ground, you may find it hard to keep the tire steady. The tire will likely spin as you try to loosen the lug nuts.
Keep it simple and get them loose before you lift the tire.
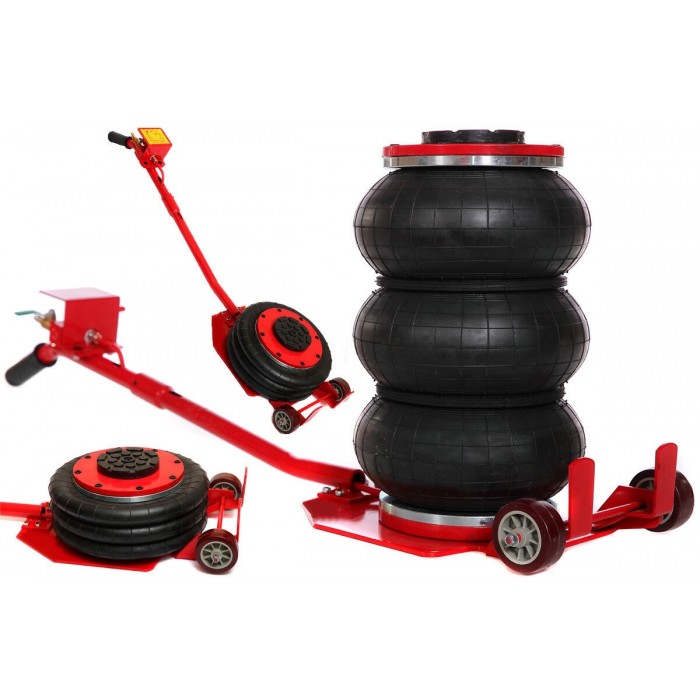
Next, you'll need to get the jack ready.
It is important that you place your jack in a secure location. Otherwise, you could cause serious and expensive damage to your trailer or even create a dangerous situation.
These are some safe places to jack your trailer:
Here are some places you should not jack your trailer:
Be sure to use a jack that is rated for the weight of your trailer.
The hydraulic bottle jack below has a minimum height of 10.44 inches and a maximum height of 20.06 inches. It also has a weight capacity of 20 tons, making it great for trailers.
Click here to see this bottle jack on Amazon.
With the jack in place, slowly lift the trailer. Lift it until you have enough clearance to safely remove and replace the tire, just a few inches.
Now you can finish removing the lug nuts. Be sure to keep them somewhere you will be able to easily access them after.
Carefully remove the faulty tire. In particular, be careful not to rest it or drop it on the oil bath in the center of the wheel.
Now you can put on the new tire and the lug nuts. At this point, just tighten the lug nuts as much as possible by hand. You'll finish tightening the lug nuts after lowering the wheel.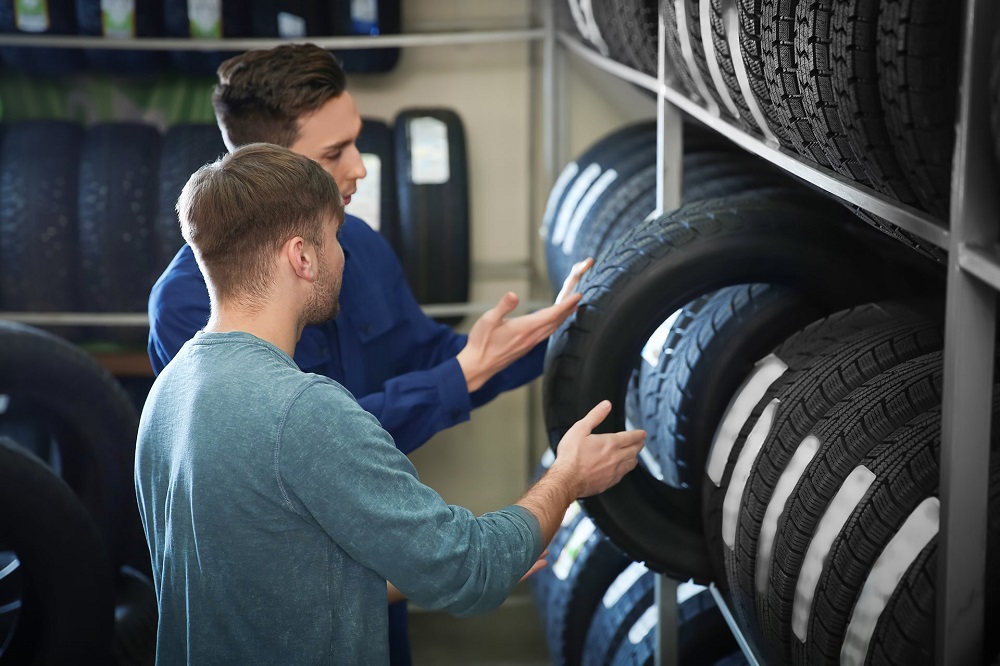
With the new wheel and the lug nuts in place, you can lower and remove the jack.
Now, finish tightening the lug nuts with a torque wrench set to the setting found in your owner's manual.
The torque wrench below has settings from 25 to 250 ft-lbs. This range should cover the vast majority of trailers.
Click here to see this torque wrench on Amazon.
You can see the full process of changing a tire on a dual axle trailer in the video below:
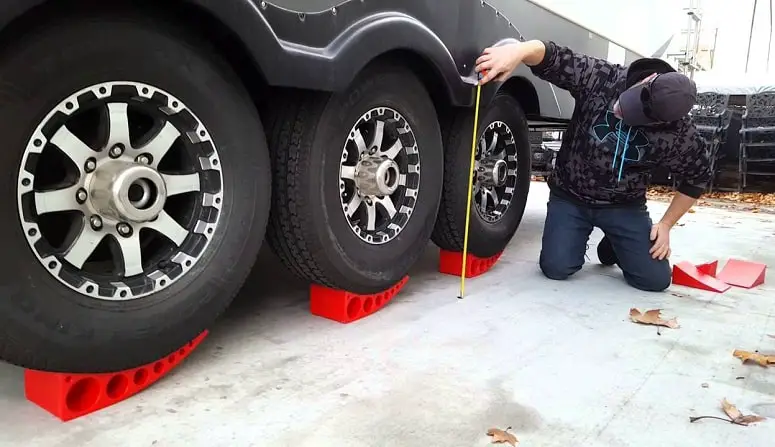
A jack isn't the only way to lift up your dual axle trailer when you need to change the tire.
One of these products is Trailer-Aid. This is a small ramp that holds one tire in place while elevating the other tire so you can change it.
Click here to see the Trailer-Aid ramp on Amazon.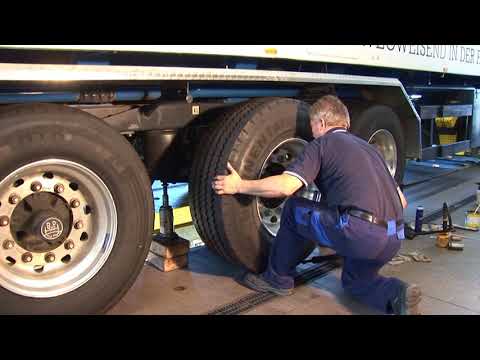
To use the Trailer-Aid ramp, you'll follow the same basic steps as before. However, instead of using a jack to lift the wheels, you'll load the good wheel into the Trailer-Aid.
You can see how the Trailer-Aid works in the video below:
You don't need to wait until you have a flat to replace your tire. Often, you'll be better off if you replace your tires when they start showing signs of too much wear.
Inspect your tires regularly. If you notice cracks in the sidewalls, that's a good sign that it's about time to replace it.
You should also check the tread of the tires. The tread will naturally wear down over time.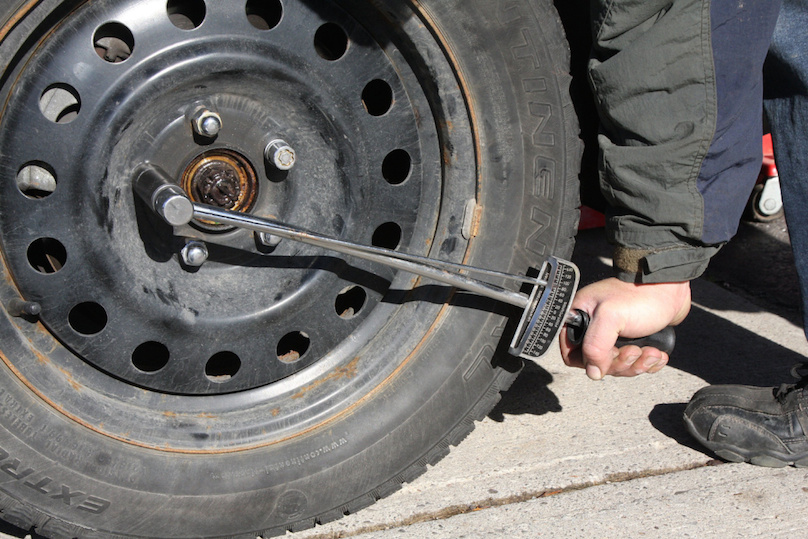 The US Department of Transportation requires at least 2/32 of an inch of tread on tires.
You should also replace tires if you've used them for five years or more.
Rotating tires refers to switching the location of tires. This practice helps promote more even wear on your tires.
As you drive, your tires will take some wear and this wear is often uneven. By rotating them, you may increase their longevity.
This also applies to trailers, in particular dual or triple axle trailers. That's why it's a good idea to rotate your tires every 5,000 miles or so. In some cases, your owner's manual may give guidance on how often to rotate your tires.
There are several ways you can rotate the tires on your trailer. You can switch them from left to right or from front to back. You can even do both, switching them in an X pattern.
It's also possible to use a combination. You can rotate them front to back the first time, then from left to right the next time you rotate them.
Any of these methods are valid, but you may find using a variety of rotating patterns is the most effective.
The price for a replacement tire will vary widely.
If you have a smaller camper, your should be able to find less expensive tires. Tires for small teardrop trailers and pop-up campers tend to run closer to $100 per tire.
However, for RVs with larger tires, you may need to pay a minimum of $200 for a new tire.
Dual axle trailers can often get by with less expensive tires for their weight because they have twice as many tires. Because of this, there is less weight on each individual tire.
A flat tire can put a hiccup in your travel plans, but if you're prepared it won't keep you long.
Now you know the steps to changing a tire on a dual-axle travel trailer. We've also seen how to use a Trailer-Aid to change one of these tires and learned more about rotating your trailer tires.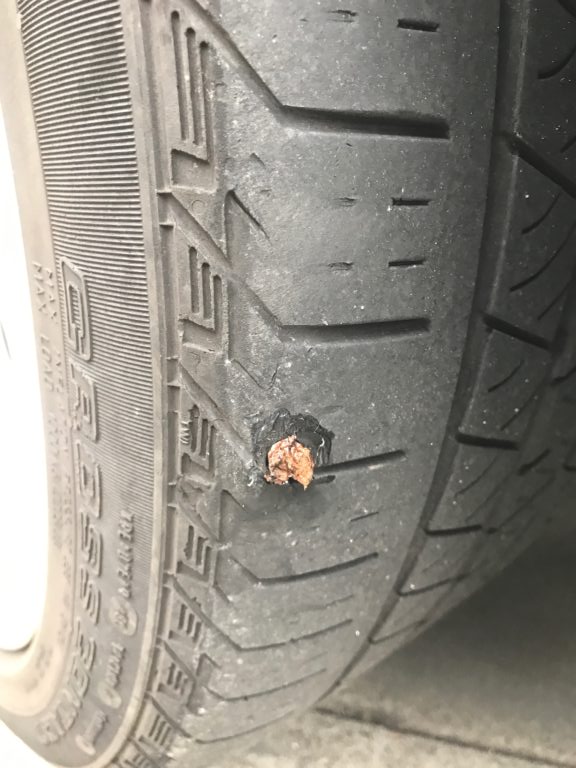
If you found this article helpful, be sure to check out these other articles:
When Should I Replace my Trailer Tires?
Should RV Travel Trailer Tires be Balanced and Rotated?
The most frequent calls to the assistance service for international cargo carriers Аwhelp 24 are calls asking for help to replace a faulty tire on a truck or trailer.
A truck or trailer wheel is quite expensive. If we take the most common size 315 /70 R 22.5 of the Michelin X Multi Z brand, then the price in Germany is 560 euros per wheel ... The same wheels of the Bridgestone, Conti Goodyear, Fulda brands cost a little less.
Almost all local carriers know where to buy cheap wheels in Poland, Lithuania, Latvia, Ukraine or Belarus. You can slowly ask for offers from sellers and tire shops, bargain, get a good discount for the number of wheels you buy, and even a deferred payment .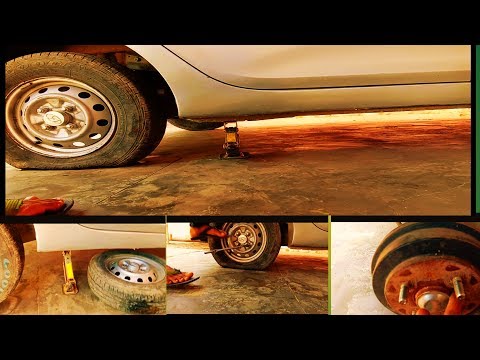 ..
..
It's a completely different matter when you need a wheel for a truck abroad in Germany, Austria, France. Why urgently and often after hours, in the evening, at night and right on the autobahn a couple of meters from cars rushing nearby ...
What to do in this case? After all, the owner of the car himself is at this time in Warsaw, Krakow, Riga or Minsk. The driver of the road train, in most cases, cannot remove the wheel himself and change it to a spare one. The truck is not a passenger car, you need a compressor with a powerful wrench, a special hydraulic press or, in extreme cases, a large sledgehammer to peel off a literally glued wheel from the hub.
A complete wheel with rim for a 385/65 R 22.5 trailer weighs about 120 kg. And this is not the limit. For reference, a wheel from a Belaz mining dump truck weighs more than five and a half tons.
It often happens that the spare tire on a truck or trailer is also empty. Either the driver forgot the jack in the garage, or he has one, but does not work. Or dozens of other reasons.
There is only one way out, call the field tire service. They have all the equipment for mounting and dismounting wheels. They know how to secure the place of forced repair of a truck on the German autobahn. And they have great road skills.
But here other problems immediately arise . In order to call a tow truck, an emergency service or a tire service in Germany, you need to know where and who to call. A united Germany has approximately 13,100 km of expressways or autobahns. Plus 39600 km of federal roads. And all of them are divided between firms for evacuation and tire fitting.
To order a tow truck or an on-site tire fitting, in addition to knowing German or English, you also need to guarantee payment, otherwise no one will go on the road even during the day, not to mention the night or a holiday.
The driver almost never has any cash. And changing a wheel on the road almost always costs more than 1,000 euros.
Therefore, Awhelp 24 has been a good help for international freight carriers for 20 years. Its employees speak German, English, Polish, Russian, Lithuanian, Latvian, Ukrainian, Romanian, French and Spanish. They also have vast practical experience in organizing the repair of trucks of all brands in Germany, Austria, and Switzerland.
The main thing is, if the wheel is out of order (it burst or just out of air), find out what else is broken. Electrical cables, turn signals, air brake hoses are often damaged. We ask the driver to look at all this, take a photo on the phone and send it to us. This helps to avoid additional costs for re-departure, already for the repair of damaged parts and components.
When a tire service is called to the site of a breakdown, our dispatchers make 5 to 10 calls to nearby tire service stations that have their own on-site services and find out who currently has the desired brand and size of wheels. Plus the opportunity to go to change the wheel on the autobahn. We compare their price offers, agree on the proposed amounts with the owner of the car and give an order to leave.
In case of failure of the wheel, you can save a lot if the car is not loaded and the driver can drive to the nearest stationary tire shop. In this case, the dispatchers of the Awhelp24 service request the location of the damaged car and find out which of the stationary tire shops is nearby. This is usually from 2 to 10 km. There you can also solve the issue of tire repair in Germany. Or about buying a used wheel. The price is from 100 -150 euros, depending on the size, condition and brand. Be it a wheel on a mega semi-trailer 445/45, R 19.5 Goodyear, Matador, Conti or .455/40 R22.5
The most difficult thing is to help the owners of old sprinter, VW-LT, Renault, Citroen cargo vans, who are often the drivers of these vehicles themselves. From our practice. A 2002 sprinter truck driver from Romania called. The question is where and how to buy a used Fulda wheel 225/75 R16 in Germany.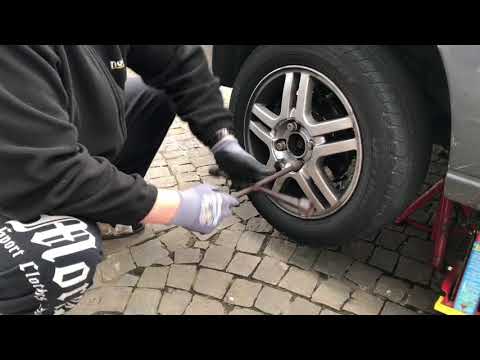 It burst like that, he put a spare on his own, drove 200 meters and the spare also failed. The price of 600 euros for an on-site tire fitting simply pissed him off. After long conversations and suggestions, the Awhelp24 service dispatcher found a tire service two kilometers from the breakdown site. There were two necessary used wheels with disks in stock. The driver went there on foot. He brought the price down to 50 euros for both wheels, plus, as a free bonus, he was taken to the truck along with the wheels ...
Got a problem in Germany?
Phone: 0049 9771178 99 97
Email Mail: [email protected]
Viber: 0049 170 737 53 54
WhatsApp: 0049 151 503 00 916
www.awhelp24.com
Hello everyone! When buying a trailer for your car, it is not always possible to take into account all the nuances, as well as choose the optimal configuration. Therefore, it is necessary to deal with retrofitting. But even if you are just going to take a caravan, the recommendations presented will come in handy. Let's talk about the support wheel for the trailer, its advantages, varieties and nuances of choice.
Another name is trailer wheel. Unlike the supporting leg, the advantages of such a solution are much greater.
The support wheel
54.84%
Folding foot
16.13%
Nothing
29.03%
voted: 31
used to be actively used, the supporting stand for the trail was actively used. But then the design was improved, and the wheel was installed. If you have two wheels on a trailer, this is an extremely useful option. But biaxial this addition is not required.
Before choosing and installing a do-it-yourself trailer wheel, you need to understand why you need it at all.
Trailer support wheel It performs 2 main tasks at once.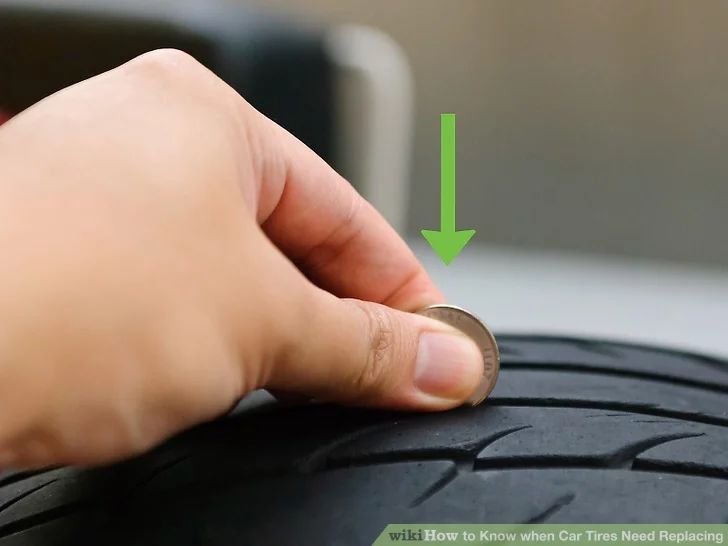
This option is useful for owners of both ordinary light trailers and special trailers:

That's why the support wheel for light trailers, as well as for more serious trailers, is in high demand. As we all know, it is installed on the drawbar.
Roller wheel trailerBut there is one more thing. It is necessary to choose and then install the rolling wheel for the car trailer correctly.
If you are interested in such a part as a wheel support for a trailer, then be sure to consider a few characteristics. It is on their basis that an accessory is chosen:
Now let's go through each item separately, and also give the necessary recommendations.
As you probably know, the swivel support wheel is mounted directly on the drawbar of single-axle trailers.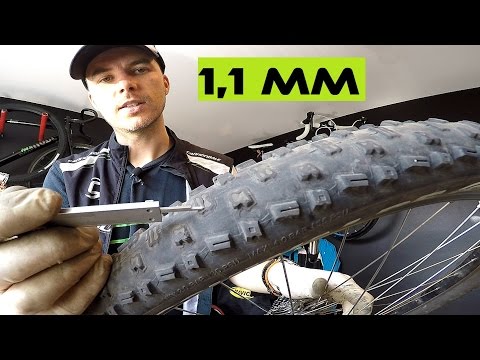 Although it is found on biaxial technology.
There are 2 fixing methods:
The welded method is considered more reliable. The only problem is that the installation is done once and for all. Remove and replace the structure will not work. We'll have to cut the mount, re-weld and so on. Yes, and in essence it is more of a "collective farm".
Another thing is the swivel clamp. In this way, you can ensure that the wheel is in the correct position while moving the trailer.
Therefore, the collar definitely wins here.
Roller wheel swivel collarMoving on.
Next moment. It is considered one of the key when choosing such an element as a support wheel for a trailer.
 In conditions of active use is not the best solution. You need to keep the wheel at hand, constantly put it on, and also take it off;
 Please also note that some wheels are equipped with a height adjustment function. In many cases, this is an extremely useful addition.
Foldable units will be slightly more expensive.
But this is a reasonable and also objectively more convenient solution.
So our recommendation is to opt for a foldable type of equipment.
When planning to install a custom trailer support wheel with your own hands, pay special attention to the type of this device.
There are also 2 options.
 When folded, the rod is neatly hidden and the wheel is pressed on its own.
 In the case of an automatic system, fewer manipulations are required. You save energy as well as your time. And the chance of getting your hands dirty is reduced.
Roller wheel automaticBy the way, it will be great if there is also a support bearing in the handle. Due to it, it simplifies and also increases the service life of the unit.
When choosing a support wheel for your trailer, pay attention to its load ratings. To be more precise, here the maximum vertical load on the device is taken into account.
This indicator varies in a fairly wide range. Approximately from 50 to 1500 kg. Let's find out what, as well as in what situations it will be required.
 Even too little. The best option is 125-150 kg;
 With such indicators, the equipment will withstand short-term loads without problems. But leaving the vehicle under maximum load pressure for a long time on the support wheel is not worth it.
When choosing a similar product, study the design of the wheel itself. There are 2 tire options here.
 That is an inflatable wheel. It has obvious advantages in the form of a smoother ride, as well as the ability to adjust the stiffness. It is enough to increase or decrease the pressure in the tire. But you have to keep an eye on it. When punctured, the tire deflates. It can also suffer from cuts.
 It's up to you to decide. Both options are potentially good.
The trailer support wheel itself is mounted on a disc.
The disc is made from 2 types of materials. But keep in mind right away that both materials can withstand the load for which they are designed.