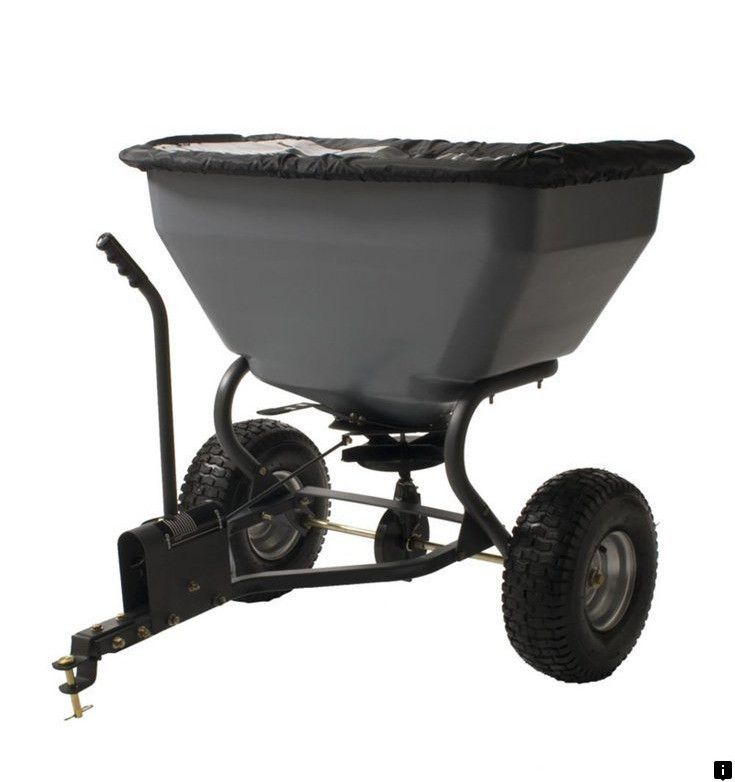
One of the greatest things about summer is yard work. As the heat and humidity rise, so do the plants and flowers. The advent of technology has made seeding and fertilizing, a job that used to take weeks, a job that takes only hours to complete. How can seeding be sped up this way, you say? With an ATV broadcast spreader, of course.
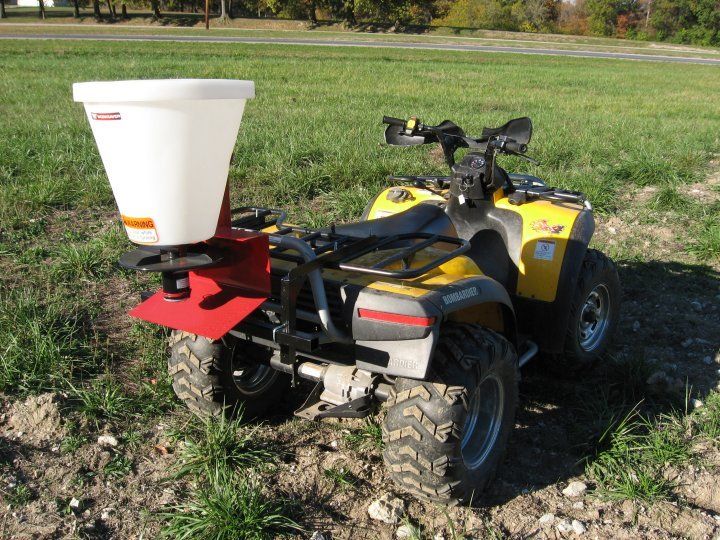
How do you use an ATV spreader? Once the broadcast spreader is attached to the accessory rack of your ATV, fill it with material and begin to drive. The hopper inside rotates, dropping piles of fertilizer or seed onto a platform with fin blades. These blades throw the material as you move forward.
Though it sounds easy, working with an ATV spreader can be daunting for those who have little experience. No worries, keep reading to learn the secrets of broadcast spreading.
An ATV spreader can be a bit larger than your old handheld spreader, but the ATV version of the broadcast spreader is straightforward. For earlier models, there would be a hand crank that you would walk down the rows being careful to make an even pattern in seeding. With the ATV versions, the crank is controlled by the wheels’ movement if you have a tow behind. On a mounted ATV spreader, there is a powerful mechanism that churns the material at a set speed.
There are just five steps to do for correct operating of the spreader:
Ensure that your safety gear is in place before opening any chemicals. Before you can begin with seeding, you must check that the register handle and dump gate are both in sync. With the gate fully closed, the handle must be fully closed as well. This handle control is critical because it will determine how large your spreading area is.
This one may have sent some cold chills down your spine, but don’t worry about it too much. Doing your homework, when it comes to broadcast spreaders, is just to determine how thick your material is. Spreaders can throw all kinds of content but work best with finely granulated seed and salt.
You wouldn’t think it, but the most important thing to pay attention to is how much the material to be spread weighs. A finer and lighter salt or seed will not be thrown as far. Whereas something to bait a field, like corn, can be set to the largest setting for dispersal.
Another thing that you should make sure of is how fast the ATV will be traveling. The faster it goes, the less coverage you could get. If you don’t have a speedometer on your ATV, see how long it takes you to travel 88 feet.
Speed, combined with the weight of the material, equals how far your coverage area will reach. If you are going 1 mph, you will travel 88 feet in 60 seconds. It isn’t recommended to move faster than 8mph, which means that you cover 88 feet in 8 seconds. The ATV should run fast enough to keep the battery charged, which may mean running at a lower gear.
Once you have the coverage area you want, set that speed and try with all your might to keep it.
Now that all the coverage area problems are ready to go, you need to make sure you aren’t wasting precious seed with an improperly set gate. The main reason for setting the gate opening to a certain level is to see how much material will be used on the job. A great place to start is to pack the feeder with a half bag of fertilizer and see how far it gets you.
Now that all the levers and gates have been checked for correct operation, it is time to take a test run. Run a couple of passes and see that the:
all work well together.
After you have done these steps, it is time to get out there! Maintaining a constant speed and getting the area covered are the most important things. As always, make safety a top priority.
should be used throughout the process.
The ForEverlast spreader is marketed for wildlife feed, but is great for many purposes. It is made from galvanized steel and can be mounted on your ATV or tailgate with little fabrication. There is a hopper restriction that allows for a smaller area to be seeded directly behind the ATV.
When it comes to durability, it is hard to beat a ForEverlast. These things are made of some top-notch galvanized steel that is nearly impervious to the weather and elements. The primary usage for this is as a feeder but can see multipurpose as a salt or fertilizer thrower.
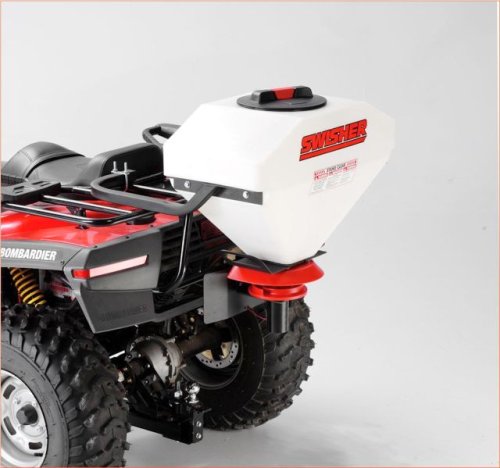
For new users, the Buyers Products All Purpose Spreader is one of our favorites. The 12v motor inside the tank pumps material out at close to 30 feet. That’s a lot! This model is powerful and super easy to connect to the tubular racks on your four-wheeler. It stands vertically and can hold as much as 15 gallons of seed or fertilizer.
The beehive design of this spreader makes it easier to disperse and makes removing obstructions a snap. The ease that this thing attaches to the racks on your ATV will blow your mind. With a couple fly clips, this thing can go in front or back, depending on the job ahead of you.
Another massive galvanized beast of a spreader, the Boss Buck, is made for the long run. It has a wireless controller for the hopper, and all the electricity can be run from the taillights. This one is great for larger areas.
The best thing about this one is the remote control and electrical set up. Though you can’t use both at the same time, there is a lot to be said about a cordless way to dump your material.
The biggest downside of the Boss Buck is its failure to withstand salt. The company suggests that after each use, the hopper should be washed and dried to prevent corrosion. That’s pretty common in the northern states where you get much more snow.
When it comes to spreaders, there are two types for the ATV.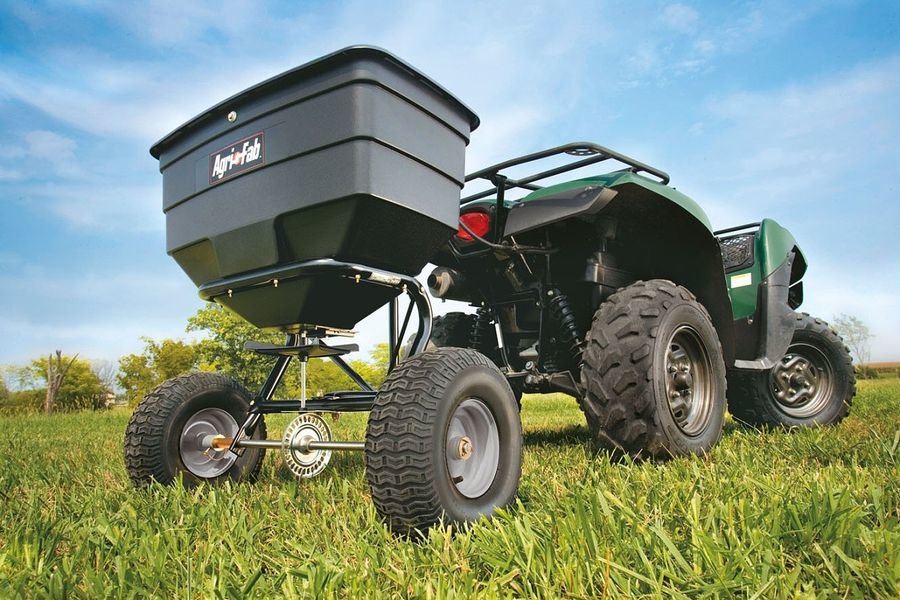 The mounted kind, typically just called ATV spreaders, and the other king, typically called towing spreaders. Towing Spreaders are much more common with mechanical spreading than the electric ones we know from ATV mounted versions. Below are our favorite towing spreaders.
This is a neat towable model that can haul 7 bushels of material and spread it as quiet as a mouse. This spreader much larger than the mounted units, this one weighs 110lbs before loading. This one also has a more straightforward spreading system that can be repaired easily.
Moving to a large spreader like this one means you can cover tremendous amounts of space, but have a significant offset in price. This spreader is more for the large rancher than the weekend warrior baiting his field for dove season.
If you have seen a tow-behind spreader before, you probably saw the Yard Commander. They have been around for several years and have a distinctive cover that goes over the top of the hopper. They have models that will go behind everything from an average lawn tractor to an industrial combine.
The Yard Commander is powder coated with a thick plastic bucket that will hold around 125lbs of whatever you are working with. That much weight means you can cover over 25,000 square feet with just a single bucket load.
SEED [email protected]:59:20+00:00
Built Truax tough! The “SEED SLINGER” is used for broadcasting fluffy, chaffy seed and small flowable seed on areas that are too small, too steep, or inaccessible for other types of seeding equipment.
Request a Quote

 4 prong, flat plug
Go to Top
ATVs are stolen even from garages in the yards of private houses and from guarded parking lots. The risk of theft increases if you post photos on social networks in front of where the ATV is stored, especially with geographic coordinates - this happens if you do not turn off the geolocation function.
To protect against theft, owners use cables, chains, locks, immobilizers and alarms. GSM beacons help find equipment. Which of these is effective and what to do in case of theft - we will tell in the article. nine0003
Steering lock . When the ATV is moving, it rests on the frame or suspension. It can only be removed with a key, which is unique for each lock.
Chain . Allows you to tie the ATV to a tree, fence or other stable object. The optimal chain thickness is from 12 mm.
Rope . An analogue of a chain, but it is easier to cut or bite. The strongest cables are with steel cylinders under a plastic coating. nine0003
The listed remedies are only part of the protection: they will delay the hijacker, but they will not prevent theft. In addition, you can put marks on the main components, so that in case of theft it would be easier to identify the ATV.
Immobilizer. Blocks the engine when trying to steal. After installing the immobilizer, to start the engine, you need to enter the secret code from the standard buttons or have a key fob with you - depending on the model. nine0003
Alarm. The siren is triggered if the electronic sensors detect an impact, tilt, push, movement, opening the case or turning the ignition key. The alarm system must be with feedback - in order to receive notifications on the key fob or SMS messages on the phone. Since thieves use devices to jam the GSM signal, it is better to buy a model that periodically sends coordinates notification to the server - if the information is not received, the server will inform the owner about it.
Lighthouse. Device with GPS/GLONASS receiver, GSM module and batteries inside. Sends the coordinates of the location of the ATV to the owner. In the standard mode, it turns on 2-3 times a day, so it is difficult to find it with a field indicator. It is advisable to put 2 beacons - both are unlikely to be detected.
Immobilizer, alarm and beacon are combined with each other and can be part of a single security and search system. One of the most effective is Cesar Moto X from Cesar Satellite. It tracks the coordinates of the ATV in real time, and in case of a hijacking attempt, it sends a signal to the monitoring center. A few minutes after the discovery of suspicious activity, a rapid response team arrives at the scene. The system is not afraid of water and does not discharge the battery, and you can control it from your smartphone. nine0003
If the ATV is insured only against theft, the money will not be paid until the criminal case is closed. Therefore, the risk of theft must be specified in the contract - so that compensation can be obtained even before the opening of a criminal case.
Documents for issuing a CASCO policy:
 nine0054
 Unlike OSAGO, the CASCO contract is not public and is concluded by mutual agreement of the parties. This means that the insurance company may refuse to issue a policy for any reason. The risk of failure is less if the ATV is new, with an anti-theft system and does not have significant damage.
Garage burglary protection:
This will not provide complete security. That's why you need to install an alarm.
Autonomous GSM alarm system . It has a built-in power supply, turns on the siren when you try to hack and sends SMS messages to the specified numbers. The downside is that the police will have to be called on their own, and how quickly they will arrive is unknown. nine0003
Private security alarm . This is a security system that sends a signal to the central monitoring station. The operator sees that an alarm has gone off at one of the facilities and sends a crew there. The arrival time of the rapid response team is from 4 minutes.
Brief action plan if the beacon was not installed on the ATV:
Most likely, after the announcement of the theft is published, scammers will call and demand a reward for the exact address of the vehicle's location. It is easy to figure out the deceivers - they will not be able to name the exact signs of the ATV and send a photo. The chance of running into scammers is higher if the frame and engine numbers are fully indicated in the ad - they will be used as evidence. nine0003
After calling the police, a district police officer will come and take a statement. Then you need to go to the precinct to complete the application. You will need a passport, PTS, STS and keys.
You need to get from the police:
If the ATV is insured under CASCO, you need to go to the office of the insurance company and fill out an application for theft. At what time is specified in the contract. Required:
Usually CASCO money is paid out in 2-3 months.
To protect the ATV from theft, you need to tie it with a thick chain, put a lock on the steering shaft, install an alarm with an immobilizer and a beacon and issue a CASCO policy. It is desirable to equip the garage with a security system. You should not photograph equipment near the house or garage and use the geolocation function when shooting. nine0003
How to adjust the mineral fertilizer spreader if the manual is lost?
If you do not have a manual for the mineral fertilizer spreader, we recommend that you contact the manufacturer for instructions. Please note that for different models of spreaders, even with a similar layout and design, adjustments can vary significantly. If you are unable to obtain instructions from the equipment manufacturer, we recommend the following procedure:
1) Set the spreader to the working width - set the distance between the centers of the trajectory of the adjacent passages of the machine, control it using navigation equipment or by preliminary marking of the field. Adjust the spreading width of the fertilizer particles, overlapping adjacent passes to ensure even application. The amount of overlap should ensure optimal uniformity of application across the working width. For modern models of spreaders, the deviation of the application rate for the working width from the average is optimally up to 5%. The overlap across the working width can be double, when the outermost fertilizer granules fall into the center of the previous pass, or partial (trapezoidal overlap), when only the edges of the passes overlap twice. The distribution of fertilizer particles over the working width, depending on the design of the spreader, can be adjusted by: changing the geometry of the blades, the speed of rotation of the blades, changing the point of exit of the fertilizer particles onto the blades, the slope of the spreading segment and at the same time depends on the size and specific density of the fertilizer particles. During operation, the blades should not destroy the fertilizer particles, there should not be a cloud of dust behind the spreader. To refine the adjustment of the working spreading width, it is necessary to make a test application at working speed, several adjacent passes.
 Evaluate the uniformity of application. If the uniform distribution of fertilizer particles is insufficient, we recommend reducing the working width and switching to a double overlap along the working width, that is, so that the outermost fertilizer granules fall into the center of the trajectory of the previous pass. nine0163 Example: For a working width of 24 meters, the granules are spread over a width of 48 meters.
2) Set the fertilizer supply to the spreader bar. Depending on the model of the spreader, the fertilizer supply can be adjusted: by the opening of the metering gate, the rotation speed of the feed belt or the rotation speed of the feed auger. For spreader models that require the presence of a device for collecting fertilizers during the test setting, it is necessary, by selecting adjustments, to select the setting for the optimal value of the minute fertilizer supply to the spreading segment
Example of calculating the minute fertilizer supply: at a speed of 10 km/h, the implement must cover a distance of 166.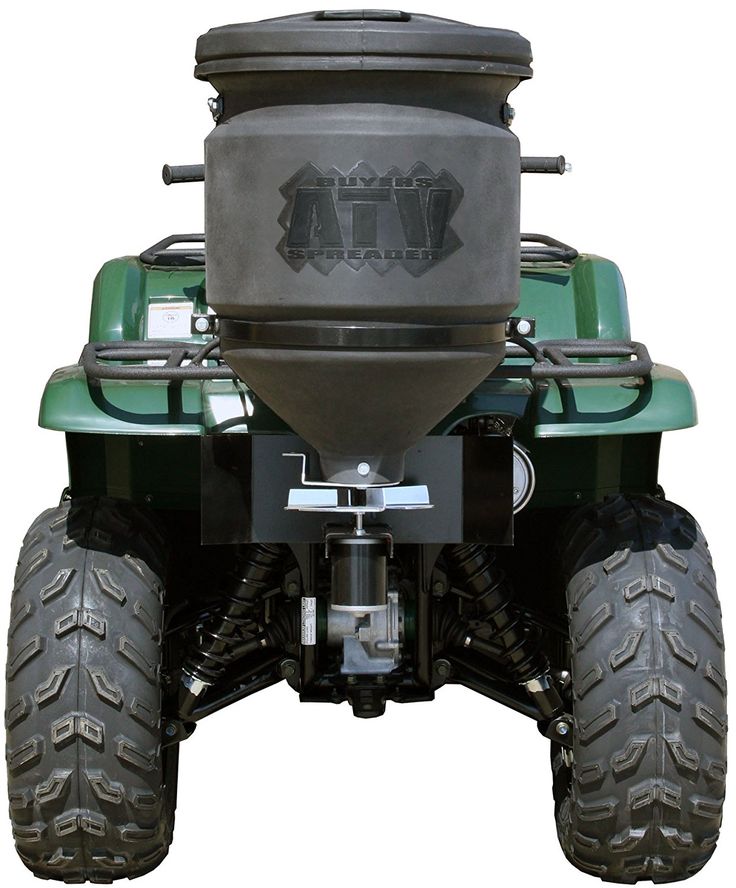 7 meters (10,000 linear meters/60 min) in one minute. With a working width of 24 meters and a head length of 166.7 meters , the application area of will be 4000.8 m 2 (166.7 m * 24 m). With a target application rate of 100 kg/ha , the application rate of fertilizer will be 40 kg/min ((100 kg/ha * 4000.8 m 2 ) / 10,000 m 2 ).
If there is no device for collecting fertilizers during testing, then we offer another way to set up - pour a small test amount of fertilizers of a known mass into the hopper, for example 40 kg, scatter them at operating speed, measure the distance for which the test sample of fertilizers was enough. Based on the distance and working width, calculate the actual application rate (kg/ha), adjust the fertilizer setting and re-test. As a rule, 3-4 tests are required to select a setting. nine0163 3) Check and confirm the actual fertilizer application rate after the first filling To do this, fill the empty spreader with a known weight of fertilizer.