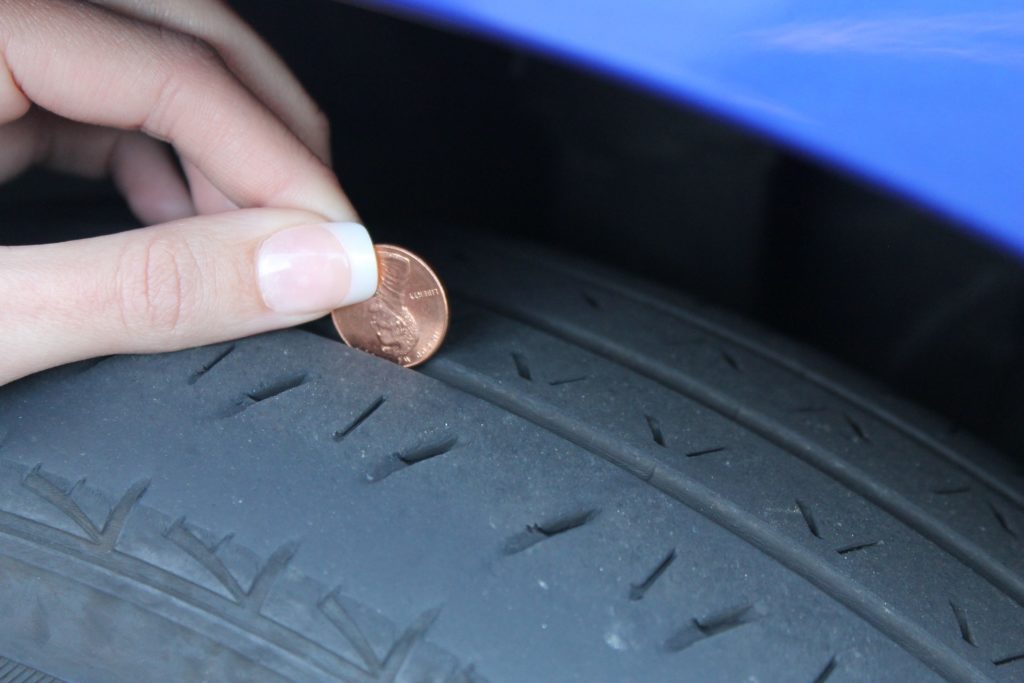
Tires are just as crucial as the engine when it comes to maintaining your car’s safety and performance. At some point, however, tires wear out and this compromises the car’s efficiency, especially in traction and braking ability which can potentially lead to fatal road accidents.
If any of your tires exhibit a pattern of excessive wear, it’s about time you change them. Changing tires involves taking off the rubber tread that is tucked inside the wheel’s rim, a grunt work that many would rather pass and hand to a mechanic.
But what if we tell you, popping the bead out of the rim is not too much of a mundane job if you are armed with the in-depth information on how to do so. Doing your own tires will save you a lot of money from costly repairs that should be otherwise spent wisely spent on other car-related maintenance.
With few hand tools and tricks, you can remove the bead off the rim yourself. But the easiest and quickest way to do it is by using a tire-changing machine. This article will cover both of these methods.
Prying the tire loose from the rim might sound intimidating especially if you are a novice or new to tire maintenance. But you don’t really have to be an auto mechanic or expert to do the task. All you need is the right tools, basic mechanic skills, and know-how. The following is an easy guide to carry out the goal.
What you will need:
● Lubricant (Alternative: liquid dish soap or oil)
● Crowbar, Prybar, Tire Levers, Tire iron (any of these)
● Presta or Schnader or any Valve Core Removal Tool (Alternative: Pliers)
● Screwdriver
● To break the bead manually, you need either one of these things: a Jack, a Knife or any other sharp cutting tool, a vehicle
● Optional: Tire Bead Breaker, Tape
The Procedure:
 The air cap or valve core is a small pressure sealing device made of either rubber or metal cylinder located on the core which is where the tire is inflated from. You will need a Schrader or Presta valve tool to extract the air cap from the rim.
Thread the tool inside the valve stem and twist it in a counterclockwise direction. This should loosen and remove the cap off the tire. Then release and allow the air to exhaust.
A valve core removal tool is a small metal that resembles a small screwdriver. It is a handy tool that is relatively inexpensive and often available in a set for different valve sizes like that of the Awpeye 4 Pack Valve Core Remover Tool.
 There are three methods and tricks you can use to break the bead bundle between the bead and the rim.
● Drive and run over the tire you are working on. The aim is to force the rubber down so its easier for the bead to pop out. Hence when driving your vehicle over the tire, make sure that it is the rubber part you are driving onto and not the metal rim. You may need to run the car over it a few times to break the rubber part.
● Put the whole weight of the vehicle on the tire via suspension. The method involves raising the vehicle using a jack and partially lowering it. Once the vehicle is lifted, place the tire underneath the jack. Adjust the jack and lower the vehicle onto the bead part of the tire. Warning: Do not attempt this method if you are new to the process of car suspension unless there is an expert or professional supervision. The procedure requires lifting a car and working underneath it which is can be really dangerous to you and to your vehicle especially if you don’t know what you are doing.
● Cut the bead off the rim. You can cut through with it using a saw blade or a drywall knife. To cut it, follow the seam running alongside the bead, carefully not touching the metal rim. Be cautious as you cut because you don’t want to damage the metal rim To avoid the blade veering towards the tread, insert a wooden towel in the sections that are already cut.
If you are really having a hard time with the bead, you can easily get away with a bead breaker tool. A tire bead breaker is a handy tool designed to dismount the innermost diameter of the tire interfacing the wheel. The operation is so fast and easy it’s basically like opening a canned good! It’s also the safest way to de-bead without damaging the rim. To make the most of your purchase, invest in a well-designed bead breaker like that of BeadBuster XB-450. To date, this is the most affordable and efficient bead breaker.
 Once you have managed to break the bead, grease the edge around the rim as well as the bead by applying the lubricant. This will prep the area when prying the tire later on. You will find it easier to pop the bead off the lip of the rim easily once everything is lubricated. Use as much as a lubricant as necessary. To avoid accidentally scratching the metal easily while prying, you can also tape the edge of the rim prior to lubrication.
  At this point, it is only the bottom half that is loosened, you still have to work on the other half of the tire. So to do this, flip the wheel over on the other side and pry in the wheel off in the same fashion as you were prying in step 4. Use as many pry and screwdriver alongside lubricant as necessary.
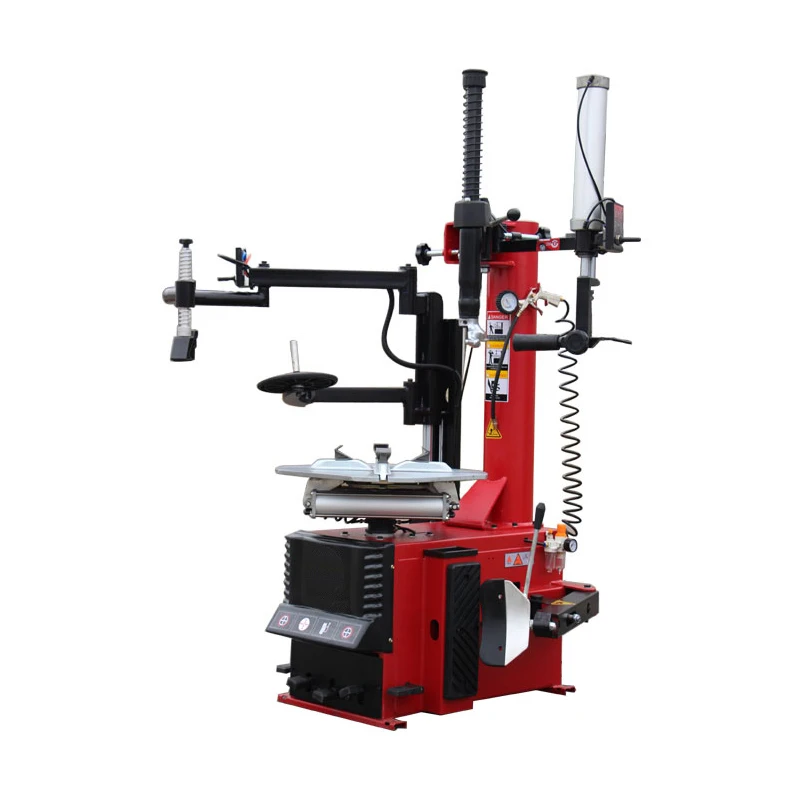
If you find taking a tire off a rim by hands too much of a task, time to pull out the big weapon. A tire changing machine skips most of the lengthy process of manually separating the tire from the rim.
Note that the tire changing machine we are referring to differs from that of the actual heavy-duty tire changing equipment technicians used in the shop.![]() The manual tire changing machine is a rather portable and handy tool that requires no power hookups to operate. While the machine will mostly do the job, you will still need the help of a few hand tools.
The manual tire changing machine is a rather portable and handy tool that requires no power hookups to operate. While the machine will mostly do the job, you will still need the help of a few hand tools.
What you will need:
● Plywood Board (Alternative: any strong wood surface that is at least ¾ inches thick)
● Manual Tire Changing Machine
● Tire Changing Rod (Alternative: any metal rod or tube with a pointed tip)
● Screwdriver
● Bolts (preferably 5 inches long and ½ inch wide)
● Presta or Schnader or any Valve Core Removal Tool (Alternative: Pliers)
● Marker or Pencil
● Lubricant (Alternative: liquid dish soap or oil)
● Optional: rug or paper
The Procedure:
 Using a marker, trace the machine’s base on the platform. Do put a mark on the holes or the location of the bolt as well.
Some prefer a block of concrete as a base because they are sturdier and stable. Others drill the machine directly on the floor. But note that you will need a mason drill to engage the bolts into hard cement. Nonetheless, the bolting process is the same as with the wood material.
 You will use it to expose the rim of the tire. Start the process by sticking the rod’s pointed end into the rim-tire joint. Using your hand or your foot, apply pressure on the wedge by pushing it down. This will gradually exposed the rim.
 To avoid scratches on the rim while inserting the rim, you can wrap a rug or any cloth (a paper may do) around the spoke.
 Apply generous amount lubrication as necessary.
You may not be able to pry a certain section in one shot and that is fine. If this happens, simply go back by lifting the foot pedal using your foot to turn the rod counterclockwise.
Related video:
This article has thoroughly discussed the process of disengaging the tire from the rim and now it’s your turn to take the wheel. Sure, the entire process of changing your own tire– from removing the wheel of the vehicle to fitting new tires might seem lengthy and complicated but hey at least we have taken down one of its processes, namely removing the tire off the wheel. Doing your own tires will save you money and soon enough, you will be reaping the satisfying feeling of your hard work.
Tire changing machines for motorcycles and cars are an indispensable device in today's auto-motorcycle repair shops. However, to buy products of excellent quality and with competitive prices, customers need to find reputable addresses and are trusted by many craft workers.
In companies or reputable workshops, there will be professional technical teams that guide the installation and use of tire removal machines according to the manufacturer's procedures. The following article will guide you on how to remove tire from rim with a car tire changing machine and by hand.
Contents
In the car there is always a place to store the above items, always have these tools ready in the car before going anywhere, because trouble can happen at any time. You should be proactive in every possible situation.
Removing tires is a matter for the professional. Because if you do not do it right, you can seriously damage tires and rims and endanger your safety. If you have a lot of manual skills and are an accomplished screwdriver, you can lift the tire from the rim by hand with an assembly iron (better with two).
Removing a tire can be annoying. So, it is dangerous to do it in the middle of the road. It is because you may get stuck in the middle of the road while riding. Hence, please move to a spacious position to remove the tires.
On the tire, there will be a piece of rubber that is the air valve. In this step, screw the valve cap in the counterclockwise direction. Using the valve remove tool will deflate the tire. After performing the above operations, place the tire on the ground to remove the tire.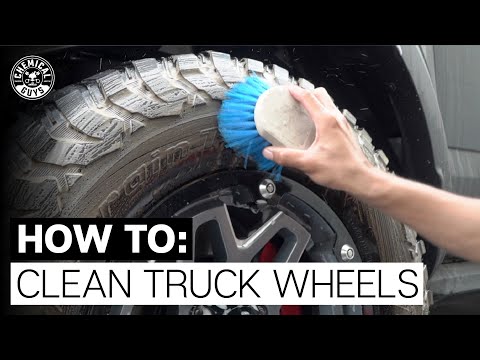
Tires and rims are always fastened together with special glue. Use strong glue and seal so that they do not fall off. When you want to remove a tire, break the glue and stick the tire to the rim firmly. To break the grain of the wheel, you have two ways: manual tools as use a large flat-tip screwdriver or use your strength.
When making the removal of tires that are prone to slippage, place a mat under the tire. Use foot force on both sides of the tire to reduce the chance of scratches and increase leverage. While removing the tire from the place, you may need to apply some hard grease to the surface.
After removing the tire from the rim, you will install a new tire. So you need to use oil to apply the inside of the tire to avoid scratching the rims. If there is no oil, you can replace it with another liquid such as soap.
You may now want to put new tires on the rims so you can continue to use them. You can use specialized tools if you do not have time. Inflate your tires and use them right away.
If you want to reuse the tire, we should place a pressure piece with rounded corners between the other vice jaw and the tire rubber. Otherwise, the sharp edges will damage the flanks. The pressure point of the vice should be very close to the rim shoulder.
It requires the mentioned mounting iron to pull it off. First, you press the tire on one side with both hands firmly into the low bed and then push it to the opposite side. There you put the tire iron on and lever the rubber over the rim flange with little effort.
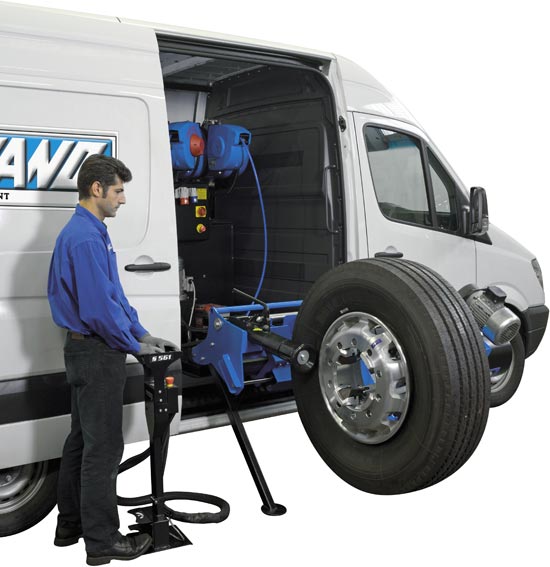
Car tires fit so tightly to the wheel that the human force can not remove them. Especially for large trucks, it becomes even more difficult. It is the reason people need specialized tire entry and exit devices called tire entry machines. Here are the reasons to use this device.
Use the tire changing machine in the following sequence to achieve the best effect but no less quickly. Before getting into work:
 Clockwise is increasing pressure, counterclockwise is decreasing pressure.
Step by step guide:
First, you need to use a tire jack to lift the wheel that you need to change the tire on. Then use a wrench to unscrew all the bolts. Next, deflate the tire that needs to be replaced.
Tires and rims are bonded together with glue so that the tire does not come apart when moving. So, to remove the tire from the rim, you need to remove this glue. To separate the tire and rim, you need to use a tire bead breaker.
Place the tire between the presser surface and the rubber pad, paying attention to the pressure plate with the wheel wall in balance.
Once you have removed the seal between the tire and the rim, for easy separation of the tire, you need to apply lubricant to the gaps between the tire and the rim and use a tire iron to create a gap between the rim and the tire. The use of lubricants both helps to prevent the rims from being scratched and the tires to easily separate from the rims.
After one side of the tire has been separated from the rim, simply repeat the above steps with the other side of the tire, the process of removing the tire from the rim will be complete.
In the maintenance of cars and heavy-duty vehicles, people need to use specialized tire entry and exit equipment. It is a tire machine. It makes the tire removal process quick and convenient. The above is a manual on how to remove tire from rim and how to use the tire machine. We hope you can remove tires from the rim effectively.
0003Related materials
Tire inflation with nitrogen and 7 more wirings at the tire fitting
In the middle-end of autumn, car owners storm tire shops. However, you can disassemble the wheels yourself. We'll show you how to do it. We will need a special tool, as well as a screwdriver to unscrew the wheel valve, and a couple of pliers to help remove the tire from the rim.
To rid the rim of the tire, we bought a simple but very useful device - a mechanical wheel beader. There are several options on the market, but we chose the one produced by the Sorokin company. It is inexpensive. Thanks to the ability to adjust the retractable linkage, tires can be removed from discs of different diameters. You only need to select the desired position of the rod and tighten the two bolts holding it, after which you can start working. nine0003
Related materials
Is it possible to pump up a wheel without a compressor - the experiment "Behind the wheel"
We took a 16-inch wheel. It is more convenient to remove the tire if you put it on the floor. In order not to scratch the aluminum disc during work, we will place a sheet of foamed polyurethane under it, which is used in construction for sound and heat insulation. We unscrew the cap on the valve, holding it with a finger, unscrew the spool so that it does not pop out under air pressure. The tire starts to deflate. nine0003
Before carrying out work with the help of a special tool, it is necessary to moisten the working edge of the disc with a penetrating liquid. Otherwise, we risk damaging the disk. Also, the liquid, having seeped under the edge, will facilitate the removal of the wheel from the humps.
We apply our device to the disk. Its hook in this case should protrude from the mandrel by 7–8 cm. For reference, this is one hole on the retractable rod. With a hand, we press on the device from one side so that it goes under the protrusion of the disk, and we wind the hook under the disk from the opposite side. We spread the levers of the device in different directions. The main thing is not to try to throw off the tire immediately, but to move it off the hump gradually. Otherwise, the tire may be damaged. Please note that the device should not be inserted near the wheel valve. nine0003
Related materials
Changing shoes correctly: everything you need to know about discs
Pulling out and moving the tool, slowly move the tire off the hump around the entire circumference. You can hold the side of the flight attendant, where there is no hook, with your foot. Having removed the tire on one side, turn the wheel over and do the same work on the other. Don't forget about lubrication. By the way, it is not necessary to use a liquid, a silicone composition is also suitable.
We removed the tire from each side of the humps. It remains to take mounting blades and completely remove the tire from the disk. We process the belt with penetrating lubricant. It is advisable to get on the inside of the rim, this will make things easier. We start the first blade under the tire. It is convenient to do this in the area of the wheel valve. We take the assembly aside in advance so as not to damage it during work. Hold the mount with your foot. We insert a second spatula next to it and lift the edge of the tire with it. We do this along the entire inner circle, also gradually. We removed the tire from one side of the disc, it remains to do the same on the other. We turn the wheel. We wind the blade behind the disk and begin to remove it from the tire. As soon as we succeeded, we can consider that the work is over. nine0003
Taking apart the wheels yourself is easier than you think. The main thing is to stock up on the right tool and free time, as well as take into account the characteristics of rubber.
Please send all questions and suggestions regarding the Technical Environment series to: [email protected].
Our new video
Mustang engine and 300 mm ground clearance — cool UAZ from America
Which SUV is cooler? Now we know the answer
Is 12 liters per hundred a lot? Test Haval Dargo
Like this article? Subscribe and you will always be in the know!
Driving in Zen
News smi2.ru
The availability of tire shops has allowed the vast majority of drivers to do without the knowledge and skills of self-beading car tires.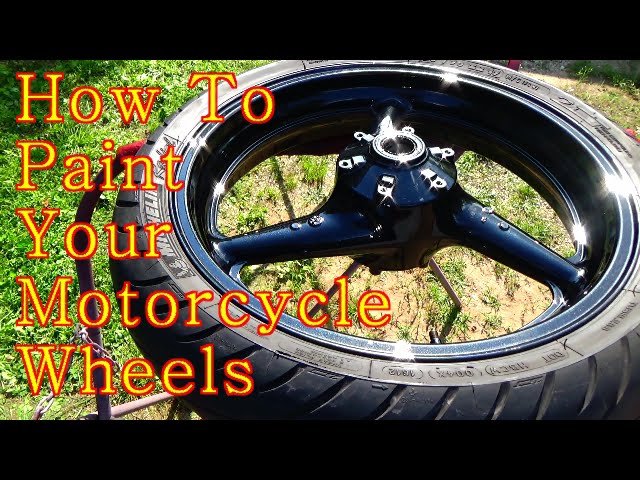 But for some, this skill can help in a number of situations. Not everywhere there are tire shops, not all wheels allow movement after a puncture, and someone can get into a difficult financial situation when the opportunity to save money on visiting a workshop would be useful. nineOl000
The procedure itself, with experience and some physical capabilities, will not be difficult. nine0003
Theoretically, all tires are divided into tube and tubeless. In the first type, a chamber is also embedded in the tire, which actually ensures tightness.
With high-quality and precise manufacturing of tires and rims from modern materials and proven technologies, the need for a chamber is eliminated, and with it the extra mass of the wheel assembly, which is unsprung, that is, especially harmful to the properties of the car. nine0003
Read: Why drivers put tubes in tubeless tires and how to do it
Accordingly, any car owner will have to deal exclusively with tubeless tires. There are exceptions when the tire, due to age and minor damage, as well as due to corrosion of the disk, ceases to hold air.
Sealants do not always help, so in order not to throw away a tire with a still deep tread and preserved sidewalls, a tube is put into the wheel. This is rare, but it still happens. nine0003
Wheels for tube and tubeless tires are also different. They differ in the size of the hole for the valve, as well as in the presence of a special annular protrusion on the rim shelf - khampa in the case of a tubeless version.
It prevents the wheel from breaking apart on the move if there is some loss of pressure. No hump will help from complete depressurization, the tire will be torn off the disk.
The suddenness of an event such as a puncture, as well as the shortage of repair shops along the roads in the old days, led to the emergence of many popular methods for dismantling a tire in order to replace the tube or apply a patch to it. nine0003
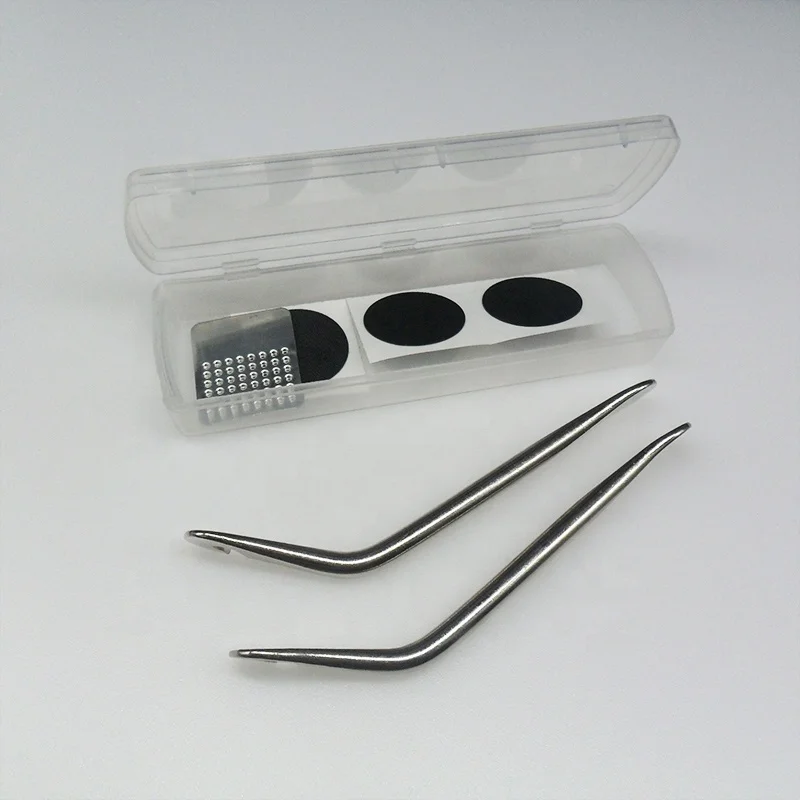
Tubeless tires are also puncture-repairable, for which there are appropriate first aid kits. There are also those in which there is no need for disassembly. But for a reliable repair, the tire is still better to remove.
Continuation: How to repair a tubeless tire yourself (harness set and repair kit)
There are two problems with dismantling. The first is to tear the edge of the tire off the rim shelf. There is a recess in the center, so the edge fits freely into it, and it sits on the shelf with a significant interference. nine0003
Especially on a wheel that looked like a lot, where metal corrosion and rubber degradation caused the tire to stick to the rim. The situation in the case of a tubeless tire is aggravated by the presence of a hump, the outer diameter of which exceeds the landing size of the tire, the bead will have to be dragged through it with force.
Second - move the edge of the tire over the edge of the disk. It is not easy enough, but in the presence of lubrication it is carried out with a pair of mounting blades. Or a roller fixture of an assembly machine. nine0003
The first problem is solved in various ways, differing in the nature of the application of the pull-off force.
When hitting, a lot of force is developed, but the situation is complicated by the elastic resistance of the tire. They hit the edge of the tire through a spacer in the form of a corner or other object that excludes rubber breaks.
The method is dangerous and not recommended for use. But many succeed in a hopeless situation.
The force is applied through the lever of one of the devices or a significant mass in the direction perpendicular to the plane of the wheel:
It is easiest and safest to have a dismantling tool in advance.
To make the job as easy as possible, you will need:
Even if the tire is completely flat, you need to unscrew the spool from the valve, and a little pressure will still interfere.
Gap between rim and tire is wetted with penetrating lubricant. Then a device is applied to the wheel and a gradual separation of the edge of the tire is made with its shift inward.
Don't do it in one motion, you could damage the tyre. Start on the opposite side of the valve. nine0003
After completely tearing off the edge and dragging it over the hump, everything is repeated from the opposite side of the wheel. The tire beads move to the middle of the disc, it is lubricated again.
Starting from the valve, the tire is dragged over the flange of the disc with two pry bars. The second edge is dragged in the same direction, it is necessary to act from the side of the disk.
Due to the lack of a hump, the process is easier. You just need to make sure that the camera does not get between the mount and the disk. nine0003
If it is not necessary to completely remove the tire, it is enough to remove the inner tube for repair after tearing off both beads and dragging the outer one.