Delivery options and delivery speeds may vary for different locations
Sign In
or enter a zip code
Email * Password *
REPAIR & HOW TO
MAINTENANCE
TROUBLESHOOTING
GUIDES
TIPS & TRICKS
ALL ARTICLES WATCH VIDEOS ABOUT US SHOP PARTS CONTACT US
Whether it's a motorcycle, an ATV, or a UTV, it probably has some kind of starter relay or solenoid.
Your solenoid might differ from others and have more connections, but there are two basic tests you can do to evaluate your solenoid's health.
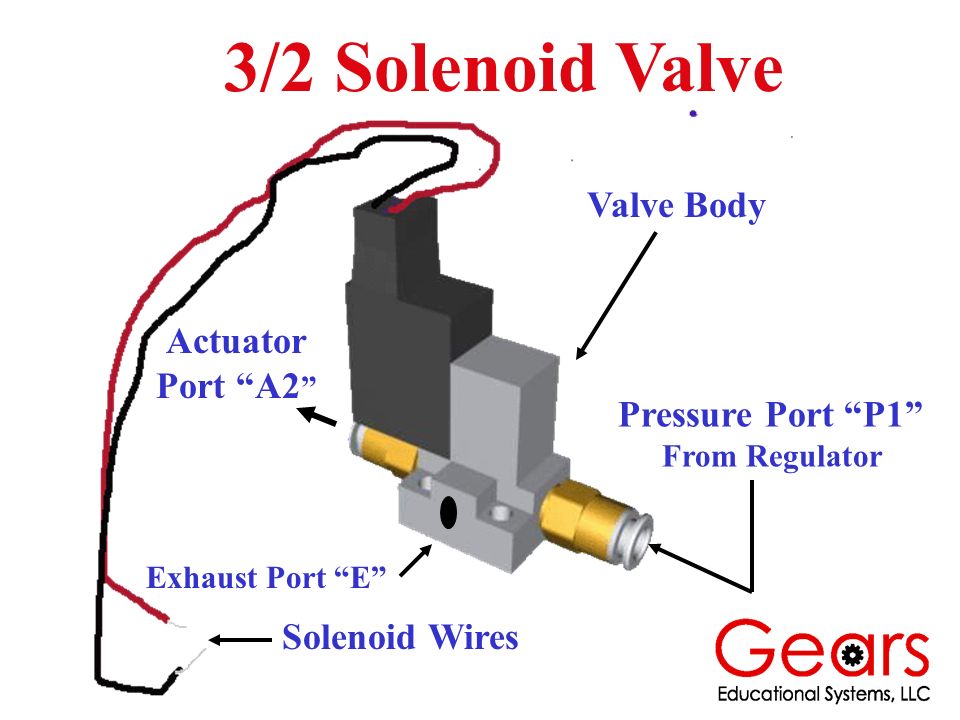
A starter solenoid is basically a switch that creates a contact point between the battery and the starter. When the starter button is pressed, it energizes the coil, which pushes a contactor to complete the circuit. This transfers DC current from the battery to the starter.
In the first diagram below, the starter button has not been pressed, so the circuit is not complete.
In the next diagram, the starter button has been pressed, and the coil in the solenoid has been energized. This pushes the contactor up and completes the connection from the battery to the starter motor.
Knowing how to test the solenoid on your offroad vehicle is an important step to troubleshooting starting problems on your machine. Here are some tests you can do to check the health of your motorcycle's starter relay.
Tools Needed - Motorcycle Starter Relay TestDepending on your unit, the tools you'll need to access the starter solenoid may vary.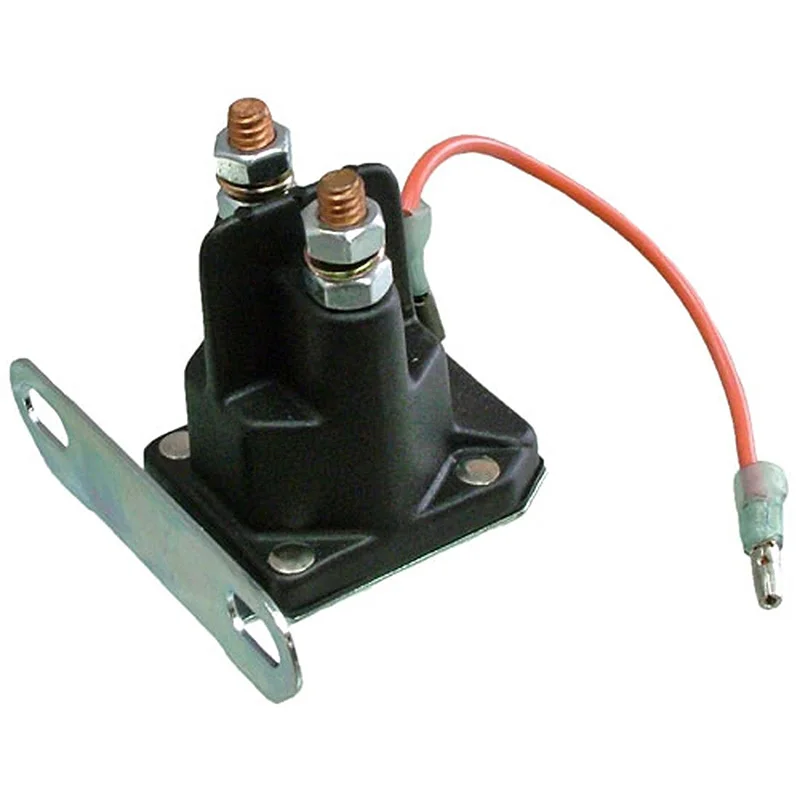 But these tools will help you regardless of what kind of unit you're working with.
This first test is designed just to see if the contactor is pushing up and completing the connection in the solenoid.
Step 1. The solenoid has two wires that normally connect to the starter button. There is no polarity on the solenoid, so it doesn't matter which side is which. You're just running current through it. Using back probes, connect directly from the battery to one of these wires. Complete the connection to the negative side of the battery first.
Step 2. Connect a second back probe to the solenoid. Then, connect it to the positive side of the battery. You should hear an audible "click" as the connector is pushed up to complete the circuit. If you don't hear it, the solenoid has gone bad. And if you do, move on to the next test.
In some cases, even when the connector engages, the unit still will not start. That can happen when there's corrosion on the connectors inside the solenoid. This next test can help you diagnose this problem.
Starter Relay Test 2Step 1. Keep your connections in place from the first test, and simply disconnect the back probe from the positive terminal on the battery.
Step 2. Connect your multimeter to the main connectors on the solenoid and set your multimeter to a resistance test. Again, polarity isn't important. Just connect one clip of your multimeter to each side of the solenoid.
Step 3. Once connected, you should see "OL," indicating an open circuit.
Step 4. Connect the positive side of the battery using the back probe connection from Step 1. This will energize the solenoid and push the connector into position, completing the circuit.
These two simple solenoid tests show you the basics of how to diagnose issues with your relay. First, check to make sure the connector is engaging and completing the circuit to the starter. Then, make sure the circuit to the starter is connected when the connector is engaged.
The starter relay is just one of many starting problems that can affect your motorcycle. Watch the video below to see how to diagnose multiple starter problems on a Honda CBR 600 motorcycle.
body
I think it’s safe to say that at one point or another, we’ve all had problems with an ATV starter. If you haven’t yet, you will. I have had starter issues with just about everything I have owned. You go to start your ATV and all you hear is, "CLICK". No engine crank.So you try it again and "CLICK". Nothing. You know the battery is good, you have the clutch pulled (if it has one), the ATV is in neutral, and the light is on but still…
nothing. The first thing you should do in this situation is to check the battery and connections.
I have had starter issues with just about everything I have owned. You go to start your ATV and all you hear is, "CLICK". No engine crank.So you try it again and "CLICK". Nothing. You know the battery is good, you have the clutch pulled (if it has one), the ATV is in neutral, and the light is on but still…
nothing. The first thing you should do in this situation is to check the battery and connections.
If you haven't read our post on multimeters yet, now's a good time to check it out.
More than likely, you already know that the battery is good, but we’ve all been in a hurry. I've mentioned before that it seems like it can be easy to overlook something small because we’re so used to taking care of it.
Kind of like when you call tech support for a computer issue and the first thing they ask is, “Is it plugged in?” I know I am guilty of doing a quick run through and noticing later on that the battery terminals were loose or that the battery was low. Once you have verified that the battery is NOT your problem, the next thing you should look at is the starter solenoid.
An ATV starter solenoid can normally be found on the frame. It is usually located on the outside of the plastic right next to or under the battery and near the wiring harness.
A starter solenoid is a switch that controls a high amp load with a low amp. Starter solenoids come in all different shapes and sizes, but normally they have a round or square body with two larger and two smaller wires. The larger wires are for the high amp load and the smaller wires are for the low amp switch. If yours only has one smaller wire, the ground is coming from the frame where it is mounted. It may be sitting in a plastic or rubber cover, but it's not uncommon for it to be on the outside.
Of the two larger wires, one of them will be coming from the battery (red) and the other will go to the starter (black). You should be able to get a voltage reading from the red wire coming from the battery. Do this by using the voltage setting on your multimeter, with the red lead on the post and the black lead on a frame ground or negative battery terminal.
If you do not have voltage at the post on the solenoid that connects to the battery, check your connection at the battery and then trace the cable from the battery to the solenoid checking for any breaks or a loose connection.
The other wire should not have a voltage reading.
Of the two smaller wires, one is a negative, or a ground, and the other is positive. I have found that the easiest way for me to test these is to unplug the connector and put both test leads into the ATV wiring harness side connector; the reading here should also be zero.
Now turn the key and get the bike ready to start (do not actually start the bike, just take the usual steps you would before starting; i. e., turn the key, make sure the bike is in neutral, etc.) This step can get kind of tricky if you've only got one set of hands. I definitely recommend using test leads with alligator clips on the ends. You can pick up the clips for around 50 cents a piece and make your own or buy a pre-made set for a couple of bucks.
When you push the start button, you should get a reading of 12V.
This battery in this photo is our test battery, so we expect the voltage to be a little low. We use this guy whenever we've bought a used ATV without a battery or for demonstration purposes. Along with our multimeter, he's made appearances here, here, and here. As long as you have a reading that is close to 12V, we'll move on.
If not, you may want to run this test a few more times to make sure you have done all of the normal stuff you would do when you start your ATV (like making sure it is in neutral, all of your wires are connected, etc). I know it is redundant but you would not believe the amount of times I have been called out to a HMMWV (that would be a Hummer in civilian speak) that would not start, only to find it was left in gear.
If you still are unable to get a voltage reading, more than likely there is an issue with a safety switch or a kill switch. Due to the vast differences between ATV models, you will want to refer to the service manual for your specific model of ATV. If you are stuck on this step, feel free to contact us and I will see what I can dig up for you. If you've gotten a voltage reading close to 12V, you can confirm that thepush button is working and giving the solenoid the signal to close.
The last thing to check now is the starter. To test the connection between the solenoid and the starter, plug the connector back into the wiring harness and test for voltage on the starter side (big terminal) while pushing the start button.
If you've gotten a voltage reading close to 12V, you can confirm that the push button is working and giving the solenoid the signal to close. The last thing to check now is the starter. To test the connection between the solenoid and the starter, plug the connector back into the wiring harness and test for voltage on the starter side (big terminal) while pushing the start button.
If you do not have voltage reading, then your solenoid is bad and will need to be replaced. If you do get a voltage reading, trace the large wire from the solenoid to the starter and make sure it has no cuts or breaks and that it is tightly connected to the starter. If there are no issues with the wire or connection, then your issue is with the starter and it will more than likely need to be replaced.
It seems like a lot of steps to get to this point, but if you don’t conduct all of the above tests in the correct order, you could be misdiagnosing the problem. What may appear to be a bad solenoid, may really be something as simple as the kill switch being turned off or the bike being in gear (Don’t ask me how I know. Ok, ask). We'll be back in the next few weeks with some more troubleshooting posts, but in the meantime, let us know what you think.
Have you ever spent a couple of hours troubleshooting your starter only to find that your bike was in gear or the kill switch was off? Tell us about it. We want to hear everything. Good experiences, bad experiences, requests, whatever you've got. Let us know in the comments below or give us a shout on Facebook.
Suspension. Shock absorbers must be free of oil, and CV boots must be free of holes through which moisture can enter. To check the condition of the wheel bearings and hub bushings, you need to raise the ATV with a jack and shake the wheels vertically and horizontally - if there is play, one of these parts is worn out. Most often these are bearings. You also need to check all the suspension arms for play - perhaps ball bearings or silent blocks need to be replaced. nine0003
ATV with working shock absorbers lowers and rises evenly - when pressing on the rear or front, one of the sides should not sag.
Transmission. Gearboxes must be free of oil leaks and cracks. The oil in them can be checked by lowering a plastic clamp into the filler neck or unscrewing the drain bolts: it’s bad if the liquid is opaque, it contains chips or other foreign particles. To check the modes of operation of the transmission, you need to jack up the front of the ATV. When all-wheel drive is on, when turning the left wheel, the right wheel should rotate in the opposite direction, and vice versa. When the differential lock is engaged, both wheels rotate in the same direction. Transfers should be included without effort and crunch. nine0003
Engine. It must be free of oil. A serviceable motor starts in 2-3 seconds and works without a metallic rattle, an arbitrary increase and decrease in idle speed.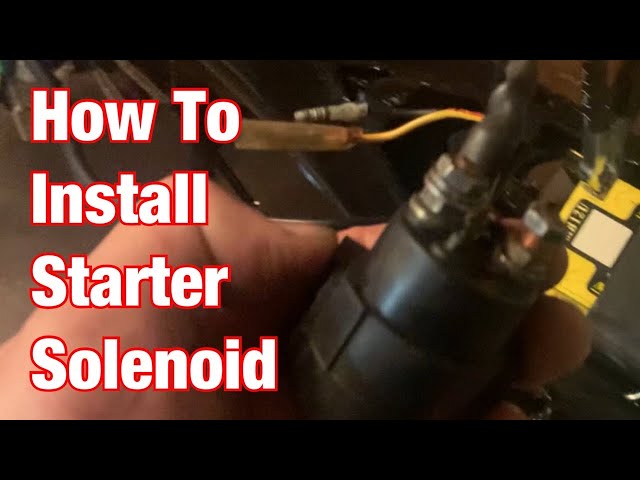
Bad sign - black oil or with foreign particles. Normally it is transparent.
A malfunction is also indicated by black, white or blue smoke from the exhaust pipe, as well as a burning smell. At idle, the exhaust gases of a serviceable ATV are almost transparent. nine0003
It is advisable to measure the compression in the cylinders - this will require a compression meter with adapters for different threads of the candles and knowledge of the normal compression value in the cylinders of a particular ATV model, taking into account the decompression meter.
Coolant . You need to check with a cold engine. The antifreeze level must be between the minimum mark "LOW" and the maximum "FULL". The liquid should not be cloudy. If there is sediment or dirty “flakes” under the radiator cap, the motor was poorly maintained and may have overheated. nine0003
Air filter . If there are oil stains on it, most likely the ATV turned over.
Electrical . It is necessary to check the operation of the parking lights, high and low beams, turn signals, alarms, horns, heating, winches. Error indicators - for example, an electric booster - should go out when the engine is started.
Electric power steering . With the ATV running and jacked up, turn the steering wheel left, right, then center. With a working electric power steering, the steering wheel does not turn on its own. nine0003
Frame. Cracks, extensive corrosion, welding spots, stripped or fresh paint in the places where the suspension arms are attached, on the arms themselves and on the bottom of the frame - a reason to refuse to buy. Cracks or welding in the cargo platform area are not critical.
The difference in one or more bolts of the engine, variator or bridge, as well as traces of sealant on the crankcase connectors, indicates that the assembly was disassembled to fix the breakdown.
ATV in good working order does not pull to one side.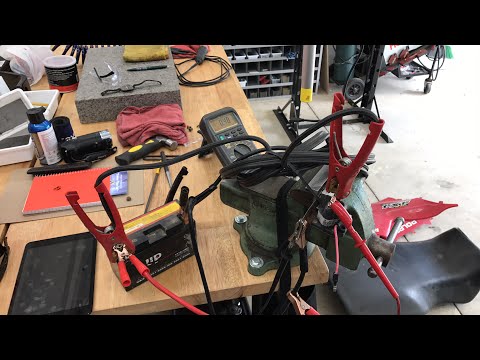 When moving back and forth with the wheels fully inverted, there is no cod. The start of movement and acceleration without jerks and bumps. When you turn on the four-wheel drive and differential lock, it becomes more difficult to turn the steering wheel. nine0003
ATV Club
August 21, 2014
Some Polaris Industries ATVs have a rather unusual 4WD system. Sometimes they even say that they have a permanent 4x4. But is it?
There is a proverb in Russian that a spoon is good for dinner. I'm not sure that the Americans from Polaris heard it, but they built their all-wheel drive system for the modern Ranger family of auto ATVs that way. nine0003
Readers have already paid attention to the description of the all-wheel drive features of the Polaris Ranger 570 EFI tested in the last issue. And they asked me to tell you more about it.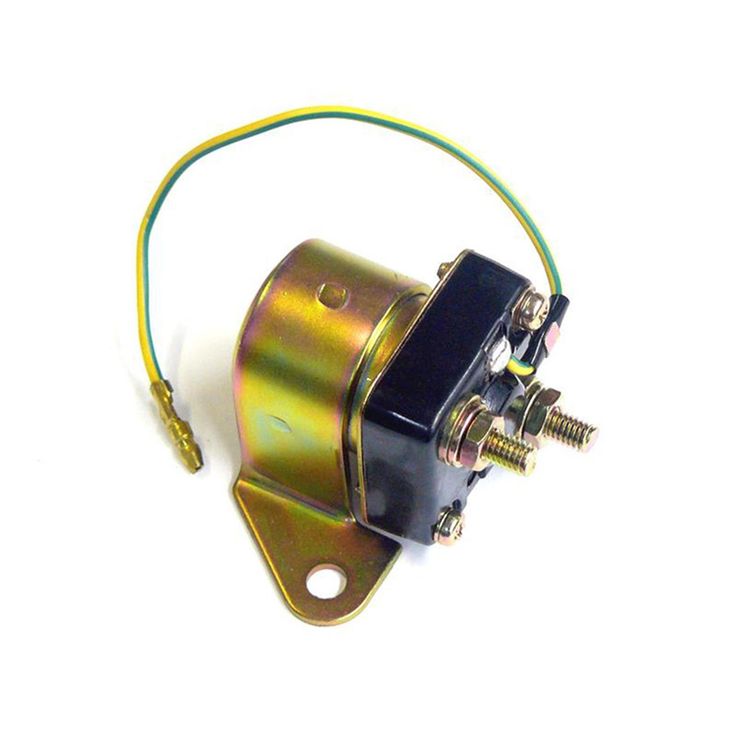
AWD clutch parts. On the left - a magnetic element and a bushing, on the right - a fixing ring and an inner race with rollers in a separator
Cross section of the AWD mechanism. The rollers are dependent on a 12 volt supply to the clutch
This type of drive is used by Polaris on both UTV Ranger and traditional ATVs of the same company. nine0003
The classic ATV all-wheel drive scheme with traditional plug-in all-wheel drive and front differential lock requires a lot of experience and skills from the driver. It is necessary to determine the moment of connection in time, stop for the manipulation itself, select the conditions for blocking the front gearbox, in addition, all these manipulations are performed manually.
How it works. Left: casters move freely - front axle disengaged; right: rollers fixed in one position - front axle is working
The Ranger, like any other Polaris AWD ATV, can instantly transition from off-road mode to hard-ground mode without stopping or losing control or traction, and without any additional action from the driver. At the same time, off-road, AWD automatically provides a transmission condition similar to a locked four-wheel drive. The Ranger has a permanent drive rear, but the rear differential is blocked by moving the toggle switch on the dashboard to the middle position. In this position, the Ranger becomes like all other ATVs in 4x2 mode - that is, there is a rigid connection between both rear wheels. nine0003
To make the quadric all-wheel drive, the driver moves the same toggle switch to the highest position. You can do this on the go (with the gas off), the ATV remains fully controlled, with a light steering, and on hard ground, the inclusion of all-wheel drive is not felt. All the advantages of the AWD mode can only be appreciated when hitting off-road, when the rear wheels “overtake” the front ones by an imperceptible 1/8 turn, that is, as soon as they start to slip.
Instantaneous engagement by AWD clutch in front gearbox when 12V applied.
Classic ATV rear differential.