(1) Proper tools. You’ll want to have a tire-changing stand, tire spoons, tire paste, gloves, Motion Pro Bead Buddy, valve-core remover, 12mm or 13mm wrench, air compressor and baby powder. Dunlop recommends using Hunter Engineering tire paste, but there are several other good brands and even recipes for making your own tire paste on the internet.
(2) Air out. With the wheel on the stand and the sprocket side up, remove the valve cap and nut. Then remove the air-valve core. Set it aside to allow all of the air to come out of the tube. Loosen the rim lock completely without removing the rim-lock nut. Now, with all of the air out of the tube, begin to knock the tire off the bead.
(3) Break the bead. Start a quarter of the way from the rim lock. Grab your tire spoon and lodge the lip side of the spoon underneath the rim and then push down. Without any air in the tire, you should be able to push the tire off the rim. Continue this step around the tire until one side of the tire is completely off the bead. Then flip it over and repeat these steps on the other side.
(4) Get a grip. After the bead is broken, you’ll want to turn over your tire spoon so that the lip is facing towards the rubber to scoop it up and get it over the rim. At this point, you’ll want to be positioned so your arms are reaching across the wheel to have the most leverage. Start about a quarter of the way around the tire from the rim lock and lodge your spoon between the tire and rim. Once you’re set, pull back on the tire spoon until the tire comes up and over the rim. Then slide the handle of your spoon underneath the rear brake rotor and leave it there.
(5) Removing the tire. Grab your second tire spoon and lodge it in between the tire and rim 2 inches away from your first spoon; pull back and put it underneath the rotor next to your first spoon. If you have a third tire spoon, it’s time to use it. Take another 2-inch bite and pull. After using the third spoon, you will only need one spoon to complete the removal process. Repeat these steps all the way around the tire on both sides until the tire is off and you can pull the wheel out of the tire.
(6) Preparing. While the new tire is still on the ground, add baby powder to the inside. The powder keeps the tube from galling up on the tire by allowing it to move freely. This allows the tube to last longer and helps prevent pinch flats. Put the valve core back into the tube. Add a very small amount of air to the tube so that it doesn’t get pinched by the tire irons. The pressure needed to be less than 2 psi. Then place the tube in the tire. Check to see if the tire is directional and adjust accordingly. Also, wipe the tire paste onto the inner lip of both sides of the tire to help it slip on easier.
(7) Valve stem. Set the tire on top of the wheel and stick the valve stem into the rim.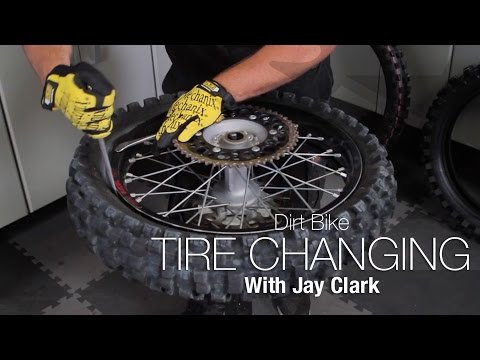 Put the nut back onto the stem, but only tighten the nut down halfway. Often times the tube will shift inside the rim if the nut is locked down tightly and the valve stem won’t be able to lean, which can cause the valve stem to tear.
(8) Mounting. Push with your waist and hands to get the bottom lip of the tire on to the rim. It will go on about two thirds of the way with your hands. Then, with your tire spoon, grab the remaining part of the tire and pry it onto the rim. Most of the tire will go smoothly, but a small section of it will be caught by the rim lock. Flip the wheel over and grab the tire with two spoons, one on either side of the rim lock, and walk it over the rim lock. Next, push the rim lock out into the tire to position it before you remove your spoons.
(9) Bead buddy. Flip your wheel over and start with two tire spoons lodged between the tire and the rim to get the bead of the tire engaged in one section. Leave enough room between the spoons to put your Bead Buddy in.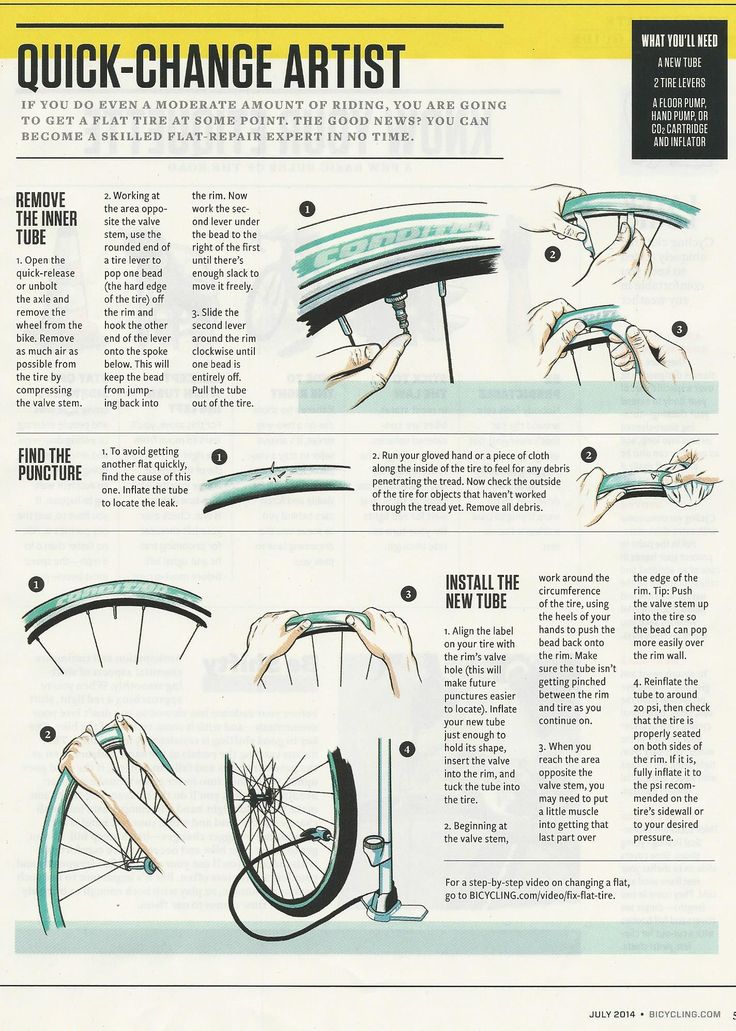 The Bead Buddy will sit with one edge in between the rim and tire while the other end latches onto a spoke to keep it in position. The next step is to lodge the spoon under the tire again with the lip facing the rim and pull back to mount it. Keep pushing it down with your hands so that the tire remains loose on the rim until the tire is fully on. For the last bite, don’t stick your spoon straight in the remaining gap. Push the spoon in between the tire and rim at an angle, using your hand to pull up on the tire to help get the spoon in. Grab the tire closer to one side. Pull on the spoon and use your other arm to press down on the rest of the tire to mount it completely on. Then push down again with the spoon to allow space for the bead buddy to come out.
(10) Beading the tire. Once the tire is fully mounted, fill up the tube with an air compressor until you see and hear the tire bead snap into place. You may need to put as much as 40 psi into the tube. Check to make sure that the tire bead has popped up on both sides. Check the tire pressure and lower it to your preferred air pressure (typically from 11.5 to 13.5 psi) before you hit the track.
Dunlophow to change a motocross tiremotion pro bead buddymotocrossmxaten thingstire mounting pasttire spoons
Our reviews are driven by a combination of hands-on testing, expert input, “wisdom of the crowd” assessments from actual buyers, and our own expertise. We always aim to offer genuine, accurate guides to help you find the best picks.
Learn more
Tire irons used for car or truck tires are generally intended for use in combination with a tire changing machine. These tools work to pull the tire over the wheel once the bead is broken. The length of these tools can typically measure anywhere from 24 to 40 inches long and have a thickness of about 3/4-inch.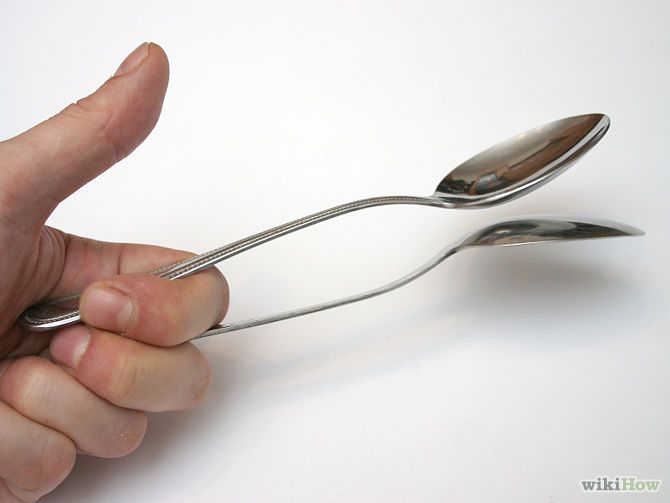
Tire spoons for lawn equipment are much smaller than what you’d use for a car tire, with a length somewhere around 14 inches. More often than not, these spoons come as a part of a kit so that you don’t need to rely on machinery to perform the job. These spoons can be useful for breaking beads and removing a tire when paired with a tire iron or two.
Tire levers for bicycle tires function precisely as a traditional spoon does, only they are scaled way down. Because they serve the very same purpose, we feel it’s only right to include them in the discussion. These tools fit right in the palm of your hand and typically feature the spoon on one end, and a spoke hook on the other. Their small size and lightweight makes these very easy to keep on your person in the case of an emergency.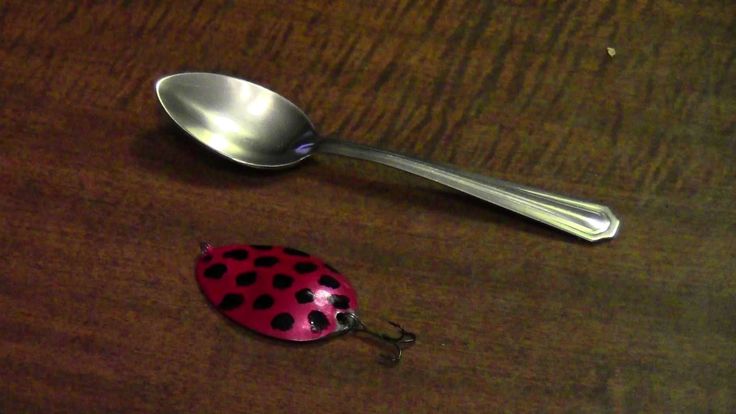
Since 1984, Motion Pro has been supplying aftermarket accessories and tools to motorcycle and ATV owners. Since the start, the brand has a laser focus on the industry and is a go-to brand for many. The headquarter is in San Carlos, California, and we’re proud to include the Motion Pro 08-0536 BeadPro Tire Bead Breaker and Lever Set on this list.
When it comes to inexpensive tools with decent quality in respect to the price, Neiko is tough to beat in the eyes of many. The brand is a well-known supplier of hand tools ranging from hand wrenches to impact sockets and more. It’s no surprise that the Neiko 20600A Tire Spoon Levers has hundreds of positive reviews, making it to our list.
With an experience dating back to 1938, it’s not exactly a surprise that Ken-Tool is a well-respected manufacturer of tools. The company is based in Akron, Ohio, and is a producer of pretty much anything you could need to change or repair tires. That includes our pick for top premium, the Ken-Tool 34645 37-Inch Mount and Demount Iron.
Tire spoons are fairly simple tools, but quality is the single most important factor like any other piece of equipment. The tool's shape needs to be precise to allow it to slide between the wheel and tire to perform the job. Beyond being precise, it must also be strong enough to withstand the pressure you apply.
The appropriate size of a tire spoon is dependent on the application. If it’s too large, the tool can be very awkward to handle. If it’s too small, you won’t have enough leverage. Not to mention you also run the risk of chewing up your wheels when trying to make the wrong tool work. Size is always a good indication of what tire’s a spoon will work with, but you can always reference the description if you’re not sure.
Tire spoons are an essential part of an emergency tool bag if you regularly ride a bicycle or motorcycle. Being able to repair a tube on the trail or far from home can be the difference between you making it back or not. Therefore, you should be considerate of the overall size to make sure you can store them and other repair tools in your pouch or bag.
 Tire spoons often come in a set that includes irons and other items. The items aside from irons and spoons are typically going to aid in the repair process that you’re going to need anyway. Valve stem caps, rim protectors, and even valve core removal tools are worth investing in all at once. Not to mention these sets often come with some sort of storage pouch to help keep yourself organized.
 Dr.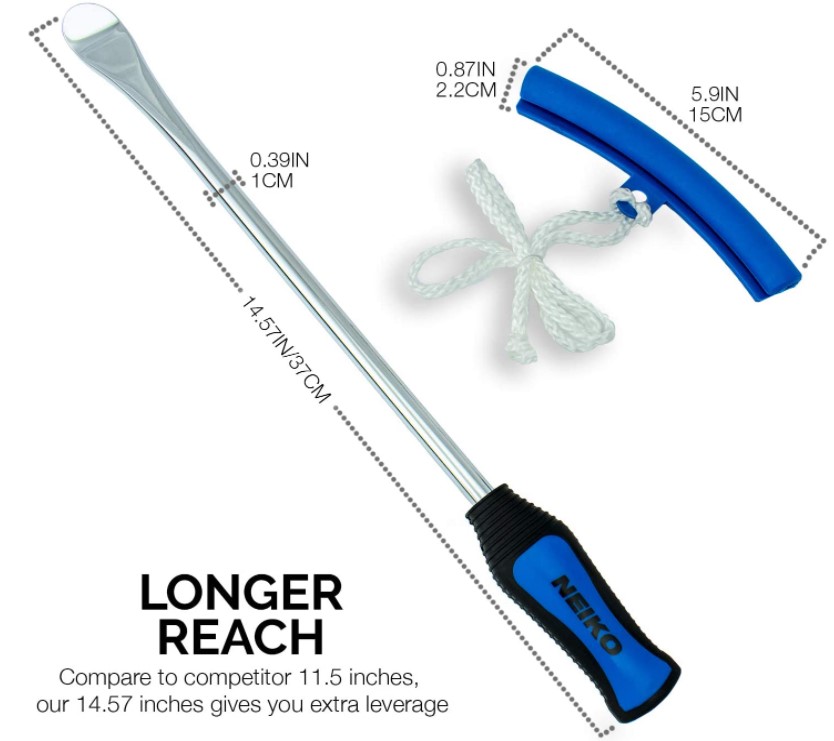 Roc Tire Spoons with Bag and Valve Core and Caps Set
Check Latest Price
There are a few reasons we place this entry on the top of our list. For one, it’s exceptionally versatile. It’s designed for use with tires on motorcycles, ATVs, and lawn equipment. It might not work for your car, but virtually anything else with tires is at its mercy. That said, it is a set of three tire irons that come with a few goodies. You’ll find rim protectors, valve stem cores, the removal tool for those cores, and even some valve stem caps among the extra gear. Aside from some soapy water and inner tubes, it’s pretty much everything you need to get that flat fixed. It also comes with a nice storage pouch that keeps things organized, even when you keep it on you while riding.
Overall, these aren’t bad for the price. However, the finish is a little rough and can cause some problems during use. Furthermore, the rim protectors are a great idea, but they are thin and wear down quickly.
SHWJ 4-Piece Bike Tire Lever Set
Check Latest Price
Changing bicycle tires doesn’t require massive tools. It also doesn’t require an equally as big budget. Our pick for best value goes to this set for the simple fact that you’re getting affordable, useful tools with decent quality. There are a total of four bike levers, which can all come in handy when changing tires and inner tubes. Each of these levers features a spoon on one end and a spoke hook on the other. The hook works by creating constant tension between the tire and wheel so that you can use another to perform the bead free. With that in mind, these tools are super compact and lightweight. They also all snap together to reduce the amount of room they take up. All of these features come in handy if you intend to keep them on your person as you cycle.
It’s tough to find anything wrong with this set. But it is extremely limited in use, as it will only work for bicycle tires.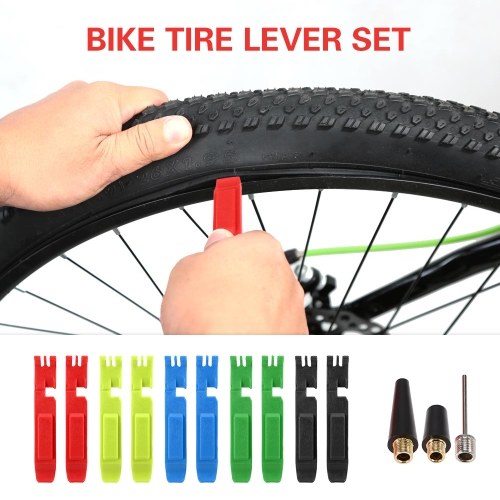
Ken-Tool 34645 37-Inch Mount and Demount Iron
Check Latest Price
If you’re not working with bicycle or motorcycle tires you need something a little more substantial. Well, look no further as Ken-Tool is the company for this sort of thing. The brand has been in the business for nearly 100 years and has a laser focus on the market. Needless to say, this tire spoon is ready to tear any car or light truck tire free. It measures 37-inches long, giving you plenty of leverage. It also has a thickness of 3/4 inch to prevent any deflection. That said, it’s double ended to tackle any tire. And if you’re a sucker for American-made tools, you should know this thing is as domestic as they make them.
Whenever something is made in the USA, you can expect to see the price tag jump. Considering that your money pays for a quality device, that is more of a factor to be aware of than a considerable drawback.
Gorilla Force Ultra Strong Bike Tire Levers
Check Latest Price
There are a few things that put this product above all other options when it comes to bicycle tires. For one, these levers are exceptionally strong and provide an excellent grip. As you know, a good grip goes a long way when wrestling tires. Furthermore, the material they use is “self-lubricating.” Because they slide easily, they make the job much more manageable and work to protect the rim from scratches. As you could expect, this tool is compact and features a hook on one end and a spoon on the other. The hook latches onto spokes to free up hands while you continue to work the tire free. And a big reason we think you’ll love it is that Gorilla Force backs it with free replacements under the lifetime guarantee.
If you are considering this option, you should know that they aren’t perfect. While they get the job done, they do seem to struggle with tighter fitting rims and will crack under excessive stress.
Motion Pro 08-0536 BeadPro Tire Bead Breaker and Lever Set
Check Latest Price
Motion Pro is a go-to brand for many motorcycles and ATV enthusiasts. If that’s the kind of tire you’re working with, this is the tire spoon you’ll want to get the job done. That said, this is a heavy-duty option that relies on chrome vanadium forged steel to promise a lifetime of use. But a rigid construction is far from the only thing to love about this toolset. This set includes two multi-purpose tire removal tools that can be used as spoons and irons. Either device measures 16-inches long, which helps make sure you can work with ease. And just in case you have to apply excess force, the incorporated cross guards are present to prevent your hands from sliding forward and potential injury.
The problem with this set is that it struggles with breaking the bead. That said, it’s not impossible, but many users report needing to rely on a third tool, which is not included.
Park Tool TL-6.2 Tire Lever Set
Check Latest Price
What’s the problem with plastic tools? Well, eventually, you’re liable to break them. Even if they’re cheap enough to replace, a busted device can leave you in a real sticky situation. Well, this particular set of tire spoons might be for bike tires, but it relies on a steel core to keep you from sailing up the creek. That steel core also allows for the tip to be extremely slim so that it can slip between any wheel and tire combo. The slick composite outer-shell also helps it slide around and prevent it from marking up the wheel. Of course, you can rest assured the quality is there to back these spoons, too, because they’re made right here in the USA.
The thin tip is handy, but you need to be careful. If not, you’re liable to scrape up the inner portion of the rim. In some cases, reviewers complain about it even slicing into the rubber tire.
Ken-Tool 32120 24-Inch Curved Tire Mount/Demount Spoon
Check Latest Price
It’s hard not to have a bias for tools made here in the USA. They promise quality and a lifetime of use. This entry is yet another fine example of that. It is a 24-inch spoon that offers ample leverage for working on passenger car tires, but it’s still plenty maneuverable for working with motorcycle and ATV tires. We should also mention that the 11/16-inch diameter is nothing to laugh at when resisting flex. Everything about this option is perfect for use in professional settings and otherwise. You can use it to break tires free in combination with specialized equipment or other tire irons, such as the other entry from Ken-Tool on our list.
The only problem with this option is the price tag. While it’s not the most expensive option, it is meant to work with other tools or equipment, meaning further investments are necessary.
Neiko 20600A Tire Spoon Levers
Check Latest Price
There are a couple of reasons to consider this option from Neiko. Starting with the necessary details, it is a set of three tire spoons that come with rim protectors. Neiko also throws in a storage pouch to help keep things tidy. The inclusion of three irons works to prevent any further investment when dealing with a particularly stubborn tire. Those rim protectors are simply there to prevent you from damaging the rim as you work. The spoons are plenty rigid despite the low price. They feature full steel construction and a protective rust-resistant coating that ensures you’ll get plenty of use out of them. And because they each feature a comfortable grip, you don’t have to worry about chewing your hands up.
The protective coating on the steel is a nice touch. However, it seems to flake or chip off after a few uses nullifying any protection it promises to offer.
GAO 2 Pack 16 Inch Bike Tube Plus 2 Tire Levers
Check Latest Price
Juniors got to learn sometime, right? I mean, kids pop bicycle tires all of the time, and they need to know how to fix them. Here's an option you either need to keep in the shop at all times, or you can gift to your kid as their first 'tool kit.' This setup comes with two tire inner tubes and two tire levers to get kid's bikes back up and running. The tire tubes are suitable for most 16-inch tires and are made from high butenyl rubber to ensure they won't wear down any time soon. The tire levers themselves are just as handy. They feature a spoon on one end, and a spoke hook on the other. And don't worry, it's actually surprisingly affordable, which is something all parents will appreciate.
As you might expect, the quality isn't anything to write home about. The levers are somewhat flimsy, but that is hard to complain about considering the excellent value.
Sumnacon Tire Levers Spoon Set
Check Latest Price
As we bring the list to an end, we’re going to take a look at one last option for small-tire applications. This three-spoon set is suitable for most ATVs, motorcycles, and lawn equipment. A few things make this worthy of your consideration. The low cost is probably what will draw your attention. Beyond that, each spoon in the set also features a comfortable grip to improve the working experience. As for the length, you have two options to choose from 11.6 inches or 14.5 inches. The spoons aren’t alone, though. As with other similar setups, this kit includes rim protectors that work to prevent you from chewing your wheels up as you work.
Unfortunately, this offering doesn’t come with a storage pouch. While that doesn’t hurt the tool's performance, it is a bit of a letdown considering much of the competition does.
Tire spoons are used to help separate a tire from the wheel. This process is necessary for changing or repairing inner tubes or swapping tires, and a spoon is a must-have when doing so.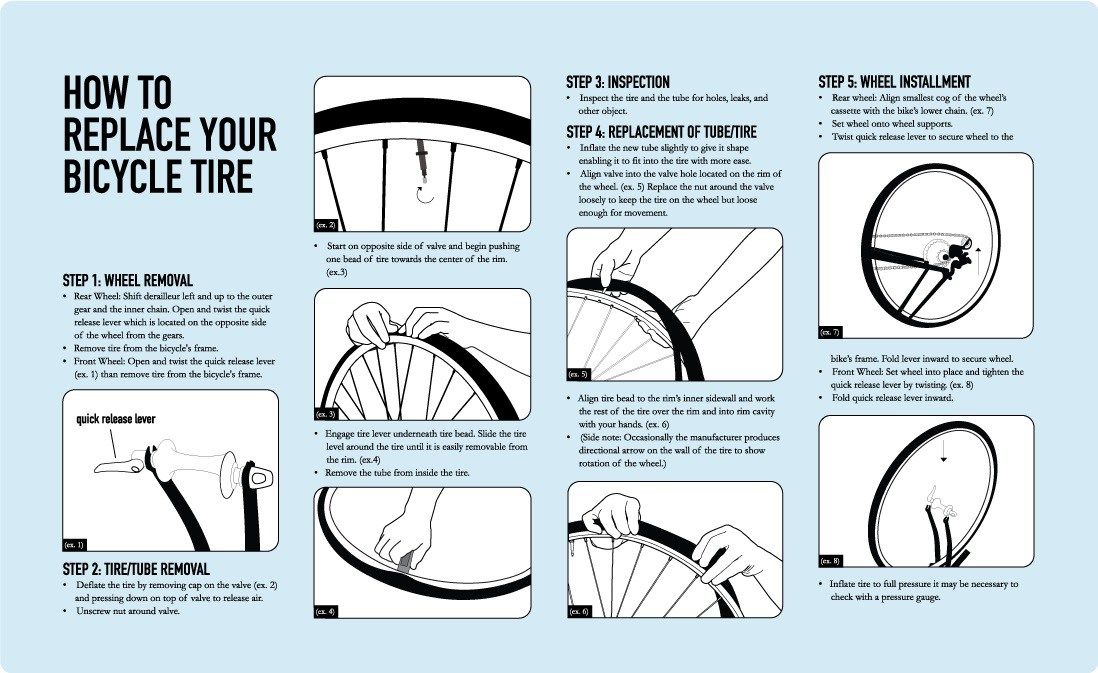
These types of tire spoons work like any other. The spoon shape works by sliding between the wheel and tire, allowing you to break the bead and pull the tire off. The process usually includes two or three spoons being used at once, with two creating a gap for the third to slide under the tire.
In our buying guide for Motorcycle Tire Changers, the Rabaconda Motorcycle Tire Changer Machine takes our top pick. But we suggest giving that passage a read to help decide which you should use.
Again, the Dr.Roc Tire Spoons with Bag and Valve Core and Caps Set takes our top pick. It’s a versatile set we can see folks getting the most use out of in a home garage. But the SHWJ 4-Piece Bike Tire Lever Set is an excellent option for someone looking to work on bicycle tires and save some money.
That said, we know we’re comparing apples to oranges here. So, you tell us what tire spoon you’ll be putting to work. If you’re looking for more ways to improve your handy skills, consider checking out our Guides section. There you’ll find all kinds of tips and tricks for projects like Removing Rust from your Car and much more.
How unnerving drivers are, the sudden vibration from the wheel. This can happen after hitting a hole, or in case of sticking to the inside of the disk: dirt, ice, bitumen. Now, car owners can avoid imbalance if they start using balancing balls. They are also called granules or beads for balancing. Thanks to the development of Western engineers at the turn of the 20th and 21st centuries, car enthusiasts around the world can visit tire shops less frequently. nine0003
Balancing pellets have a regular round shape design. The principle of operation of the balls is as follows, under the action of centrifugal force, the granules are distributed in places where the weight imbalance is greater. During the movement, the beads are affected by an electrostatic field, and under the influence of tribostatics, the granules seem to stick to the inner surface of the tire. The more balls in the rubber, the heavier their total mass, which makes it possible to eliminate even a strong imbalance of the wheel. nine0003
The core of each granule is a component such as glass or ceramic. Outside, the core is covered with a shell of silicone material. The creators of automatic balancing were Canadian engineers from Counteract Balancing Beads Inc., from Ontario. It was they who obtained a patent for the invention in 1997. The developers presented the tire self-balancing technology based on glass microbeads. The granules had electrostatic features and a slippery silicone coating. Standard ball diameter 0.15-0.9mm. At present, the technology has not changed.
As the car moves, the beads rub against the inside of the tire, creating a tribostatic effect. The granules try to be evenly distributed over the inside of the tire. Beads accumulate in the place of greatest load and stick together. It remains in this position even after the vehicle has stopped. As a result, not only the rubber and the disc are balanced in motion, but the assembly that includes the brake disc with the hub. It will not work to balance the entire node on the machine. Therefore, granules, in this case, are much more effective. nine0003
In order to place the balancing balls in the wheel, the spool must be unscrewed. Through the pumping fitting, it is necessary to pour the powder from the granules into the wheel. Also, the beads can be placed in the tire when flanging.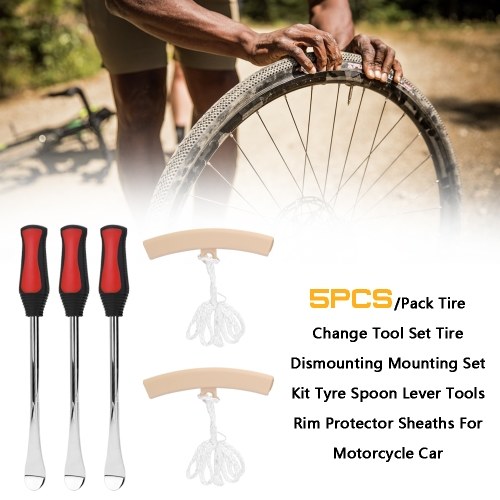 Refer to the user manual for the charge volume. Then, the spool is screwed into place and the wheel is inflated.
The benefits of bead balancing are undeniable. Thanks to a dynamic process, the balance of the wheel is constantly being adjusted. For example, if ice has stuck to the inside of the disc after washing, then the granules will correct the imbalance. As soon as the ice thaws, the balls will again correct the correct rotation of the wheel, changing their location. Pros of using a microbead:
Despite the positive effect of microbeads, there were also disadvantages in its use. However, the "fly in the ointment" is quite small. Firstly, the pellets are guaranteed to scatter when the wheel is unmounted. Collecting microbeads, in the presence of a waiting queue, is not very pleasant. Secondly, some of the balls will be lost when the tire breaks. But this already belongs to the category of rare situations. The main disadvantages of bead balancing:
The use of balancing pellets still brings more benefits than losses. Each car owner must decide for himself whether to use automatic balancing. nine0003
Canada is an industrial country. Its roads are criss-crossed by heavy vehicles. Therefore, automatic balancing was created primarily for trucks. That is, the development is addressed to large tires. But even after exceeding the speed limit of 110 km / h, the effect of the balancing granules disappears, this was noticed by the drivers of road trains. The effect of beads on passenger tires has not yet been fully explored.
If you have a strong desire to purchase balancing balls, you should take into account the operating conditions. As it became clear from the materials of the article, bumpy roads and private use of expressways can reduce the effect of automatic balancing to zero. But if you are a truck owner, then this type of technological innovation will most likely be useful. nine0003
Let's start with the simplest. We remove the protective cap of the fitting (photo 1), put a rag underneath so as not to splash the engine compartment with gasoline, and press the spool of the fitting with the sting of a thin slotted screwdriver. A thin, weak stream of gasoline indicates low pressure in the fuel rail - you will have to look for the cause. If gasoline splashes with good pressure, there is hope that the pressure is close to normal (2.8–3.2 bar), it remains to measure it with a pressure gauge. Service specialists do this with fuel pressure gauges with adapters. We will use a simple one, from a tire pump. It is only important that the measurement limit is at least four bar. You will also need a piece of petrol-resistant hose 150 mm long with an inner diameter of 10-12 mm, and two clamps to it. nine0003
Using the wheel valve cap, unscrew the spool from the fuel rail fitting (the pressure has already been released) (photo 2). We put the pressure gauge hose on the fitting and tighten it with a clamp. We turn on the ignition without starting the engine: after two seconds, the fuel pressure in the rail should rise to 2.8–3.2 bar and stabilize at this level (photo 3).
If it is significantly lower (about 1 bar) and remains so for a long time, the supply line 4 (see fig. ) must be checked - it is most likely clogged. There are two problem areas here: fuel filter 5 and fuel pump mesh 2.
Let's check the filter first. It is located under the bottom of the body near the gas tank (photo 4). If it's OK, let's look at the pump grid. We take the fuel pump out of the tank, remove the mesh and wash it.
Before installing the fuel pump, it is very useful to check the tightness and reliability of connecting its tube (arrow in photo 5) to the fuel line.
Of course, you will ask what to do if the supply line is clean, the pump is buzzing and the pressure is low. Change pump! He's worn out. nine0003
And it also happens that the pump is running, but there is no pressure in the rail at all! This happens in winter if there is a lot of water at the bottom of the gas tank. Freezing on the pump grid, it will interrupt the flow of gasoline into it. What to do? Make a fire under the gas tank, heat it with a blowtorch or other source of fire - in no case. It's better to remove the fuel pump and clear it of ice. Another option is for the leisurely: roll the car into a warm room and wait... By the way, in this case it makes sense to drain the water from the gas tank at the same time. It's hard work, but rewarding. nine0003
But now we have made sure that the pressure in the rail is normal. Does gasoline enter the engine cylinders? This is not a fact! The nozzles can become clogged, the fuel supply is reduced, or even stops completely. But sometimes the injectors do not receive a control signal, although they themselves are working.
We start the control with an inspection of the spark plugs. Wet means fuel is coming in. Dry?.. Then we will check the signal at the injector harness connector with a probe (photo 6). Yes, but are the candles dry? You will have to unscrew the mounting screws of the ramp and lift it under the intake manifold so that the injector nozzles become visible. Turn on the ignition and turn the engine crankshaft with the starter.