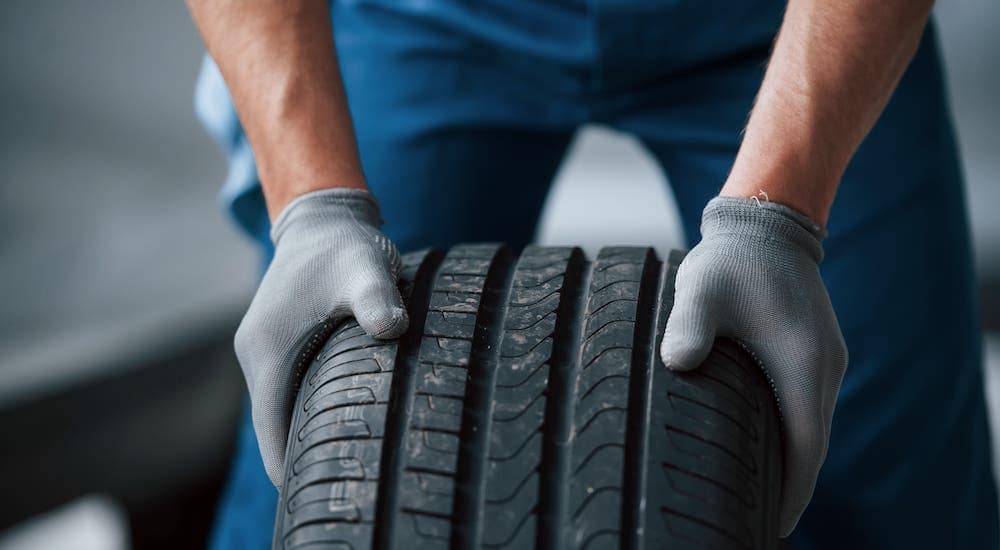
Cracks and scratches on your ATV plastics are bound to happen sooner or later. You could maintain and clean your ATV after every use, and still, you’ll end up with faded or scratched up plastic eventually.
To some people, scuffed up plastic on their quad is not a big deal. I mean, it’s not like it affects performance, handling, or anything important anyways. But there’s just something about the way it makes the machine look that I don’t like. So I went ahead and found the best ways to fix some of the most common ATV plastic damage you’ll encounter.
It’s a good idea to know why plastic fades to help you understand why the methods here work for restoring faded plastic. Basically, plastic starts to look faded because the oils in the plastic evaporate over time. The evaporation of oils in the plastic is sped up when the plastic sits in the sun for long periods of time.
Plastic is made from refined oil, and as the oil in the top layer of the plastic evaporates, the plastic is weakened and looks faded. Your plastics become more prone to cracks too the more you let it fade and weaken.
You could simply sand down the top layer of plastic, until you get to the part where the oil hasn’t evaporated yet. Then buff it out until it looks nice and new. But with this approach, you’re still weakening the plastic because you are actually removing layers of the plastic each time you do this.
Another method I’ve tried, is using a heat gun to help bring the oil in the plastic to the surface. This does work pretty good and makes the plastic look nice. But again, you’re not actually restoring oil to the plastic so over time, the plastic is getting weaker and weaker.
My preferred method, and what I recommend you try first. Is to get this Premium Plastic Restorer From Car Guys found here on Amazon. This way you’re not removing plastic, oil, or anything else from your ATV parts. In fact, this stuff is actually adding additives to the plastic to help get them to the condition they were in when they were brand new.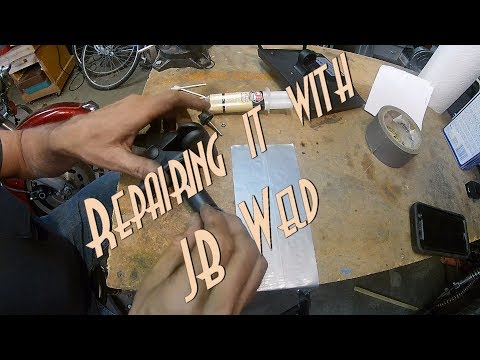 This particular plastic restorer also has some nice UV protection to help keep the plastic from drying out and fading in the future.
Keep in mind, this is not to repair scratches or anything like that. It is specifically to restore dry faded plastic. There are some other brands out there that will do the same thing, I’ve just had the most luck with this one. To be honest, this is way easier than sanding or using a heat gun anyway, and I don’t have to worry about the structural integrity of the plastic being compromised.
There are two types of scratches you’ll encounter most often, light scratches or deep scratches. Light scratches are the ones caused by branches or bushes hitting the plastics and leaving little visible marks. A lot of people don’t even bother with these types of scratches, and just chalk it up to wear and tear. But for someone spending a lot of money on a quad or ATV, I can understand wanting to remove even the littlest of scratches.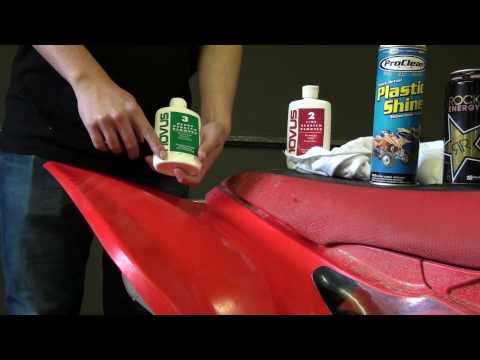
The best way I’ve found for removing light scratches is to go with some 1500 Grit Wet Sandpaper. Just use the sand paper over the areas with scratches and buff it out when you’re done. You could finish up with a coat of the plastic restorer I talked about above to make it look brand new.
Using wet sand paper could even work for medium to deep scratches, but I don’t like removing that much plastic from my ATV parts. For the deeper scratches you end up having to start with 400 grit or worse, and work your way up to 1500 grit to get a smooth surface. For me, it’s not worth all the time and energy sanding to just end up compromising the integrity of the plastics. Don’t forget, the more plastic you sand away, the easier they will crack.
So for deeper scratches I’ll use a plastic bonder/filler. My go-to is this JB Weld Plastic Bonder Gap Filler found here on Amazon. I’ll use this to actually just fill the scratches. It’s pretty easy to use, you push out some of the goop from each tube. It’s a 1 to 1 ratio and comes out at the same time. Mix it together and fill the deep scratches with it. The stuff sets in about 15 – 20 mins and you can sand it down after a half hour.
If you use a putty knife to clean off the excess after filling the scratch, it makes the sanding after much easier. This does set in a black color, so if you don’t want to have to paint afterwards, don’t use this method. I don’t paint after, and I don’t mind having the black filler here and there on the plastics. It’s better than having deep gouges in your plastics just asking to be cracked.
If you haven’t taken care of your ATV plastics, they could dry out over time and eventually crack and break. Or the more likely option, you hit something didn’t you? That’s ok, cracked plastics can usually be fixed without too much trouble. If you don’t want to spend the money buying new plastic parts, you’ll need to do it yourself.
For small little cracks you could try using the JB Weld I talked about above, but that only really works for cracks less than a few inches. But, you probably really messed your toy up bad, and for that, you’re gonna need something better.
I recommend using what’s called a hot staple gun. Like this Astro 7600 Hot Staple Gun Kit found here on Amazon. This thing is amazing and I’ve used it on more than just my ATV. It works by heating up these specially designed staples it comes with. The staples get set into the plastic making a nice strong bond, but still allowing the plastic to be flexible.
You just line up the pieces you want joined, and use the staple gun to staple them together. The staple is heated to it can sink into the plastic a bit, making a super strong bond. I always do the stapling on the underside of the plastic, that way you don’t see the staples. If you use this method, you will still see the crack on the upper side of the plastics. You can then use the JB Weld to fill in the crack, and then sand away any excess making a nice smooth surface.
Sometimes a piece of plastic from an ATV gets bent but doesn’t crack. That’s good, you don’t have to repair any cracked plastics now. But it can leave a discolored looking area on the plastic that doesn’t look right.
For fixes like this, I like to use a heat gun. It’s really kinda cool how well it works, you can watch the plastic change color as you hold the heat gun to it. Be careful though, too much heat can melt the plastics and there’s no coming back from that. Hold the heat gun a few inches away from the plastic and keep it moving side to side the whole time.
Any old heat gun will work for something like this. Heck, I’ve seen people use a propane torch with success. If you’re unsure what type of heat gun to use, check this Heat Gun from Amazon for starters.
That’s all there is to it. If you want to paint your ATV plastics a new color, check out this article: How To Prep And Paint ATV Plastics.
Sharing is caring!
ATV Riders Forum > ATV Riders Mechanical Section > ATV Steering & Suspension > plastic welding???
PDA
View Full Version : plastic welding???
spyder
03-07-2004, 01:39 PM
After a recent run in with one of darn trees at the last race i realized i broke the plastic mounts on my front fenders. my boss told me to have welded with plastic does any body have a clue how to do that or is he pulling my leg. Thanks:huh
jonc623
03-07-2004, 02:42 PM
he is not pulling your leg try a auto body shop some of them use a plastic welding machine i just use a drill and zip ties to fix plastic it may work for you
Out_Sider
03-07-2004, 02:44 PM
u can buy stuff like JB weld..its suppose to weld plastic
T.Hopp
03-07-2004, 07:03 PM
Plastic welding exists but its costly. My #1 hobby is white water kayaking. I see alot of cracked plastic. One of my boats suffered a 4" long crack on the bottom from a rock much bigger than I. I checked a couple places to have it welded and the cheapest place wanted $75 minimum to weld it. Also, Some plastics can't be welded because it is a mixture of different recycled plastics. It is due to the impurities in the remanufacturing process. Just passing on some info.
beak7707
03-07-2004, 07:09 PM
My friend just bought a plastic welder for 30 bucks.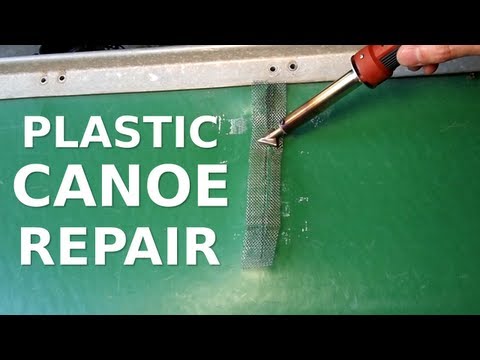 I dont remember the website where he got it at, but I'll ask him and get it for you. I thought it was going to be a joke but it works good. It looks like a sodering iron, and you just burn a v-shape along the crack, then fill it with the clear plastic rod. After we welded the plastic I was bending and pushing on it pretty hard and it didn't break. For 30 bucks you cant beat this thing, I'll get you some pics and the website.
Texan32
03-07-2004, 07:12 PM
perhaps he was refering to "fusing" the plastic. If one was so inclined, you could try to heat the plastic up enough to just start melting it. Then push the two sides together. It would fuse (weld) the plastic back into 1 piece.
Personally, when i cracked my front fender, i drilled a handfull of tiny holes on both sides of the crack. Then, i used picture frame wire and "sewed it up". So, it looks like my finders have been stiched up by an ATV doctor:blah:
4wheelboy
03-07-2004, 08:27 PM
i just use a sodering iron and run it along the plastics till they get soft an put them togther :(
James Parent
03-07-2004, 08:50 PM
JB weld is 4 bucks, i cracked my seat nearly in half. .
.
From the right side front to the left side almost to where the seat lock is (400ex) about a 2 foot crack.
i got some JB weld, cleaned the area really well, sanded it off (make it rough so it holds better) and applied the JB weld. I was supprised because it smoothed out by itself, and was hard in about 15 minutes ( theres two types.. 4 day and a 4 hour.. I recommend the 4 hour) its worth it...
after that i applied some Plastic renew.. you can't even tell, its perfectly new
James Parent
RideRedEX
03-08-2004, 06:38 AM
the website that beak7707 was talking about is www.urethanesupply.com just do a search for plastic welder they sale a special kit called atv fender welder. it works great
lil400exman
03-08-2004, 01:02 PM
is the 4 day a stronger bond james?
beak7707
03-08-2004, 09:07 PM
I've used both, and I think the fast drying holds up just as well.
brandonpeake
03-09-2004, 08:45 AM
yeah i used to put in natural gas lines and i fused the plastic pipe together with what looked like a spatula and it got 600 degrees F on each side and made lips on the pipe and u stick it together with another machine, so i can be done and work well
i think
harbourfreight.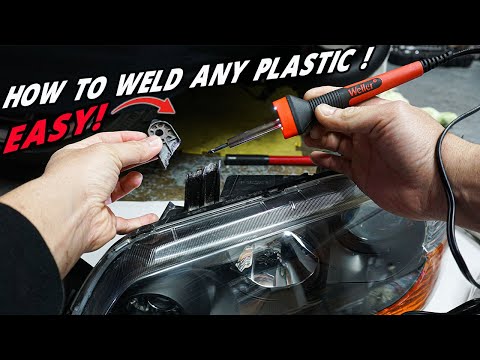 com sells them for cheap
WKY400EX
03-09-2004, 10:43 AM
Like brandonpeake said, check out Harbor Freight. Here's a link to the plastic welder. (http://www.harborfreight.com/cpi/ctaf/Displayitem.taf?itemnumber=41592)
James Parent
03-09-2004, 07:27 PM
i just recommended JB weld because its only 3.99$
I think the slow and quick dry are the same strenth..
the quick is better though.. especially if you need to do something upside down or don't feel like holding the two peices together for a long time.. just let the stuff harden for about 2 minutes and then its really sticky... on the JB Weld tubes it says you don't need any clamps or anything for the 4 hour.
james
You can pick this up at Pepboys or that new auto store Auto zone?
Black400
03-09-2004, 10:30 PM
eastwood.com has plastic welders.
the_hulkamaniac
03-10-2004, 09:21 PM
Yeah go with the plastic welder.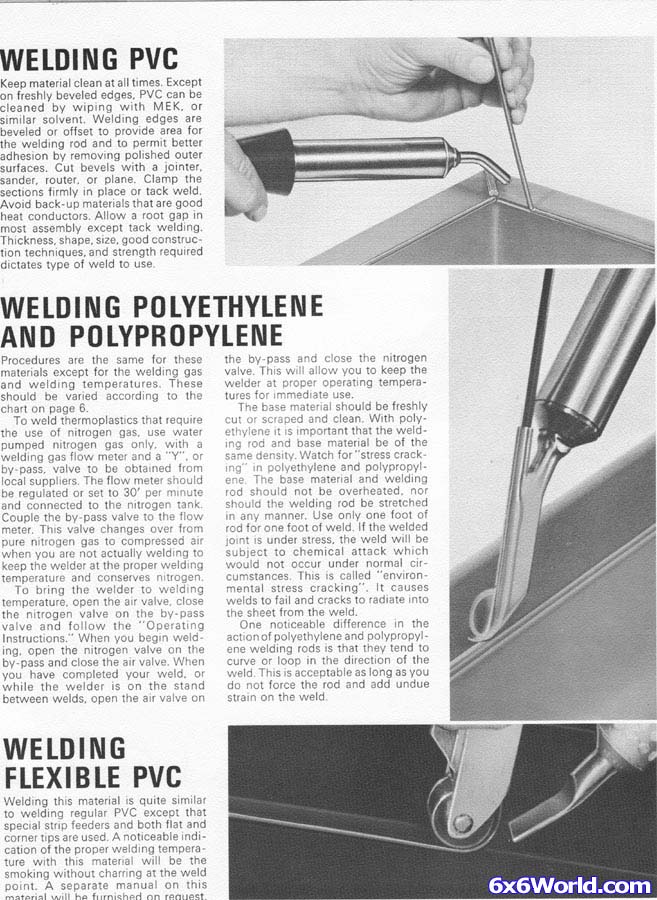 I've done my 250r a few times, and some friend's quads. Once when the fender was 80% cracked off.
Fuse welding is ok but you will still need some material to go back in the crack. You do have to "V" the crack either with the element, utility knife, or a dremmel. 1/16 to 1/8 is all you will need. Most of the polymers they will give you "WILL NOT" stick! Either shave off a 1/4" from the outer edge of a fender, or find a friend with broken fenders and cut strips off it.
Then work in sections, aprox 3-4" long, also stagger the sections, on big cracks. This is to keep the plastic warm, and ready to accept the weld. First lightly fuse weld it. Then go over it again this time melting some of the cut plastic directly into the weld. Work slowly so it can melt completly through. Go to long and it will drip on the other side. You can make a second pass on the opposite side of the first weld to ensure it's good. Oh yeah 1/2" wide weld is good enough.
Either side will do.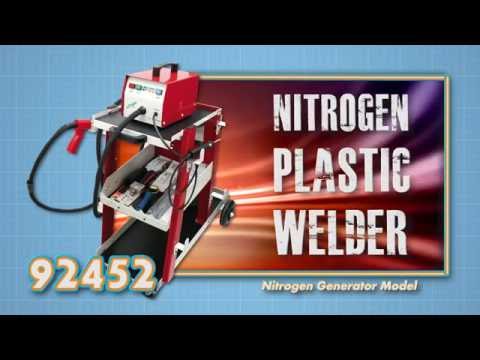 If you can't stand the look of it get a plastic renew kit sand and buff the weld. She'll be good as new.
Again my 250r has held up well for over a year now. I used red plastic to weld my factory white. Looks kinda cool.
Good luck
p.s. Do it some where ventlated/outdoors. The fumes can make you sick.
Powered by vBulletin® Version 4.2.1 Copyright © 2022 vBulletin Solutions, Inc. All rights reserved.
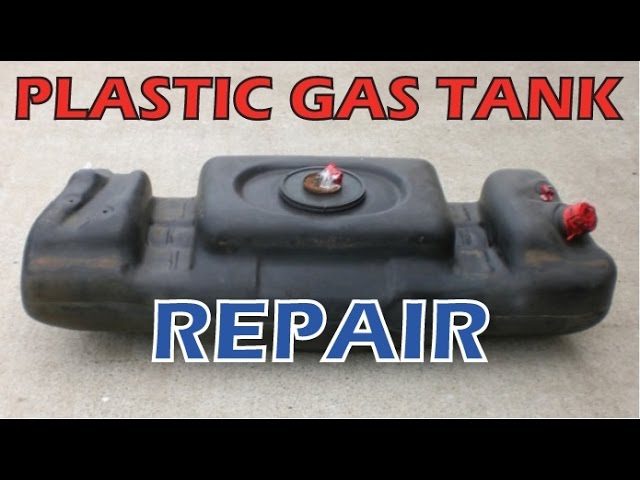
Many modern motorcycles are replete with plastic panels, they are needed to create a complete look of the bike, improve aerodynamics and protect important components. In order to protect these parts from damage, modern polymers are made flexible and impact resistant, but even this does not save the motorcycle from falls and accidents. In such cases, the manufacturer offers to replace the part with a new one, which costs a lot of money. We have prepared several affordable options for how to make plastic on a motorcycle with your own hands.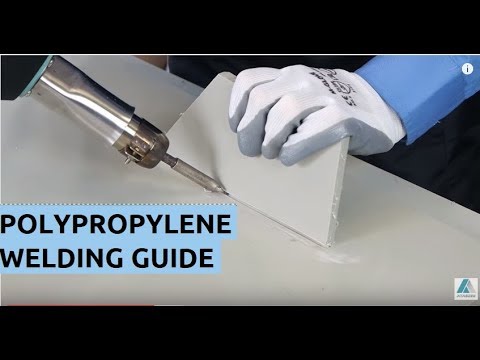
First of all, it is necessary to determine the degree of damage. With the proper approach, it is possible to restore a completely broken part, but sometimes it will cost at the level of buying a new one. If the damage is relatively minor and relates to a structure that does not carry a critical load, such as part of the body of a motorcycle (maxi scooters), then cosmetic repair methods are suitable.
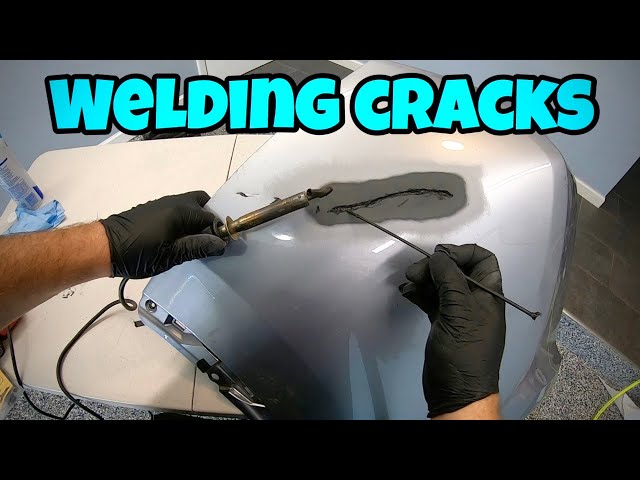
Cracks, chips and gluing together several pieces of plastic can be done using hot air soldering or a soldering iron. Responsible, load-bearing structures, as well as parts with a high degree of damage, are best repaired using methods that involve restoring the mass of a plastic part and its characteristics (stiffness, elasticity, etc.). In cases where plastic can no longer be repaired with a patch or gluing, there is an option to detail from scratch. To do this, you will need to carefully study the entire modeling process, have a lot of summary time and nerves.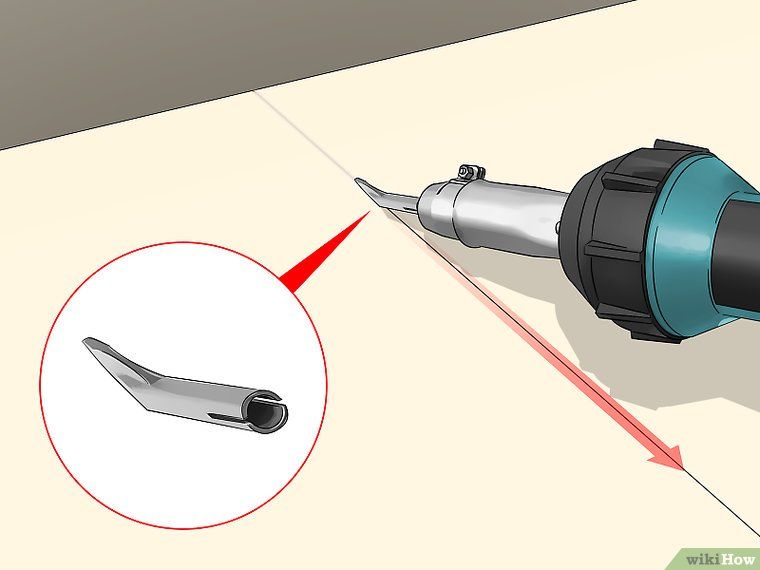 Often, in such cases, it is easier to purchase a used spare part and repair or even buy new plastic.
To repair the plastic of a motorcycle with heated air, you will need a building hair dryer, but not any, but with a temperature controller. You can use the cheapest device, but then there is a risk of overheating the plastic, which will lead to the loss of its basic properties. Overheated material will be brittle and may break under the vibrations from driving on normal roads. You will also need a special nozzle with a thin nozzle, about 5-8 mm.
In addition to the hair dryer, you will need a large piece of plastic identical to the one being welded. To do this, you should pay attention to the marks of the part, most likely you will have a product of the PP, RA or ABS brands in front of you. Polypropylene PP, for example, melts at 300 degrees, and starts to burn at 350, so it should be welded at a temperature of 300 - 340 degrees. Polyamide or PA should be welded at 410 - 460 degrees, ABS at 360 - 400.
Soldering process:
Advice. If the plastic twists a lot initially, then for ease of working with it, you can fasten it with brackets.
 As the plastic melts, it will fill the seam, you can help this process by lightly pressing on the plate, at the moment when the material has become quite liquid.
 Such a repair of motorcycle plastic with your own hands is practically no different from the previous one. The main difference will be the tool used.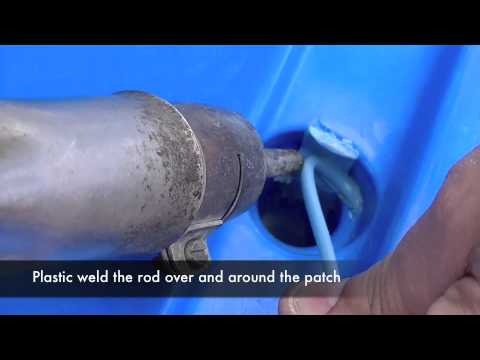 You will need a high power soldering iron that you don't mind getting dirty. The type of material to be welded and the appropriate solder are also important here. The latter can be found in the form of special tapes in stores.
Welding process:
Advice. With proper skill, you can simultaneously make a hollow and fill it with solder.
So the process will take much longer and require more concentration, but the layers of plastic will hold on better, which means that the connection will be more durable. If you did everything right, then in the end you will get a strong seam that looks rough on the inside, but with the outer one is almost perfectly even. This can be achieved due to the deep penetration of the mass during the formation of the recess.
Note! Some advise using reinforced metal mesh to strengthen. This option only makes sense if you are working with fragile low quality material that is not able to bend.
Motorcycle plastic repair can be done by gluing parts together.
For this we need:
Bonding process: First of all, we remove the defective part, thoroughly wash it with hot water, then clean the areas around the cracks and the ends of the chips, and finally degrease the treated parts. Next, we dilute the resin with a hardener, keep in mind that the material will keep in a plastic state for 2-4 hours, so it is better to cook it in small parts. If you add a little castor oil to the mixture, it will turn out to be more ductile, which is especially important for flexible plastics. The finished resin, on the inside of the part, is applied with a brush in one layer. Next, we put a layer of fiberglass with a width of not more than 5 cm and cover it with another layer of glue. In total, 3-5 layers of mesh should be obtained, and the final layer is glue. Remember! All work with epoxy resin should be carried out with gloves and goggles. Upon completion of work, the part is left to dry for a day, at room temperature. A sign of the hardening of the material is the absence of adhesion and the strength of the structure. You can press lightly on the seam to test its strength and to make sure the material has set. If everything suits, the repair is completed, otherwise we completely remove the layer and apply a new one.
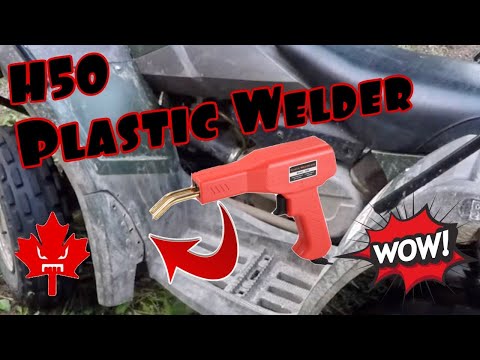 There is still the outer part, but it should be treated with putty to prevent damage and then painted over. Gluing is needed to create a strong base, and the final work is best done with more workable materials.
Speaking of motorcycle plastic restoration, do not forget about the complete replacement of missing or damaged parts. Here we divide the process into making the panel from scratch and making the missing piece. The hardest part is making the part yourself. It is possible to completely repeat the factory forms only from fiberglass. The process is very long, not the cheapest and suitable only for enthusiasts. Initially, you should make a matrix that repeats the shape of the future part. A layer of fiberglass and resin is gradually applied to the matrix, thereby forming the part. Then the product is sanded, primed and painted. Such a detail will last exactly until the next incident, because fiberglass is very fragile, and its repair does not make sense due to the loss of rigidity of the entire structure.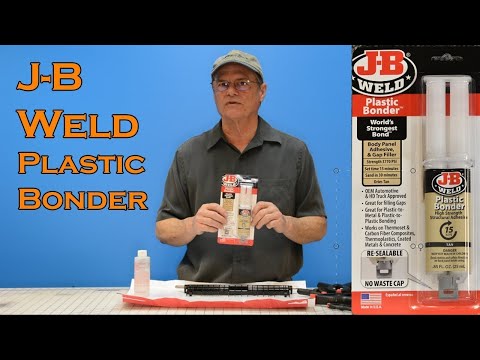 Finally, plastic repair can be done with a piece of plastic of suitable composition and size. From the workpiece, you should cut out a shape that repeats the missing part. The method is suitable for straight sections and with a slight spherical bend. A bend can be obtained by heating the part, shaping it and fixing it until it cools.
Articles
20 Feb
At first glance, it may seem that assembling a homemade ATV is not an easy task. In fact, everything is much simpler than it seems, with the necessary parts and tools. An all-terrain vehicle of this type is usually constructed from parts that can be found on any unused motorcycle that is in decent working order.
To assemble the machine yourself, you may need the following tools:
• Welding machine.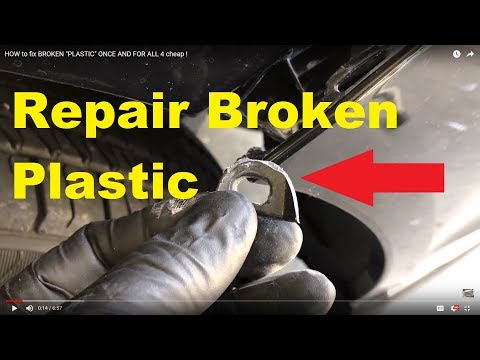
• Bulgarian.
• Good set of ring and socket wrenches.
• Other small tools such as pliers and screwdrivers.
To assemble the ATV, you will need a small room with good lighting and heating. If you assemble in the summer, you can sit under a canopy.
As a power unit for a homemade all-terrain vehicle, engines from Soviet-made motorcycles such as the Ural or Dnepr are suitable. For lighter and more maneuverable equipment, you can use units from motorcycles such as "Java" or "IZH", which were equipped with single-cylinder two-stroke engines.
To simplify the design of the future ATV, together with the engine it is better to use the same transmission and drive with which they were originally equipped. To design a machine with all-wheel drive, you will need to install an additional gearbox. This is extremely rarely used in home-made devices, since it will be difficult to implement an additional node without a sharp increase in weight at home.
The frame for a DIY craft is usually made from scratch. As a material for the frame, you can use blanks from an old motorcycle. The pipes from which they are made are light in weight and have the necessary strength and flexibility. In extreme cases, you can choose the material yourself. Here the main parameter will be weight. Excessively thick pipes or profiles will make the ATV very heavy and unbearable for fast and maneuverable riding.
Shock absorbers with springs from the same motorcycles can be used as suspension. The suspension itself is made in the form of the letter "A", and is movably fixed on the frame. Shock absorbers and springs should be selected in such a way that they can withstand the weight of the future car, and provide a smooth ride with good handling on bumps and pits.
Partially motorcycle steering can be used, with the addition of two-wheel drive. The drive is carried out by adding levers and ball joints to the design, which can be borrowed from the car.