As a car owner, you need properly working tires for a seamless driving experience; however, your tires could still develop problems despite the introduction of the more advanced tubeless tires.
Tire leakage is one of the most common issues for most drivers because it happens unexpectedly. If your tire has a leak around the rim, how do you fix it? Here’s all you need to know!
Tires leak air around the rim because of punctures, tire bead damage, ripped tires, rim problems, or deteriorating valve systems. To fix the leak, drivers have to remove the tire to reseat the bead and reseal, which can be done at home if you have the appropriate equipment or with the help of a mechanic if the inner-tube tires need fixing.
For more information about what causes the tire to leak around the rim, how to fix and prevent it, and how much it will cost to repair your tires, read on!
Identifying a rim tire leak can be difficult to notice at first if your car has a slow leak; however, if your vehicle has a built-in tire-pressure monitor system or TPMS, you’ll get a low-pressure notification because the leak causes the PSI )pounds per square inch) to decrease.
If your tire is leaking, here are the reasons why this could be happening.
Tire Puncture
Once you run over a sharp object, you could puncture your tire. While most drivers assume that the puncture will cause the tire to go flat immediately, this is not usually the case, and the hole might cause a slow two-to-three PSI leak per week.
In some cases, the sharp object like a nail can remain lodged in the tire, which prevents the air from leaking out quickly.
Whether it’s a minor damage or not, you shouldn’t ignore the leak as this may lead to extensive tears and tire damage.
According to The Inflator, approximately seven tire punctures occur every second in the U.S. alone; therefore, this is the first thing you should check for when there’s a leak.
Valve Stem Damage
Valve stems are critical parts of the tire system, and they come in different forms and sizes depending on the tire.
These stems are the tiny protrusions on your tire that you unscrew during inflation; therefore, they need to be in good shape, without any damages or dirt-clogged.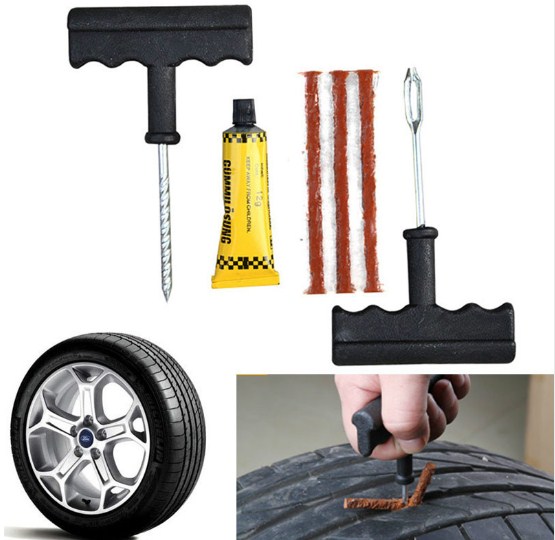
Additionally, when valve stems get exposed to elements over time, they become worn out or corroded, which can cause the air to leak around the rim.
Bead Leak
Tire leaks can also result from bead damage, where the tire seals itself to the rim.
To know whether the bead is the problem, you’ll need to determine how old the tire is because if your tire has dry rot or is older, it may no longer seal properly and have reduced elasticity.
Additionally, beads also get damaged because of a corroded rim or when the tire is mounted or removed using a tire lube.
Your entire wheel gets this type of damage if you regularly hit potholes or bumps at high speed, deforming the wheel’s metal surface, which may cause the tire to pull away.
Keep in mind that if the bead is damaged and you can’t seal the tire to the rim, you have to replace the tire.
Rim Issues
If you are using aluminum or magnesium alloy wheels, your wheels are more susceptible to corrosion, which affects the part where the rim meets the tire bead.
Rim damage can be caused by several causes, especially if you are constantly driving on bad roads with many potholes.
Before installing new tires, ensure your technician checks the bead seal and wheel correctly to confirm that the rims are not corroded.
Furthermore, check for wheel porosity that causes air to leak from the rim due to corrosion, incorrect wheel weights, or poor casting. To fix the leaking issue, avoid injecting a tire sealant and fix the rim first.
Once you discover that your tire is leaking air around the rim, what next? Here are some steps to guide you.
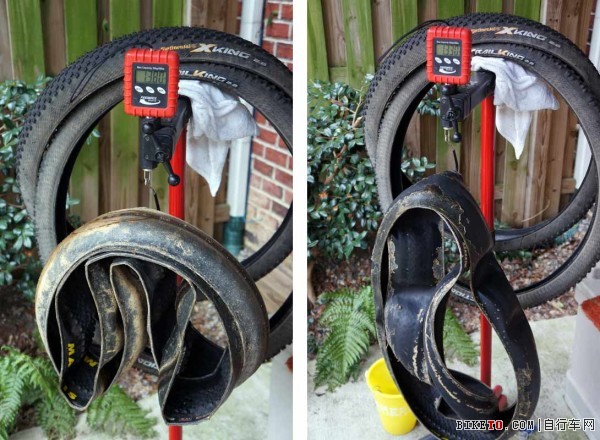
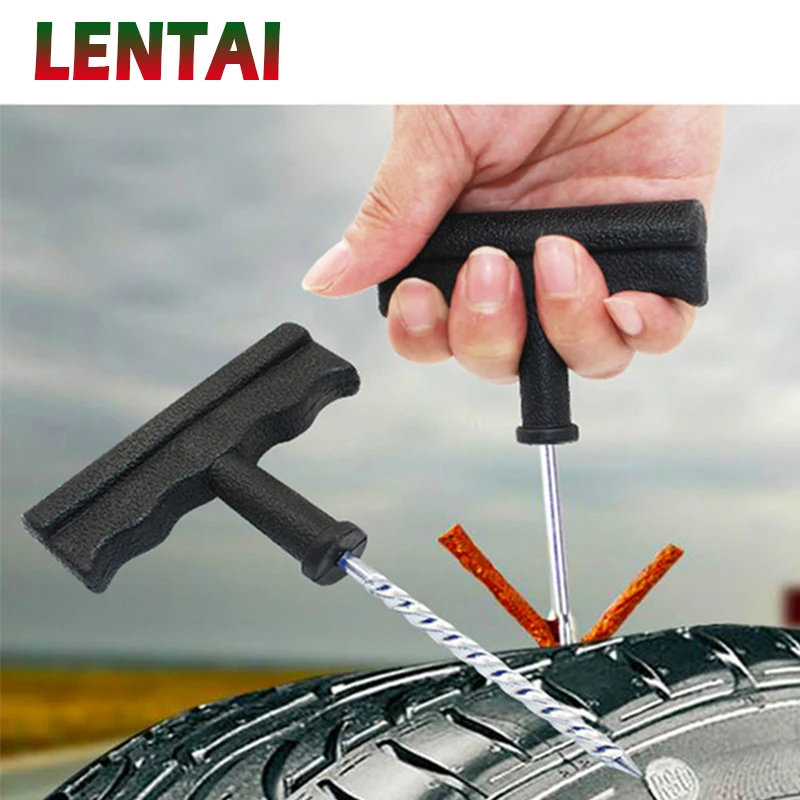
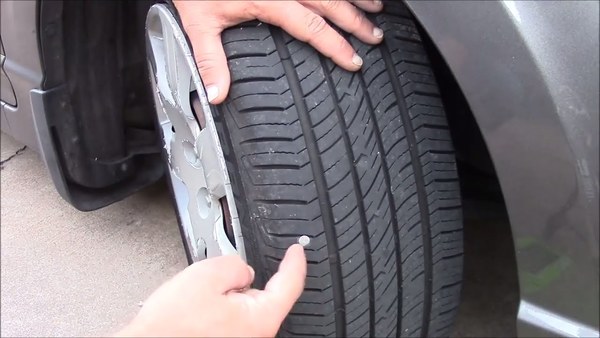
1. Remove The Tire
To identify the cause of the leak, you’ll need to remove the tire and place it on a flat surface with the valve stems facing up.
2. Fill The Tire And Rim With Soapy Water
Add soapy water to your tire; around the outer edge of the rim, the area of the leak will be identifiable through bubbles from the leaking air.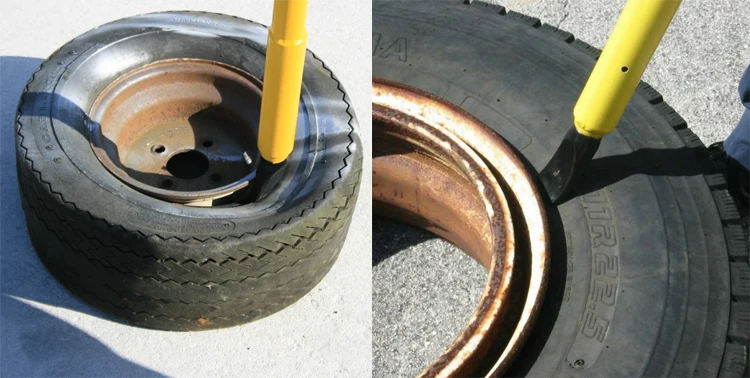 Mark the area and move to the next step.
3. Release Air From The Valve Stem
After you’ve marked the area, empty the air from your tire by pressing inward on the valve system using the valve removing kit in your car or unscrewing it from the stem.
4. Separate The Tire and Rim
Since the tire and the rim are attached with a seal, you’ll need something heavy like a wood board to separate them.
Use a hammer to hit the wooden plank until the tire’s bead breaks free from the rim.
5. Clean The Tire and Repair
Once the two parts separate, you can stop the leak around the rim by cleaning the tire’s edges with a cloth to remove loose debris and dirt.
After the cleaning is done, you can add some repairing solution to the leakage and start filling the air.
Once you fill the tire with the desired air pressure, you can check again for any leakages using the same process with soapy water.
Fixing a tire rim leak can be expensive or affordable, depending on the leak’s cause and where you get the service done.
According to customer reviews, if you get the leak repaired at the shop you bought the tire from, you are more likely to get this service for free, but if you go to a different dealer, expect to pay $10-$20.
However, if the leak is because of a damaged rim, you’ll incur more costs which vary greatly depending on the brand.
If you check popular online sites, rims’ prices range from under $25 to $200; therefore, it will cost you more to repair the leakage if you have to replace the rim or entire tire.
To avoid this tire leak, there are some preventive measures that you can take.
Regular Maintenance
As mentioned above, tire leakage can result from valve stems or rims that are dirt clogged; therefore, you need to check your tires regularly.
With more accidents connected to tire blowouts and issues, it’s safer to have your tires checked for any potential problems to prevent leaking around the rim.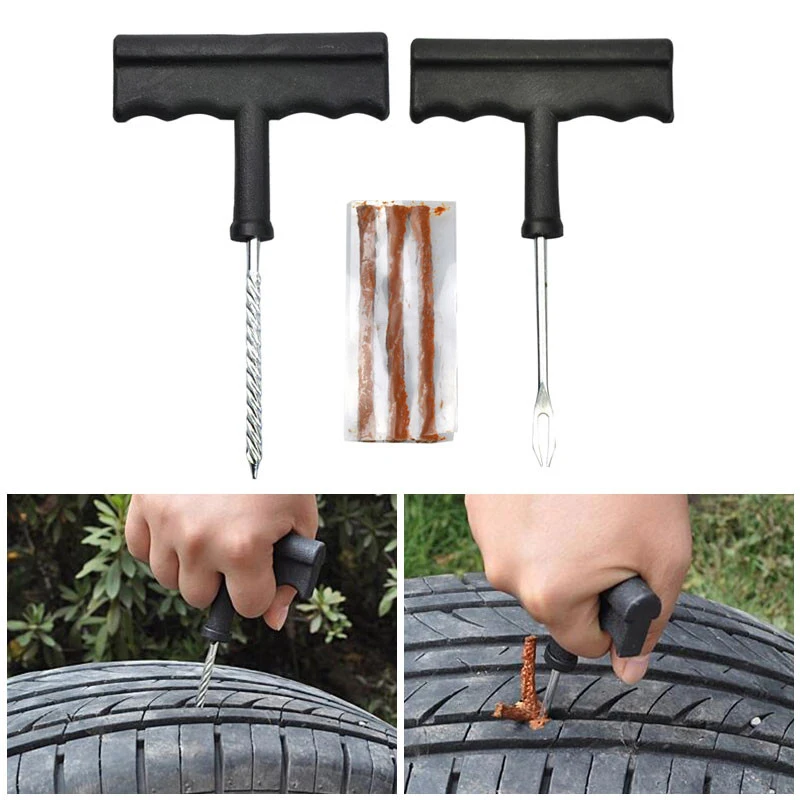
Drive Carefully
We have already established that punctures are the number one cause of tire leakage; therefore, if you can, it’s best to avoid situations that could cause punctures.
To achieve this, you should drive more carefully and at recommended speeds, especially on roads with potholes or speed bumps.
Avoid Overinflating Tires
Overinflating tires doesn’t solve a tire leakage problem. Once you identify that air is leaking around the rim, follow the above steps I shared to fix the issue.
However, if you choose to overinflate, the tires will become unstable, rigid, and lose traction when you are driving.
Use A Professional Mechanic
According to the U.S. Tire Manufacturers Association, drivers should supplement their monthly inspections with regular professional tire care.
The check should include wheel balancing, alignment, and tire inspection to protect your tires from leaking air.
To find out more, you can also read our posts on how common are flat tires, underinflated tires, and how long will tires last with bad alignment.
Tires leak air around the rim for several reasons, but luckily this problem can be fixed and prevented.
While it’s possible to fix a leak at home using the kit from your car, you can also enlist the services of a professional mechanic if you spot extensive damage.
I have shared some simple steps that you can take to fix the leak, especially if you are doing it at home.
To avoid these tire problems, regularly check your tires for air pressure and damages at least once a month, consult professional mechanics, and drive carefully to avoid incurring extra repair costs.
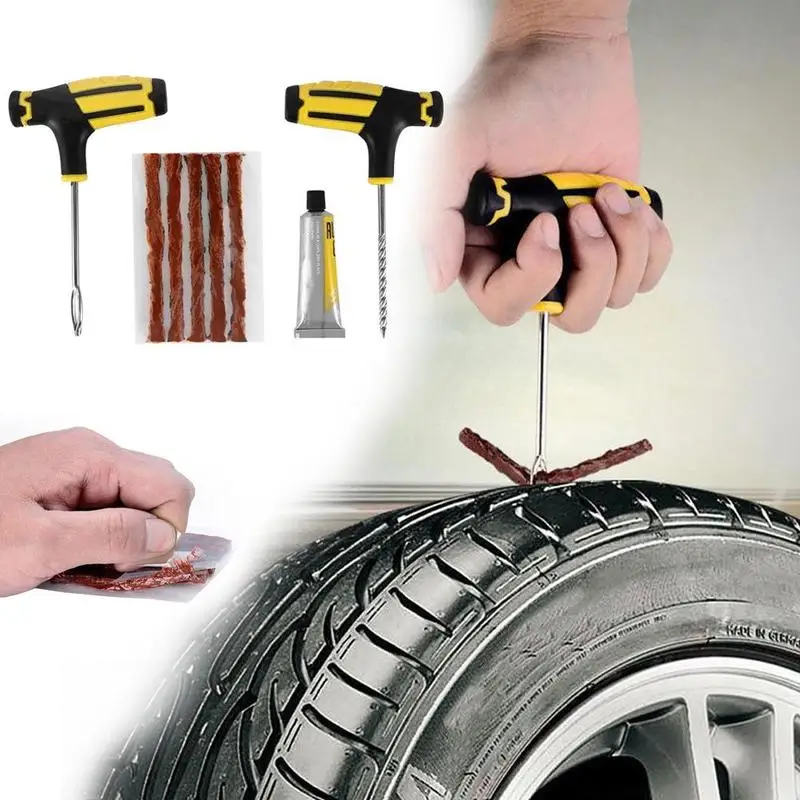
Leaks along the tire bead are relatively common in ATV tires regularly run in mud, sand, and rough and rocky surfaces. This type of leak is typically relatively small, allowing the air to seep out overnight or over a few days.
To fix a leak at the tire bead on an ATV tire, you have several alternatives where these are the most common:
Each of these methods has its pros and cons to consider. Depending on your specific situation and what is causing the leak, one approach may be better suited over the other. We’ll cover each of them in detail in this post.
Bead leaks happen when the tire does not seal properly against the rim’s bead in a tubeless wheel. The bead area of the rim needs to be completely clean and undamaged for the rubber to make a tight seal against the rim.
Typical causes of bead leaks on an ATV tire:
Disassembling the tire from the wheel and addressing the issue causing the leak should be your primary alternative if you have the required time and tools. If performed correctly, it will provide a permanent repair without any of the cons that come with the other alternatives.
Pros:
Cons:
You may or may not already know where the tire is leaking. Even if you suspect that the leak is near the bead, it’s a good idea to verify exactly where the leak is located and make sure there are no additional leaks before moving on.

Use a valve stem removal tool to remove the valve stem. This will completely deflate the tire in just a few seconds. Alternatively, you can use an air-down tool to remove all the air. However, this method is more time-consuming than removing the valve stem core from the tire valve.
Depending on what is causing the leak, you may or may not have to break the bead to address the issue adequately.
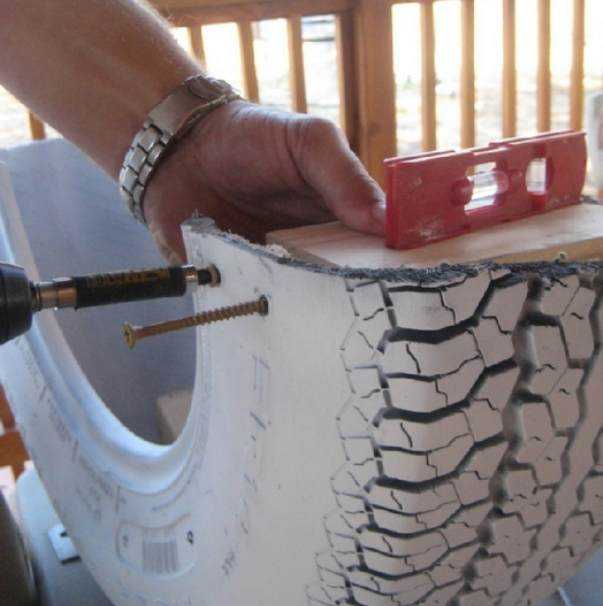
If the leak is caused by dirt caked in between the rim and tire, but the rim is otherwise undamaged, you may get away with pulling back the tire slightly for cleaning.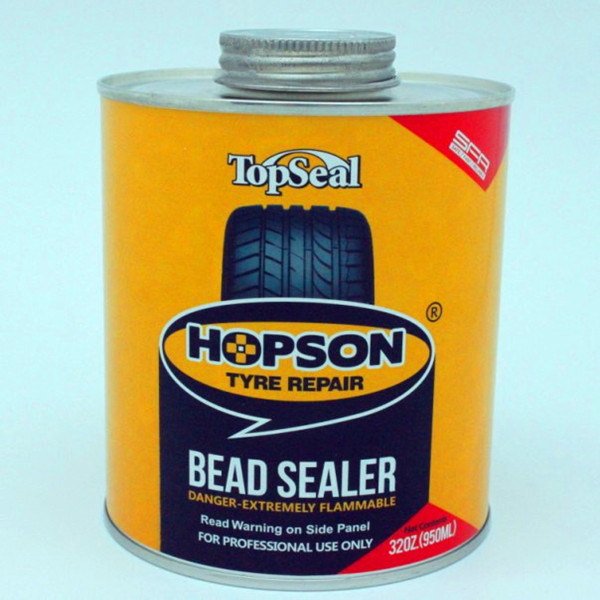 You can do this by finding a way to apply weight to the tire’s sidewall until there is a small gap between the rim and tire.
Cleaning without breaking the bead is easier on larger tires such as car tires or tractor tires. On smaller ATV tires, it’s less fiddly if you manage to break the bead completely. The result should be better as well.
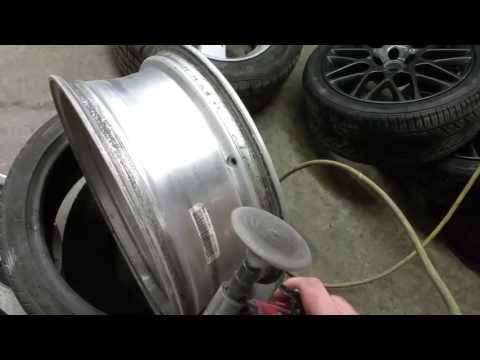
If the rim is corroded or damaged, you are better off removing the tire from the rim entirely for proper access to the affected area.
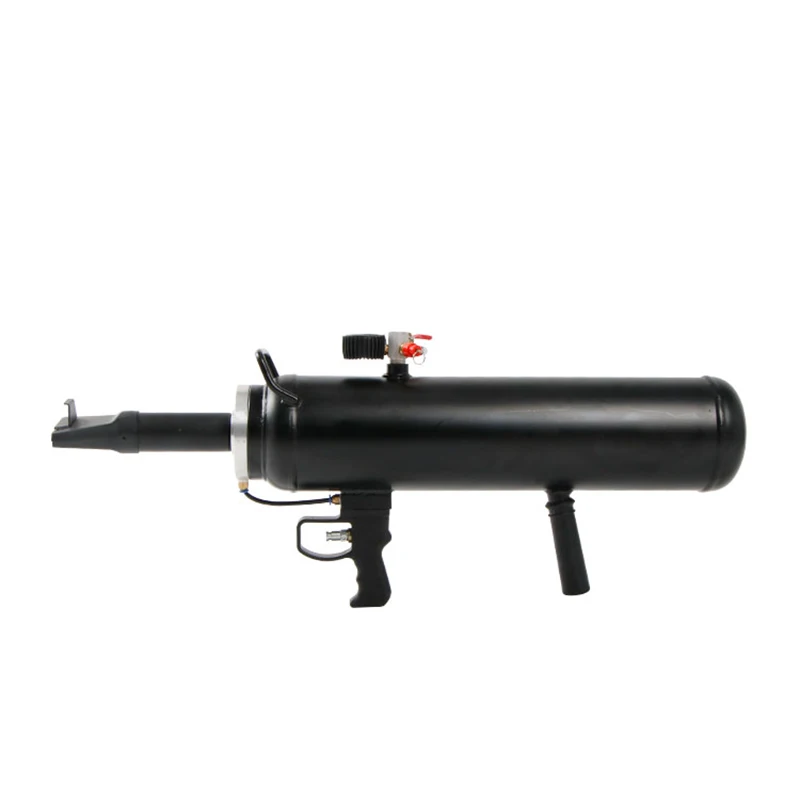
There are several ways to break the bead of a tire at home. My personal favorite is using a portable tire changer tool. These are readily available, relatively cheap, and work well on most ATV tires.
I recommend bolting the tool to the floor if possible. I installed threaded concrete bolt anchors to remove the device when not in use. A bolted-down tool ensures more control of the process and better leverage.
Tip: To boost the success rate and reduce the risk of tire sidewall damage when using this type of tool, leaves a tiny amount of air still in the tire before you break the bead. This will prevent the tire sidewall from giving in, causing the tool to slide out of position as you apply pressure.
As a cheap alternative to a store-bought tool, you could consider making a DIY bead breaker like the one I used before buying a dedicated tool.
Two pieces of wood and a couple of strong hinges give you a decent bead breaker in no time. Remember to cut the short piece of wood at about a 15 degree angle for better grip by the rim.Check this post for a few other ways of breaking the bead on an ATV tire.
This is how you break the bead:
A bead-breaking tool can be worth the investment, particularly for ATV owners who struggle with tire issues regularly.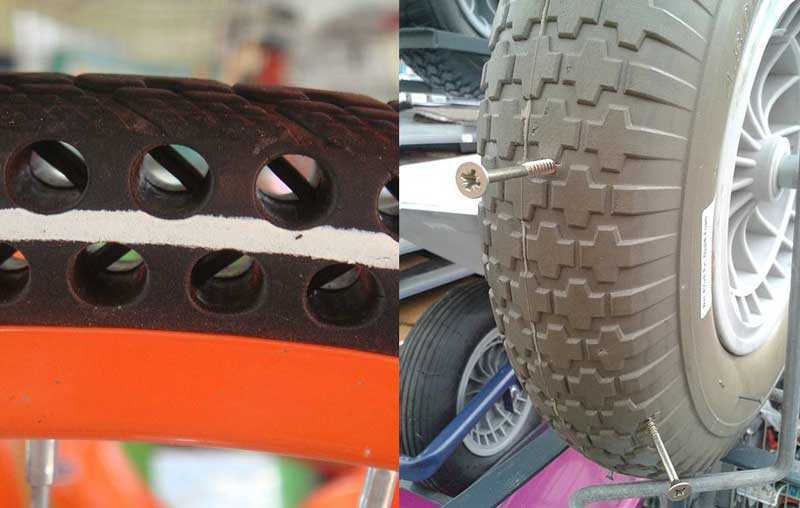 You should feel it when the tire pops over the bead. When the rim and tire are about two inches apart, you know that the bead has been broken. Ensure the tool stays in place throughout the process and does not slide down the tire sidewall.
After breaking the bead, you need to find out what issue is causing the leak. Use a flashlight for a good view. Look for dirt, corrosion, or rim damage; Sometimes, you may even find more than one issue that needs to be addressed.
Continue as described below according to your observations.
When you ride in dirt, mud, or sand, small particles and debris may begin to work their way in between the rim and tire. As more dirt builds up, it creates space for even more dirt until it eventually breaks the seal and causes a leak.
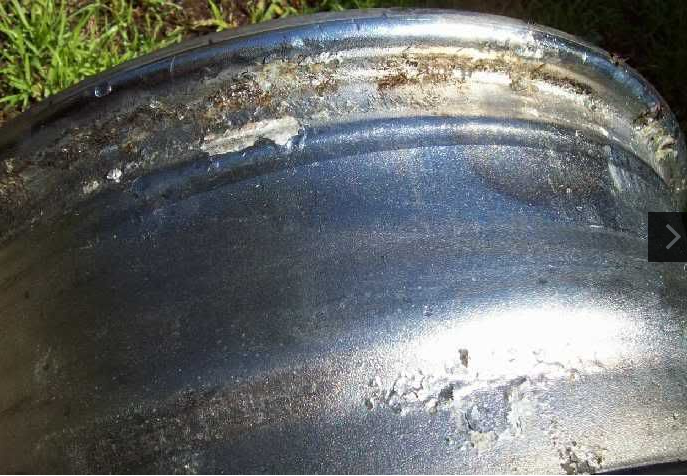
Both steel and aluminum rims may rust or corrode, but steel rims are particularly prone to leaks caused by rust.
Dirt and sand trapped between the rim and tire may wear down the paint over time, eventually causing the exposed metal to rust. Metals expand when they rust, creating gaps and an uneven surface that lets out air.
To fix a corroded rim, you need to remove the corrosion and apply a coating to prevent further corrosion issues.
Consider sandblasting and powder coating the rim for an even better and more professional result. I won’t detail how to do this in this post as it requires tools that typically only enthusiasts or professionals have access to.
The same method applies if the paint on your rim is flaky and starts to come off.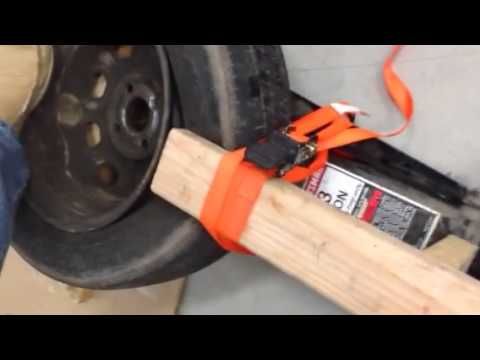 Sand down all of the affected areas and apply fresh paint.
If you hit a rock a bit too hard or scrape the side of your rim against a hard surface, the rim may become damaged, preventing a tight seal.
You can repair minor nicks and dents by removing the tire from the rim and smoothing out the damaged part with a Dremel tool or fine-grit sandpaper.
Larger dents or cracks that may affect the rim’s structural integrity should only be addressed by a professional. Visible cracks left unattended may expand gradually until complete failure down the line. While tire sealant or installing an inner tube may keep a cracked rim airtight, it should only be considered a temporary fix.
Before you seat the tire back onto the rim, please take note of the maximum air pressure the tire can safely handle. Never, under any circumstances, exceed the specified max air pressure.

Bead sealer is specially designed to seal troublesome bead leaks that otherwise are hard to repair. It also helps prevent leaks, making it a good option for those that regularly find themselves with bead leaks.
Pros:
Cons:
Bead sealer is applied as a thin coat to the inside of the rim where it touches the tire. Follow the supplied instructions carefully for a good result.
Another option to try if you don’t have access to bead-sealer is a quality silicone sealant, applied the same way as the bead sealer.
Ensure not to inflate the tire before the bead sealer or silicone has completely set, as it will force out the sealant.
When you’re out on the trail and don’t have the tools or time to fix the leak properly, or if you’re simply looking for a quick fix, consider using a tire sealant such as Green slime.
Pros
Cons
Another option to fix a stubborn leak is installing inner tubes in a tubeless tire. However, tubes in low-pressure off-road tires are not always the best option.
Pros
Cons
Check out this post if you want to learn more about the pros and cons of installing tubes in ATV tires.
Sadly, there is no way to prevent bead leaks altogether. But, by applying one or more of the actions below, you will significantly reduce the risk of it happening.
If you know that you ride in a way that dirt will build up and eventually get a leak, it is better to clean when you have tools and time. Implement cleaning the bead into your maintenance.
How often you should do this procedure depends on how much and under what conditions you ride, but once a year could be a good starting point.
Bead sealer does not only help seal current leaks, but it also helps prevent new leaks down the line. The sealer keeps the gap between the rim and tire shut, so that dirt cannot begin to build up.
Inner tubes not only fix current leaks but will also help prevent upcoming leaks from causing any issues.
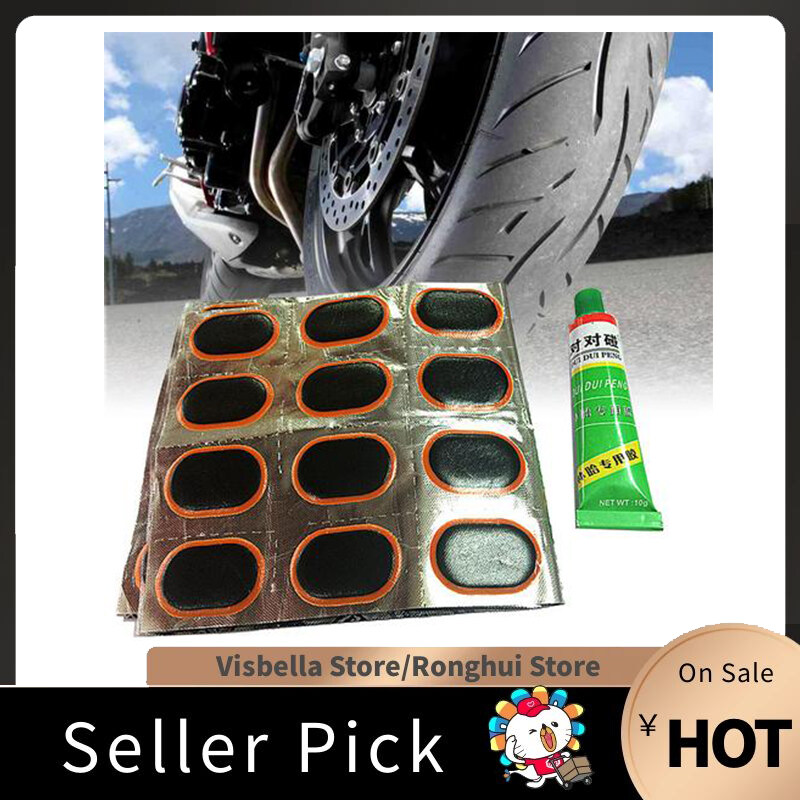
There are several different ways to fix a leaking bead on a tire. You can use sealant, patch or replace the tire.
If you have a small leak, you can use sealant to fix it. Sealant is a sticky substance that is applied to the outside of the tire and helps prevent the leak from reoccurring. To use sealant, first make sure the tire is inflated to maximum pressure. Then apply sealant to the area where the leak occurs. Make sure you cover the entire area around the hole with sealant. Once you have applied the sealant, wait for it to dry before driving.
If you have a large leak, you will need to patch it instead of using sealant. Patching means you take off part of the old tire and put on a new one so that there is no more leak. To do this, first make sure your car's air pressure is at maximum level, and then remove the old tire by unscrewing its bolts. Then find an identical replacement for your tires and install it back in reverse order (the front wheel should be facing back). Finally, screw in the bolts and inflate the new tire to maximum pressure before driving.
If a tire needs to be replaced because of a large leak or there isn't enough room for patches or sealants, here's what you'll need to do: remove both of your car's wheels and remove each individual bolt from each wheel rim. (You may need help from someone else). Then find an identical replacement for your tires and install it back in reverse order (front wheel facing backwards). Finally, screw in the bolts and inflate the new tires to maximum pressure before driving.
Fixing a leaking bead on a tire can be tricky, but there are a few steps you can take to prevent the problem from reoccurring. First, make sure the bead is properly seated in the tire. fix the problem. Also, check for cracks or holes in the wheel rim that could allow air to escape from the tire. Finally, replace the tires if they are worn and start to leak.
There are several reasons why your bead may start to leak. The most common cause is a rupture in the rubber casing that surrounds the bead. Over time, this rupture can allow air to seep into the tire and cause pressure loss. Another potential cause of a bead leak is a defect in the manufacturing process , which leaves small holes in the rubber casing. Finally, if you have an old or worn tire, it may not hold air pressure and eventually leak. Either way, there are a few simple steps you can take to fix a leaking tire bead.
If you notice that your tire is rapidly losing air pressure, the first thing you should do is check for tears or defects in the carcass around the bead. If there are no obvious problems, you may need to completely replace the tire.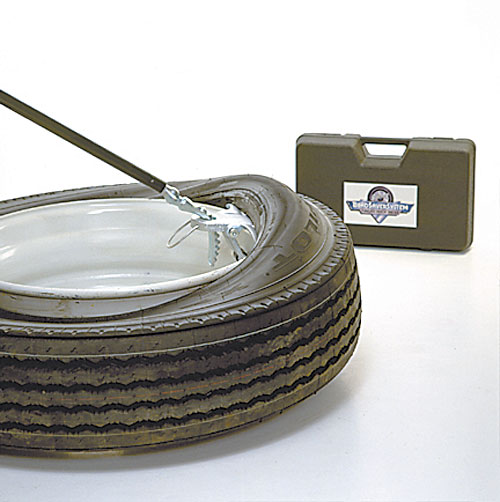 the hole is only in part of the casing, try to patch it with tape or other temporary solution.
If air is leaking through the bead, it may not be safe to ride on the tire. Driving on a tire with a leaking bead can cause uneven inflation pressure and even burst the tire. If you notice that your tire bead is leaking, you should replace the tire as soon as possible.
Leaking tire beads can cause air to escape from the tire, which can cause it to burst. Driving on a tire with a leaky bead also increases the risk of an accident. If you notice a bead leaking from your tire, there are several ways to fix the problem. First, try replacing the failed bead with a new one. If that doesn't work, you may need to replace the entire tire. tires is dangerous and illegal, so proper tire care is important. ) If bead replacement is not possible or if the leak persists, try inflating the tire until it reaches maximum pressure3) If inflating the tire does not solve the problem, replace the entire tire4) Remember: always drive safely and follow the rules of the road when using your vehicle! Do not attempt to repair by yourself - seek the help of a qualified mechanic.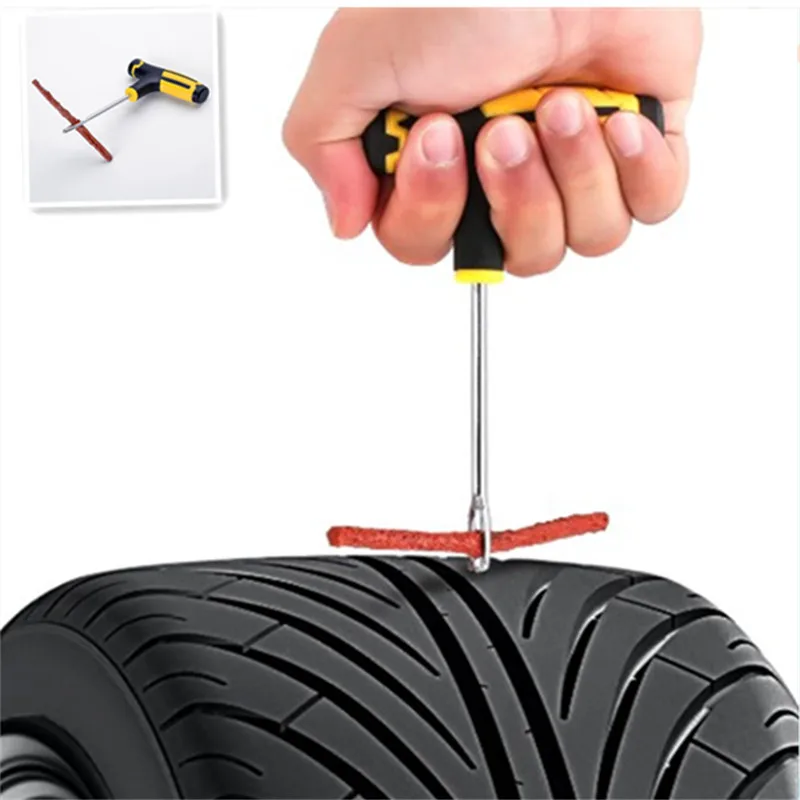 "Repairing a Leaking Bead on a Tire" 1) Check for signs of damage or wear on both sides where the bead meets the pipe2) Remove the old bead by carefully prying it out with your fingernail or a small screwdriver3) Clean the area around the old bead before installing the new one4) Install the new one bead by pressing it firmly against the tube and pulling it against the rim5) Reinstall the wheel6) Drive as normal Tire manufacturers generally recommend changing all four tires at least every 12 months. To fix a leaking bead on your vehicle" 1. Inspect both sides of the valve stem to inner tube joint for damage or wear 2. Remove old sealant 3. Clean area around valve stem 4. Apply sealant 5. Install valve stem 6. Drive as usualRemember: always drive safely and follow the rules of the road when using your vehicle!"
To fix bead leaks on tires:
1st check for any signs of damage or wear on both sides of the bead to tube joint.
2nd remove the old bead by gently prying it off with your fingernail/small screwdriver - BE CAREFUL NOT TO DAMAGE THE PIPE OR VALVE STEM!
3rd sand the old bead, being careful not to get the sealant inside the valve stem - this material will eat through the plastic pretty quickly!
4. Apply fresh sealant (usually included) ensuring an even coverage all around - again be careful not to get it inside the valve stem!
5th install the newly purchased "bead" by pressing it firmly against the tube and pulling it against the rim... BE SURE TO PRESS ENOUGH ENOUGH TO PUT THE RING AROUND THE TIRE AND REMOVE ANY AIR THAT MAY HAVE BUILD BETWEEN THE TIRE AND THE CELL DURING PREVIOUS WORK ON THE TIRE! THEN REINSTALL THE WHEEL!!NOTE: IF YOU ARE USING NEW SEALANT (AND THE OLD SEAL IS STACKED FOR SOME TIME), IT IS RECOMMENDED TO INFLATE THE TIRE BEFORE INSTALLING THE BEAD, SO THIS WILL HELP TO KEEP THE CAMERA FLAT!!! RIDE AS YOU NEED!!!
OUR TECHNICIANS TIP: ALWAYS ENSURE MAXIMUM TIRE PRESSURE BEFORE RIDING...
A leaking tire can be repaired in a few hours with the right tools and knowledge. However, if the leak is severe or the tire is damaged beyond repair, it may need to be replaced. Tires should typically last 6 to 12 months before what they need to be replaced.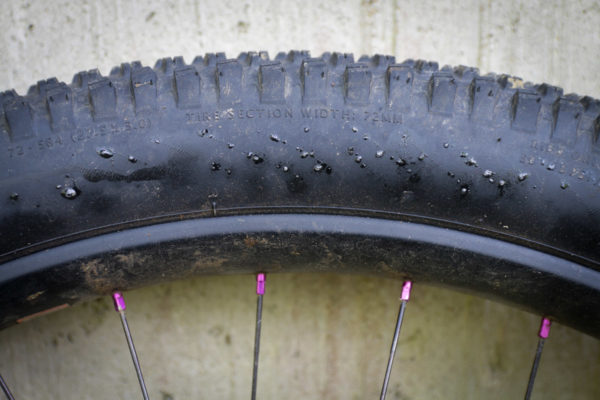
There is no universal answer to this question because the severity of a bead leak and tire size and type will vary. However, if you think your tire may have a bead leak, it is important to take steps to fix the problem before it becomes worse.
Most bead leaks can be repaired by replacing the damaged area with new rubber. Depending on the severity of the leak, you may also need to patch any cracks or tears in the rubber with a patch or glue.
If you do not think your tire needs to be replaced immediately, it is important to take steps to prevent further damage. This includes making sure your tires are properly inflated and checking regularly for signs of wear. If necessary, you can also change tires sooner rather than later by making an appointment with your local workshop.
The most common cause of bead leaks is a puncture.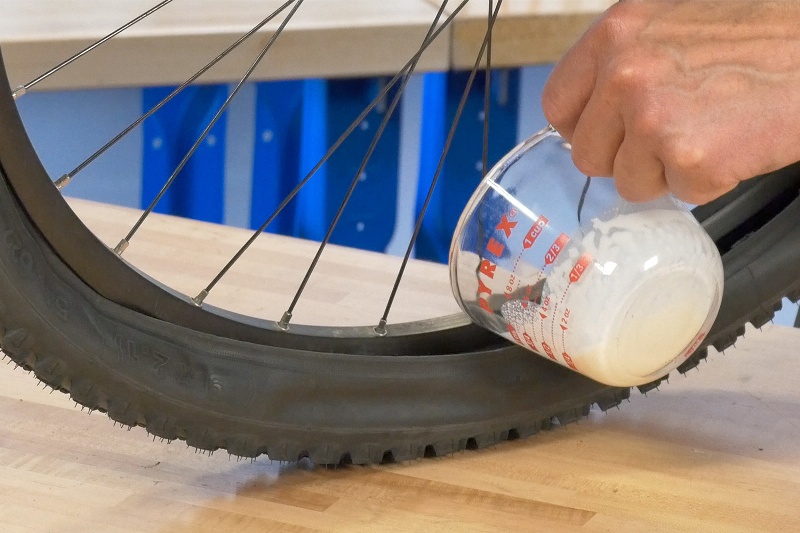 When a tire is inflated, air pressure pushes against the rubber around the bead and starts to push the bead out of its seat. Over time, this can cause a hole in the bead to escape air. Other causes include nail damage or screws, weak or worn tires, and improper inflation. In many cases, repairing a leaky tire requires replacing the entire tire.
There are several ways to fix a leaking bead on a tire. You can try to fix it yourself, but if the bead is severely damaged or the hole is too large, you may need to take it to a shop for repair. To fix a leaking bead yourself, first make sure the tire is correctly inflated. Then use a needle and thread to remove the old bead. Finally, replace the new bead with the correct size and secure it with adhesive tape or glue.
The cost of having someone else fix a tire bead leak can vary depending on the severity of the leak and the location of the leak. In most cases, it will cost around $50-$100 for a professional technician to take care of the problem. However, if the leak small and located near the edge of the tire, it can cost as little as $10-$20 to fix. In addition, some tires may require more than one repair attempt before they are properly installed. Thus, in general, it can be difficult to accurately estimate how much it will cost someone else to fix your bead leak. However, based on these general guidelines, you should pay between $50 and $100 for this service.
If the bead is leaking air, you will need to fix it by reinstalling it. your vehicle for more specific troubleshooting instructions.
If your tire is leaking again, there are a few things you can do to try and fix the problem. First, make sure the repair you made is still holding up. If it doesn't, you may need to replace tire. Secondly, check for debris or objects that may be blocking the seal between the bead and tube. Finally, use a pump to force air into the tire until it returns to its normal inflation level. If all of these steps fail you may need to completely replace the tire.
It happens that a tire loses pressure for no apparent reason and you can’t understand what’s wrong, because you can’t see any punctures or damage ... What is the problem? Someone may think that supernatural forces intervened, but most likely there is a more logical explanation for the loss of pressure. Find out why seemingly intact tires can lose air pressure and what you can do to keep unexpectedly flat tires from spoiling your mood!
Even if the tires are not used, the rubber in the tires ages over time. Just as expired products can look fresh in packaging, old tires can look like new but lack their durability and performance. This is why many tire manufacturers recommend taking tires out of service after 6-10 years from the date of manufacture, even if they have never been used!
Over time, the rubber in tires loses its properties, small, barely noticeable cracks may appear in it. They can be difficult to detect and even more difficult to repair. Air leaks slowly through microcracks in the rubber. If you suspect that one of your tires has cracked due to aging, you should contact a specialist to check its condition.
Tire age is not the only thing that can cause micro cracks in tires. Dry rot can also damage the integrity of the rubber compound that tires are made from! But what is dry rot? Dry rot is a term that describes the fragility of a tire, which is caused by degradation of the rubber compound from which the tire is made.
Unlike wood dry rot, tire rot is not caused by fungi or bacteria. Dry rot of a tire occurs as a result of exposure to external conditions that adversely affect the composition of the rubber compound of the tire. As a result, the tire dries out, which is the cause of cracks and flaking.
Proper tire care and regular inspection will help prevent dry rot. If you plan to leave the car parked for a long period of time, check the tire pressure at least once a month and inflate them if necessary. Make sure tires are out of direct sunlight.
When storing tires for a long time, use special covers. We previously talked about how to properly store tires here.
If you notice signs of dry rot on a tire, usually small spider web-like cracks located on the sidewall of the tire, contact your tire shop for advice on what to do next.
You changed a tire and after only a few kilometers it began to deflate, and the tire tread has no punctures and the sidewalls are not damaged - then anyone will think that this is some kind of curse! But not the one who knows that the problem may also lie in a faulty valve.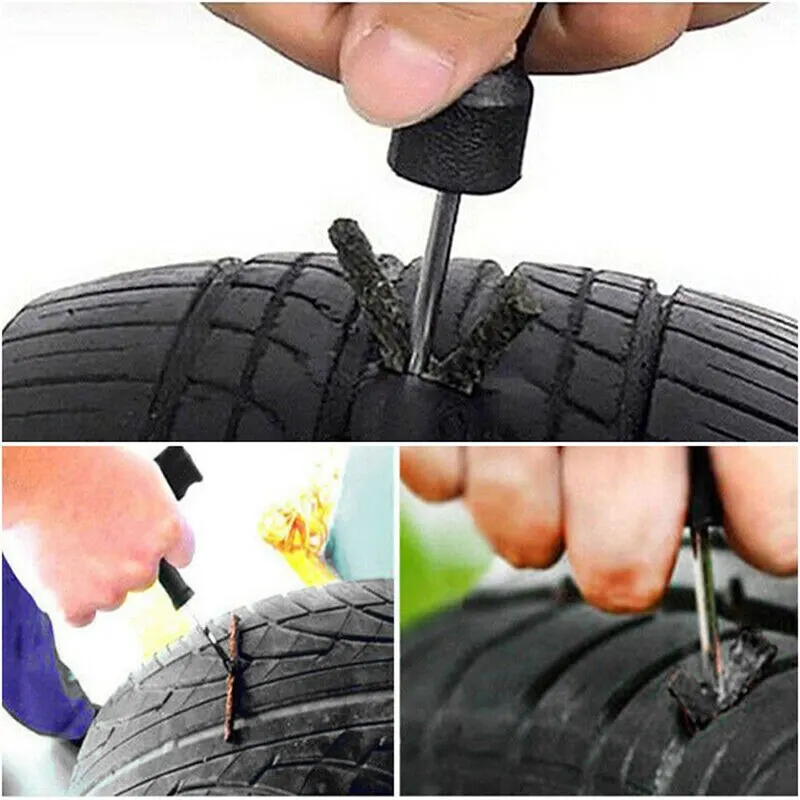
The valve is a wheel element that allows you to adjust the air pressure in the tire. The valve consists of several parts, including the body, spool and cap. The spool allows air in and out, and the cap keeps debris out of the valve.
Wheel valve rubber housings can crack due to age, moisture, temperatures, road salt and even UV rays! The spool can also wear out and become unusable. A valve that is damaged in any way may leak air.
Wheel valve problems can be avoided by replacing them every time the tires are changed in season!
The tire bead is a structural part of the tire, which is a hard rubber edge, thanks to which the tire is securely fastened to the rim. The tire beads are made of special rubber compounds reinforced with metal. This structural element of the tire must ensure a tight and hermetic fit of the tire to the rim.
Air leaks around the board can be caused by improper tire installation. Damaged, bent or corroded discs can also cause the tire to loosen to the disc and leak air.