So, you have a flat tire or one that’s leaking air. It’s not the end of the world. Luckily there are safe and cost-effective ways to properly repair most tire punctures. The purpose of this article is to show you the difference between a safe, permanent repair and a temporary string, plug or patch repair.
According to the National Highway Traffic Safety Administration (NHSTA) and the Tire Industry Association (TIA), the only method to properly repair a tire puncture is to fill the injury with a repair stem and back the stem with a repair patch. This is commonly known as a combination repair or a patch/plug repair.
Patch/plug repairs are most often performed using a one-piece repair unit that combines the repair stem and cap (or patch) into one unit. However, special circumstances may require the use of a two-piece combination repair (ex. If the angle of the puncture exceeds 35 degrees). The repair is then permanently bonded to the inside of tire and through the injury channel using a cold, chemical vulcanizing process.
The repair essentially becomes part of the tire, creating an air-tight seal that keeps air in and moisture and contaminants out (more on this procedure below).
Emergency roadside plug repairs are NOT intended to be a permanent tire repair. Plugs and string repairs are designed to get you back up and rolling long enough to get home or to the nearest service center to perform a proper tire repair.
The common misconception with plug and string repairs is that because they hold air, they are safe to use. While it is true that many plug repairs do a great job of keeping air in the tire, that’s only part of the equation. Because they’re not completely sealing the injury, plug repairs may allow air and moisture to penetrate the body of the tire. Over time, this could lead to a dangerous (or even deadly) blowout.
A Patch-Only Tire Repair Leaves Your Tire Susceptible to DamageA tire repair that uses only a patch is also NOT considered proper or safe. A properly installed patch will do a great job of allowing the tire to hold air. However, similarly to the plug-only repair, the patch does not fill the injury channel. Therefore, air and moisture could seep into the tire from the tread surface and eventually damage the tire.
Only a proper patch/plug repair completely seals the puncture from inside the tire and through the entire injury channel. There are a few extra steps necessary to perform a proper tire repair in accordance with industry guidelines. We’ve developed a simple acronym to help organize and remember the steps: R.E.P.A.I.R.
 It can also be determined if the puncture did any significant damage to the cords or belts.
 The over-buffed area of the inner liner is treated with a thin layer of rubber sealant, and the excess repair is trimmed to approximately ¼” above the tread surface.
There are a number of factors that may determine whether or not your tire is safe to repair. These factors fall into three main categories:
 Excessive wear, casing separation, impact damage and other conditions may make it unsafe to properly repair your tire. For a more comprehensive list of repairable vs. non-repairable conditions visit our blog Can Your Tire Be Repaired?
The occasional flat or leaky tire is an unavoidable part of life. But, taking shortcuts to repair it can be dangerous to you and your passengers. Take the time and do the research to do the job right and/or find a reputable tire repair shop trained in proper tire repair procedure.
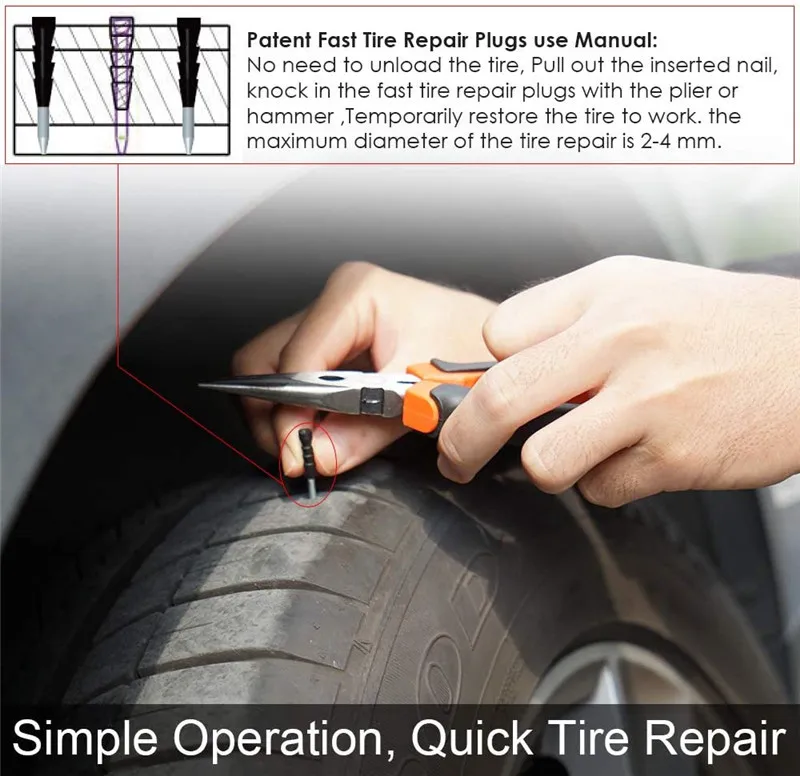
Tire plugging is the fastest method to repair a punctured car. Tire plugging uses a cord to prevent the airhead from escaping. If you are an experienced person, you can avoid damage to your car with simple tips.
So, how long does a tire plug last? Most manufacturers say that plug versions can last 7-10 years if installed correctly.
Yet, this number is meant as a reference because you can’t always fix it perfectly. The article gathers useful knowledge and some of the most frequently asked questions about tire plugs. Let’s scroll down to read more information!
Buy Best Tire Repair Kits at Amazon.com
What Is A Tire Plug?It is the primary tool in the repair by plugging method. From the outside, it looks like a standard wire, and the structure is quite remarkable; it is a sticky object; depending on the case, the item can expand or contract to match the size of the hole.
Its working principle is also quite simple: after being inserted into the tire, the plug wire will sense the pressure, determine the shape of the wound, and then automatically expand to adapt.
In addition, the material that makes the wire must be guaranteed to meet the standards, confirming the certainty so that after the air is pumped in, there will be no problems.
There is no denying the convenience that the plug method brings, and you can even repair it without removing the tire from the rim.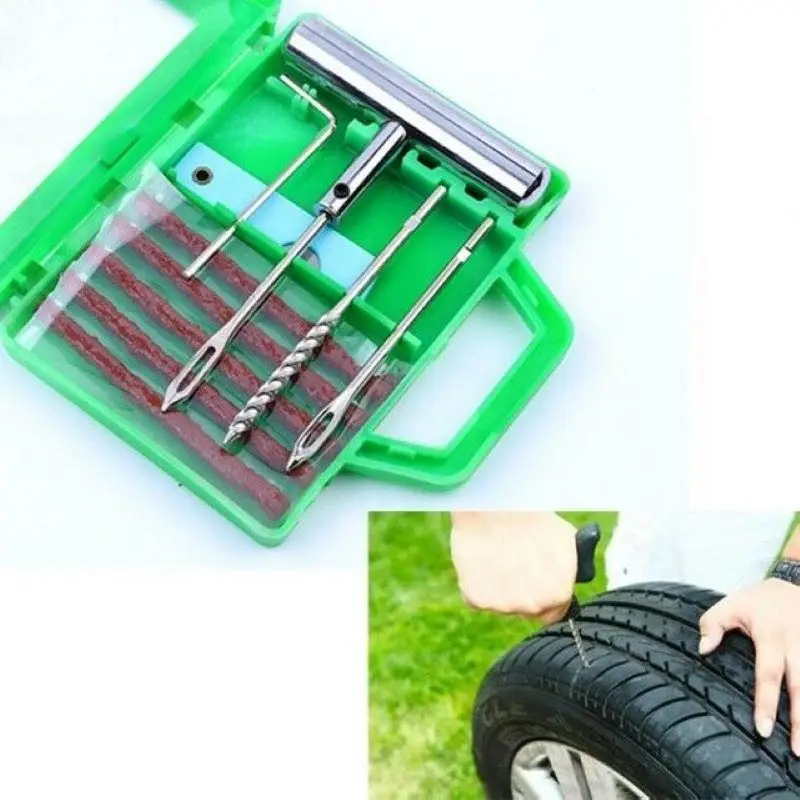 You can even plug in the tire in some exceptional cases, even when the wheels are connected.
When a vehicle is repaired correctly and maintained, a plug’s life span can last up to 7-10 years. It is an unbelievable number for a wheel that has been repairable.
However, manufacturers advise users not to overdo patching like this in practice. When using too many repair measures, the impact will affect the inherent functions, causing deflation and explosion.
When traveling on the road, the car’s wheels have problems, do not rush to decide when the experience is not proficient; the best way is to take the car to a repair center to have expert advice on the appropriate repair method.
Is Plugging A Tire A Good Idea?Buy Best Tire Repair Kits at Amazon.com
Plugging or patching is only a temporary measure before you have enough time to change into a new tire.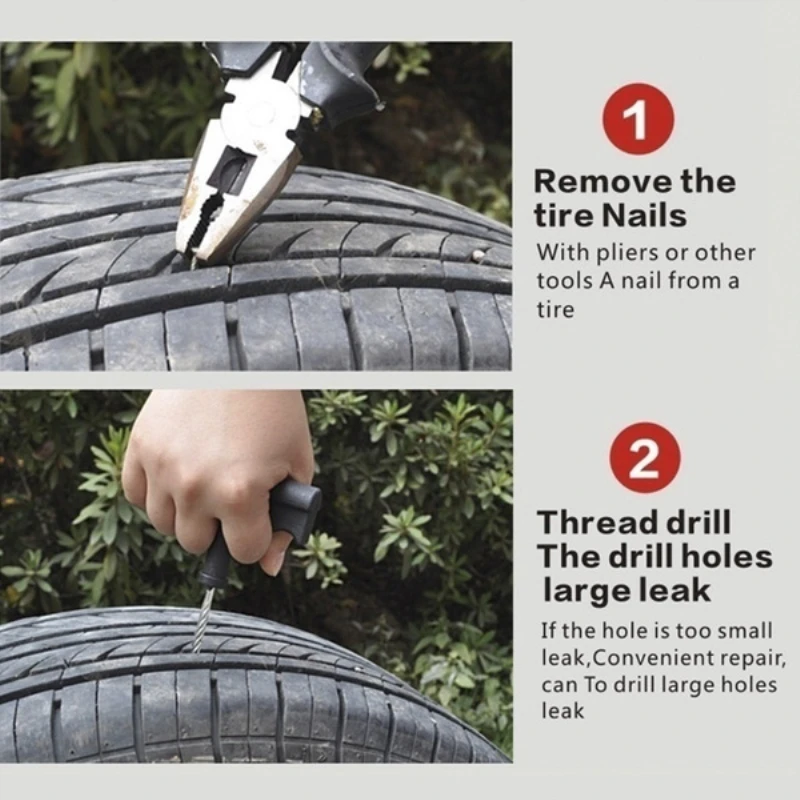 The life of a tire after plugging can last from 7-10 years or 25,000 miles; no one can be sure that there will not be any problems.
Plugging in tires will be a good idea, even effective if the wheel is in an emergency that needs to be moved.
Is It Safe To Plug In A Tire?You can safely use your plugged-in tires when traveling in a specific section of the road. Unlike a spare tire, which has a short life, it is possible to prevent air from escaping through a previous puncture completely with a plug repair method.
Via many surveys, experts think there is a better measure than a plug – radial patch. It is a suitable method available on almost all popular tires on the market.
The process takes about 30 minutes while using a wire to insert the air hole takes up a few minutes. Both must be vulcanized to reinforce and increase the rubber surface’s certainty.
Is It Ok To Drive On A Plugged Tire?As long as the wound has adequately been reinforced, you are entirely safe traveling by car with tires. The safest time to use is not too long from when you repair using the above method.
Besides, some notes have also ensured stability when operating this type.
However, do not drive when there is a wound near the wall or on the side of the wheel; if the plug diameter exceeds ¼ inch, it is best to replace the tires.
Finally, the body’s weight, do not use plug tires to carry heavy objects; this inadvertently puts pressure on the wheels when the tires are weak.
How To Plug In A Tire?Here are some ways to help you better understand the plugging process.
Step 1: Locate the leakThis step does not require you to remove the wheel altogether, but you can use a jack to support the wheel’s weight, so it is pretty easy to do the following steps.
The above article has provided you with knowledge related to plugging or manipulations to perform this process.