October 13, 2003 02:00 AM
Guys, how many times have you walked out of the men's room and forgotten to check your pants zipper?
You were probably lost deep in thought and had a momentary lapse in concentration as you prepared to exit. Whatever the reason, it's an embarrassing moment, for sure, when someone shocks you back to reality with the words, ``Hey, buddy, your fly's open!''
BOOM! There you are, out in public, in front of God and everyone to see. Unless you're a flasher, this is a sure way to get humiliating attention.
Zippers are a problem for commercial truck tire people both personally as well as professionally-and I'm not just talking about having your fly open while calling on your best fleet account. Sure, that's probably not good for business. But circumferential fatigue ruptures-known in the trade as ``zippers'' in steel radial truck tires-are the problem to which I'm referring.
Revisiting the problem
Now unless you've been living in a cave for the past 10 years, you know what a zipper rupture is. But for those of you who have been ``on an extended leave of absence,'' a zipper rupture is a tire failure in which the tire blows out in the upper sidewall, leaving an even line of broken steel cords exposed, which gives it the appearance of an open zipper. They are typically 10 to 12 inches long but can extend up to 36 inches in length.
When the tire blows out with this condition, the rupture begins at one point and then opens in both directions due to the instant transfer of load to adjacent steel body plies until the air pressure is evacuated. Only one side of a tire ever ruptures.
Typically, zipper ruptures occur in tires that have been run flat or severely underinflated in a dual wheel position. Low inflation pressure and the resultant increased sidewall flexing create fatigue in the cords.
With the proper inflation pressure, tire cords are always kept in tension as they traverse through the tire footprint on the road. However, as the inflation pressure decreases and gets closer to 0 psi, the cords are compressed as the tire rolls through the footprint area. This produces severe bending of the cords. Since the wire cords are bent hundreds of thousands of times as the tire runs, they are severely weakened and may even break.
Continued or extensive operation in an underinflated condition weakens one or both steel radial sidewalls to some degree. When the tire is re-inflated, the pressure put back in the tire pushes against the cords that no longer have the strength to hold it. The tire then blows out, often with an explosion. Tire pressure usually exceeds 40 psi when a zipper rupture occurs.
The blast of air that is released when the tire blows out can cause serious injury and even death. It's not unusual when a zipper rupture occurs for people to permanently lose their hearing, get hit with flying tools, the tire cage or the tire and rim/wheel itself. They also can get hurled across the room or into the air and impaled on equipment or building structure, or just be killed by the concussion of the air blast itself.
We are talking about a tremendous, lethal force here.
The root cause of the zipper rupture is loss of inflation pressure. This is most often caused by a puncture in the tire but can also be produced by a leaking valve stem, poor bead seat, bent flange, cracked rim or any other condition that will cause the tire to lose air.
Anytime a tire comes in flat, has a repair or needs a repair, everyone in the tire shop, retread shop or service truck that comes in contact with that tire should be on heightened alert and examine the tire closely for a potential zipper. Tires that have been repaired should be serviced with the utmost care. While a tire is being inflated-always in a safety cage-everyone at a service location must stay out of its trajectory-that's the sidewall area of the tire-to avoid being in the tire's dangerous blast zone.
Pinpointing zippers
Zipper problems were first recognized in the early 1990s.
An industry task force organized by the former American Retreaders Association (ARA), now known as the Tire Industry Association (TIA), conducted studies and developed training materials-booklets and videos-to advise retreaders, truck tire servicers and truck tire users of the dangers of zipper ruptures and how to identify them. The Rubber Manufacturers Association also developed technical bulletins and warning posters on servicing tires that could be zipper candidates.
Many articles also were written in trade publications, passing along this information to the industry. In addition, retread equipment and rubber suppliers made these training materials available to their dealers and provided warning labels to put on newly retreaded and repaired tires to help minimize zipper-related accidents, too.
The inspection procedures developed then are still good today. They require you to feel the tire, listen to it and look closely at it. If you know what to look for, a potential zipper can sometimes be detected very easily.
If the tire has serious damage in the sidewall plies, the weakness can usually be felt by pressing the suspect area with your fingertips or thumbs and listening for a crunching or popping sound which can be heard as the broken sidewall cables move. The sidewall may also feel soft, and bumps and blisters may be felt on the sidewall surface.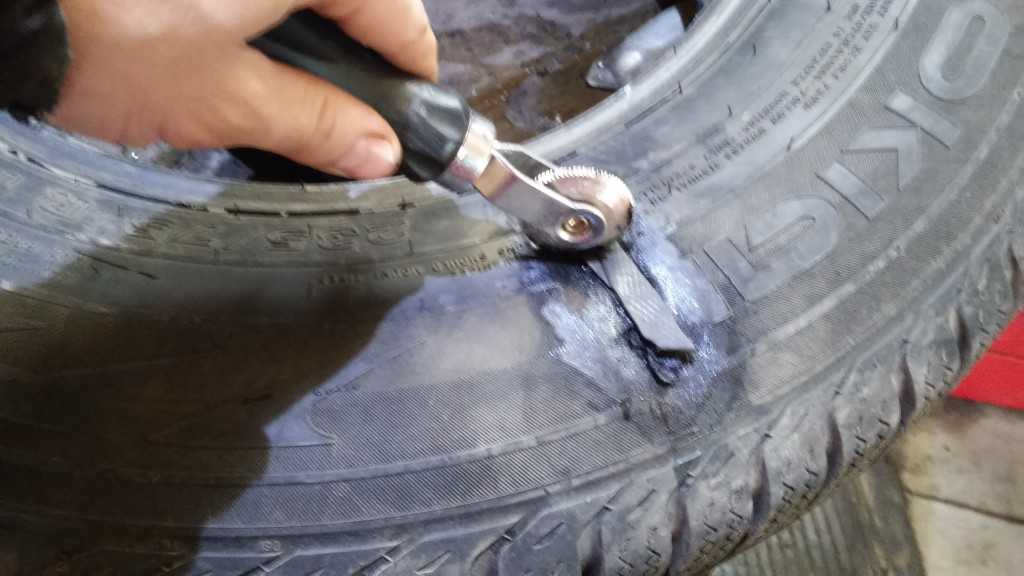
Some tires that have been run low or flat show obvious signs of innerliner distress and fatigue-including wrinkles, discoloration and/or cracking-while others show no signs at all. The use of an indirect or grazing hand-held light can often reveal sidewall distortions, bumps and blisters indicating broken plies.
Unfortunately we don't work in a perfect world. Real world commercial truck tire work environments are not normally quiet. So it's often difficult to hear popping and crunching sounds when inspecting tires in the shop with equipment running and compressed air in use, or on the side of the road with the roar of traffic going by, and the use of a hand-held grazing light is impractical.
Further, some tires are very insidious. They hide the fact they contain potential zippers and make detection very difficult. However, I'll wager that most of the tires that zipper are the ones that didn't get inspected too well.
Step up prevention
In the early to mid '90s much press and attention was given to zippers. Now, about a decade later, I think people are getting lackadaisical about this condition.
Very few articles are written about zippers now, and you only hear about this condition when, for instance, a teenager or young father gets killed. And even then, I know we don't hear about all the accidents that occur.
Heck, what I've found lately is that tire dealers and retreaders don't even keep track of the zipper ruptures they have unless their own employees get injured by one. Then a report is made out primarily to meet workers' compensation requirements.
Few people are using this information to improve the level of inspection and tire service procedures to prevent future zipper blowouts, accidents, injuries and deaths.
Every commercial truck tire dealer and retreader should document every time a tire zippers. That should include not only at his own business locations with his own employees, but at his customer's locations and where the fleet's employees are involved as well-even when no injuries occur.
Zippered tires that blow out at customer locations should be returned to the tire dealership so they can be examined to determine whether they are indeed zipper ruptures. Complete information can then be recorded on the tire, as well as any vital information on injuries or damage. This just makes sense in case a lawsuit should result.
All tires that zipper should be presented to the individuals responsible for inspecting them. If they passed through a retread plant, all employees should inspect them and be reminded of how important each is in detecting potential zippers. In order to heighten their awareness and improve their detection techniques, anyone who repairs tires and services them should have the opportunity to examine zippered tires that should have been caught prior to airing them up.
These are important training tools that cannot be used too much.
Also, by keeping a record of the zippers your dealership experiences, you can track them better-and determine if a specific customer is more prone to these conditions than others, perhaps due to inherently poor maintenance. Then you can take special precautions with that customer's tires.
You can also go to the source and work with customers to improve their maintenance routines and help them reduce the potential for future zipper ruptures. At the least, you can determine if you're making any progress in reducing the number of zippers you have by keeping records month to month and year to year.
This could come in handy especially if, BOOM, you find yourself in court.
Open zippers can certainly be embarrassing as well as fatal. Use every opportunity you can to remind and train your company's associates to prevent them. Their very lives may depend on it.
A steel cord radial truck tire is an engineering marvel. It has to endure a wide range of temperatures in every imaginable environment. This flexible chamber enables large vehicles to ride on a virtual cushion of compressed air.
In reality, the compressed air inside the tire carries the load of the truck. A radial truck tire utilizes steel cord sidewall plies to maintain the strength and integrity of all the components which make up that chamber. The beads simply act as anchors for these body cords, and the belt package protects them from the road surface.
The steel cord used for body plies and belt packages is actually a cable comprised of numerous smaller wires. In some instances, the cable is held together by a continuously wrapped "fret" wire. This single strand of wire keeps the cable wound tightly and ensures uniformity with the other components.
As long as radial truck tires are properly inflated and loaded, the steel cords are not subjected to excessive flexing or heat. Over the course of time, there is an insignificant amount of variation if correct air pressures are the norm rather than the exception.
On the other hand, any tires that are underinflated or overloaded will experience an increase in flexing and heat, often resulting in problems. If these tires make it to the truck stop or tire dealer before they separate, they become prime candidates for a dangerous zipper rupture.
Inflation is Vital
I coined the term "boot-o-meter" because it represents one of the most common forms of tire inflation maintenance. Some drivers go high tech and use a club, but others "just give ’em a kick." Neither method can be effectively calibrated. The only way to determine the inflation pressure of any tire is to put a gauge to the valve stem.
When radial truck tires are properly inflated according to the load being carried, a minimal amount of stress is applied to the components. According to the manufacturers, "any tire known or suspected to have been run at 80% or less of normal operating inflation pressure and/or overloaded, could possibly have permanent structural damage (steel cord fatigue)."
You don’t want to experience "steel cord fatigue."
Like any machine, if a tire is worked too hard for too long it’s going to break down. Once the assembly reaches less than 80% of the recommended inflation pressure, the tire is forced to flex more which generates a lot more heat. Overloading produces the same effect and can result in the same thing Ð a zipper rupture.
Any All-Steel Tire
A zipper rupture is a spontaneous burst of compressed air that can occur in the sidewall/flex area of EVERY steel cord radial tire. I put an emphasis on the word "EVERY" because a number of radial light truck tires have a steel sidewall ply. Tossing an LT235/35R16 on the center post machine could be hazardous if it’s an "all-steel" construction. Rule of thumb: If the sidewall ply is made of steel, the tire can experience a zipper rupture, so it must be inflated in a safety cage without exception.
The problem with zipper ruptures is the unpredictability of "fatigued" or damaged sidewall cables. In some severe cases, the cables break and produce an audible "pop" and/or a visible bulge during inflation. Sometimes the innerliner will show discoloration or wrinkling.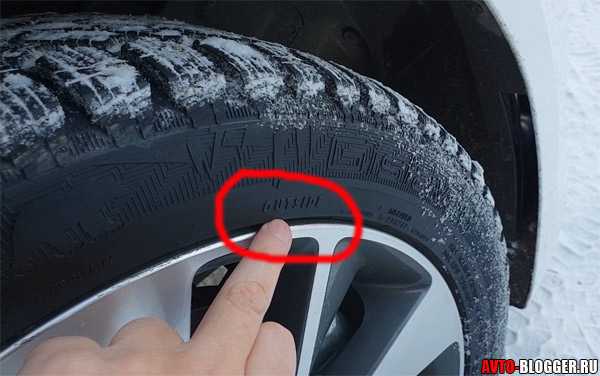 Any bead damage or sidewall irregularity could trigger a zipper rupture. On the surface, if you don’t see or hear the signs, there’s no steel cord fatigue. But sometimes a rupture happens without warning.
That’s right, a perfectly good new, used, repaired or retreaded steel radial tire can suddenly zipper rupture when a customer goes to install it on the vehicle a week after it was delivered. It won’t have any bulges and there won’t be any popping sound. All of a sudden, it just goes "BOOM!"
Technology has yet to produce an affordable and dependable inspection machine for detecting potential zipper ruptures. The available equipment can be justified in a high-volume retread plant, but the average tire dealer cannot afford it. When it comes to detecting zipper ruptures in steel cord radial truck tires, service personnel have one option, the Tire Information Service Bulletin Vol. 33, No. 2, published by the Rubber Manufacturers Association (RMA).
RMA established inspection procedures for identifying potential zipper ruptures in steel cord radial medium and light truck tires in March 1995.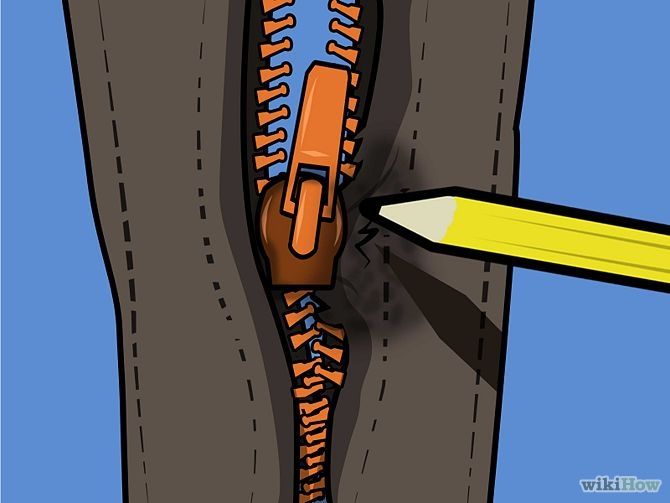 This publication is an integral component of TANA/ITRA’s OSHA 29 CFR 1910.177 Compliance Training Program. These inspection procedures must be used on every tire returning to service.
Low Pressure or Overload
The first step is to determine whether the tire has been operated at 80% or less of the recommended inflation pressure or overloaded. Technicians should always check the air pressure of any inflated tire before it is removed from the vehicle. If one tire of a dual assembly is less than 80% of the recommended pressure, then both tires must be completely deflated, demounted and inspected.
After the deflated tire is removed from the vehicle, it must be demounted from the rim and thoroughly inspected for any irregularities. If the tire passes inspection on the inside as well as the outside, it can be mounted and inflated in a safety cage to 20 psi with the valve core removed. If no signs of a zipper rupture are present, the tire should be inflated to 20 psi OVER the recommended operating pressure.
Over? Once again, a simple inspection procedure that’s been around since 1995 is known by virtually no one. How many people actually know that every used, retreaded or repaired tire should be overinflated by 20 psi? How many know a suspect tire should remain in the safety cage at 20 psi over operating pressure for 20 minutes?
Outside of a thorough high-tech electronic inspection, the only real protection against a potential zipper rupture is a detailed visual inspection and overinflating the tire by 20 psi in a safety cage with the valve core removed. Any tire suspected of being operated underinflated or overloaded should remain in the safety cage overinflated by 20 psi for 20 minutes. Obviously, you’ll want to stay outside the trajectory zone during those 20 minutes.
The additional stress the overinflation will place on the steel sidewall cables may show irregular bulges Ð a telltale zipper sign before it is deflated to the recommended operating pressure. If lightening happens to strike, the best defense is strict adherence to established industry inspection and inflation guidelines.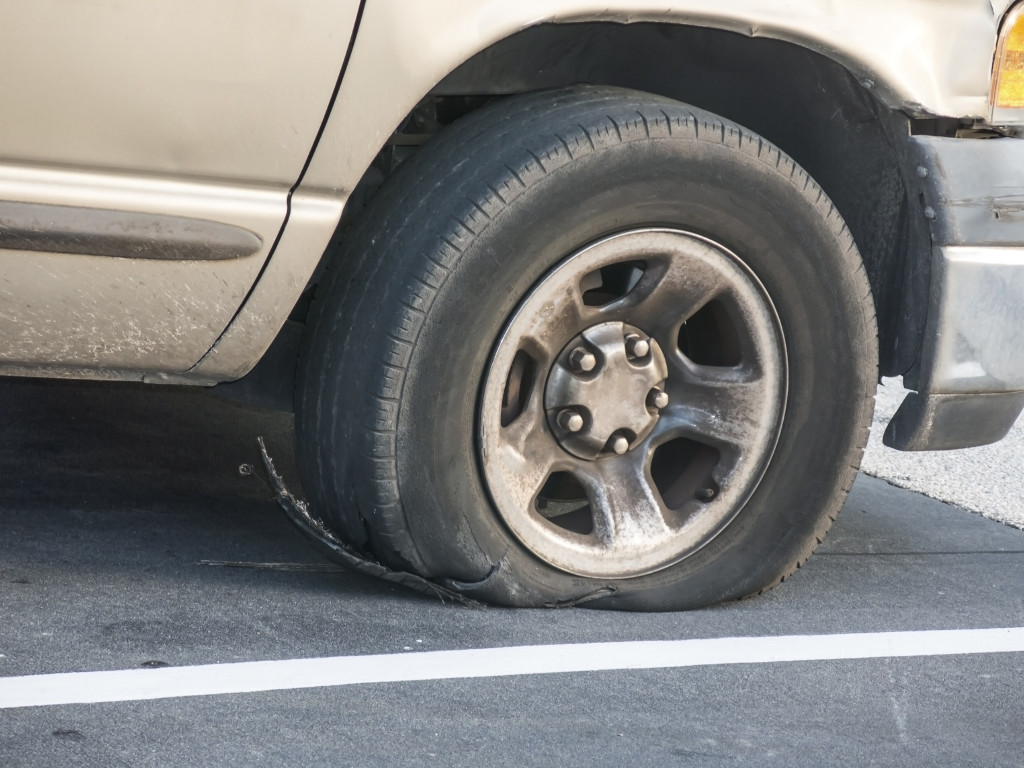
Notice how many times I’ve said, "with the valve core removed." Every tire should be inflated without the valve core in case it needs to be deflated rapidly. Imagine a bulging and popping radial truck tire inflated to 120 psi in a safety cage with the valve core installed. How do you choose someone to remove the valve core if the clip-on air chuck somehow dislodges and doesn’t allow remote inflation or deflation?
Once the appropriate practice of overinflating and waiting becomes the prevailing method for checking tires before they are returned to service, the number of injuries due to zipper ruptures should be reduced.
It is likely that a few tires will rupture while overinflated. As long as it happens in a safety cage, neither your technicians nor the truck driver will likely get hurt.
Kevin Rohlwing is the director of training for TANA/ITRA.

Reference: house, 3 phases (15 kW per house), grounding with a 3 m long pole, self-contained electrical system based on solar panels
The photo shows the result of a short circuit on the side of the 10 kV line. The protection did not work at the regional substation. This is how the introductory shield looks from the 0.4KV side. The IEK 100A machine could not break the arc between the jaws. Next along the line was MAC HYBRID 9kW 48V. We escaped with a slight fright: the varistor was changed in the inverter, after which the MAC came to life, however, the RS232 port stopped working normally. That is, a serious accident at the substation, which burned out a 100 Amp automatic fuse, affected the inverter only with a burned-out varistor and errors on the controller, and all other functionality of the device was preserved, like all the equipment connected after it - praiseworthy work. nine0003
And below in the photo is the metering unit from the side of 10 kV
This accident did not happen in my house, but these photos were handed over to me by specialists from the MicroART company. At one time, I decided to switch to equipment of the Russian manufacturer for my hybrid solar-grid electrical system and described these devices here and here.
I had the following case: during a thunderstorm, lightning struck my substation or nearby, as a result of which the protection at the entrance to the house worked out. The result of that thunderstorm was a burned-out battery charger connected to the network at the time of the thunderstorm, a blown ventilation automation relay (the relay was powered from the line that was supported by the same charger), and the Hybrid 4.5 kW inverter MAC started flashing and stopped generating. After a thunderstorm, restarting all systems brought the house back to power, the inverter started without problems, and I thought about seriously protecting the home electrical network. nine0003
A bit of theory
During a thunderstorm in an ordinary apartment or office building, the protections installed by the stationary power supply must work out.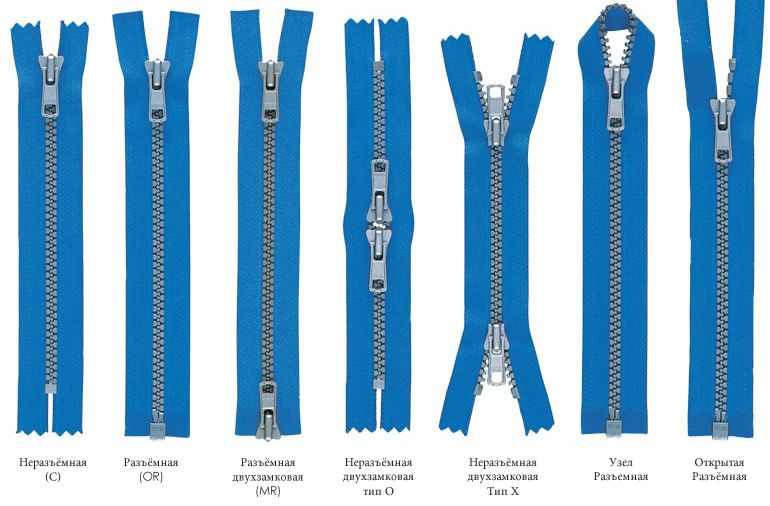 In a cottage village, village or cottages, protection, as a rule, is limited to dug-in grounding at the substation and a fuse that disconnects the entire network from work. Moreover, according to the connection rules, grounding must also be installed on every second pole and separately on the final one, where the subscriber house is connected. Having walked through my village and examined more than fifty pillars, I did not find a single grounding, that is, I can only rely on myself. nine0003
The second "killer" factor is induced electricity. During lightning, there is a fairly powerful burst of EMP, and the house wiring is, in fact, a large antenna. The closer the lightning, the greater the likelihood of a power surge in the internal network. Installers of home local networks have constantly encountered and continue to encounter this phenomenon, when switches without grounding, during a thunderstorm, burn out in whole chains.
So, we need to protect ourselves from an external impulse that can come from a substation and from an internal surge that can happen with lightning near the house. nine0003
Practice
Lightning rod
If your house is located on a hill, far from any buildings and is the highest point on the ground, it is better to take care of a lightning rod. The device is reliable, but it is necessary to clearly calculate the coverage area. There are a lot of materials on the net on this subject. I will only say that the action of a lightning rod spreads in a cone from the highest point to the ground. To "cover" the whole house, it is necessary to install either two lightning rods with a metal cable between them, or one, but quite high. If the grounding of the lightning rod is made separately from the general grounding, then it is necessary to apply a potential equalization system. nine0003
Extracts from the INSTRUCTIONS FOR THE DEVICE OF LIGHTNING PROTECTION OF BUILDINGS AND STRUCTURES RD 34.21.122-87:
electrical installations, with the exception of neutral wires of overhead power lines with voltage up to 1 kV. „
„
“2.5. To exclude the entry of high potential into the protected building or structure but underground
metal communications (including electric cables for any purpose) earthing switches of protection against
direct lightning strikes should be, if possible, removed from these communications at maximum distances,
admissible according to technological requirements. „
Input of the network into the house
The danger of inputting high voltage is terrible not only in a thunderstorm, but also when the wires overlap on the poles or a large phase imbalance. A common thing for rural power networks, when the phase voltage can be 180, 200 and 240 V. GOST allows power supply with a voltage deviation of up to 10% (if exactly, then + 10% and -15%) from the norm of 220 V, that is from 187 to 242 V. But not all supplied equipment can withstand such voltage drops. For normal protection, it is best to use voltage regulators. Moreover, there are three-phase and single-phase stabilizers. Most often, three single-phase stabilizers will work better than one three-phase, if only because the simplest devices monitor the voltage in one phase and the change (increase or decrease) in the voltage occurs in all three. Simplified: when the voltage rises from 180 to 220 V, the voltage on the other phase will increase from 210 to 250 V, which is fraught with equipment. Therefore, tracking each of the phases will be more reliable. In addition, there are several types of stabilizers:
The first has a high accuracy of voltage setting, since the motor slides the carrier along the windings and sets the desired voltage. Pros: low price, high accuracy of output voltage. Cons: low response rate to power surges, physical wear and tear of mechanics . Pros: affordable price, sufficient switching speed. Cons: insufficient reliability due to the use of mechanical relays. nine0017 The third type is the most interesting, but also the most expensive. The use of powerful keys allows you to instantly respond to changes in the input voltage and switch the transformer windings. There is simply no physical wear, as well as sticking of contacts. In addition, switching occurs when the sine passes through zero, so jumps are also excluded. Pros: high response speed, no physical wear. Cons: high price.
For myself, I chose a more expensive, but also more reliable option, a stabilizer with triac control CH-LCD “Energy” for 6 kW. Since I already have a 4.5 kW inverter, which can deliver up to 7 kW at the peak, it was decided to choose a stabilizer with a rated power of 6 kW and the ability to output up to 7.4 kW at the peak. nine0003
You can read in detail about the features of these stabilizers and what kind of stabilizers there are in general here.
Well, I was interested in taking it apart and seeing what was inside.
The opening of the stabilizer showed
As you can see from the photo, the stabilizer uses a toroidal transformer, which, with the same dimensions as the W-shaped one, has a higher efficiency and less weight. The transformer itself was made in Tula, and the stabilizer was designed and assembled in Moscow. Thus, we can safely declare a completely Russian production, which was managed to organize and maintain in the company MicroART. nine0003
So, I insured against subsidence and voltage growth in the range of 125-275 Volts, but what if there is a sharp voltage surge that goes beyond these limits? The inverter somehow showed me 287 V in phase, after which it went into protection. But apply 380 V to it and it will simply burn out, like the stabilizer. I wanted to protect expensive equipment. Some kind of release was required, which, at threshold voltages, would turn off the external network. It is better to be left without a network than to repair or change burned-out equipment later. The output was found - the mains voltage control relay UZM-51M1. nine0003
This device is designed to ensure the operation of one phase, while you can manually set the upper and lower voltage thresholds at which the relay will operate. The shutdown time is about 20 ms, which is a very good indicator. At the same time, small drawdowns or some overvoltage will not cause an instant shutdown, but a shutdown timer will start. When the parameters return to normal, the relay will independently connect the load to the network. So, home devices are protected from surges and surges in the external power grid using a voltage control relay and a stabilizer. In the event of a mains failure, the inverter starts to work. But what if the external network is already disconnected, lightning strikes nearby and the house wiring works like an antenna? nine0003
Protection of the internal network
We will assume that all sockets are properly wired, grounded properly and excess charge flows into the ground. But a power surge in the internal network easily destroys all equipment, since all protections are for defense against external surges. But there is nothing from internal interference. With this thought, I turned to MicroART engineers when I was picking up the stabilizer and they recommended me a "Lightning and interference protection device" - SPD. nine0003
This is a kind of spark gap, which, when a critical voltage appears between the phase and ground, passes a pulse through itself, sending it to ground. That is, during a thunderstorm, when lightning strikes nearby and the voltage in the home network rises to several kilovolts along the phase wire relative to the ground and exceeds a certain value, this SPD will simply release the entire charge into the ground. Therefore, it is placed in front of the inverter, with one end connected to the phase and the other to ground. It is worth considering that the discharge can be significant, so you should not save on the cross section of the ground wire, otherwise the resistance of the wire may turn out to be critical and not have time to transfer the impulse to the ground. nine0003
This is how the connection to the external network and the generator is made:
I already mentioned that I have an autonomous solar system. A serious impulse can also come along the wires coming from the solar panels, disabling the solar controller, and behind it the inverter. Therefore, I also hung an SPD on each of the wires from the solar panels.
Generator protection
In the most emergency case, when there is no external network, the sun is not visible, and the batteries are already dead, all autonomists have a backup option - a gasoline / diesel generator. It will allow the home network to function, work itself as a powerful tool, and even recharge the batteries. I described a similar redundancy topology in my material here. The problem with this connection is that most generators produce extremely unstable and “noisy” power. Sometimes inverters or chargers simply cannot work with such power. To suppress interference, there is a special surge protector. You can get by with a standard "pilot", but it is usually designed for power up to 2-3 kW, and more is often consumed from the generator. So, I also found an EMI (electromagnetic pulse) filter: EMI suppression line filter. nine0003
It can handle up to 11 kW of power, which is enough to power a whole house if a powerful generator is available. It has a through connection and a separate ground pin.
Results of the work carried out
The result of one thunderstorm and small losses was a rethinking of protection methods, both from external energy collisions and from internal ones. In addition, the security of all electrical appliances in the house has increased, both from voltage drops and from sudden surges and impulses. In addition, autonomy has increased due to the connection of the generator through a filter, which guarantees a stable charge of the batteries and the normal operation of the inverter. nine0017 As a result, the electrical system has changed. Before:
This is how it became AFTER the protection was installed:
The generator connection scheme is quite simple. Any of the wires is combined with the existing ground and zero brought into the house. The second wire after that becomes the phase. It is important to choose a switch that will prevent the simultaneous short circuit of the generator phase and the phase from the substation.
The first start of the whole system looked like this:
| Address: , Tula, Novomoskovskoe shosse, 50 | Phone: 8 (4872) 252-223 | E-mail: [email protected] | Feedback |
DIFFERENTIAL FEATURES: pronounced local wear; size and shape correspond to the contact patch. Presence of tread cut scratches. As a rule, other tires on the same axle have similar characteristics.
POSSIBLE CAUSE: Wheel locking due to overbraking or braking system defects.
RECOMMENDATION:
Tire: Removal of the tire from service with sufficient wear.
Vehicle: Check the operation of the brake system.
DIFFERENTIAL FEATURES: Breaks in the outer grooves of the tread.
POSSIBLE CAUSE: Repeated, repeated runs into penetrating objects (curbs, rails, etc.) Frequent turns and maneuvering "in the patch". Hot tires are more susceptible to this damage. nine0003
RECOMMENDATIONS:
Tire: Operation possible subject to legal regulations.
Decommissioning if the damage is too deep.
Check tire pressures for correctness.
Vehicle: Avoid driving over obstacles and maneuvering in confined spaces.
DIFFERENTIAL FEATURES: many cuts all over the treadmill.
POSSIBLE CAUSE: Driving on aggressive pavement (construction sites, quarries).
Excessive tire pressure and moisture, which amplifies the harmful effect.
Aggressive driving style.
RECOMMENDATIONS:
Tire: Further use is possible if legal regulations are complied with.
Use tires that are suitable for the operating conditions. nine0017 Maintain the tire pressure recommended by the manufacturer.
Vehicle: No.
DIFFERENTIAL FEATURES: belt delamination which can lead to complete tire failure.
POSSIBLE CAUSE: Long-term operation with insufficient tire pressure or overload, causing the internal components of the tire to overheat. nine0003
RECOMMENDATIONS:
Tire: Remove the tire from service. Regularly check and maintain the tire pressure recommended by the manufacturer. Avoid overloading tires.
Vehicle: No.
DIFFERENTIAL FEATURES: change in the condition of the tread rubber, shoulders or sidewalls. Rubber becomes softened, sticky, lamellas and grooves become closed. A change in the shape of a part of the tire may be accompanied by a strong specific odor. nine0003
POSSIBLE CAUSE: Tire contact with petroleum products or petroleum products.
RECOMMENDATIONS:
Tire: Remove the tire from service. Check tire storage conditions.
Vehicle: Check and repair any fuel or oil leaks. Avoid parking in areas with oil stains.
DIFFERENTIAL FEATURES: A network of cracks in the surface of the rubber on the sidewall of the tyre.
POSSIBLE CAUSE: Aging due to long-term use, UV exposure.
Exposure to ozone (even for several hours), proximity to sources of ozone (electric welding, electric motors, mercury lamps, etc. ) Store tires in places protected from exposure to ultraviolet rays and ozone. nine0003
Vehicle: No.
DIFFERENTIAL FEATURES: Sidewall damage. Damage to the integrity of the sidewall rubber due to contact between the dual tires (with/without carcass damage).
POSSIBLE CAUSE: Wheel pair contact resulting in concentric sidewall wear and premature removal of the tire from service.
The reason for the contact may be: under-inflation, overload, insufficient distance between the wheels. nine0003
RECOMMENDATIONS:
Tire: Remove from service if the rubber is abraded to the carcass or there are wrinkles on the inner sealing layer.
Check and adjust tire pressure.
Vehicle: Use rims with the recommended dimensions, offset (distance between tire centers of symmetry), follow recommendations for minimum distance E for twin wheels.
DIFFERENTIAL FEATURES: Separation of the sidewall rubber layer due to pressurized air infiltration (infiltration) into the inner layers of the tyre.
POSSIBLE CAUSE: violation of the integrity of the internal sealing joint during installation/dismantling (for example, with a shovel). Outside breakdown with object stuck.
Operation of a tube-type tire without a tube.
RECOMMENDATIONS:
Tire: Remove the tire from service and prevent it from being repaired, hot retreaded or welded on. Check the methods and technology for marking the tire, mounting/dismantling and avoid repetition.
Vehicle: Check that the rim is in good condition (no dirt, rust, etc.)
FEATURES: Smooth concentric tear on the sidewall.
POSSIBLE CAUSE : Operating with tire pressure not as recommended (reduced), driving with overload. Different inflation pressures in dual tires. Incorrectly matched pair: different degree of wear, size, brand, type.
RECOMMENDATIONS:
Tire: follow the recommended tire pressure, avoid overloading, follow the recommendations for choosing twin wheels:
Vehicle: No.
DIFFERENTIAL FEATURES : Rupture of carcass with/without damage to sidewall rubber and/or liner.
POSSIBLE CAUSE : Violent impact on an obstacle (kerbstone, edge of a pit...) with the sidewall pinched between the rim flange and the obstacle. nine0017 This damage is more likely to occur if the recommended tire pressure is not met or if the tire is overloaded.
RECOMMENDATIONS:
Tire: Dismantle and hand over to truck tire service specialists to study and determine the possibility of a quality tire repair.
Vehicle: No.
DIFFERENTIAL FEATURES: Traces of foreign objects (rust, sand…) on the rubber layer of the bead base and/or bead heel.
POSSIBLE CAUSE: Poor condition of the seat and flange (rust), ingress of dirt during installation If the disc is severely worn, replace it. Maintain cleanliness in the tire shop. Strictly follow the recommendations for tire fitting. nine0003
Vehicle: No.
DIFFERENTIAL FEATURES: Damage to the bead toe rubber when mounting/demounting a tire
POSSIBLE CAUSE : Improper mounting/dismantling techniques and/or severe tool wear.
RECOMMENDATIONS:
Tire: Remove the tire from service. Have tires mounted/dismantled at specialized truck tire shops or using proper mounting/dismantling tools and techniques. nine0003
Vehicle : None.
DISTINCTIVE FEATURES: Qualitative change in the composition of the bead rubber (heels and bases), bluishness, stickiness, cracks, burns, unwound carcass threads.
POSSIBLE CAUSE: Excessive bead heating, often due to brake failures or vehicle braking too long (heat generating friction between brake drum and lining). nine0003
RECOMMENDATIONS:
Tire: Remove the tire from service.
Vehicle: Check the condition of the brake system. Avoid prolonged braking on descents. Observe the rules of safe traffic.
 Thermal conductivity of materials (conduction)
Poker example: The heat from the fire is transferred along the poker to the hand, and the longer the poker, the greater the heat loss: the side that we hold in our hand has much less heat. nine0003
1 - Contact between brake linings and drum
Less distance means less heat loss. Strong and fast local heating.
Heat radiation
Example - furnace chimney:
A fire in a furnace heats its walls with infrared radiation. The screen between the fire and the object absorbs this radiation. The heating of the screen increases as it approaches the flame. nine0003
Convective heat exchange
Example - heating radiator:
The hot air heated by the radiator rises and transfers heat.
DISTINCTIVE FEATURES : "Marbling", the presence of wrinkles and small folds on the sealing layer in the zone of greatest deformation.
POSSIBLE CAUSE: Driving with insufficient tire pressure and/or overload. nine0003
RECOMMENDATIONS:
Tire: Remove the tire from service.
Important: never inflate a tire after an overload run or without first dismantling it and inspecting the inner surface of the tire.
Vehicle: No.
DIFFERENTIAL FEATURES : Spilling of rubber sealing layer with subsequent possible complete destruction of the tire carcass. nine0003
POSSIBLE CAUSE: Continuous operation with overload or low tire pressure.
RECOMMENDATIONS:
Tire: Remove and dispose of the tire.