A steel cord radial truck tire is an engineering marvel. It has to endure a wide range of temperatures in every imaginable environment. This flexible chamber enables large vehicles to ride on a virtual cushion of compressed air.
In reality, the compressed air inside the tire carries the load of the truck. A radial truck tire utilizes steel cord sidewall plies to maintain the strength and integrity of all the components which make up that chamber. The beads simply act as anchors for these body cords, and the belt package protects them from the road surface.
The steel cord used for body plies and belt packages is actually a cable comprised of numerous smaller wires. In some instances, the cable is held together by a continuously wrapped "fret" wire. This single strand of wire keeps the cable wound tightly and ensures uniformity with the other components.
As long as radial truck tires are properly inflated and loaded, the steel cords are not subjected to excessive flexing or heat. Over the course of time, there is an insignificant amount of variation if correct air pressures are the norm rather than the exception.
On the other hand, any tires that are underinflated or overloaded will experience an increase in flexing and heat, often resulting in problems. If these tires make it to the truck stop or tire dealer before they separate, they become prime candidates for a dangerous zipper rupture.
Inflation is Vital
I coined the term "boot-o-meter" because it represents one of the most common forms of tire inflation maintenance. Some drivers go high tech and use a club, but others "just give ’em a kick." Neither method can be effectively calibrated. The only way to determine the inflation pressure of any tire is to put a gauge to the valve stem.
When radial truck tires are properly inflated according to the load being carried, a minimal amount of stress is applied to the components. According to the manufacturers, "any tire known or suspected to have been run at 80% or less of normal operating inflation pressure and/or overloaded, could possibly have permanent structural damage (steel cord fatigue)."
You don’t want to experience "steel cord fatigue."
Like any machine, if a tire is worked too hard for too long it’s going to break down. Once the assembly reaches less than 80% of the recommended inflation pressure, the tire is forced to flex more which generates a lot more heat. Overloading produces the same effect and can result in the same thing Ð a zipper rupture.
Any All-Steel Tire
A zipper rupture is a spontaneous burst of compressed air that can occur in the sidewall/flex area of EVERY steel cord radial tire. I put an emphasis on the word "EVERY" because a number of radial light truck tires have a steel sidewall ply. Tossing an LT235/35R16 on the center post machine could be hazardous if it’s an "all-steel" construction. Rule of thumb: If the sidewall ply is made of steel, the tire can experience a zipper rupture, so it must be inflated in a safety cage without exception.
The problem with zipper ruptures is the unpredictability of "fatigued" or damaged sidewall cables. In some severe cases, the cables break and produce an audible "pop" and/or a visible bulge during inflation. Sometimes the innerliner will show discoloration or wrinkling. Any bead damage or sidewall irregularity could trigger a zipper rupture. On the surface, if you don’t see or hear the signs, there’s no steel cord fatigue. But sometimes a rupture happens without warning.
That’s right, a perfectly good new, used, repaired or retreaded steel radial tire can suddenly zipper rupture when a customer goes to install it on the vehicle a week after it was delivered. It won’t have any bulges and there won’t be any popping sound. All of a sudden, it just goes "BOOM!"
Technology has yet to produce an affordable and dependable inspection machine for detecting potential zipper ruptures. The available equipment can be justified in a high-volume retread plant, but the average tire dealer cannot afford it.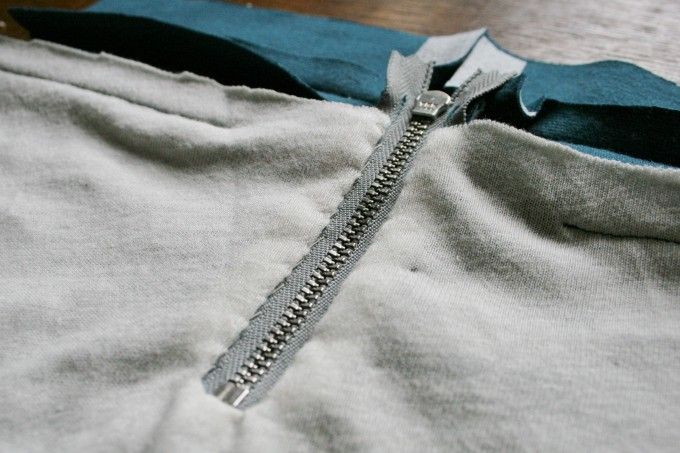 When it comes to detecting zipper ruptures in steel cord radial truck tires, service personnel have one option, the Tire Information Service Bulletin Vol. 33, No. 2, published by the Rubber Manufacturers Association (RMA).
RMA established inspection procedures for identifying potential zipper ruptures in steel cord radial medium and light truck tires in March 1995. This publication is an integral component of TANA/ITRA’s OSHA 29 CFR 1910.177 Compliance Training Program. These inspection procedures must be used on every tire returning to service.
Low Pressure or Overload
The first step is to determine whether the tire has been operated at 80% or less of the recommended inflation pressure or overloaded. Technicians should always check the air pressure of any inflated tire before it is removed from the vehicle. If one tire of a dual assembly is less than 80% of the recommended pressure, then both tires must be completely deflated, demounted and inspected.
After the deflated tire is removed from the vehicle, it must be demounted from the rim and thoroughly inspected for any irregularities. If the tire passes inspection on the inside as well as the outside, it can be mounted and inflated in a safety cage to 20 psi with the valve core removed. If no signs of a zipper rupture are present, the tire should be inflated to 20 psi OVER the recommended operating pressure.
Over? Once again, a simple inspection procedure that’s been around since 1995 is known by virtually no one. How many people actually know that every used, retreaded or repaired tire should be overinflated by 20 psi? How many know a suspect tire should remain in the safety cage at 20 psi over operating pressure for 20 minutes?
Outside of a thorough high-tech electronic inspection, the only real protection against a potential zipper rupture is a detailed visual inspection and overinflating the tire by 20 psi in a safety cage with the valve core removed. Any tire suspected of being operated underinflated or overloaded should remain in the safety cage overinflated by 20 psi for 20 minutes. Obviously, you’ll want to stay outside the trajectory zone during those 20 minutes.
The additional stress the overinflation will place on the steel sidewall cables may show irregular bulges Ð a telltale zipper sign before it is deflated to the recommended operating pressure. If lightening happens to strike, the best defense is strict adherence to established industry inspection and inflation guidelines.
Notice how many times I’ve said, "with the valve core removed." Every tire should be inflated without the valve core in case it needs to be deflated rapidly. Imagine a bulging and popping radial truck tire inflated to 120 psi in a safety cage with the valve core installed. How do you choose someone to remove the valve core if the clip-on air chuck somehow dislodges and doesn’t allow remote inflation or deflation?
Once the appropriate practice of overinflating and waiting becomes the prevailing method for checking tires before they are returned to service, the number of injuries due to zipper ruptures should be reduced.
It is likely that a few tires will rupture while overinflated. As long as it happens in a safety cage, neither your technicians nor the truck driver will likely get hurt.
Kevin Rohlwing is the director of training for TANA/ITRA.
Home
Dosage
Products
Order
About Us
Avoiding Potential Tread Separations & Zipper Ruptures What is a Zipper Rupture?A Zipper rupture is a circumferential rupture in the mid-sidewall of a steel-corded radial truck tire. These are particularly dangerous as they are unpredictable and often occur with little or no warning to alert the driver or tire service provider. They are frequently accompanied by a deafening blast with the explosive force of a pound of dynamite leaving a 10” to 36” zipper rupture in the sidewall. If this occurs while the tire and wheel are removed from the vehicle, but not yet in a cage, it can be life-threatening. Fortunately, it’s avoidable. How They OccurSteel-belted radial truck tires utilize steel cord sidewall plies to maintain the strength and integrity of the tire structure. They support the chamber, containing the air that carries the load. A puncture, leaking valve or any source of air migration (slow leaks) can lead to substantial, though not always apparent air loss. Tires that are under-inflated or overloaded will experience increased flexing and heat buildup. This produces severe bending of the steel cords. Consider that a truck tire rotates hundreds of times per mile and thousands of times per hour under a heavy load. According to ITRA (International Tire and Rubber Association), now TIA (Tire Industry Association), any tire known to have run at less than 80% of recommended air pressure could possibly have permanent steel cord fatigue. Quite often a pressure check reveals that one or more tires are substantially below this 80% threshold and could legally be considered to have run flat. This is the major cause of tread separations and zipper ruptures. New TiresThe ARA (American Retreader’s Association), now also known as TIA (Tire Industry Association), claims there are as many tread separations in new tires as in retreads. This is again attributable to air loss and air migration beneath the tread. The incidence of manufacturing defects in new and retread tires having been found to be the cause is generally low. Retread TiresThe repair, preparation and inspection of used casings are critical to the performance and longevity of the finished product. The smallest amount of air or improper adhesion between the cap and casing will expand as heat increases from deflection and road surface friction and can lead to delamination, tread separation and blowouts. PreventionThe number one cause of tread separation is porosity and air migration. Ultraseal Tirelife Extender/Sealer provides a uniform fluid/fiber coating that prevents air migration by sealing porosity and punctures as they occur. Additionally, Ultraseal draws heat from the tread and transfers it to the wheel and sidewall where it is more efficiently radiated to the outside. Back to Tech Bulletins... Back to Knowledgebase Previous Next |
| Address: , Tula, Novomoskovskoe shosse, 50 | Phone: 8 (4872) 252-223 | E-mail: [email protected] | Feedback |
BRAKING WEAR WITH LOCK WHEELS (SW)
DIFFERENTIAL FEATURES: pronounced local wear; size and shape correspond to the contact patch. POSSIBLE CAUSE: Wheel lock due to overbraking or braking system defects. RECOMMENDATION: Tire: Removal of the tire from service with sufficient wear. Vehicle: Check the operation of the brake system.
TEARS (RUPTURES, CRACKS) IN THE EXTREME GROOVES OF THE Tread
DIFFERENTIAL FEATURES: Breaks in the outer grooves of the tread. POSSIBLE CAUSE: Repeated, repetitive collisions with penetrating objects (curbs, rails, etc.) Frequent turns and maneuvering "on the patch". Hot tires are more susceptible to this damage. RECOMMENDATIONS: Tire: Operation possible subject to legal regulations. Vehicle: Avoid driving over obstacles and maneuvering in confined spaces.
MULTIPLE CUTS
DIFFERENTIAL FEATURES: many cuts all over the treadmill. POSSIBLE CAUSE: Driving on aggressive pavement (construction sites, quarries). RECOMMENDATIONS: Tire: Further use is possible if legal regulations are complied with. Vehicle: No.
PROTECTOR LEAVE
DIFFERENTIAL FEATURES: belt delamination which can lead to complete tire failure. POSSIBLE CAUSE: Long-term operation with insufficient tire pressure or overload, causing the internal components of the tire to overheat. RECOMMENDATIONS: Tire: Remove the tire from service. Regularly check and maintain the tire pressure recommended by the manufacturer. Avoid overloading tires. Vehicle: No.
CHANGING THE PROPERTIES OF RUBBER
DIFFERENTIAL FEATURES: change in the condition of the tread rubber, shoulders or sidewalls. Rubber becomes softened, sticky, lamellas and grooves become closed. A change in the shape of a part of the tire may be accompanied by a strong specific odor. POSSIBLE CAUSE: Tire contact with petroleum products or petroleum products. RECOMMENDATIONS: Tire: Remove the tire from service. Check tire storage conditions. Vehicle: Check and repair any fuel or oil leaks. Avoid parking in areas with oil stains.
NETWORK OF CRACKS
DIFFERENTIAL FEATURES: network of cracks in the surface of the rubber on the sidewall of the tyre. POSSIBLE CAUSE: Aging due to long-term use, exposure to ultraviolet rays. Vehicle: No.
TWIN TIRE SIDEWALL CONTACT
DIFFERENTIAL FEATURES: Sidewall damage. Damage to the integrity of the sidewall rubber due to contact between the dual tires (with/without carcass damage). POSSIBLE CAUSE: Wheel pair contact resulting in concentric sidewall wear and premature removal of the tire from service. RECOMMENDATIONS: Tire: Remove from service if the rubber is abraded to the carcass or there are wrinkles on the inner sealing layer. Vehicle: Use rims with recommended dimensions, offset (distance between tire centers of symmetry), follow recommendations for minimum distance E for twin wheels.
SIDEWALL RUBBER DETAILATION (DELAMINATION)
DIFFERENTIAL FEATURES: Separation of the sidewall rubber layer due to pressurized air penetrating (infiltration) into the inner layers of the tyre. POSSIBLE CAUSE: violation of the integrity of the internal sealing joint during installation/dismantling (for example, with a shovel). Outside breakdown with object stuck. RECOMMENDATIONS: Tire: Remove the tire from service and prevent it from being repaired, hot retreaded or welded on. Check the methods and technology for marking the tire, mounting/dismantling and avoid repetition. Vehicle: Check that the rim is in good condition (no dirt, rust, etc.)
Frame tear on sidewall
FEATURES: Smooth concentric tear on the sidewall. POSSIBLE CAUSE : Operating with tire pressure not as recommended (reduced), driving with overload. Different inflation pressures in dual tires. Incorrectly matched pair: different degree of wear, size, brand, type. RECOMMENDATIONS: Tire: follow the recommended tire pressure, avoid overloading, follow the recommendations for choosing twin wheels:
Vehicle: No.
Sidewall damage due to strong impact / pinching
DIFFERENTIAL FEATURES : Rupture of carcass with/without damage to sidewall rubber and/or liner. POSSIBLE CAUSE : Violent impact on an obstacle (kerbstone, edge of a pit. RECOMMENDATIONS: Tire: Dismantle and hand over to truck tire service specialists to study and determine the possibility of a quality tire repair. Vehicle: No.
Violation of the integrity of the rubber layer of the heel of the bead
DIFFERENTIAL FEATURES: Traces of foreign objects (rust, sand…) on the rubber layer of the bead base and/or bead heel. POSSIBLE CAUSE: Poor condition of the seat and flange (rust), ingress of dirt during installation If the disc is severely worn, replace it. Maintain cleanliness in the tire shop. Strictly follow the recommendations for tire fitting. Vehicle: No.
Bead toe damage
DIFFERENTIAL FEATURES: Damage to the bead toe rubber when mounting/demounting a tire POSSIBLE CAUSE : Improper mounting/dismantling techniques and/or severe tool wear. RECOMMENDATIONS: Tire: Remove the tire from service. Have tires mounted/dismantled at specialized truck tire shops or using proper mounting/dismantling tools and techniques. Vehicle : None.
Bead failure due to thermal effects
DIFFERENTIAL FEATURES: Qualitative change in the composition of the bead rubber (heel and base), bluishness, stickiness, cracks, burns, unwound carcass threads. POSSIBLE CAUSE: Excessive bead heating, often due to brake failures or vehicle braking too long (heat generating friction between brake drum and lining). RECOMMENDATIONS: Tire: Remove the tire from service. Vehicle: Check the condition of the brake system. Avoid prolonged braking on descents. Observe the rules of safe traffic. Types of heat transfer:1.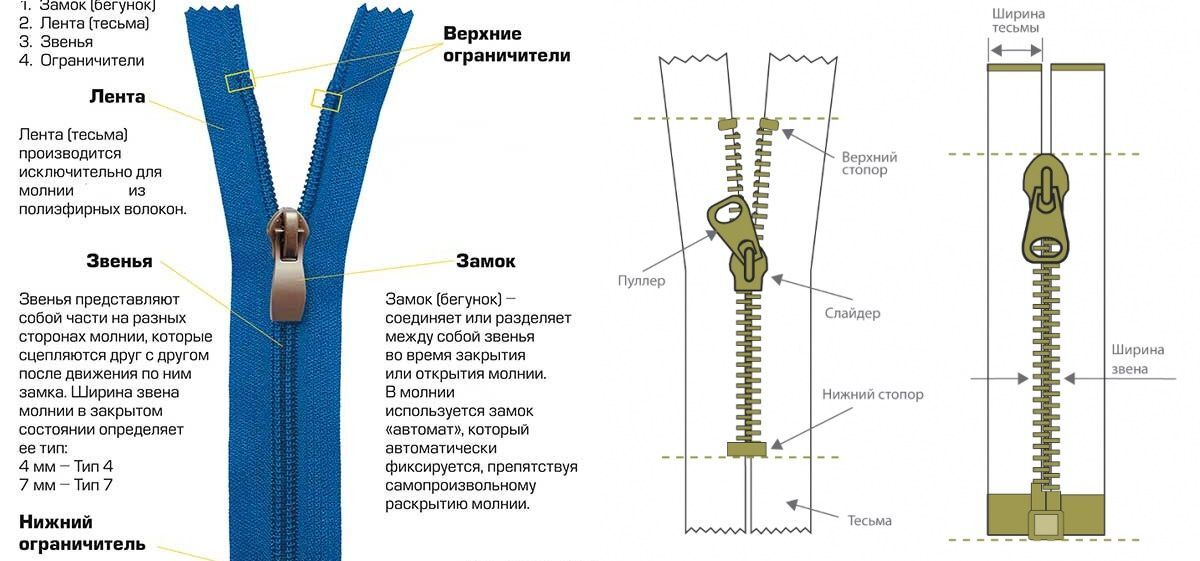 Thermal conductivity of materials (conduction) Thermal conductivity of materials (conduction)
Poker example: The heat from the fire is transferred along the poker to the hand, and the longer the poker, the greater the heat loss: the side that we hold in our hand has much less heat. 1 - Contact between brake linings and drum Less distance means less heat loss. Strong and fast local heating. 2. Thermal infrared radiation3. Convective heat exchange
Heat radiation Example - furnace chimney: A fire in a furnace heats its walls with infrared radiation. The screen between the fire and the object absorbs this radiation. The heating of the screen increases as it approaches the flame. Convective heat exchange Example - heating radiator: The hot air heated by the radiator rises and transfers heat.
Wrinkle (shagreen)
DISTINCTIVE FEATURES : "Marbling", the presence of wrinkles and small folds on the sealing layer in the zone of greatest deformation. POSSIBLE CAUSE: Driving with insufficient tire pressure and/or overload. RECOMMENDATIONS: Tire: Remove the tire from service. Vehicle: No.
Destruction of the sealing layer
DIFFERENTIAL FEATURES : Spilling of rubber sealing layer with subsequent possible complete destruction of the tire carcass. POSSIBLE CAUSE: Continuous operation with overload or low tire pressure. RECOMMENDATIONS: Tire: Remove and dispose of the tire. Vehicle : No.
Electric shock damage
DIFFERENTIAL FEATURES: Electrical discharge can damage the rubber and in some cases carcass threads and even the bead ring, resulting in typical craters. POSSIBLE CAUSE: Electric arc (flash) due to contact of a body part with a source of high voltage or lightning. RECOMMENDATIONS: Tire: Remove all vehicle (truck) tires from service for a thorough check. Vehicle: No. « back to list | |
Sometimes it happens that clothes fail at the most inopportune moments: a broken zipper can cause delays and other troubles!
Tags:
Cloth
life hacks
Jackets
how to fix a zipper on a jacket
how to fix a zipper with your own hands
Shutterstock
If this still happens, do not rush to get upset, because there are several simple life hacks that will help you fix the zipper on your jacket, bag, backpack or your favorite jeans with your own hands in a matter of minutes.
Content of Article
If you know that lightning can break, it is better to take precautions in advance to prevent annoying breakage. But even if everything has already happened, it can be fixed. It is enough to arm yourself with a few useful tips to quickly fix a broken mechanism.
A zipper on clothes, also known as a zipper, or snake, is found on almost any product. From time to time, it can diverge or fray at the very base below, due to which it becomes unusable. It is not always possible to take a thing for repair, so it is important to know how to fix a zipper at home.
ADVERTISING - CONTINUED BELOW
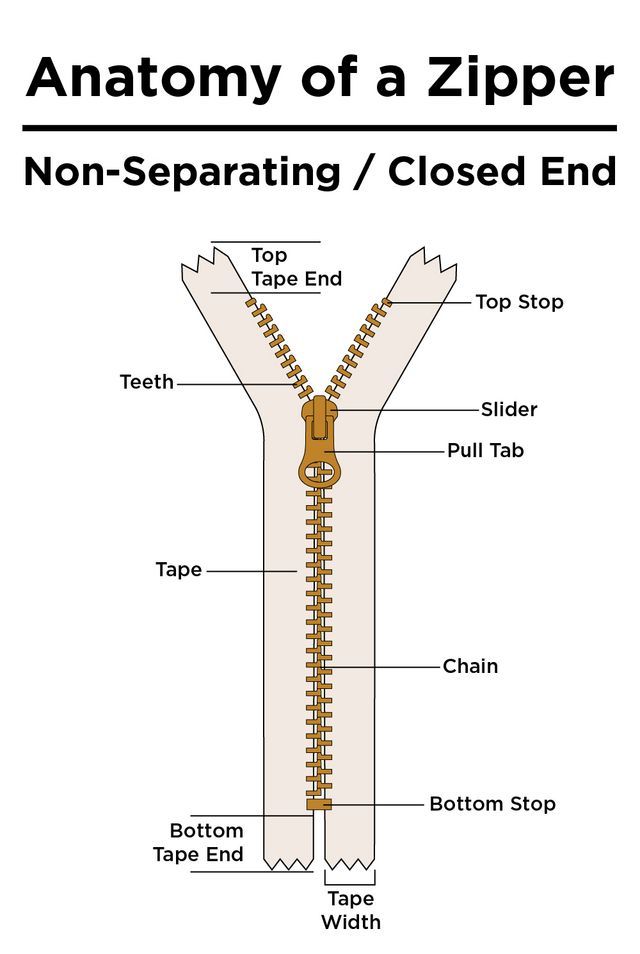
If the zipper diverges, you must start with the slider that has ceased to fasten the edges, clamp it so that it closes.
The slider can be repaired in the following ways:
 You can buy them at any sewing store;
To prevent zipper breakage or extend the life of repaired parts, it is important to follow the simplest clothing care measures.
If the base of the zipper is damaged, you can use a plastic straw for cocktails. Repair is done as follows:
The easiest answer to the question of how to fix a zipper if it diverges is to use pliers. Just squeeze the slider between the teeth of the device and pull towards the closure. In this way, you will help the fastener return to the grooves. Try not to press the attachment point too hard so as not to damage the mechanism.
If the zipper has broken and only one half of the slider remains on the fastener, use ordinary scissors. Find the bottom position of the slider and cut the fabric horizontally between the teeth in this place. This little notch will prevent the zipper from opening below. Put the torn off half of the dog on the zipper in the incision area and fasten to the end.
A broken zipper can be repaired with a screwdriver. Insert the tip of the tool into the slider groove at the top to widen the hole. Insert the free end of the fastener into the extension and tighten with pliers.
Apply transparent nail polish to the place where the zipper broke and fasten.
If all else fails, there is only one option left - to replace the slider /
Before installing a new dog, you need to remove the old one. This is done simply: you can break it with pliers, anyway, the lock is no longer useful.
We share simple life hacks on how to replace a slider on a fastener.
When choosing a new slider, pay attention to the number engraved on the part so that it fits exactly to the zipper.