Anyone who has been riding bikes for a while can tell you that sooner or later, you’re going to get a flat. Even with tube sealant that prevents flat tires for up to two years, it’s just an unavoidable occurrence. When flats occur, the best thing you can do is be educated and prepared to patch the tube so that you can quickly get back on the road. Let's get started:
Materials NeededConsider these different flat tire scenarios: The at-home repair scenario where you're walking your bike into the garage and notice that the back wheel is sagging a little bit—you have a flat. Or, the on-the-trail repair scenario where 20 miles into a 50 mile ride, you go down hard on a rock and get a nasty pinch flat.
We’re going to walk you through some of the materials you’ll need for either situation, and then how to use them for both. Here’s a list of some things you will need to repair your tube.
Follow these 4 easy steps to patch your bicycle tube and repair your flat.
Step 1. Remove Your Tire
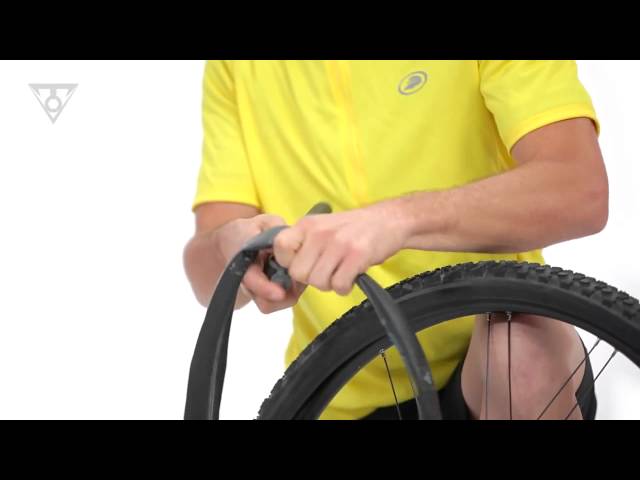
Take your tire lever and hook it around the outer edge of the tire (the bead) to get it off of the rim. Once you have the tire lever under the tire rubber, hook the other end of your tire lever around one of your spokes to keep the tire elevated. With a second tire lever, work your way around the rim, taking the tire out of the bead until one side has been completely removed from the rim.
Step 2. Find the Leak
If the puncture or gash in your tube is not easily apparent, you’re going to need to fill the tube back up to locate where the air is escaping from. There are a couple of different ways to find the leak. The layman’s way would just be to run your hand along the tube and try to feel it out.
The bucket of water method that we mentioned earlier, however, is a more accurate way. If you’re at home, fill your sink or a large bucket full of water and submerge each end of the tube. Watch for air bubbles escaping from your tire to locate your problem area.
Make sure you submerge each side, as there may be more than one puncture. Be sure to check the inside of the tire to make sure that the puncture-causing object has been removed. Once located, mark that spot with your tire marking chalk.
Step 3. Patch the Hole
When patching the hole in your bicycle tube, make sure that the area around the puncture is clean so that the patch will stick. Using the scuffer from your patch kit (sand paper or emery paper will also do the trick), rough up the area around the puncture so that your adhesives have something to grip.
If your patches don’t require glue, simply press them firmly over the hole. For patches that do need glue, add a layer of glue and spread it evenly around the area. Wait for the glue to get a little tacky, and then press on your patch.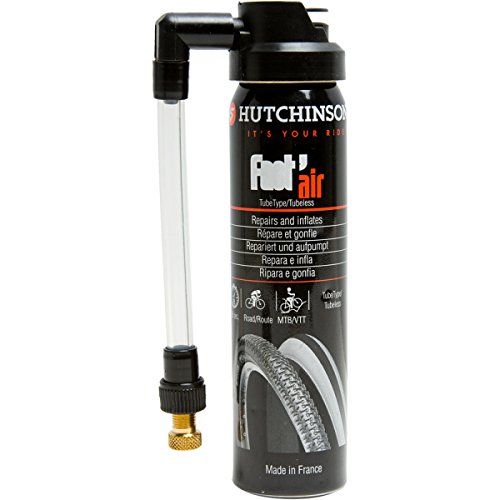 If you have the materials available to you at home, some cyclists will sprinkle talcum powder on top of the patch so that that patch/adhesive doesn’t stick to the inside of the tire.
Step 4. Put It All Back Together
Put a little air into your tube and then put it back in the tire, making sure, again, that there are no foreign objects remaining in the tire. Be sure to insert the tube and tire back into the rim using only your hands, as the tire levers may pinch the tube and cause another flat (we certainly don’t want that after all your hard work).
Once you’ve pushed the tire back in and the valve stem is securely inside the tire, inflate your tube back to maximum pressure, being sure to check the tire one more time to make sure that the bead is installed snugly. Ready to ride!
None of us ever enjoy getting a flat, but you can often tell how experienced an Adventure Rider is by the way they react to a puncture on tube-type tires. New Adventure Riders tend to throw their fists up in the air and curse the motorcycle gods. Veterans just get down to business because they know that a motorcycle puncture repair is just 15 minutes out of the day if you’re in practice, 25 if you’re a little rusty.
Here are five tips that will help take the pain out of the inevitable flat. We’ll assume that you know how to remove the wheels from your bike and are carrying the proper tools for the job.
Position the tire bead in the drop center and you’ll have more room on the opposite side to spoon the tire on.
Motorcycle tires, like car tires, have steel wires embedded in the sidewalls to keep the tire stiff and on the wheel. Think of the wires as hoops, and remember that they will not stretch no matter how hard you try. If you pull one side out, the opposite side will go in.
ADVERTISEMENT
Note also that the circumference of the tire’s bead is smaller than the outer lip of the wheel it has to go over.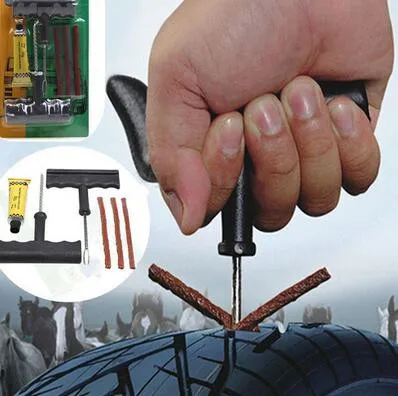 So how is it even possible to get the tire on the wheel?
The secret is in the center of the wheel. This section of the wheel goes by several names, but we’ll call it the drop center, because it “drops” away toward the hub. The wheel’s circumference is smaller in the drop center. Get the tire bead in the drop center and you can more easily pull the opposite side of the bead over the outer lip of the rim. Moral of the story: If you’re breaking a sweat, you’re doing it wrong.
Your kickstand can double as a built-in bead breaker if your bike has a center stand.
Some adventure bikes, and quite a few dual sports, have rims with safety beads, which is a raised area near the inner lip of the rim designed to keep the tire in place in the event of a flat. They improve safety, but can make getting the tire bead away from the rim a real chore.
The first technique to try is simply pushing down on the bead with your hands. Often that’s all it takes.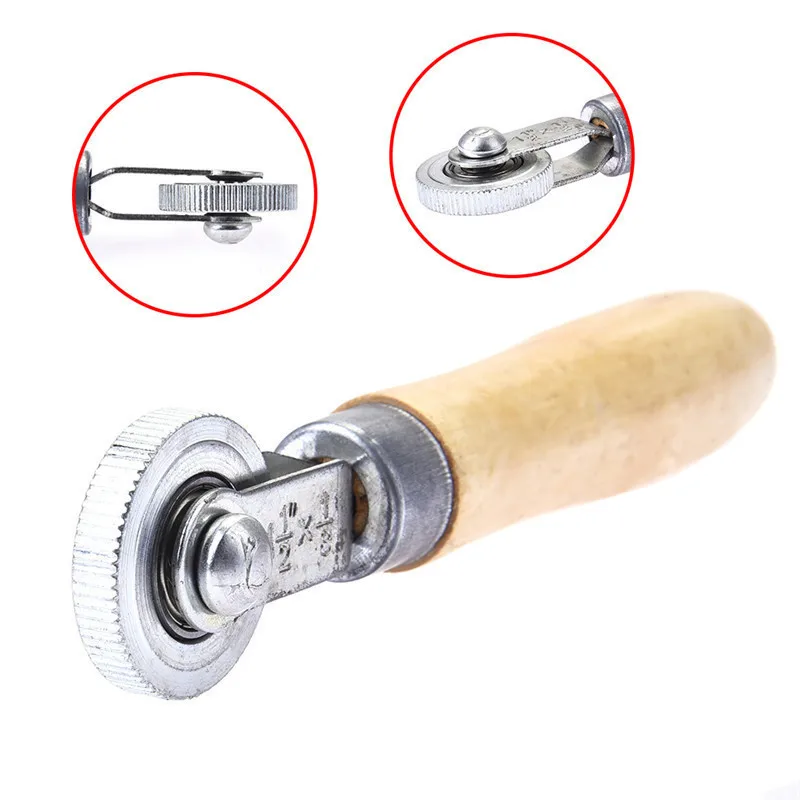 If that fails, try stepping on the bead with you boot. Put your full weight on it (make sure the brake disc is up or you could damage it). Jump up and down. Use both feet.
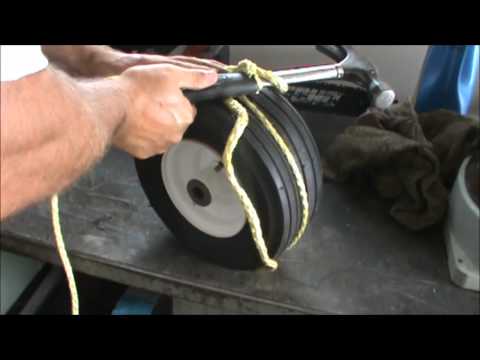
Another method is to use your bike as a bead breaker, provided it has a center stand. First make sure to secure your center stand in place by strapping it to the front wheel so that it doesn’t accidentally roll forward. Next, extend the kickstand, place the tire under it so that the kickstand foots is resting on the edge of the bead, then lean the bike over until the bead pops. Flip the tire over and do the other side.
You can also use your tire irons as bead breakers for stubborn beads. Work them between the tire and the rim, facing up at first, in a small area. As you create a gap, turn the spoons around so they face down and can squeeze between the rim and the tire. Continue working them around and the gap will grow. It’s a lot of work but eventually, the bead will pop off. Motion Pro also makes a set of tire irons with a built-in bead breaker that simplifies the task.
If all else fails, there’s the “nuclear” option: ride the bike, very slowly, for a bit. A flat tire generates a lot of friction and heat. The tire will start to squirm around which will work the bead loose. Note: This is only recommended for rear flats. It’s extremely difficult to control a bike with a flat front tire.
If you lube the bead of the tire with soapy water, it may make it easier to slide the tire over the rim, but lube also makes it easier for it to slip right back off.
The conventional wisdom is that lubing the tire bead makes it easier to get on and off the wheel. And that is correct; the bead will slide along the outer lip of the wheel much easier with tire lube, soap and water, Windex, etc.
But that also means the bead can just as easily slip back off when you are trying to put the tire back on the rim. You’ll get one section of the bead on, and the side about 90 degrees away will slip right back off. Unless you have a Bead Buddy, or something similar, you’ll feel like you need three hands to get the job done. What if you don’t have a Bead Buddy, or you run out of lube on the trail?
The answer is to practice your technique until you can quickly change a tube with just two tire irons, nothing more. Stand on the edge of the (flat) tire 180 degrees opposite of where you are working the tire irons to make sure the bead is in the drop center of the rim. Get it right and moderate pressure with the irons will move the bead right over the rim, without lube. In fact, the bead is more likely to stay put if it isn’t slippery.
There’s no need to take the tire completely off the rim to repair or replace a tube.
If you’re changing or patching a tube, there’s no need to take the tire completely off the wheel. Break the bead on both sides of the tire, then lever just the disc side off the wheel. Keeping the disc side up while you lever off the tire helps ensure it doesn’t get scratched or bent in the dirt. Once you get the tire off on one side, put your foot on the disc and lift up the tire bead with one hand, then pull out the inner tube with the other.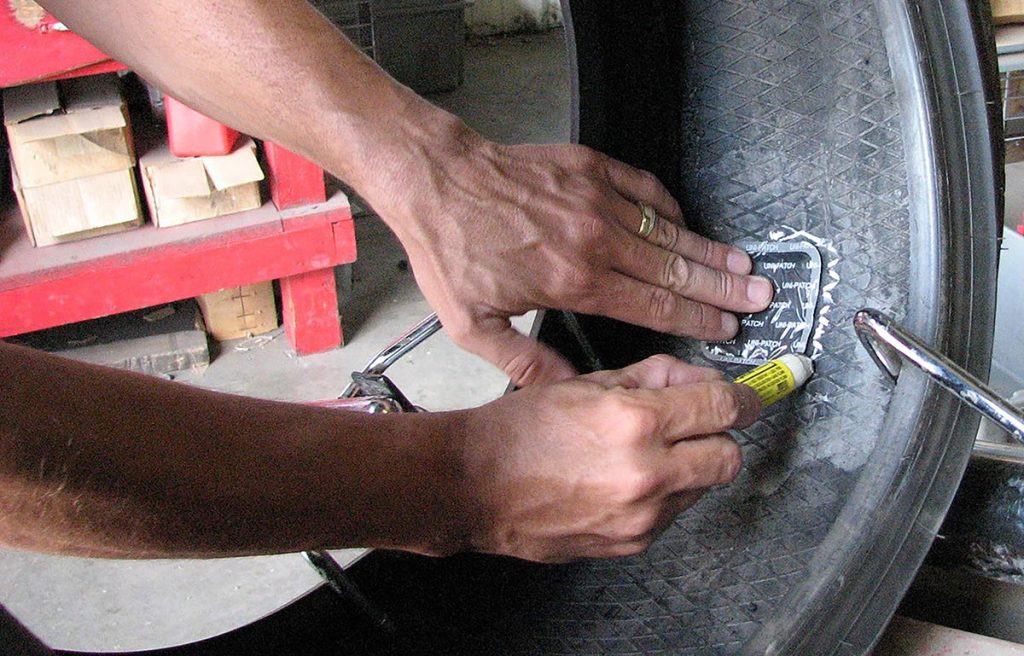
And don’t forget to run your hand around the inside of the tire and rim once the tube is out. Check for nails, stones or any sharp points that may have caused the flat. Debris can also get into your wheel bearings while you are working on your tire puncture repair, so it’s a good idea to put a rag under the wheel and store your axle and spacers in a clean area.
You want to make sure you keep all of your wheel parts clean, organized and out of the dirt. On some bikes, the exhaust pipe can be used as a handy axle holder.
Bonus Tip: It’s possible to patch a tube without taking the wheel off the bike. Some riders break the bead and lever one side of the tire off, then just pull the tube out with the wheel still in place. Of course, this method assumes you are patching the tube, not replacing it.
Make sure you push that inner tube down away from the edge of the rim. A little extra precaution can help you avoid re-puncturing a newly repaired inner tube with your tire irons while reinstalling the tire.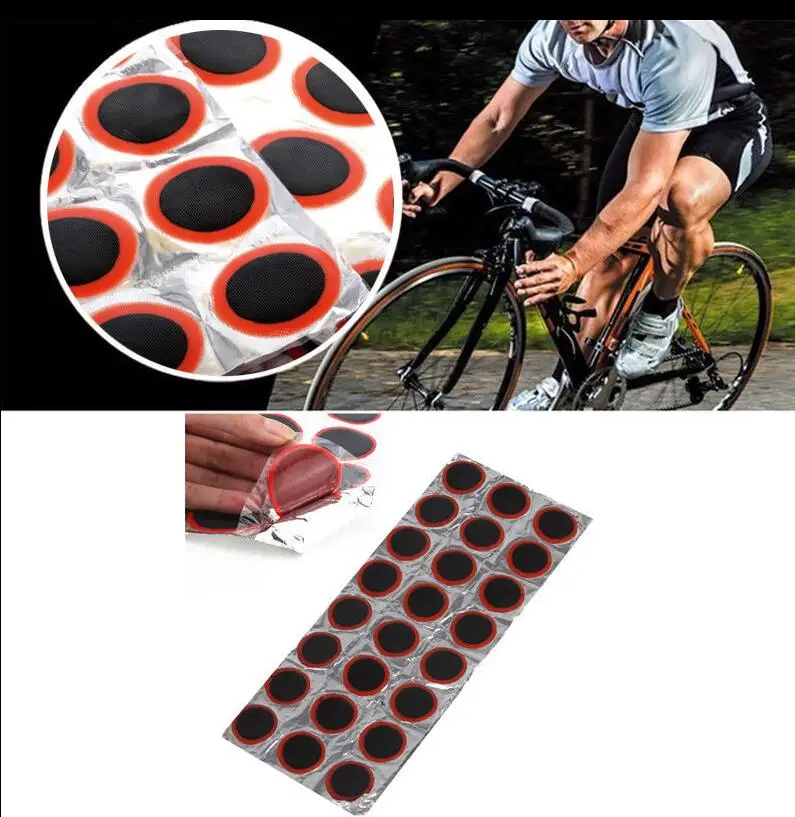
The tube is patched or replaced, the tire is back on the wheel, everything looks good. Then you air it up and … it leaks. It’s the dreaded pinch flat and it happens to the best of us.
Somewhere in the process of levering the tire back on, you managed to grab the tube with your tire iron and put a hole in it. Or the tube got twisted inside the tire and damaged when you aired it back up. Either way, it’s coming off and you have to start over again.
One trick for reducing the likelihood of pinch flats with tire irons is to put a couple of pounds of air in the tube before putting it back in the tire. You only want enough to keep the tube free of twists and allow it to roll out of the way of tire levers.
Put a couple of pounds of air in, then hang the tube on your extended index finger. If it creases about halfway up the tube, you’ve got it right.
Another trick is to remember not to over-rotate your irons. Don’t push the levers past 90 degrees, or perpendicular to the rim.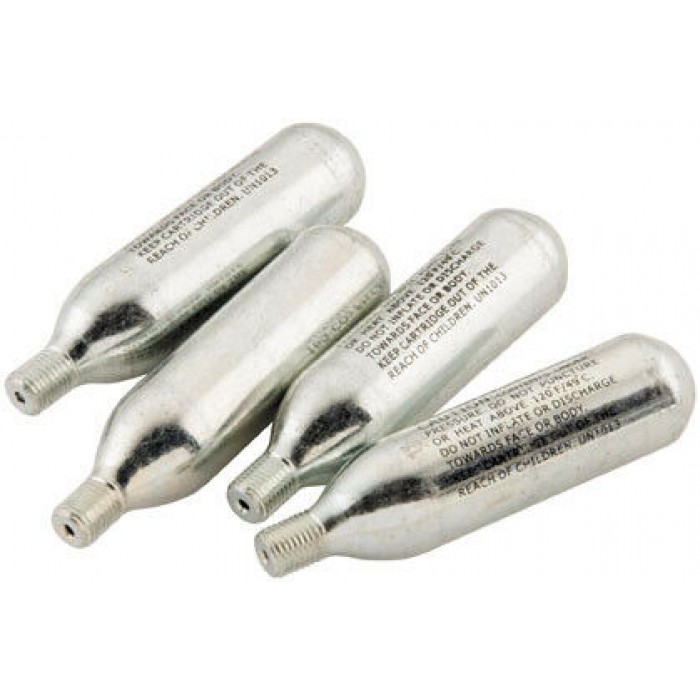 At that point the bead should slide on the rim and you’ll have less of a chance of catching, and damaging, the tube.
Bonus Tip: After reinstalling the tube, use the levers on the bead to guide the valve stem into the hole. With a little air in it, the tube will hold its shape and you can manipulate it by moving the bead, which is much easier than trying to get the valve stem seated with your fingers. A valve stem fishing tool is also handy for getting the valve stem pushed through the hole.
Got some useful tips for fixing flats of your own? Tell us your best tips in the comments!
Photos by Spencer Hill and Bob Whitby
Bob has been riding motorcycles since age 19 and working as a journalist since he was 24, which was a long time ago, let’s put it that way. He quit for the better part of a decade to raise a family, then rediscovered adventure, dual sport and enduro riding in the early 2000s. He lives in Arkansas, America’s best-kept secret when it comes to riding destinations, and travels far and wide in search of dirt roads and trails.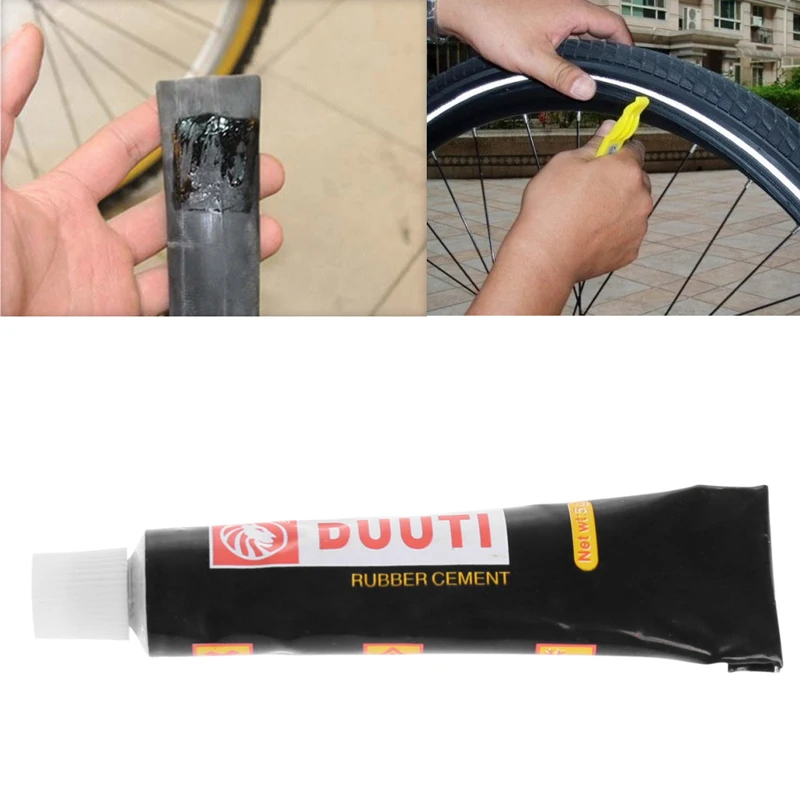
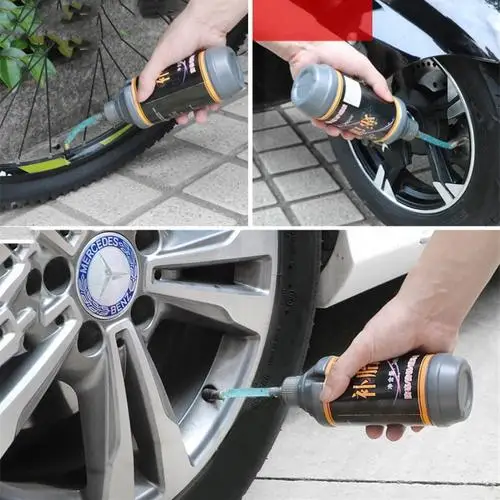
A nail or other sharp object that has pierced through the tire, preventing further movement of the vehicle. Today, tire repair, like decades ago, is carried out using rubber patches and glue, only at a higher technological level. To repair punctures in tube and tubeless tires, special rubber fungi, fungal legs and patches are used, which allow repairing punctures up to 15 mm in diameter without using a special tool.
Rubber mushrooms and a combination of fungus legs with patches allow you to repair all types of tires: radial and diagonal, conventional tube tires and tubeless tires for cars and trucks.
Tire repair using this technology restores the full performance of the tire up to the end of the tire life, provided that the repair technology is followed.
In general, the tire repair fungus has a very simple device, and consists of two main parts:
The hat is made of rubber and has an adhesive self-vulcanizing adhesive layer on the inside (on the stem side). The leg also has an adhesive self-vulcanizing layer and a variable diameter, at the base it is larger, since it is this part that fills the puncture, at the end it is thinner (for threading a special device for installing the fungus into the ear). Another version of the fungus stem, when a metal rod is placed in its thin part, which allows inserting the fungus stem into the puncture without an additional tool. At the base, the leg may have a corrugation with a depth of up to 1.5 mm, which increases the reliability of fixing the fungus in the puncture.
Tire repair fungus is a versatile and reliable tool, but it can not always be used. There are three restrictions on the use of fungus:
For a successful tire repair, you need to choose the right fungus - it must be suitable for the type of tire (tubed or tubeless, passenger or truck) and have a stem diameter 1-2 mm larger than the puncture size. With the right selection, the repair will be successful, and further operation of the tire will not cause problems.
1. Determine and mark with a marking wax chalk the place of damage outside and inside the tire. Remove the item that damaged the tire.
2. Using the T109 spiral file, determine the angle of the damage and its size. If the angle of damage exceeds 25 degrees, then a two-part repair method must be used.
3. We select the fungus corresponding to the size of the damage. The fungus is selected in such a way that the diameter of its stem is 1-2 mm larger than the size of the damage.
4. Mark with chalk inside the tire the place of machining under the cap of the fungus, retreating from the edge of the cap 10-15 mm.
5. We process the marked place with buffer cleaner A110, removing dirt with a scraper T103. We repeat this operation 2-3 times.
6. Drill a hole for the stem of the fungus using a cutter that matches the size of the stem of the fungus and a low-speed drill (up to 2500 rpm). Drilling should start from the inside, then from the outside. The operation is repeated 3-4 times.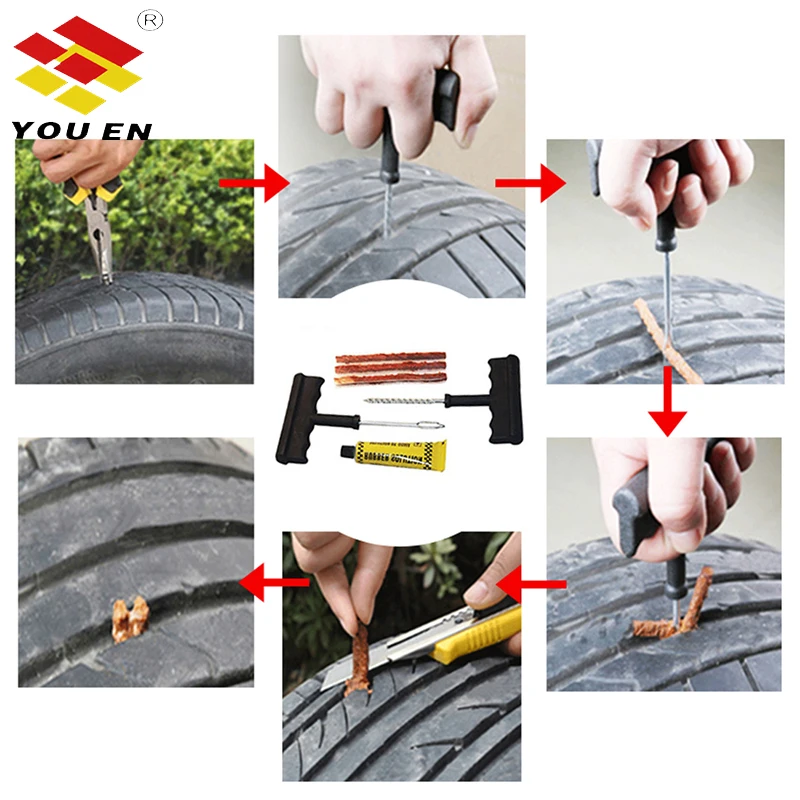
7. Once again we process the place under the cap of the fungus with buffer cleaner A110, removing dirt with a scraper T103.
8. We process the cleaned place with an abrasive tool at a rotation speed of not more than 3000 rpm. Be sure to use safety goggles.
9. Remove crumb rubber and cord residue with a vacuum cleaner or soft brush.
10. We coat the hole under the stem of the fungus with glue A024 using a spiral file T109. Leave the file in the hole.
11. Apply glue A024 to the surface treated for the fungus cap in a thin even layer. Let it dry for 3-5 minutes.
12. Remove the protective film from the adhesive layer of the stem and cap of the fungus without touching it with your hands.
13. Remove the spiral file from the hole and insert the metal tip of the stem of the fungus into the hole from the inside of the tire.
14. We grab the tip of the fungus stem with pliers and bring it to the surface of the tire, controlling the snug fit of the cap to the inner surface of the tire.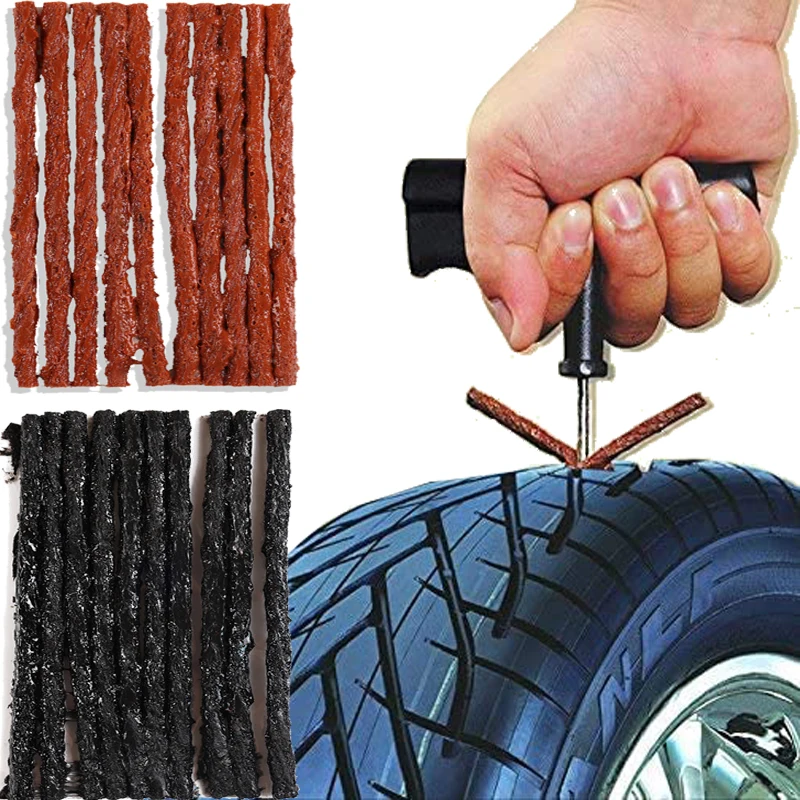
15. Roll the cap of the fungus with a roller from the center to the edges. Remove the protective film from the outer surface of the cap and once again roll it (the cap) from the center to the edges.
16. We process the edge of the head and the remaining cleaned surface on a tubeless tire with A305 inner layer sealant, and on a tube tire with talc.
17. Cut off the protruding part of the stem of the fungus at a distance of 2-3 mm from the surface of the tire. We check the place of repair for tightness. The repaired tire is ready for use.
Under the order
On order
Under the order
Under the order
On order
Under the order
Under the order
On order
Under the order
Under the order
On order
No comments at the moment
Your name
your comment
The motorcycle gives a feeling of freedom, allowing you to discover new routes. However, in reality, this freedom can turn into a trap in an instant if you are unlucky enough to puncture a tire somewhere in the middle of the road. The feeling of annoyance will be ten times stronger if there is no way to fix a punctured wheel. At this point, it remains only to hope for cellular communication and help from other drivers on the road. Therefore, consider the basic recommendations for repairing a motorcycle tire on the road.
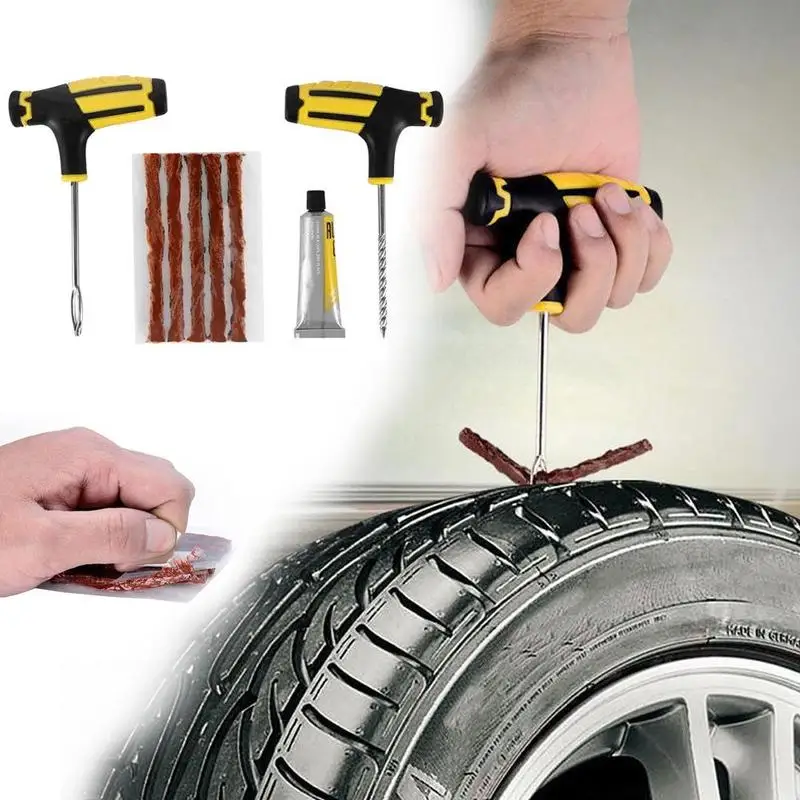
Always keep a rubber band or tire repair insert in the trunk. This simple tool will add peace of mind on the road. It will be much better if you learn how to use it in advance. You don't want to be the guy who has the right tool but lacks the skills to fix a problem, even something as simple as fixing a tire, do you?
The repair technology for tube and tubeless tires is different, but both types are subject to restoration (at least to such a state as to get home). Repairing a tubeless tire is easier. Repairing a tubed tire requires removing the wheel, removing the tire, and removing the tube to install the patch.
So you hit a nail, screw, glass, or that damned sharp stone and punctured a motorcycle tire. If the object that caused the damage is still in the rubber, the first step is to remove it. Pliers are great for this. Therefore, you should always keep this tool in the trunk: with it, you need to grab an object sticking out of the tire. Try to pull it out along the same path that it entered the tire so that the puncture does not increase and become torn.
After removing the object, clean the edges of the pierced hole. To do this, the repair kit must have a special tool - a tool for cleaning holes. All debris and rough edges must be removed to create a surface for patching.
Next, you need to install a patch. Different kits offer different types of patches, so you should read the kit's manual to complete this step correctly. However, there are two main types of patches: long cord patches and fungus patches. Some kits may include adhesive to bond the patch to the tire rubber.
Patches or cord inserts are supplied with an awl for installation. It is necessary to bend the cord in half, and thread one half into the tool. This is necessary for a tight fit of the material. Next, bring the cord into the hole until it protrudes above the tire by about 1 centimeter. Then you can pull it out of the awl and put the tool aside. Take a knife and cut off the excess patch material by about 0.5 centimeter.
Mushroom patches (plug and play type) require the use of a special tool for installation. Again, you must follow the instructions for the specific repair kit. Then stretch the patch material with pliers. When the puncture is closed, you can cut the patch over the tire.
After installing the patch, the tire needs to be inflated. For repairs on the road, you will need either a 12V electric compressor that can be connected to the motorcycle's electrical system, or a CO bottle 2 . Carrying a compressor with you is not always convenient. A more compact and more portable option is to use the small cans of CO 2 in combination with the tire inflator. This is the fastest way to inflate tires on the road.
If possible, apply some soapy water to the patch to make sure it is airtight. If there is a leak, you will see tiny air bubbles around the repaired area.
On-road retreading of tube tires is a more labor-intensive process. If your motorcycle is equipped with such tires, then you will need a few more tools to repair them. In most models, you will have to remove and disassemble the wheel in order to get to the camera. The vehicle owner's manual should describe how to do this and what tools to pack in your luggage. In addition, you will need a tire removal tool. It makes the job easier.
Once the inner tube has been removed from the wheel, the remaining air must be completely deflated. The next step is to prepare the camera for patching. The repair kit should include a special scraper to roughen the surface around the punctured hole.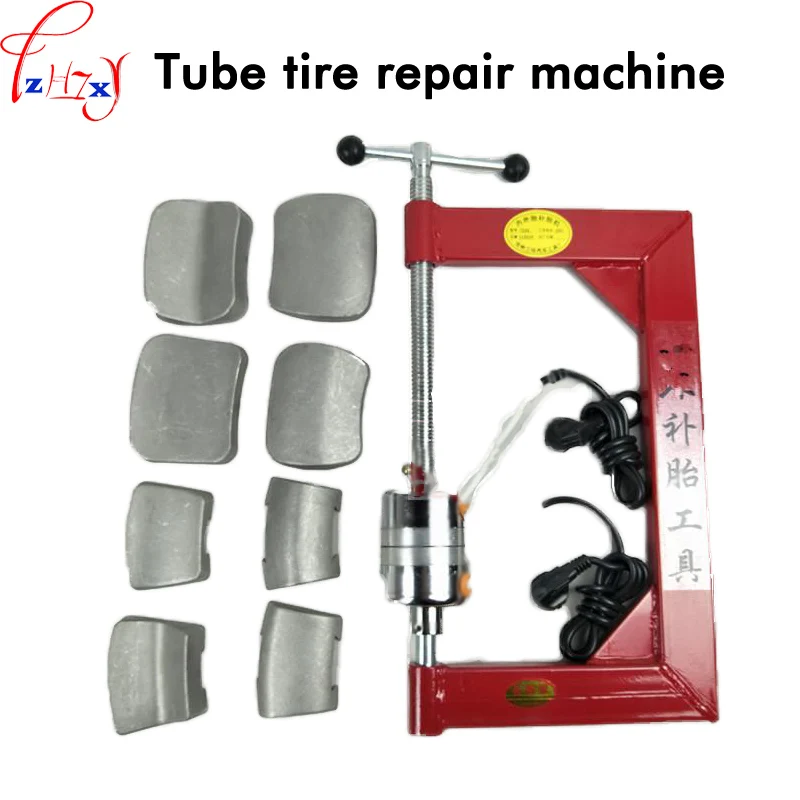 This treatment is necessary to ensure adhesion of the patch to the chamber material.
After completing the preparation, you can start installing the patch. Follow the instructions in the repair kit manual. Some patches come pre-applied with adhesive, while others require the use of the included adhesive. It is necessary to place the patch on the damaged area of the tire and lap it firmly, moving from the center to the edge, to ensure a snug fit without air bubbles.
Now that the inner tube has been repaired, the tire needs to be checked to make sure the object that caused the puncture has been removed from the tire. Then you can install the camera and tire in place, after which it remains only to pump it up. If possible, the tire should be checked for leaks.
So, after retreading a tire yourself, the best solution is to immediately go to the nearest tire repair shop. Specialists will perform a much more efficient repair, guaranteeing driving safety.