CHINESE ATV CARBURETOR (50cc to 110cc 4-STROKE) SERVICE & REPAIR MANUAL [email protected] for parts www.streetpartz.com
This Manual is designed to help the novice & expert understand, adjust and rebuild your carburetor on your Chinese ATV. It is divided into 3 sections; 1. Understanding the fundamentals. 2. Adjusting your Carburetor. 3. Rebuilding (proper cleaning)
Carburetor "The Fundamentals" Its operation is a mystery to most, and because of that carburetor troubleshooting and tuning has earned a reputation akin to black magic, when in reality a fundamental understanding coupled with a little experience in interpreting engine feedback is enough to become fluent in the ways of old fashioned air-fuel mixing Basic Function Fundamentally, and entirely, the carburetor's job is two- fold: first - to throttle (or control) the airflow to the engine, and second - to add fuel in the appropriate quantity to that airflow.
That's it. Period. But notice the subtleties of that definition. First we need airflow, then we need fuel. Put another way, your right hand is not connected to the "gas", but more accurately to the "air". The ability to produce power is directly linked to engine's ability to injest air. Porting, low restriction intake, and tuned exhaust all are designed to improve airflow into the engine. Of course, air has no energy content, gasoline does. But because the two are mixed together in a precise ratio, more air translates to more fuel, and more fuel (which does have energy content) translates to more power. However, somehow, power needs to be controlled from zero to maximum. That's where the first function of the carb comes in - the throttle limits the airflow, and therefore the power. Nothing particularly magical about the throttle. Suffice it to say that the throttle accomplishes two things - it limits airflow, and creates vacuum between it and the engine. So let's talk about fuel now.
 There is a chemically correct ratio of air to fuel, which is called the stoichiometric ratio. For gasoline, this ratio is about 14.5 lbs of air to 1 lb of fuel. Your fuel injected car runs that ratio nearly exactly all the time thanks to things like computer control, and oxygen sensors. Its catalyst needs that type of control to keep the exhaust clean. But for off-road, performance-oriented engines, a little richer is better, like around 12-13:1. But how exactly do we accomplish that with an antiquated hunk of die-cast aluminum? With some pretty basic fluid mechanics... The "Primary" System Let's pretend we're inventing the carburetor, and start out with a pretty simple scenario: your engine is idling, therefore not much air and fuel is required. That means the throttle is almost complete closed, and there is a high amount of vacuum between the engine and carburetor. If we want to match the air stream with some fuel we could tap into the float bowl and direct that fuel into the vacuum side of the throttle.
 The vacuum created by the engine with the throttle closed will draw the fuel up from the bowl. We would drill this passage pretty big, but then limit the fuel by installing a smaller orifice inline. We'd keep changing this orifice until just the right amount of fuel was passing into the carburetor. To fine tune that fuel flow, we could add a needle valve that's adjustable by hand. In a nutshell, this is your primary fuel circuit. In our simplistic schematic
below the inline orifice is more commonly identified as the pilot jet. The hand adjustment is the low-speed mixture screw, or idle mixture screw, or air screw. From the diagram below you'll notice that there's a path from the air-cleaner side of the carburetor to the near the pilot jet. This illustration shows an alternate way to control fuel flow through the primary circuit, which is by displacing the fuel by air fed in through the air screw. The more we open the air screw the leaner the mixture will be. The "Secondary" System But sitting around idling will get old pretty quick. We need to make some power to get the machine moving. So we start to crack open the throttle, which has a dual effect. First it increases the airflow to the engine, and second it drops the vacuum. As far as the primary circuit is concerned, this is problematic for a couple reasons. The drop in vacuum means there's less "force" pulling the fuel into the intake stream. To compound this, there's a lot more air going into the engine without an accordingly higher amount amount of fuel. We need a new method to draw fuel from the float bowl... Here's where a bit a fluid dynamics comes into play, thanks to a guy named Bernoulli who a century ago realized that if you neck a tube down in the center (like an hour-glass laying down) then a vacuum will be produced at the center that's proportional to the airflow, aka a venturi. That'll be perfect when the throttle is wide open. If we add an orifice (a main jet!) between the float bowl and the venturi port we can vary the amount of fuel that's delivered.
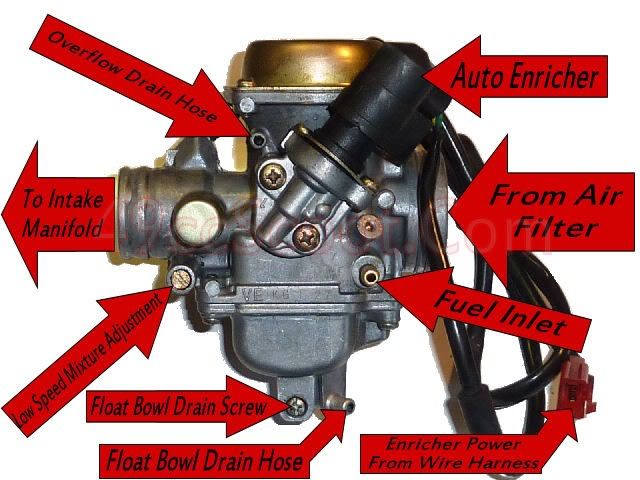 Theoretically, this shouldn't change much, but adjustments might be
necessary to compensate for air density variations (due to humidity, temperature, barometer), and for things that might affect the vacuum signal between the venturi and bowl (like air-cleaner restriction). The "Everything Else"System Alright, it looks like we got both ends of the operational spectrum covered. But not too many of us work the throttle like a light switch. We need a system to handle the varying fuel delivery requirements at part throttle. Problem is, at part throttle the venturi is really sucking (literally), and although the main jet is sized perfect for wide open throttle, it's just too big and supplying too much fuel at part throttle. We're running way too rich. A system for trimming the fuel flow according to throttle position is what's really required. Since the throttle slide is moving up and down why not attach a long tapered needle to the slide and move it in and out of another orifice, so that the cross-sectional area available for fuel flow changes as the needle moves up and down? Perfect.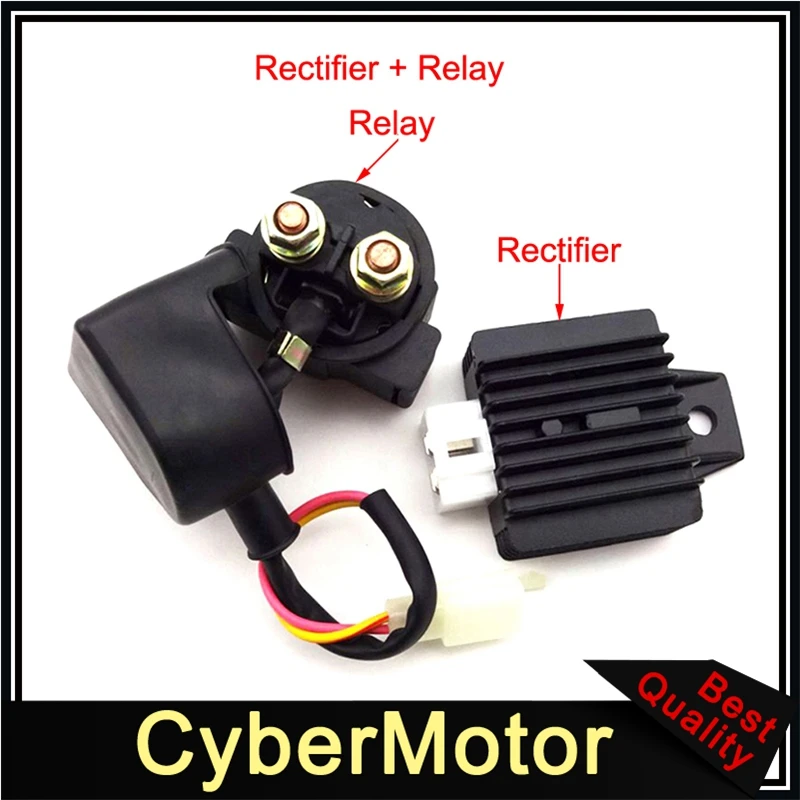 At idle (throttle closed and needle down) it pretty much blocks any fuel flow. And at full throttle the needle is completely out of the way, thus allowing the main to perform full fuel metering duty.
Carburetor Adjustment & Troubleshooting Carburetor adjustment is another one of those great mysteries of engine tuning that some perceive as being a black art. And true enough, it is a bit of an art if you lack the sophisticated equipment to do it scientifically such as CO analyzers and dynamometers. And as an art form, it takes practice to get good at it. Carburetor adjustment can be done by the garage tinkerer quite successfully, and has been for years. Unfortunately, it does take some trial and error and experience developed over time to do it well. The topic of carb tuning has been covered by just about every motorsport website, and has had countless books written on it. The intention with this installment in our carburetor series is to tackle the subject in the context of the asian mini-quad. Specifically, what are the pitfalls and troubleshooting techniques that are unique to these machines. The most fundamental idea regarding carb adjustment is that there is an ideal air to fuel mixture for every engine operating condition. This is not only defined by the engine’s own unique requirements, but also by the air density (temperature, pressure /altitude, humidity). What this means is that not only must a tuner determine what the engine wants at a certain environmental condition, but that adjustments may need to be made to accommodate a colder day, a more humid climate, or a higher altitude. The idle mixture screw on the Asian mini-quad is located near the air-cleaner side of the carburetor (slotted screw on upper right hand of the photo).
Before getting into the environmental adjustments, the first step is to get the adjustments and jetting correct for that engine configuration. Anything that would affect the engine’s breathing ability will affect carb adjustment. Obviously, installing an aftermarket carb will require tuning, but so will changing to a different air filter. Cylinder porting and a pipe will not directly require a tuning adjustment since they only affect the engine’s ability to create airflow. The carb really doesn’t know what’s downstream. However, it might care what’s downstream – for example, if a pretty hot cylinder is installed with lots of compression and/or lowend porting, then the carb might want to be a little richer, or fatter, to decrease peak combustion temperatures. Ideally, tuning should be done at the “near normal” conditions you expect to run so as to minimize the need for fine tuning when conditions change. Whether stock or aftermarket, the first step in carb adjustment is to dial in the idle circuit. Remember that a relatively high vacuum exists downstream of the throttle slide when it’s closed, or at idle. A passage in this area is connected to the float bowl that allows fuel to be sucked into the engine while the throttle is closed.
 As the throttle is opened, this vacuum drops and the amount of fuel drawn into the engine through this passage decreases accordingly. We can adjust this amount of fuel by turning the idle mixture screw. On these carburetors the idle mixture screw actually controls the amount of ‘’ air that’s bleed into this passage. The more the screw is turned out, the more the bleed passage is opened, and therefore more air instead of fuel that’s being sucked into the engine via the primary or idle circuit. The idle circuit air supply passage can become blocked with dirt and cause a rich running condition. This is the hole at about 7 o'clock on the carb inlet.
The question is just how do we know when the adjustment is correct. The simple answer is when you’ve obtained the highest idle rpm. The highest rpm is achieved when the air-fuel ratio (AFR) is optimized. Remember that while this adjustment is being made the throttle is essentially fixed, that is, held at idle. We are not changing the amount of air being drawn into the engine.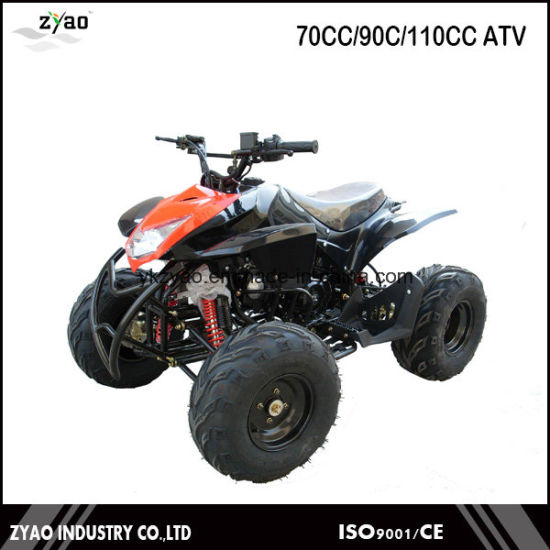 If the engine rpms increase, that would imply that the engine is doing a more effective job converting the fuel and the given amount of air to useful mechanical power. Too little fuel, and the revs are too low. Too much fuel, and the revs are also too low. Somewhere in between, and combustion efficiency and the revs are maximized. With the engine off, turn the idle mixture screw in (CW) until the screw seats and count the number of turns. Note this number as a “fall-back” if you decide that your adjustments are not working and you want to get back to the baseline, or ground zero point. Next, turn the screw back to the baseline adjustment and start the engine and warm it up thoroughly, maybe even ride the quad a bit before starting the adjustment. With the engine running at idle turn the screw in (CW). This has the effect of closing the ‘air bleed’ passage to the idle circuit, thereby allowing more fuel to be drawn up from the float bowl, richening the fuel mixture. Make 1/4 turn increments until you notice a drop in engine speed .
 Then turn the screw out (CCW) in 1/4 turn increments. You should notice the engine revs going back up, then dropping again. Take note of how many turns it took to reach this point. Divide this number in half to determine where the theoretical optimized point is. Turn the screw in to reach this point. You may need to experiment with this procedure a few times to satisfy yourself that you’ve found the sweet spot. If by turning the screw you were never able to find the point where the revs peaked, i.e, the revs keep climbing/dropping until you bottomed the screw, or the screw came out, then you may need a different size pilot jet. As noted above, the idle circuit is fed by a passage that connects a port in the carb to the float bowl. The amount of fuel drawn by this circuit is not only controlled by the idle mixture screw, but also by the size of the orifice in the pilot jet at the float bowl. If you’ve turned the screw in completely (air bleed totally closed) and the revs seemed to keep increasing up to that point, it would indicate that the engine is wanting an even richer mixture.
 Install a bigger pilot jet. If you’ve backed the screw completely out and the revs still haven’t peaked, it would indicate a need for even more bleed air, or less fuel. Install a smaller pilot jet. If adjustment of the idle mixture screw doesn’t seem to have any affect, then one of two things is going on. The first most likely possibility is the air bleed passage may be blocked. This can occur if the air-filter has passed too much dirt which has gotten into the passage at the mouth of the carb. If this happens the engine will be running very rich, but can still run. The second possibility is that the pilot jet itself is blocked from dirt getting into the float bowl. If this happens, very little or no fuel will enter the carb.
It’s quite likely that engine will not even run since the primary ingredient in the recipe for combustion is missing – fuel. Engine’s generally have a higher tolerance for too rich than for too lean. If it seems you need quite a bit of throttle to keep the engine idling (no longer using the idle circuit for fuel supply) then this could be your problem.
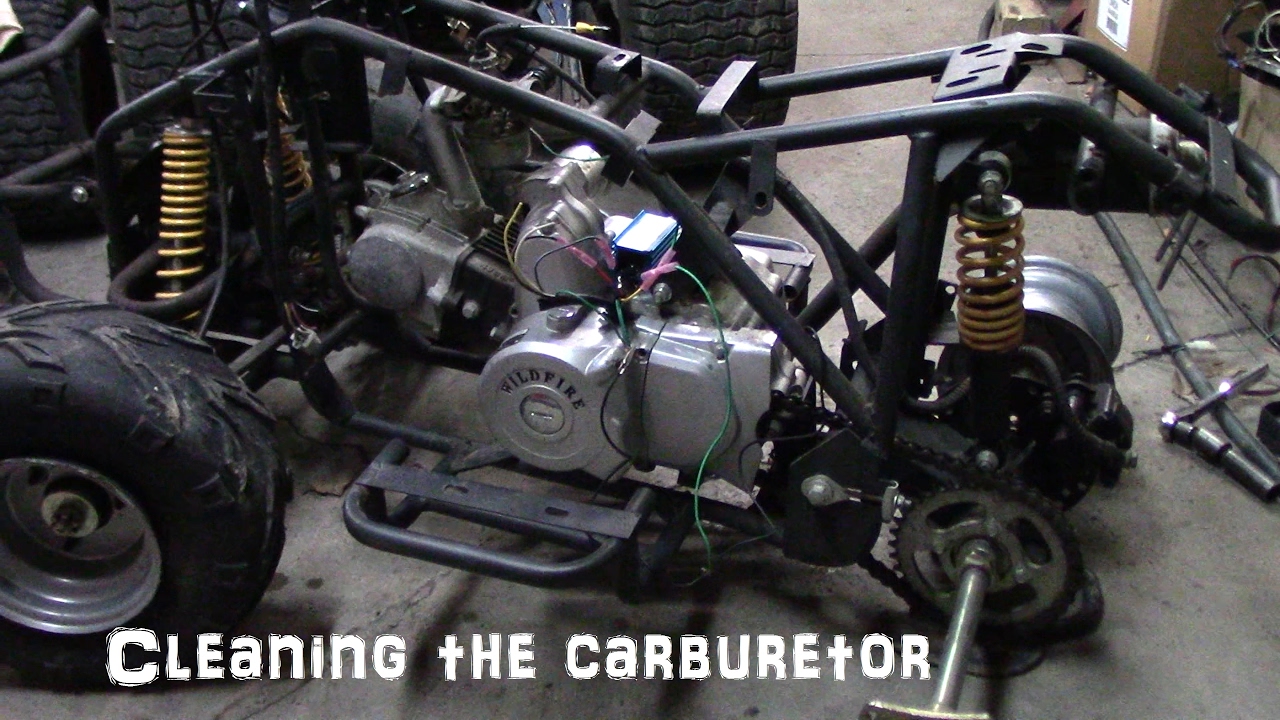
Carburetor Cleaning: Ninety-five per-cent of the time, carb rebuilding is nothing more than taking the thing apart, cleaning it all up, replacing a few worn parts, and putting it back together. A thorough, immaculate cleaning job should not take any longer than an hour to per-form, and more like 15 minutes if you’re in a hurry. First, remove the carb from the atv. In most cases, it’s easiest to remove the top of the carb and pull the slide out before you pull the carb out of the manifold and air-box boots. This is fine—just leave the slide hanging there from the cable and take the carb over to the bench. Drain the old fuel out of the carb body and remove the four screws that hold the float bowl on. Remove the floats, and the float needle and seat. Remove the main jet and pilot jet; push the needle jet up with a blunt object and pull it out the top of the carb. Moving up to the outside of the carb, re-move the idle adjust screw and the idle air screw. Remove the choke lever, and care-fully remove the nut that holds in the choke assembly.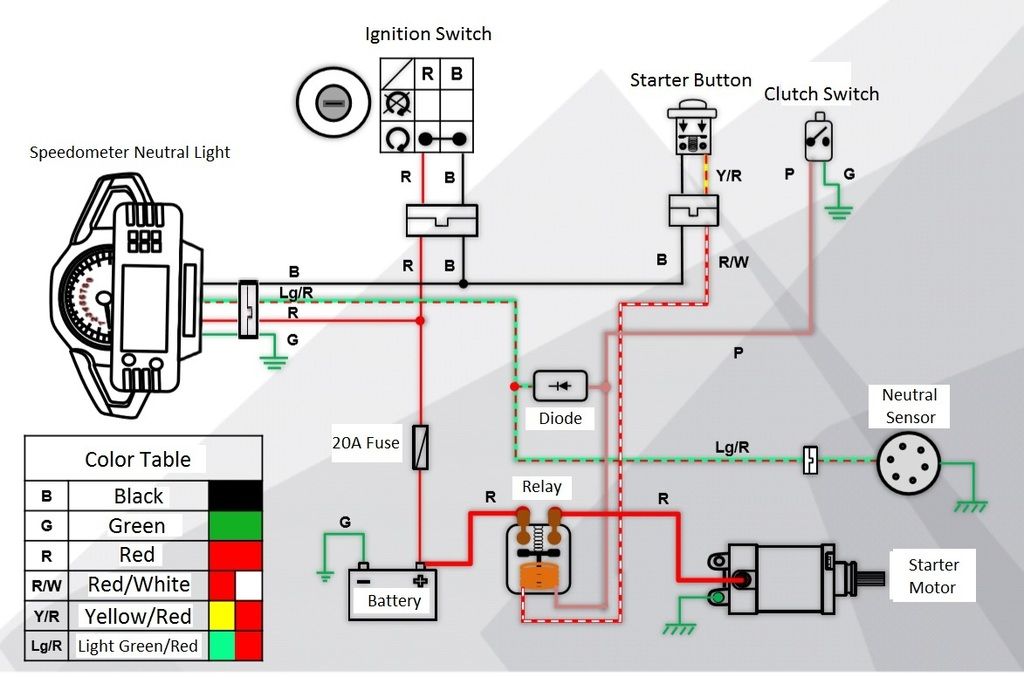 Pull the choke assembly, spring, and related parts out of the body, and sit them on a clean rag with the rest of the jets. A good example of a slightly worn slide. If the grooves get any deeper than this, it will be necessary to replace it. The new one will last longer if dirt is
When you purchase through links on our site, we may earn a commission at no additional cost to you. Learn More
Chinese-made ATV brands such as TaoTao, Baja, X-Pro, and Linhai offer an affordable entry point into ATV riding. But just like with anything with an engine, you may eventually find yourself in a situation where the vehicle does not want to start.
Often, particularly with newer bikes, the issue turns out quite obvious and relatively simple to fix. On older models that have had a rough life with a lot of use and abuse or have been sitting a lot, you may have to put more effort into getting it running again.

Before spending too much troubleshooting potential mechanical issues, it is a good idea to revisit the proper starting procedure for your ATV.
Forgetting one or more steps in the standard start-up procedure is the most common cause when an ATV won’t start.
If that’s the case, no worries, it has happened to me, and it usually happens to everyone at some point.
Chinese ATV starting procedure (ATVs with an electric starter)
Tip:1 Most ATVs have a starter interlock feature that prevents the starter from engaging if the gear shifter is not in park or neutral and the brakes are not engaged. You won’t hear any noise in this case, and the ATV will act like it’s completely dead.
The brake must be engaged for the ATV to start.Tip2: Chinese ATVs often have a manual choke lever on the carburetor. Alternatively, there is a choke lever on the handlebars. When it’s cold or if the bike has been sitting, you may need to activate the choke for the bike to start.
If the ATV did not start after the basic start-up procedure, a mechanical issue might be causing the problem.
The fastest way of troubleshooting a no-start situation is based on what symptoms the ATV displays and then through a process of elimination, beginning with the most fundamental issues.
Note that this post covers the most common causes to look into when your Chinese ATV does not want to start. The list of possible causes is almost endless. If you do not find a solution to the problem in this post, please refer to our more in-depth ATV won’t start troubleshooting guide.
If you at any point feel that you’re stepping outside your mechanical comfort zone, your best bet is to take the bike to the dealer for further investigation and assistance.
You go to start the ATV like you usually would with the ignition key set to start and the kill switch turned off / set to the “RUN” position. But when you hit the power button, nothing happens.
If the battery voltage drops too low, it may not have enough power to turn the starter engine.
How to read battery voltage using a multimeter
If the battery voltage is low, you need to recharge the battery.
A battery sitting at a low voltage for an extended period may be damaged beyond repair.
Related: How to Test an ATV or UTV Battery. Good, Reduced, or Bad? and How to Charge a Dead ATV Battery
The wire connectors should be firmly connected to the battery terminals. Snug them up if they are loose. Also, make sure the wire connectors are in good condition and properly connected to the wires.
If there is any corrosion on the battery terminals or wire connectors, they need to be cleaned for a proper connection.
Caution: Always wear protective eyewear when working with or near the battery. Be careful not to short the battery by accidentally touching ground with the tool when working on the positive battery terminal.
Most Chinese ATVs have the main fuse on the positive (red) starter wire.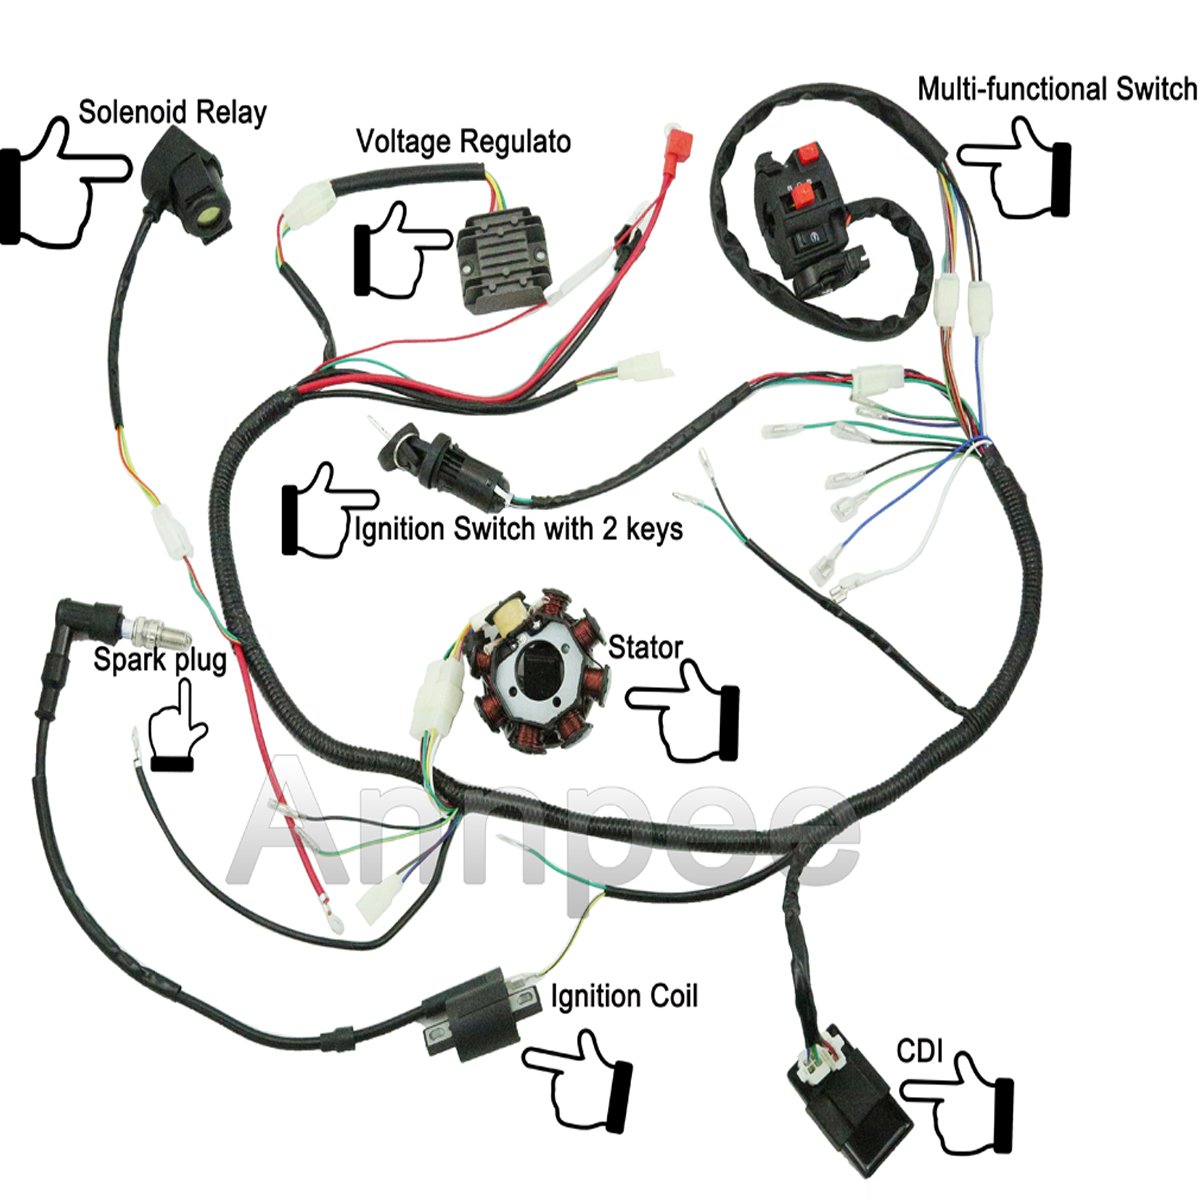
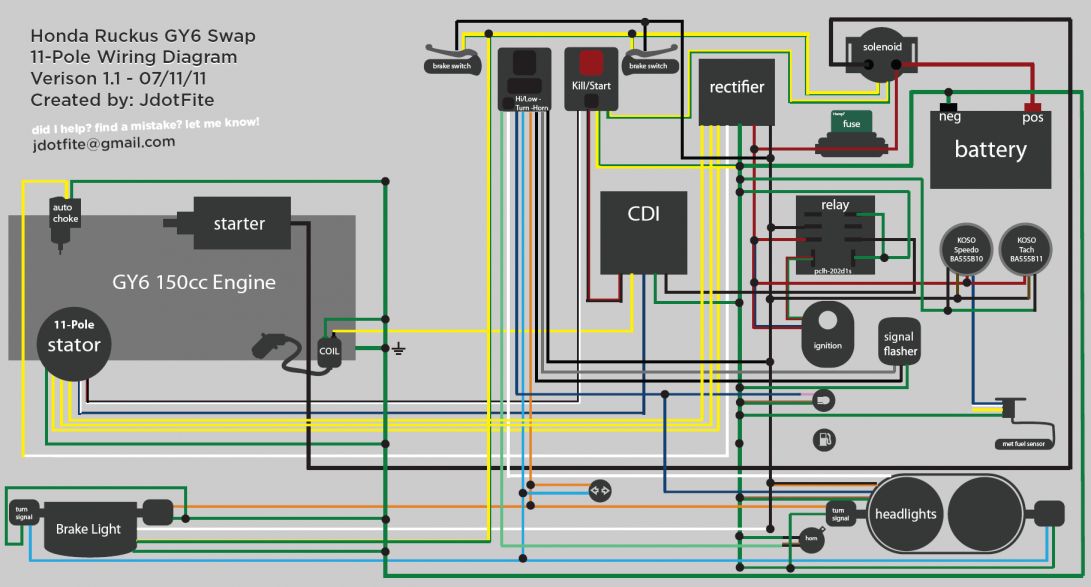
ATVs either have a starter relay or a solenoid. We’re not getting too technical about the difference between the two, as they serve the same purpose.
The starter relay/solenoid is a component in the ATVs electrical system that activates the electrical starter when you press the starter button. They are powered directly from the battery with a heavy gauge red positive wire and ground through a black wire or directly through the frame.
Smaller ATVs typically use a relay due to the low current required to run the starter, while bigger ATVs typically use a solenoid.
A starter relay looks almost like any other relay; a small box about 1×1 inch in size.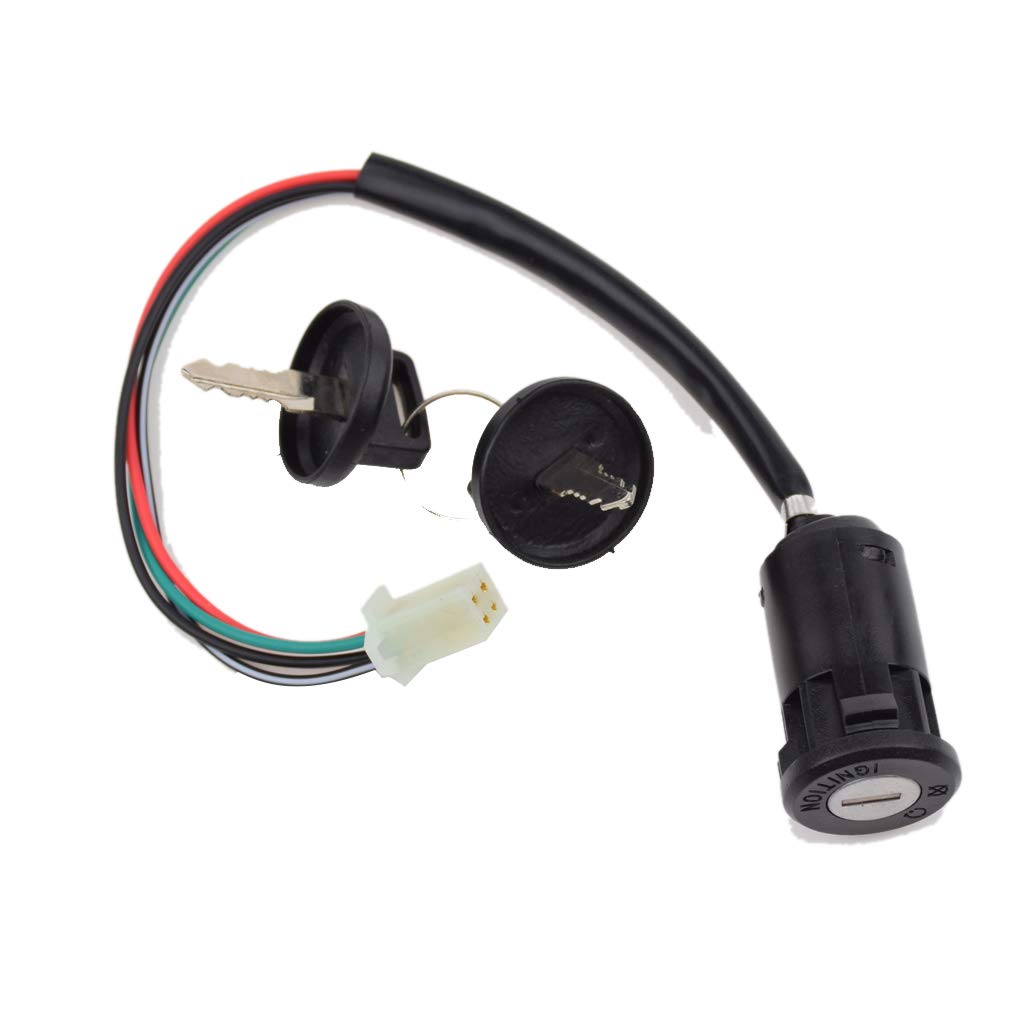
The solenoid is cylindrically shaped and slightly larger than a relay. It has three or four connectors, typically located near the starter motor.
Each time you press the starter button, the relay/solenoid should make an audible clicking sound. The sound is less audible on relays than on solenoids. If you hear a click, you know it is getting power.
If there is no sound, the relay/solenoid may not get power or be seized.
You can use a multimeter to test if there is a power issue. The multimeter settings are the same when reading the battery voltage.
The relay/solenoid gets power if you get a reading of 12V or more at the battery side connector.
If there is no reading, ensure the wires coming from the battery are not damaged, are properly connected, and there is no corrosion at the terminals.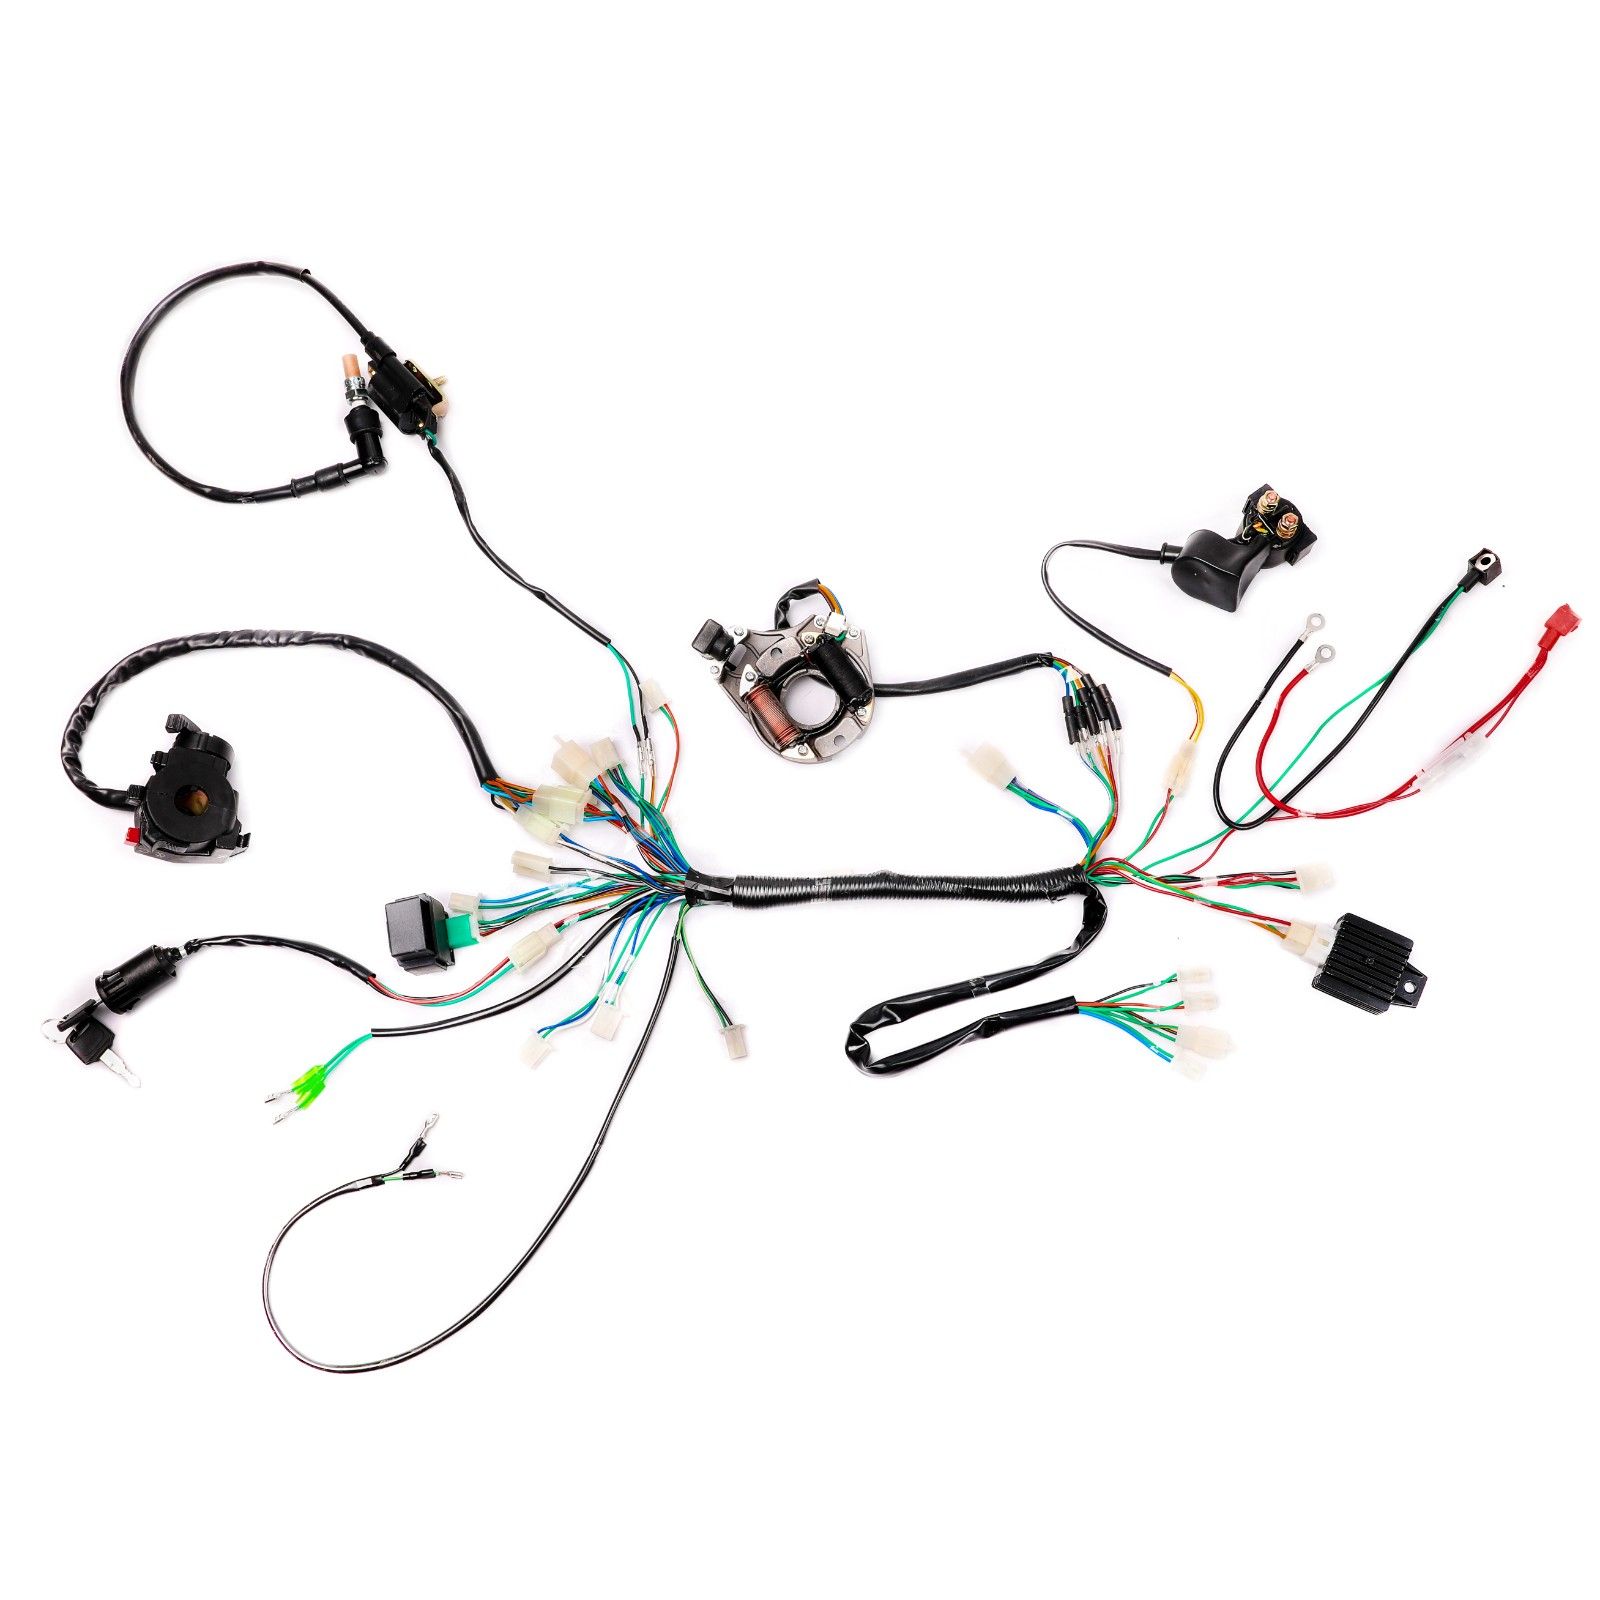 Also, check for rust as three-prong solenoids grounds through the base.
Starter buttons can go bad from internal corrosion or mechanical failure. If you have a multimeter, testing the starter button is relatively straightforward.
The kill switch is typically unused over extended periods and may therefore short out due to internal corrosion.
The two internal terminals on a working kill switch should connect when the switch is in the “Off” or “0” position. Moving the switch to the “Run” or “1” position should break the connection.
To test if the switch is working, you can use a multimeter to test for continuity as you did with the starter button.
As a short-term solution with a corroded switch, you could attempt disassembling and cleaning the switch internals with a wire brush and some WD40. But for a long-lasting result, you are likely better off replacing it with a new one.
If both switches check out alright, ensure the wiring from each button is undamaged and properly connected.
You press the starter and hear a clicking sound, but the starter does not engage, and the engine does turn. This indicates there is an issue with the solenoid or possibly with the starter.
Because there is a clicking sound, you know that the solenoid is getting power. But the solenoid could be faulty even if it clicks.
Inside a solenoid, a spring-loaded, electronically charged magnet switch is connected to a steel bar.
Pushing the starter button activates the magnet switch so that the steel bar completes the circuit between the positive input terminal from the battery and the output terminal going to the starter. This is what causes the clicking sound.
When releasing the starter button, the spring ensures the connection is broken instantly and disengages the starter.
When you hear a click but the starter does not engage, there is no connection between the two terminals. This is usually caused by corrosion at the base of the terminals. The metal bar comes up but is too corroded to pass an electrical current between the two terminals.
The solenoid internals may rust if exposed to water, causing the solenoid to seize up. This eventually causes the solenoid to burn out as the rider keeps trying to start, but the solenoid cannot complete the circuit.
One way to test a solenoid is to jump the main terminals manually using a heavy gauge wire. Do not attempt this if you are not confident in what you are doing.
A safer way of testing a solenoid is by removing it from the ATV and activating it by applying an external 12 V source (car battery) to the terminal for the starter button. Then test for continuity between the input battery terminal and the output starter terminal.
In this case, the engine turns over as expected, but the ATV does not want to fire up.
An engine needs three essential components to run; fuel, spark, and air. When the engine turns over but does not start, there is usually an issue with either of the three components.
Before you do anything, ensure there is gas on the fuel tank and the fuel valve is open (in the ON position). You’d be surprised how common it is to misjudge how much fuel is left.
There are several ways to test if the ATV is getting fuel, but my favorite is removing the spark plug. That way, you’ll be able to check for spark simultaneously.
Another way to quickly test if the ATV is getting fuel is by spraying a shot of starter fluid into the air intake. If the ATV starts with starter fluid, you know there is a spark, and the issue is likely fuel-related.
Make sure enough fuel reaches the carburetor from the fuel tank.
When troubleshooting a no-fuel situation, I recommend first removing the fuel line from the carburetor or opening the carb overflow.
If fuel comes out, you know that the issue is not with the fuel delivery system up to the carb but with the carburetor itself.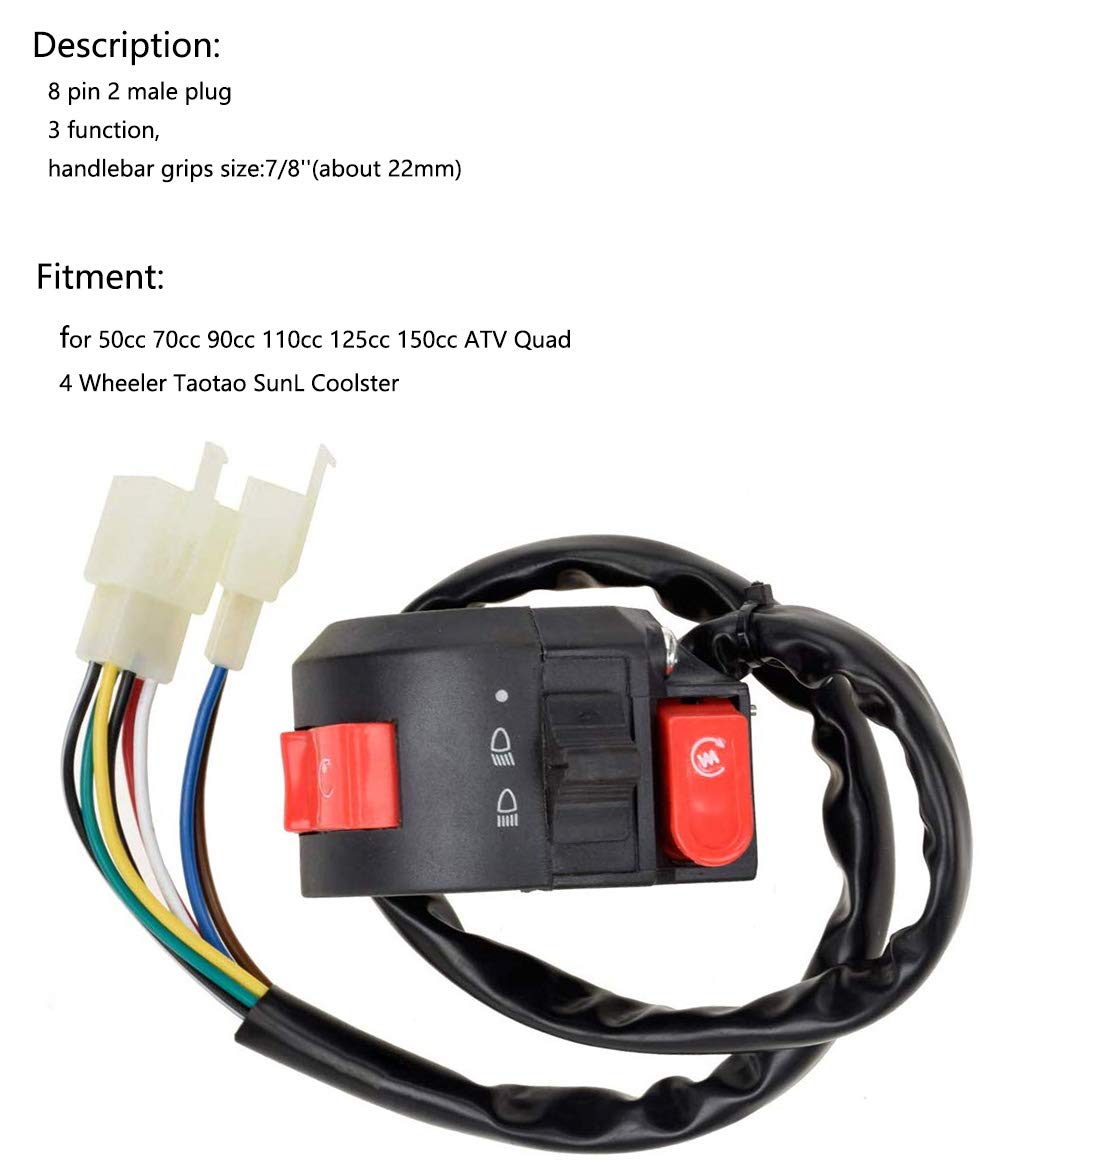
Depending on your findings, these are the usual culprits to look into:
Fuel delivery system
Carburetor issues
For more detailed instructions on what to do if your ATV is not getting fuel, whether it has a carburetor or it is fuel injected, please refer to this post for guidance.
If the fuel is bad, it may not ignite, even if it reaches the cylinder. Fuel can go bad over time due to evaporation or from contamination with dirt or water.
Related: How to Know if the Gas in Your ATV Is Bad or Not
There are two main ways of testing an ATV for spark.
Caution! Electrical shock hazard. Do not perform a spark test if you are unfamiliar with the procedure!
Visually check for spark
With a spark tester tool (safer)
 Please refer to the test above.
Please refer to these posts to learn more about troubleshooting an ATV that turns but has no spark and this one to learn how to test an ignition coil. In the last post, we also cover a range of other ATV no-start scenarios like:
Related: How to Start a Dead ATV: Step-By-Step Guide
Air is the final of an engine’s three essential components to start and run.
Ignition problems are one of the most common reasons an ATV won't start. And if you notice that there is no spark on the children's ATV or it is very weak, then you need to “dig” in this direction. Therefore, let's figure out what can cause the problem, and how to fix the breakdown.
Lack of spark tells the ATV owner that there is a problem with the ignition system. This problem affects both inexpensive ATVs for children and top-end Japanese vehicles. So, every owner of motorcycles should know what causes problems and how to fix it. Typically, spark problems are due to:
The reason why a child's ATV has no spark can be quite specific. For example, if the owner has installed an inductive sensor incorrectly, the ATV will not start.
The first thing to do if there is no spark on the quadric is to check the spark plug. Most often, the problem occurs precisely because of this component. The owner of the equipment needs to unscrew, clean the candle from soot, and screw the element back.
Also check the electrode. A working candle should have a light brown color. Any deviations from the norm (black or white tint, oily reflections, etc.) indicate problems in one or another system.
In fact, checking the performance of the candle is quite simple. You just need to insert one end of the candle into the cap, and the second will touch the engine. After that, you need to turn on the ignition, and crank the crankshaft. If there is no spark, then the spark plug needs to be replaced.
Note: The spark plug may not be the problem, so the rider should run a proof test with a good spark plug.
Another reason why a child's ATV has a weak spark is a broken spark plug cap. First, the component must be disconnected and dried. Checking the cap is performed in the same way as diagnosing a candle.
Another common cause of no spark is a broken wire or oxidized contacts. Even a slight disturbance of the winding can lead to current leakage. Therefore, the rider should:
In most cases, wiring problems arise due to inaccurate repairs or improper winterization of equipment. To avoid damage to the winding and prevent corrosion, it is recommended to store the quadric in a warm and dry room.
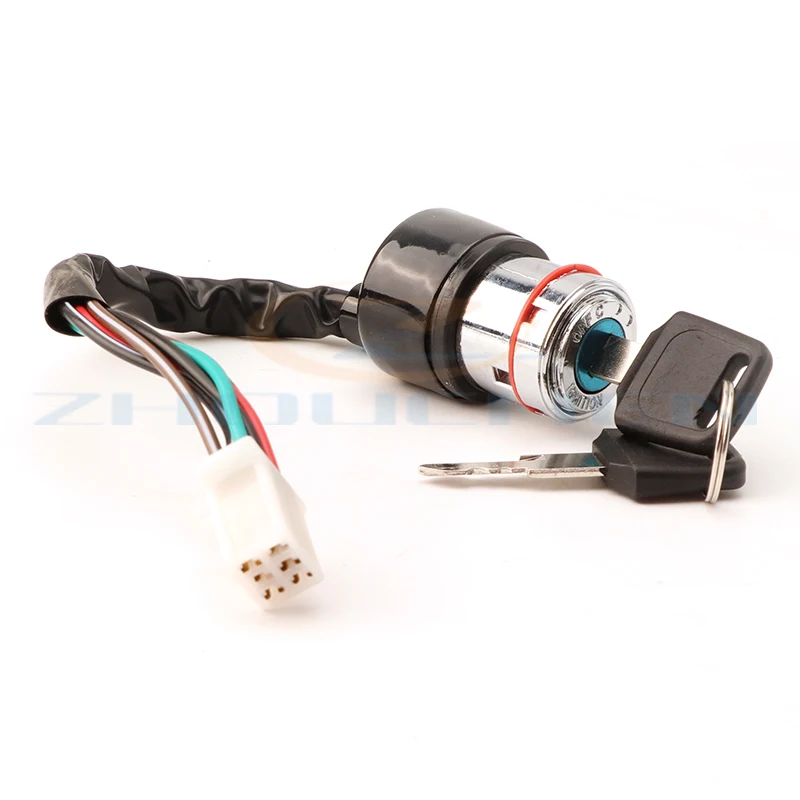
If the basic methods (inspection of the wiring, replacement of the spark plug and cap) did not work, you will have to start diagnosing the ignition system. If there is no spark on a 50-150cc children's ATV, check:
 Unfortunately, it is difficult to check the status of the switch, since it is made in one piece. Therefore, if there is suspicion, it is better to simply replace the element.
 If the problem persists, the rider should contact the workshop. The fact is that there can be minor and hidden problems in the ignition system that prevent the ATV from starting.
Check the spark plug regularly, not just when the spark is gone. The trick is that the component is a kind of indicator of problems, and allows you to diagnose a number of problems in time. For example, if on a candle:
 This indicates problems with the fuel system (fuel mixture too rich).
 And this is not a complete list of "symptoms" that can be found on the candle. Therefore, it is recommended to check it once every 3-4 weeks.
11/16/2020 10600
ATV
For children from 4 to 9-10 years old
Fuel brand: AI-92.
Engine power: 3.5 HP
Engine displacement 49.9 cm3.
Engine cooling - air
Number of strokes - 2-stroke.
Speed: up to 40 km/h.
Fuel tank capacity 1 liter
Brakes: disc brakes
Assembled size: 104*58*67 cm
Weight: 43 kg
Maximum load: 60 kg
Headlights: yes
Front bumper: yes
Warranty 6 months.
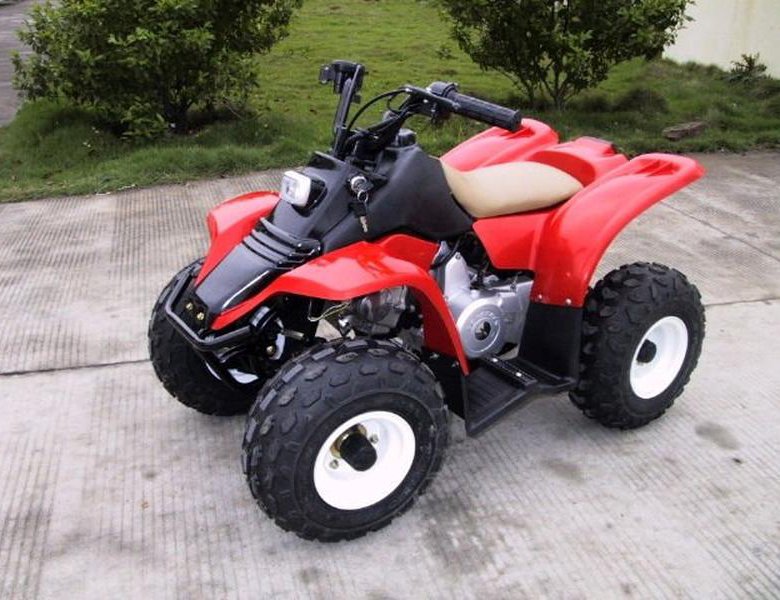
ATV CAT 50 cc - children's ATV in a utilitarian design, on large 6 inch wheels with good lugs. Suitable for children from 4 to 9-10 years old.
The ATV is equipped with a high-torque 49.9 cc 2-stroke engine. see
The ATV is perfect for trips in the forested area and on country roads, regardless of the weather and season!
Main technical characteristics:
Electrical equipment: ignition key, electronic starter, parental control (100 m) 3 Transmission: 90 with gearbox, 2x4 drive on the rear axle
Suspension: Front and head monomorter
Number
Fuel brand: AI-92. Fuel tank material - plastic.
Engine power: 3.5 HP
Engine size: 49.9 cm3
Engine cooling: forced air
Number of strokes: 2-stroke.
Starter: new type manual, electric with electric drive
Headlights: yes, LED
Wheels : rubber, rear and front tires 6" (front 4.10-6, rear 13.5-6)
Speed : up to 40 km/h
Fuel tank capacity: 1 liter
Brakes : front and rear disk
The size of the assembled product : 104*58*67 cm
Weight : 43 kg
Maximum load : 60
Front chobber: is
Video review of children's ATV:
This information is not a public offer.