Do you remember a few weeks ago when Scott replaced the drive chain on my Warrior? Well while he was working, he got a good look at my skid plate. Then I came home to this... Needless to say, it had seen better days. So now what? We've mentioned before that since my Warrior is a 1999, it can be difficult to find aftermarket accessories. Fortunately, he didn't just rip off the skid plate without having a plan - we were going to build a DIY skid plate. And it all started with a piece of scrap metal.
I believe it was an old radio mount. We buy a lot of items from government auction sites (that's where we got the trailer seen in so many of our photos) so it's not uncommon for us to repurpose scrap metal pieces. In the photo above, you can see that it's just a flat piece of aluminum with the ends curved upward (or at least upward for the way we're using it).
We also had these brackets (I think they were brackets) that we used to mount the rear end of the skid plate to the frame. First, Scott bolted them to the frame not only to make sure that they fit, but so that we could get an idea of where to weld them onto the skid plate. At first we had some issues with welding the brackets and we were getting a little frustrated. So we shifted our focus. As we were trying to get an idea of how everything would line up, we realized that we were going to need to bend the rear of the plate so that it curved upward. To give us a break from welding, we decided to start working on adding some curves (which is why in the next several photos there is only one bracket welded to the plate). When Scott suggested bending the skid plate, I was really nervous. I had no idea what that would entail but he had it done fast! He started off by marking a line where he wanted the bend to be. Then the plate went into a vice and he used a propane torch to heat the metal while he pulled the top of the plate toward him. In around five minutes, we had a really nice profile and I was starting to see the potential.
 Next we needed to notch out the front of the skid plate to make room for the frame. We actually used a 2x4 to trace the area we wanted to cut out then moved the plate back to the vice. Scott used a grinder to cut along the lines we traced. We had originally thought we would cut the entire square out but when we held it up to the frame for a second time, we decided we might try to bend it up towards the frame instead. After a following the same steps as the first bend, we had an entirely different profile. Of course, this whole process was not an exact science. There was a lot of test fittings and our plans changed more than a few times. On our test fitting after we bent the front of the skid plate, we decided that we needed one more bend to make things as form fitting as possible. So it was back to the vice and the torch. Because this bend was a little more complex, we used a bolt as a place holder to help us make the secondary bend. It's slight, but when we hold the bolt straight against the piece that we bent, you can see the subtle curve.
 Once we had our bends all worked out, we got back to welding. We started by cleaning the bracket that snapped off. And this time we were super vigilant with cleaning the skid plate before we started. You want to brush the plate extremely well before welding. Since we had already attempted this once, we made sure to heat our plate as well to get off any residual aluminum. Our second attempt at welding went much smoothers. And just FYI, if you've never welded aluminum before (we've just started toying with it ourselves) it's awesome. We are still on our original package of Dura-Fix aluminum welding rods that we picked up from a local farm show last year. Being able to weld with aluminum has come in pretty handy. Aside from using it on my new skid plate, we've also used it to repair threads. Since the brackets in the front won't take as much abuse as the ones in the back, we opted to bolt them on instead of welding. With the front bolts on, we were ready to install. Overall, we're really happy with how the new skid plate turned out.
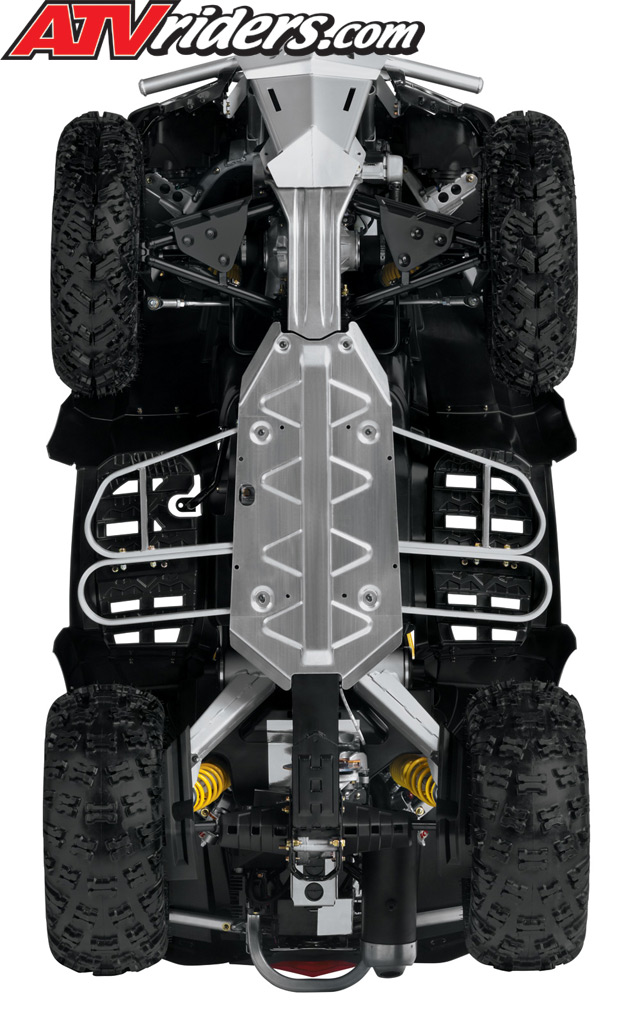
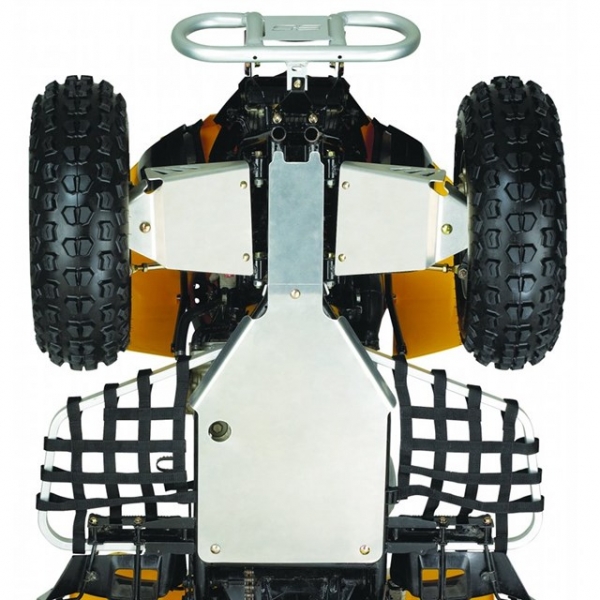
The ultimate goal for the rear is that when in reverse, any brush will roll under the curve that we added. We've talked about exaggerating this bend a little bit more down the line, but we want to try and ride with it a few times first to see if there is anything else we want to tweak as well. Plus it's hard for us to judge in the summer since most of our riding is through mud and up hills. We may ride through some brush, but not near as much in the summer as in the fall. So, it may be a few months before we make any more tweaks.
I really like how the front turned out. That tiny little bend went a long way to giving us a more form fitting profile. I am so glad that we opted to bend out a notch instead of cut it out completely. Right now I'm fantasizing about rounding out the edges and I've even considered giving my new skid plate a slick paint job. Of course, Scott thinks I'm nuts. What can I say? With an ATV old enough to ride itself, I don't get accessories very often. So I'm pretty ecstatic. But most of all I'm impressed. When he mentioned that he was going to make a new skid plate for me, it's not that I was skeptical, but I couldn't really see how. It was a lot of fun watching him make all of those bends, cuts, and welds and I couldn't be happier with the end result. Now it's time to go ride!
Have you ever made your own accessory? What about aluminum welding - ever tried it? And am I crazy? Would you paint a skid plate? Let us know what you think!
So I'm pretty ecstatic. But most of all I'm impressed. When he mentioned that he was going to make a new skid plate for me, it's not that I was skeptical, but I couldn't really see how. It was a lot of fun watching him make all of those bends, cuts, and welds and I couldn't be happier with the end result. Now it's time to go ride!
Have you ever made your own accessory? What about aluminum welding - ever tried it? And am I crazy? Would you paint a skid plate? Let us know what you think!
Filed in: Maintenance and Repairs, Yamaha Warrior 350
Share: Previous article A Look at The BEST ATV Service ManualHome ATV/UTV Body / Protection Skid Plates
Open filters
You can refine your search by selecting one or more filters. The following filters are the attributes for ATV/UTV Skid Plates.
Price
from
to
BRAND
CATEGORY
SECTION
TYPE
STYLE
MATERIAL
COMPATIBLE BRAND
COLOR
POSITION
THICKNESS
If you think that an item should be in our collection, contact us!
Products per page
12244896
Sort by
Description A-ZDescription Z-APrice low to highPrice high to lowDiscount % low to highDiscount % high to lowBestsellers
On sale
Hot Deals
Seizmik Skid plate with rock sliders Fits Polaris
Starting from
$1,049. 99
99
More details
On sale
Hot Deals
PHOENIX PRODUCTS A-Arms Skid Plate Fits Honda
Starting from $59.25
Up to 75 %
More details
On sale
Hot Deals
PHOENIX PRODUCTS A-Arms Skid Plate Fits Can-am
Starting from
$35. 00
00
Up to 75 %
More details
On sale
Hot Deals
PHOENIX PRODUCTS A-Arms UHMV Skid Plate Fits Yamaha
Starting from $31.75
Up to 75 %
More details
Prices displayed on this web site are exclusive for online orders and might be different in store.
X
Delivery
Eligible amount for free delivery excludes taxes and/or other applicable fees
(ex: environmental taxes: tire or hazardous substance taxes).
Some items available for purchase online can also incur additional delivery costs due to excess weight or size.
Shipping
Shipping time excludes weekends and/or holidays.
It represents the time needed by the supplier to prepare and ship the products after receiving your purchase order. Please do not confuse with the receiving date which could vary among carriers.
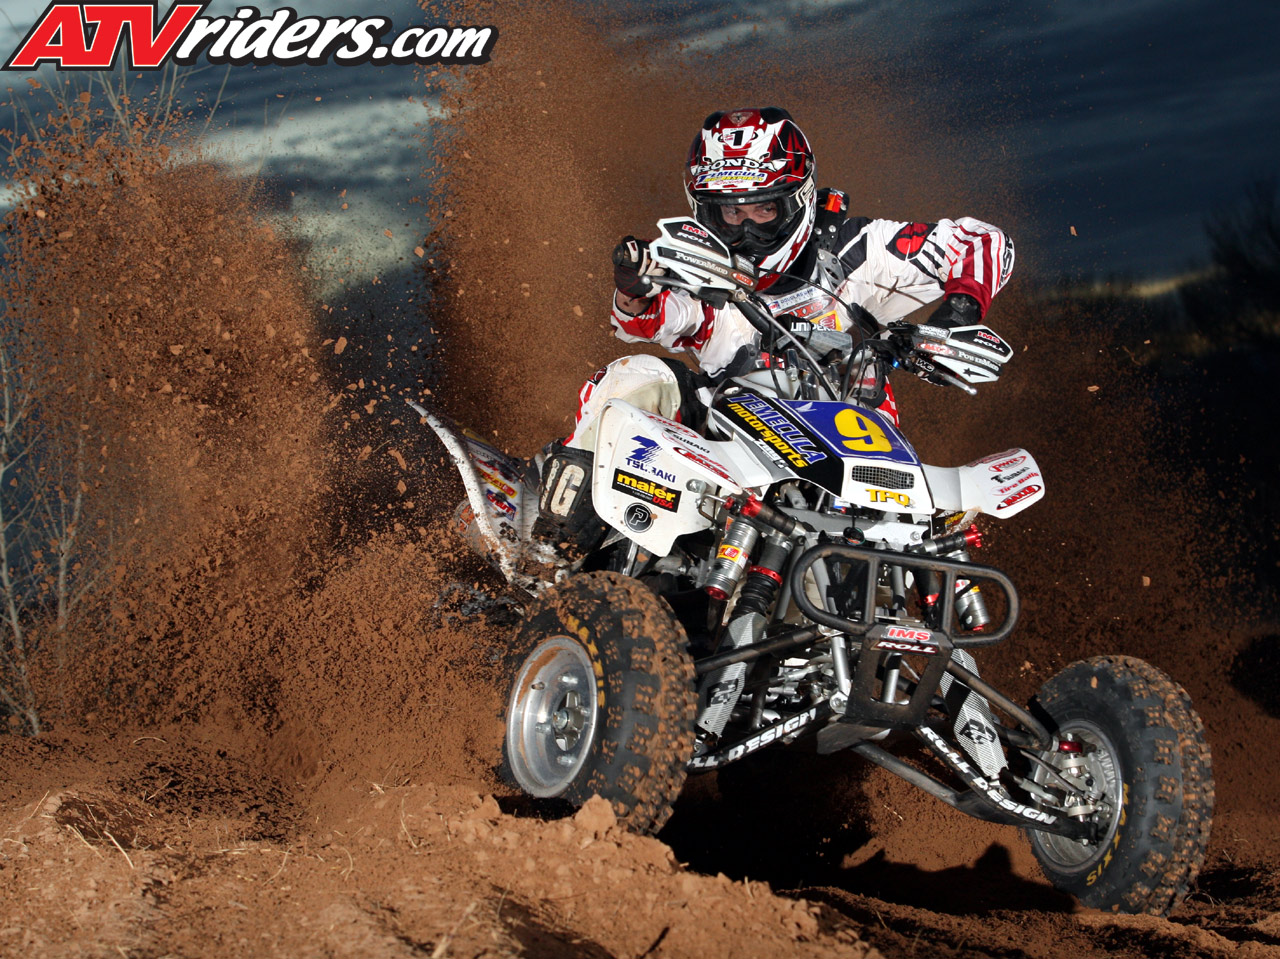
Whether you are new to the wheel of a quad bike or already quite familiar with the opportunities that Godzilla quad bikes offer you, there are always more or less dangerous routes and more or less dangerous tracks and surfaces. However, the heart of almost any racer freezes in front of rocky areas, which menacingly expose boulder spikes towards the bottom of your quad. In general, of course, the best advice in such a situation would be to avoid such routes, but we do not always choose roads under our wheels. Therefore, where a dangerous route cannot be avoided, it is necessary to approach it fully prepared. Knowing some rules, you can avoid damage to the ATV and harm to your own health when driving on rocky areas. With a little preparation, your knees and elbows will stay intact, and the ATV won't have to be pieced together.
To be honest, most of what will be described in the article is taken not from theoretical reflections, but from my own practice, it just so happens that in my area I often have to travel exactly through areas covered with stones, and I perfectly imagine how recklessness can end in such a site. So I wanted to share with you some, if not secrets, then practice, and I hope this will help someone save their device.
If you anticipate that you will be driving a lot on rocky roads, you should prepare your ATV in advance by installing skid plates on it to absorb the impact of the rocks.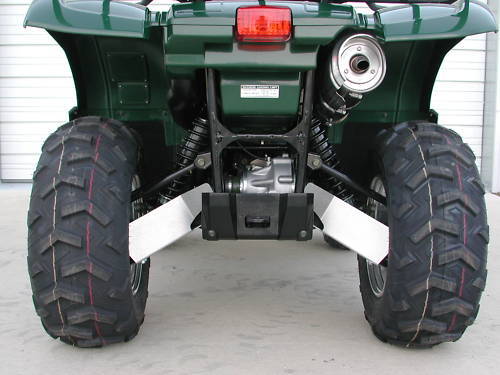 Such plates come in different thicknesses and sizes, so you need to select them for a specific ATV model and depending on the load on it. For example, while I was just traveling around the area, I was quite satisfied with the bottom protection with a thickness of .125 and protection for the pendulum arm - .190. but when I started to participate in extreme races, I had to dress up the ATV in more durable armor. Bumpers, radiator grilles, headlight protection, these simple devices will help you protect the vital parts of your ATV from stones flying out from under it at great speed, but of course, the main emphasis of protection must be placed on the bottom of the device, which, when driving, is literally this word faces all the obstacles on the road.
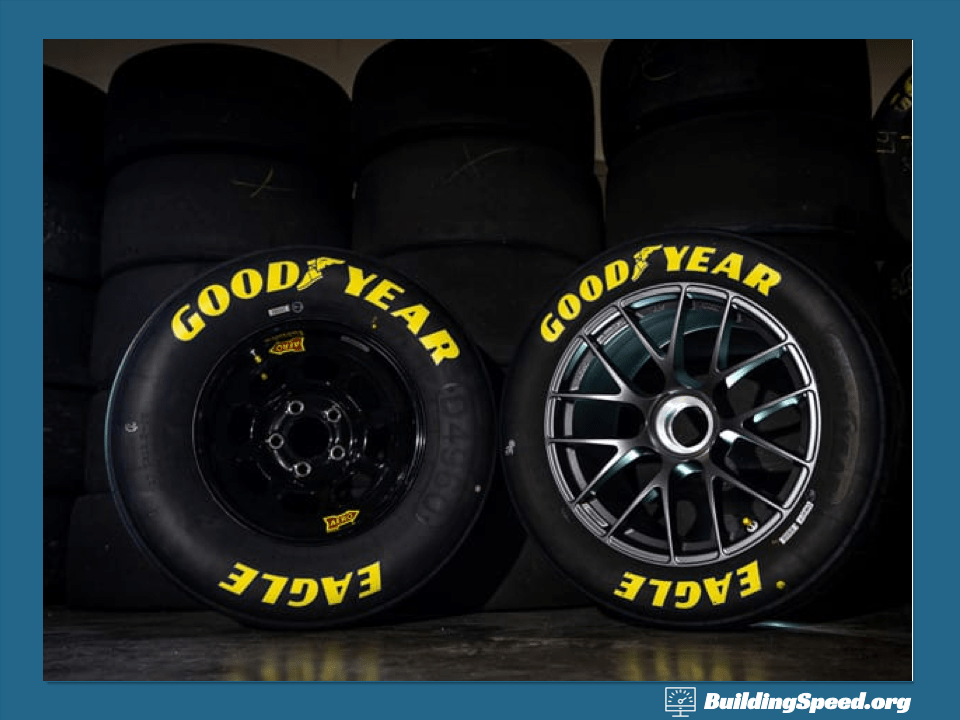
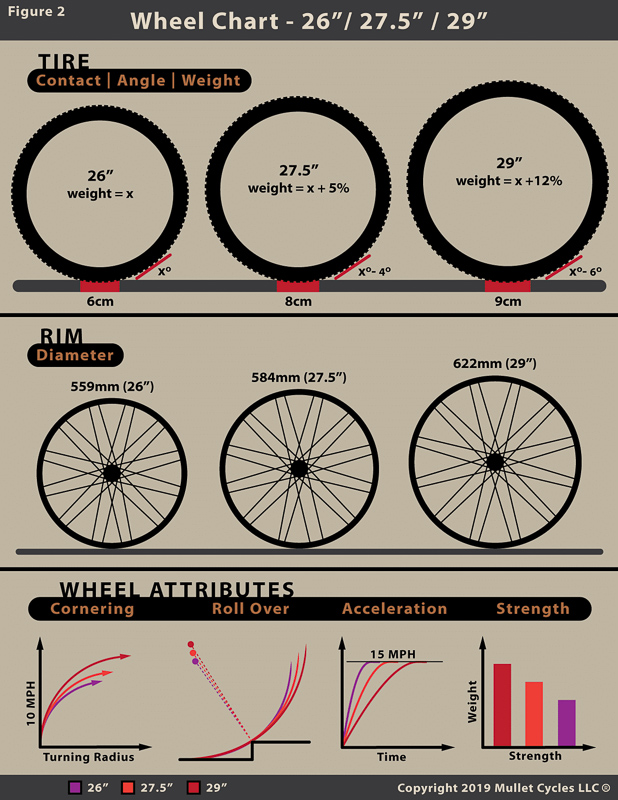
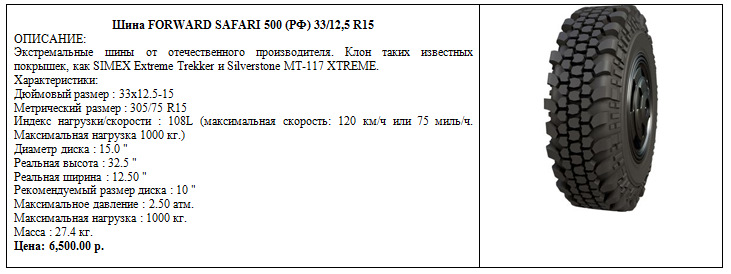
The next step in tuning is choosing the right tires. Choose tires that can withstand sufficient load. The strong reinforced carcass of such a tire must protect against punctures and tears that can occur if the tire is compressed hard near the edge of the rim. The front tires are better to take slightly larger than the rear. For example, I have 21 on the back, and 22 on the front axle.
Now about the riding technique itself. First of all, immediately give up the idea that you can fly over a rocky area, riding on such a surface requires attention and caution. Look at the road ahead of you and pay attention to what lies in front of you. Drive around cracks and potholes of great depth. Also, do not allow large stones to be under the bottom of the ATV. Stones are also dangerous where, having fallen between the wheels, they can send them in different directions, moving at high speed, you risk breaking the tie rod that connects the wheels or bending it, which will require a thorough repair and restoration of the ATV. So if you feel like the rocks are starting to wedge the front wheels, back up and free them from the trap. This is another reason to drive at low speed in order to have time to respond to what is happening.
High speed increases the load on the tyres.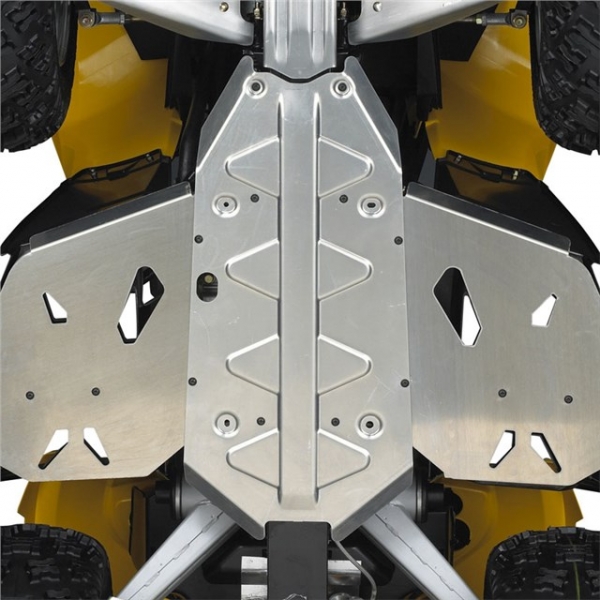 If you have professional high-strength rubber on your ATV, you can take a chance and drive over the stones faster, the main thing is to stay in the saddle on sharp jumps and slopes. However, if your tires aren't capable of handling the hard hits that are almost inevitable when driving fast over rocks, you run the risk of quickly being left barefoot in the middle of the road. It makes things a little easier in this case by shifting the center of gravity of the ATV to the rear, simply leaning back, you can ease the load on the front tires.
If you are racing, you can gradually increase your speed with each subsequent lap, as you will begin to roughly understand where and what traps await you on this lap, but trying to force a rocky area and gain some time can cost you too much - your ATV, and even health.
Stones become especially dangerous if they get wet. Rain or high humidity is dangerous on all surfaces, but wet rocks can be especially treacherous. Tire grip is reduced and the ATV can become completely unpredictable. It is very important to fully control the behavior and speed of the ATV while driving on wet rocks, to do this, keep your finger on the clutch at all times to avoid possible wheel spin.
Once again I will say that even an experienced driver wants to go around a rocky track on the tenth road, because the unpredictability of an ATV dangling on stones negatively affects your nerves, even if you are driving along the track not for the first time. Although of course over time you pass it all calmer.
Either you study the site enough to know in advance where problems may arise, or you just learn to be philosophical about what is happening. You should not try to set records on such routes, but on the other hand, you can learn to pass them without loss or damage, be able to control the device on every jump, and will not get stuck every half a meter. And if you can also learn to ride the track a little faster than the rest, consider yourself a step up in the art of ATV control. Just do not forget that even the most skilled racers rocky tracks can cause trouble.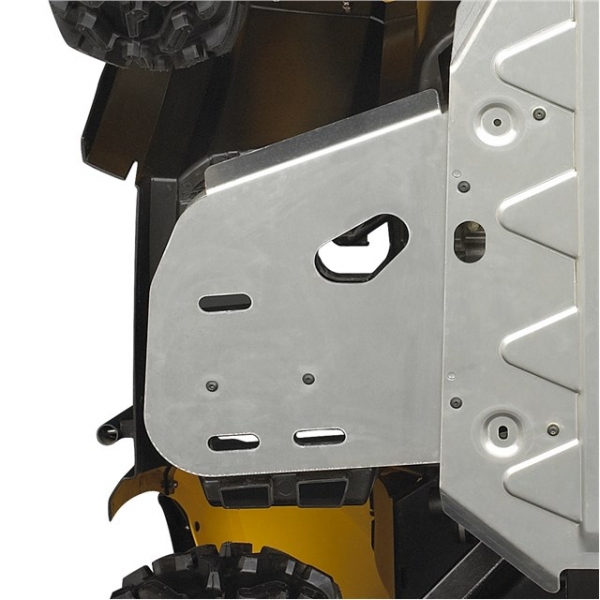
The mica plate in the microwave oven is responsible for its operation, but if it burns out, what can it be replaced with, and how important is it? The device of a microwave oven is such that due to the reflection of waves from this plate, food is heated (for more details, see the article on how a microwave oven works).
Contents
Mica plate is responsible for a number of important functions. If it is damaged, then it is necessary to replace it, since without it the microwave will not work. Plate role:
The replacement of the mica plate may be required not only because of its combustion. It can become very dirty, soaked or scratched, which will lead to incorrect operation of the microwave.
The cause of the microwave oven not working may be a broken waveguide or magnetron. How to make sure that the reason is in the plate, and not in other parts of the microwave?
If you find any of the above signs of damage to the mica plate, you must replace it as soon as possible. This can be done both in the workshop and at home.
See also: how to test a magnetron in a microwave oven.
If you know for sure that a mica plate burned out in a microwave oven, then the question arises of how and with what to replace it. It is important to understand that the selected material must meet the following specifications:
If you do not follow these rules, then you risk not only being poisoned by harmful substances, but also arrange a short circuit . As a result, you will have to make not just preventive repairs, but change expensive parts or buy a new device.
Microwave manufacturers use mica for a reason. This is due to the fact that the material meets all the necessary requirements, and is also inexpensive and readily available.
A feature of mica plates is that they can be reused if you perform simple manipulations:
In recent years, microwave repairers have been actively using plastic as an alternative. Replacement of mica plate with food grade plastic part has the following rationale:
Despite the obvious advantages, this is not the most common method, as plastic is more expensive and can also be difficult to obtain.
See also: why the microwave does not heat up.
Replacing a burnt plate is not at all difficult, even an amateur can handle this process. Whichever material you choose, the workflow is the same:
After you have completed the replacement, it is important to check the quality of the microwave oven. To do this, put some products in the microwave and turn on the device at full power.
It is strictly forbidden to start the microwave oven empty!
If the mica plate in your microwave oven is broken, don't worry.