Be Back On the Road in Seconds with Fix-A-Flat® Bikes Only
San Luis Obispo, CA (January 2013)—Hardcore cyclists and leisure riders alike have all had it happen to them: the dreaded flat tire. The pros will fix it on the spot with a cumbersome kit while the rest of us walk our bikes home. There is a much faster and easier solution for everybody though: Fix-A-Flat® Bikes Only, from the leader in quality, convenient DIY tire repair.
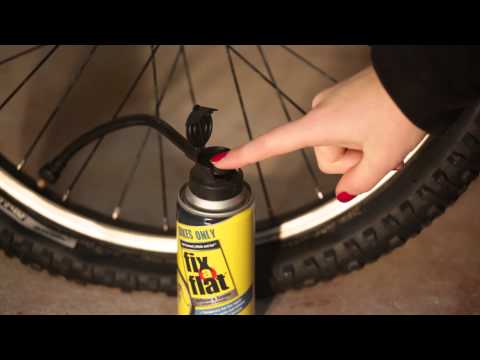
Fix-A-Flat Bikes Only instantly seals punctures in bicycle tires with tubes and inflates in seconds allowing you to finish your ride without having to change the tube. No tire levers or patches required. Inflates a 26 inch bicycle tire to 36 psi in seconds.
“Cyclists with any level of experience can now be on their way quickly and easily,” said Patrick Mallon, Brand Marketing Director for Fix-A-Flat®. “Gone are the days of having to replace a tube on the fly or trying your hand at a repair kit.”
Fix-A-Flat® Bikes Only comes in a convenient 6 oz. can for easy onboard storage and retails for $9.99 at K-Mart. For more information, please visit www.fixaflat.com/products/aerosol/fix-a-flat-bike/
Product Features
Since 1970, Fix-A-Flat® has been the #1 brand in tire repair in the United States. Their aerosol tire inflator products have helped millions of people safely repair flat tires and get back the road for more than 40 years. Their new upcoming product line, Fix-A-Flat® Ultimate Repair kits, will provide consumers with state of the art technology in flat tire repair.
For more information, please visit www.fixaflat.com.
Car Coach Reports combines leading industry expertise with the best in new car tech, care care tips, driving safety, car news, business, lifestyle, test drives and car reviews.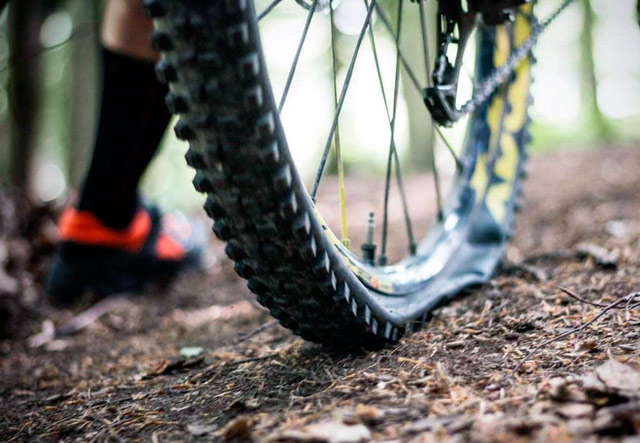 Our Car Coach reporters travel around the globe to report on the very latest issues surrounding cars, technology and the automotive industry. Our style is fresh and engaging with the everyday driver in mind.
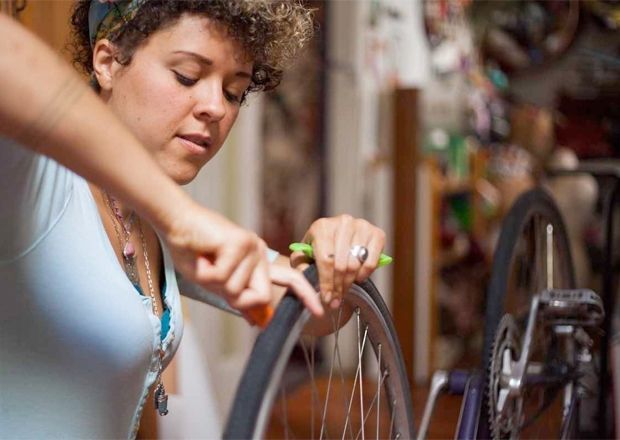
Changing a bike tire might not seem like an especially important life skill, but if you ride a bike in any capacity, it’s a skill you should learn. No one ever plans on having their ride interrupted with a flat tire, but flat tires are one of those annoyances that every rider has the displeasure of experiencing at one point or another. By thinking ahead and taking some time to learn how to change a flat, the hassle of having to change a tire remains just that: an annoying interruption, but not the end of your ride.
If you want to successfully change your bike tire, then before even learning the “how” of it, you first need to know and collect the “what.”
In other words, you need to be prepared, which means having a fix-a-flat kit that you take with you on each ride.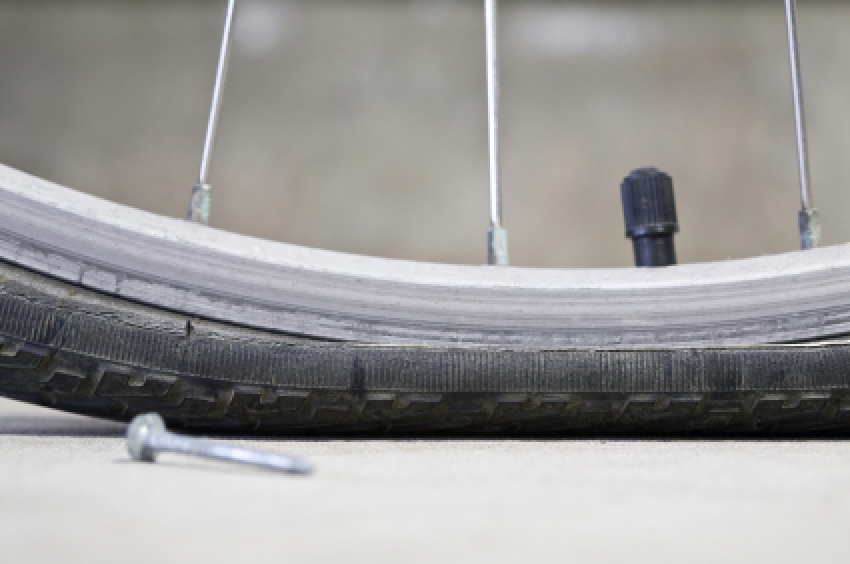 At the very least, you should include the basic materials required to effectively fix your flat; what you’ll need will depend on whether you’re riding tubeless or tubed.
Putting together a fix-a-flat kit might seem like an afterthought, but having one on hand might be the difference between a minor disruption to a ride and a major aggravation. If you end up with a flat, remember - always find a safe place, away from traffic and other possible dangers, before working on your bike.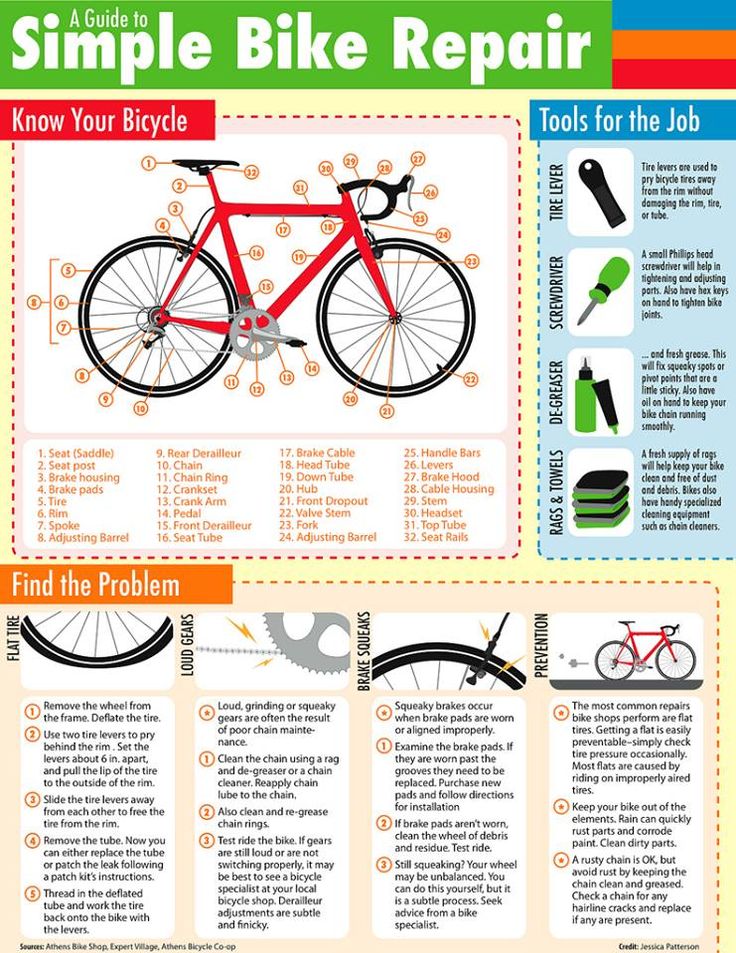
The first step in changing a flat tire might seem obvious, but here it goes: remove the wheel.
If your tires are tubeless and you have a tubeless repair kit, then you might be able to skip this step. If the damage to the tire is a simple puncture, you can just plug it without taking the wheel off. However, if you find that the damage to the tire is extensive enough to where plugging it won’t resolve the issue, then the wheel will need to be removed. To remove the wheel from your bike, start by flipping it upside down.
Pro tip: You might find it easier to work on your bike when it’s upside-down. When flipping your bike, remove the computer from the handlebars to avoid scratching it.
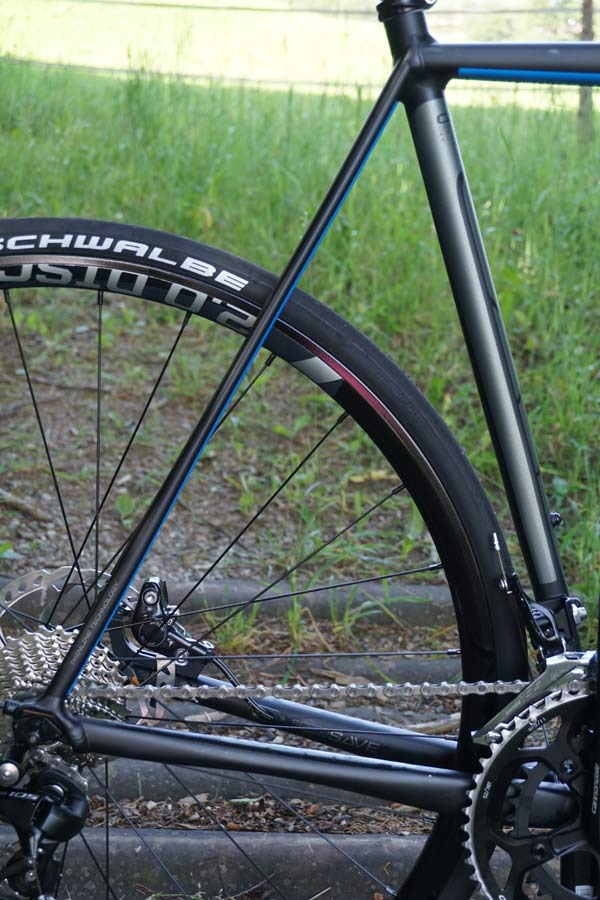
Removing the rear wheel might seem intimidating at first, particularly when you realize that the chain and derailleur are located in the rear. However, the process of removing the back wheel isn’t much more difficult than removing the front, especially if you take your time.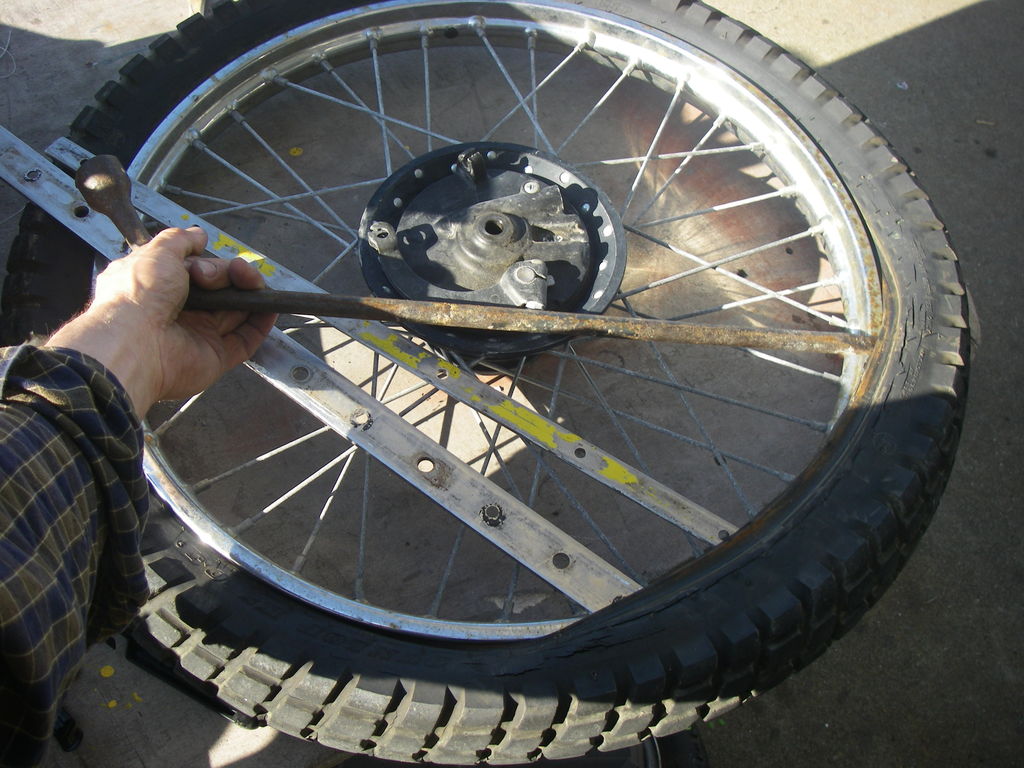 To begin, first shift the bike into the smallest sprocket, creating slack in the chain for easier wheel removal and installation. Raise the bike by the saddle and while pedaling with your hand, use the right shift lever to shift gears. Repeat this, using the left shift lever, so that the chain ends up on the smallest chainring in the front as well.
While typical wheel removal requires that you open the brake if you’re addressing a flat tire, then it’s likely that the tire has already lost enough air so that it slides out easily. If your bike is equipped with disc brakes, then you’re in luck because the wheels can be removed without touching the brakes. Quick releases that hold the wheel in place are especially common. To loosen the wheel via quick release, pull - do not twist - the lever out and away from the frame until it is completely open. You should be able to remove the wheel with ease by carefully lifting the bike by its saddle and letting the wheel fall out. If it doesn’t fall on its own, hitting it with the palm of your hand gently should be enough to make it drop. If it still doesn’t come out, then check to make sure the chain and derailleur aren’t stopping it. If they are, lift your bike by its saddle and, while holding it up, reach around with your other hand to pull back the derailleur and consequently, the chain. Some derailleurs are equipped with a clutch, requiring that you release the clutch and then remove the axle. Push the derailleur cage towards the crank and let the wheel drop. At no point should you find yourself trying to force anything to move.
Once the wheel has been removed, it’s time to address the tire itself.
Standard tires are designed with an inner tube, which is inflated with air. While relatively inexpensive to replace, making them a popular option, tubes can be punctured or pinched flat relatively easily. Tubeless tires don’t have an inner tube and are instead equipped with an airtight rim that the tire snuggly rests in.
If you’re running tube, then you’ll need to remove it; if you’re running tubeless, you’ll need to patch it with a tire plug.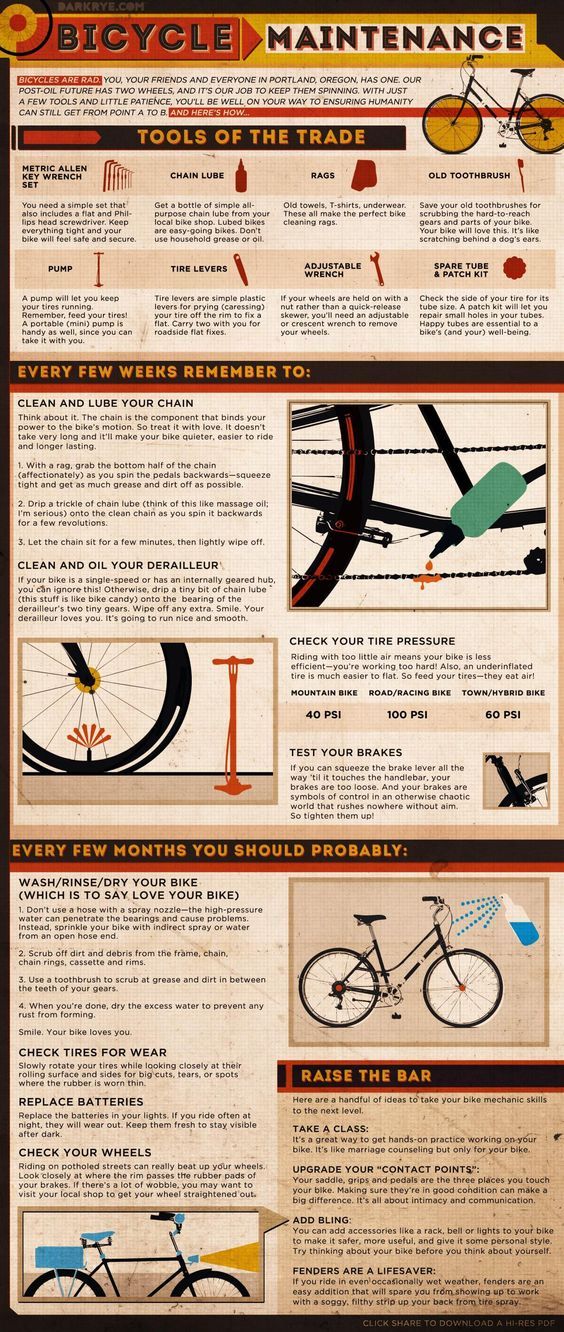 Tire plug kits are sold at most reputable bike shops and consist of a strips of rubber and an insertion device, requiring no other equipment or changing out hardware. Most tubed tires can be converted to tubeless.
To remove the tire, you’ll need to use your tire levers. To do so, insert the flat end of the lever under the bead. Place a second lever under the bead and move along the rim until the tire is off. In most situations, you can reinstall the replacement or a patched tube without completely removing the tire. By breaking the bead on just one side, you will save a lot of time and greatly simplify the process.
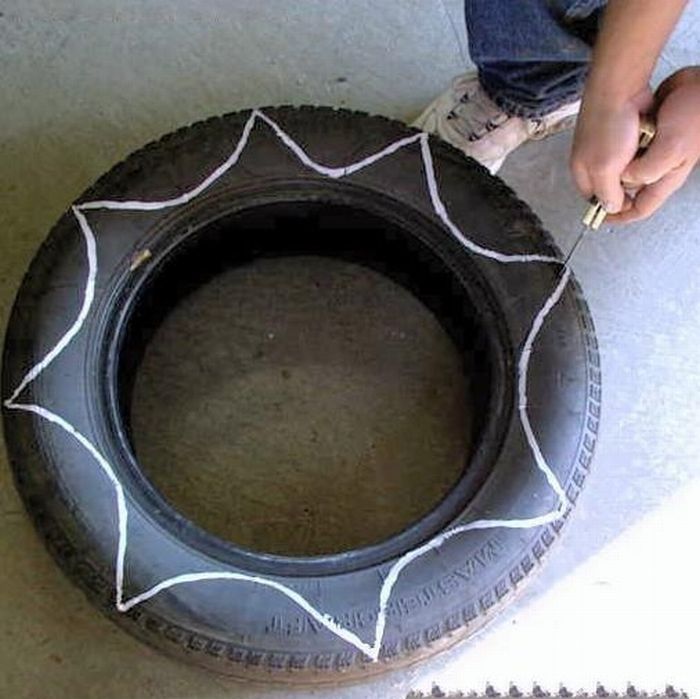
While many would recommend you run your finger along the tire to search for the culprit of your flat, doing so could also result in you having to do some patchwork on your finger, too. If whatever punctured your tire is still there and it’s capable of piercing a bike tire, then your finger stands no chance against it.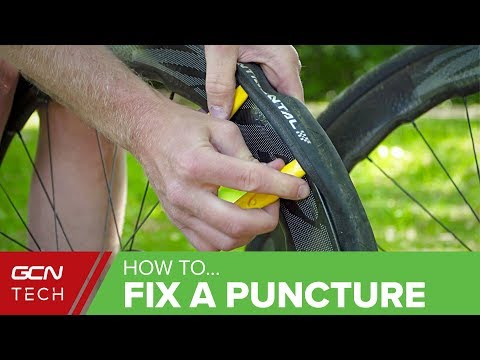 Before doing a hands-on analysis of the problem, visually inspect the tire, both inside and out, first. It might take longer, but you’ll be able to avoid a finger cut and maybe even a tetanus shot. You can also pack cotton pads or use something else to create a barrier between your finger and the sharp object that it might encounter, but there’s still a risk of injury . Tire levers are used for the removal of tires, but you can also run one along the tire for inspection purposes if you prefer playing it safe.
If both the visual and tactile inspections fail, reinflate the tire to see if you can hear the air leaking out of the puncture point. If you find only one puncture hole, then you’re most likely looking at road debris as being the culprit. Depending on the location and manner in which your tire has been punctured, a pointed tool, such as a screwdriver, can be used to push out the object in question before it works itself inward and creates additional punctures. If you see two holes next to each other, then it’s likely that you’re dealing with a pinch-flat, which means your flat wasn’t caused by road or trail debris; it was caused when the tube got itself pinched between the tire and rim.
Patching tubes is an excellent option for anyone who prefers pinching a few pennies, going green by reusing, or being resourceful when there are no more spares. Patch kits are available exactly for this purpose and come with everything you need need in order to get the job done. Patch kits also happen to be very compact so they are a perfect backup, even if you prefer to replace the tube outright.
If patching is your thing, then you’ll want to start by cleaning the affected area and then roughing the surface with an emery cloth or sandpaper. Kits come with two kinds of patches: glueless and those required glue. If your kit has glueless patches, then it’s basically like putting on a bandaid: peel off the backing, place it over the hole, and press with firm pressure. If your patches require glue, then simply add a thin layer of glue to both the tube and the patch. Once the glue has reached a tacky consistency, place the patch and press firmly until you’re sure it’s solidly in place.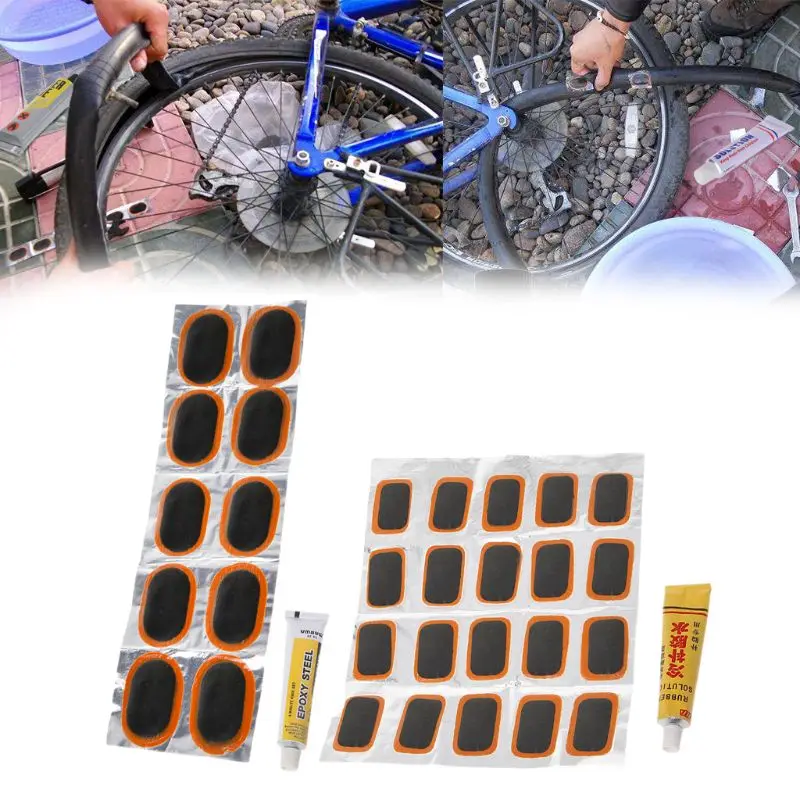
There are some flats that are simply too severe to patch. In those circumstances, you’ll need to skip this step and simply install a new tube.
To install your tube, you’ll start by using your pump to inflate it just enough so that it obtains its form, making it easier for installation and reducing your chances of suffering a pinch-flat. Starting with the valve stem, put the tube on the rim and insert the stem straight through the valve hole. Carefully work the tire back onto the rim by rolling the bead away from yourself using your hands, not a lever; levers increase the likelihood of accidentally puncturing the replacement tube. Upon reaching the valve stem, wrap sides of the tire bead low into the rim and push up on the stem to get the tube into the tire.
Pro tip: if you align the branding on the tire with the stem, you’ll be able to locate the stem much quicker next time.
To avoid having to deal with another flat, it’s important that you take extra care to ensure that the tire bead isn’t pinching the tube. Do this by grabbing the tire with both hands and "massaging" and twisting it side-to-side as you work around the rim. This will ensure that the tube is positioned correctly inside the tire, away from the bead that can pinch it.
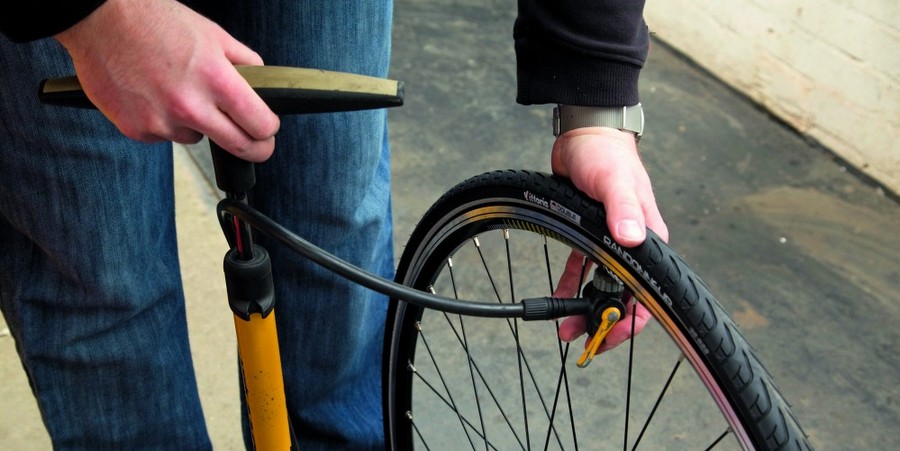
Now is when you find out whether or not your efforts paid off; it’s time to inflate your tire. To do this, you can use either a CO2 cartridge, a minipump, or both. Each method of inflation has its pros and cons, so ultimately, choose what’s most comfortable for you. If possible, equip yourself with both.
CO2 cartridges are highly effective, especially when your goal is to inflate to higher pressures, but they are a one shot deal, so there’s no reusing them. It’s a good idea to practice tire inflation at home using a CO2 cartridge to ensure that when the inevitable occurs, you don’t blow out your tube or waste the cartridge, and get left stranded. The key to using a CO2 cartridge is to ensure that the inflator is properly connected to the valve stem.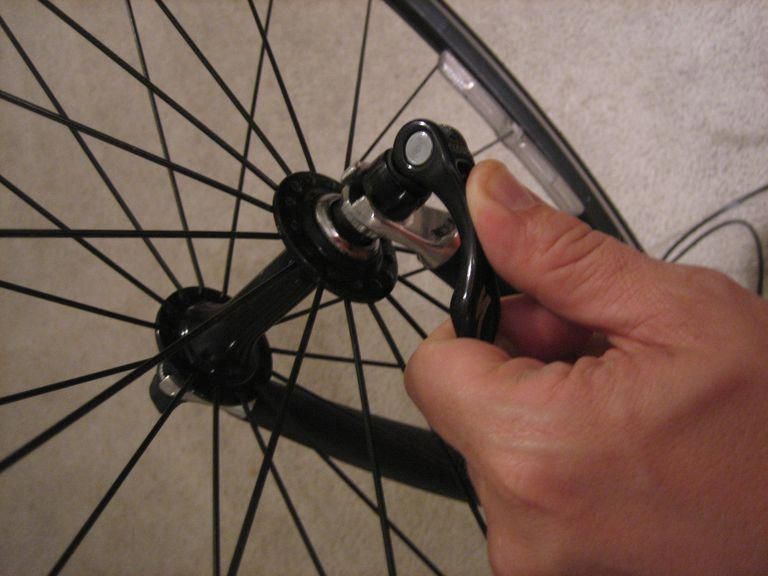
Having a minipump in your arsenal is highly recommended so that you always have a backup method for tire inflation, even if it’s not as easy to use as CO2 cartridge. Having a pump with a hose is also strongly suggested because it allows you to push the pump against the ground for better leverage, allowing you to accomplish higher pressures; pumps that attach directly to the valve stem don’t offer this advantage and might cause damage to the valve stem or even the rim when used improperly. Combination mini pump/CO2 inflators are also available.
As you’re inflating to your desired PSI, double and triple check the bead so that you’re sure it’s sitting in the rim correctly. Only after you’re certain that everything is in its proper place should you reattach your wheel.
Last but not least, it’s time to install the wheel. The processes of replacing the front and back wheels vary a bit, but neither is especially harder than the other, as long as you know how to effectively get the job done.
To attach the front wheel, first line up the fork dropouts with the axle of the wheel and gently lower the fork onto the axle. Carefully push down on the handlebar to check for the proper placement of the axle in the dropouts. It’s important to be mindful that the quick release or thru-axle lever is on the opposite side of the drivetrain and not touching the frame. Hold the quick release lever in place as you tighten the bolt. If you find that the lever closes too easily or ends up making contact with the frame, just open the lever and tighten the bolt a bit more. Be careful that you don’t over tighten the bolt, as it should be tightened just enough to allow you to use firm pressure when closing the quick lever. If your bike is equipped with rim brakes, don’t forget to reconnect, adjust, and check them for functionality.
If your flat occurred on the rear wheel, then lay the top of the chain around the smallest cog on the cassette and make sure the frame dropouts line up with the axle.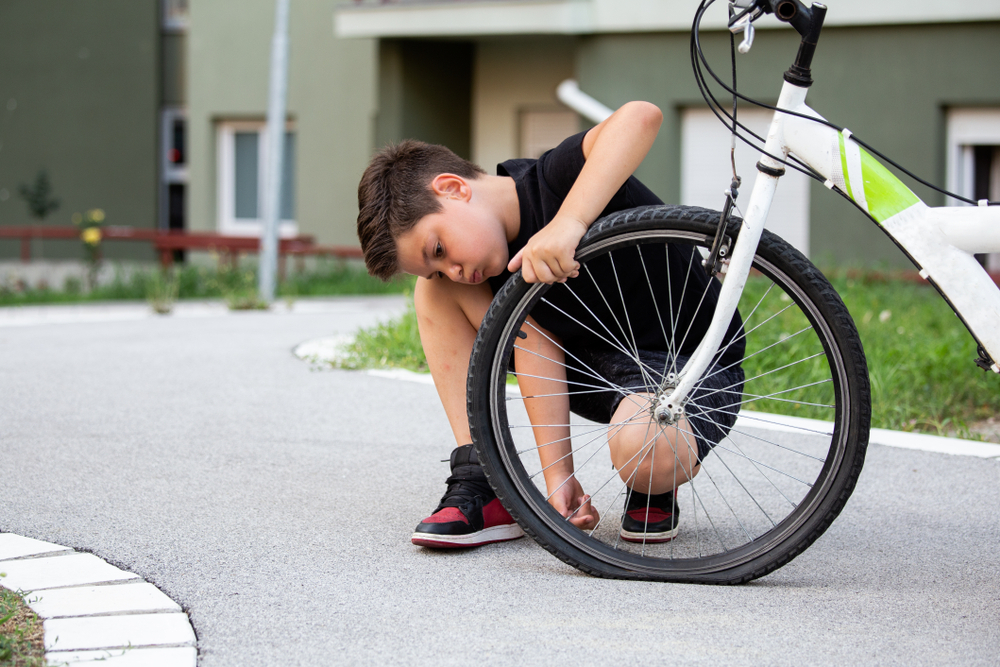 As you gently push the wheel back into the frame, take care to also pull the derailleur down and back so that it doesn’t get in the way. In the event that the wheel doesn’t go in easily, remove it and try again. If you’re sure that the wheel properly placed, then it’s time to close the quick release (and rim brakes if applicable) or insert the thru-axle into the frame and hub and thread it shut. The final test in determining whether your bike is ready to continue its journey is by lifting the rear wheel and spinning the cranks. If it runs smoothly, then you know you’re good to go.
Flat tires are already unplanned and unexpected; planning ahead by prepping a fix-a-flat kit and learning how to change your tire can ease your mind for such unfortunate circumstances, but what do you do when even fixing your flat doesn’t go as planned? Read on for some quick, easy solutions when even flat tires don’t go your way.
Small, unfixable punctures.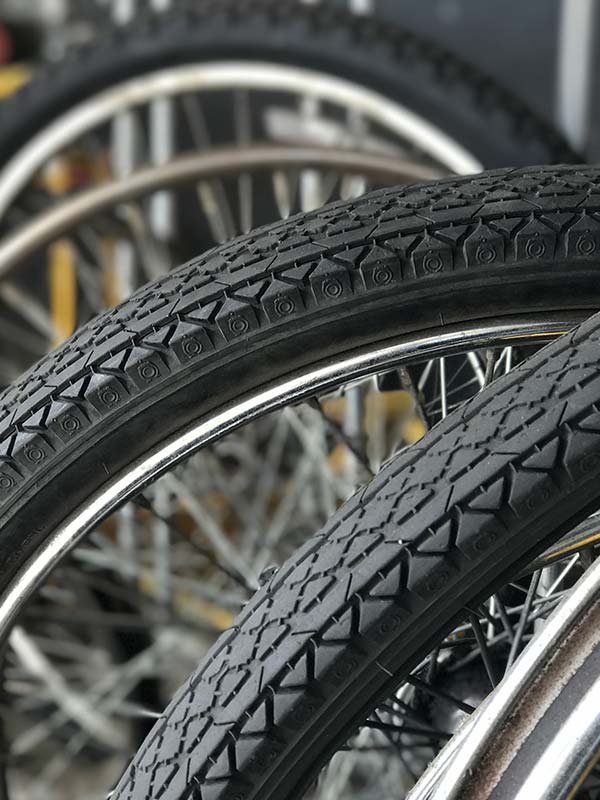 Super glue is already a life-saver in so many situations, so why should cycling prove to be any different? Super glue is a great quick fix for smaller punctures that might not be fixable otherwise, albeit temporary.
Large, unfixable punctures. If you find that you end up with a hole that’s simply too big to repair, then it’s time to resort to some out-of-the-box thinking. Cut out the damaged innertube section and tie the two ends together. It’ll be obvious to you that it’s not a perfect solution, but you should at least be able to reach about 50 psi, which is certainly enough until you can better resolve your tire situation.
Unfixable tire and sidewall gashes. In the event that your tire or the sidewall of your tire ends up sliced or gashed beyond standard repair, don’t despair; make a boot instead. Using a dollar bill, old gel wrapper, or piece of duct tape to cover the hole from the inside is a quick, easy way to resolve your emergency until you get home. It might not be ideal, but it should suffice until a more permanent resolution can be made.
Learning the skill of bike tire repair can be thought of as a form of insurance: you might not want it and you might never use it, but if ever find yourself in a situation where you need it, you’ll be glad it’s there. The folks at Velosurance are all cyclists and understand that it’s only a matter of time before an unfortunate circumstance arises. From gap medical to liability, vehicle contact protection to even roadside assistance - for when you’ve got a flat and are fresh out of options - Velosurance offers a highly customizable policy to provide coverage for nearly any cycling associate risk. Whatever your needs, chances are, there’s a policy for you.
The question of where to store a bicycle is somewhat surprising. Most often, he implies different answers: depending on whether it is autumn-winter in the yard or spring-summer. In the first case, we are talking about where to remove the unit until the next season, in the second - where to leave it after cycling so that it is always at hand. Let's look at all the bike storage options.
Lucia Tacla
Decide in the store
Prudent people think about where to store a bicycle in a small apartment even before buying it. This, of course, is not as interesting as putting a big dirty bike into a one-bedroom cluttered with furniture in emergency mode, but, in general, it’s right. The folding mechanism of the bicycle will save you from the problem of finding a place: such a unit will easily fit in a standard closet or a typical mezzanine above the front door, it will not take up much space on the balcony.
With a clumsy model, things are somewhat more complicated. But, in any case, keep in mind: an aluminum frame is preferable to steel in terms of corrosion, and the lack of hydraulic lines (brakes, fork) will not let them suffer from frost in case you have to leave it to winter outside.
Anonymous
Before reaching the house
Ideally, the bike should not be brought into the house at all, so as not to dirty the floor and walls - at least during the cycle season. Washing the wheels after each walk is still a pleasure: you can’t run with a rag, it won’t fit into the bathroom. And how to store a bicycle in an apartment if there is no space at all? If the stairwells in the entrance are not suitable for leaving two-wheeled vehicles there, it makes sense to look for like-minded people and rent a garage (ideally, a warm one): you can store a bicycle there all year round, preserving it for the winter. Services for winter storage of equipment are also offered by warm underground parking.
The second option is to contact your management company for a duplicate key to the basement. Alas, often our basements suffer from high humidity - from such a climate, equipment begins to rust. Yes, and the key may not be given: there, after all, there are important engineering communications, a heating unit, etc. In some HOA there is the possibility of collective storage of bicycles in the attic from autumn to spring. In general, contacting the Criminal Code (HOA) will not be superfluous - maybe they will suggest something sensible there.
Need a repair technician?
Let's find a contractor according to your criteria
Collective Works
At the entrance
Stairwells are a favorite place to store bicycles in Russia. The equipment is always at hand, and dirt does not penetrate the house - it is very convenient. But do not think that the neighbors are just as happy with your resourcefulness: bicycles and strollers prevent residents from carrying bulky furniture, block access to flowers on the window sills in the stairwell, and, finally, soil the common property and simply annoy (“you set it up!”).
The law is contradictory: both the Housing Code and SanPins require residents to prevent mismanagement and littering of entrances, but at the same time they recognize stairwells as “common property” - that is, all residents can use it if they do not restrict the rights of neighbors. This means that even one justified claim is enough for you to restrict someone's rights with your bike.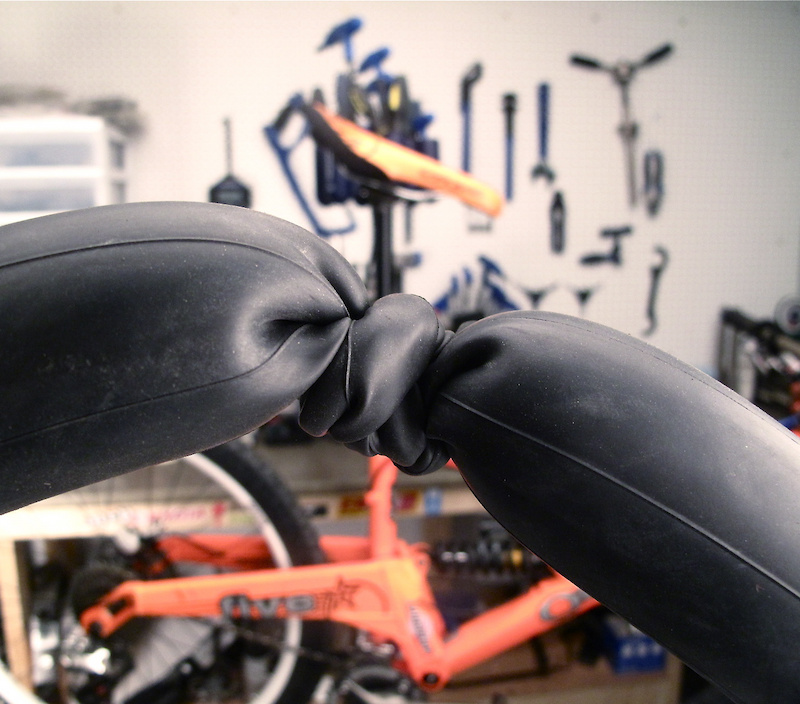
The most powerful argument against wheels in the entrance is fire safety requirements. With fire supervision, everything is usually simple: escape routes must be free, any obstacle is a violation of the requirements, an order and a fine.
Finally, the entrance is the leader in the number of bicycle thefts, and even a thick chain does not guarantee the safety of equipment.
But if you are lucky with your neighbors and the entrance is carefully guarded, choose the most deaf, unused places to store your bike (for example, on the wall, using vertical mounts or hooks, as in the photo) - so you do not interfere with the cleaning of the staircase.
Nic Darling
If the design of the entrance allows, you can adopt this method of placement. Although it is more suitable for individual houses.
m2project
On the balcony
Most Russians are firmly convinced that the balcony is generally the only place where you can store a bicycle in an apartment.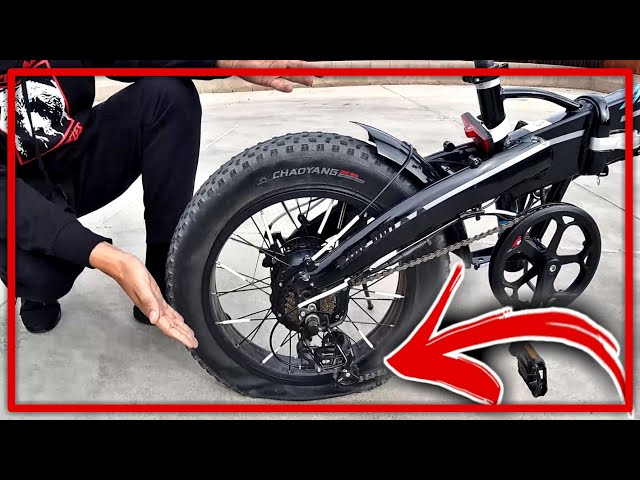 But here there are several nuances.
The outdoor balcony is only suitable for summer bike storage (if you love it, of course). Temperature fluctuations and precipitation are detrimental to hydraulics, plastic, paint and metal. Even if you loosen all the cables, lubricate all the nodes with oil and hide the bike under a waterproof film, you still cannot avoid corrosion - for example, due to condensation. It will be a real torture for a bicycle to hang it behind the balcony bars - you can immediately say goodbye to it. Manufacturers generally recommend not storing bicycles in rooms with temperatures below freezing.
Tip: Think about how you will roll (or even carry) a dirty bike through the whole apartment, even if it is small. And buy special shoe covers for bicycle wheels or bicycle socks for the whole bike.
Nikita Kozlov
Insulated covered balcony is one of the best places to store bicycles in the apartment, both in winter and summer. There is only one minus - you will no longer be able to set up a full-fledged summer garden or arrange a workplace here. There are two ways to combine business and pleasure: hang the bike on special brackets (sold in bike shops) from the ceiling in a prone position or fix it vertically on the wall.
SEE ALSO…
Dream Balcony: Blossom, fuchsias and roses!
STOR-X Organizing Systems, Kelowna
Thus, as in the photo, you can store 2-3 bikes compactly even on the smallest balcony, while hardly using its usable area. The vertical system is also suitable for the summer - it remains only to wipe the wheels.
Tip: Keep the bike out of direct sunlight, as this can damage the protective varnish and peel off paint, crack rubber and plastic. Just cover the adjacent part of the window with a roller blind (if it is not possible to store the bike in a bag).
Michelle Allan
Preservation
Every responsible owner should know how to store a bike in the winter. When removing a bicycle for the winter, you should clean it with your own hands from dirt and old grease, re-lubricate the parts (hinges, brakes, chain, gearshifts), and wipe the metal parts with an oiled rag. In addition, you need to loosen the shock absorber springs and cables. If the bike hangs, then the tires should be lowered a little, and if you stand, on the contrary, pump up from time to time.
How to store a bicycle in a small apartment? To save space, the bike can be partially disassembled: remove the wheels and fenders, saddle, handlebars (or turn 90 degrees), rearrange the pedals so that they look inward. The occupied area will be halved - you can hide it on the mezzanine.
Or under the bed. The volumetric podium allows you to hide a lot of useful things under the mattress. Sometimes it’s not even necessary to disassemble the bike, it’s enough to remove the pedals and turn the handlebars.
SEE ALSO…
Where to store things from the balcony if there is no balcony In many old houses, for example, Khrushchevs, apartment layouts provided for mezzanine storage cabinets in the hallway and next to the kitchen.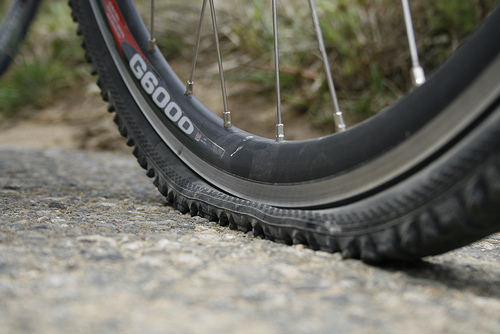 Usually, new owners dismantle them during repairs and do not return them back (from an aesthetic point of view, this is a rather sad design). However, it makes sense to leave such a mezzanine for winter storage of a bicycle. Again, we are talking about storing a folding bike or placing it in the elements.
Monkey Bars of Wichita
Wardrobe
Bicycle (with vertical storage) can be placed in a walk-in closet. By the way, by hanging the bike with the wheels up to the ceiling, its frame can be used as a hanger bar, the trunk as a railing, and the handlebars as hooks for bags.
Special-style
And you can use the end of the corridor by mounting a wardrobe there. Instead of washing machines in the photo, it’s easy to imagine a couple of bikes. On the Internet, it is easy to find the layouts of built-in wardrobes for 2-4 bicycles.
Kimberly S. DuBose, Residential Design
Finally, there is special furniture for bicycles and sports equipment that solves the problem of how to store a bicycle at home: it is either “screens” with shelves and hooks, or metal and wooden frames without walls (or only without doors): drawers and shelves at the bottom, a place for a bicycle at the top.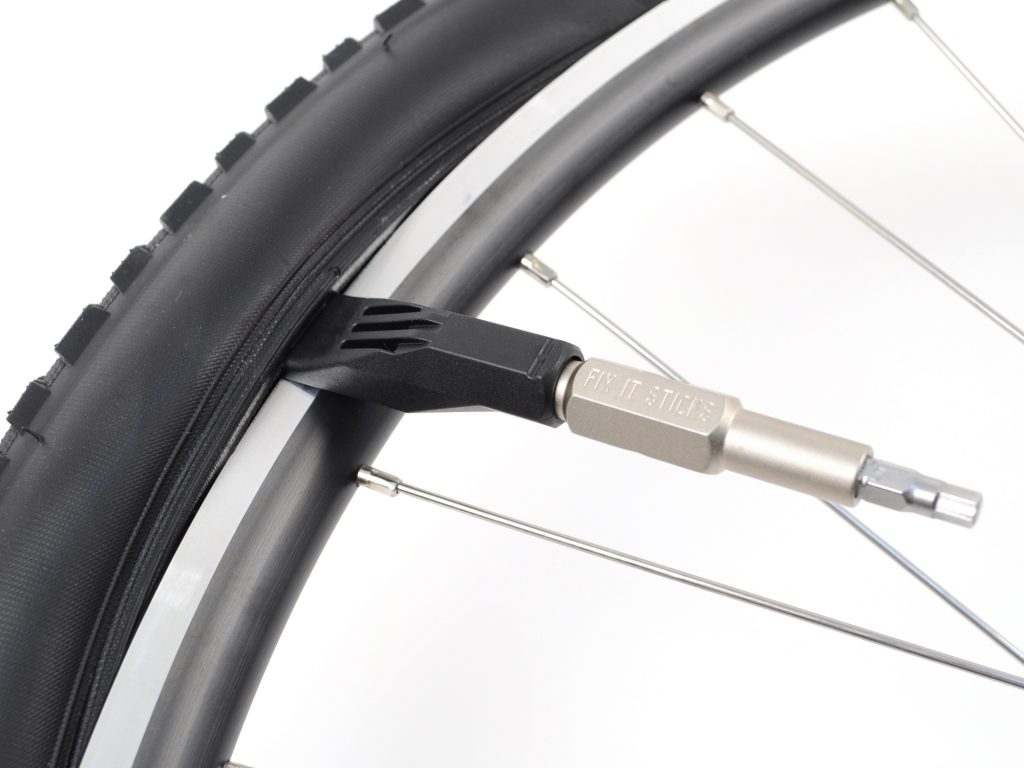 Thanks to the profile, such a cabinet looks easy, but at the same time - finished. If you have a spacious entrance hall or a large technical vestibule in front of the apartment, we recommend this design.
Corynne Pless
On the wall
Alas, not every apartment has a place for a closet or in a closet for a bicycle. You can use walls. Of course, in most cases, a wall-mounted arrangement is only suitable for winter storage of a clean bike, but there are options for out-of-season storage.
How to store a bicycle in an apartment? It is best to find a place for fastenings at the front door so as not to drag dirt into the house.
Important: Do not place the bike near a radiator or electric convector - the heat will dry out the rubber and damage the protective varnish on the frame.
Chris Dorsey Architects, Inc
Mounts for a vertical bike are different: hooks, brackets, hangers, shelves, baskets, racks - for one and two units.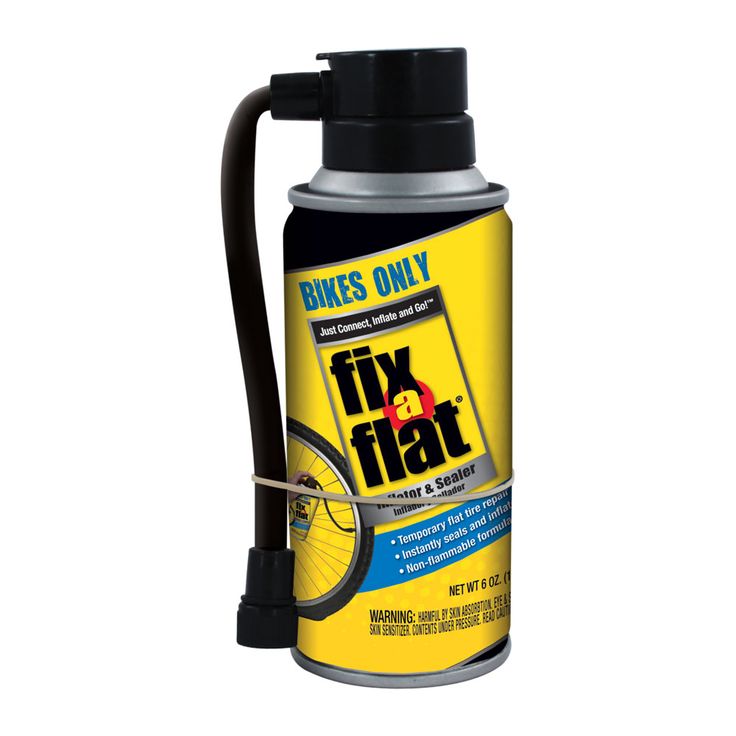 They are sold in bicycle and online stores, but it is often not difficult to make such ones.
When designing a bicycle rack, consider that it must support its weight plus 5 kg, that is, for an adult model, a minimum of 20 kg. It is necessary to mount the mounts so that at least 15 cm remain from the bicycle wheels to the floor, for ease of cleaning.
Peter Stockhausen
Shelves can be made in different designs - for books, flowers, hats.
If you have a women's or sports bike with an oblique frame, you can install it on a hanging rack: this will be a shelf for the wheels, and you can store shoes or magazines inside.
Veronica Blazhko
Another method of fastening is vertical. Here, too, there are different suspensions: behind the wheel (not very recommended - disk deformation is possible), behind the frame and behind the steering wheel. The bike can be hung parallel to the wall.
Daleet Spector Design
And you can - perpendicular. In this case, it will be convenient to use columns and other architectural ledges. Looks impressive and allows you to zone the room.
See if you have any "dead" zones in your apartment that are never used. It can be a niche between a wall and a closet, a gap between a wall and a sofa, or 20 cm between a wall and a door is enough to accommodate a thin sports bike (especially if you remove the handlebars and wheels). Any door is suitable for vertical fastenings (for example, to a pantry), but in such a way that it opens at the same time.
Hint: Place wheel stands on both wheels to avoid damaging the finish.
Ezra Lee Design+Build
From an ergonomic point of view, the position of the bike along the wall, of course, wins - especially in a niche.
Another ergonomic option is to line up the "walls": for example, two vertically suspended bicycles, between them - a rack or bookcase.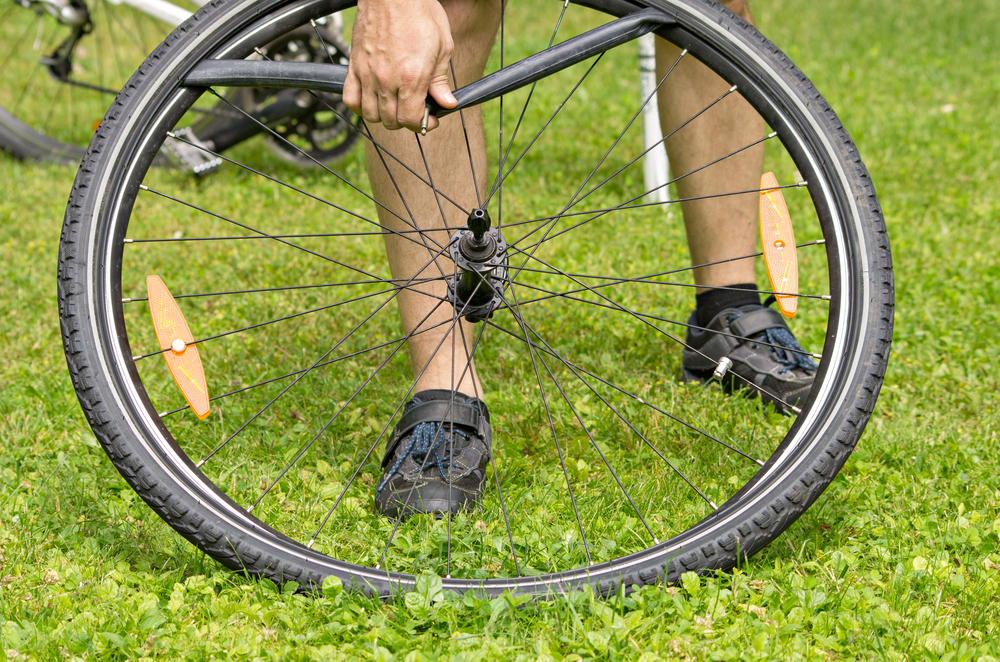 A bicycle is a visually light construction, so such walls do not look massive.
SEE ALSO…
Bicycle in the interior - 235 photo ideas
Cush Design Studio
On the ceiling
The only way to use it is, again, along the wall under the ceiling, as a more effective alternative to wall hooks.
Foursquare Builders
How to fit into the interior
A bicycle on the wall will inevitably attract attention, and will become either an ally or a destroyer of the interior. It will look best in a teenage children's room or in a loft-style room: here any technique and mechanics are more or less appropriate. Two-wheelers also look good in cool Scandinavian interiors that are not crowded with furniture.
READ ALSO…
Nordic character: What can we learn from the Scandinavians?
LABLstudio
In other respects, a bicycle is the same interior element as, for example, an armchair. So the wall should also be a good background for the bike. A win-win combination: a dark silhouette plus a white wall. Retro models will look especially nice in such an environment.
Satterberg Desonier Dumo Interior Design, Inc.
Be ironic: imagine how a bicycle would look on the same wall, but in a large picture frame. This is no longer a place for storage, but an installation. Designer wheel covers will also allow you to fit an alien mechanism into any interior. Knitted ones look especially touching.
St. Barths Home
Velo - in business
If space permits, such an ingenious invention as a bicycle can not be hung on the wall and not hidden in a closet, but, on the contrary, put in a conspicuous place, turning it (in winter, for example) into a stand for flower pots - the baskets on the steering wheel and trunk seem to be created for this.
Christiano Homes, Inc.
In a non-standard bathroom, you can even put your bike under the sink (from this idea even a series of designer coasters was born). The basket is convenient to store toilet paper or towels.
By the way, another design series of furniture arose from the combination of a bicycle and a bar counter (located on request in a search engine) - a large saddle became a bar stool. You can do it yourself.
SEE ALSO…
Home / Blog / Bicycle self service
Every vehicle needs maintenance, and a bicycle is no exception. Despite the fact that its device seems quite simple at first glance, all mechanisms must be in good condition so that the ride is not only comfortable, but also safe. In addition, preventive measures such as washing, cleaning and lubricating help prolong the life of your bike. Simple maintenance is quite within the reach of any owner, and if there is a need for serious repairs, it is better to contact the workshop.
A simple but important rule is to keep your bike clean and lubricated. This is not difficult, but it has a serious impact on the condition of a two-wheeled friend. Periodically, the following actions should be performed:
Proper storage conditions are important. It is not worth keeping a bicycle on the balcony; cold and damp rooms are not recommended for it. It is also desirable that the environment is clean. You can store the bike disassembled, in a special sealed case, if there is not enough space in the apartment. An interesting option is storage on the wall, where the bike is suspended using special fasteners. Perhaps this method will save space. The main thing is to make sure that the bike holds well and does not fall, because the fall will not do him good.
Technical work requires special tools. This is a range of tools that will come in handy during the maintenance and repair of the bike:
Such a set is considered basic, in case of a simple repair, however, professionals use other tools: various types of pullers, a release wrench, a brake bleeding kit, a chain washer, an oil dosimeter and other devices. You can gradually add them to your repair case, expanding the set as needed if you plan on cycling yourself.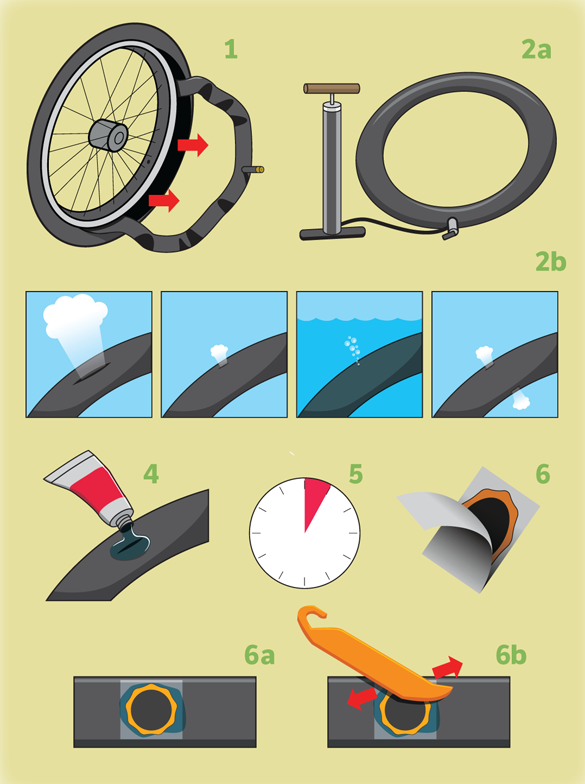
In addition, you will need consumables that are also necessary for the proper functioning of the bike. These are lubricants, cleaners, sealants, cables and springs, brake pads. They need to be replaced quite often, especially during active use.
The main component of any bicycle is the frame. It serves as a frame to which other elements are attached, and also takes on the load during the ride. Because of this, it can deform over time, fatigue accumulates at the joints. The situation can be exacerbated by falling bicycles or collisions, riding in inappropriate conditions, exceeding the load capacity. The frame is also vulnerable to corrosion, so it is worth inspecting it regularly for rust and taking appropriate measures. Cracks and breaks in the frame are difficult to fix at home, so it’s better to contact the master here.
Wheels can deform over time, bending of the rim will negatively affect driving performance. To solve the problem, you can change the tension of the spokes using a spoke wrench.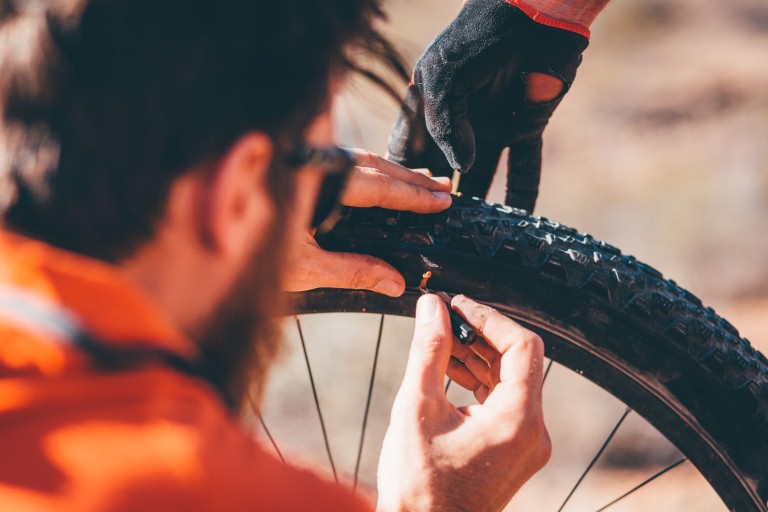 It is also worth monitoring the level of tire pressure, maintaining optimal performance - this will help to avoid curvature.
The wheel hub must be washed carefully, without using a strong jet, and the lubricant must be changed periodically. The front fork needs to be cleaned and lubricated, changing the sealing parts as needed. Sometimes you need to replace the spring if the softness of the shock absorber cannot be adjusted.
Steering, brakes, transmission
Steering columns with industrial bearings need to be lubricated periodically. Headsets with loose balls may require replacement of internal components that crumble over time under load. Also, the column should be cleaned from dust and dirt.
The brake system must be taken care of, because the safety of the cyclist directly depends on its serviceability. It is recommended to check the following components as often as possible:
Parts should be inspected for integrity and wear, checking their condition. It is better to do this a couple of times a week if you actively use the bike. It is also important when setting up to correctly set the pads with a minimum, but not slowing down, clearance - this will make the system work more efficiently. The rim must be free of damage and defects and must be cleaned regularly.
Pay attention to the cables, their condition and tension affect the accuracy and speed of the brakes. The best option for a bicycle is when the reaction occurs immediately during use - the pads instantly fit and bounce.
If the brakes have a hydraulic system, the line must be maintained in working condition. Problems can arise due to fluid contamination or the presence of air is negatively affected. To fix problems and pump the system once a season, a special tool is used. As for the liquid, it is recommended to follow the manufacturer's requirements.
Also during the work it will be necessary to sort out the transmission, which includes the following actions:
The bottom bracket and connecting rods are removed using special tools - pullers. The connecting rod pair must be in perfect condition, without cracks, it is also important to pay attention to the bearings in the bottom bracket. These elements must be properly lubricated with a special compound.
Cleaning and lubricating the chain helps to reduce wear on other more expensive items - cassettes. The chain can be removed by hand using a lock or a squeeze. Worn sprockets can be replaced individually. Periodic transmission maintenance helps extend the life of the mechanisms and maintain performance.
In some cases, you will not be able to solve the problems yourself, for example, if the bike has a seriously damaged frame or other noticeable defects. Then you should take the help of a master and contact a specialized workshop. In addition, specialists can also perform minor repairs and preventive maintenance if for some reason you do not have time for this or you simply do not want to do such things.