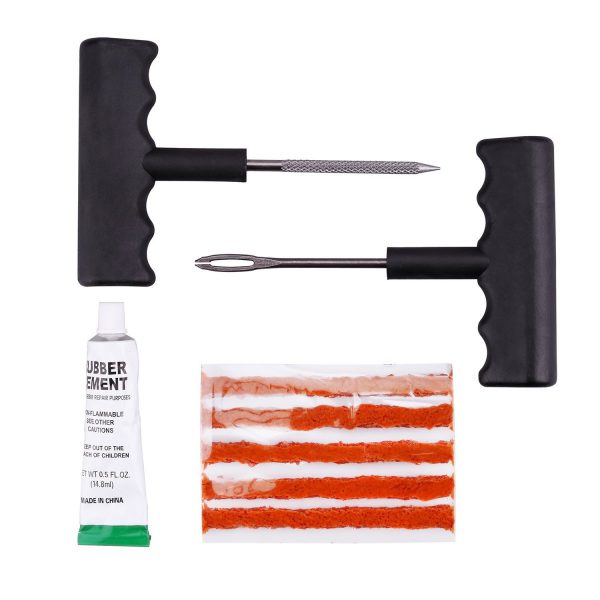
So, you have a flat tire or one that’s leaking air. It’s not the end of the world. Luckily there are safe and cost-effective ways to properly repair most tire punctures. The purpose of this article is to show you the difference between a safe, permanent repair and a temporary string, plug or patch repair.
According to the National Highway Traffic Safety Administration (NHSTA) and the Tire Industry Association (TIA), the only method to properly repair a tire puncture is to fill the injury with a repair stem and back the stem with a repair patch. This is commonly known as a combination repair or a patch/plug repair.
Patch/plug repairs are most often performed using a one-piece repair unit that combines the repair stem and cap (or patch) into one unit. However, special circumstances may require the use of a two-piece combination repair (ex. If the angle of the puncture exceeds 35 degrees). The repair is then permanently bonded to the inside of tire and through the injury channel using a cold, chemical vulcanizing process.
The repair essentially becomes part of the tire, creating an air-tight seal that keeps air in and moisture and contaminants out (more on this procedure below).
Emergency roadside plug repairs are NOT intended to be a permanent tire repair. Plugs and string repairs are designed to get you back up and rolling long enough to get home or to the nearest service center to perform a proper tire repair.
The common misconception with plug and string repairs is that because they hold air, they are safe to use. While it is true that many plug repairs do a great job of keeping air in the tire, that’s only part of the equation. Because they’re not completely sealing the injury, plug repairs may allow air and moisture to penetrate the body of the tire. Over time, this could lead to a dangerous (or even deadly) blowout.
A Patch-Only Tire Repair Leaves Your Tire Susceptible to DamageA tire repair that uses only a patch is also NOT considered proper or safe. A properly installed patch will do a great job of allowing the tire to hold air. However, similarly to the plug-only repair, the patch does not fill the injury channel. Therefore, air and moisture could seep into the tire from the tread surface and eventually damage the tire.
Only a proper patch/plug repair completely seals the puncture from inside the tire and through the entire injury channel. There are a few extra steps necessary to perform a proper tire repair in accordance with industry guidelines. We’ve developed a simple acronym to help organize and remember the steps: R.E.P.A.I.R.
 It can also be determined if the puncture did any significant damage to the cords or belts.
-web.jpg) The over-buffed area of the inner liner is treated with a thin layer of rubber sealant, and the excess repair is trimmed to approximately ¼” above the tread surface.
The over-buffed area of the inner liner is treated with a thin layer of rubber sealant, and the excess repair is trimmed to approximately ¼” above the tread surface.There are a number of factors that may determine whether or not your tire is safe to repair. These factors fall into three main categories:
 Excessive wear, casing separation, impact damage and other conditions may make it unsafe to properly repair your tire. For a more comprehensive list of repairable vs. non-repairable conditions visit our blog Can Your Tire Be Repaired?
The occasional flat or leaky tire is an unavoidable part of life. But, taking shortcuts to repair it can be dangerous to you and your passengers. Take the time and do the research to do the job right and/or find a reputable tire repair shop trained in proper tire repair procedure.
The TLX has increased cargo-carrying capacity and reduced weight thanks to an efficient tire sealant and inflator kit. This kit provides an easy and clean way to temporarily seal a small puncture or hole (3/16th of an inch or smaller) in the tire tread. Once injected into the tire, the sealant coats the inside of the hole or puncture, preventing air from escaping.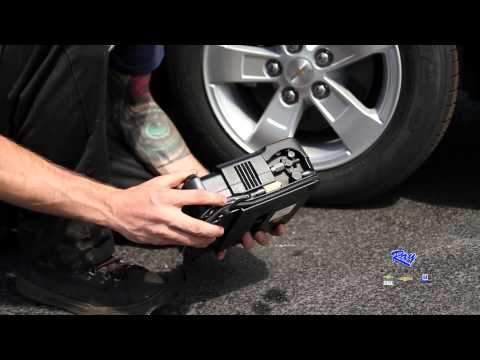 The vehicle can then be driven (no faster than 50 mph) to a location where the tire can be repaired or replaced, depending on its condition.
The tire sealant and inflator kit can be used to add air to the vehicle’s tires in areas where compressed air is not available.

No, the sealant is only for temporary use and vehicle should be driven to an Acura dealer or tire repair facility as soon as possible so that the tire can be properly repaired or replaced.
The compressor can be used repeatedly; however, the bottle of sealant needs to be replaced after each use. The used bottle should be returned to an Acura dealer for disposal, and a new bottle can be purchased at the Acura dealer.
Yes, the sealant has an expiration date clearly marked on the sealant bottle, visible through an opening in the kit. Approximate shelf life of the sealant is 4 years.
No, the sealant works on punctures or holes 3/16th of an inch or smaller. It cannot seal larger holes, or damage to the side walls of the tire.
No, the Acura tire sealant and inflator kit sealant will not affect the TPMS sensors or system in the vehicle (other sealants may, however). If the tire is repaired after using the supplied sealant, the sealant should be flushed from the TPMS sensor using cool water.
You can contact Acura Total Luxury Care Roadside Assistance, 24 hours a day, 7 days a week at (800) 594-8500.
Yes, the tire sealant and inflator kit will work on other tires.
Yes, there is a spare tire and wheel set available for purchase from an Acura dealer.
Content may not apply to all models. Consult your owner's manual for specific information about your vehicle.
You have no vehicle information saved in your Acura Owners account.
Select Year & Model
Choose a Year and Model to View YEAR20232022202120202019201820172016201520142013201220112010200920082007200620052004200320022001200019991998199719961995199419931992199119901989198819871986MODELSelect
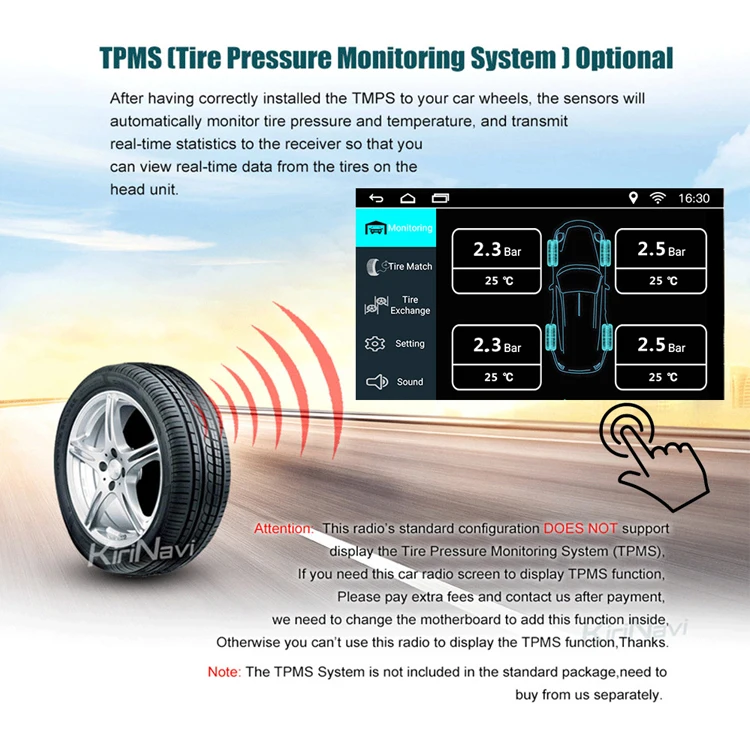
Select| Main page CATEGORIES: Archeology TOP 10 on the site Preparation of disinfectant solutions of various concentrations Technique of the lower direct ball delivery. Franco-Prussian war (causes and consequences) Organization of the work of the treatment room Semantic and mechanical memorization, their place and role in the assimilation of knowledge Communication barriers and ways to overcome them Processing of reusable medical devices Samples of journalistic style text Four types of rebalancing Problems with answers for the All-Russian Olympiad in Law We will help you write your papers! DID YOU KNOW? The influence of society on a person Preparation of disinfectant solutions of various concentrations Practical work in geography for the 6th grade Organization of the work of the treatment room Changes in inanimate nature in autumn Treatment room cleaning Solfeggio. All rules for solfeggio Beam systems. | ⇐ PreviousPage 3 of 9Next ⇒ TIRE PRESSURE MONITORING SYSTEM (TPMS) This vehicle is equipped with a tire pressure monitoring system (TPMS). This system monitors the pressure in all tires. If the warning light comes on and the message “CHECK TIRE PRESSURE” appears on the LCD, it means that at least one of the wheel tires is flat. If the vehicle is driven with a flat tire, the TPMS system will activate, warning the driver of low tire pressure with a low tire pressure indicator on the instrument panel. This system is only activated when the vehicle is moving at speeds above 25 km/h. CAUTION FLAT TIRE REPAIR WARNING This vehicle is not equipped with a spare wheel. Instead, it comes with an emergency tire repair kit. This kit can be used to temporarily repair minor tire damage. If possible, it is preferable to use a tow truck to transport the vehicle to a location where a full repair and replacement of a flat tire can be carried out. Using the emergency tire repair kit may cause the tire pressure sensor to malfunction and cause the low tire pressure warning light to illuminate on the instrument panel. In the event of tire damage, follow the instructions below. CAUTION STOPPING THE VEHICLE 1. Carefully drive the vehicle away from the road. 2. Switch on the hazard warning lights. 3. Stop the vehicle on level ground and apply the parking brake. 4. Move the "P" position switch on the selector lever to the park position. 5. Switch off the motor of the electric vehicle. 6. Raise the hood to alert other road users and roadside assistance personnel to your location. 7. Get passengers out of the car and make sure they are all in a safe place, away from the road and the car. CAUTION REMOVING THE TIRE REPAIR KIT
Remove the emergency tire repair kit from the side compartment in the luggage compartment. The emergency tire repair kit consists of the following items: 1. A bottle of tire sealant. 2. Air compressor. 3. Speed limit sticker. BEFORE USING THE TIRE REPAIR KIT If any foreign object (such as a screw or nail) is stuck in the tire, do not remove it. Check the expiration date of the sealant (shown on the tag on the sealant container). Do not use expired sealant! TIRE REPAIR CAUTION
Note 1. Open the cover of the air compressor and remove the speed limit sticker, then place it in the driver's field of vision to remind the vehicle of the speed limit with the repaired tire repair kit.
CAUTION 2. Remove hose (1) and plug (2) from the air compressor. Remove the container holder cover from the air compressor.
3. Remove the sealant bottle cap. Screw the container onto the air compressor holder. (Do not remove the canister seal. The seal will break properly when the canister is screwed on.)
4. Remove the cap from the flat tire valve. 5. Remove the protective cap (A) from the hose and screw the hose securely onto the tire valve. Make sure the pressure relief valve (B) is securely tightened. Make sure the air compressor switch is in the off (O) position, then insert the plug into the car socket.
6. Turn the electric vehicle's power switch to the "ACC" position. Then turn the air compressor switch to the on (“-”) position and inflate the tire to the pressure indicated on the information tag located on the B-pillar on the driver's side, or if this is not possible, to at least 180 kPa.
Note If the tire pressure fails to inflate to 180 kPa within 10 minutes, the tire is badly damaged and cannot be repaired with a repair kit. 7. Switch off the compressor when the desired pressure is reached. If the tire cannot be inflated to the required pressure, the air compressor can be switched off when the minimum pressure of 180 kPa is reached. Remove the plug from the power outlet and quickly remove the hose from the wheel valve. Install the protective cap and valve cap. Properly fold the tire repair kit back into the luggage compartment. CAUTION 8. Drive immediately for 10 minutes or 3 km at speeds up to 80 km/h. 9. After driving, make sure the air compressor switch is in the off position, then screw the hose securely onto the wheel valve. Check tire pressure with a compressor. A temporary tire repair can be considered complete if the tire pressure does not drop. 10. If the tire pressure has dropped, repeat steps 5-9. If the tire pressure drops again or stays below 130 kPa, the tire cannot be repaired with the repair kit. Contact a Nissan dealer for assistance. Note AFTER TIRE REPAIR At the earliest opportunity, take your tire to a Nissan dealer for repair/replacement. WARNING ⇐ Previous123456789Next ⇒ See also: Psychological characteristics of a sports competition Preparation of disinfectant solutions of various concentrations Employment and labor market Social status of the family and its typology |
| This page was last modified: 2019-12-25; views: 132; Page copyright infringement; We will help you write your paper! infopedia. |
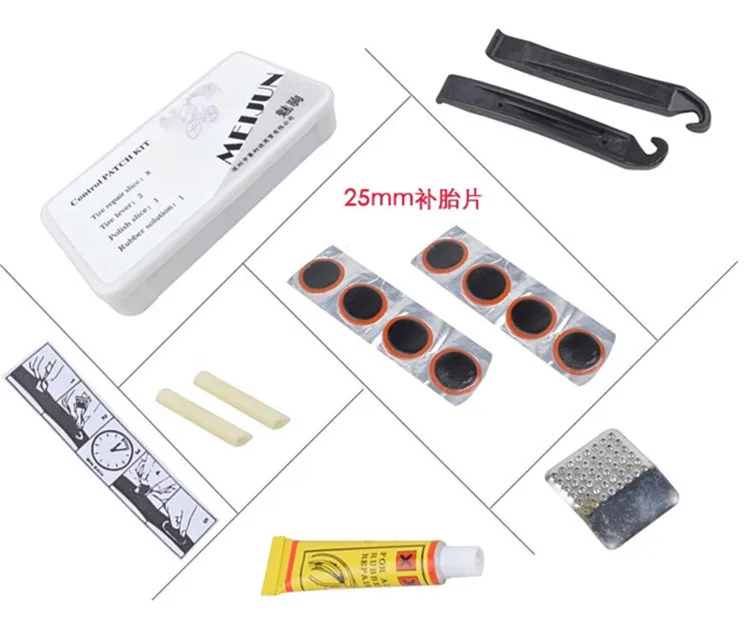
7. Tire Repair Kit
NOTICE
Vans require separate instructions that came with the tire repair kit.
Your vehicle may not have a spare tire. In this case, it is equipped with an emergency tire repair kit, with which one flat tire can be repaired. The tire repair kit is located in the glove compartment.
CAUTION
Depending on the type of tire and the nature of the damage, only partial repairs may be possible or sealing may not be possible at all. Decreased tire pressure can affect vehicle handling and result in loss of vehicle control.
Do not use the repair kit for tires damaged by driving with a flat tire.
Do not use the tire repair kit on runflat tires that still perform after a puncture. Do not attempt to repair damage that is not in visible areas of the tread.
Do not attempt to repair damage to the tire sidewall.
Tire Repair Kit seals most punctures up to 6mm in diameter to temporarily restore traffic. When using the kit, observe the following rules:
- Drive with care, avoid sudden maneuvers, especially if the vehicle is loaded or a trailer is attached.
- The kit allows you to perform temporary emergency repairs and drive to the nearest service center or travel a maximum of 200 km.
- Do not exceed the maximum speed of 80 km/h.
- Keep the kit out of the reach of children.
- Use the kit only in the outdoor temperature range from -30°C to +70°C.
WARNING
Compressed air can create an explosion hazard or strong driving force. Do not leave a used tire repair kit unattended.
CAUTION
The compressor should not run for more than 10 minutes.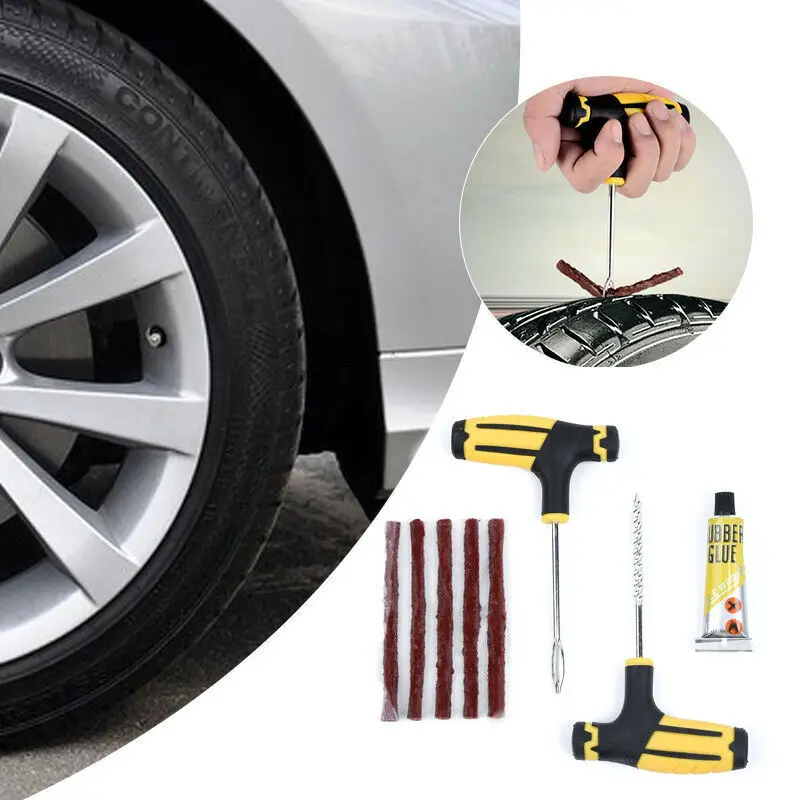 Note
Note
Use only the tire repair kit supplied with this vehicle.
- Park the car on the side of the road so that it does not obstruct traffic and use the kit without endangering yourself.
- Apply the parking brake even when stopped on a level surface to prevent possible vehicle movement.
- Do not attempt to remove foreign objects such as nails or screws stuck in the tire.
- Do not turn off the engine while using the kit, unless the vehicle is in a closed or poorly ventilated area (eg inside a building). In this case, turn on the compressor with the engine off.
- Replace the sealant bottle before the expiration date printed on the top of the bottle.
- Inform all people who use the vehicle that the tire has been temporarily repaired with a repair kit and ensure that the special operating conditions are observed.
CAUTION
Check the condition of the sidewall of the tire before starting the operation.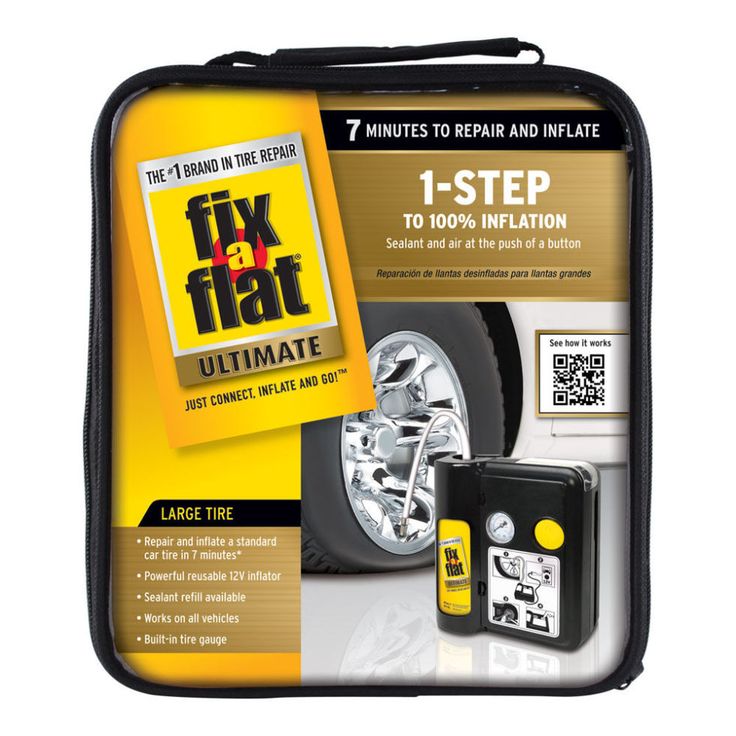 If there are any cuts, bulges, or similar damage, do not attempt to inflate the tire. Do not stand near the tire while the compressor is running. Watch the sidewall of the tire. If any cracks, bulges or similar damage appear, turn off the compressor and bleed air using pressure relief valve B. Do not run this tire.
Sealant contains natural latex. Avoid contact with skin and clothing. In case of contact with the liquid, immediately flush the affected areas with plenty of water and seek medical advice. If the tire pressure does not reach 1.8 bar within seven minutes, the tire may be severely damaged and no temporary repair is possible.
In this case, do not continue driving without changing this tire.
When the bottle is placed on the holder, the seal is pierced. Do not remove the bottle from the holder as this will cause the sealant to leak out.
A - Safety cap B - Safety valve C - Hose D - Orange cap E - Bottle holder F - Pressure gauge G - Wire with electrical connector H - Compressor switch I - Label J - Bottle cap K - Sealant bottle
1 • Open the cover of the tire repair kit.
2. Remove label I from the can, which shows the maximum speed limit of 80 km/h, and stick it on the instrument panel, in the driver's field of vision. Make sure the label doesn't obscure any important elements.
3. Remove hose C and wire with electrical connector G.
4. Unscrew orange cap D and bottle cap J.
5. Cloth, screw bottle of sealant K fully clockwise onto bottle holder E.
6. Remove the valve cap from the damaged tire.
7. Remove safety cap A from hose C and screw hose C tightly onto the valve of the damaged tire.
8. Check that the compressor switch H is set to position 0.
9. Plug the power plug G into the cigarette lighter or auxiliary power socket.
10. Start the engine.
11. Set the compressor switch H to position 1.
12. Inflate the tire for no longer than seven minutes to a pressure of at least 1.8 bar and no more than 3.5 bar.
Set the compressor switch H to position 0 and check the tire pressure with a pressure gauge F.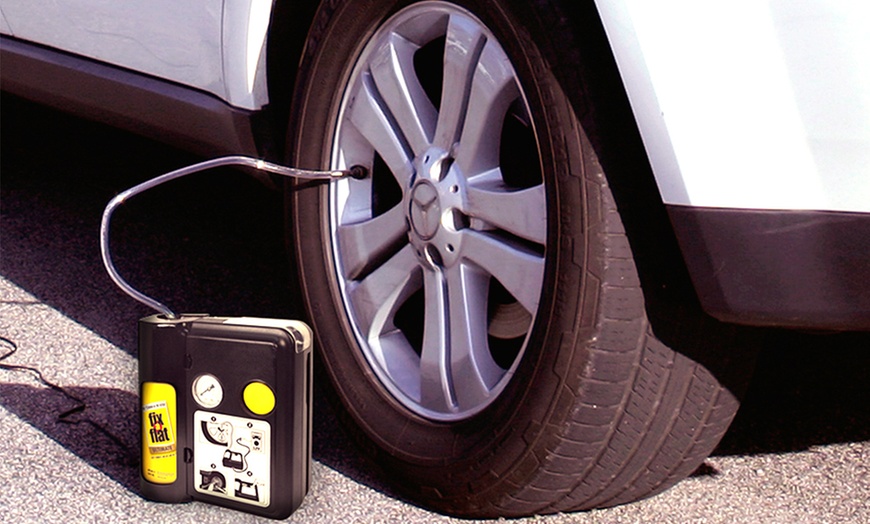
13. Remove the power connector G from the cigarette lighter socket or auxiliary power socket.
14. Remove hose C from tire valve and quickly install safety cap A. Install valve cap.
15. Leave the bottle of sealant K in holder E.
16. Store the kit, bottle cap and orange cap in a safe but easily accessible place in the vehicle.
The kit will be needed again after checking the tire pressure.
17. Drive immediately and drive about three kilometers to allow the sealant to saturate the damaged area.
Note
When pumping sealant through the tire valve, the pressure can rise up to six bar, but after about 30 seconds the pressure will drop again.
WARNING
If you experience severe vibrations, instability, or noise while driving, slow down and drive carefully to a place where you can safely stop the vehicle. Recheck tire condition and pressure. If the tire pressure is less than 1.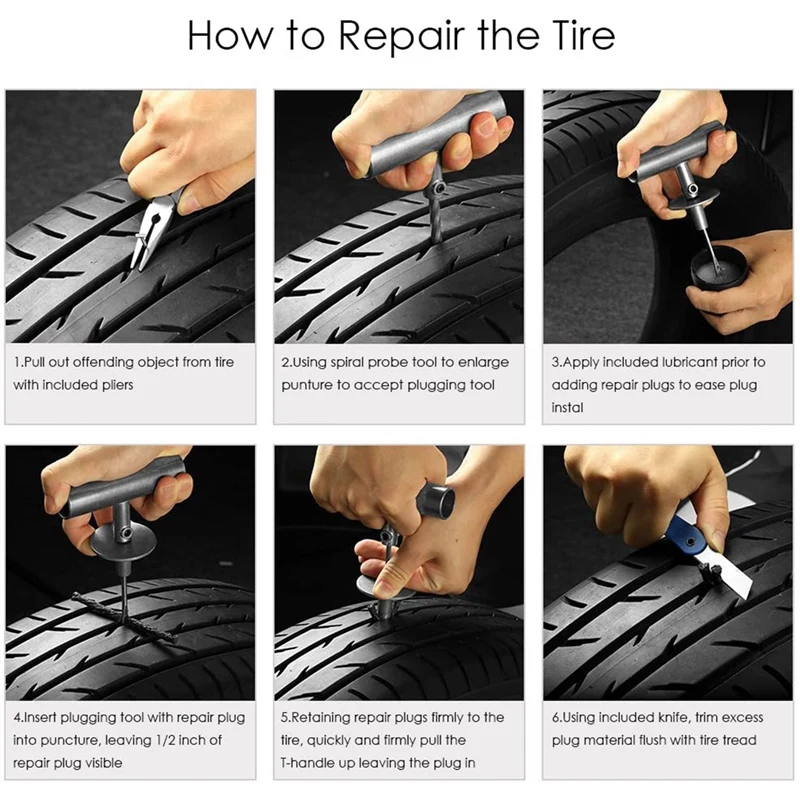 3 bar or any cracks, bulges or similar visible damage is present, do not continue driving without changing the tire.
1. Stop the vehicle after driving approximately three kilometers.
Check and, if necessary, correct the pressure in the damaged tire.
2. Install the kit and check the tire pressure on pressure gauge F.
3. If the pressure in the tire filled with sealant is at least 1.3 bar, increase the pressure to the prescribed level.
4. Inflate the tire again to increase the air pressure.
5. Check the tire pressure again using pressure gauge F. If the tire pressure is too high, bring it to the prescribed level using pressure relief valve B.
6. After inflating the tire to the required pressure, turn the compressor switch H to position 0, remove the connector G from the power socket, unscrew the hose
C, tighten the valve cap and install the safety cap A.
7. Leave the bottle of sealant K in holder E and store the kit in its original safe place.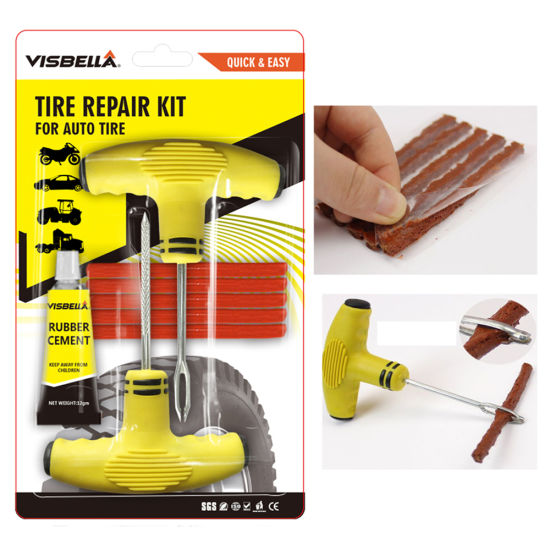
8. Go to the nearest service center and replace the damaged tire. Before the tire is removed from the rim, inform the mechanic that the tire is filled with sealant. After using the kit once, replace it as soon as possible.
Note
Please note that the emergency tire repair kit only temporarily restores the vehicle's ability to drive. Different countries may have different rules for repairing tires after using the kit. Consult a tire repair specialist.
Before driving, check that the tire pressure is correct. Monitor the pressure until you change the tire filled with sealant. Note
Sealant bottles can be disposed of in general household waste. Return residual liquid sealant to dealer or dispose of in accordance with local waste disposal regulations.
To ensure even wear and extend the life of your tires, we recommend that you change your tires regularly from front to rear and vice versa. The shift interval should be between 15,000 and 20,000 km.


 Determination of support reactions and pinching moments
  In addition, it can cause serious damage to the car due to an accident, as well as injuries of varying severity. Check the pressure in all four tires. To turn off the warning light, adjust the tire pressure to the recommended COLD tire pressure indicated on the vehicle information tag. If the light stays on after adjusting the pressure, the tire is damaged. You need to make repairs as described below.


 Switch off the air compressor briefly to check the tire pressure with a pressure gauge. If the tire is inflated to a higher pressure than necessary, bleed the air using the pressure relief valve.
  Contact a Nissan dealer for assistance.
 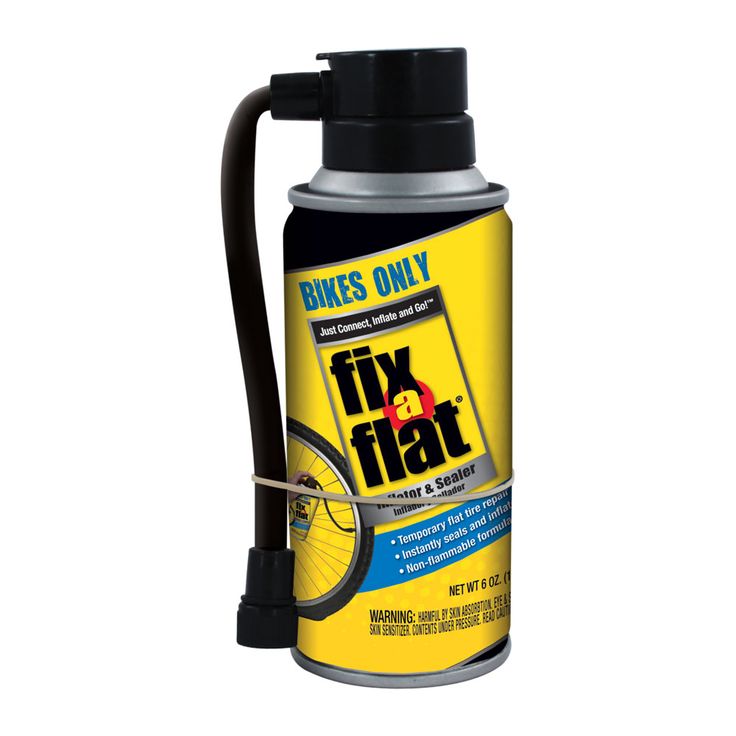 Adjust the tire pressure to normal (the pressure value is indicated on the information tag located on the B-pillar on the driver's side).
 su All materials presented on the site are for informational purposes only and do not pursue commercial purposes or copyright infringement. Feedback - 176.57.188.101 (0.004 s.)