The tire repair kit is located in the underfloor storage area of the trunk. The kit contains:
The Honda Tire Repair kit is ideal for temporarily repairing a small hole in the tread area. The majority of roadside flats are caused by a simple puncture from a nail or another object. The tire repair kit should be sufficient to repair approximately 85% of all flat tires. Many people like Deshais have 24 hour assistance that they are able to call for anything else.
Some people aren’t sure about the benefits of using the tire repair kit versus the conventional spare tire and tools. Deshais honestly points out that she, like many others, has reservations about putting on a spare tire by herself. The tire repair kit is simple enough for most people to use on their own without having to wait for Roadside Assistance. Plus, using the kit takes about half the time of putting on a spare.
The kit is much lighter, cleaner, and easier to work with. This is especially important if you’re dressed for work or on your way to an important event. In addition, the lighter weight of the kit versus a spare also contributes to fuel efficiency. That’s a real bonus. The small size means more room for storage, and that’s something you can use everyday compared to a spare tire that you may never use.
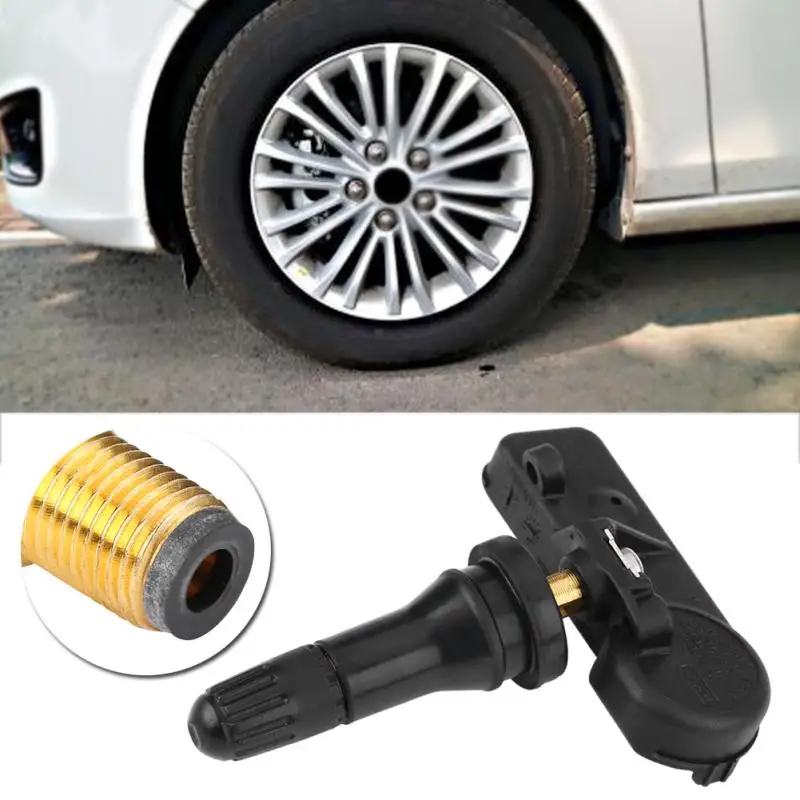
The sealant is specifically designed for vehicles with a tire pressure monitoring system and won’t damage those sensors. You can use the air-only hose to top off air pressure in the tires if you’re not near a gas station. You can also use it to fill up the tires on your mountain bike – That’s another cool bonus!
◦ If it’s a rip on the sidewall or a tread puncture larger than 4mm – about the size of a pencil eraser – you will need to call Roadside Assistance.
◦ There’s a safety lock in the hose connector that prevents the release of sealant until the hose is fully engaged.
◦ Do not use the kit using accessory power alone.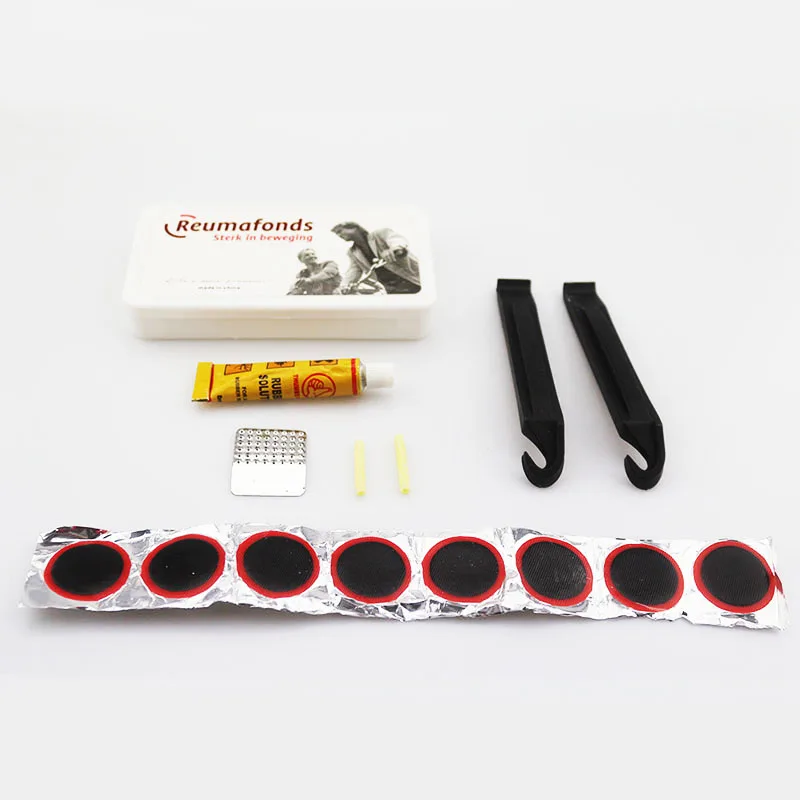 You need to run the engine while using the compressor to inject sealant and air.
◦ Only repair the tire outdoors.
◦ The whole process should take about 10 to 12 minutes.
◦ When the sealant injection is complete, the pressure will drop.
◦ Only drive at a safe speed on a temporarily repaired tire – No more than 50 mph
◦ Reminder stickers should be placed on the repaired wheel and inside the vehicle.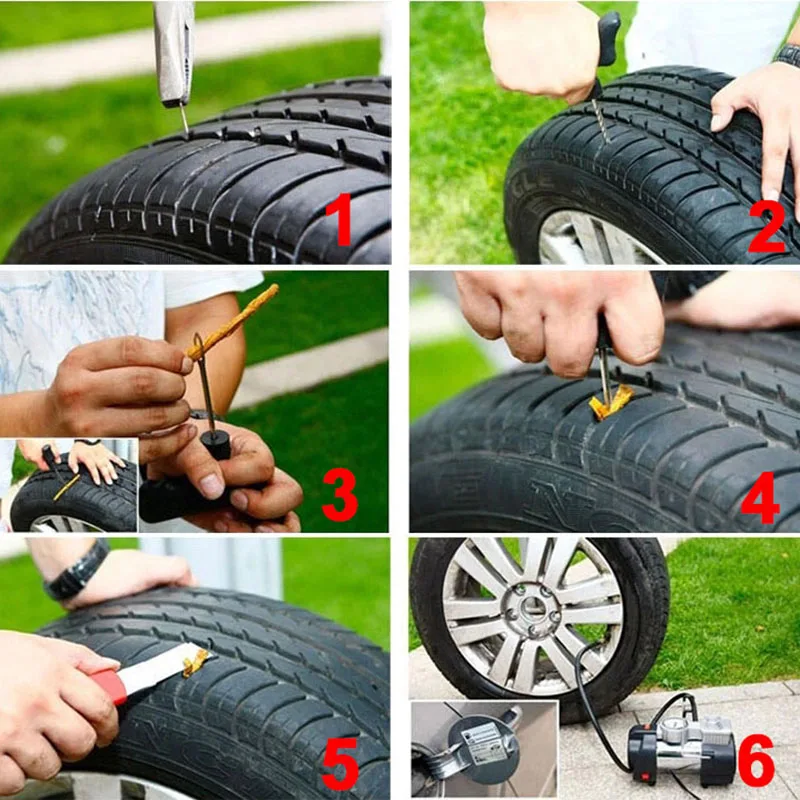
It’s that easy. No heavy dirty wheel and tire to lift. No jack to operate. Just the convenient compact tire repair kit. You’ll have peace of mind knowing it’s there when you need it.
Disclaimer: The stock image is being used for illustrative purposes only, and it is not a direct representation of the business, recipe, or activity listed. Any person depicted in the stock image is a model.
Prevention is better than a cure, everyone knows that, but sometimes things simply happen. In the world of off-roading, tyre punctures are a definite possibility. You might be the most vigilant driver around – checking your tyres' condition, inspecting them for wear and tear, cracks, splits, cuts but your tyres may still cop an errant nail, screw or stick in the tread or sidewall; and that's puncture time.
Your tyres are your points of contact with the ground, so never drive for any great distance when you know one or more of your vehicle's tyres are punctured. The simple solution is to fix the puncture, so you can drive the, hopefully, short distance to reach a tyre professional who will then properly fix the tyre or replace it.
Be prepared with a good tyre-puncture repair kit, know how to use it and then you'll be ready for action when the time comes.
Note: Only use a tyre-puncture repair kit on tubeless-type tyres. Also, and this is a great tip from aftermarket supplier ARB: "Never attempt a repair on a tyre that shows signs of internal or external structural damage such as exposed belts, sidewall bulging, ply separation, cracks etc.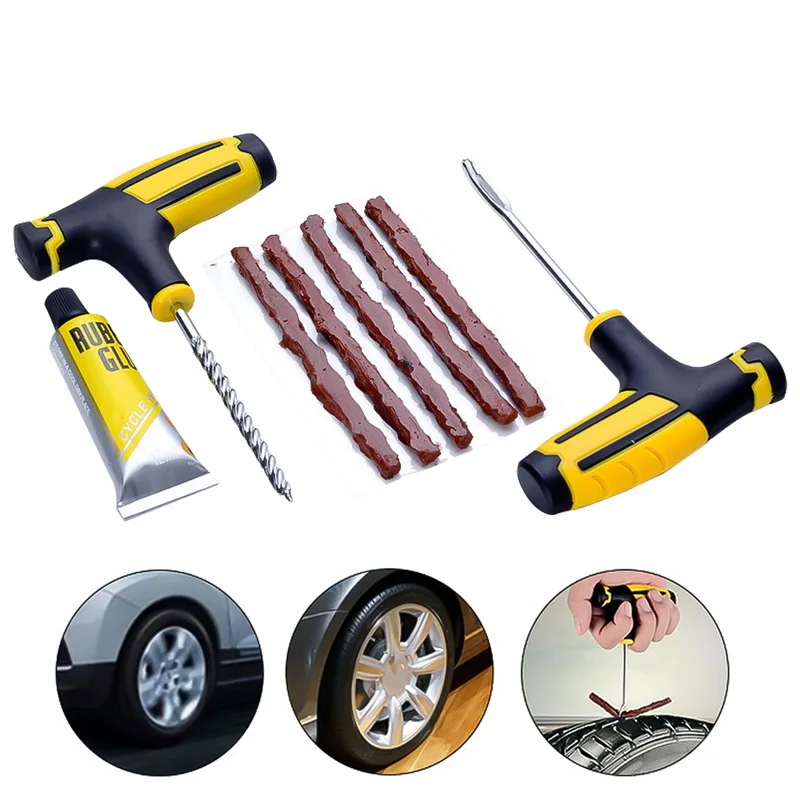 "
"
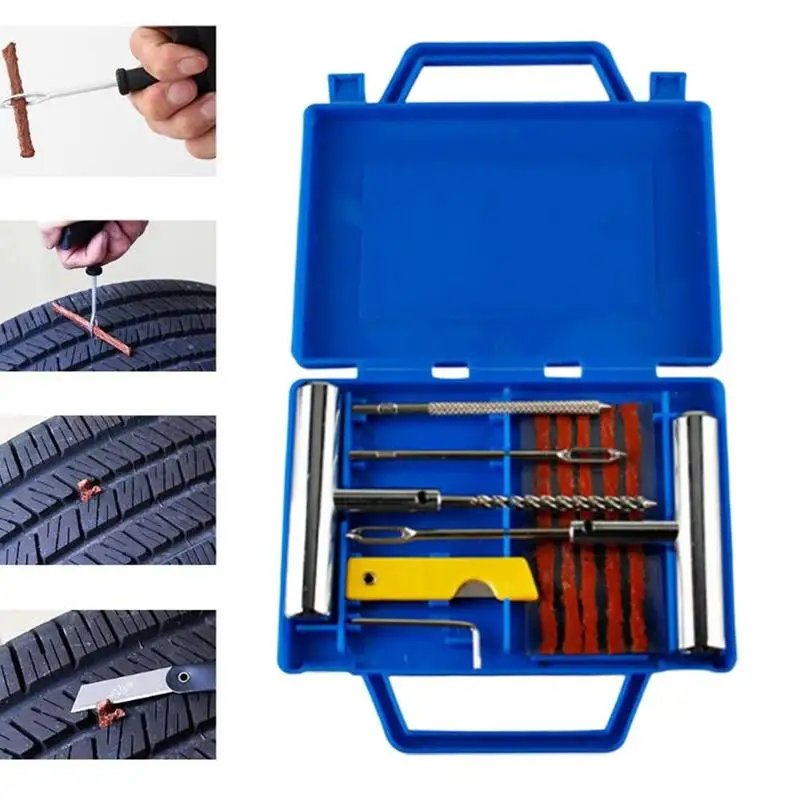
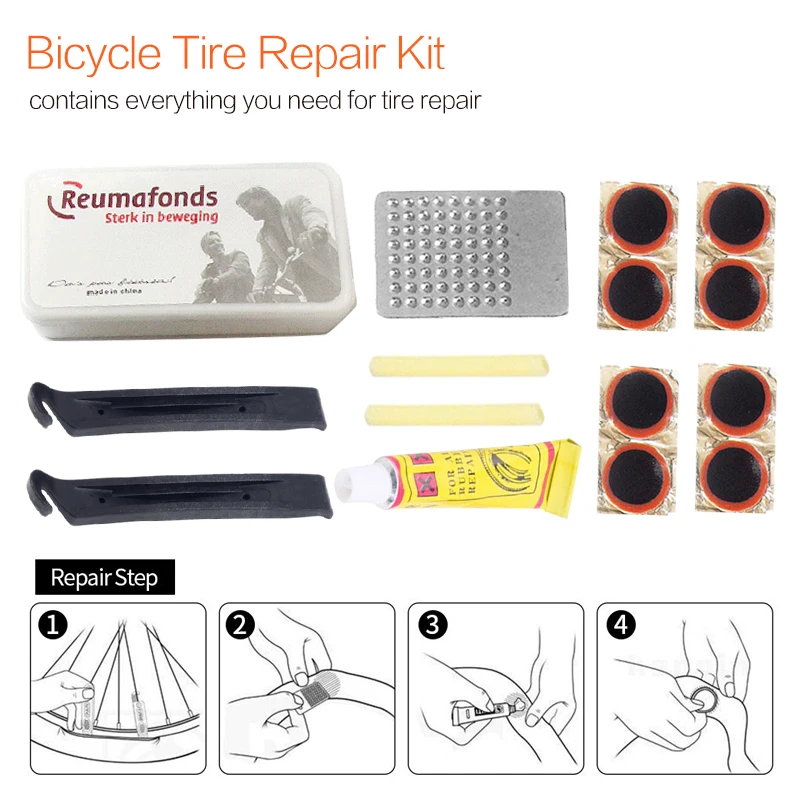
A tyre-puncture repair kit.
A tyre-puncture repair kit should include a carry case and all of the gear you need to achieve a temporary fix of a puncture, which will give you enough leeway on that repaired tyre to safely reach a tyre-repair professional in order to have it properly fixed.
As with any gear, you get what you pay for so when it comes time to buy a tyre-puncture repair kit, spend as much as you can afford because that way you'll ensure you have the best quality equipment onboard. In this yarn, we're using an ARB Speedy Seal Mk2 kit ($49).
The tools and materials in a tyre-puncture repair kit include:
A pair of pliers: Use these to remove the cause of the puncture (i.e. the nail, stick etc).
Lubricant: Use this on the reamer to ease its way into the hole.
The reamer: It looks like a cross between a short ice pick and a drill bit with a handle. The reamer is used to probe the puncture, clear away any remaining debris and temporarily separate the tyre's steel belts without damage, helping to smooth the way for the repair cords/plugs.
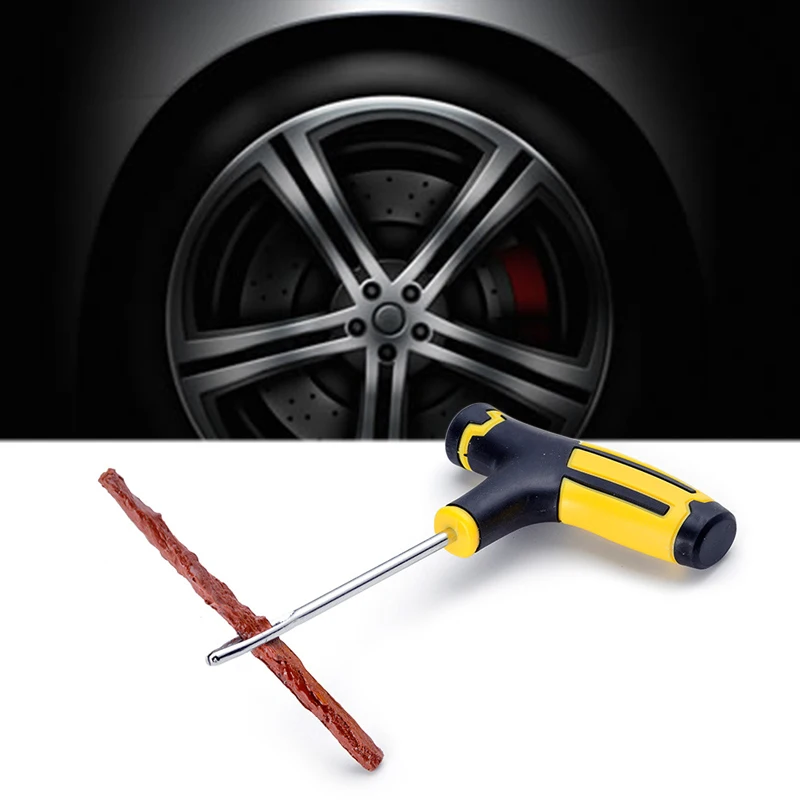
The cord-insertion tool: Looks like a cross between a sewing needle and an ice pick. You use this to, you guessed it, insert the repair cord into the puncture.
Repair cords: Thick strings of spongy cord that you insert into the puncture to fill the hole and make the tyre temporarily safe to drive on.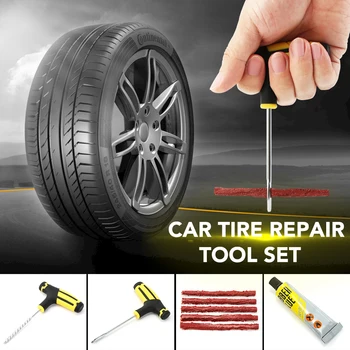
Some kits, like this one, include valve accessories, a blade (to trim the repair cords) and more.
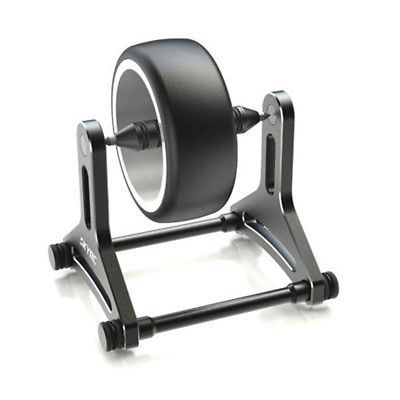
Make sure your vehicle is on as flat ground as possible, is switched off, in gear and the handbrake is engaged. If possible, do all of your repair work while the tyre is still on the vehicle, that way its weight will help you maintain a stable working area while you fix the puncture.
Find the punctured spot, and pull the offending object (stick, nail etc) out of the hole with a pair of pliers, as provided in the ARB Speedy Seal Mk2 kit.
Use the reamer tool to clear out the puncture hole.
Then you need to clean the hole as best you can so no left-over material can cause any further problems and your repair cord has a clear hole in which to adhere.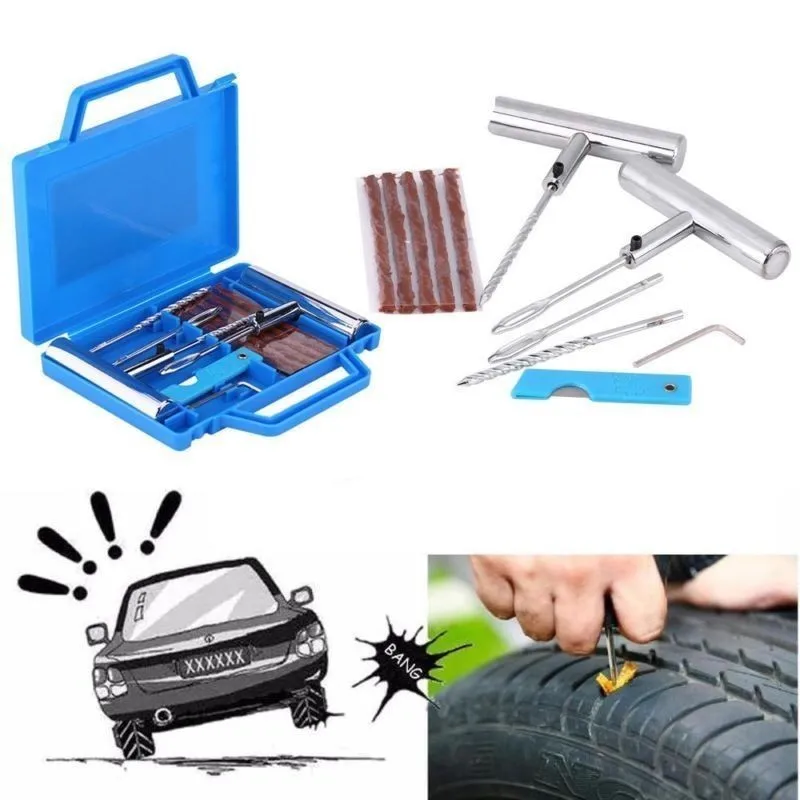
Smear the kit's lubricant on the reamer – this is the tool with the spiral, drill-bit-like shaft – then insert the reamer into the puncture to clear the hole. Move the reamer around in the hole, in circles, in order to make the hole a bit bigger, separate the steel belts, then pull the reamer out. Now's the time to reinflate the damaged tyre to help wth insertion of the cord.
Thread a length of repair cord through the eye of your insertion tool.
Next, thread a length of repair cord through the eye of the insertion tool so there are equal lengths of cord protruding from either side of the tool. Then smear a bit of lubricant on the insertion tool if necessary and push it into the hole until only a little bit of the repair cord is visible.
Hold the tool's metal hilt against the tyre, and pull the insertion tool out. Do not twist the insertion tool's handle. Trim the ends of the repair cord so they aren't protruding too much, inflate your tyre back to the suitable pressure and away you go.
Make sure you have the fixed tyre repaired by a professional as soon as you possibly can.
I've been on desert trips where some fellow travellers have been forced to drive for hundreds of kilometres over sand dunes and corrugated dirt tracks on tyres repaired with a kit such as this, but it's better if you avoid doing that if you can.
Our recommendation is to have the fixed tyre repaired by a professional as soon as you possibly can.
For Honda Insight vehicles with Honda TRK repair kit.
Your Honda Insight does not have a spare tire. Instructions for installing the "spare tire" are given in the appropriate section of the Manual. Instead, a tire repair kit (Honda TRK: TERRA-S® Temporary Tire Repair Kit) is provided. This kit is intended exclusively for the repair of damaged wheels. When using the kit, be sure to follow the instructions and recommendations below.
It is necessary to regularly check the expiration date of the adhesive according to the time intervals and mileage of the vehicle, as indicated in the vehicle maintenance schedule.
If your vehicle has a small spare tire, refer to this instruction page to replace a damaged wheel.
The repair kit can be used to repair small tire punctures caused by nails or screws.
Honda Insight repair kit should not be used in the following cases:
1. If the adhesive has expired.
2. If the size of the cuts in the tire tread exceeds 4 mm.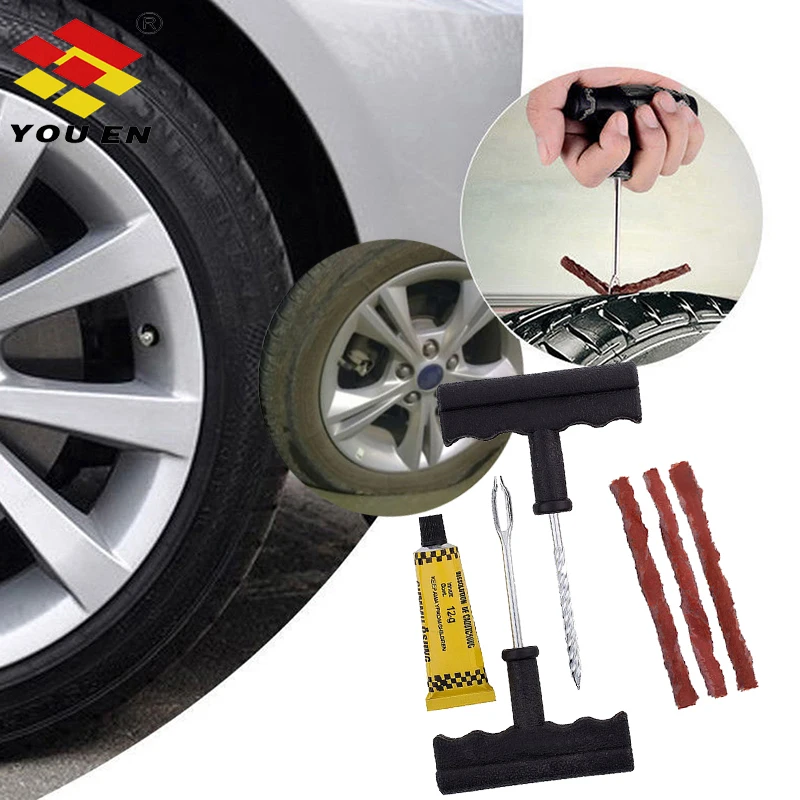
3. If the tread sidewall is punctured.
4. If the tire is damaged as a result of driving with a half flat or full flat tire.
5. If the tire has come off the wheel rim.
6. If the wheel rim is damaged.
7. If two or more wheels are damaged.
Open the tailgate. Lift the cover of the spare wheel well, pull the strap up. To keep the niche cover out of the way, attach a hook to it.
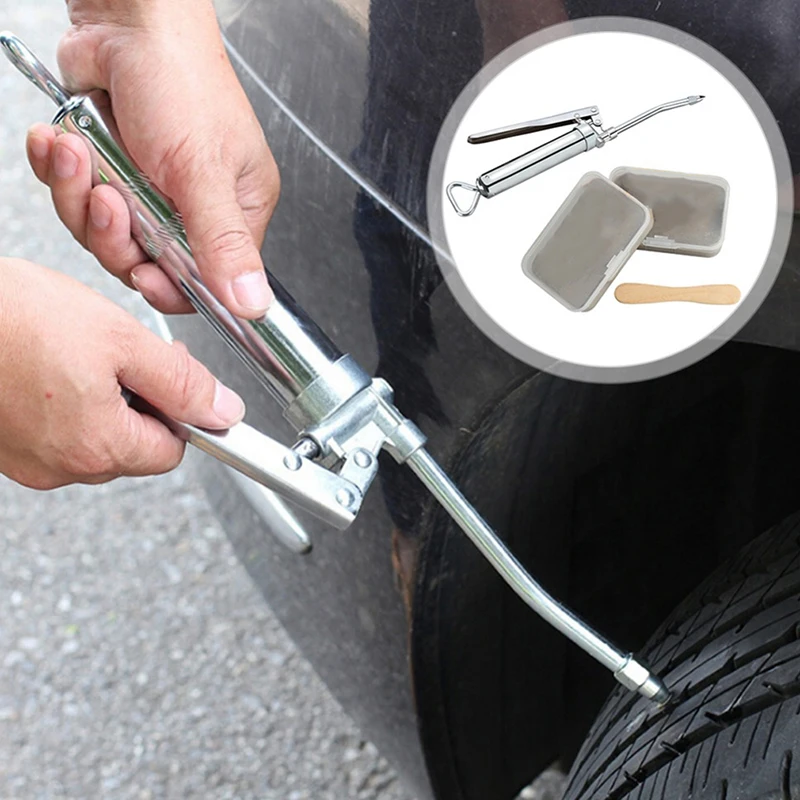
Remove the Honda TRK repair kit (air compressor, adhesive bottle, filler hose, valve puller, putty and instructions) from the drawer.
1. If your Honda Insight has a flat tire while driving, stop in a safe place. Make sure you park your vehicle on firm, level and non-slip ground. Shift the transmission to P (Park) and apply the parking brake.
2. Turn on the hazard lights and turn the ignition to the LOCK position (0).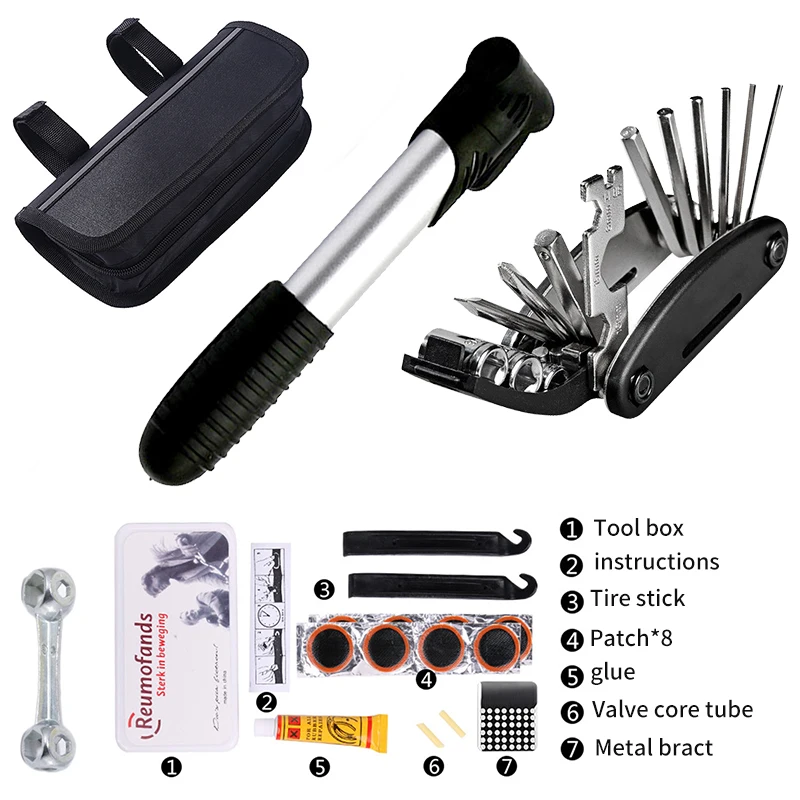
3. Carefully inspect the tire for a puncture or other damage.
4. If the damage does not exceed 4 mm and does not extend beyond the tread tread, proceed as follows.
5. Remove all passengers from the vehicle while the flat tire is being repaired.
CAUTION. If the repair is carried out without removing the nail or screw, the tire may leak air, and damage or burst the tire. At the same time, you should drive carefully, especially when cornering.
6. Remove the repair kit and shake the container (A). Screw the filling hose (B) into the container (A) while piercing the aluminum foil stopper.
Attention! Adhesive that gets on clothing may not be able to be cleaned. Avoid spilling liquid.
7. Unscrew the cap (D) from the tire valve (C). Release any remaining air from the tire by pressing on the valve with the back of the valve removal tool.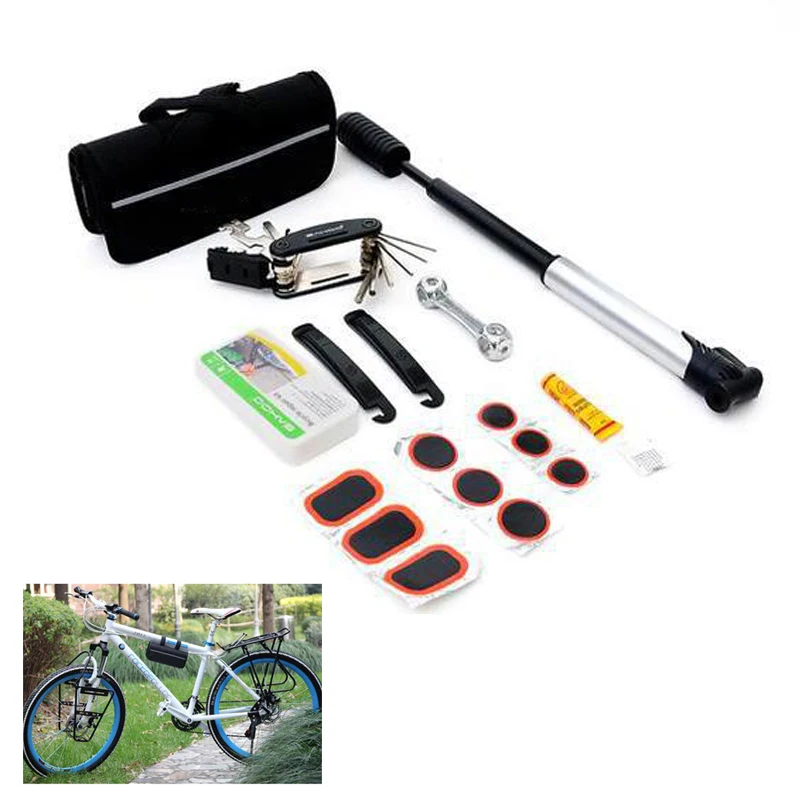
Unscrew the nipple (F) with the back of the valve removal tool (E). Do not place the nipple (F) on sand or mud. If air remains in the tire, the nipple may be forced out of the tire. When removing the nipple, be careful.
8. Remove the plug from the filling hose and insert the hose into the tire valve neck (C).
Press down on the container, holding it with the hose down. Squeeze the contents of the container completely into the tire.
9. Remove the hose from the valve neck and screw the valve (F) securely into the valve neck (C) using the valve removal tool (E). Reinstall the valve cover.
Insert the end of the valve puller into the opening of the charging hose.
Attach the “Tyre Sealant in the tyre” sticker to the wheel (G).
Affix the “Maximum Speed” decal (H) on the dashboard within direct line of sight of the driver.
Turn the Honda Insight ignition key to the ACCESSORY (I) position. Turn on the compressor (L). Inflate the tire to the recommended air pressure (M). Do not inflate the tire for more than 10 minutes. If the pressure is exceeded, it is necessary to bleed excess air by slightly loosening the compressor hose. Do not use the electric compressor continuously for more than 15 minutes. This may cause it to overheat.
11. Continue driving immediately. Drive carefully, keeping the speed below 80 km/h. When driving at speeds above 80 km/h, the Honda Insight may start to vibrate, which will adversely affect driving safety.
12. After 10 minutes or 5 km, stop and check the air pressure in the tires with a pressure gauge. Remember that the pressure check is done with the compressor off. If the pressure has not changed, this indicates that the damage has been repaired. Proceed with caution to the service station.
13. If the tire pressure has dropped, re-inflate the tire and repeat step 10.
Using the Honda Insight air compressor movement.
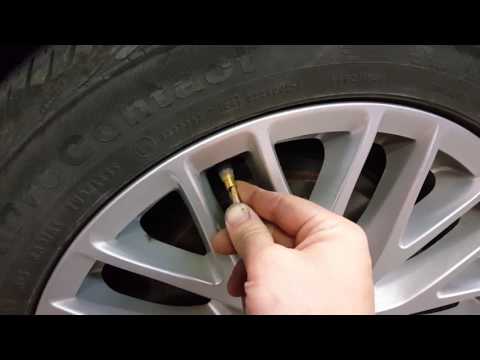
Step 1. Unscrew the wheel valve cap and screw the compressor hose onto the valve securely.
Step 2. Plug the compressor into the accessory socket in the luggage compartment.
Step 3. Turn the ignition key to the ACCESSORY (I) position. Turn on the compressor and bring the air pressure in the tire to the recommended one. Check the air pressure with a pressure gauge. Turn off the compressor before checking tire pressure.
Step 4. After the tire is inflated to the correct pressure, remove the plug from the socket. Check for air leaks from the tire. Replace and securely tighten the tire valve cap.
Avoid leaking adhesive from the tire.
1. Remove the tire and wheel from the vehicle. Bleed the air.
2. Cut off the valve with a knife. Be careful not to damage the tire or wheel.
3. Insert the hose into the tire through the valve neck. The hose should be inserted as deep as possible.
4. Squeeze the container and suck out the adhesive. (It is better to place the tire on a table.)
5. If the adhesive is not completely evacuated, repeat step 4.
6. Bend the hose and tie it securely with rope or tape to prevent leakage of the adhesive. Dispose of the used bottle when purchasing a new one from an authorized dealer.
As a reminder to bleed the adhesive from the tire, this decal is attached to the wheel. She also informs that the Honda Insight tire was repaired using an adhesive.
CAUTION . The Honda TRK adhesive contains ethylene glycol.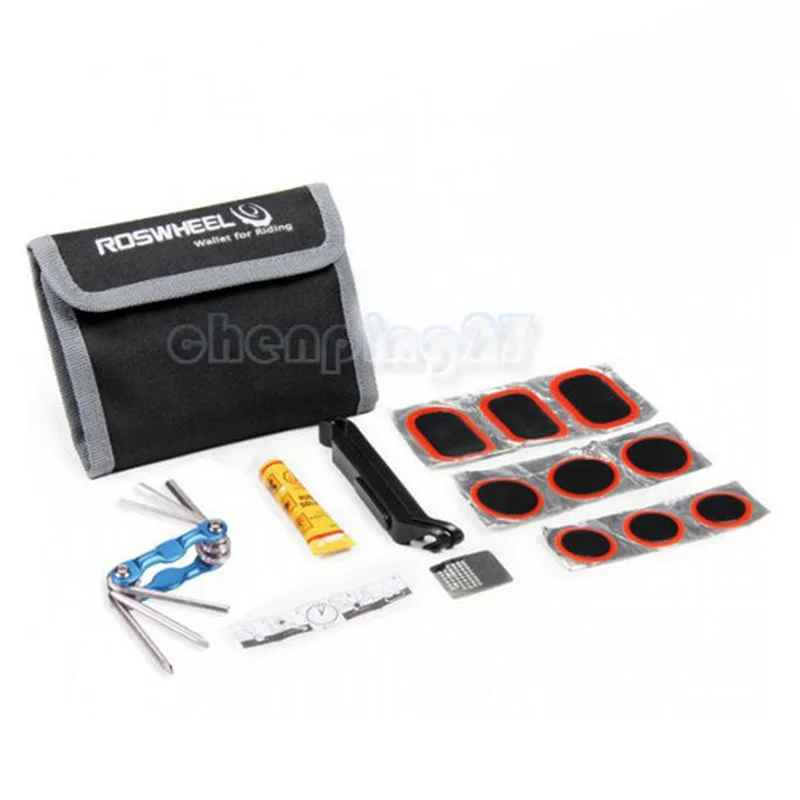
Adhesive may be fatal if ingested. If the adhesive is ingested, drink plenty of water. Seek immediate medical attention.
Contact with the adhesive in the eyes or exposed areas of the body can result in severe chemical burns to the mucous membranes and skin. In case of contact with the adhesive composition, wash the affected areas with plenty of water. Seek immediate medical attention.
Keep the adhesive out of the reach of children. Store the adhesive in a tightly closed container.
Our recommendations for review
Replacing a damaged wheel (on Honda Insight vehicles with a spare wheel)
If a wheel is damaged, stop immediately in a safe place to change it. If a wheel is damaged, drive slowly and carefully along the shoulder or the rightmost lane to the nearest exit to a suitable area. For vehicles with a TRK repair kit, your vehicle does not have a spare wheel, instead it is equipped with a tire repair kit. This repair kit is designed to repair a damaged tire on the road (see the Honda Insight Guide for details).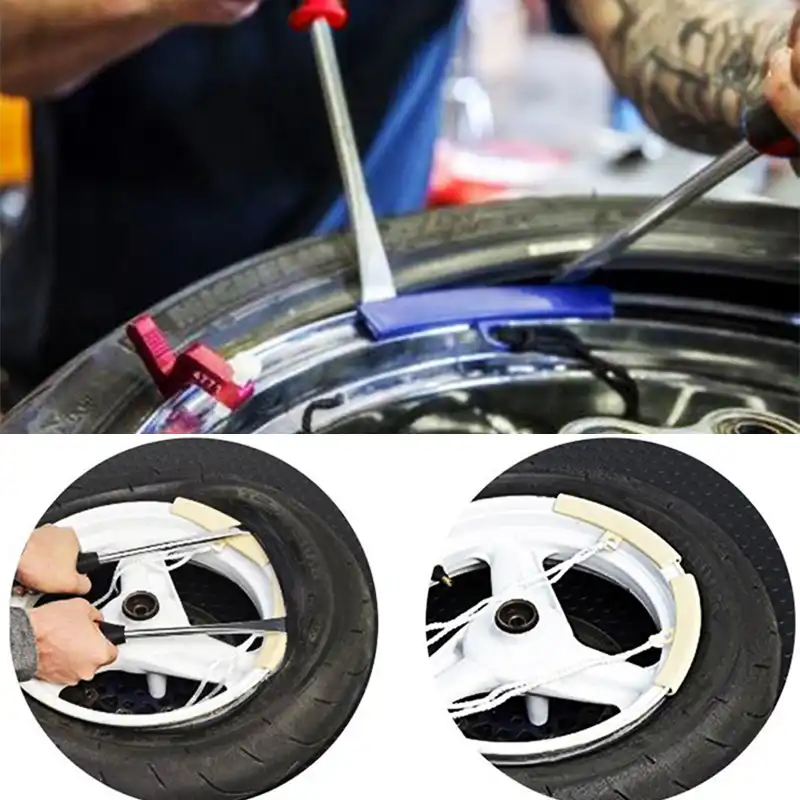
Small Spare Tire (for some Honda Insight Vehicles)
The Small Spare Tire is for use only as a temporary replacement for one of the damaged Honda Insight wheels. Repair or replace the damaged wheel as soon as possible and install it in place of the small spare wheel.
Honda Insight Car Interior Care, Body Corrosion Protection
Carpet Care Regularly, preferably as often as possible, clean the carpet with a vacuum cleaner. Keep in mind that a dirty coating wears out faster. For a more thorough removal of dirt and to maintain the good appearance of the carpet, periodically treat it with special detergents. We recommend using commercial foam shampoos. Always follow the detergent manufacturer's instructions on the packaging and apply to the carpet surface using a sponge or soft brush. When cleaning, avoid excessive wetting of the carpet and do not add water to the foam detergent.
Honda Insight Body and Exterior Paint Care
Roof Antenna The Honda Insight is equipped with a manual antenna that mounts at the center rear of the roof.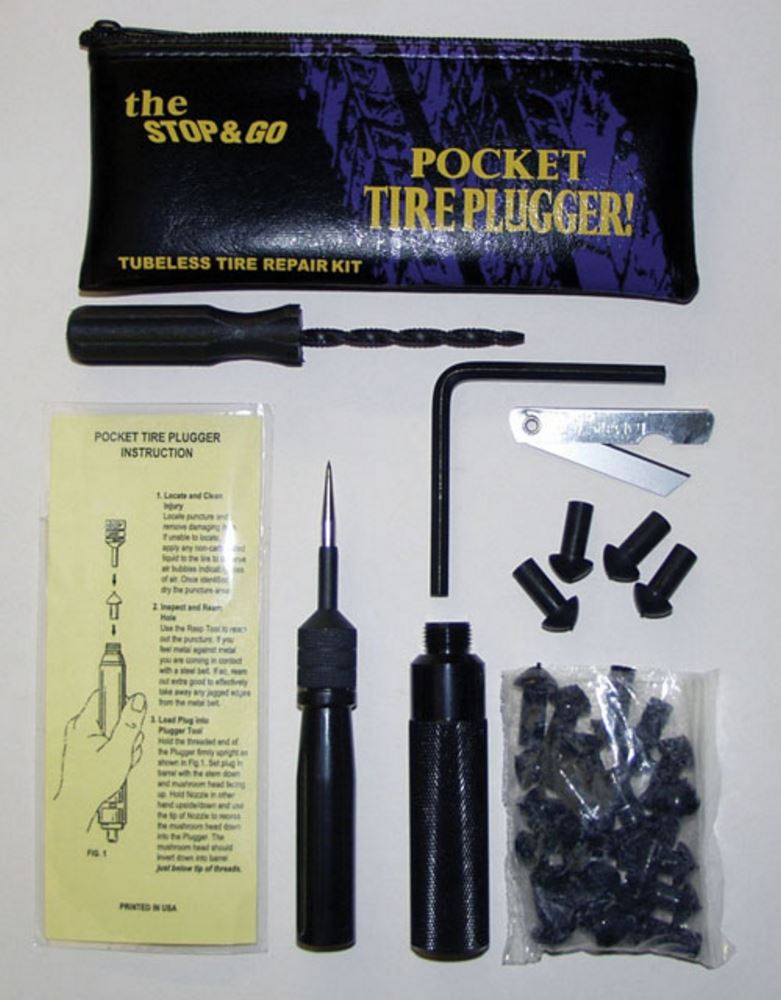 If you are going to use an automatic car wash, do not forget to unscrew the antenna before doing so. This will protect it from damage by automatic brushes.
Our books can be purchased using єPіdtrimka cards!
home / Catalog / Honda / Honda Fit / Honda Jazz since 2001, repair book in electronic form / ...
Show book content
 Wheels and tires
 To ensure the safe operation of your vehicle, the tires fitted to your vehicle must be of the exact type, design, and size specified by Honda. Tires with the same tread pattern may only be mounted on wheels of the same axle. Tires must be maintained at nominal air pressure. Below are detailed instructions regarding the method and frequency of monitoring the air pressure in tires, instructions for determining the technical condition of tires (external signs of damage and wear) and recommendations for replacing worn tires.
Caution :
Operating the vehicle with badly worn tires or abnormal tire pressures can lead to an accident in which the driver and passengers are at risk of serious injury, injury or even death.
Strictly follow all instructions and recommendations regarding the control and maintenance of nominal air pressure in tires, as well as other tire operating rules.
Tire pressure
Maintaining the correct air pressure in your tires provides the best combination of vehicle handling, tire durability and your comfort.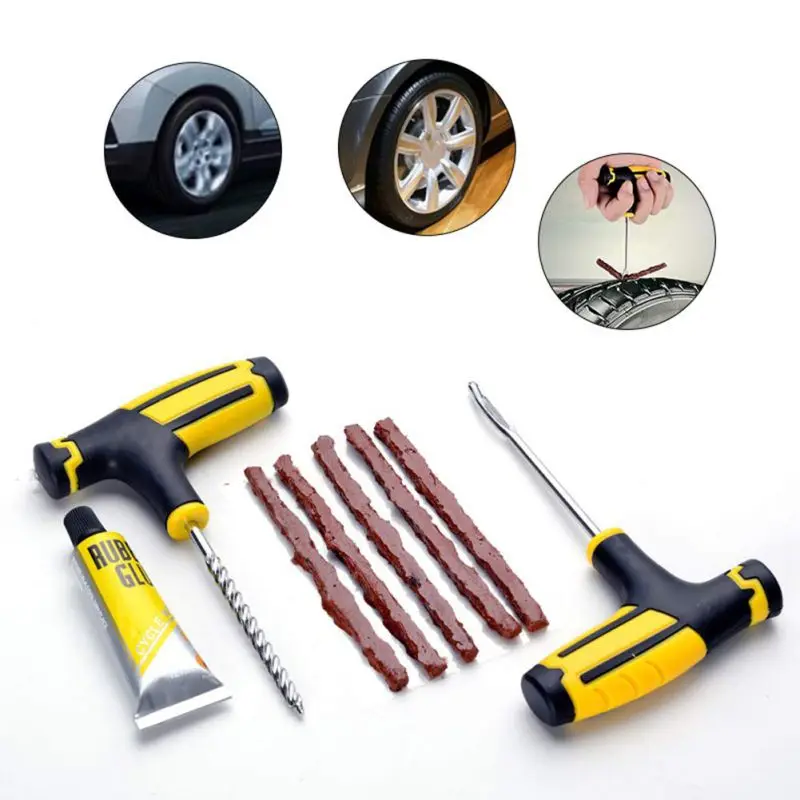 Low tire pressure leads to rapid and uneven wear of the tread, impairs vehicle handling, increases fuel consumption and, in addition, makes tires more likely to fail due to overheating. Overinflated tires impair the smoothness of the vehicle and are more susceptible to damage from hitting road bumps, potholes, etc. In addition, excessively high air pressure in tires causes uneven tread wear.
We recommend visually checking the tire pressure daily before driving. If you have determined by eye that the tire pressure has decreased, immediately check the air pressure with a tire pressure gauge.
Check tire pressure with a tire pressure gauge at least once a month. Even in fully serviceable tires, the air pressure can drop by 7-15 kPa (0.07-0.015 kgf / cm 2 ) in a month.
Remember to check the air pressure in the spare tire at the same time as checking the other wheels. Air pressure is checked only on cold tires. The tires can be considered cold if the vehicle has been stopped for at least three hours or if the vehicle has been parked for a period of time less than 1.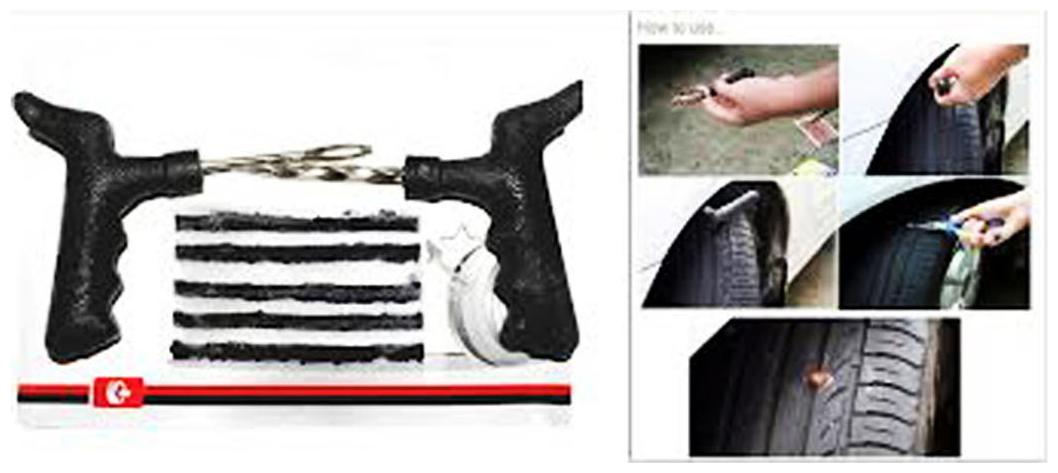 6 km.
6 km.
After driving a car for several kilometers, the tires have time to warm up and the air pressure in them increases by 30-40 kPa (0.3-0.4 kgf/cm 2 ) compared to the cold state. This is quite normal. Do not reduce the air pressure in warm tires to bring it to the nominal value that is set for cold tires. Otherwise, the tires will run at reduced air pressure.
You should purchase and carry your own tire pressure gauge in your vehicle, which you should use at all times when checking tire pressure. Keep in mind that tire pressure gauges work with a noticeable error and give a certain spread in readings, so it is preferable to constantly use the same measuring device. In this case, you will be able to notice a tire failure in time: the detected slight decrease in air pressure in the tire can be attributed with great certainty to damage to the tire, and not to differences in the readings of pressure gauges.
Recommended tire pressures
The recommended cold tire pressures are shown on the label located in the driver's door opening.