A winch is one of the most power-hungry accessories you can get for your ATV, so it’s crucial that the wiring is correct.
Wiring a winch so that it turns on is relatively simple. But wiring a winch so that the installation is safe, reliable, long-lasting, and won’t damage the ATV’s electrical system takes a bit more effort.
This guide look at all the aspects of wiring an ATV winch correctly. It does not contain detailed information on mounting the winch to the ATV.
Take your time, and do not skip any part of the guide.
Basic ATV winch wiring diagram.Disclaimer: This guide is not brand-specific but is based on the installation manuals for several well-known ATV winch brands. Your winch wiring harness may be slightly different, but the basic principles apply.
While most winches use the same basic wiring layout, not all use the same color coding and connector patterns.
The best option is always to have the specific installation manual. It’s your responsibility to ensure your winch isn’t designed differently than those in this guide.
Always use caution when working with electricity and observe the safety instructions below. Failing to do so could lead to serious injury, death, or vehicle damage.
NOTE: These warnings only consider the wiring aspect of the winch installation. Please refer to the winch installation guide or owner’s manual for other important safety warnings you should know before operating the winch.
These guidelines apply whenever you run wires or cables for the winch and its controls.
A winch draws alot of power, and if the insulating outer layer of the wiring becomes damaged for any reason, it could cause a short to ground. Possible hazards include a powerful electric burst, fire, and damage to the vehicle’s electrical components.
Apply these guidelines to reduce the risk of damaging the wires:

This guide does not detail how to mount the winch to the ATV physically, but the winch should be mounted before you begin wiring.
The best option is to get a vehicle-specific bolt-on winch mounting kit that comes with instructions and everything you need to install the winch securely to the ATV.
Related: Alternative ATV Winch Mounting: Upside Down? Truckbed? Hitch? Rack?
The winch works by transforming electrical power into mechanical power. The contactor is an electromagnetic switch that controls the power of the winch. The contactor has two primary functions.

Contactor mounting location
The contactor should be mounted in a location that meets the following criteria.
The exact location will vary depending on the ATV, but typical locations include the following:
For the contactor and winch to work properly, the contactor must be installed correctly. All the wires in the winch wiring circuit connect to the contactor.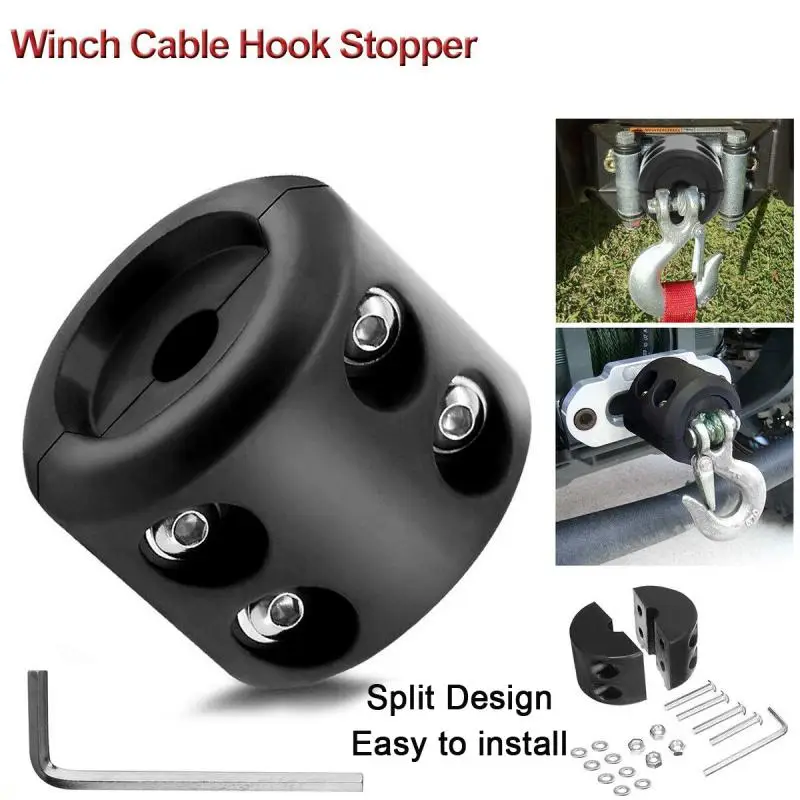
Drill the holes for the contactor
Ensure you’re not drilling into fuel lines, the fuel tank, brake lines, electrical wires, etc.
DO NOT mount the contactor yet. It is easier to attach the wires to the contactor before mounting it permanently to the ATV.
The handlebar switch is typically located on the left handlebar to prevent interference with the thumb throttle.
If you have to reposition some of the original ATV control to make room for the rocker switch, ensure you do not compromise the vehicle’s safe operation.
Ensure the selected mounting position provide sufficient clearance against all vehicle controls and that the clamp does not tighten over any brake lines or cables.
TIP: A piece of electrical tape around the handlebars will prevent the mounting clamps from rotating.
Once the handlebar switch is mounted, route the wire harness to the location you’ve prepared for the contactor.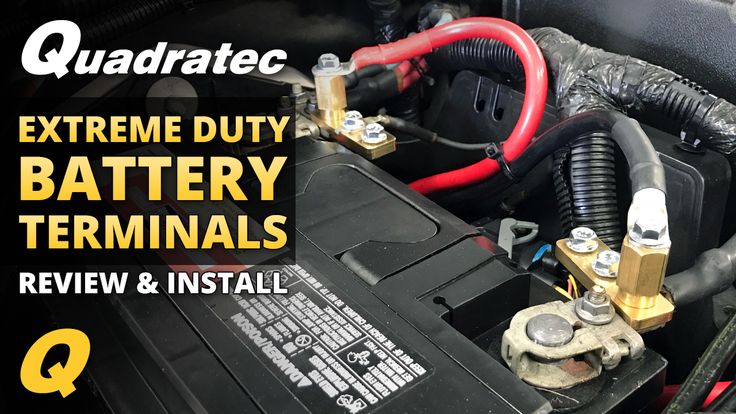
Route the red wire to the back of the ignition switch.
NOTE: Please refer to the guidelines at the beginning of this guide on how to run the wires properly
OPTIONAL: If the winch comes with a wired remote, find a suitable location for the remote socket, drill out the required holes and mount the socket.
The red wire (usually 20ga) from the rocker switch needs to be connected to a fused wire that has power only when the key is turned ON.
Most ATVs have a spare key-controlled accessory circuit suitable for this purpose.
Use a test light or multimeter to verify that the wire only has power when the key is ON.
Most kits include a wire splice to make the connection easier. Use to splice the red switch wire into the power wire. Wind the connection with electric tape to protect it.
Before securing the cable with zip ties, ensure the cable is not obstructing the handlebar’s full range of motion.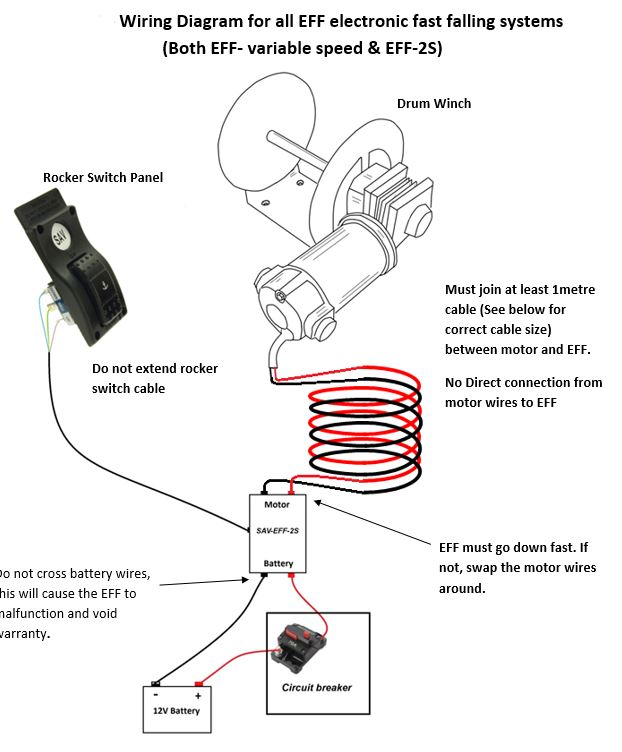
OPTIONAL: If the winch comes with a wired remote, route the wire harness to the contactor location the same way you did with the rocker switch wiring harness. Also, splice the red wire into the same key-controlled accessory circuit.
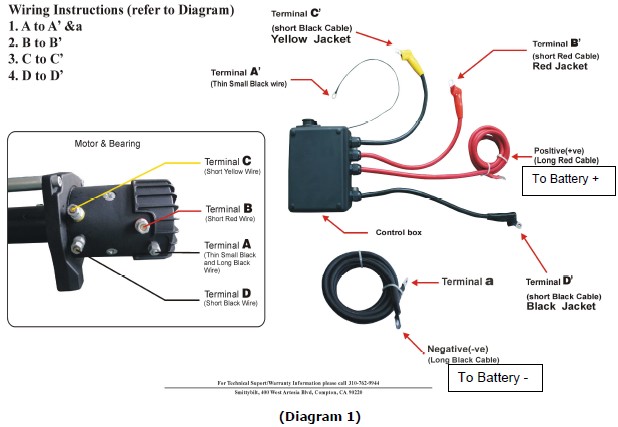
The main winch wiring consists of four heavy gauge wires. The wires are colored, but not all winch brands use the same color coding.
NOTE: Please refer to the guidelines at the beginning of this guide on how to run the wires properly.
Some brands use red and black wires from the battery to the contactor and red and black wires from the contactor to the winch.
Other brands use red and black wire from the battery to the contactor but blue and yellow from the contactor to the winch motor.
The contactor terminal layout can also vary between winch brands, so it’s important that you get familiar with your connector before connecting the wires.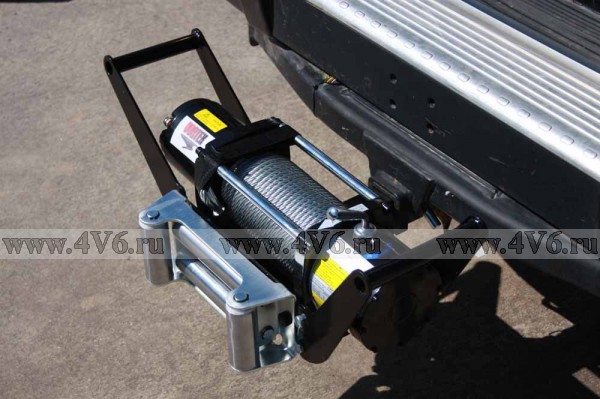
The connector and winch motor terminals are usually labeled “+” and “-” or color-coded to make it easier to know which wire goes where.
CAUTION:
This is how you connect the wires
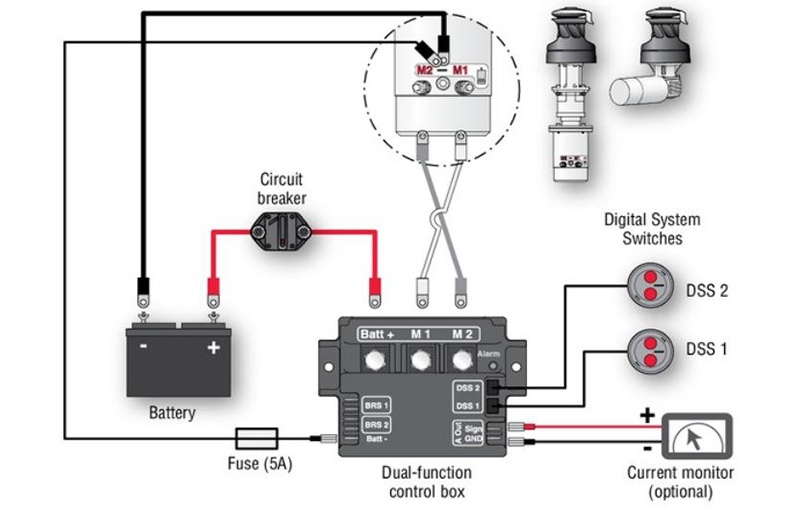
The winch is now connected but DO NOT use it until after you’ve performed the final system check.
CAUTION: While not related to the wiring, before you use the winch, make sure to read the instructions or operating guide on winching techniques and safe winch operating.
If you don’t have any previous winching experience, the winch’s immense power and how quickly you can get seriously injured may surprise you.
To test the winch, turn the ignition key to the ON position.
Suppose the winch spools IN when it should spool OUT; the wires coming from the contactor are likely wired wrong.
Switch the winch motor connectors and test once more. Do NOT continue to spool in when the rope has bottomed out, as this will damage the winch.
What gauge wire your ATV winch needs depends on the engine size and how much electricity it draws.
Most ATV winches use 8-gauge or 6-gauge wire, where 8ga is only used in the smallest 1500lb and some 2500lb winches, and 6ga is used in the more powerful 2500lb to 4500lb winches.
Related: What size ATV winch do you need? (with examples)
Some people wonder how you can wire a winch without using a solenoid, but that is not something I recommend you try.
In short, you cannot wire a winch directly to the battery as you won’t have a way to turn it on or off. It is also not safe and will likely drain the battery.
Are you looking for a Battery Cable Size Chart? We have two of them at the bottom of this page.
Some of the most common questions I get asked are “what type of battery wire do you use to build the cables?” and “What size cable should I use for my vehicle?“
Below are some descriptions of what we use, information on the gauges of wire and when to use it, and some other technical charts to use. I’ll even give you my opinion about if you should be using marine grade wire on your Dodge Dart…..
If you’re wondering whether to use a 2/0 battery cable or 1/0 we’ll give you the data you need to decide.
Be sure to watch the video at the bottom of the page. We explain which gauge wire is right for every application. And we’ll show you how we build cables for you.
1. Different Types of Battery Wire and Uses:
2. What Gauge or Size Cable do I need?
3. Battery Cable Gauge Charts for Cars & Trucks (with technical data):
4. What Gauge Battery Wire Should You Use?
| SGT Battery Cable: We generally use SAE (Society of Automotive Engineers) SGT battery cable. SGT designates the type of insulation. (Wire is rated by several characteristics but most commonly its insulation type. For example ‘THHN” is probably what you have for the wiring in your house. It usually has a fairly low strand count (meaning the strands are larger), making the wire stiff enough to stay where you put it but is still flexible enough to bend around tight corners. Buy SGT Battery Cable |
| SGX Battery Cable: Sometimes we use SGX battery cable. SGX uses a high-grade XLP (Cross-Linked Polyethylene) insulation which has a higher temperature rating and is more abrasion-resistant. The trade-off is the insulation is thicker and stiffer. Often it has a higher strand count. If you need a higher temp rating, it’s a good choice. Buy SGX Battery Cable |
| Marine Battery Cable: There are several types of “Marine” wire. Most of the SGT we sell also carry a marine rating (BC-2 rating) Get all of the Marine Battery Cable specs here. |
| Fuse Link or Fusible Link: Think of a fuse link as a very slow-acting (“slow-blow”) fuse that looks like a piece of wire. Fuse link wire has special very high-temp insulation that won’t burn even if the wire becomes so hot that it fuses open. It’s most common use is in alternator wires. It protects the electrical system from a catastrophic failure of the alternator diodes. Without the fuse link, the alternator wire would melt or burn, possibly starting an underhood fire. It’s usually a 6 to 9-inch piece two wire sizes smaller than the wire it is protecting. For example, a 4 gauge wire would use a piece of 8 gauge fuse link. Buy Fuse Link Wire |
| OFC (Oxygen Free Copper): OFC (Oxygen Free Copper) wire often gets sold by stereo shops to hook up speakers or a high-power amp. Don’t waste your money. This stuff is just another way for slick salesmen to get more of your hard-earned money. What’s different about it? Standard wire is AT LEAST 99.90% pure copper. OFC is 99.95% pure copper. An extra 0.05% copper sounds good. What’s the downside? COST. OFC is often TWICE the price for the same size of standard cable. So you are paying DOUBLE for 0.05% more copper. There is NO measurable electric difference (source Wikipedia). CCA (Copper Clad Aluminum):Just say “no”. For more info see Wikipedia. |
| Summary: For automotive cables, use SAE-rated SGT or SGX battery cable. It works great for automotive applications at a fair price. Do NOT use welding cable, OFC or CCA for underhood applications. For boats, you must use “marine” rated wire. |
I recommend building cables larger than stock. The manufacturers make stock battery cables as small as possible that barely get the job done. Going up a size or two is worth it in the long run because they do work better and last longer.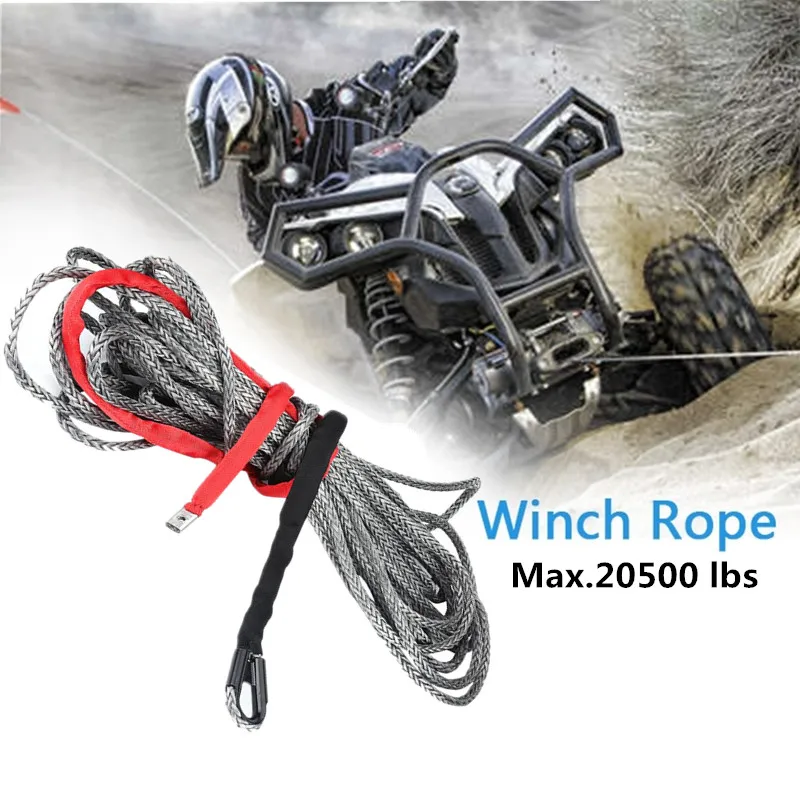 Isn’t that what you want for your car or truck? Something that will work better and last longer.
For very long cables (for example, 15-foot long battery cables to relocate your battery) go one size larger.
10 gauge works for accessory leads, low power alternators, and starter trigger wires
Buy 10 gauge wire
8 gauge works for accessory leads and low power alternators.
Buy 8 gauge wire
6 gauge works for accessory leads and most stock alternators. Battery cables for small engines (like ATVs and sub-compacts). Some stock golf cart wiring.
Buy 6 gauge wire
4 gauge wire makes great accessory leads and alternator wiring (up to about 160A). Many cars use this as a battery cable. Some electric ATVs use #4 for the battery banks. It also makes very good automotive booster cables.
Buy 4 gauge wire
We recommend #2 wire for 4-cylinder and small 6-cylinder automotive engines, hi-power accessories (like winches, power converters), and alternators over 160A.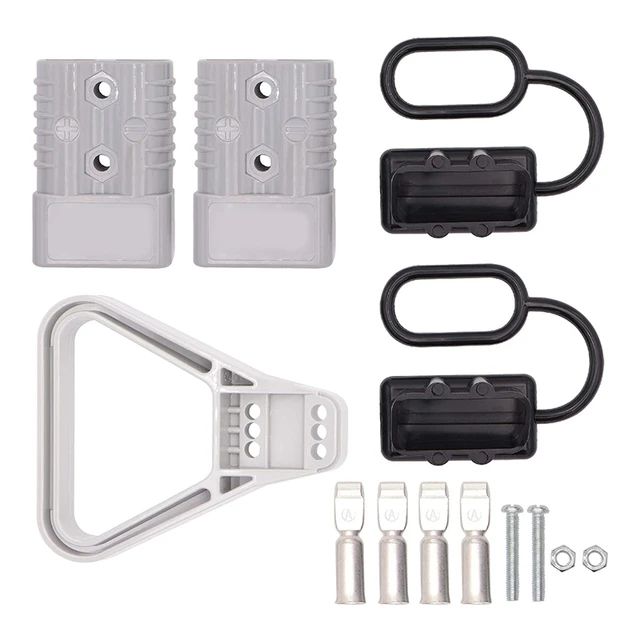
Also works great for high-performance golf cart battery banks.
Recommended for professional heavy-duty,
booster cable (jumper cable) kits.
Buy 2 gauge wire
We recommend 1 gauge wire for large 6-cylinder or small V8 automotive engines, hi-power accessories (like winches, power converters), and high output aftermarket alternators in 200A range.
Buy 1 gauge wire
1/0 makes a great battery cable for large or hi-performance 6-cylinder engines and stock V8s.
Buy 1/0 gauge wire
Use 2/0 battery cables for hard-to-crank engines (like high compression, big blocks, or diesel engines), electric vehicle battery banks (depending on controller amperage), and large RV power converters house batteries.
Buy 2/0 gauge wire
3/0 and 4/0 are for very large marine or diesel engines and high-power alternative energy battery banks.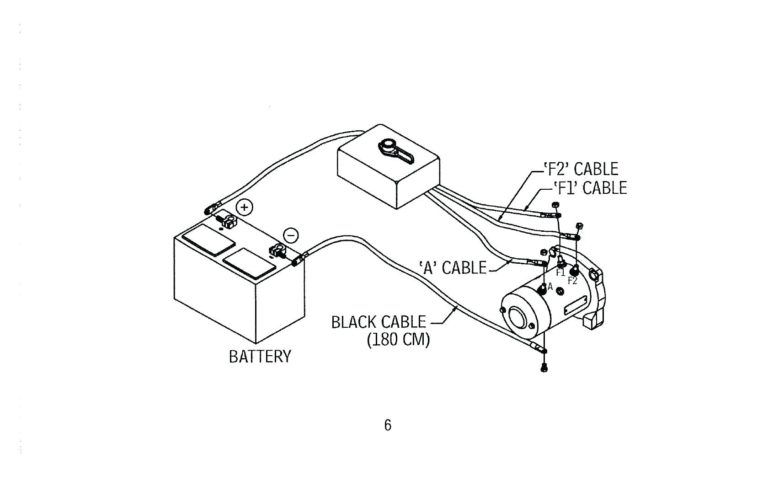
Buy 3/0 gauge wire
3/0 and 4/0 are for very large marine or diesel engines and high-power alternative energy battery banks.
Buy 4/0 gauge wire
Note: This information comes from a variety of sources and it is used for reference only.
We have not personally verified all the data shown.
American
Wire Gauge
(AWG) is the standard for denoting wire
size in North America. The AWG chart below, the larger the number, the smaller the
wire
diameter and thickness.
Correct Gauge Terminology
The term “gauge” is used for wire up to 1 AWG.
The term “aught” is used for wire 1/0 AWG and larger. This number of “0” in the size is the number of “Aught”
For example:
8 AWG = Eight Gauge
2 AWG = Two Gauge
1 AWG = One Gauge
1/0 AWG = One Aught
2/0 AWG = Two Aught
Correct Gauge Terminology
The term “gauge” is used for wire up to 1 AWG.
The term “aught” is used for wire 1/0 AWG and larger. This number of “0” in the size is the number of “Aught”
For example:
8 AWG = Eight Gauge
2 AWG = Two Gauge
1 AWG = One Gauge
1/0 AWG = One Aught
2/0 AWG = Two Aught
Allowable Amperage of Conductors for Under 50V (Per SAE J-378) Note: Since most wire is rated at 85° use the 80°C values
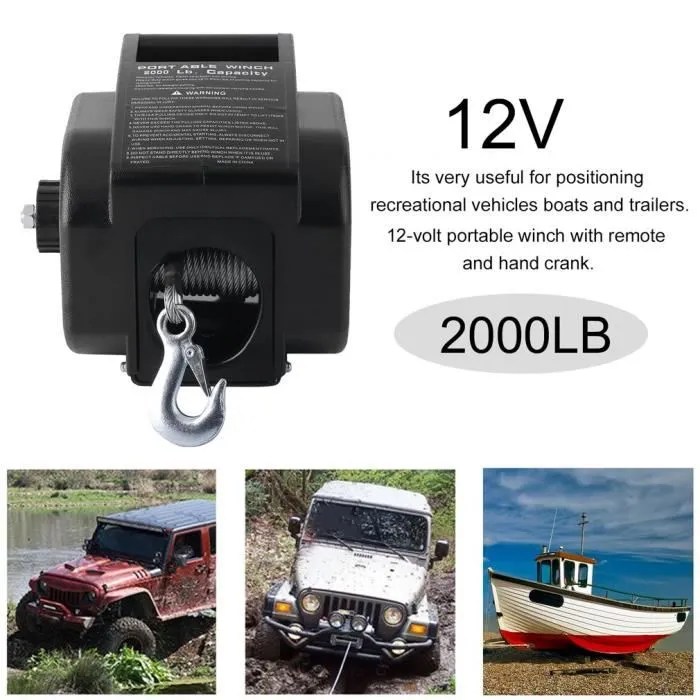
For extreme off-road ATV riders, an electric winch is a real lifesaver when stuck in potholes and mud. The electric winch is very easy to install and operate, it is controlled by a remote control, which is installed on the steering wheel of the ATV. Most importantly, such a winch will not require much physical effort from you to pull out the ATV. It has an electric motor powered by a battery. When choosing, you need to proceed from engine power and tractive effort. It is recommended to choose a winch with a pulling force of 1.5-2 times the weight of the ATV. And how to install, connect and use it, we will tell in this article. nine0003
Electric winch is a drum with an electric motor. To connect it to the battery, the kit includes an electric unit and a set of wires, with the help of which the battery and the winch are connected. The control panel can be wireless and wired, which is also connected to the unit.
To mount the winch to the ATV, you need a platform, brackets, bolts and clamps. The kit also includes a roller lip, and a cable complete with a hook may also be included. nine0003
 The platform, as a rule, comes with a winch, but if it is not available, you can make it yourself from a metal plate with a thickness of at least 4.8 mm. It is mounted on the frame with bolts of different sizes, it can also be welded to the frame.
 The electrical box is recommended to be installed slightly away from the winch, but most often it is installed on the site.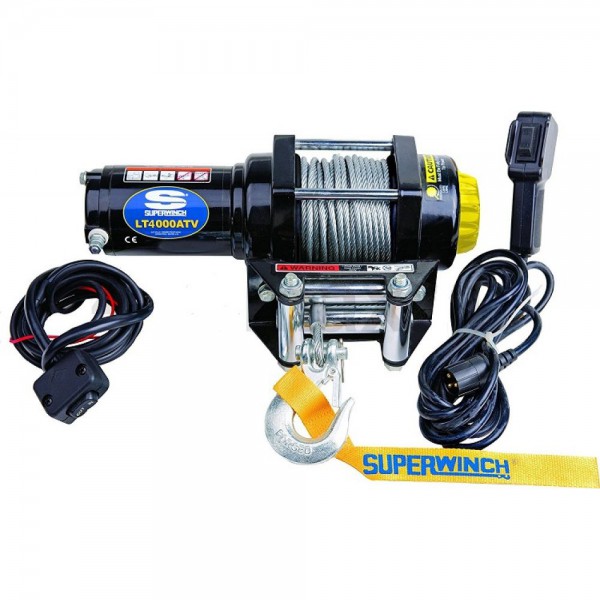 Next, we connect the power cables in accordance with the connection diagram specified by the manufacturer in the product data sheet. nine0003
We connect the control panel and install it on the ATV steering wheel. It is recommended to pull the wires tightly, excluding their friction with other parts. They also need to be protected with cable corrugations.
Next, we fix the roller lip to the platform using bolts. And you can assemble all parts of the ATV back.
Once you've installed your electric winch, it's worth testing it out on level ground before driving it off-road. Using a winch requires certain knowledge and compliance with safety rules. Below, we will tell you what you need to know when pulling an ATV out of a hole or mud with a winch. nine0003
 In particular, if the winch has a steel cable, it is forbidden to work without thick leather gloves. In addition, clothing or hair must not be allowed to get on the winch drum. It is advisable to wear non-slip shoes and a hat.
Important!
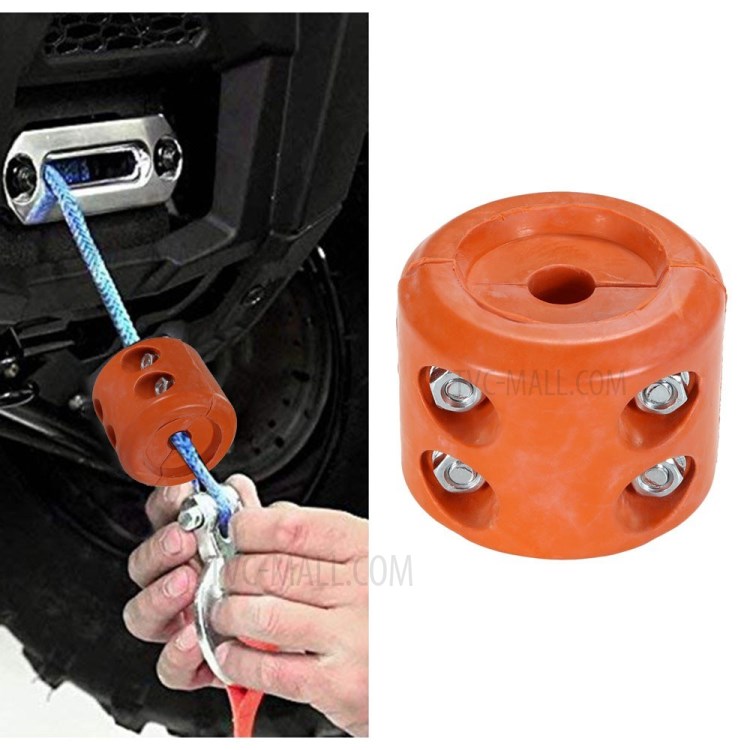
When working with a winch, all safety rules specified in the equipment passport must be observed.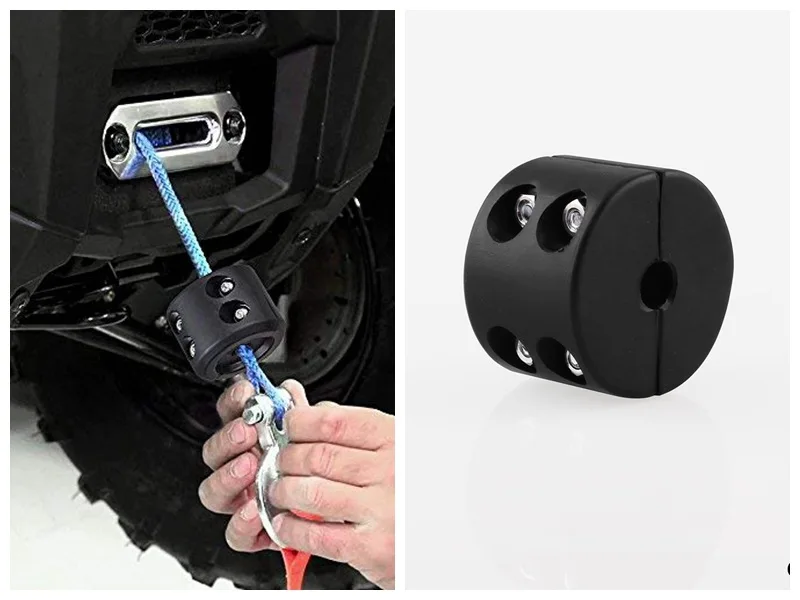 You must not approach the cable and winch in working condition and allow other people to approach it. It is necessary to use a cable damper, as in the event of a break, it can damage people and objects around. nine0003
Before use, you need to make sure that all elements are in working condition, that they do not have breaks or damage, and that all fasteners are fixed sufficiently securely.
After using the winch, it must be cleaned of dirt, dried and lubricated with special oil.
A winch is a must have when traveling off-road. It allows you to pull a stuck ATV out of mud, water or deep ruts. Many models of CFMOTO ATVs and ATVs have a winch from the factory, for others it needs to be purchased separately. In this article, we will tell you how the winch works, what to look for when choosing, and also give useful tips on how to use it. nine0003
The ATV winch is a drum with a cable. An electric motor is located on one side of the drum, and a gearbox on the other.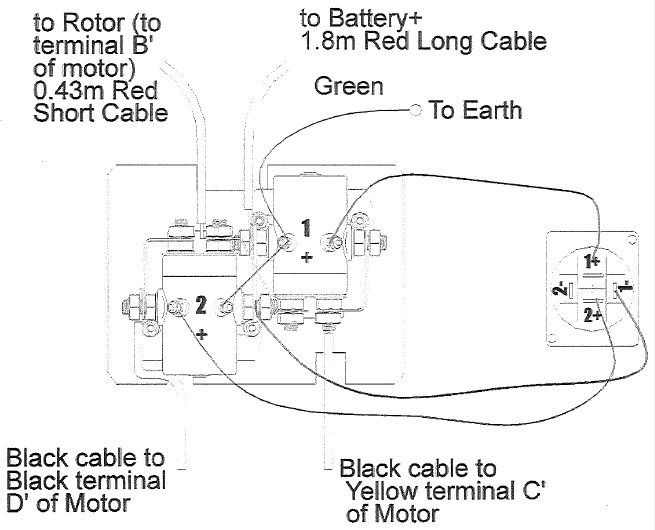 Rotation from the electric motor to the gearbox transmits a shaft that passes inside the drum. The gears of the planetary mechanism are located in the gearbox.
Reducer reduces speed and increases traction. The rotation from the gearbox is transmitted to the drum, which winds the cable, creating traction and gradually pulling out the stuck equipment. nine0003
One of the key parameters to consider when choosing a winch is traction. It determines the maximum weight of the load that can be torn off the surface. With each skein of the drum, the winch force decreases.
Thrust is measured in pounds (labeled on winches as lbs), 1 lb = 0.45 kg. The force depends on a number of features: the diameter of the drum, the number of wound turns, the power of the electric motor, as well as the gear ratio of the gearbox. nine0003
It is not always necessary to choose the most powerful and fastest winch: the more powerful the mechanism, the more difficult it is to handle. Beginners can harm equipment and even their health - it is not uncommon for a broken cable or a broken hook to cause injury.
Suitable for ATV cubic capacity:
Steel - cheap and easy. Requires work with gloves, not repairable. May cause injury if mishandled.
Synthetic - requires maintenance but is easy to use. It does not "shoot", and if the cable is damaged or torn, it can be braided on the spot.
Most experts believe that material choice should be based on personal preference: some riders lean towards steel over time, others towards synthetics. nine0003
The winch is installed on a special platform on the ATV frame. If there is no platform, you need to buy it and install it according to the instructions. The site has standard anchor points that fit classic winches up to 3,500 feet of pull.
When choosing a winch, pay attention to the width of the drum:
With certain skills, you can modify the fasteners and install almost any winch - the main thing is not to make the fasteners "break" and not to strengthen weak points. If the ATV is under warranty, it is advisable not to touch the frame and buy a standard winch.
Installing the winch is easy, but the connection will have to be tricky. To lay the wiring, it is advisable to remove the plastic from the ATV. The winch must be connected to the control unit and battery. It is recommended to keep the power cable as short as possible to avoid current loss. All wires must be hidden in the corrugation so that they do not come into contact with the frame and are protected from moisture. nine0003

