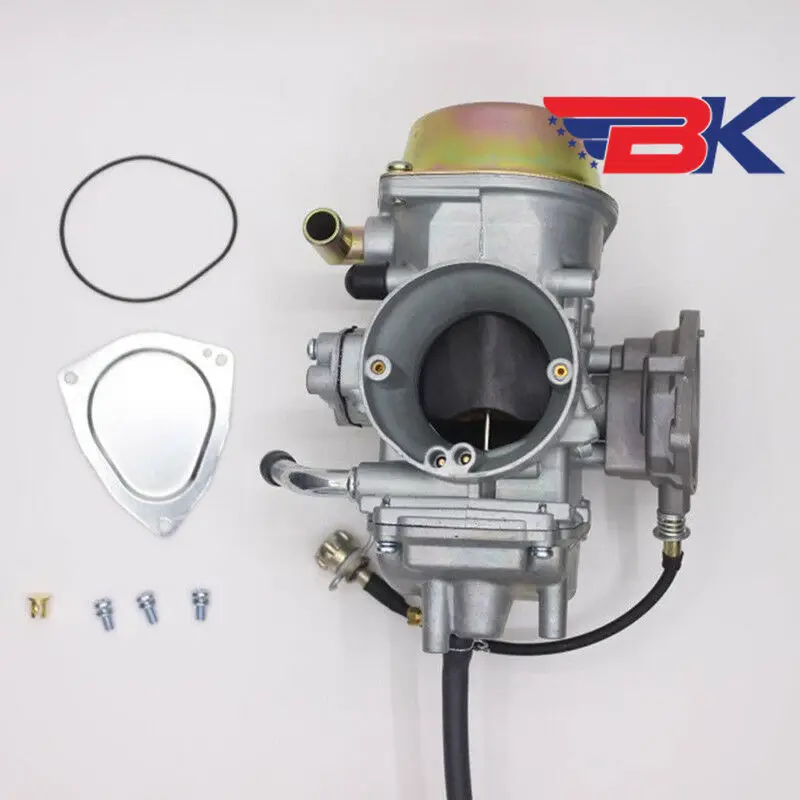
THE MOST COMMON CULPRITS FOR GAS LEAKAGE IS IT THE FUEL SHUTOFF VALVE OR FUEL LINES? LEAKS FROM THE CARB BOWL LEAKS FROM THE CARB FUEL OVERFLOW INCORRECTLY SET FLOAT HEIGHT LEAKS FROM THE CARB BOWL GASKET
Noticed a puddle of gas under your ATV? While it’s not particularly fun to see, you should take heart that the most likely causes of gas leaking have relatively simple fixes.
Image from www.sandhollowut.com
The most likely culprits for gas leakage are the gaskets, fuel lines, and seals. If you visually inspect the bottom of your vehicle, you should be able to see which of these components is causing your trouble.
The first spots to check for leaking gas are the carburetor overflow, fuel switch, carburetor drain, and fuel bowl. Clean up your vehicle and kill the fuel lines. Start up the fuel line again, and check the overflow first. Keep your eye on the carb, too, as you might notice the leak appearing there.
If you have a significant leak, it won’t take long for gas to start pouring out at a rapid pace.
ATV are the core piece of riding gear for off-road riders
Find out the best look for you
Image from David T YouTube channel
Just about every quad has a fuel cutoff switch below the gas tank. In some cases, this valve begins to leak, and you need to rebuild it using a kit or replace it.
If there’s no leak there, work your way down the fuel lines. If they remain dry, there’s no leak there. If you do find a leak, it’s simply a case of replacing the fuel line with a new one.
If the bottom of the carb is wet with gas, you probably need a new seal. But first, make sure the drain plug is correctly tightened.
If the leak is instead coming from the fuel overflow pipe of the carb, something else is afoot inside the carburetor, and you’ll need to perform further troubleshooting.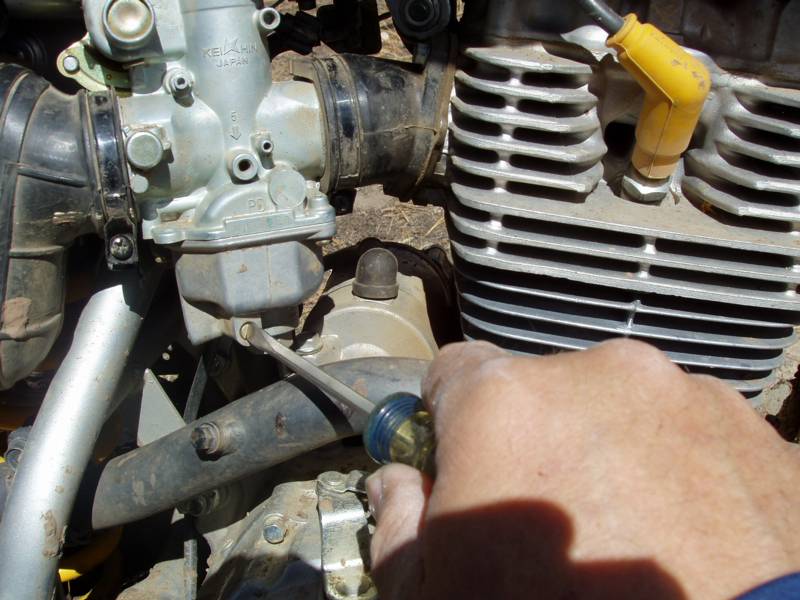
There are a few possibilities for why fuel is being expelled from the carb fuel overflow. Interestingly, if your fuel tank vent is blocked or not working, then this will cause air pressure to build up, forcing fuel into the carb. This excess fuel eventually gets pushed out of the overflow pipe.
The easiest way to test whether the issues can be a blocked tank vent is to take off the gas cap and wait 5-10 minutes. If the leak stops, you’ve found your culprit. It’s usually relatively easy to fix this issue by cleaning the ATV or replacing the gas cap.
Another top reason for leaks from the carb fuel overflow is a stuck carburetor float. The carb float works to regulate the flow of fuel into the carb bowl through a simple mechanism. But if it gets stuck in an open position, fuel will keep pouring into the bowl to the point it overflows through the fuel overflow.
There are a few potential fixes for a stuck carburetor float before you take your carb apart:
Otherwise, you can take the ATV’s carb apart, clean it, and repair any issues you find.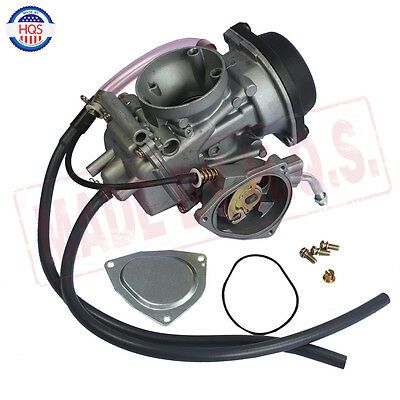 Taking apart a carb is not a job to be taken lightly, and it may make sense to get your carb repaired at a service center.
ATV are the core piece of riding gear for off-road riders
Find out the best look for you
Image from The Savage Crows YouTube channel
Gas leakage can be a result of the carb float being set at the incorrect height. Setting the carb float height incorrectly will simply waste gas and cause leakage. You can check your manufacturer’s service manual for the correct level to set the carb.
If your leak has come on suddenly, it’s unlikely to be the float height unless you’ve recently been working on the carb for other reasons.
Image from www.atvconnection.com
Another reason for leaks at the carb can be the gasket that sits between the carb housing and the carb bowl. This gasket can become damaged when you open up the carb bowl, or it can go bad from wear and tear.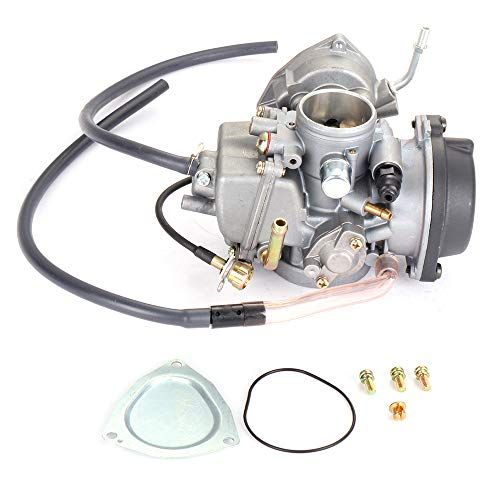
Replacing the carb bowl gasket requires taking off the carb and disassembling it. It’s not an expensive procedure as you’re only replacing a gasket, but it can take some time, and you need to be careful not to damage any of the other delicate carb elements when doing it.
SPORTSMAN Black
36 EUR
32.40 EUR
HIT
ENDURO LIGHT Graphite
the most durable
458 EUR
HIT
ENDURO Camogrey
the most durable
657 EUR
ENDURO Graphite
the most durable
279 EUR
HIT
ENDURO Graphite
the most durable
657 EUR
-28%
AQUAMASTER-ZIP LIGHT Camogrey
with central zipper
598 EUR
430.40 EUR
HIT
ENDURO LIGHT Camogrey
the most durable
458 EUR
-12%
AQUAMASTER LIGHT Red
reliability & comfort
438 EUR
386. 20 EUR
NEODRY Black
17 EUR
11.90 EUR
ENDURO Camogrey
the most durable
279 EUR
AQUAMASTER Blue
reliability & comfort
647 EUR
-20%
HIT
AQUAMASTER Red
reliability & comfort
259 EUR
207.20 EUR
-40%
HIT
AQUAMASTER Orange
reliability & comfort
259 EUR
155.40 EUR
AQUAMASTER Red
reliability & comfort
677 EUR
BELT
9 EUR
ENDURO BF Camogrey
bootfoot waders
528 EUR
ALL SEASON Black
62 EUR
ENDURO BF Camogrey
bootfoot waders
329 EUR
MUDWAY Graphite
179 EUR
MUDWAY Camogrey
179 EUR
Explore all
 - Honda 3-Wheeler Carburater
1 Questions View all
Viktor Fruehauf
Rep: 25
1
1
Posted:
Options
There is a nipple on the bottom of the Carburetor and i dont know what its for.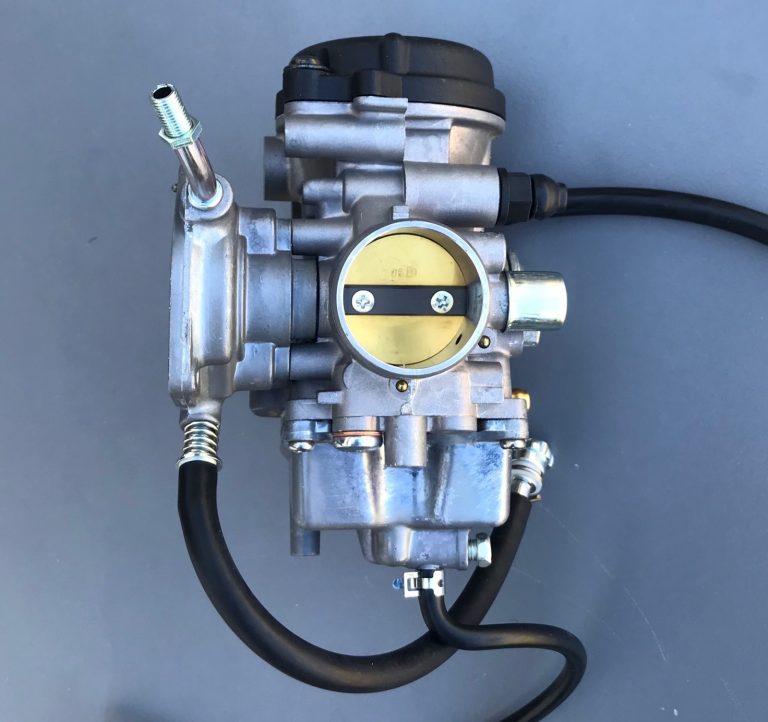 There is also a hose that came loose, and i think it came from the carburetor. when i attach the hose, i dont know if the other end of it is supposed to go somewhere or not. when i turn the gas valve on, the hose leaks gas, so im guessing its supposed to go some where. i can provided pictures if they will help.
Answered! View the answer I have this problem too
Is this a good question?
Yes No
Score 2
Cancel
Chosen Solution
L Pfaff @lpfaff1
Rep: 99.8k
8
161
354
Posted:
Options
Viktor Fruehauf, Probably a vent #16 and overflow hose#12 . If either are dumping gas when you turn the fuel on, your float is stuck and it is flooding the carburetor and possibly engine. If oil smells like fuel do not run the engine until you get the carburetor fixed and the oil changed. ATV forum and carb. cleaning vid. links below and a link to new carbs. may be cheaper to buy new instead of rebuilding. Good luck.
I hope this helped you out, if so let me know by pressing the helpful button.
http://www.hondaatvforums.net/forums/rep...
https://www.youtube.com/watch?v=Tw7zrVg9...
http://www.ebay.com/bhp/atc-200-carb
Was this answer helpful?
Yes No
Score 5
Cancel
Garry Beattie @garrybt
Rep: 1
Posted:
Options
I am having exactly the same problem with my two Yamaha ATV 200E’s.
Fuel is dripping out of the hoses.
Could this mean I need to overhaul both carburettors?
As L Pfaff said, it could be part #16, which looks like an O ring.
Does the throttle valve, that screws into the top of the carburettor, continue all the way down to block off the nipple at the bottom of the carburettor (where the hose attaches to, that is leaking)?
Garry
Was this answer helpful?
Yes No
Score 0
Cancel
Paul Maddison
Rep: 1
Posted:
Options
Some carbs do not have a drain screw.
They have a hose attached to bottom of carb.
This has a seal in the end to stop FUEL coming out.
It is only used for carb servicing/draining.
Overflow on these carbs is higher up.
Took me ages to work this out.
Most advice is to do with float seal.
Mopeds tend to have the carb set I have described.
Especially chinese 4 strokes.
GOOD luck.
Was this answer helpful?
Yes No
Score 0
Cancel
michelle williams
Rep: 1
Posted:
Options
The seal on the carb prob needs to be replaced or if you don’t have money cut one out of a card board coke box. It worked on mine.
Was this answer helpful?
Yes No
Score 0
Cancel
Articles
08 Feb
After a long wait for rides, the last thing you want is to face a breakdown in the middle of the forest, and then spend part of the season for repairs. Therefore, it is very important to properly service the ATV after the winter - change the oil, lubricate everything you need, make sure there are no backlashes and smudges, check the tightness of the bolts and nuts. We will talk about everything in more detail in the article. nine0003
This is important, because over time the oil loses its properties - because of this, heat is less efficiently removed and friction between parts increases. All this leads to accelerated wear.
Please note that the ATV engine can only be filled with special oil for motorcycles - this is due to the clutch in an oil bath. And it is advisable to use what the manufacturer recommends, as it guarantees stable operation under increased loads. For example, for CFMOTO there is a special line of CFMOTO G-Motion oils. nine0003
Two things are checked:
The air filter prevents dust and small particles of dirt from entering the engine, so it is important to keep it in good condition. nine0003
To clean the foam filter, wash it in warm water with Fairy or in a special agent, wring it out a little (do not twist it) and dry it. After that, impregnation with oil for filters is necessary.
When driving, the radiator becomes clogged with seeds, grass, lint and dirt. If you do not clean it, the next ride can turn into a test - a long road to the house with constant stops to cool the engine.
It is better to clean the radiator with a compressor by removing the protective grille. It is undesirable to use a pressure washer due to the risk of damaging the honeycombs. nine0003
It is best to move the radiator to the front luggage area - it is more convenient to service, you can safely overcome puddles and other water obstacles without fear of subsequent overheating of the engine due to stuck dirt.
Important: if you plan to dive deep into the water, it is obligatory to install snorkels, seal the wiring and remove the breathers - without this, it is highly likely that the swim will end tragically for the equipment.
During long storage, gasoline deteriorates - fractions evaporate, the octane number becomes lower, oxidation and precipitation occur. If you drive on such fuel, the piston group and the fuel system may suffer, so it is better to fill in fresh. nine0003
There should be no play - try to shake all the rods and levers by hand. You also need to make sure that there are no oil smudges on the shock absorbers.
It is necessary to check the cardan shafts for play, make sure that there are no breaks or damage on the anthers of the CV joints.
It is also important to inspect the variator belt: if there are cracks or broken teeth, a new one must be installed. The variator itself can be blown out with compressed air. Lubrication of its individual parts is required only if it is indicated in the instruction manual (it all depends on the ATV model). nine0003
Timely renewal of grease will help extend the life of the components. Depending on the model of the ATV, the number and location of injection points may be different. Usually they are on the suspension arms, crosses and spline joints of cardans, steering knuckles.
To do this, take the wheel on the sides and shake it in different directions, jacking up the ATV. If there is play, the wheel bearings are most likely worn out, less often the bushings. nine0003
Check:
The recommended tire pressure for your ATV can be found in the owner's manual and also on the vehicle itself, usually near the left rear fender. nine0003
It is not necessary to be guided by the value indicated on the tires themselves - this is the maximum pressure that the tire can withstand.
Apply a protective spray or electrical lubricant to pins and connectors to prevent moisture ingress and malfunction of the ATV.
Even before the season, you must make sure that the high and low beams, side lights, emergency alarm, power steering, turn signals, horn, winch and heating are functioning normally. nine0003
Normally, the battery charge is from 12.5 V. If it is less, it should be charged. Plaque on the terminals, cable lugs and the battery case itself can be removed with a sponge moistened with a solution of baking soda in water.
A new quad needs a break-in to get the piston rings to fit against the cylinder. This will ensure normal heat transfer and prevent serious damage - for example, burning or jamming of the piston. nine0003
Run-in is carried out in the first 500 km of run. Rules:

A new ATV must be broken in correctly.
close
In some areas of the country, it is difficult to drive ATVs during the winter months, so owners decide to store their vehicles during the off-season.
Long term storage of your ATV is more than just leaving it in a garage or shed. Since you will no longer be driving and the cold season is approaching, you need to prepare your transport for hibernation. It won't take long, but preparation will keep you protected from corrosion and damage, and when the winter is over, you'll be ready to go. nine0003
Preparing your ATV for long-term storage requires little more than a simple post-ride cleaning. Yes, cleaning is absolutely necessary, but there are a few more things, obvious and not so obvious, that many owners overlook or forget. The tips below will help you keep your vehicle in tip-top condition, ready for the road as soon as winter is over.
As mentioned, give your ATV a complete wash. Apply lather, rinse off and apply lubricant (on the drive chain and all other parts that need to be lubricated), then apply protectant on the plastic parts - all the things you usually do when preparing for a ride. The only difference is to apply WD-40 to the exhaust pipe to prevent corrosion, and plug the hole in it to keep dust or insects out. Plug the hole with a rag or, better, use a special plug. In addition, it does not hurt to coat all unpainted and polished metal parts with WD-40. nine0003
Gasoline will degrade if left for too long. If your ATV has a plastic fuel tank, it's best to drain all the fuel - not only from the tank, but also from the hoses and carburetor. On machines with a metal tank, depending on where you live, you need to do the opposite. In an empty tank, rust can begin to form in places where condensate accumulates - so it is better to fill the tank and add a stabilizer. Be sure to start the engine and let it idle so that the stabilized fuel fills the entire system. nine0003
Take care of the battery. An unused battery drains quite quickly, and if left in this state, the battery life will be greatly reduced. The most convenient way is to connect a charger to the battery, which will use very little electricity, but keep the battery charged all winter. In the spring, do not forget to turn it off. Most chargers use float or technology mode when the battery is fully charged. Most likely, you already have such a device, but if you are a beginner or have recently moved from a region where you could ride an ATV around the clock, get it. nine0003
Tires deflate slowly over time, so inflate them to the maximum before storing. It's also best to check them once a week. Also, tires should not be left on frozen concrete for the next six months. Use the blocks to lift the quad off the ground so you take the load off the suspension.
Change oil and filter. Old oil contains dirt and chips, and over time it can thicken and remain in the crankcase or on engine parts. After changing the oil and filter, let the engine run for a few minutes to coat all moving parts with fresh oil. Then crank the engine a couple of times every month without starting to keep the moving parts lubricated. nine0003
In addition, remove the air filter, as rodents like to make a den or store their supplies in it, and it can dry out during the winter. Don't forget to replace the filter cover.
Cover your ATV, but do not use plastic. You need to cover with breathable material, otherwise the moisture will not evaporate and rust and mold will begin to form.
In general, it is best to store your ATV in a dry place that is not too cold. If your garage or shed has windows, make sure that sunlight will not hit the plastic parts and tires. Follow these tips and when the new season starts, you'll be ready.