Article written in collaboration with Alex at LaBaron’s Powersports.
When installing any exhaust system, it is usually necessary to make changes to the fuel settings in order to yield the best results, and ensure that your engine is not running dangerously lean. Stock fuel settings, whether, carbureted or EFI, are generally far from ideal. The engine’s fuel requirements are deeply affected by large changes in the exhaust system, intake setup, or internal mods. While some machines are still within the safe limits, even with an aftermarket exhaust system installed, others are dangerously lean, or woefully rich, and exhibit drivability problems. This is why understanding your fuel system is crucial regardless of whose exhaust system you choose to run.
Whether your machine is fuel injected, or carbureted, we at Barker’s Performance Exhaust will do everything we can to provide you with accurate PC5 fuel maps and jetting specifications where possible. Due to the unique requirements that sometimes are necessary from machine to machine in different environments, it is usually beneficial to have your machine custom tuned by a reputable tuning facility.
Fuel Injection 101: What you need to know before choosing a fuel controller
EFI has taken over our sport. It has afforded countless people peace of mind and ease of maintenance, but there are many misconceptions about modern EFI systems, and what you don’t know can cost you money and horsepower.
Modern EFI systems on most motocross bikes, street bikes, and atv’s are technically PGFM or programmed fuel management. The computer reads from a factory programmed “map” of fuel values, in which throttle position (TPS) and engine RPM are the coordinates from which the computer gets its fuel value. These fuel values are slightly altered by the MAP sensor which determines engine load, and the IAT sensor, which determines air temperature. These stock maps are often very simple, and inaccurate.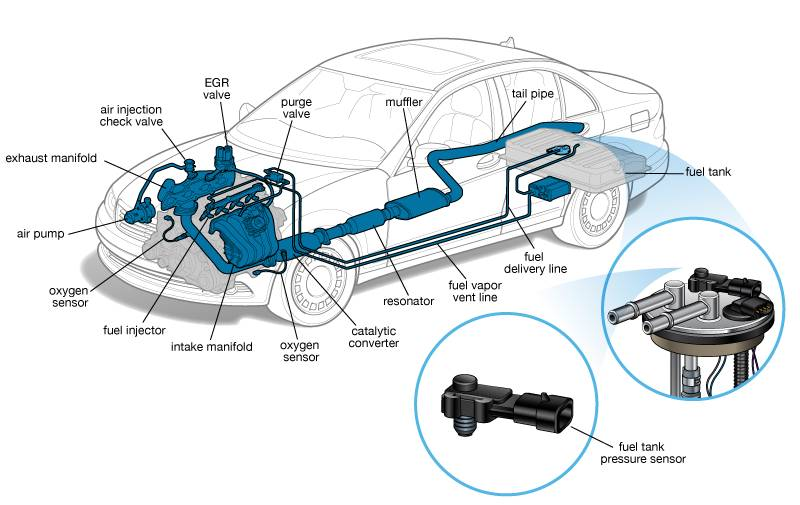 In all but a few machines, there is no O2 sensor that tells the computer that the engine is rich or lean. The modern four stroke engines see such drastic changes in operating conditions (rpm, throttle position, engine load, gear selection), carefully metered fuel control is essential for optimal performance. This is why it’s important, when modifying your machine’s power plant, to select a fuel controller what has a very high level of adjustability.
There are 2 major types of fuel management hardware. The Dobek TFI, and the Dynojet Power commander. The Dobek TFI utilizes a push-button interface that allows the user to adjust fuel trim in large areas (low, mid, high, WOT, as well as some blending options). These areas are adjusted via the buttons on the front of the unit. The Dobek TFI can be adjusted on a dynamometer by a professional tuner, or in the field by a savvy powersports hobbyist. This type of tuner will save you money over the Power Commander, and is adequate to tune in a machine with mild bolt-on modifications.
If you plan on doing internal engine mods in the future, or just want to squeeze every ounce of power out of your exhaust/intake combo, you may go the route of the Dynojet Power Commander 5. The power-commander utilizes a high-resolution fuel control map that allows precise 3-dimensional tuning of hundreds of pinpoint areas, based on both throttle position, and engine RPM. It has an accelerator pump feature, and can be integrated with Dynojet’s Autotune module, quick-shift system, boost pressure sensor, and nitrous map switch. This adds limitless tuning and integration possibilities for anyone who wants to do an extreme engine build, or otherwise demands the most precise fuel tuning system available. The caveat here is cost. The power commander not only costs more money, but in the event you cannot find an accurate pcv fuel map for your exact setup, you will be forced to bring your machine to a dynamometer shop and have your unit custom mapped. Tuning the power-commander in the field without an advanced data-logging system is nearly impossible, for even the upper echelon of power sports gurus.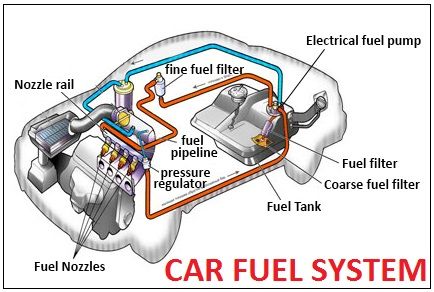
Luckily, there are reputable dynamometer shops across the country that support the dynojet power-commander. We at Barker’s Exhaust, work tirelessly, along with LaBaron’s PowerSports of Almont, MI, to develop precisely tuned power-commander maps for nearly every exhaust system we produce. In many applications, we build maps using several intake configurations that we find work very well with our systems. But even so, if you have other engine mods, you may seek out a custom built map for your specific application.
Whichever route you go, an engine that is running at the proper air fuel ratio at every RPM, every throttle position, and every engine load level, will produce more horsepower everywhere, respond more quickly, and ultimately be more reliable, than one with hit-and-miss tuning.
Carburetion:
Carburetors have between 3-7 tunable circuits that meter fuel delivery based on engine RPM and load (vacuum) and throttle position (throttle valve height).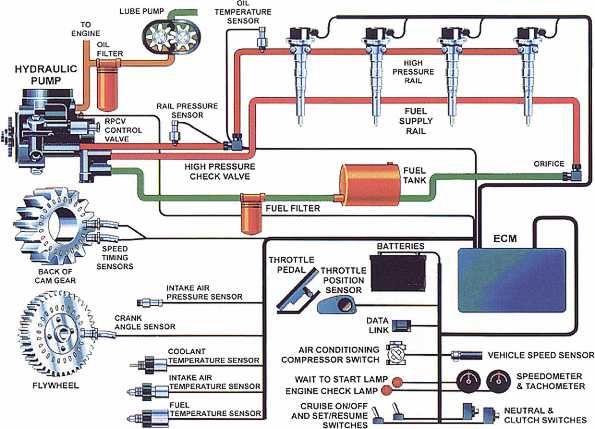 These circuits are adjusted via a series of fixed orifices (jets) and adjustment screws. Although much simpler than EFI, complex modern carbs such as the FCR can still be tricky to tune.
We will strive to supply jetting recommendations for carbureted machines using our exhaust systems. Keep in mind, carburetors are much more sensitive to atmospheric conditions, and your environment may not be the same as ours. This may constitute further tuning, and if you do not feel confident doing so, you may also wish to seek the services of a reputable dynamometer tuning center.
DP controllers are basically an Electronic Jet Kit. Like carb jet kits in the past, the more you modify, the more responsibility you take in getting your fuel curve right. Most people can easily tune a vehicle from stock to stage 1 modifications. DP controllers give you this ability at the touch of a button instead of trying to understand a computer software program. Don't be afraid to make some changes and then go for a ride to try them out. Just be sure to record your settings so you can easily revert back if needed.
WHERE TO START
 Some conditions can be caused by being either rich or lean so it is hard to generalize this for tuning advice.
TOP TUNING RECOMMENDATION - INSTALL AN AFR GAUGE
The days of Dyno dependency are over. AFR data viewing, in real driving situations, is the new standard.
Easily installed on most motorcycles, ATVs and UTVs the SAFR provides a simple analog gauge with a wideband O2 system that displays the vehicle's air / fuel ratio (AFR) values and allows riders to fully understand how their vehicle is running. The SAFR is a diagnostic tool which ensures the vehicle is running at optimum levels on the street or in the dirt. It is not intended to be a permanent installation. The unit is fully compatible with all vehicles.
The debate about which fuel supply system is better - carburetor or injection - does not subside to this day. Many consider the carburetor system reliable and time-tested. Supporters of injection technology consider it more technologically advanced and perfect. In this article, we will consider which type of engine is more relevant and appropriate on ATVs.
A carburetor is a device that prepares the air-fuel mixture and regulates its supply to the engine's combustion chamber. Carburettors are still used on ATVs, although they are considered obsolete technology.
 As a rule, even if it is necessary to install two carburetors, it is more economically feasible to install an injection fuel supply system. After all, regardless of the number of cylinders, the injection system needs only one control unit, namely it is the most expensive part of the system.
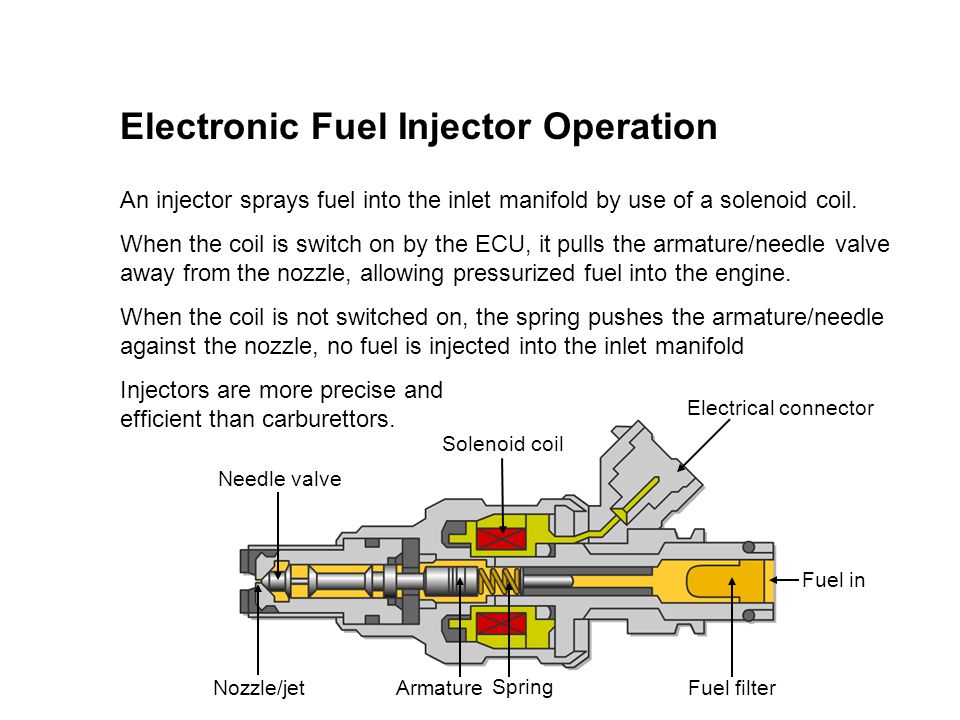
Injectors have been widely used since the 80s of the XX century. Their wide distribution became possible after the development of electronics and electrical engineering. The main difference between the injection system and the carburetor system is that the fuel supply is controlled by controllers. They contain an algorithm for the moment and duration of the opening of the injectors, which is calculated based on the data coming from the sensors. Depending on the received data, the controller regulates the fuel supply, ignition and the operation of other systems. Data analysis occurs constantly and at high speed. It should also be noted here that injection systems constantly monitor the efficiency of their work by analyzing the completeness of fuel combustion using sensors in the exhaust system.

In the CFMOTO ATV line, all models are equipped with engines with electronic fuel injection. Such motors are more economical, easier to start, their power and torque are higher. They are high-tech and meet strict environmental requirements.
How to adjust the carburetor on an ATV? What to pay attention to? What are the signs of misuse of the device? About this today in our article.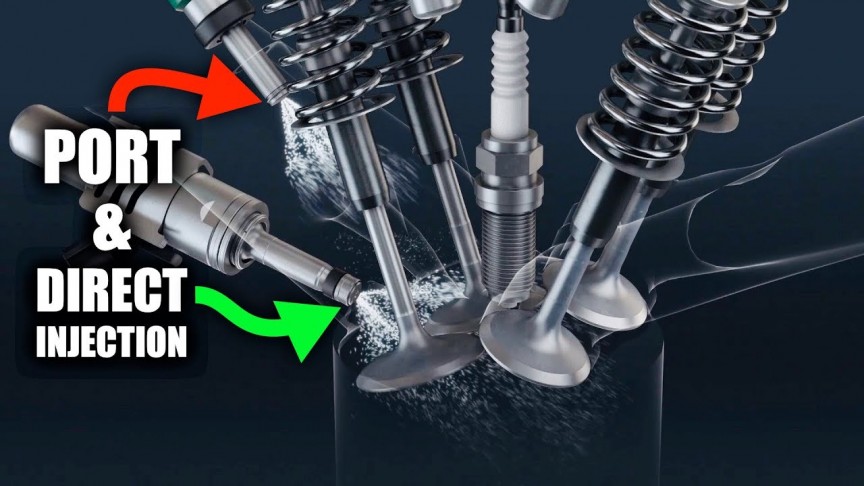 Using the proposed instructions, you will be able to set up the carburetor step by step without the help of specialists.
For stable operation of the ATV, it is necessary that the engine receives the optimal amount of combustible mixture corresponding to its rev range. Otherwise, the following problems may occur:
What should be applied in this case:

Important! Carry out tuning only when the carburetor is cleaned outside and inside, as well as when the engine is warmed up to operating temperature.
Note. The location of the bolts on each carburetor model may vary, so read the instructions that came with your machine.
1. Start the ATV and test ride. Wait until the engine has completely cooled down.
2. Check the condition of the spark plug. To do this, unscrew the cap and inspect the candle.
What to look out for:
3. Unscrew the needle cover at the top of the carburetor. Pull the needle. This is the main element that regulates the supply of fuel to the combustion chamber, since the needle is connected to the gas trigger. When the trigger is pressed, the needle rises, slightly opening the hole for supplying the fuel mixture. This directly affects the growth of power and speed of the ATV.
4. Remove the cable, then press the needle to pull it out. The needle has 5 grooves and a retaining ring. By default, it is set to medium. The lower the retaining ring is located, the higher the needle is raised, which means that a lot of gasoline and little air is supplied. Accordingly, the higher the ring - the less gasoline and more air.
5. Reposition the circlip in the desired direction to optimize carburetor performance. Insert the needle into place.
6. Start the engine and press the throttle trigger. With proper adjustment, the engine should not stall from a sharp pressure.
And remember, you should resort to adjusting the needle only as a last resort, when adjusting the quality and quantity screw does not bring results.
The performance of a four-wheeler depends on the correct level of gasoline in the carburetor. An excessive amount will flood the candles, spill onto the ground and lead to unnecessary expenses. If there is too little fuel, the engine simply will not start.
How to optimize the fuel supply
