Ask a question, get an answer ASAP!
GET A QUOTE
Tire Patch Cost
Service Location
Price range for all vehicles
(171,627)Flat tires are an inevitable part of owning a car. Changing a flat tire can be difficult and requires several different tools that you might not have handy.
Fix-a-Flat is a convenient option for plugging the hole in the tire once you’ve identified where the damage is located. It allows you to drive your car safely to the closest gas station where the tire can be filled and repaired properly. It is advisable to keep a can of Fix-a-Flat in your car at all times so that you’re not stranded the next time your tires lose air due to a hole or some other type of damage.
If your car is equipped with tire pressure warnings, please consult the manufacturer before you use an aerosol tire sealer like Fix-a-Flat.
Here's how to fix a flat tire using Fix-a-Flat:
Gather the correct materials - In order to use Fix-a-Flat, you will need to purchase one can of Fix-a-Flat
Stop the car in a safe location - If you’re driving, pull over to a safe location on the side of the road or into a parking lot.
Identify the source of the leak - Once you realize your tire is losing air, it’s important to identify where the leak is coming from. That way, you can decide whether Fix-a-Flat is the appropriate method for repairing your tire issue.
Identify the damaged tire - The damaged tire will look visibly deflated compared to the other tires.
Warning: Fix-a-Flat is not designed to repair completely flat tires. It is also not designed to repair large tears or cracks in sidewall. It should only be used as a temporary solution until the tire can be replaced or a spare tire can be installed.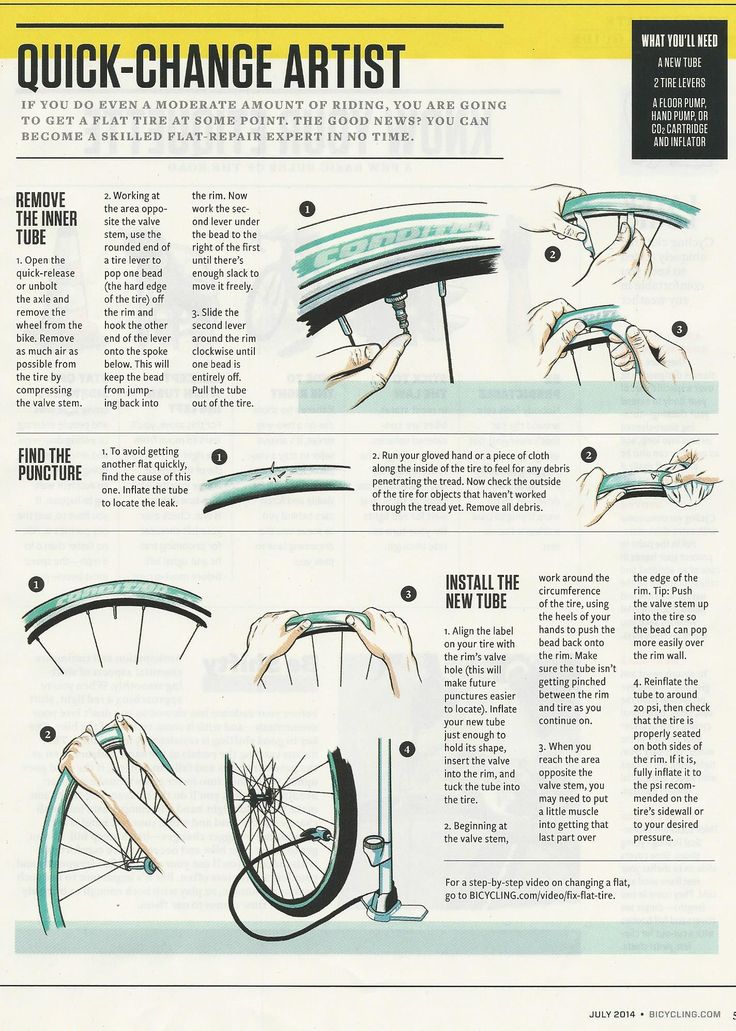 If the tire is too damaged, get a certified mechanic, such as one from YourMechanic to put on a spare tire instead.
Look for the tear or hole in the tire - Sometimes, this spot will be obvious. If you’ve driven the tire over a nail or if some other object has torn a hole in the tire, then you will probably be able to find the hole easily. Make sure that the damage is not too extensive and not larger than ¼ of an inch.
Open the tire valve - Unscrew the cap of the tire valve and place it somewhere easy to find because you will need to put it back on after repairing the tire.
Prepare to seal the tire - Shake the can of Fix-a-Flat to get it ready for use.
Attach the Fix-a-Flat nozzle - Screw the Fix-a-Flat nozzle onto the tire valve. Make sure that it is secure. You will begin to hear air inflating the tire when the nozzle is completely secured on the valve.
Warning: Fix-a-Flat is designed so that the entire can is emptied into one single tire. Do not use the same can on several different tires.
Close the tire valve - After the can is completely emptied into the tire, unscrew the nozzle and replace the valve cap on the tire.
Drive the car immediately - It’s important that you drive your car immediately after using Fix-a-Flat to allow the tire pressure to increase and distribute the sealant evenly on the tire. You should only drive the car about 2 to 4 miles after sealing the tire.
Inflate tire to recommended psi level - The psi level of a tire is the manufacturer's recommended pounds per square inch level for a tire. After using Fix-a-Flat, you may still need to inflate the tire with air so that it reaches the recommended psi level.
Drive to the nearest air pump - Any nearby gas station should have air pump.
Fill the tire - Pump air into the tire up to the recommended psi level, checking it frequently with a tire gauge.
Tip: Refer to your car’s manual or check the manufacturer’s website to find the recommended psi level for your car’s tires. The correct air pressure will also be listed on the tire placard attached to the vehicle door edge, doorpost, glove box door or fuel door.
Using Fix-a-Flat is a temporary solution and your tire will need to be replaced or repaired by a professional. It’s important to let the person repairing your tire know that you’ve used Fix-a-Flat so that they know that your tire is sealed with aerosol gases and not just air.
If you notice that some of your car’s tires show uneven wear or if they lose contact with the road, get a professional mechanic, such as one from YourMeechanic, to inspect them as soon as possible.
The most popular service booked by readers of this article is Tire Patch. YourMechanic’s technicians bring the dealership to you by performing this job at your home or office 7-days a week between 7AM-9PM. We currently cover over 2,000 cities and have 100k+ 5-star reviews... LEARN MORE
SEE PRICING & SCHEDULING
flat tires
The statements expressed above are only for informational purposes and should be independently verified. Please see our terms of service for more details
4.2 Average Rating
Service Hours
7 AM - 9 PM
7 days a week
Phone Number
1 (855) 347-2779
Phone Hours
Mon - Fri / 6 AM - 5 PM PST
Sat - Sun / 7 AM - 4 PM PST
Address
We come to you at no extra charge
Guarantee
12-month/12,000-mile warranty
Our certified mobile mechanics perform over 600 services, including diagnostics, brakes, oil changes, scheduled mileage maintenances, and will come to you with all necessary parts and tools.
Get a fair & transparent quote instantly before booking.
(
171,627
)
161,099
161,099
SEE REVIEWS NEAR ME
11 years of experience
585 reviews
Request Nicholas
Nicholas
11 years of experience
Request Nicholas
by Robert
Honda Accord L4-2.3L - Oil Change - Raleigh, North Carolina
Knocked it out in no time!
by Marc
Honda Pilot - Car is not starting - Durham, North Carolina
came early, done in an hour. did a great job on my 12 year old vehicle. highly recommended!
8 years of experience
23 reviews
Request Nestor
Nestor
8 years of experience
Request Nestor
by Denice
Hyundai Santa Fe V6-2.7L - Tire Patch (Driver Side Front) - Boise, Idaho
Right on time, very knowledgeable and helpful on what needs to be done next. Thanks!
21 years of experience
1068 reviews
Request Pardeep
Pardeep
21 years of experience
Request Pardeep
by Ellen
Hyundai Santa Fe V6-2.7L - Tire Patch - San Jose, California
Very quick and efficiento
27 years of experience
275 reviews
Request Nazareth
Nazareth
27 years of experience
Request Nazareth
by Jesse
Chevrolet Express 3500 V8-6.0L - Car is not starting - Duarte, California
Very professional, highly recommended.
Our certified mobile mechanics make house calls in over 2,000 U.S. cities. Fast, free online quotes for your car repair.
GET A QUOTE
GET A QUOTE
How to Know What Tires to Buy
Your Your vehicle requires traction in order to accelerate, brake efficiently, and maintain control when you are steering. In order to do those things well, you need to own good tires on your vehicle. There are hundreds of different tire...
How to Make Your Car Tires Last Longer
A new set of car tires is expensive. Make them last longer with frequent inspections, keeping them clean, and making sure the air pressure is correct.
How to Rotate Car Tires
Car tire rotation reduces blowouts and other tire-related car accidents. Tires should be rotated every 5k-6k miles or at every other oil change.
Passenger's side wheel vibrates
It sounds like you have a faulty wheel bearing. The vibration goes away when you turn because you are loading the bearing and taking up all of the play. Wheel bearings can be checked by jacking up the vehicle, and...
Uneven tire wear and excessive shaking in the steering wheel once hitting highway speeds.
Hi there, thanks for writing in. Based on your description of the symptoms and tire wear, it seems that your mechanic probably is correct. When the tie rod and ball joints (https://www.yourmechanic.com/article/symptoms-of-a-bad-or-failing-tie-rod-end) are damaged, they will cause the suspension to...
Bottome of vehicle makes a helicopter sound when driving at slow speeds
The sound you are hearing is related to the tires moving from what it sounds. The first thing to inspect is proper tire inflation. Tires make strange noises when they are low or damaged. Second needs to be the brakes....
Estimates
Cities
Maintenance
Our service team is available 7 days a week, Monday - Friday from 6 AM to 5 PM PST, Saturday - Sunday 7 AM - 4 PM PST.
1 (855) 347-2779 · [email protected]
Read FAQ
GET A QUOTE
Posted by Mike Hagerty Know How
So you’ve got a flat tire. If you don’t have a jack and a spare (as is often the case with many modern vehicles) you’ll need to know how to use Fix-a-Flat.
Fix-a-Flat is an aerosol tire sealant (sometimes called canned tire inflator) that will repair a small hole in your tire and re-inflate the tire itself. The hole has to be small though — the manufacturer says ¼ inch or smaller — so if you’re dealing with a puncture from a nail or something similar, Fix-a-Flat might be just what you need to get back on the road in a hurry.
How Does Fix-a-Flat Work?A can of Fix-a-Flat contains tire sealant as well as compressed air. When you use it, the air pushes the sealant out of the can and into your tire through the valve stem. The sealant coats the inside surface of the tire and fills the puncture.
What Will I Need?Eye protection is always a good idea when you’re working with an aerosol, and having a clean towel to wipe up spills would be smart too. Fix-a-Flat cleans up easily, but if it’s left on certain surfaces, such as chrome wheels, it can cause damage.

Unfortunately, no. Your tire is only temporarily repaired. According to the manufacturer, you have three days or 100 miles to have that tire patched or replaced, so your next stop should be a tire shop.
When Shouldn’t I Use Fix-a-Flat?The only problem you might face with Fix-a-Flat is if the size of the hole is too big or the distance you have to travel before a more lasting repair is too great. If the hole is bigger than a ¼ inch or you have more than 100 miles to the nearest tire pro, you should use a spare tire instead. If you don’t have a spare handy, calling for a tow may be the best option.
Check out all the tire products available on NAPA Online, or trust one of our 17,000 NAPA AutoCare locations for routine maintenance and repairs. For more information on how to use Fix-a-Flat or any other canned tire inflator, chat with a knowledgeable expert at your local NAPA AUTO PARTS store.
Photos courtesy of Wikimedia Commons.
Categories
Know How
Tags
flat tire, flat tire repair, tire maintenance, tire pressure, tire wear, tires
Mike Hagerty is an automotive journalist whose work has been featured on radio, TV, in print and online since 1997. He's the Publisher and Editor of MikeHagertyCars.com, and contributes car reviews to the Los Altos Town Crier and losaltosonline.com. Previous outlets have included KFBK and KFBK.com in Sacramento, California, the ABC television affiliates and Hearst-Argyle and Emmis radio stations in Phoenix, Arizona; AAA magazines for Arizona, Oklahoma, Northwest Ohio, South Dakota and the Mountain West and BBCCars.com.
Igor Molodtsov, chief designer of the UGOL online repair service
Wear-resistant materials
Therefore, for the renovation of investment apartments, it is necessary to choose the optimal combination of wear-resistant materials.
Quartz-vinyl tiles are the best choice for flooring in the room, kitchen and corridor. It will withstand floods, children on scooters and even a couple of playful large breed dogs. PVC tile on the floor is very difficult to spoil, besides, it is much easier and cheaper to replace it with a separate die than to restore a piece of inexpensive linoleum. And if you pick up interesting drawings under a tree or under a stone, this will make the interior more attractive.
When it comes to walls, anti-vandal wallpapers are an excellent solution. For rental apartments, hot stamping vinyl is ideal, as well as dense foam vinyl on a non-woven base for painting. Paints are better to use acrylic wear-resistant. They allow you to wipe off stains from coffee, felt-tip pens and do not fade in the sun.
Pay special attention to the bathroom. It’s definitely not worth saving by sewing it up with plastic panels. Plastic is very fragile - it is difficult to fix a shelf on it, and the sheathing itself will take a good 5-7 cm from the area of \u200b\u200byour bathroom. Tenants are unlikely to consider such a solution modern - and they will be right.
For toilets and bathrooms, porcelain stoneware and ceramics are the perfect combination. By the way, it’s better to buy a tile with a margin - one more package: if one tile breaks, you don’t have to change the whole decor.
Lifehack
The bathroom must have a mirror, shelves and hooks, otherwise tenants will make extra holes in the tiles themselves. It is better to think over all these points even before the repair and order a design project that will take into account such trifles. Moreover, today there are online repair services that will quickly and inexpensively develop a stylish project specifically for an investment apartment.
The right color scheme
Make the interior of the rental apartment bright. So the apartment will seem larger and, most importantly, cleaner. It should resemble a hotel room and appeal to people with different tastes. Best of all, bright interiors, made in a minimalist Scandinavian style, are rented out.
But if you want to rent your apartment quickly and for the highest price, don't go overboard with minimalism. Ikeevskaya furniture in a bright interior will not distinguish your apartment from dozens of similar options. Therefore, use a catchy move - add bright colors.
When choosing accent colors, consider the specifics of the region. For St. Petersburg, bright saturated colors are ideal. One wall in the room can be safely painted in a fresh shade - let's say mint. This color is comfortable for perception and has a positive effect on performance and creativity. At the same time, one accent wall is very easy to update - you do not have to repaint the entire room.
Life hack
It is better to make the interior of an apartment for long-term lease more neutral - the tenants themselves will fill it with accent things. The design of housing for short-term rentals should a priori be brighter, otherwise they will not pay attention to it.
Adding decor
Do you want the tenant to want to move into it already while viewing the apartment? Add the right textiles when decorating the interior - it will be easy for future residents to imagine their cozy evenings in your apartment.
Remove heavy dark curtains from the windows and add a plain material that mimics natural fabrics. If the apartment has upholstered furniture (certainly with removable covers!) - enliven it with a soft blanket and one or two pillows.
When choosing a color, do not limit your imagination, stick to the rule of three colors. For example, you can add an accent color (carpet, curtains, plaid) to the main color (walls, floors) and complement it all with a third color (posters or pillows).
Life hack
Avoid figurines, antique floor lamps, but hang neutral paintings or posters - for example, with sea views or a city panorama. And don't go overboard with the quantity. The decor should not be expensive, and if necessary, it can be quickly replaced.
Furniture - only the bare necessities
The most popular types of apartments for rent are studios and odnushki. In small apartments, it is important to properly arrange the furniture, focusing on sleeping places. The best combination is a double bed in the recreation area and a sofa bed in the kitchen.
Why is the bed the main sleeping place and not the sofa? Any landlord wants comfort, even if looking for an apartment for one night. And in the eyes of the guests, the bed has always been and will be the preferred option.
When arranging the sleeping arrangements in the studio, take into account privacy - preferably not at the expense of space. A good choice is sliding partitions, screens and curtains made of dense textiles.
When designing a kitchen, follow the rule: the shorter the rental period, the less furniture should be in the kitchen. The minimum set is a table (preferably folding), a few chairs (it is better to purchase additional folding ones). The set is also light: a pair of floor cabinets with a small countertop, a sink, a two-burner hob, light hanging shelves.
Don't forget a small refrigerator. Why be so squeamish? This will allow you to be more mobile - you can organize an additional sleeping or working place in the kitchen.
Lifehack
Try to provide an interior for all occasions. The more variability and mobility, the greater the chance that the apartment will suit different tenants.
Storage systems
Daily and hourly rentals don't need a lot of storage space - just a small closet and a few shelves will suffice. But if your goal is to rent an apartment for good money and for a long time, make at least one large and spacious wardrobe that will fit everything - from outerwear to bedding sets. You can put it in the hallway or in the room.
A chest of drawers in the room and a shoe rack in the hallway, as well as a cabinet in the bathroom - this is the minimum after the cabinet. What else is needed, only your future tenants know. Just in case, get boxes and baskets for things. With them, it is much easier to organize the order of the house and even transform the interior.
By the way, if you need to zone the space, then with one rack you will also solve the problem of lack of storage space. In this case, boxes for things will come in handy.
Lifehack
Cabinets, chests of drawers and shelving are better to have lightweight ones: they will be easier to move during cleaning.
Good lighting never leaves you
Another important detail to keep in mind is good lighting.
A gloomy dark apartment with dim yellow light will not cause pleasant emotions in the tenant. Therefore, only the upper light will not be enough. The apartment should provide several points with lighting.
Place a modern floor lamp in the dark far corner of the room, place a wall lamp near the bed, and hang a mirror opposite the window to reflect daylight. The finishing touch is a little decorative light: add nightlights, table lanterns and candles.
life hack
Always use energy saving light bulbs. They will last much longer than regular ones.
Photo: shutterstock.com, UGOL online repair service.
The hardest part is getting started. In order to survive the repair with the least loss of time, effort and money, it is important to know what to do and in what sequence
Photo: Neva Towers, project by INRE studio
We figure out together with an expert how to repair an apartment, especially if you have not done this before, whether to hire a designer and what issues to discuss with him.
The material was checked and commented by Evgeny Nedoborov, partner of the author's design studio INRE
adv.rbc.ru
It is necessary to assess the condition of the premises and its capabilities. In many cases, old apartments undergo major repairs with the replacement of electrical wiring and windows, but are often limited to new windows, doors, and wall alignment. Sometimes it is enough to carry out cosmetic work: to scrape the parquet or lay a new carpet, remove the wallpaper and paint the walls.
Overhaul includes:

If you find it difficult to estimate the extent of the repair and the necessary actions yourself, contact a specialist. It is not necessary to order a design project; You can choose the style and content of the interior yourself. But if the basic parameters are not fully developed, then a situation is not ruled out when a new cosmetic repair will be spoiled due to cracks in old windows or leaks in pipes. The duration, complexity and costs of the upcoming repairs depend on the number of works. The latter should be given special attention: the more plans, the more money will have to be invested in their implementation.
How to sell an inherited property: documents, taxes, nuances
With the help of cosmetic repairs, you can completely transform an apartment. If the budget is limited and a professional designer is not included in your plans, practice "watchfulness". This is best done by collecting examples on interior sites. Think about what you like: bright colors or restrained minimalism, or maybe the brick walls of the house are ideal for creating a loft or you want to bring the design closer to cozy boho-chic. Save the selected photos to a separate folder on your computer or phone, highlight the characteristic features of the selected examples.
Photo: Neva Towers, project by INRE studio
Designers recommend focusing on interiors created in similar conditions: pay attention to the size of rooms and their functionality, window arrangement. Consider the architecture of the space - in a modern house it makes no sense to make stucco and bas-reliefs, but these details can be beaten if they already exist. If several people live in the apartment, coordinate the chosen styles with them so that everyone is comfortable in the renovated apartment.
Photo: Neva Towers, project by INRE
You can use special applications and online services for apartment design to choose the right combinations and further arrangement of furniture. Explore trends and anti-trends: these lists often show innovative ideas that you'll love.
Apartment design project: how to create interiors and start renovation
Many tasks can be done by yourself, but if you have no experience, it is better to entrust especially complex processes to specialists. Ultimately, this will save on rework and troubleshooting. You do not have to buy materials, expensive equipment and tools yourself. In addition, the work of a professional team is a great guarantee that cracks will not appear on the new ceiling due to non-compliance with the rules and painting technologies, and fresh tiles in the bathroom will remain intact.
It is better to entrust the installation of doors and windows, floor screed, electrical and plumbing work to specialists. You can paint the walls and arrange furniture yourself - this is a matter of desire, effort and time.
Photo: Shutterstock
When you decide on the design and content, you can proceed to the calculations and create a list of necessary building materials and consumables. It is best to buy them with a small margin. So, if part of the wallpaper is damaged during unsuccessful pasting, you can replace it from a spare roll. In addition, the store may not have the selected tile left, and half a meter of plinth will have to be searched for and ordered with overpayments - bulk purchases are always cheaper. If it is difficult to make calculations on your own, contact professionals. Many companies provide a service for allocating the budget and purchasing everything necessary for repairs, even if you decide to do it yourself.
In addition to building materials and furniture, try to include small things and details in the list: lamps, additional shelves, carpets and decorative elements.
The estimate is useful even at the repair planning stage. You can use online calculators, build a shopping cart in online stores, and rely on your designer's advice. To make the correct calculations, you need to know the exact parameters of the room: the footage, the height of the walls, the location of windows and doors. The contractor can make an estimate, but in any case, you must provide him with a measurement plan and agree on specific wishes for future repairs. Be sure to announce, or rather document, the types of work, technologies used, categories of building materials, deadlines and desired costs.
The desire to save money is understandable and understandable, but try to turn to professionals when it comes to security. It is better to entrust these repairs to specialists:
On average, a major overhaul will cost twice as much as a cosmetic one. But it's a long-term investment in occupant comfort and safety, and it's not worth skimping on.
After the development of the design project and the purchase of materials, you can proceed directly to the work. The repair plan should reflect all measurements, layout, location of sockets, switches and lighting. It is best to start work with the most difficult and dirty: replacing windows, pipes, installing window sills. A lot of dust is generated during the rough repair process, so it is incompatible, for example, with tinting the walls in the next room. Often they start with redevelopment and erection of walls, and after laying the tiles in the bathroom, they move on to the kitchen. If you stay in the apartment for the duration of the renovation, make sure that dirt and debris do not spread throughout all the rooms. Be sure to pack your belongings and transfer them to storage from the room in which the work is being done.
Photo: Shutterstock
Try to stick to the planned work plan; step-by-step instructions will help you not to miss important points:

 The tiles are laid after the bath is installed so that perfect joints can be made.
 Repair mistakes: how to avoid fines and not lose your apartment
Expert comments
Evgeniy Nedoborov, partner of the author's design studio INRE:
— Before you start repairing, you need to decide on two areas— space and interior design. First, all the “subtleties of life” of a person are clarified to the details: the number of children, the presence of animals, habits. For example, does the owner cook himself, what time of day does he spend more time at home, does he like to gather guests, does he or family members have hobbies, do customers collect art, who in the family is the first to start getting ready for work, and much more. Based on the set of scenarios, a further visual image is thought out.
The next stage of work is to identify preferences in interior design. This is followed by development and delivery in stages:
Planning decisions.
Styling solutions based on client references. It is important to remember that absolutely everything is impossible to “make friends”. Therefore, designers take into the project only key techniques and color solutions.
Working documentation becomes a drawing for builders. It includes: planning decisions; top, middle and bottom electrics; floor covering with height marks and joints; ceiling with knots and cuts; water supply and sewerage; furniture with basic overall dimensions; list of premises in square meters; wall sweeps indicating the types and types of application of finishing materials.
Design project.
The document is transferred to the customer and builders, which simplifies communication between all parties and significantly saves the budget. An approved design project allows the client to control costs, and it is more difficult for builders to confuse the client, since all the work is calculated. At the same time, the design project is a business plan for the client: he understands what he paid for and how the stages are closed.
Also, the design project allows you to make an estimate for the cost of materials and furniture manufacturing. We even have a special service in our studio, thanks to which you can predict expenses for a month, for six months. In any interior, there are background things that you can save on, for example, finishing materials (wallpaper, paint). But accent elements - chandeliers, furniture, handles - give the interior an individuality, make it unique, so we always explain to the client that high quality justifies the high cost.
If you want the interior to fully comply with the design project, be sure to use the service of architectural supervision. Only in this case, the quality implementation of the project is guaranteed. All those who work on the site - architects, designers, planners, engineers and electricians - solve only their own task. None of them pays attention to the connections and details that arise when solving work issues during the construction process.