Years ago, when I was a young punk just getting into the idea of personal mobility, an old mechanic succinctly explained to me how pneumatic tires work: “It’s the air, stupid!”
Turns out that blunt lesson delivered with a little spray of his Copenhagen chew from between his teeth was absolutely correct. The tires don’t really carry the load—it’s the air.
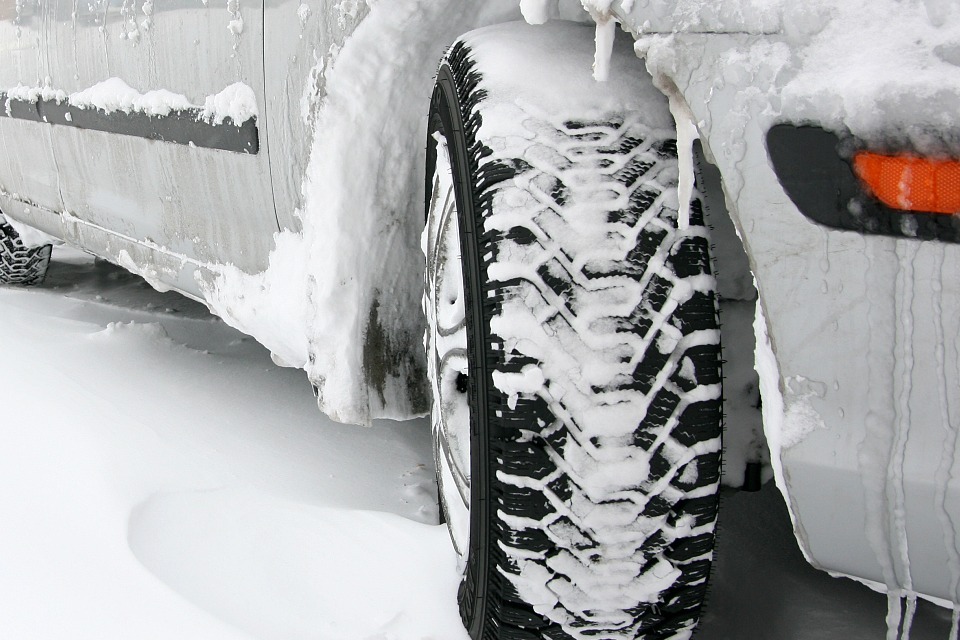
Take the air out of the tires, and you don’t have a functional vehicle. Tires become misshapen lumps that make it tough to even push, let alone ride, your bike. That superbike of yours moves from road rocket to “disabled vehicle.” Inflate the tires to the correct psi, kPa, or bar, and you have your freedom back.
So, what, exactly, is the correct tire pressure for motorcycle tires? The succinct, but less than satisfying, answer to that one is, “It depends.”
The best answer is whatever the motorcycle manufacturer says it is. However, the type of tire can lead to big differences in what that number may be. For example, those big, fat tires on the ATVs and UTVs are often low-inflation types that may be correctly inflated with only 2 to 10 psi in them. On the other end of the spectrum, some small diameter trailer tires may call for up to 60 psi. Typically, street motorcycle tires are in the 28 to 40 psi range.
Another factor is the anticipated load conditions and road conditions. The manufacturer may recommend slightly increased tire pressure for heavy loads (see the image). So, if you’ve got the saddlebags, tail bag, tank bag loaded to the max, and are planning to ride two-up, check your manual or the motorcycle for a label that provides information for that riding situation.
Under-inflated tires can run hot and, if the ambient temps are high, temperatures in the hull of the tire can soar. The combination of sidewall flexure, high heat, heavy load, and high speed can lead to a blowout.
There are more than 50 standard units of measure for pressure. For the purposes of measuring air pressure in your tires, we really only need to think about three: psi, bar, and kPa. Most know psi is pounds per square inch, while bar means atmospheric pressure at sea level (100 kPa), and kPa being kilopascals (1000 pascals). Type the conversion you want into your Google search box, and the answer appears. Sites such as UnitConverters have a more comprehensive range of unit choices.
Which unit will be most common for the specifications on your tire’s inflation depends on where you live, where the tires were manufactured, and under which standards. In North America, psi is the most common. That said, when picking out a tire pressure gauge, it may be handy to think about getting a digital pressure gauge that offers all three scales, such as the Digital Sport Tire Gauge from Slime.
Most of the pencil-style mechanical pocket gauges provide psi and kPa, while most of the dial-indicator gauge types are either psi only or psi and kPa.
Just a word here about gauge accuracy. In my experience, which dates back to just after the third global extinction event, pressure gauges that are all plastic and cost very little tend to have the widest variations (5 to 8 psi high or low) in readings when compared to more than one metal-body unit such as those shown on the left in the image.
Accuracy and precision are not the same. Accuracy is how close the reading the gauge gives you is to being the actual pressure. Stated another way, it is how far off the reading is from the true pressure, plus or minus, on any given reading. Precision is the degree to which the gauge can reliably and repeatably measure in units—that is, can it read down to fractions of psi, or a single pound per square inch, or is the smallest degree of precision that can be read off the gauge only to the nearest five pounds per square inch. How accurate are the gauges in the hose at the gas station? Well, that’s anybody’s guess. I always double-check with my own gauge.
Also, how low can the instrument reliably measure pressure? Some simple pencil-style pocket-size gauges have a scale that starts at 10 psi. This matters if you have a bike that air-adjustable suspension elements that must not be inflated to a pressure greater than 6 psi, as is the case in the compression damping adjustment in the forks of my 1984 Honda VF1100S. Over-pressurizing the forks can cause damage that is a pain to fix. So, if you have suspension or tires that require such precision, you will want to consider spending the extra money on a high-precision gauge.
Precision and range also matter. An air-adjustable fork, such as on the Honda VF1100S, must not get more than 6 psi.You may have a motorcycle with tire pressure monitoring systems (TPMS), either factory-installed such as a Honda Gold Wing Tour or retrofitted (Blu Technology Products and others), those are great.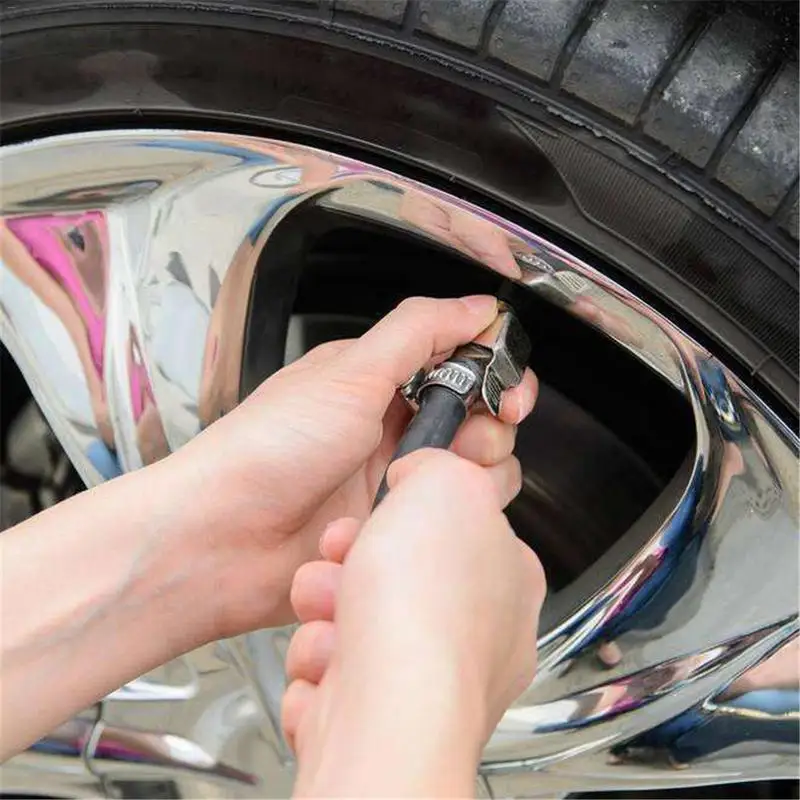 But, they are not infallible.
Carrying a pressure gauge along with you is still a good idea because, if your bike is starting to handle like you’re riding in a banana cream pie, but the TPMS still says all is well—you might want to stop and get a second opinion.
An angled valve stem, such as this one on a Sportster, can make tire inflation a little easier.
Another consideration is where the valve stem is on your bike and what contortions you and your gauge may have to go through to get at it. Somebody was thinking when they designed the rims for my Harley-Davidson Sportsters with a valve stem that is angled out to make getting a gauge and air hose fitting on it a little easier. On other motorcycles, such as the Road King, for example, the rear rim may have the valve stem vertical and with the brake disc, exhaust pipe, saddlebag, and low clearance of the rear end, that makes it a pain to even see, let alone get a gauge and filler nozzle on the valve stem.
Difficult access to the valve stems, as in this example, should be considered when picking out your gauge and compressor equipment.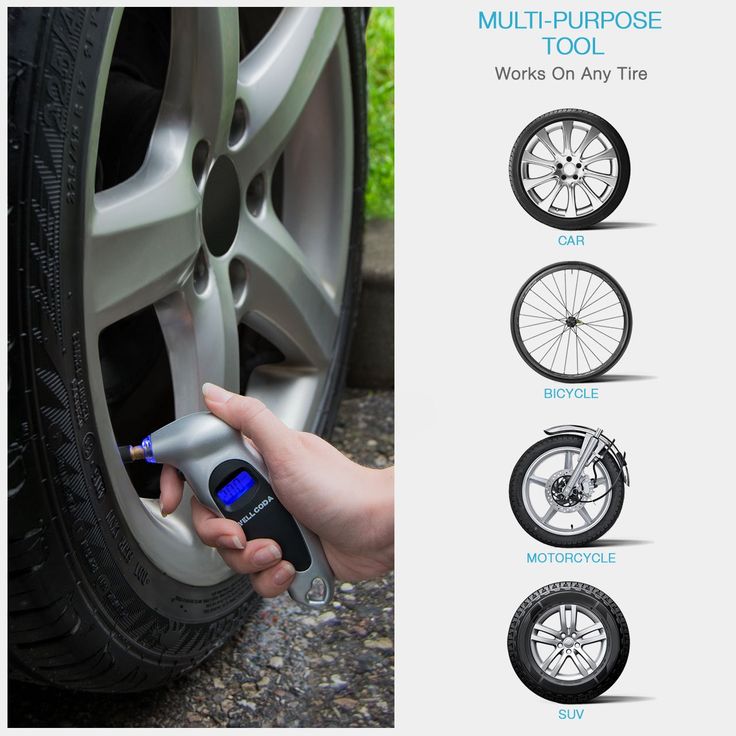
If you have your own compressor, having an extension with an angled head can help with getting at some valve stems, but in some, it’s just plain going to be a pain. No matter, though. The pain of that kind of inconvenience is very minor compared to that which results from an under-inflation blow out miles from home or poor traction caused by over-inflation.
For more info on motorcycle tires on UltimateMotorcycling.com, see:
Sorting Motorcycle Street Tires
Motorcycle Tire Safety Standards Explained
Top 10 Things to Know About Motorcycle Tires
MIC Releases Booklet and Video on Motorcycle Tires
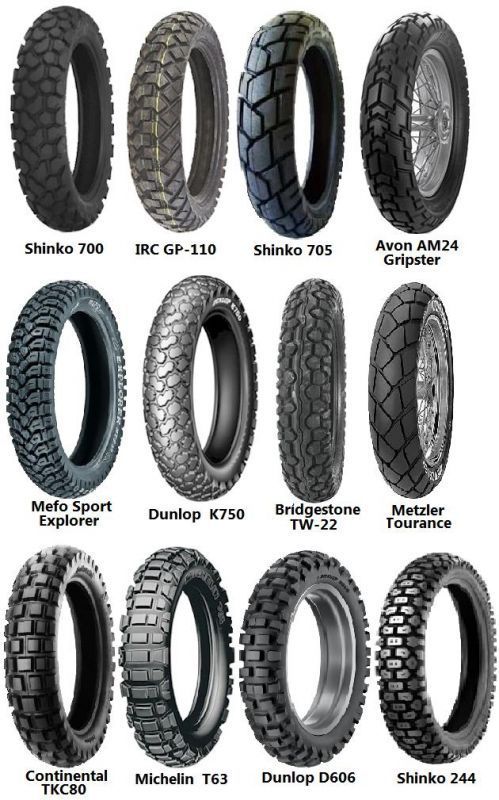
How much psi pressure is needed in motorcycle tyres? It’s important to remember that different bikes require different pressures. The correct psi for road tires will vary from those required for off-road endurance biking. Make sure to refer to the manufacturer’s user manual when choosing the right psi for your motorcycle. Sand-covered terrain will require a lower psi pressure than firm dirt tracks. In these cases, your motorcycle tyres will need a lower psi pressure than those for road biking.
Tires are a vital part of a motorcycle’s stability. Motorcycle tires can last up to 60 miles before needing replacement. In addition to this, higher tire pressure can decrease the amount of tire life. Many motorbike manufacturers call out two to three psi reductions in tire pressure when they see a problem with a motorcycle’s stability. The reason is simple: higher pressure decreases the damping effect that is essential to motorcycle stability.
Motorcycle tires are critical components of the bike’s handling, and lower tire pressure makes them more responsive to steering and braking. A low tire pressure can compromise the bike’s stability when faced with extreme riding conditions. For example, when riding in soft sand, it is important to reduce tire pressure to get out of tight spots. To get around this problem, Birch always keeps a motorcycle tire pump in the glove compartment.
In addition to affecting motorcycle safety and comfort, the tire pressure can impact the bike’s handling qualities. While the sidewall of a tire indicates the recommended tire pressure, the “Max PSI” numbers stamped on a motorcycle tire are the load index for that particular tire. The load index for a motorcycle tire varies based on the weight of the rider and the passenger. Consequently, lower tire pressure improves motorcycle handling.
It is imperative to remember that lower tire pressure is not the same as lower tire pressure. A lower tire pressure will not achieve the desired temperature required for good performance. Using a high-quality gauge will help you identify the correct PSI for your motorcycle. It’s not as expensive as you might think, and will do the job just as well. And remember: low PSI pressure doesn’t necessarily mean lower handling or braking.
Using lower psi pressure in motorcycle t yres can have negative effects on fuel economy. Depending on the conditions, an under-inflated tire can reduce fuel economy by up to 10%. Underinflated motorcycle tyres can also be dangerous, causing a significant drop in safety and fuel economy. Therefore, it’s important to check motorcycle tyre pressure regularly.
When cold, motorcycle fuel condenses and causes a larger footprint, reducing fuel economy. Motorcycle tyres must be inflated to the appropriate PSI to maximize safety. Lower pressures can also increase drag, which is bad for fuel economy. Similarly, overinflated tyres can cause a rough ride and quick tyre wear.
Motorcycle tyres are designed to be very stiff and durable, so their psi pressure should be high enough to keep them from tearing. The recommended inflation pressure for motorcycle tyres is 60 psi, but the manufacturer recommends a lower psi if it is causing an unstable bike. The resulting explosion injured a rider and damaged his wrist.
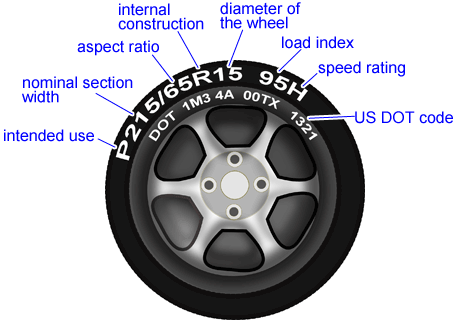
The correct motorcycle tire pressure should be based on the sidewall pressure of the tyres and the owner’s manual. Generally, motorcycle tires have a load index of between 70 and 80. The motorcycle load index is specific to the motorcycle model, so you should check tire pressure to avoid any damage. The lower the load index, the worse the gas mileage will be.
Under-inflated tyres are dangerous. Even a 20% difference in pressure can cause a tyre to rupture or lose its shape. In addition, motorcycle tyres with a lower pressure will have an increased chance of aquaplaning. The braking distance on a motorcycle will be significantly longer than if it is properly inflated. Further, the vehicle’s rolling resistance will increase.
Moreover, riding a bike with lower-psi pressure will reduce its fuel economy and tire life. The air in the tyre will also generate heat and traction. The proper inflation pressure will help you achieve the optimal temperature. Lower-psi pressure increases the footprint and the heat generated by the tyre. As a result, the tyre will wear out before it can function to its full capacity.
Optimum psi pressure is vital for motorcycle tyres as it helps to improve the performance and comfort of the bike while reducing the wear on the tires. There are several ways to monitor the tire pressure, including a pressure gauge. Motorcycle tyres are designed for normal road use and should be maintained at the manufacturer’s recommended pressure. However, lowering the pressure may result in increased safety and reduced performance.
Check the tyre pressure at least once every week or before each ride. Leaving it for six months without checking the pressure may cause a loss of six PSI in the tyres. This amount equates to a 30 percent decrease in the total pressure of the motorcycle.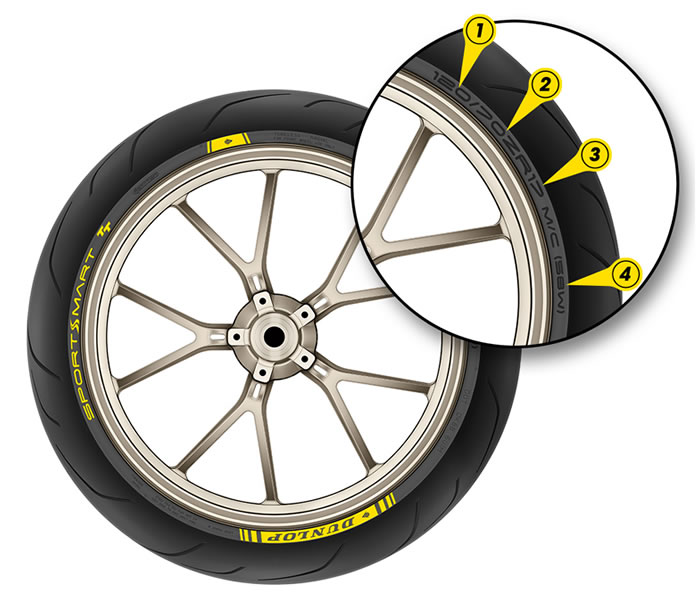 You don’t want to ride in under-inflated tyres either, as they are uncomfortable and may eventually cause the tyres to break.
Ensure a minimum of 60 psi when mounting your motorcycle tyres. Higher pressure will reduce the damping effect of the tire footprints, reducing the wear and tear on your motorcycle tyres. Motorbike manufacturers call out a two or three-psi reduction when they notice this problem. Depending on the type of riding you do, you may have a shorter life span than the manufacturer recommends.
Optimum psi pressure for motorcycle tyres is important for safety. Street motorcycles typically have a 28 to 40 psi pressure range. ATVs and UTVs typically have big fat tires with low-inflation levels. On the other hand, trailer tires are typically up to 60 psi, while street motorcycle tyres are designed to operate at a normal road pressure of 28 to 40 psi.
Optimum psi pressure is determined by the manufacturer. The manufacturer will issue a recommendation for optimal pressure depending on the motorcycle’s speed and load. Motorcycle manufacturers tend to simplify these recommendations. Some tyre manufacturers will offer different pressures based on the motorcycle’s maximum speed and ambient temperature. If you have a motorcycle, always check the tyre pressure with a professional.
You can always check the tire pressure before you ride a motorcycle by following a few simple steps. Motorcycle tires are always labeled with the recommended air pressure on the sidewall. You can also find the pressure of a motorcycle tire by unscrewing the valve stem cap. If the stem is sturdily attached to the valve, you should be able to see the recommended pressure. You can also check the tire pressure at a local tire shop by comparing the readings of different gauges.
When checking the tire pressure, you need to be sure to read the appropriate units and pressure range on your motorcycle’s sidewall. Most professional gauges have two-way readouts, but a pen type with a plastic sliding post is inexpensive and should give a reasonable reading. You can also consult your motorcycle’s owner’s manual for more details. Make sure you follow the recommended tire pressure as well, as different tire brands have different specifications.
You should check the tire pressure on your motorcycle at least once a week, or at least every couple of days, or if you ride daily. The reason is simple: changing the air temperature in different places can cause tire pressure to change. When your motorcycle tires get too hot, they lose six PSI, which is 30% of the total pressure. The result is uneven handling and uncomfortable ride characteristics. A low tire pressure is even worse, because it can lead to rapid wear on the tires.
Tire pressure on your motorcycle should be checked before you ride. Unlike car tires, motorcycle tires require more pressure than your car’s. While the manufacturer recommends checking your tire pressure once or twice a week, motorcycle safety experts recommend checking the pressure on your motorcycle at least every time you ride. You should also check your oil on a regular basis. Always keep a clean motorcycle as it is one of the biggest factors in safety.
Besides checking tire pressure before riding a motorcycle, you should also perform a visual inspection of your tires regularly. Make sure to check the tread depth and any signs of uneven wear or discolouration or bluing. If you notice any problems with your tires, don’t drive it. A quick check on your bike may be enough to get you back home safely. However, it’s always better to be safe than sorry.
Introduction
What is the pressure in motorcycle tires?
How to properly set tire pressure?
What is the result of under/over pressure in motorcycle tires?
Conclusion
The safety and reliability of riding a motorcycle depends not only on which tires are used, but also on what level of pressure is maintained inside.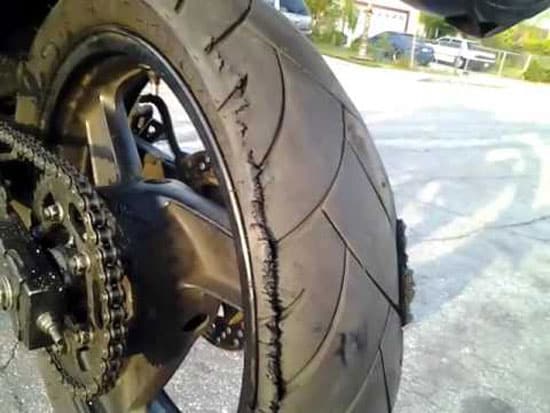 It is very dangerous to treat this carelessly. And why and how to correctly calculate the pressure in motorcycle tires - read our article and find out.
Air, like any substance, expands when heated and contracts when cooled. This is also true for motorcycle tires - when hot, one level of pressure is maintained inside the tires, and when it is cold, it is completely different. Tire pressure is important, as it is responsible for the most important characteristics for any bike - both scooter and sport enduro:
Handling and maneuverability on dry and wet surfaces;
The size of the contact patch is directly responsible for traction;
Suspension workload;
Fuel consumption;
Wear resistance.
In short, only correctly inflated tires can do their job well - to keep contact with the track and not lose it throughout the entire trip. Any deviation from the norm (lack or excess of pressure) is fraught with unpleasant consequences.
Front and rear tires must have different pressures and this is important to understand before handling the pump. The owner's manual of any bike always indicates the optimal pressure for cold tires, so if you measure the indicators immediately after the ride, do not be surprised that the pressure gauge will show different values - the air inside has warmed up and expanded.
The manufacturer indicates all parameters of cold rubber inflation on the table on the motorcycle frame or in the user manual. They vary depending on the type of motorcycle, but, as a rule, the data varies between 2.0-2.5 atm for the front wheel and 2.2-2.9Atm for rear. If you plan to put another person on the bike, we recommend inflating the tires by 0.2 atm.
| Wheel size | Pressure, front/rear, kgf/cm2 (atm) | |
|---|---|---|
| Normal load | Full load | |
| 100/60-10 | 2. | 2.3/2.4 |
| 130/60-13 | 1.8/2.0 | 2.0/2.2 |
| 130/70-12 | 2.2/2.3 | 2.3/2.4 |
| 120/70-12 | 2.25/2.3 | 2.3/2.4 |
| 110/70-12 | 2.2/2.3 | 2.3/2.4 |
| 120/80-12 | 1.8/2.0 | 2.0/2.2 |
| 130/70-10 | 1.8/2.0 | 2.0/2.2 |
| 100/90-10 | 1.9/2.1 | 2.0/2.2 |
| 120/90-10 | 1.8/2.0 | 2.0/2.2 |
| 130/90-10 | 1.9/2.1 | 2.0/2.2 |
| 3.0×10 | 1.75/2.0 | 2.0/2. |
| 3.50×10 4PR | 2.5/2.5 | 2.6/2.6 |
Hot pressure depends on many factors up to the riding style of the rider, so they will have to be selected individually for each specific case:
To begin with, inflate the tires to 2-2.3 atm, given that for the rear tire the pressure should always be 0.3 atm more than for the front.
Ride at your normal pace for 10-15 minutes. The pressure in the rear and front tires should increase by an average of 0.2 atm.
Then use the pressure gauge again: if it shows a value within the normal range of cold pressure, then you have achieved your goal. If it is higher, then lower the wheels, if lower, pump up. Measure tire pressure and adjust the amount of air inside until you get the result.
If you notice a slight discomfort immediately after the start, this is normal.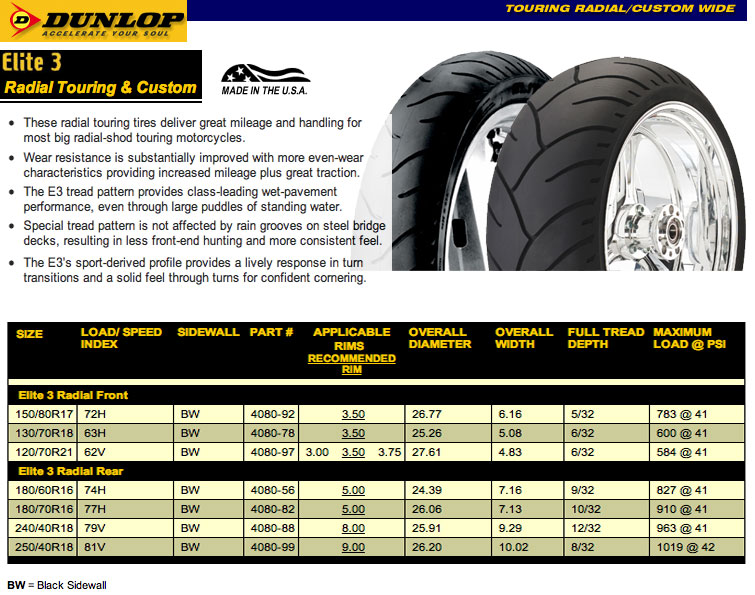 The rubber needs to warm up a little and after five minutes everything will return to normal.
If you overinflate your tyres, get ready for the fact that the contact patch will decrease, and with it the traction will deteriorate, the ride will become much harder, there will be a possibility of vibration, and the load on the suspension will also increase significantly. Riding in over-inflated tires on a wet road is quite dangerous, because due to the small contact area, the motorcycle will begin to skid in corners and brake poorly. The most unpleasant consequence will be a deterioration in strength and wear resistance. Motoshina can even explode when driving on hot asphalt - one pebble can cross out everything.
Increased tire pressure is used only in two cases: if there is another passenger on the motorcycle or during long high-speed races.
Under-inflated tires have their own list of problems: their contact patch may be larger, but due to its irregular shape, it wears out and deforms extremely quickly.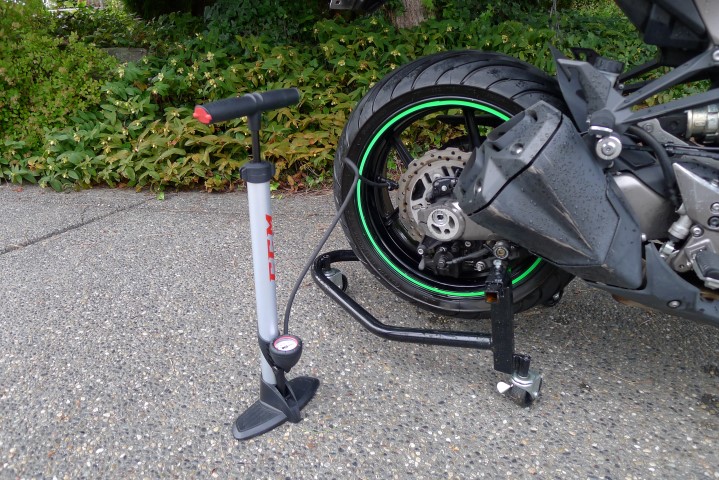 Of the useful qualities of rubber, handling, maneuverability, directional stability and fuel consumption are seriously affected. In the end, if you do not correct the pressure in the motorcycle tires, everything will end with a cord detachment. If your motorcycle has wheels with chambered tires, then insufficient inflation of the chambers will sooner or later lead to accidental disassembly.
Riding on underinflated tires is practiced only on special enduro sports bikes for off-road stunts.
However, in order to calmly control a motorcycle, it is not enough just to set the correct tire pressure and calm down on this - we also recommend that you refer to the speed index table.
| Speed index | Maximum speed, km/h |
|---|---|
| A | 40 |
| B | 50 |
| C | 60 |
| 65 | |
| E | 70 |
| F | 80 |
| G | 90 |
| J | 100 |
| K | 110 |
| L | 120 |
| M | 130 |
| N | 140 |
| P | 150 |
| Q | 160 |
| R | 170 |
| S | 180 |
| T | 190 |
| U | 200 |
| H | 210 |
| V | 240 |
| W | 270 |
| Y | 300 |
| VR | >210 |
| ZR | >240 |
| (W) | >270 |
| Z | >300 |
It is forbidden to put tires with a low speed index on high-speed motorcycles - they may not cope with the capabilities of the motorcycle, which will not lead to anything good.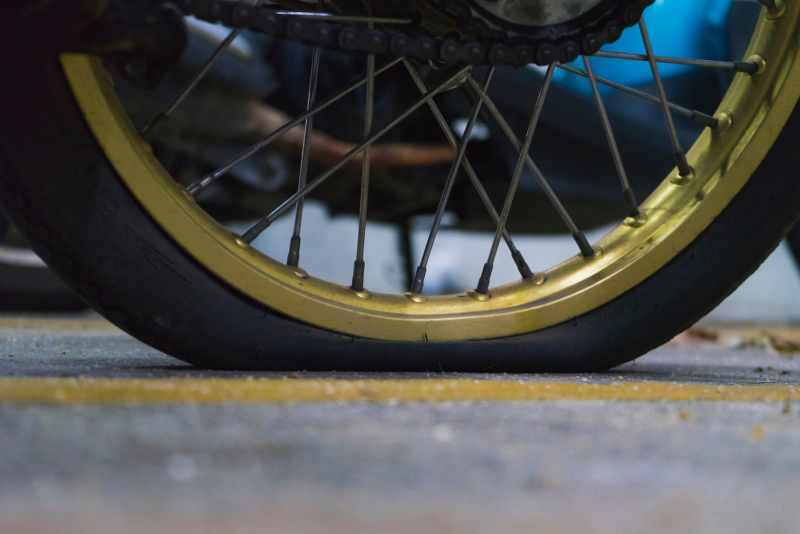
It is very important to check the pressure in the motorcycle tires in time to always be aware of its technical condition and not provoke a breakdown. Owners of sports and cross-country bikes, who constantly experience heavy loads, have to control it especially closely. It is the accuracy of the measuring device - the pressure gauge - that is extremely important. Often the point is not at all in the setting, but in a bad device that simply gives false readings. If the error reaches 0.5 Atmospheres, then you better choose another device for yourself. In the BlackTyres online store, you can easily find a reliable pressure gauge, and with it the right pressure in motorcycle tires, which will help them to reveal their best sides and characteristics.
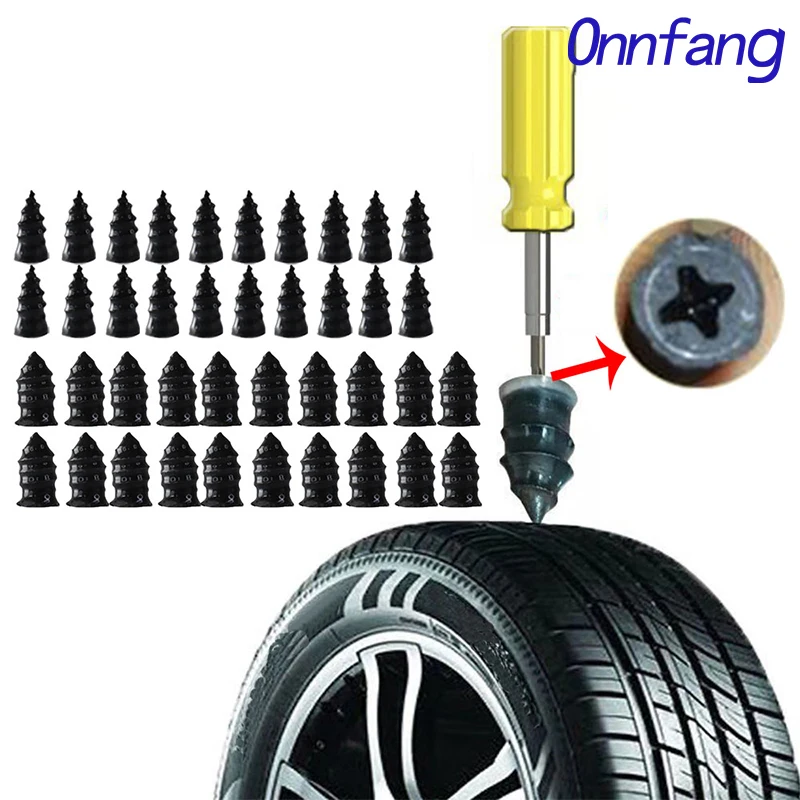
There is not always a way to call a tow truck, and driving on a flat tire, “chewing” the rubber and killing the rim is at least uncomfortable.
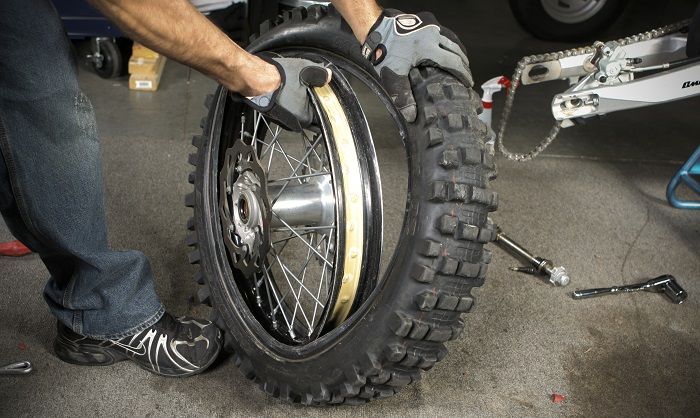
The very first replacement of rubber on a motorcycle or scooter gives reason to think - what is better in terms of quick repairs: tubeless ones that do not require wheel disassembly to eliminate a puncture, but leave the rider helpless if, along with damage, it “led” and flattened the edge of the disc? Or chambers - allowing sealing almost ring breaks (if only there were enough patches), but requiring the removal of rubber from the rim for this? The unequivocal answer is no. Few classics, straights or tourers today remain "loyal" to tube rubber models: tubeless tires are lighter, softer, warm up and cool down faster thanks to simplified heat transfer. In sports, more precisely - enduro and motocross, chamber - on the contrary, prevail: only spoked wheels can "play", withstanding strong alternating loads during landings and impacts.
The nuance is that a tire with a chamber can be put on any spoked or cast disc, and a tubeless one can only be placed on a cast one, because only it can ensure tightness. Tube – can be installed in a tubeless tire as an emergency measure. In case of major damage to the sidewall, cracks or curvature of the edges of the rim, this will make it possible, after pumping up the wheel, to reach the nearest tire service (and there already - straightening, balancing and other maintenance according to the rules). True, for such a focus, it is advisable to take a camera with a face value one less than the diameter of the disk, otherwise it will create folds inside that will rub for a couple of hundred kilometers. The resource of such a “treatment” is large - until the next puncture, like a new one.
It depends on the magnitude of the damage whether it will be possible to eliminate it on your own, or whether you will have to “surrender” to the motorized tow truck. In tubeless - holes up to 5–6 mm are patched, in chambers - as much as there is enough glue and patches, the main thing is the condition of the tire. To determine the extent of the disaster - find a place where you can safely stop without violating traffic rules (where it is prohibited - you will have to sacrifice tires and drive on).
If the wheel deflates slowly, and the object that pierced it is still inside, you can try to carefully drive to the tire shop. A completely deflated "pancake" will have to be resuscitated on the spot, or - remove the wheel and take it to the service.
To find a hole in a tubeless tire, if it is very thin and not immediately visible, the wheel must be pumped up, slowly pouring water - bubbles will go. In place, tubeless tubes can be “harnessed”, or filled with sealant inside, without removing from the motorcycle.
With the second type of tires - more difficult. A torn balloon must be removed from the tire to detect a defect and seal. In a good way, the wheel must be removed from the motorcycle and disassembled on a clean, flat, hard base. Suppose such a “patch” can be provided even off-road, but how to remove the wheel on a motorcycle if it does not have a central stand? And shooting is not required. The motor must be carefully laid on its side, after making sure that the faucet is closed, gasoline does not flow out through the tank cap (antifreeze does not flow from the tank if the motor is “dropsy”), and removing the plastic or wardrobe trunk with fragile contents (if any).
You will have to unscrew the wheel from the motorcycle only if you need to replace the tire, or it is decided to patch the tubeless tube with a “fungus”. In the absence of a central stand, this will also have to be done on a lying bike, or - make this stand from improvised materials (bricks, stump, car jack), placing them under the crankcase protection from below, the central tube of the frame, the duplex jumper (but not under the plastic, itself engine crankcase or attachments!), under both footrests - if they are not folding, or - under the pendulum. Before removing the rear wheel on a motorcycle, the front fork must be loaded with something, or an even higher lining is made.
In a motorcycle tire fitting shop, tubeless tubes are repaired by cold vulcanization. They are removed, disassembled, the puncture site is cleaned from the inside, degreased, lubricated with glue and a calibrated “fungus” patch is inserted into the hole from the inside. The fungus itself is a thin plate of rubber with a “leg” tube in the center. The leg - by the guide wire is dragged through the hole of the damage, and the "hat" seals it.
After half an hour - you can put the tire back. The reliability of such a repair is high, the patch does not cause a significant imbalance, the service life of a sealed tire does not decrease.
This method is also applicable on the road, the main thing is to have the necessary equipment and materials with you:
The fungus repair procedure does not require much experience. The main thing is to keep it clean, fully clean the place where the patch fits, let the glue dry slightly to a dull finish and press (roll) the surface of the fungus with high quality, expelling all the air between the layers. If necessary, you can degrease the place before gluing with gasoline, but without the rest of the above, it will not be possible to fully carry out repairs.
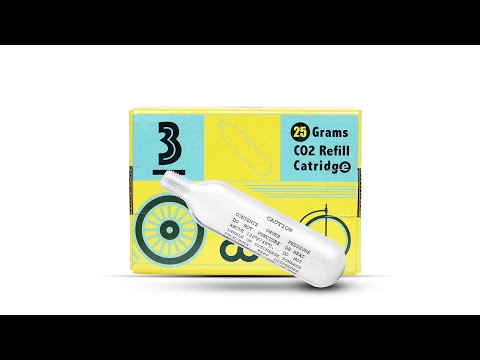
The compressor is sometimes replaced by a small cylinder of compressed air or carbon dioxide. Unlike a mechanical pump, it will immediately create a “throw” of pressure, pressing the tire beads against the rim flanges (in emergency cases, even a fire extinguisher was used to pump flat tubeless wheels). When connecting the compressor, start the bike's engine before you start inflating the tire - let it idle.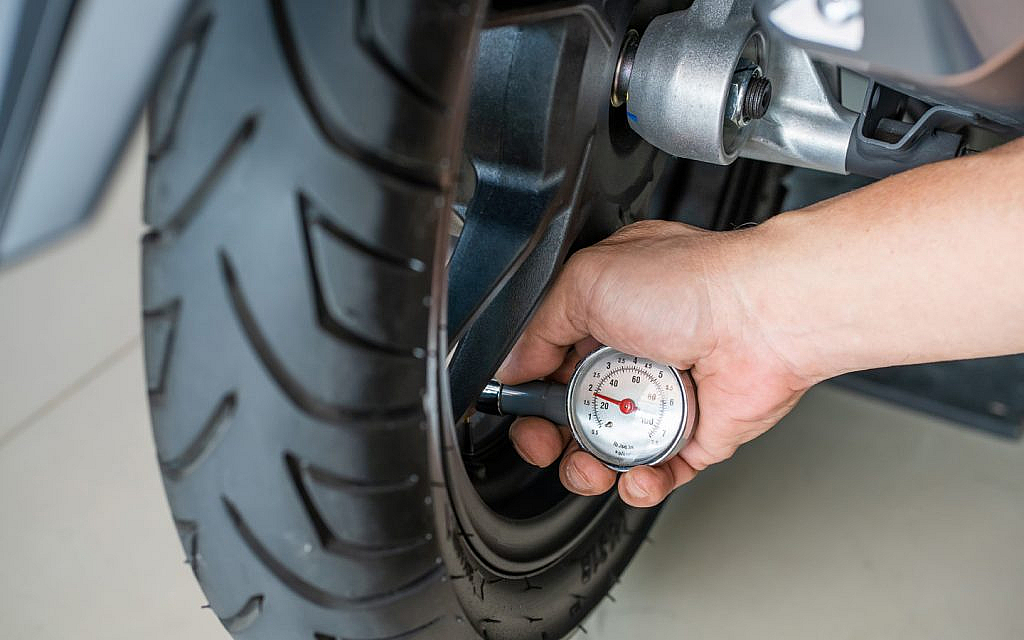 Otherwise, the motor can "land" the battery, and you will not start.
Manometer - needed for control. It is undesirable to pump over the repaired tire. It is recommended to "inflate" 0.2 atmospheres less than the nominal value. Inflating too little is also bad: a flat tire has a larger contact patch with the road, so the place of a fresh patch will deform more.
“Burning” a tubeless tube and sealing its internal cavity through a nipple are quick, simple methods that do not require special skills. To repair the damage, you only need the materials themselves, and how to pump up the wheel.
Now in Moscow, and not only, 6-5 varieties of cans with a sealant are sold - a quickly hardening "liquid rubber", with a volume of 800 to 250 ml.
Applying "Anti-Puncture" is simple: put a tube with a fitting on the nipple of the camera, turn the can over, and hold the button according to the instructions.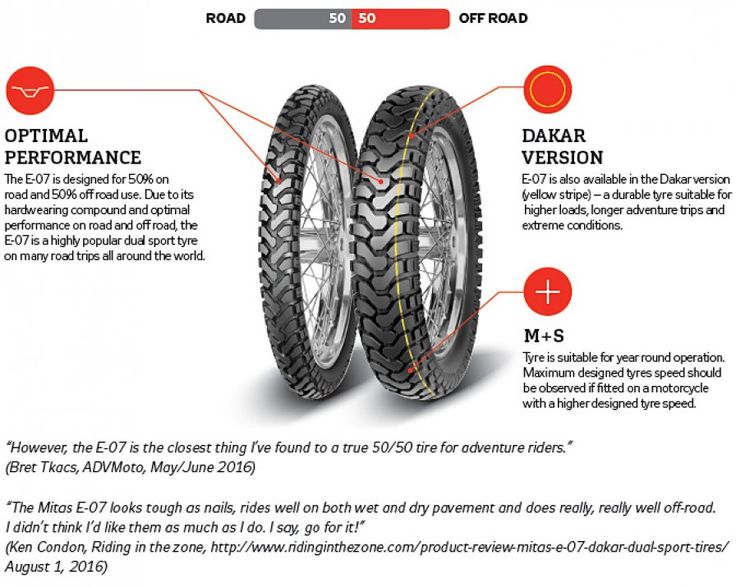 Then - pump up the wheel, cleaning the nipple from the foam, roll it, making a full turn to distribute it.
The sealant is blown out with air into the puncture hole and clogs it, solidifying. After 20 minutes - you can go. Reliability of repair is high. Resource - until the next puncture.
If you have a compressor, start immediately pumping up the wheel, so it will be easier to work with a puncture, insert a patch, and it will swell faster.
Procedure:

You can go in 5 minutes, you just need to make sure that it doesn’t descend anywhere else.
Outwardly identical, repair kits for harnessing wheels can differ in price by almost half. This variation is explained by different configurations - one will have only three items, the other - six or seven.
A complete tubeless tire repair kit contains:
Regardless of the cost, you need to choose a kit in which the harnesses will be reinforced, and the awl - with a deep spiral winding (notch), and not a “needle file”. Inserting a flagellum is sometimes easier with a regular thin screwdriver. If there is no glue in the kit, or it has dried up, the flagellum is moistened with gasoline.
At motorcycle service stations and car services, holes in the chambers are closed by hot vulcanization: a layer of raw rubber is applied to the cleaned, fat-free puncture site and, after squeezing it well, it is heated with a special “iron”. Iron - burns, layers - are fused into a single whole. Reliability of repair is high. The resource will be almost like a new one.
Cold vulcanization (patching) - used if the workshop is not equipped with a vulcanizer. In this case, the quality of the service and the reliability of the repair will depend on the accuracy of the master. For the convenience of gluing, the camera is completely removed in the service, but, I repeat, this is not necessary. It can be repaired on the spot in the same way (there are no other options except for replacing the camera), but without removing it from the motorcycle.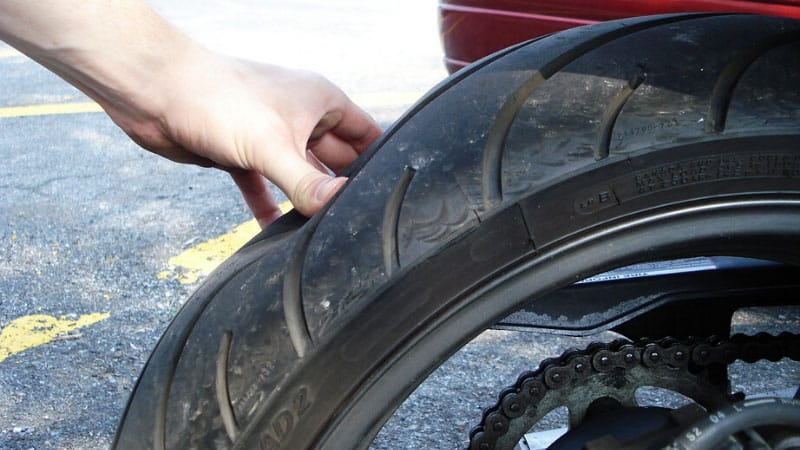
This can only be done if you have two metal mounting blades. At least one, the second can be replaced with another flat tool. You can still disassemble the wheel with a wide screwdriver and a “family” key wrapped with electrical tape. But this is only as a last resort, otherwise you can damage the cord.
Sequence of work:
 Let the glue dry for a minute.
 The fencing must be carried out twice as carefully and more slowly than dismantling, lubricate the side with water or soap, “help” more with your hands, otherwise there is a risk of picking up the edge of the chamber with a spatula and tearing it.
Important! If the wheels of the motorcycle are equipped with tow bars - before pressing the tire bead from the rim, you need to loosen this tow bar! But do not unscrew the nut completely, do not disassemble to the end.
A standard “first aid kit” (a set for repairing classic motor rubber) contains only patches and glue, so it is advisable to supplement it yourself with a piece of “skin” or a needle file. You can degrease with gasoline, or apply a little glue first and wipe off immediately, rolling up the dust with it.
Now there is no shortage of specialized motorcycle workshops not only in Moscow - in all major cities there are motorcycle helpers who help motorcyclists directly on the track, or tow to where you can quickly change the camera, or patch the tubeless correctly, so that there is no trace left. Where there is a guarantee.
Self-replacement of a tire on a motorcycle requires a certain physical condition, and for the first time - a “kilometer of nerves”. At the service station, instead of you, automation will “sweat”, which will not lock up the board and will not scratch the disc coating with a spatula. The main thing is to do it quickly (if you need to go urgently, the price sometimes does not matter).
Repair at the service - may be the only possible one if, due to driving on a flat tire, the tire nipple is turned and torn off. Especially if he flew off and got lost, but there is no spare. In mototiremontazhke - there is always a set of consumables for any wheel diameter. In the same place, in extreme cases, you can buy a new tire, or a used dokatka.
In addition to the patch, for normal operation of the wheel, balancing must be ensured. This is generally a useful procedure during any change of rubber, otherwise if there is a strong imbalance, the wheel bearing will inevitably break due to vibrations, and the hands will quickly get tired and “buzz” after long rides.
The first couple of tens of kilometers - do not drive, go at the speed of the stream.

 2/2.3
2/2.3  1
1