Honda 400EX Valve Adjustment Instructions
Time to adjust the valves on your 400EX? Interested
in doing it yourself? You have come to the right place!
Adjusting your own valves is within the capabilities
of anyone with basic mechanical knowledge. Please be
safe out there, be sure to follow all standard shop
practices (in other words, don't hurt yourself… if you
do, don't blame me!) I also highly recommend purchasing
a service manual. If you aren't completely sure that
you can do the job properly, either have a competent
friend show you, or take it to the shop and have them
do it for you. If you adjust the valves to tight (to
little clearance) then it is possible to burn a valve,
damaging the valve, and possibly the cylinder head.
You are probably wondering, "what tools do I need?".
1) metric socket's and various ratchets/extensions (I prefer 6 point sockets)
2) metric combination wrenches
3) metric allen wrenches
4) various screwdrivers (don't skimp, cheap philips screwdrivers do more harm than good!)
5) feeler gauges (make sure that the set includes both a .004 inch and .005 inch.)
6) a clean place to work, with good lighting
7) fire extinguisher, safety glasses, etc (hey, you never know)
Now that you have your tools assembled, lets get to work! Doing your own maintenance can be a very rewarding and fun part of ATVing, but remember to think safety! Before starting work I recommend thourghly cleaning the machine, and degreasing the motor.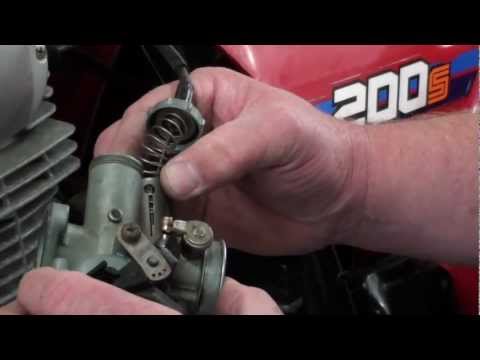 You don't want any 'stuff' falling in the motor, and a clean machine is much easier to work on.
Start by removing the rear fender seat assembly. Unhook the negative battery cable and secure it where it can't accidentally fall into contact with the battery. This will prevent the motor from accidentally starting later on. With the rear seat/fender assembly out of the way, it's time to remove front plastic. The top tank cover comes off first. Start by removing the 4 plastic push pins [figure 1]. To remove the pins, pull the center section of the pin up about ½ inch. This unlocks the pin, allowing you to remove it. Remove the gas cap, and pull the cover towards the rear of the quad then remove it. Time for the front fenders to come off. Remove the 4 10mm bolts and 2 5mm allen bolts that secure the front fender assembly [figure 2]. Then pull the fender assembly forward slightly so that you can reach and disconnect the wiring for the headlights and ignition switch [figure 3].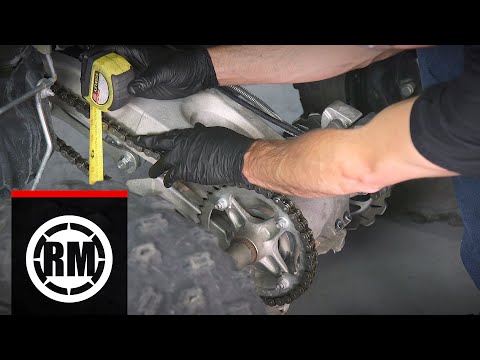
With the plastic out of the way it's time to remove the fuel tank. Turn the fuel valve off, and disconnect the fuel line from the carburetor. Put a rag underneath the line to catch the small amount of fuel that will drip out when you remove the line [figure 4]. Now remove the rubber strap on each side of the rear of the tank, and the 2 10mm bolts at the front of the tank and remove the tank from the bike.
Time to remove the fuel tank heat protector. Start by unhooking the carburetor air vent, plastic push pin for the intake snorkel (you don't have to remove the snorkel though), clutch cable from the guide, and the 2 10mm bolts [figure 5]. Now you should be able to remove the heat protector from the frame. Make sure to pay special attention to the way the cables and vent hoses are attached to the fuel tank heat protector [figure 6] so you will be able to properly reinstall them.
With a clear view of the cylinder head, it's time to get down to business.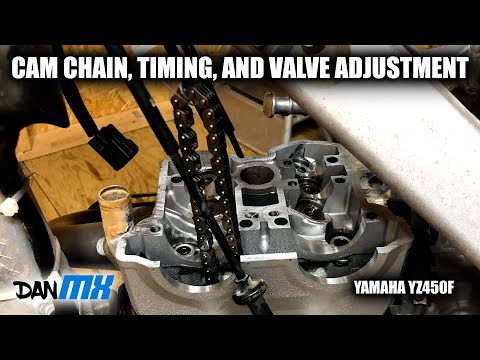 Remove the 4 valve adjustment caps from the top of the cylinder head [figure 7] and the 2 timing plugs from the left crankcase cover [figure 8]. You will need 6mm and 10mm allen wrenches to remove the timing plugs. Carefully inspect the o-rings on all the covers, if any are torn replace them to prevent oil leaks and/or crud from getting in the motor.
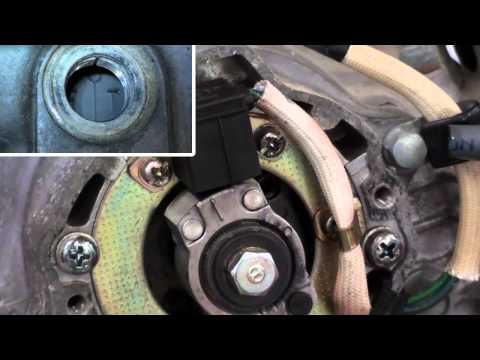
With the transmission in neutral slowly rotate the motor counter-clockwise. Use a 17mm socket on the crankshaft and rotate the engine, while watching the intake valves. (carburetor side). After the valve's start to close, slowly watch the small timing window until the mark with the T aligns with the notch [figure 9] (be careful, as there are several marks on the flywheel). After the mark with the T is aligned, there should be some play in all 4 of the rocker arms, if there isn't then continue rotating the engine until the T mark lines up again, and there is slack in all 4 rockers. This ensures that the motor is on the compression stroke.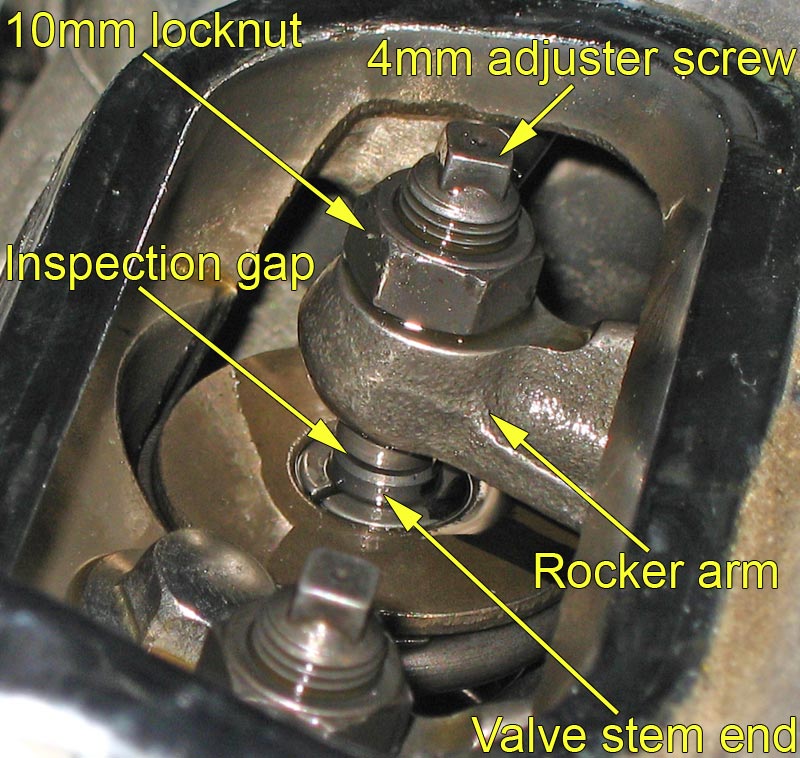 Never rotate the crankshaft clockwise, if you go past the mark, continue rotating it until the mark comes up again. The key things to remember are the T mark must be lined up, and there should be some play in all 4 of the rocker arms.
Time to adjust the clearance! Insert a feeler gauge between the rocker arm, and the sub-rocker arm [figure 10] Loosen the 10mm lock nut, and adjust the screw in or out until there is slight drag on the feeler gauge. Tighten the lock nut while holding the adjuster screw. After tightening the lock nut recheck the valve clearance to make sure the adjusting screw didn't move. The exhaust valves should have .005 inches of clearance, and the intake valves should have .004 inches of clearance.
With all 4 valves adjusted, replace the valve and timing covers, making sure that the o-rings are not torn. I usually put a small amount of oil on the o-rings so that they don't stick the next time I have to remove them. Put the rest of the machine back together by reversing the steps.
Finished? Grab a cold drink, and pat yourself on the back for a job well done!
Delivery options and delivery speeds may vary for different locations
Sign In
or enter a zip code
Email * Password *
REPAIR & HOW TO
MAINTENANCE
TROUBLESHOOTING
GUIDES
TIPS & TRICKS
ALL ARTICLES WATCH VIDEOS ABOUT US SHOP PARTS CONTACT US
Easier cold starts, better fuel economy and improved engine performance are benefits of correctly adjusting the valve clearance on a Honda ATV.
Although you don’t need any new parts to adjust the valve clearance on a Honda ATV, we recommend replacing the O-rings in the cylinder head cover. A pack or two of OEM Honda plastic rivets also may come in handy when working on a TRX. Watch the video above and follow the steps below to learn how to do a Honda TRX 400EX valve clearance adjustment.
Tools and Parts – Honda TRX 400 Valve Clearance AdjustmentStep 1. Remove the rear fender and seat by releasing the latch at the back and lifting the entire assembly off the ATV.
Step 2. Remove the fuel tank cover by pulling out the four plastic rivets holding it in place.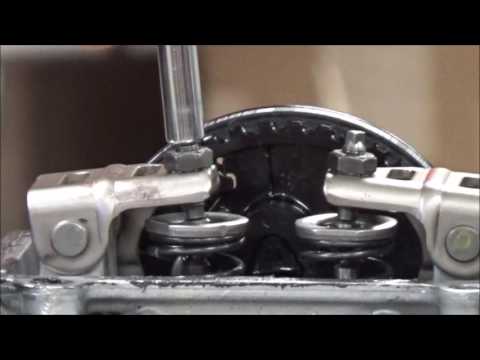
Step 3. Remove the front bodywork center section by pulling it out.
Step 4. Remove the two 10mm bolts and the plastic rivet underneath the left front fender assembly, as well as the plastic rivet on top of it and the 5mm Allen bolt behind it, and remove the assembly.
Step 5. Remove the fuel tank by taking off the two 10mm bolts at the front end, making sure the petcock is set to OFF, and disconnect the fuel hose that leads from the petcock to the carburetor. Next, lift the tank off the ATV.
Step 6. Remove the plastic tank protector beneath the fuel tank by taking off the two plastic rivets and two 10mm bolts, and pulling out the cover.
Step 7. Remove the two access plugs located in the crankcase cover. The upper plug needs a 6mm Allen and the central plug needs a 12mm Allen.
Setting the Engine to TDC and BDCThere are four valves on your Honda TRX400EX (two intake valves and two exhaust valves). The intake valves are the two behind the cylinder head, and the exhaust valves are the two in front of the cylinder head.
The valves are measured and adjusted when they’re fully open. When the engine is at top dead center (TDC), the intake valves will be open and the exhaust valves closed, and when the engine is at bottom dead center (BDC), the exhaust valves will be open and the intake valves closed.
Step 8. Rotate the engine by turning the crankcase bolt counterclockwise until the T-mark is aligned with the notch in the upper crankcase inspection hole. This indicates the engine is either at TDC or BDC.
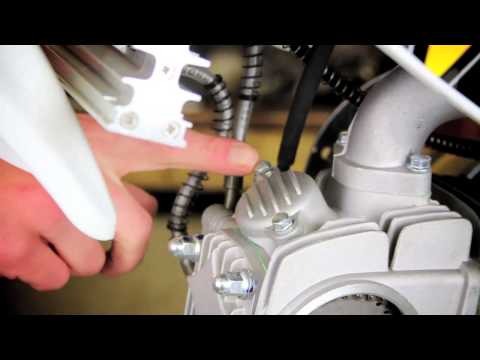
Step 9. Remove the four caps from the cylinder head cover.
NOTE: Don’t allow any contaminants in the engine. Eliminate as much dirt and debris as possible from the cylinder head cover before removing the caps.
Adjusting Honda TRX400EX Intake Valve ClearanceStep 10.![]() Check if there is any play in the intake valves. There should be a tiny amount of movement in the valves, which indicates the valves are open and the engine is at TDC. If the valves are locked solid, they’re closed and the engine is at BDC. If the engine is at BDC, bring it to TDC.
Check if there is any play in the intake valves. There should be a tiny amount of movement in the valves, which indicates the valves are open and the engine is at TDC. If the valves are locked solid, they’re closed and the engine is at BDC. If the engine is at BDC, bring it to TDC.
Step 11. Loosen the 10mm locking nut and the valve adjustment screw. Insert a 0.1mm feeler gauge into the gap between the adjuster and the valve.
Step 12. Tighten the valve adjustment screw until it begins to put tension on the feeler gauge, then tighten the locking nut while holding the adjustment screw in place. This should set the exhaust valve clearance to 0.1mm.
NOTE: It’s easy to accidentally tighten the adjustment screw as you tighten the locking nut, so check that the valve gap is still 0.1mm and readjust the gap if necessary.
Step 13. Repeat steps 11-12 on the other intake valve.
Step 14. Rotate the engine again until the T-mark is aligned in the crankcase hole to bring the engine to BDC. Check for play in the exhaust valves. If the valves are locked solid, the engine is still at TDC, so turn it until it is at BDC.
Step 15. Loosen the 10mm locking nut and valve adjustment screw, but this time use a 0.12mm feeler gauge to set the valve gap. Use the same process as you did in steps 11-12.
Step 16. Repeat Step 15 on the other exhaust valve.
Reassembling the Honda TRX400EXStep 17. Clean the cylinder head cover caps, then install a new O-ring on each and smear the O-rings with oil. Reinstall the caps back into the cylinder head cover.
NOTE: Don’t overtighten the caps and risk stripping the threads in the cylinder head cover.
Step 18.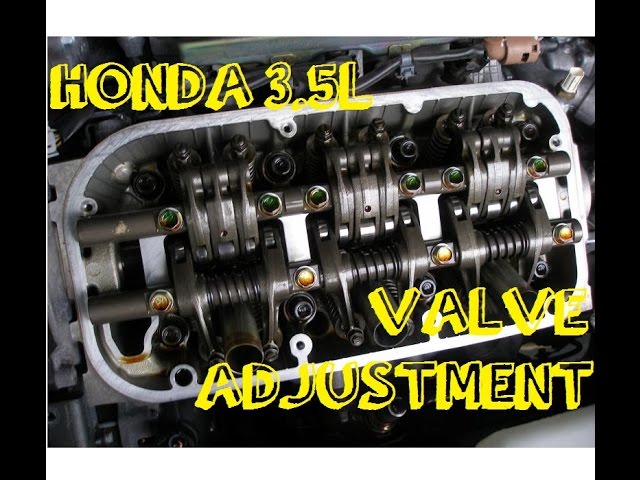 Reinstall the two access plugs back into the crankcase cover, followed by the tank protector above the cylinder head with its two plastic rivets and 10mm bolts.
Step 19. Reinstall the fuel tank by reconnecting the fuel hose to the petcock and reinstalling the two 10mm bolts.
Step 20. Reinstall the left front fender assembly with the two 10mm bolts and the plastic rivet underneath, the plastic rivet on top and the 5mm Allen bolt at the back.
Step 21. Push the front bodywork center section back into place, then reinstall the fuel tank cover with its four plastic rivets. Reinstall the rear fender and seat assembly and you're done.
body
Adjusting the valves on an ATV is one of the most important maintenance steps.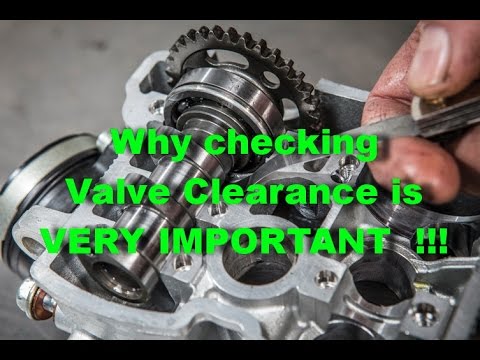 Ignoring this operation will adversely affect the operation of the engine, make it difficult to start the ATV, and even lead to a number of serious breakdowns. Therefore, it is important for the rider to figure out when it is necessary to carry out the adjustment and whether it is worth performing the procedure on their own or it is better to seek help from an ATV store in Kyiv.
Experienced motorists advise adjusting the valves on the ATV immediately after purchasing the equipment. The fact is that when assembling devices (especially Chinese ones), manufacturers do not pay due attention to this procedure. And the operation of ATVs with incorrectly adjusted clearances leads to:
The second clearance setting should preferably be done when the vehicle is running in. That is, after 300-350 km of the way, the rider should check the cylinder head.
Please note: An operation such as adjusting the valves on an ATV is considered a mandatory maintenance item and should be carried out every 1000-1500 km.
Before adjusting the valves, you need to prepare the quadric for the procedure. To do this, it is recommended to raise the front of the ATV. This will clean the cylinder head oil bath and remove excess fluid.
Then dismantle the body parts that make it difficult to get to the valves. However, it all depends on the model of the quadric, in some devices you can get to the cylinder head without removing the plastic parts and assemblies.
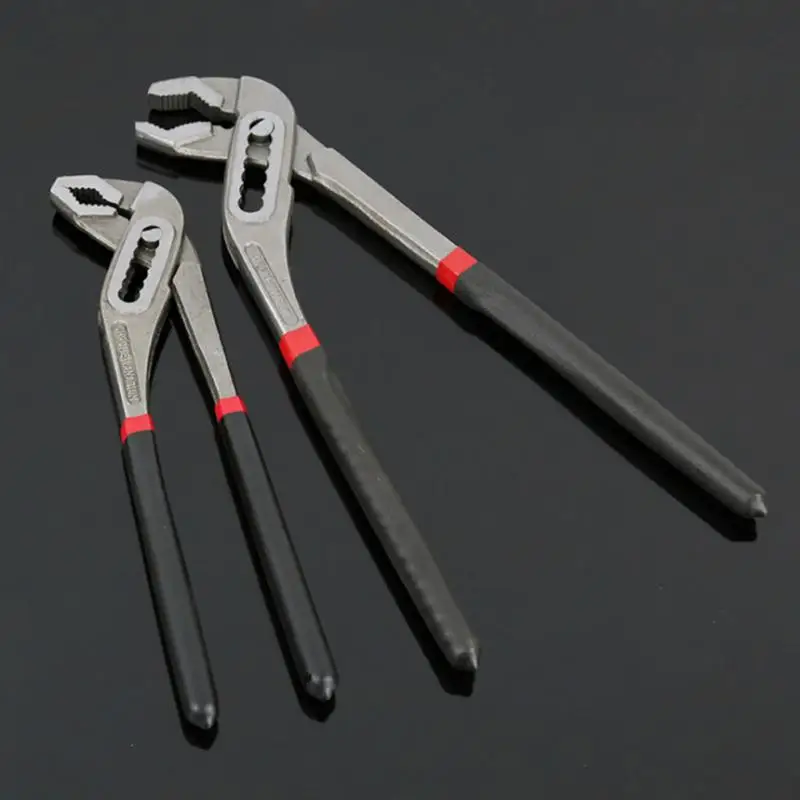
The rider also needs to prepare tools: an 8 wrench (better with a head so as not to damage the nuts), measuring probes (you can find them in any auto shop) and a hammer. nine0003
Let the machine cool down before adjusting the ATV's valves. The procedure is performed "cold", so it is better not to start the ATV before adjusting.
In fact, adjustment is a basic operation, so even a novice ATV rider can perform it. The driver only needs:
 You need to rotate the knot until the corresponding mark appears in the window.
 After making adjustments, start the ATV and observe engine operation. It is possible that at first the device will make a slight tapping sound.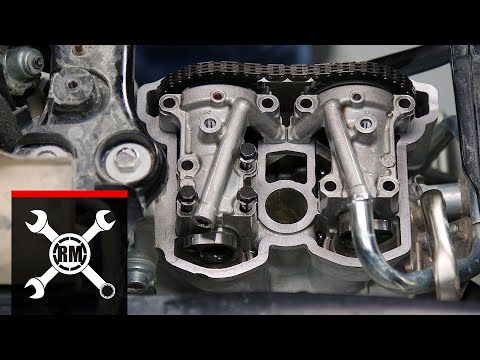 However, if the knock is strong, then the valves were not set correctly.
Important: Do not load the ATV heavily after adjustment. Carry out a mini run-in (5-10 km). Also, during the trip, listen to the sounds that the ATV engine makes. nine0028
02/19/2021 4241
Adjusting the valves on an ATV is a maintenance procedure. As a rule, the first adjustment of valves on modern ATVs is made after a run of 1000 kilometers. We recommend checking the valve clearances of the ATV and, if necessary, adjusting them after 300-350 km.
Very often, especially on Chinese-made ATVs, the gaps are set incorrectly right from the factory, also due to heating and cooling cycles, the valves can stretch and the gap will be broken, which can subsequently lead to damage to the valve plates, deterioration of the timing mechanism and even to valve burnout. nine0003
So if you're serious about engineering and want to maximize the performance of your ATV engine, don't be lazy and check the valve clearances during your first service.
How to adjust the valves on an ATV.
Before unscrewing the valve cover, we recommend lifting the front of the ATV with a winch to empty the cylinder head oil sump, this will allow you to stay a little cleaner when removing the cover and not stain the ATV parts with oil. By the way, some ATVs have special adjustment windows to avoid removing the valve cover completely. nine0003
You may need to remove the gas tank plastic lining and the gas tank to remove the valve cover.
Attention! When adjusting the ATV engine must be absolutely cold (30-35 degrees).
Next, you need to unscrew the cylinder head cover or windows (it is better to use a head, and not a ring wrench, so as not to damage the edges of the bolts). After all the bolts are unscrewed, the cover may not immediately give in, in order to move it, it is better to lightly hit the bottom edge of the cover with a hammer through a wooden block. Do not attempt to use sharp objects to avoid damaging the lugs on the lid.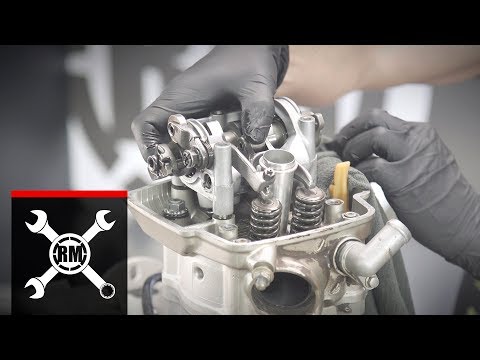 nine0003
After removing the cover, carefully remove the rest of the gasket from the cover and from the head so that they do not enter the engine.
Next, you need to set the cylinder to TDC (top dead center) of the compression stroke. If you are wondering what is top dead center, we suggest you read the article about the ATV engine and its device.
So, in order to catch the TDC, you need to unscrew the viewing window cover, unscrew the spark plug (required) and crank the crankshaft with a manual starter (kick starter) until a special mark appears in the viewing window. nine0003
Sometimes the mark is applied incorrectly and therefore it is better to check the TDC control, being safe, by checking the position of the valves. All dead center valves must be closed.
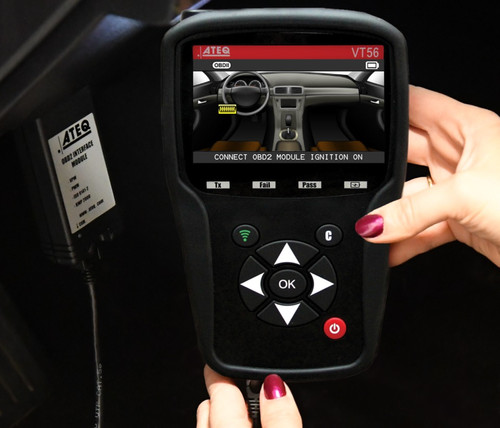
We need special feeler gauges to check the clearance. They are sold at any auto store.
Next, we need to check the valve clearance, for which the probe is inserted into the valve stem clearance.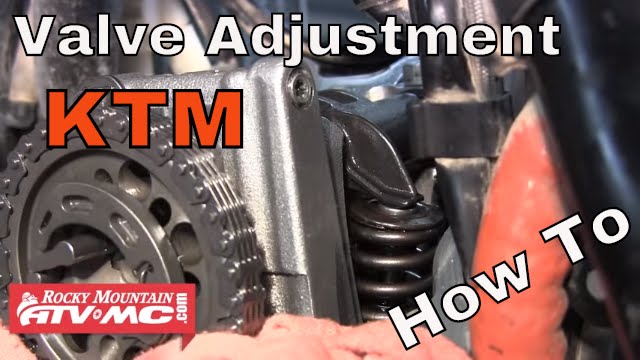
Valve clearance is different for each ATV model, and you can find its value in the manual for your ATV. nine0003
The stylus should enter the gap freely (should not cause scratching when moving in the gap), but at the same time, a 0.01 mm larger stylus should not enter the gap.
If you notice that the valve clearance on your ATV does not match the manufacturer's instructions, you need to make an adjustment.
To do this, loosen the lock nut and adjusting screw, insert a feeler gauge of the correct size into the gap, turn the adjusting screw until it contacts the feeler gauge, and fix the lock nut. Then check the gap again. nine0003
It is not necessary to tighten the nuts hard, a medium hand force on the wrench is sufficient.
After all valves have been adjusted, the cylinder head cover must be reinstalled. To do this, lubricate the tidal surface of the cover with a heat-resistant sealant with a thin even layer (it is not worth saving on it).