Engine timing is mission-critical. Getting this stuff wrong can spell big trouble. If you suspect timing is out, best not to run the motor.
Checking ATV engine camshaft and crankshaft timing marks is the correct way to verify timing. It’s a simple 4 step process:
By the end of this post, you’ll understand clearly how to check your ATV engine timing marks, why timing jumps and how to fix it, and also other causes of bad timing.
Page Contents
Timing is everything, every component of your engine has an important job to do, and some components have to do it at a very precise moment in the engine cycle. Doing their job too early or too late can make the difference between an engine on full song and no singing at all.
The bottom end of your engine (crankshaft) coordinates the top end (valve train). It employs sprockets, chains, tensioners, and guides rails to keep everything in time. The valves positioned in the cylinder head open and close sequentially, allowing fuel in and spent gases out.
The spark plug needs to fire at the correct time. Ordinarily, when the engine is idling, the plug fires when the engine is at TDC, and it signifies the beginning of the power stroke.
As the engine speeds up, though, the plug is fired earlier. Know as BTDC (Before Top Dead Center), this is because the spark plug takes time to produce a spark. Starting the process early, therefore, means the plug continues to fire at the sweet spot in the engine cycle.
The firing, advancing, and retarding of the spark plug is controlled by the trigger (aka pulse, pickup, or crankshaft sensor (CKP)) and the CDI box (Capacitor Discharge Ignition).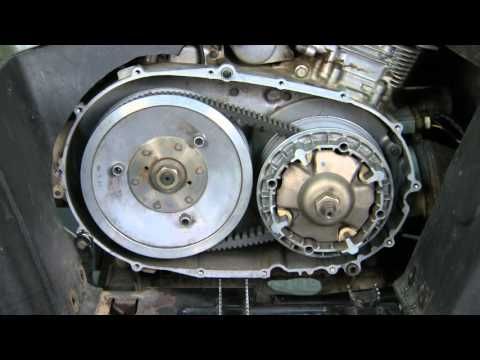
An ignition timing issue may be caused by a faulty CDI box or an incorrectly positioned pickup sensor.
Your ATV engine is a four-stroke simply because it has four clearly defined stages in its operation.
The piston moves down the cylinder and draws fuel mix in through the open intake valve.
The piston moves up the cylinder, compressing the air-fuel mix (valves closed).
Plug fires and the piston moves down the cylinder powering the crankshaft (valves closed).
The piston moves back up the cylinder forcing spent gases out the open exhaust valve.
And the cycle starts over.
There may be lots of reasons why your ATV engine doesn’t sound or operate like normal. Timing is not one of the first items checked unless it suffers from some of the following symptoms:
Don’t rule out some of the simple causes first and they include the following:
Checking your timing is a straightforward procedure, but you’ll likely need to remove a few items to gain access. This guide guesses that your engine is an Over Head Cam found in most modern ATVs. I’ve included a single and a twin-cam, your timing markings will likely be different but not to worry, from the timing diagrams below, you’ll get the picture.
The process goes like this:
 It should align with the mark on the cylinder head.
For twin-cam engines, the process is similar, with just an extra sprocket mark to line up. Typically, both sprocket marks align with the horizon plain of the cylinder head (marked as red lines below) and some sprockets may have an additional mark (not in the pic below), and typically they point straight upwards (90°).
The timing chain and valve train are all mechanical and require adjustment and maintenance for trouble-free service.
The more usual causes of jumped timing include:
Resetting the timing can be a pain in the ass, but you do need to get it correct. If the timing isn’t correct, the piston could impact the valves, causing some very expensive repairs. Your very first job is to find a manual for your engine. The process, torque specs, and tightening sequences vary from engine to engine.
Critical information and tools
You’ll need to know your timing marks, torque specs, fastener sequences, and you’ll need a torque wrench. You’ll find a list of all the tools I use here on the ATV tools page.
This guide will give you a general flavor of the job ahead.
A full inspection of the chain, sprockets, guides, and tensioner is advised. A failing tensioner is a very common cause of jumped timing, and obviously, if root causes aren’t fixed, timing will jump again and maybe with costly consequences.
You may find these posts useful:
How often to service an ATV?
ATV parts page
ATV won’t jumpstart
Air-cooled ATV white smoke
Will ATV start with a bad stator?
Delivery options and delivery speeds may vary for different locations
Sign In
or enter a zip code
Email * Password *
REPAIR & HOW TO
MAINTENANCE
TROUBLESHOOTING
GUIDES
TIPS & TRICKS
ALL ARTICLES WATCH VIDEOS ABOUT US SHOP PARTS CONTACT US
If the timing chain on a Honda ATV slips a tooth or is incorrectly laid over the timing sprocket during an engine rebuild, you have to reset the cam timing.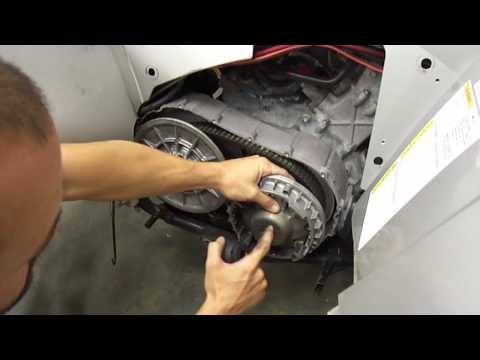
Watch the video above and follow the steps below to learn how to set the cam timing on a Honda TRX400EX.
NOTE: To access the timing cam, you’re going to have to do a bit of disassembling first.
Honda TRX400EX DisassemblyStep 1. Remove the seat, plastics, fuel tank, and the engine cover beneath the fuel tank.
Step 2. Remove the air intake, and the top motor mount bolt and the pair of spacers that secure the cylinder head cover.
Step 3. Remove the cylinder head cover from the top of the motor to expose the timing cam and timing belt.
Watch the video below to see how to disassemble a Honda TRX 400.
Honda TRX400EX Setting the Cam TimingStep 4.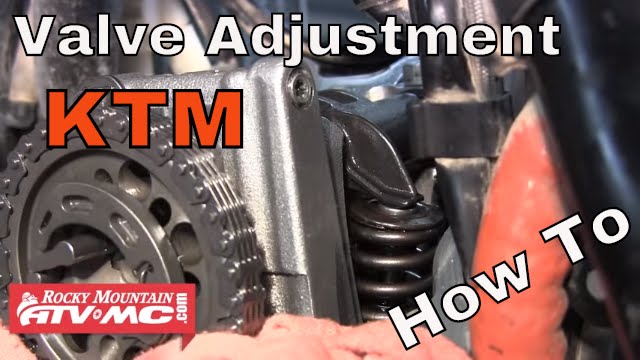 Remove the crankshaft cover and the camshaft inspection cover, located on the left side of the crankcase in the flywheel cover.
Step 5. Rotate the crankshaft counterclockwise until the T mark on the flywheel lines up with the mark on the inspection hole. The motor is now at top dead center or bottom dead center (TDC or BDC). It needs to be at TDC, so look at the camshaft lobes and if they’re facing down, the motor is at TDC, or at BDC if they’re facing up. Continue rotating the crankshaft until the T mark lines up in the inspection window again
Step 6. Once the motor is at TDC, look for the two marks on the cam timing sprocket. The two marks should be aligned with the face of the cylinder head for the timing to be correctly set.
Step 7. If the marks are not level with the cylinder head, you'll need to reset the TRX400EX’s cam timing. To do this, remove the two bolts holding the camshaft.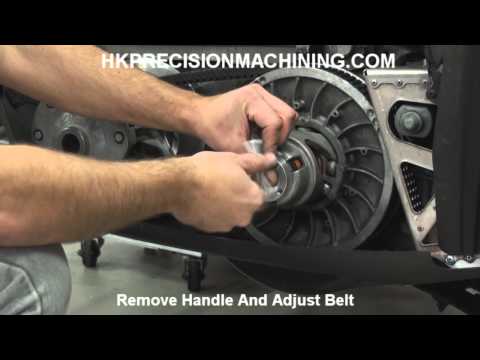 Lift the timing chain off the timing sprocket, then the timing sprocket off the cam and rotate it so the two marks align with the cylinder head. Replace the timing sprocket back on the cam and the timing chain back over the sprocket.
Step 8. Reinstall the two camshaft bolts and rotate the crankshaft counterclockwise until the engine reaches TDC again and the T mark on the flywheel is centered in the inspection hole. Check that the two marks on the cam timing sprocket are correctly aligned and if they aren’t, repeat Step 7.
Honda TRX400EX ReassemblyStep 9. Reinstall the cylinder head cover onto the motor.
NOTE: Use a new cylinder head cover gasket when reinstalling the cover.
Step 10. Reinstall the top motor mount bolt and spacers, air intake, engine cover beneath the fuel tank, the fuel tank, plastics and the seat and you’re done.
body
8(495) 128-15-13
Here's a quick look at Arctic Cat's top 10 innovations for the 2019 model year.
The ALPHA ONE system sets new standards in the mountain snowmobile niche.
By far the loudest new feature for 2019 is the ALPHA ONE rear suspension and mountain snowmobile track system.
System design uses a single rail centered on the unique Power Claw track.
ALPHA ONE differs from the usual two-rail systems in flexibility, which allows the track to easily take the form of snow.
Arctic Cat engineers set themselves three main goals during the development of the ALPHA ONE system:

The ALPHA ONE system successfully achieved all three goals. The maneuverability is simply amazing. Riding on mountain slopes has become much easier for both beginners and professional riders.
Stability and traction are also much better thanks to the flexible track system. The ALPHA ONE track adapts to the terrain much better and faster than traditional mountain snowmobile tracks.
In terms of weight, the ALPHA ONE is 2 kg lighter than a conventional harness of the same length. At the same time, the caterpillar became 3 kg lighter.
This is a really cool system that mountain snowmobilers will appreciate. ALPHA ONE will be available on M 8000 snowmobiles with track lengths of 154 and 165 inches.
Arctic Cat and FOX showed first hand what simple, quick adjustment means when they partnered to supply snowmobile QS3 shocks a few years ago.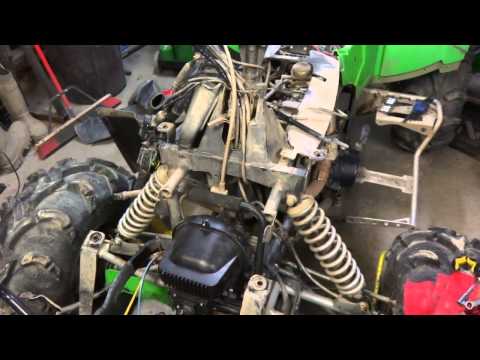 Gone are the days when you had to have a lot of tools to make adjustments. The QS3 shocks are equipped with an easy and simple three-position adjustment system.
However, this is no longer enough. We want to make suspension tuning even easier!
Meet the latest iACT system, which allows you to adjust the stiffness of the suspension on the go. To do this, you need to use the button located on the left handlebar. The rider has the option to choose between soft, medium and hard settings.
Just one click is enough to optimize your suspension for different riding conditions.
New adjustment system will be available for ZR 6000, 7000, 8000 and 9 sport snowmobiles000 2019 model year.
The trend towards "do it all" snowmobiles gets stronger with each new model year. Arctic Cat is adding X versions for the Norseman 6000 and 8000 snowmobiles for the 2019 lineup. They will feature mountain handlebars, articulated rear suspension, ProUte skis with adjustable spacing (90. 17 - 105.41 cm), heavy duty track system with 153- inch Power Claw track, Arctic Cat IFP shocks and Deluxe digital instrument cluster.
This snowmobile blurs the lines between utility, mountain and even sports equipment. It is unlikely that Norseman is a bestseller, but it will definitely make its owners completely satisfied with the purchase.
2019 Arctic Cat snowmobiles get new handlebar controls that are much easier to use while riding. Improved ergonomics and excellent readability of the digital instrument panel will definitely please riders.
A new push-to-start button that mirrors the design of the reverse button will allow owners of 6000 and 8000 snowmobiles with electric start to keep both hands on the steering wheel while starting the engine. The heating system switch now provides more controllability and also prevents accidental changes in the heating level.
The throttle trigger has become smaller and has acquired a convenient shape.
The
M 8000 Hardcore Mountain Snowmobile will now be available in North America. Previously, they were supplied only for European countries. "Hardcore" is designed specifically for jumping and aggressive riding in mountainous terrain. These models are equipped with FOX ZERO QS3 and QSL shocks for maximum energy efficiency and tuning flexibility. The M 8000 Hardcore snowmobiles are available in 153" and 162" tracks.
The new brake system starts with a shorter brake lever. More braking force with less force applied to the lever. The main brake cylinder has become more secure and reliable.
One of last model year's bestsellers, the Arctic Cat ZR 200 returns for 2019 with electric start.
TheZR 200 ES will be available in signature green and purple.
The updated bodywork will now be available on virtually all 2019 3000 and 7000 snowmobiles.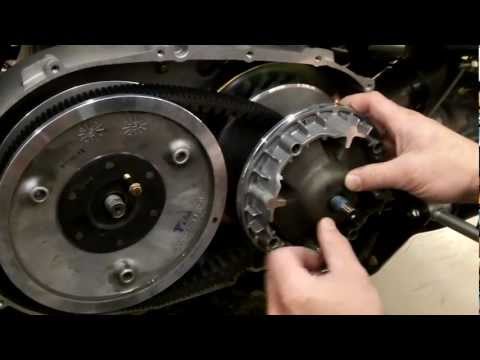 Quick release side panels and hood, improved air vents and an ergonomic design for the rider's knees.
Engineers have redesigned the ProClimb skis. Now they provide better balance in deep snow and easy handling.
Arctic Cat has equipped the 2019 models with an impressive number of small changes. These details may not deserve a separate heading, but they will definitely make 2019 snowmobiles better.
ZR and Cross Country models received a 9-tooth drive wheel for smoother torque transmission. The ECM reconfiguration resulted in improved performance for the 6000, 7000 and 8000 models. New handlebar grips and carefully hidden wires made the handlebar look aesthetically pleasing. On many models. The mighty Thundercat received inch Ripsaw lugs and skis with a single skid, which made it possible to achieve an increase in maximum speed by 3-5 km / h.
Overall, Arctic Cat has introduced some really cool improvements for the 2019 model year.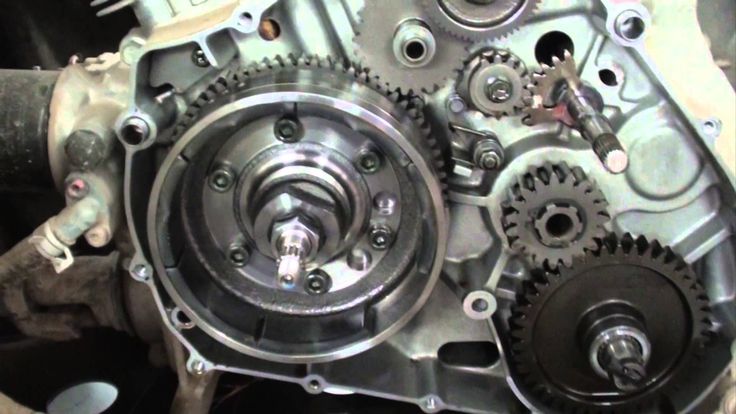 We will follow all the innovations of Arctic Cat and keep you informed.
We will show and tell you in detail how to correctly adjust the snowmobile track and, of course, we will recommend top products for efficient operation and maximum engine protection.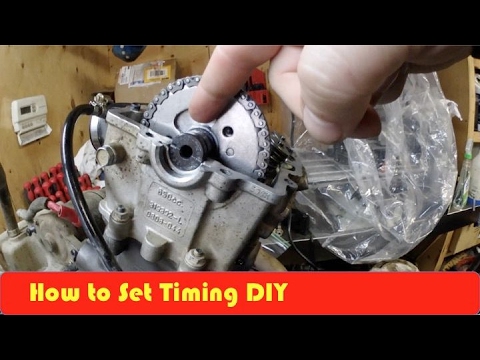
The dead of winter - it's time to talk about snowmobiles!
Many people ask, “How do I properly adjust a snowmobile track?” Today we will show and tell you how it is done, in all details.
And finally, AMSOIL's top snowmobile products:
AMSOIL INTERCEPTOR® Synthetic 2-Stroke Oil. Two-stroke snowmobile engines operate under heavy loads. Start-stop, wide-open throttle all day, aggressive driving all take their toll on the engine. INTERCEPTOR Synthetic 2-Stroke Oil is a 2-Stroke Oil specifically formulated to provide maximum performance and use in snowmobile engines including Ski-Doo, Polaris and Arctic Cat, helping consumers enjoy more riding and less time spent on service. . The product is compatible with almost all other two-stroke oils, while the low smoke and odorlessness ensure the safety of the health of drivers.
AMSOIL Formula 4-Stroke Power Sports Synthetic Motor Oil is a synthetic motor oil specially formulated for use in ATVs, snowmobiles, ATVs and more.