When you purchase through links on our site, we may earn a commission at no additional cost to you. Learn More
It’s not uncommon that valve stems start leaking only after a few years in use due to dirt, corrosion, road salt, or degraded rubber. Luckily, they are relatively cheap and easy to replace at home.
The same basic principles displayed in this guide apply to most tubeless tires, whether on an ATV, car, lawnmower, or snowblower.
A tire shop may charge around $20 to $30 to change a valve stem. If you do the job yourself, it will cost about 5$, depending on what tools you choose and have at your disposal.
I’ve made this guide for those that wish to do the job at home to save a few bucks or don’t have a tire shop nearby. We’ll be looking at two different methods; one where the wheel needs to come of the room, and a second, where the valve can be replaced with the tire still on the rim, using a specialist tool.
You can replace a valve stem with the tools most people already have in their garage. However, to make the job easier, faster, and safer, we recommend that you get a couple of cheap tire tools as well, available at most auto supply stores
Valve stems come in a range of sizes. They vary in diameter and length, depending on the size and style of wheel you have.
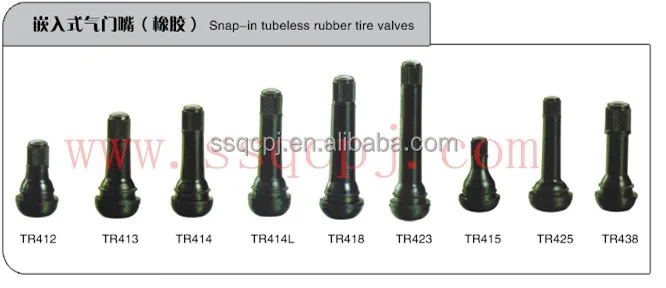
A design-number is used to categorize the various types and sizes of valves available.
Let’s use the most common valve for ATVs as an example: TR-412.
| Industry Valve Number | Maximum Inflation Pressure (PSI) | Effective Length (in) | Rim Hole Diameter (in) |
| 412 | 65 | 0.88 | 0. 453
453 |
| 413 | 65 | 1.25 | 0.453 |
| 414 | 65 | 1.50 | 0.453 |
| 415 | 65 | 1.75 | 0.453 |
| 418 | 65 | 2.00 | 0.453 |
| 423 | 65 | 2.50 | 0.453 |
| 415 | 65 | 1.25 | 0.625 |
| 425 | 65 | 2.00 | 0.625 |
You will find the design number of your old valve stem stamped on the bottom of the stem. This does, however, require removing the valve stem or removing the tire from the rim.
TR412 valve stem.Alternatively, you can measure the old stem and compare your findings with the table above.
You can move straight to step 2 if you already know how to remove the wheel from the vehicle safely.

Remove the valve cap, then use a valve stem core removal tool to unscrew the valve stem core from the valve stem. This will release the air from the wheel.
Remove the valve stem core, using a valve stem core tool.If you don’t have a valve stem removal tool at hand, you should be able to unscrew the core with a pair of small needle-nose pliers. Just place the pliers on the flat portion of the core, and turn anti-clockwise. In a pinch, you could even use a pair of tweezers, as long as they fit.
Next, you need to break the tire bead from the rim.
I tend to use my portable tire changer, but there are several ways you can de-bead a tire. Click here to find a list of alternatives for home mechanics to choose from.
After successfully de-beading the tire, place your knee or a wood block between the rim and the tire for easy access to the bottom portion of the valve stem.
You only have to de-bead the side of the wheel that has the valve stem in it. I removed the tire from the wheel completely to take better photos for this post, but this is unnecessary.
To remove the old stem, you have two options.
You can use a sharp knife to cut it, either on the outside or inside the rim. Cut as close to the rim as possible without scratching the rim itself.
Use a razor blade to cut the old valve stem flush with the inside of the rim.After cutting, you should be able to pop out the remaining piece of the stem easily.
Alternatively, you could use a pair of vice grips to pull the plug out from the inside of the tire. Use this method if you plan on reusing the valve stem.
Spray some soapy water on both the outside and inside of the rim as lubrication. Place the grips over the stem’s thick portion and use leverage to pull the plug out. You may need to reposition the tool several times for better grip until you get the core out.
Before installing the new valve stem, you need to lube the rubber portion to slip into place much more effortless.
Use dish soap, some vegetable oil, or spray the new valve with a generous amount of soapy water.
Notice: Do not use any petroleum-based products such as oil or grease as it will degrade the rubber over time.
Lube the valve stem with dish soap.Insert the valve stem through the hole from the inside of the rim. Make sure the hole is clean and free of debris. The threaded part should protrude on the outside of the rim.
To pull the plug in place, you will need a valve stem pull tool. You can find them at most auto supply stores at an affordable price.
These tools come in a variety of shapes, but all work with the same basic principle.
The threaded portion of the tool mounts to the valve stem core’s threads to get a good grip.
Attach the valve stem tool to the threaded portion of the valve stem.Do not use pliers to pull the valve stem, as this will likely damage the soft copper threads.
Use the tool to pull the valve stem straight out from the wheel until the small rubber groove on the valve stem pops in place.
This tool uses leverage to pull the valve stem out through the rim.As an alternative, you can use a simple 4-way valve tool to pull the valve stem in place. Make sure the valve is properly seated.
The tire is seated back on the rim by using compressed air. This will press the tire outwards until it pops over the tire bead and rests against the rim’s lip.
Lube the tire and tire bead with soapy water. This allows you to seat the tire without using excess pressure, which could blow out the tire’s side.
The trick to succeeding is by adequately closing the gap between the rubber and the rim as you start adding air.
On softer and smaller tires, you should be able to close the gap manually. However, on tires with stiffer sidewalls, you may not be able to create a tight enough seal to build up pressure.
I prefer using the ratchet strap trick as this works great most of the time.
Using a ratchet strap when seating the tire will helpforcing the tire sidewalls outward.Use a ratchet strap to press the tire walls out against the rim. Attach the strap as shown in the picture and tighten it until the tire touches the rim.
With the valve stem core removed, add air until the bead pops in place. Never exceed 7-8 PSI with the strap attached.
As soon as the tire has seated, deflate the tire, remove the strap and install the valve stem core before inflating the tire according to spec.
You are now done and can install the tire back on the vehicle.
The hardest part of replacing a valve stem from the inside is getting the tire off the rim.
If you don’t have the tools or don’t feel comfortable with the idea of de-beading a tire, consider getting a valve changing tool kit designed to replace a valve stem from the outside, like this one from Amazon.
It can be a bit fiddly to get the hook past the old valve stem. Use plenty of soapy water as a lube, and be careful not to damage or scratch the rim as this could cause a leak.
Inflatable tire valve stems are one of the characteristics of a wheel that enables you to maintain proper tire inflation by adding or removing air as required. However, different factors will influence the tire valve stem to loosen, or worse, produce a leak. The good news you can tighten a loose tire valve stem with common tools and techniques.
To tighten the tire valve stem, begin with a clockwise rotation of the valve stem to the greatest extent feasible, screw up the valve stem with the valve stem tool to finish the tightening operation. Remember not to overdo it as this might result in damage to the valve.
It is possible for the valve stem to become loose and produce a leak in the tire. Some of the reasons for valves to leak include exposure to chemicals on the road, impact from bumps and potholes, corrosion from moisture, and aging.
When a valve stem is exposed to the sun for an extended period of time, the rubber components of the stem might dry out and fracture, causing the valve to fail. Failure to tighten might have catastrophic repercussions since a valve is crucial to the performance of a tire as well as the safety of the vehicle on the road.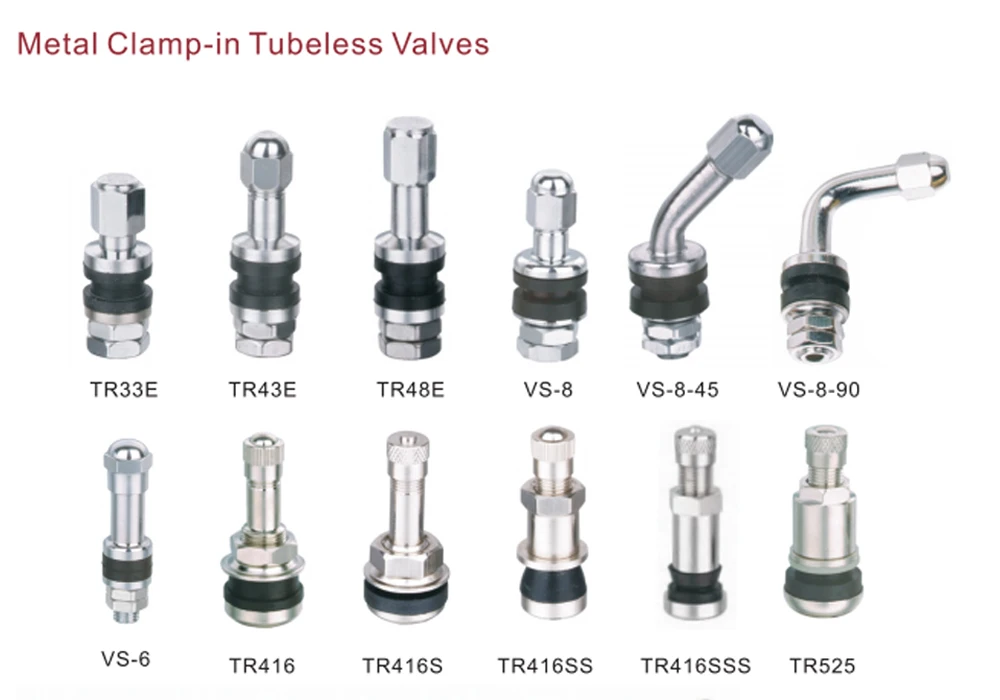 It is just as vital as installing and maintaining your vehicle’s equipment to ensure that it is properly tightened.
Because of the internal workings of your valve stems, the air is allowed to enter and remain in your tires. To inflate your tires, you just set the air pump on top of the valve stem’s tip and turn the handle. The valve on the inside is opened to allow air to flow in. Then, when you turn off the pump, the valve shuts and remains sealed due to the pressure or a spring that is in place.
How Can You Tell If Your Valve System Needs Tightening?Rubbing a water-dish soap mixture over the uncapped valve stem with your finger is the easiest way to see if it’s leaking. If air is escaping, bubbles will appear, indicating that the valve is leaking. There is no leakage on the tire if no bubbles form.
What Is The Proper Tightness For a Valve Stem?Not only may valve-stem nuts be overtightened, but so can valve cores if the valve is overtightened. A valve core that has been subjected to excessive torque will be damaged, and a leak will result. Valve cores should be tightened to a torque of between 2 and 5 inch-pounds, which is practically hand-tight in nature.
When you have the main tool required, which is a tire valve stem tool, tightening your valve stem is a simple procedure. The tightening technique is as follows:
Step 1: RemoveTo get access to the valve stem, you must first remove the plastic valve stem cap from the valve.
Step 2: TightenTo tighten the valve stem, use your fingers to crank it clockwise as far as it will go or until it feels tight.
Hold the valve stem in place as you turn the valve tool clockwise onto the top of the valve stem; this will assist you in attaching the valve tool to the valve stem more securely and effectively.
Step 4: Continuous TurningUntil the stem is tight, continue turning the valve tool clockwise.
To remove the tool from the stem when you are done, hold the valve stem and turn the valve tool counterclockwise.
Cause of Tire Valve BreakageIn the case that moisture enters the valve stem and freezes, it might result in air loss and/or a flat tire. As the rubber components of the valve stem age and dry out, they may fracture, resulting in air leakage or even complete air loss.
Fixing a Leaking Tire Valve StemAside from a loosened valve stem, air leakage may occur even when the valve stem is well secured, which can be a source of concern.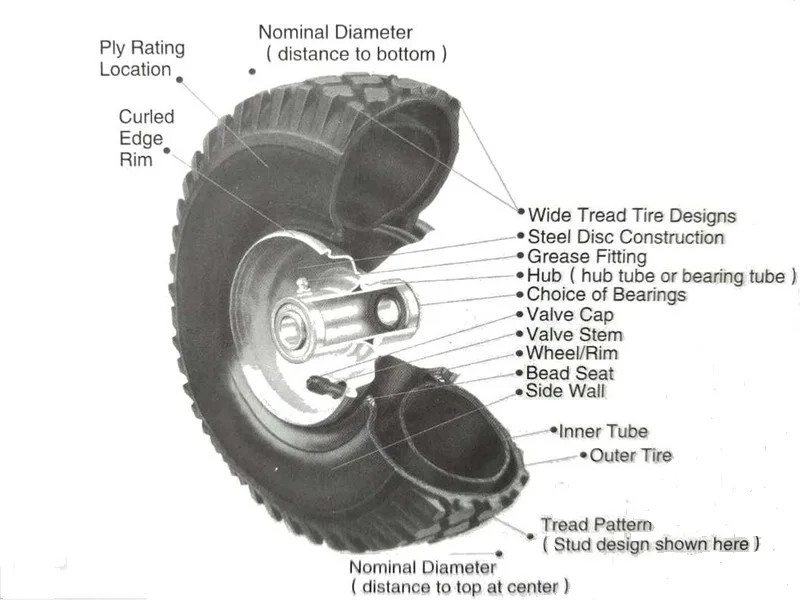 And if this occurs, you will be required to replace the valve in question.
Going to the tire shop for replacement or repair may be more expensive, but doing it yourself with a few simple instruments like a core removal tool and a replacement valve tool core will be more convenient and will save you money in the long run.
The following are the measures to take while changing a valve stem:
Step 1: Perform a DiagnosisFirst and foremost, determine if the leak was caused by a valve issue rather than a separate puncture.
Step 2: Deflate the tireDeflating the tire and removing any leftover air before beginning with the valve repair is critical because the pressure may cause the valve core to eject at a high enough speed to cause injury.
Step 3: Remove the Valve CoreRemove the core from the valve using the valve core tool. There are four separate ends, each of which serves a different function, and a forked end is required for the removal and installation of the valve core.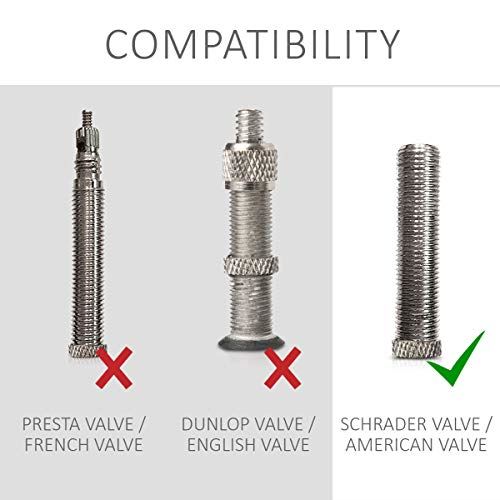 Put pressure on the forked end of the tool to remove the core as you spin the tool counterclockwise. Insert the forked end into the valve. Clean the interior of the valve using the tapered end of the tool that is adjacent to it.
Always remember to clean out the valve of any dirt or debris.
Step 4: Install a New Valve Core and Inflate the TireInsert the new core into the valve, and using the forked end of the valve core tool, screw the core into place, turning it clockwise. Make sure that the core is not excessively tight since this might cause damage to the new valve core.
Step 5: Replace the Stem CapReplace the cap on the tire once it has been inflated and check the pressure. Even though it does not directly contribute to the tire’s ability to retain air, it is critical that you replace the caps once you have inflated the tire.
The valve’s inside is protected by the covers from debris and corrosion caused by moisture and chemicals carried in by the road, which can cause leaks.
New tires are given with brand new valve stems. As a result of exposure to road chemicals and impact from bumps and potholes, as well as corrosion caused by moisture, valve stems may get damaged over time and with ongoing usage. In addition, prolonged exposure to the sun may cause the rubber components of valve stems to dry out and break, resulting in a leak.
It goes without saying that a broken or worn-out valve stem will not function properly, causing air to slowly but steadily seep out of the valve. Also, leaks may occur anywhere along the valve stem, such as at the place where the valve contacts the tire.
Choosing the Right Valve StemInflation pressures and higher speed limits make a selection of the proper valve stem extremely important.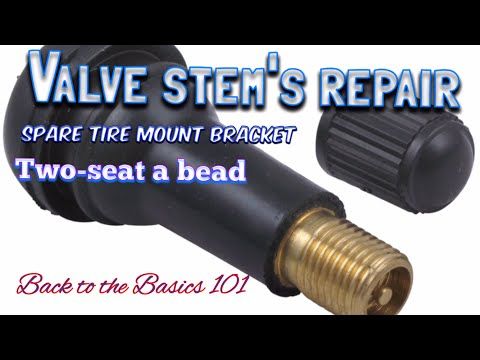 Most of the complaints involve light-duty trucks with TR413 or TR415 series snap-in valve stems. Many of these tires are now categorized as medium or even heavy-duty truck and bus tires. But because of their load-carrying capacity, some tires are still produced in sizes we formerly considered light truck tires.
The stem hole in these tires’ wheels is sometimes the same size as a passenger vehicle’s valve stem hole. The TR413 and TR415 valve stems were intended to handle up to 60 psi (4.1 bars). They are now rated at 65 psi (4.5 bars). Many outdated catalogs still grade the TR413 and TR415 valve stems at 60 psi maximum. One of the most common issues with the TR413 and TR415 series valve stems is that they run hotter than usual due to hot weather or other comparable conditions. Valves may break, blow out of the rim hole, or get unseated.
Replace it with a TR600HP or TR801HP high-pressure snap-in valve stem. Valve stems rated at 100 psi (6. 9 bars). A 200 psi clamp-in metal valve stem is also an option (13.8 bars). The TR600HP and TR602HP valve stems have .453-inch stem holes whereas the TR801HP and TR802HP stems have.625-inch stem holes. TR413 valve stems are for wheels with a maximum stem hole thickness of.156 inches, while the TR600HP high-pressure valve stem series is for wheels with a maximum stem hole thickness of.205 inches.
The TR602HP, TR801HP, and TR802HP valve series share this tolerance. A metal clamp-in valve stem must be used when the rim thickness at the stem hole is larger than .205 inches. In this case, the wheel might be thicker if the hole is larger. However, use the specified stem provided for the wheel’s stem hole thickness.
Making Use of ExtensionsWith the TR600HP and TR801HP series snap-in valve stems, metal stem extensions should never be utilized with the valve stems. The additional weight of the extension may cause the stem to shatter or crack, resulting in the stem being dislodged and air being lost.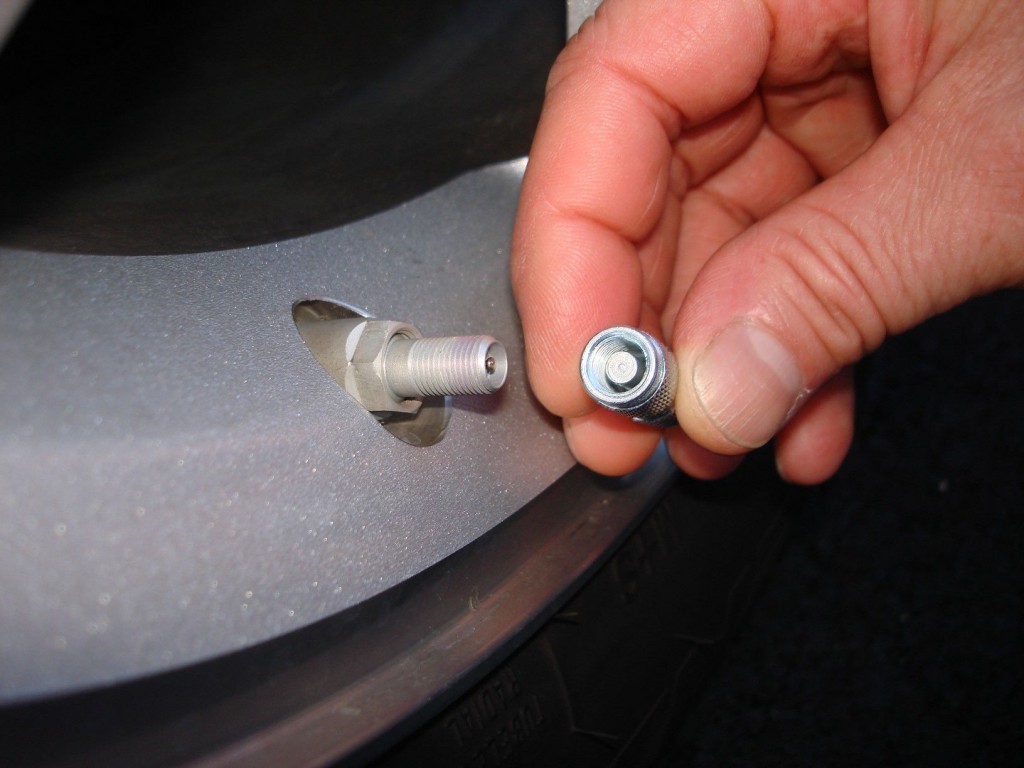 Metal extensions should only be used with metal clamp-in valves, and they should not be any longer than is absolutely required.
The TR416S is one of the most common clamp-in valve stems for wheels with a.453-inch stem hole, and it is available in a variety of sizes. It is possible that this valve stem will survive a long time since both the sealing grommet and the valve core may be changed if they get damaged or worn out during normal operation. When installing the clamp-in valve, extreme caution should be used since each one has a distinctly required torque for tightening the nut.
Check Hole SpecificationsNever assume the stem on the tire/wheel assembly is the correct stem. There may not be enough coined or machined area around a.453-inch stem hole. The coined area must be at least.125 inches larger than the valve hole.
Watch For ZippersZippers are harmful on all tires, not only on long-haul medium truck tires. A sidewall fracture in a tiny light truck tire can be as hazardous as a bigger truck tire. Underinflated steel cord tires are always prone to zipper failure.
Despite the fact that a broken valve stem is a minor component of a tire, it may cause significant problems. It’s possible to adjust the tightness and looseness of a tire stem valve, but it’s best to do it on a frequent basis to avoid damaging it. When you remove your tire from your vehicle, you should do it carefully.
Can you repair a valve stem?Repairing the valve stem using a valve stem tool and a few other basic tools may be done by the car owner if the valve stem is leaking. In order to get started, all you will need is a valve core tool and a package of replacement valve cores (both inexpensive). Use a valve core tool to carefully remove the old core and screw in the new core (be careful not to strip the threads), then fill the tire with air until it’s fully inflated.
When the tire is completely inflated, drip a combination of dishwashing liquid and water over the valve stem, around its base, as well as around the inner edge of the wheel where the tire and rim meet, to see if you can pinpoint the source of the issue. Any escaping air will cause bubbles to form in the soapy water around the leak’s location.
What causes a tire valve stem to go bad?Valve stem damage – New tires typically come with new valve stems, because the old ones tend to wear out. If you have older valve stems, they may go bad over time, due to use, dislocation, and exposure to chemicals on the road, such as road salt.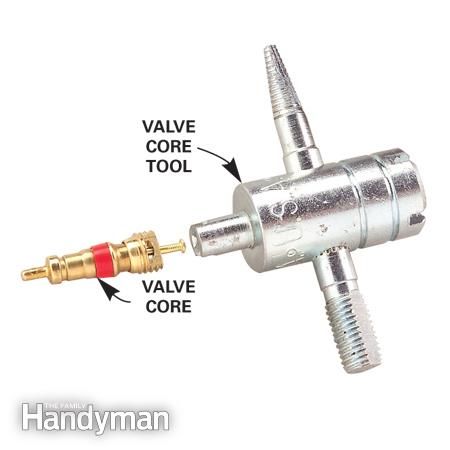 They may corrode and go bad.
If possible, take the tire to a tire shop and have them remove the tire and replace the valve stem using a tire machine. This is the quickest method for replacing a valve stem in most circumstances. However, in the event that this is not a possibility, a tire may be removed and the valve stem replaced by hand in certain cases.
How do you change a valve stem on a tire core?Insert a valve stem removal tool or a slotted metal valve cap into the valve stem removal hole and screw counterclockwise until the valve stem removal tool or slotted metal valve cap is removed. Remove the core of the valve stem and set it aside. Replace the valve stem core with a new one and tighten it clockwise until the valve is fully closed. Then inflate the tires.
A ‘no-name’ valve stem may seem to fit and function well today, but how long will it last? Time and temperature influence the material’s lifespan. Reliable valve stem brands have a long service life and can go well with the tires’ life span, lasting up to six, eight, or even ten years.
When the tire valve stem becomes loose over time, it may result in gradual leaks that are difficult to detect. How to tighten a loose valve is a simple procedure that takes nothing more than a valve stem tool and your fingers to accomplish.
The procedure of tightening a slack valve stem, or replacing a valve core, is affordable, fast, and simple, and it may be completed by the car owner at their convenience and leisure.
Depending on the type of soil, the pressure in the tires of a car, motorcycle or bicycle has to be varied in order to get the maximum flotation from the vehicle. But if in the case of a car, what to let down, what to pump up a tire is not difficult (I inserted the compressor into the cigarette lighter and just “business”), then in the context of “two-wheeled friends”, the problem is more acute.
Dmitry Zlenko
Many bikes come with compact hand pumps. It seems that you know as well as I do that while you “breathe” one and a half or two atmospheres into the tire with such a “magic wand”, you will get tired so that you don’t want to go anywhere. And here, you understand, the second wheel is in line! And the degree of reliability of this kind of plastic compressors leaves much to be desired: then some part will fall off, then the stem will bend, then the check valve will stick. In a single season on my bike, I scrap a couple of these "hand trainers." Yes, and an eight-year-old son without the help of adults is not able to pump up a wheel on his “friend” with such a device.
Eh, to combine the ease of use of a car compressor with the compactness of a hand-held bicycle pump ... And while I was dreaming about this miracle, the well-known to all motorists manufacturer of electric compressors Berkut has already created such a “device”! Imagine, it looks like an ordinary bicycle pump, except that it is packed in an aluminum case and does not have a handle, which traditionally has to be pulled up and down.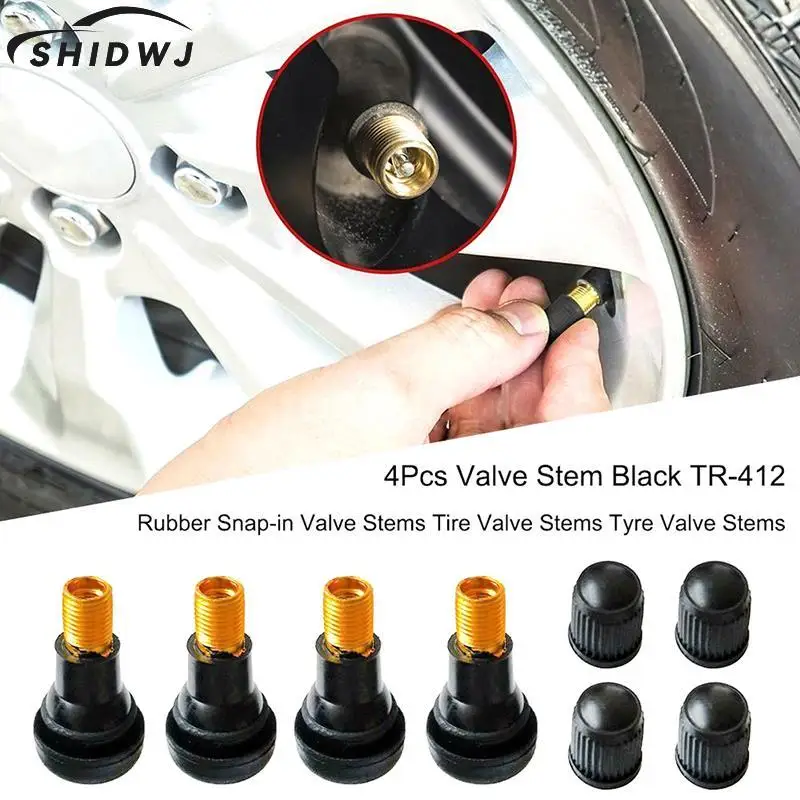 From one end of the Berkut Specialist VL-1000 there is a hole for screwing a small hose, and from the other end there are two buttons and a connector for recharging the pump from a 220 Volt network. On both ends of the pump, everything is closed with dust and moisture protective rubber plugs.
There is a mechanical pressure gauge on the hose, thanks to which you can determine the degree of inflation of the bicycle tires by touch, but what is called with the help of a precise instrument. At the end of the hose there is a fitting for a wheel valve (in the common people "nipple"). In fact, there are two fittings, one is screwed onto the other: this design allows the compressor to be used to inflate tires with “nipples” of different standards.
The Berkut Specialist VL-1000 is turned on and off with the help of a large red button, which, as we said earlier, is located on the end of the pump. Nearby there is a smaller button - it is responsible for the operation of the LED flashlight.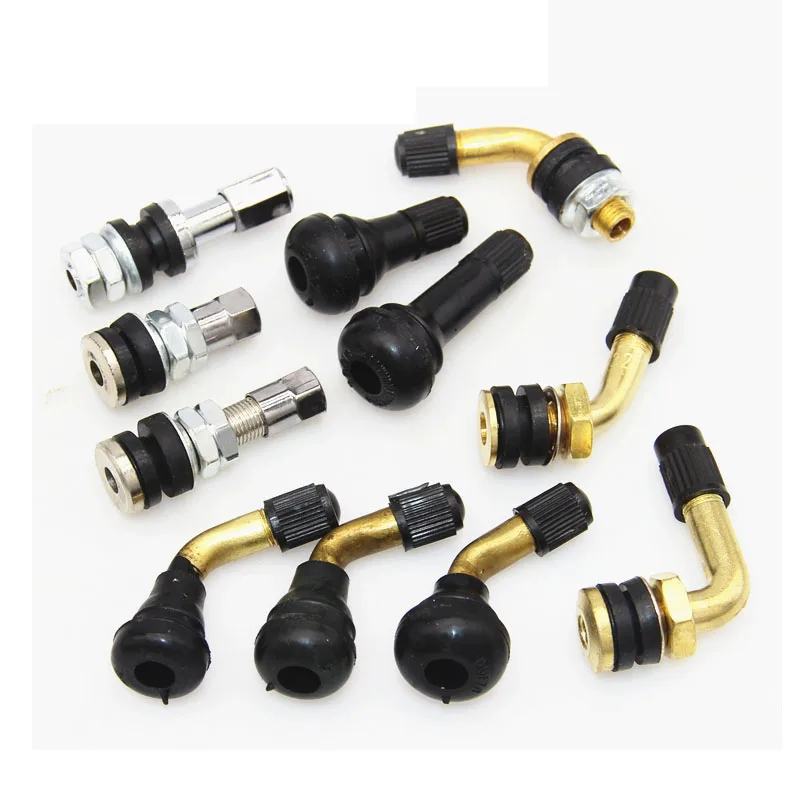 Why does a compressor need a flashlight? Well, don't tell me... If the need for pumping up the wheel arose after sunset, the built-in LEDs will help you quickly find the "nipple" and screw the fitting onto it. And to find in the dark the same cap from the nipple or some other “lost thing” with a flashlight is much easier than without it.
Does Berkut Specialist quickly inflate a 27-inch bicycle tire? Almost instantly. This accumulator compressor inflated a deflated bicycle tire to the rims to two “points” in 13 seconds! The instructions for this "gadget" say that it is not recommended to inflate more than two wheels up to 28 inches at a time, as this can lead to overheating of the pump. And if the wheels are of a larger diameter, then you need to take a break after "swindling" each wheel. Well, I don’t know, having pumped up two “twenty-seventh” wheels in a matter of seconds, the pump was still cool outside temperature. By the way, you can use the pump in the temperature range from minus 10 to plus 45 Celsius.
If we continue the topic of the technical characteristics of the Berkut Specialist VL-1000, it should be noted that in one minute the pump is able to pump up to 10 liters of air from the atmosphere into the tire, and the maximum pressure given out by the device is as much as 8 bar!
Although the Berkut Specialist VL-1000 is positioned as a bicycle compressor, we decided to check whether it can become a friend for motorcycle tires. A pit bike wheel is about the same diameter as a bike tire, but due to its higher profile and wider width, it requires a significant amount of air. But our test subject in some 34 seconds stuffed the rear tire of a pit bike up to two atmospheres. It took ten seconds more to inflate the front tire from 0 to 2 units (the fact is that the front wheel is one and a half times larger than the rear).
It can be said unequivocally that this battery bike compressor is the ideal solution not only for "pedal horses", but also for motorcycles or scooters. Indeed, in the end, on two-wheeled vehicles there is no 12-volt outlet into which an electric car compressor could be inserted, and if we talk about pit bikes, then many of them do not have not only a “cigarette lighter”, but even a battery. Naturally, this pump will be a great help in everyday life: pumping up the same soccer ball or inflating tires in a baby stroller with the Berkut Specialist VL-1000 is as easy as shelling pears.
Subscribe to the Autovzglyad channel:
off -road, spare parts, accessories, bikes, motorcycles
• Manometer;
• Technical specifications for the motorcycle and its tires;
• Motorcycle hand tire pump or air compressor (compressed air units are available at some gas stations).
The pressure gauge must measure pressure within the appropriate range and in the appropriate units that you can work with (in Europe it's bar, in North America it's pounds per square inch (PSI)). Many professional pressure gauges are capable of measuring in both units. Slider type gauges with a sliding plastic stem are relatively inexpensive, but they are capable of making fairly accurate measurements.
The correct tire pressure for a particular motorcycle will be indicated in its Owner's Manual. If it is not at hand, then this question can be checked with a mechanic, read the specification on the side of the tire of the selected brand, or call the dealership where you bought the motorcycle.
A manual motorcycle tire pump does a great job when you need to inflate air and is much cheaper than an air compressor. In addition, it is easy to carry and does not require electricity. A tire pump is an essential part of a motorcycle tool kit. Of course, if necessary, you can use the pumps at gas stations, but always double-check the pressure with your own pressure gauge.
Tip:
Be sure to use your own pressure gauge to check the pressure level after filling the tires with air. Service station pump gauges are considered relatively inaccurate measuring devices. Also, your pressure gauge should be the only one that will be used to ensure correct readings. Each measuring device is unique in its own way.
Over-inflated tires will wear out prematurely, damaging both the tread itself and the tire rim. Excessively high pressure can also reduce traction.
• Locate the valve stem on the inner surface of the wheel rim. For convenience, it may be necessary to roll the motorcycle back and forth until the valve stem is easily accessible. Sometimes the valve stem has a cap (which protects the valve from dirt, debris, and damage). In order to remove it, you need to unscrew it by turning it counterclockwise.
• After removing the cap, the end of the valve will be visible. Make sure it is clean and then install a pressure gauge on the end of the valve, carefully aligning it before pressing on the valve stem.
• First check that the pressure gauge has been reset to zero or that the dipstick has been returned to its original position. If a hissing noise is heard or air is felt to come out, this means that the pressure gauge is not set correctly and the measurement results will be incorrect.
• Remove pressure gauge and try again. If no air leakage sounds are heard, the pressure gauge is correctly attached. Most pressure gauges retain their readings after they are removed from the valve. If a slider gauge is used, be careful not to move the end of the gauge before reading the measured pressure.
• By knowing the air pressure level in the tire, it can be adjusted accordingly to achieve the desired value. When pumping air, it's always easy to pump too much in and then bleed to get the pressure you need. However, it is worth adding air little by little, and then you need to check again until the correct pressure is ensured in the tires.
• If excess air is to be removed, the pin in the center of the valve stem can be pressed with a fingernail, or often at the opposite end, gauges have a small angled tip for this purpose. Once the pressure is at the desired level, replace the valve stem cap.
Checking the tire pressure on the rear wheel is a bit tricky due to the chain and rear brake discs. If the motorcycle is equipped with a center rack, then it will be very useful for this task.
Repeat the above process for the rear tire. When finished, screw the cap back onto the cleaned valve stem.
Look for the following: tread depth, signs of uneven wear or undulations, signs of aging such as small cracks in ruts, and any signs of puncture damage. If you find something like a nail or screw in your tire, but the tire is still holding pressure, don't remove it until you've taken the motorcycle to the nearest service station. If you remove a foreign object from the tire, it can immediately release all the air.