I found many ways to align your front and rear motorcycle wheels, which of course also aligns your chain sprockets assuming the motorcyle is constructed properly from the factory.
I tried the long straightedge method (one guy used long flourescent light tubes), the string method (SportRyder's Wheel Alignment Method), and the chain alignment tool method (see the MotionPro . The first two methods are an incredible pain in the rear, and with the third (alignment tool) it's too difficult to determine visually when the chain is truly aligned. Furthermore, the string and straightedge methods simply aren't practical on my bike -- and others -- because either the side stand or the center stand get in the way.
Then I had a small epiphany regarding the axles on the V-Strom, which like those on most other motorcycles are hollow. I googled my idea and at found at least one guy who also thought of it and made a tool for it: Quality Machine Company, Inc. - Savannah Georgia
But you don't need a tool. Just find two rods about 2 feet long that fit as tightly as possible into the front and rear axle holes (they can actually be a looser fit, but a tight fit makes it easier for a one-person alignment job since it won't wiggle as much). Get your bike as vertical as possible (like on a center stand or swingarm stand) and run the rods through the axle holes, leaving a foot or so sticking out on each side.
Now get your front wheel as straight as possible with respect to the bike frame. I used a piece of index card taped to the center of the top surface of the triple clamp, and drew a "pointer" line on the card that, when the bars were moved, would point the center of the triple clamp directly toward the center of the dash panel (between the odometer/clock adjustment buttons).
When the front wheel is pointing straight ahead, use a tape measure placed near the outer end of the rods to measure the distance from one rod to the other. When they're the same, your wheels are aligned. You're actually measuring the parallelism of the front and rear axles, but if the front wheel is in fact aligned with the long axis of the bike frame it's the same thing as measuring the alignment of the front and rear wheels.
The beautiful thing about this method is not just the simplicity, but the accuracy. Because the rod extends about a foot from the center of the wheel, any tiny misalignment of the rear wheel is magnified at the measurement point, allowing much greater accuracy compared to the string or straightedge methods. The chain alignment tool method doesn't even come close.
Save Share
JavaScript is disabled. For a better experience, please enable JavaScript in your browser before proceeding.
1 - 20 of 31 Posts
1 - 20 of 31 Posts
 Please consider creating a new thread.
Top
Published: 30 October 2009 Updated: 19 November 2014
1 of 1
Checking the wheel alignment on a bike is a really useful skill, especially when you’re out there looking to buy a new machine and you want to make sure the frame isn’t bent and the forks are still straight.
The first thing you need is a straight edge and an eight foot fluorescent tube will give you that.
Next, clamp your straight edge against the front tyre, then very gently move the steering until the straight edge is touching the front edge of the rear tyre and measure the distance between the straight edge and the rear of the tyre, it’ll probably be about 10mm.
Now repeat the process on the other side and use the chain tensioners to set the gap so it’s equal.
Don’t use the chain adjustor marks to align the wheels. Instead, use this method, then turn the adjustment bolts equal turns, maybe a flat at a time to get the chain tension right.
Once the wheels are aligned, crouch down at the back of the bike and look down the chain run, if it’s out, then there’s something wrong with the chassis.
Further reading:
Motorcycle FAQ
If the wheels are out of line it could indicate a twisted chassis
If the wheels are out of line it could indicate a twisted chassis
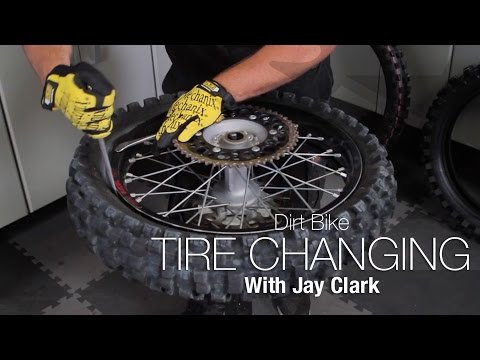
Greetings to all motorcyclists who at least once got into the pits of our "beautiful" roads and then wondered how to straighten the deformed wheel of their motorcycle. After the wheel hits the pit at speed, the rim is deformed (curved). Either the radial runout of the rim (“egg”) or the axial runout of the rim (“eight”) appears. In this article, we will try to figure out how to get rid of both deformations and consider the sequence of actions when aligning a spoked wheel. nine0003
In the article we will consider the repair of spoked wheels, not cast ones. With cast wheels, everything is quite simple: a LITTLE curved alloy rim is fixed through an adapter washer (turned specifically for your hub) on a special machine, and rolled between the rollers of the machine several times until it becomes even. It was not in vain that I singled out the word A LOT of a curve, since if a light alloy rim is severely deformed, then there is no point in repairing it, especially if you are a fan of fast speeds. nine0003
And if your light alloy rim is severely deformed upon impact, and even more so burst, then do not listen to what they tell you in the wheel repair shop, which are now full, and that allegedly any curved or cracked light alloy rim can be repaired - that's it that's bullshit. A severely deformed or cracked rim is better to hand over to the "colormet". Why so cruel? You will find the answer here in this article, which I strongly advise everyone to read, especially lovers of speeds over 200.
Alignment of deformed wheels and curvature tolerances. nine0010
In general, the wheel can become crooked not only from falling into a pit (from a blow), but also from an incorrect (uneven) tightening of the spokes by beginner repairmen. And for the runout of the wheel rim, there are acceptable standards.
For spoked wheels of domestic road motorcycles, crossovers, enduros and choppers, these allowable standards are not as strict as for alloy wheels of sportbikes (since the speed on such motorcycles is less) and the tolerances are up to 1. 2 - 2 mm for the radial runout of the rim ( "egg") and up to 3 mm for axial runout ("eight"). But still, when aligning the rim, the master should always strive for the ideal (zero runout). nine0003
For light-alloy wheels of road and sports motorcycles, the tolerance requirements are more stringent, since the speeds and revolutions are close to those of an aircraft. For light alloy wheels of modern road builders, the allowable runout, in both planes, should not exceed 0.5 mm. And for light alloy wheels of sportbikes, the runout (both axial and radial) should not exceed 0.2 mm. Knowing these tolerances, when repairing, you need to strive to achieve them, and at best go to zero.
On spoked wheels, the runout (curvature) of the rim that exceeds the permissible limits is eliminated by moving the rim relative to the wheel hub, by successively lengthening and shortening the required groups of spokes. But exactly what necessary groups of knitting needles, we will consider in more detail below. nine0003
Rim radial runout - oval or egg.
Rim runout is checked and corrected first. Before checking, the wheel axle and the wheel itself are fixed in a special rack, which is easy to make by welding two profile pipes or two channels to some kind of table (see photos 1 and 2).
You also need to turn the axle for the wheels, and in order for this axle to become universal (suitable for all wheels), you need to turn out two cones for this axle, which will abut against the bearings of the wheel being checked and clamped on the axle with screws (see photo 2). You can read more about the manufacture of such a device, which is also suitable for static balancing of motorcycle wheels, in this article. nine0003
But you can just clamp the wheel axle from your motorcycle in a vise (by turning it 90 degrees) and then put the wheel, bushing on the axle (you can use a piece of tube that is suitable in length so that the wheel does not walk) and tighten the axle nut. Next, the nose of the indicator stand is brought to the wheel rim in two planes and it is checked how much the wheel is curved, scrolling the rim and watching the arrow deflection.
Next, instead of the hour indicator, ordinary chalk is fixed in the rack (using a homemade clamp), which will draw a section of the rim that protrudes more than others when checking. When checking radial runout, a chalk mark on the rim may appear either in one area or in two diametrically opposite (opposite) areas. nine0003
If the chalk mark appears on only one area of the rim, this means that the wheel hub is not in the center of the rim. Well, if, when the wheel is scrolled, the chalk draws a trace on two opposite sections, this means that the rim has deformed and become oval (or egg-shaped).
Before starting work (or rather a couple of hours before work), I advise you to spill all the heads (nipples) of the spokes, or rather their thread, with some kind of penetrating liquid, such as WD-40, but you can also use brake fluid. This will make the spoke heads spin much easier, especially if they are corroded. I do not recommend using an ordinary open-end wrench when scrolling the spokes, since there is a high probability of crumpling the edges of the spoke nipples, especially if they are not new and their thread is slightly rusty. nine0003
You will need to make a spoke wrench that will grip all four sides of the head, not two. Such a key is not difficult to make from a 12, 13 or 14 head from a tool kit. There is a square in the head, which is only suitable for the spokes of small displacement motorcycles. But for thicker spoke heads (larger bikes), the square inside the head will need to be widened with a needle file, turning all four edges a little (check with your bike's specific spoke). nine0003
When you achieve with the help of a needle file that the square of the head will fit snugly on the square of the head of the knitting needle, you will need to make a cut in the head with the grinder's disk, such a width that the knitting needle can freely pass into this cut.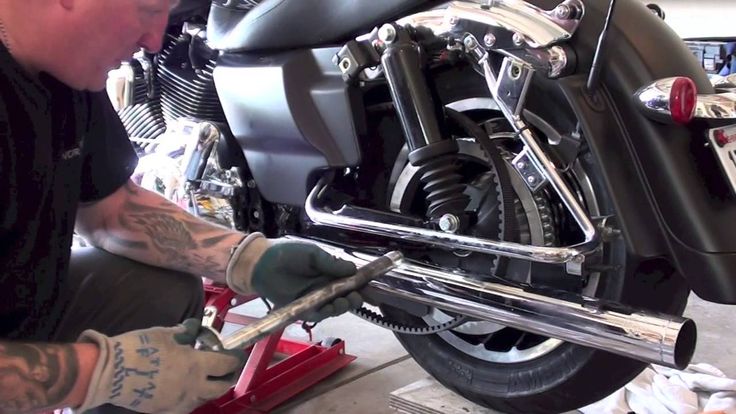 The cut will allow you to put the key (square) on the spoke head on the wheel. Now all that remains is to weld some kind of rod to the head with a square, and the key is ready.
Using this wrench, I was able to unscrew even very rusty spokes, and the edges of the spoke nipple always remained intact. nine0003
Alignment process . To return the hub to the center of the wheel (rim), you must first loosen the tension of the spokes on that half of the rim that does not have a trace of chalk. Moreover, it is necessary to loosen the spokes more strongly in the middle of the section of that half of the rim, which does not have a trace of chalk. And the spokes that are not in the middle weaken less and less. That is, the farther from the middle, the weaker each spoke is weakened. It turns out that the half of the rim, which does not have a trace of chalk, will gradually move away from the hub. nine0003
And that part of the rim that sticks out (convex), that is, with a trace of chalk, on the contrary, will approach the hub. And in this part of the rim (marked with chalk), on the contrary, you need to tighten the spokes. And in the middle of the convex section of the spokes, we tighten the spokes more strongly, and as we move away from the middle of the convexity of the rim (marked in chalk), the spokes are pulled weaker (the farther each spoke is from the middle, the weaker we pull it).
You can count the turns for accuracy, for example, in the center of the bulge you will make 4-5 turns of the knitting needle, and each next knitting needle (in a row), distant from the center of the bulge (on each side), will be stretched a quarter of a turn less. The next knitting needle, farthest from the center of the bulge (on each side), will already be stretched less by two-quarters of a turn, and so on. Of course, this account is rather conditional and the number of revolutions of each spoke depends on the length and height of the bulge (that is, the amount of deformation), but everything will come with experience and it is better for beginners to do everything a little bit, slowly. nine0003
The main thing to understand is that the tension of the spokes by twisting their nipples should only be done until, due to the movement of the hub towards the center of the wheel, the diametrically opposite spokes (which were loosened by you) are tensioned. And further tension of the spokes, without additional weakening of the opposite spokes, should not be done in any case, as this will lead to damage to the spokes or damage (licking) of their nipples.
And after each step of loosening and tightening the opposite spokes, you should re-check the runout of the wheel with a chalk or an indicator (suddenly the rim is even). This will allow you to accurately observe the process of returning the hub to the center of the wheel, or aligning the rim, and will not allow you to overtighten the hub in the opposite direction. nine0003
Rim ovality (or “egg”) is corrected by loosening the spokes where the chalk left no marks and tightening the spokes where the chalk left marks. And here, too, those knitting needles that are located in the very middle (top) of the convex section are stretched the most, and other knitting needles are stretched less as they move away from the top of the bulge.
To accurately check radial runout, before and after alignment of the rim, a chalk or indicator is applied both outside and inside the rim (closer to the spoke holes), so that during the check, the chalk or indicator may not get into a local dent on the edge of the rim, (which happens from hitting a stone or the edge of a pit). nine0003
Axial runout of the rim ("eight").
Everyone knows that the spokes of the wheel move in turn to one side of the hub, then to the other. And the rim with the “eight” can also bulge (be convex) to one side or the other. Naturally, on the side where the rim sticks out more, when the wheel is scrolled, the chalk will leave a mark. And on this side of the rim, where the chalk left a trace, those spokes that also go to the same side of the hub - weaken. Moreover, the pair of spokes that is located where the chalk left the most distinct mark (the top of the bulge) is weakened more, and the subsequent spokes, on the same side of the hub, are weakened less. nine0003
On the same section of the rim (where there is a distinct trace of chalk), the spokes that go to the other side of the hub are tightened on the contrary. And if the previously loosened spokes are tightened before the axial runout of the rim is completely eliminated, then these spokes are loosened again. That is, when aligning the axial runout of the rim, it is impossible to tighten the spokes of one side of the wheel (hub), without first loosening the spokes alternating with them on the rim, going to the other side of the hub.
After the final elimination of rim runout, both radial and axial, and repeated checks with a dial indicator, all spokes are evenly tightened. The uniformity of the tension can be checked by sound (like the strings of a guitar), that is, all the knitting needles, when tapped on them with a key, should sound the same as possible. nine0003
Check after wheel alignment, just in case.
To be completely sure that when installing the wheel on the motorcycle and test driving, the spokes will not loosen and the wheel will not bend again, the following should be done. It is necessary to lay the wheel rim on two opposite wooden beams, and then stand with all your weight on the wheel hub, first on one side, and then turning the wheel over, stand on the other side of the hub. After that, the wheel is again checked with chalk or an indicator to see if there is a runout of the rim, and the uniformity of the tension of all the spokes is also checked by sound. nine0003
If everything is in order, then all you have to do is to grind off the threaded part (flush with the nipple) of those spokes that protrude from the nipple towards the tire (which is not installed yet).
Well, what to do if the edge of the rim is bent due to impact or careless handling of the mount (during tire replacement). Here you have to rest the inner part of the rim against a wooden stump, and putting a wooden or textolite block on the protruding part of the rim flange, strike with a sledgehammer. In some cases, a large vise (vise jaws with aluminum spacers) or a hydraulic press can be used to even out the curvature of the rim edge. nine0003
Only here the main thing is not to overdo it with effort and do everything a little bit, since the press force is several tons. In any case, under the bent part of the rim, a textolite support is placed on the reverse side, and only after that we press. Otherwise, you will push not only the bent section, but also the adjacent (smooth) one.
That seems to be all the wisdom of straightening wheels, at least those that I know. After all, with the help of the methods of work described above, I managed to restore more than one wheel and save them from a landfill. And I hope this article will help many motorcycle owners to straighten the deformed wheel of your motorcycle, and subsequently enjoy the speed, because only on perfectly even wheels, you can accelerate to decent speeds without consequences; success to everyone. nine0003
Tags: How to straighten the "egg" or oval on the rim of a motorcycle wheel., How to align the "eight" on the rim of a motorcycle wheel?
This is not a guide to winning the Dakar race, nor is it a collection of tips on how to overtake KMS in motocross with road tires. However, quite a few motorcyclists are humiliated by a sandy road or an embankment due to lack of training or skill. We are not talking about asphalt with a thin layer of sand, but about the situation when you pulled off the main road and suddenly found yourself on an area completely consisting of sand. nine0003
On the sand you have no stability. Everything floats under the wheels, the rear tire slips and digs in while the front wheel burrows or blows to the side. The sand is too mobile, does not give the necessary grip, which is why the probability of falling is so high.
An additional negative factor is the confusion of the pilot, who, without the practice of sandy rides, panics when the motorcycle tries to escape from his hands. The sand is too sensitive to sudden maneuvers. If you manage to keep your balance and not fall in motion, then when you stop, it will be more problematic to move from a place due to digging in. Motorcycles loaded on a trip sag great when stopped on the sand, which creates certain inconveniences. nine0003
If you have the opportunity to prepare for a sandy ride, the first step is to lower the tire pressure. The average value fluctuates around 0.3 bar, on which you lower the pressure from the norm. It is not necessary to reduce the pressure in both wheels, but it is important to reduce it at least on the rear wheel, since its grip with the surface is much more noticeable at the moment. Endurists also resort to lowering the pressure in the wheels when passing through muddy areas for the same reasons. nine0003
For those who like to blow up sand dunes, there is a special rubber. But even if you don't prepare for the ride so totally (or the sandy route is a random short misunderstanding) pay attention to the tread of your motorcycle. It will not be sweet at all on highway tires to drive on the sand, so maybe choose a different route altogether? The tire tread will tell you how the bike will behave in the sand, which means you will have an idea of what you are dealing with.
You have jumped off a good road onto a sandy one. The first thing you need to do is either stand up on the footrests, or what is used more often - sit as far from the tank as possible, closer to the rear suspension.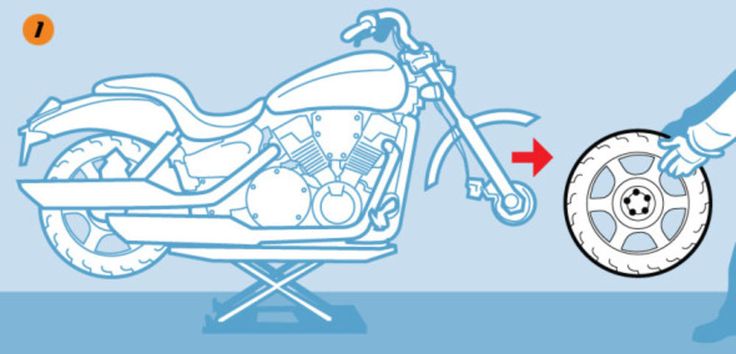 Guess why this is needed? When you shift your own weight, you load the rear of the motorcycle and unload the front. As a result, your motorcycle becomes more stable, and most importantly, it stops digging in with the front wheel!
Long rides in sand are physically exhausting as you have to put effort into holding the bike and stabilizing it. Sand does not forgive mistakes, as well as high-speed driving. nine0003
Usually, when someone asks about riding on sand dunes, the experienced ones brush it off:
- Throttle, don't be afraid and get on!
The point of stepping on the gas is not to overshoot the rear section, but simply to unload the front suspension. With the extra speed you get stability, and at low RPM you are more likely to get bogged down (if the sand is dry). By the way, if you did stop and sat on the sand, then you don’t need to step on the gas. The rear tire will dig in instantly. It will be difficult to start off the sandy road, so if you feel that you can’t cope, reach at least a less solid area, the path is bald patches of grass or just wet sand (wet sand is harder and more elastic, it will be easier to start off it than with dry). nine0003
Short sections of sand are coasted, at a constant speed or by inertia to avoid unnecessary slip.
The speed must be selected according to the maneuverability.
In other words: speed should allow you to react to the situation without sudden movements (you're not in motocross after all), stabilize you and keep your wheels from bogging down in loose sand.
On public roads, the front brake is the main one and no matter how afraid you are of falling through the steering wheel while braking, with proper experience it saves your life. On the sand, forget about the front brake! Habit or fear, don't touch the front brake! Who can guess why? Come on, I believe in you! nine0003
- Front fork loaded? thought my reader.
Those who remember this can be proud of their motorcycling skills. Loading the front fork in the sand is equivalent to +1000 to digging in the wheel and, as a result, to falling or wrapping the wheel to the sides. Therefore, the engine must be braked. The rear brake can be used, but as a last resort, because the rear wheel is already puzzled by traction.
Engine braking is ideal. In this case, you change the speed smoothly and accurately. A minimum of sudden movements is your main principle in driving on sand. nine0003
The trouble with driving on sand is that with any sharp or wrong movement, as we have already said, the wheels dig in, and the front wheel completely turns to the side in case of an unsuccessful turn. Due to the mobility of the sand, you catch the balance like a tightrope walker. It is easy to cope with sand when there is not enough of it, but it is worth jumping off the track onto a broken primer, which "kind" people decided to heal with a sand machine, then that's it, write "gone".
Hence the conclusion: all maneuvers must be performed along more gentle trajectories. Even if it seems to you that only twenty-ton trucks can turn around with such a radius, your task is to pass the turn without turning the wheel. nine0003
And one more very important observation:
Try not to turn with the steering wheel, but with the tilt of the motorcycle. When turning the steering wheel, the wheel is often covered with sand and you have to fight with the motorcycle. When maneuvering with a tilt, you will have a gentle trajectory, since it is difficult to turn sharply with a tilt. With constant speed or coasting combined with tilt control, you'll be able to maneuver accurately, and you don't need more.
And yes, the slopes can look much more dangerous on the sand than on the pavement, but there is still hope to turn out; the mobility of the sand here will play on your side, subject to experience. Beginners are afraid that the motorcycle is about to fall (on asphalt with such an angle you would already be scratching your back on the dividing line due to a wheel failure), they accelerate and fly out of fear in an unknown direction from the road, as they are in a hurry to level the motorcycle where it is necessary it would be a little succumb and complete the maneuver.