As an ATV owner, it’s a good idea to learn a few basic mechanical skills, such as being able to bleed the brakes when needed.
This job is relatively easy to do and can save you quite a few bucks on mechanical expenses. Follow this guide, and you have a great chance at succeeding with just about every brake bleeding job.
Hydraulic brake systems use special brake fluid to transfer the energy from your hand or foot and down to the brake caliper. The fluid is essential for proper brake function.
Inside the caliper, a piston is being activated by the brake fluid when pressure is being applied. The piston will then press the brake pad against the brake disc, creating friction to stop the bike.
Bleeding the brakes means letting out some of the brake fluid to remove trapped air or to replace the brake fluid altogether.
You can bleed the brakes with the wheels still attached, but it is best to remove them before starting the bleeding job for better access.There are two leading causes for having to bleed the brakes on your ATV:
Brake fluid cannot be compressed, but air can. If even the smallest bubble of air enters the system, the brakes will not function as they should but rather feel soft and squishy. To get all of the air out of the system, we need to “bleed” the brakes.
Air may enter the system if you replace or disassemble one or more components connected with the brake line, such as removing the brake caliper for a service. Or you may have a brake line come loose, allowing air to enter the system.
Please note that air should not get into the system under the regular operation of the ATV. Therefore you have to locate and address the cause of the leak before bleeding the brakes.
Another common situation where knowing how to bleed the brakes comes in handy is when it is time to replace the old brake fluid with new. So-called flushing the brakes.
Brake fluid is hygroscopic, which means it absorbs water over time. Also, it breaks down when being exposed to heat. The fluid closest to the brake calipers is the most affected because of the heat produced when breaking.
Healthy brake fluid should look clear or with just a slight amber color. If it looks like cola, it is well overdue for being replaced.
Bad brake fluid will negatively affect your brakes’ performance, so make sure you replace it in time. Luckily this job is both cheap and usually relatively easy to do.
It’s a good idea to completely replace the brake fluid on your bike every time you change your brake pads or at intervals according to your ATV service manual.
Most ATV’s have one master cylinder for the front brakes on the handlebars and another one for the rear brakes in a separate location. The reservoir for the foot pedal is often located a bit away from the actual cylinder unit.
The setup will vary from model to model. Some bar-mounted master cylinders will operate both the front and rear brakes as well.
The method for bleeding them, however, is pretty much identical.
To locate the master cylinder(s) on your bike, trace the brake lines from the brake caliper. You need to address each brake fluid reservoir connected with the brake you are having problems with.
Here you can see the hose running from the rear brake master cylinder and up to the brake fluid reservoir.If you are not sure where your problem is, you might as well bleed the brakes on all four wheels. Then start with the caliper the furthest from the master cylinder and move against it.
Let us begin with the standard method for bleeding any hydraulic brake system. It requires almost no tools or previous mechanical experience. Just follow the steps below:
Optional (but recommended):
 Use it to collect old brake fluid for proper disposal. Not only will the environment thank you, but you will keep your shop and ATV clean as well.
1. Jack up the ATV.
Start by jacking up the ATV and remove the wheels where you are bleeding the brakes. It is possible to bleed the brakes without removing the wheels, but you will get much better access to the bleed nipple with the wheel out of the way. If this is your first time bleeding the brakes, I always recommend removing the wheels.
2. Remove the brake fluid reservoir cap.
You will need to add new brake fluid as the old goes out. The lid on the reservoir up on the handlebar is held in place with two hex screws. Be careful as the threads strip quite easily.
You find the brake fluid reservoir up on the handlebar.Depending on the bike’s age and the time since the screws were removed, they may be grown in there pretty good. This is where the small impact drivers come in handy. Find the correct bit and use the driver by giving a light tap.
This will knock loose any corrosion and open the screw slightly at the same time. One knock is usually sufficient. The reservoir for the foot pedal usually has a twist cap that unscrews by hand.
3. Clean the cap and rubber diaphragm thoroughly.
You do not want to contaminate the system with debris, dirt, or water when reassembling it later.
Clean the area surrounding the brake fluid reservoir before opening the lid carefully.4. Top of the brake fluid up to the maximum level mark.
Pay close attention so that the brake fluid level in the brake fluid reservoir never drops below minimum while bleeding the brakes. You may need to top off the reservoir several times before you are finished.
It’s recommended that you reinstall the lid before moving to step 5. While it is possible to pump the brakes with the cover off, you run a significant risk of quirting brake fluid all over your bike if you pump the brakes too hard or too fast.
5. Pump the brake lever or foot pedal 3-4 times, depending on which brake system you are bleeding.
Remember to pump carefully if you do this with the lid open! Then keep the lever-activated by hand or by putting on a spring-loaded clamp to keep it under tension.
A spring-loaded clamp or even a bungee cord may be of good help if there is no one around to assist you.6. Open the bleeder valve.
Start with the valve that is the furthest from the brake fluid reservoir. It is located on top of each brake caliper and is opened by turning it anti-clockwise about half a turn. You should see brake fluid squirt out of the bleeder.
Let the brake fluid flow into a container to keep your ATV and garage clean.7. Close the bleeder valve when the brake lever or foot pedal reaches about 80% of its overall travel length.
Do NOT overtighten the bleeder. The threads in the aluminum brake calipers strip easily!
8. Repeat until the brake fluid that comes out of the bleeder is completely free of air bubbles.
This may take a while, depending on how much air there is in the brake lines.
9. Follow the same procedure on all four wheels.
Some bikes have just one combined brake caliper for the rear wheels.
10. Top off the brake fluid reservoir up to the maximum mark.
The mark may be a line found inside the reservoir or an inspection gauge on the side. Other reservoirs have a gauge on top of the reservoir cover that is white when brake fluid levels are low but turns black when the correct level is reached.
This is how it should look like when you have enough brake fluid in the reservoir.11. Replace the lid and rubber diaphragm.
Make sure it is seated properly. Do not over-tighten the bolts. You are now done and can reinstall the wheels.
The manual method works fine most times, but not always. It comes with a few annoying downsides as-well:
The master cylinder on an ATV and the piston inside it are relatively small compared to those you find on cars on any other larger vehicles. Because of its small size, it can only pump a relatively small amount of brake fluid with each pump.
This makes the standard method of bleeding brakes work less efficiently on smaller brake-systems found on ATVs, UTVs, dirt bikes, motorcycles, or snowmobiles.
The amount of fluid being pumped may not be enough to move the bubbles of air out before you bottom out and have to start a new pumping cycle.
It will take about 10-15 minutes to completely flush the brake system on an ATV using the standard method. It will take even longer if you do it on your own.
If you’re having problems removing all of the air, you may be looking at several hours of struggle before you eventually succeed or give up.
When you pump the brakes, you force the air downwards against the bleeding valve. Air is lighter than brake fluid and will always want to go upstream, away from the bleed valve.
Combined with a small pump, you may not be able to get all of the air down to the bleed valve.
So then what? Luckily there is another cheap and easy method for bleeding the brakes that work very well.
Vacuum bleeding is another cheap and easy way you can use to bleed the brakes properly.
In addition to the five first bullet points listed for the standard method, you will also need a hydraulic brake bleeder tool.
These come in various shapes, but they all work by the same principle: they suck the brake fluid down and out through the bleed valve using a vacuum.
Some models use a hand pump to create the vacuum. They will also have a one-way check valve that allows brake fluid to flow out of the brake caliper without letting air back into the system when you release the pump.
Other models connect to an air compressor to create the suction effect.

Now you should be ready to tackle almost any brake bleeding jobs. But from time to time, even the vacuum pump won’t be sufficient to bleed all of the air out of the system.
Before taking the bike to your dealer, it’s worth reading through this post on what to do when you’re not having success bleeding the brakes using the methods described above.
Alternatively, you can try to reverse bleeding the brakes on your ATV.
Bleeding the vehicle's brakes is part of the regular maintenance process. ATVs are not various. While the details procedure of bleeding the brakes might differ depending upon the make as well as the design of your vehicle, the standard steps include draining the brake fluid and then replenishing it with a new lubricating substance to eliminate any type of air bubbles, which might be embedded the system.
As an ATV proprietor, it's a good suggestion to learn a couple of standard mechanical abilities, such as being able to bleed the brakes when required.
This article will certainly take you through what, why, and exactly how to bleed ATV brakes to maintain everything running efficiently as possible so you can kick back and also enjoy your ride.
Table of Contents
Hydraulic brake systems use special brake liquid to move the energy from your hand or foot and to the brake caliper. The fluid is vital for correct brake features.
Inside the caliper, a piston is activated by the brake liquid when stress is applied. The piston will after that push the brake pad versus the brake disc, producing rubbing to stop the bike.
Bleeding the brakes means letting out some of the brake liquid to remove trapped air or to change the brake fluid entirely.
Bleeding ATV brakes eliminate old brake liquid, enabling you to add brand-new brake liquid. It's recommended that you change brake liquid every time you change your brake pads.
You may likewise require to bleed your ATV brakes to get rid of caught air. Air in the cylinder or brake line can make your brake lever feel soft as well as squishy when you push it, seriously impacting braking efficiency.
Bleeding ATV brakes is a relatively easy process that you can do at home with basic tools. There are 3 methods to do it: the manual method, the vacuum method using a brake bleeder device, and also the reverse bleeding method.
You require to jack your ATV as well as remove the wheels before you can bleed the brakes. It is in theory possible to bleed the brakes without removing the wheels but it is much more difficult. Removing the wheels makes it easier to reach the bleed nipple so it is suggested.
You require to put new brake liquid in as the old liquid comes out of the system.
The cap on the reservoir is secured with 2 hex screws. Be careful as you remove it as stripping strings is easy to do.
If it has been a while since you last removed the screw, you may need to use an impact driver. Find the correct bit and then use the driver to tap it gently. Hopefully, this will vibrate any corrosion and open the screw up a bit.
Fortunately, the reservoir for the foot pedal is usually a cap twist that you can do by hand.
Brake liquid needs to be maintained unpolluted so any type of exposure to debris, dirt, or even water needs to be kept to a minimum.
You require to ensure that the level of brake fluid in the reservoir is maintained above the minimum during the bleeding procedure. It might be necessary to replenish the reservoir a number of times during the work.
It is best to replace the caps at this phase. You do not require to and you can pump brakes without cover, however, you are substantially more probable to get brake liquid everywhere.
You will either pump the brake bar or the foot pedal depending on which system you are bleeding. Pump careful if you are risking it and also going cap-free!
You require to keep the lever activated with your hand or by utilizing a spring-loaded clamp. Essentially, you just require to keep it under tension while you are bleeding.
It is much easier to begin with the bleeder valve outermost away from the fluid tank.
The valves will certainly get on the top of the brake caliper as well as are opened by turning anti-clockwise roughly half a turn. If you have done it properly, the brake fluid needs to begin to permeate out of the bleeder.
When the Brake Bar is at Over Three-quarters of the Total Travel Length, Close the Bleeder Valve.
It is very important not to over-tighten the valve as the threads can easily flake off.
You require to repeat these actions up until the brake liquid that comes out of the bleeder valve has no air bubbles in it. Be prepared to do this for some time if there is a lot of air in the brake lines.
Repeat these actions for all wheels. Remember that some bikes have simply one brake caliper for the rear brakes-- they will be incorporated into one.
You require to fill with brake fluid to the maximum marker. This might get on the evaluation gauge on the side of the storage tank on the within. Some have a gauge at the top that changes color depending on whether the level is low or high.
If you are unsure, get in touch with your maker to learn more.
Make sure that the clean and dry cap and seals are properly installed and also make certain not to tighten the screws way too much.
You can currently replace the wheels as well as you are all done!
While a little much more complicated, this method is still a very easy and also low-cost means to bleed brakes as well as might get out more air.
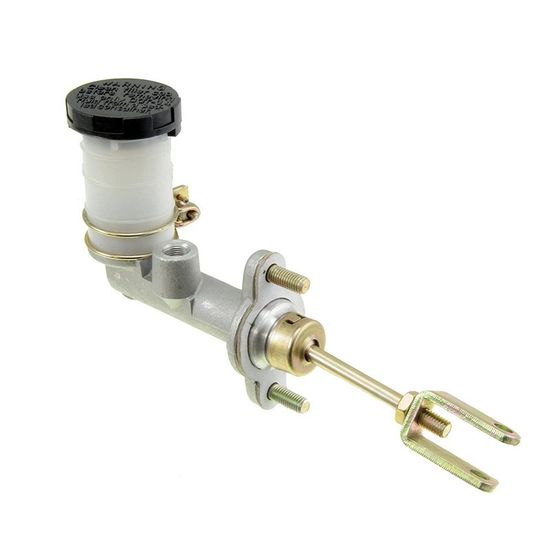
Some versions of hydraulic brake bleeders have a hand pump to create a vacuum. There will additionally be a one-way valve to maintain the liquid in one direction. Other models are connected to the compressor to produce the same vacuum result.
Adhere to the Same Steps for the Manual Method Up till the Brakes are Pumped. Stop right here.
Currently, you need to obtain the 8mm wrench so that it is ready to be used.
Link the hydraulic brake fluid pump to the bleeder valve. It is best to comply with the producer's directions right here for the very best results.
Activate the pump and after that transform the bleeder valve into a half turn. Air bubbles need to be gotten with the fluid and splutter into the container.
You need to pay attention to the level in the reservoir as the pump can drain it immediately if you are not paying attention.
If your level begins to run low, you require to tighten up the valve again as well as switch off your pump. Put extra fluid into the tank, switch the pump back on and also loosen the bleeder valve.
Continue pumping until the brake fluid is streaming in a consistent stream-- no spluttering as this means there are air bubbles-- and also it is clear or slightly amber.
Tighten the bleeder valve and afterward turn off the pumping tool.
Repeat this process for all of the brakes you wish to bleed.
When you are finished, ensure that you top up the brake liquid reservoirs so that the liquid sits at the maximum line.
If you don't want to buy an expensive bleeder venting tool, another quick way to remove trapped air and old oil is to reverse bleeding.
Reverse bleeding works in the opposite way to normal brake bleeding. Instead of pushing the old brake fluid out of the reservoir and draining it through the bleed valve, new brake fluid is added through the bleed valve and the old brake fluid is sucked out of the reservoir.
Not only is reverse bleeding easier and faster (especially because you don't need a pump brake lever), it can sometimes be better at removing trapped air pockets.
You'll need 2 syringes, a 5/16 inch clear tube, a Phillips screwdriver, and an 8mm wrench. Here's the step-by-step process.
 If there's someone else around, ask them to draw out more brake fluid from the storage tank. If you are alone, hang the syringe from something like a band or cord to maintain it upright, then go draw brake fluid from the reservoir.
There are 2 reasons to Bleed your ATV brakes:
The most minute air bubble in the brake system can create problems in features and also make the brake feel squishy or soft. This is a huge safety worry so every one of the air needs to be gotten off the system immediately. You need to bleed your brakes.
Air will not enter the brake system through normal use. You must locate the problem and rectify it. It is best to do this before you bleed your brakes or you will have to bleed once again.
Air can get in the brake system if it is not shut. Seek any type of loosened brake lines and also repair them per the maker's directions.
Changing or taking apart any kind of component connected to the brake line may enable air to enter the system. You might find that you need to bleed your brakes after service, particularly if the brake caliper is taken off.
As brake fluid is hygroscopic, it will take in water throughout its time in your ATV's brake system. Direct exposure to warmth will certainly additionally create the brake fluid to break down, minimizing its efficiency as well as restricting the power of your brakes.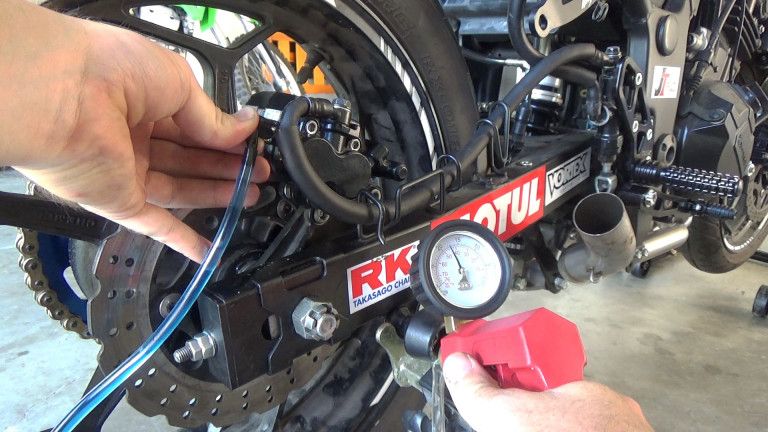 Any type of fluid that is near the brake caliper will certainly be most influenced by heat degeneration due to the high friction near the disc when damaged.
Healthy or new, good-quality brake liquid will be someplace between completely clear and transparent with a color of brownish-yellow. Any brake fluid that looks a lot more like cola or coffee has been waiting on a replacement for a while. Replace it asap!
As bad brake fluid does adversely impact the working of your brakes, it is very important to change it rather on a regular basis. Generally of thumb, you ought to intend to replace your brake fluid every single time you transform your brake pads.
Bleeding the brakes on an ATV is really important to maintain them functioning appropriately.
You can use the manual method to bleed your ATV brakes to easily change the brake fluid or eliminate air bubbles.
If you have a great deal of air in your liquid hereafter process, you might need to attempt once again using a vacuum pump to remove the brake liquid faster as well as with greater pressure. This will drag out more air from the brake system.
How To Bleed Motorcycle Brakes? Best Guide 2022
Rodney L Herron
Rodney L is a technical writer and product consultant with over a decade of experience in the motor industry. Rodney is a fan of performance machines that run fast and loud and an expert in all things custom. His numerous articles and write-ups are available at our knowledge base. Whether it’s something wrong with your motorcycle or you are building a custom bike, you can trust Rodney’s experience.
Bleeding your car's brakes is part of regular maintenance. ATVs are not diverse. Although the procedure for bleeding the brakes may vary depending on the make and model of your vehicle, standard steps involve draining the brake fluid and then adding new lubricant to eliminate any type of air bubbles. that can be built into the system. nine0007
As an ATV owner, it's a good idea to learn a couple of standard mechanical abilities, such as the ability to bleed the brakes when needed.
In this article, you will definitely find out what, why and how exactly to bleed the ATV brakes so that everything works as efficiently as possible, so that you can relax and enjoy the ride.
Contents
Hydraulic brake systems Use special brake fluid to transfer power from your hand or foot to the brake caliper. Fluid is vital for proper brake performance. nine0007
Inside the caliper, the piston is actuated by the brake fluid when a load is applied. The piston will then press the brake pad against the brake disc, creating friction to stop the bike.
Bleeding the brakes means bleeding some brake fluid to remove trapped air or completely replace the brake fluid.
Bleeding the ATV brakes eliminates old brake fluid, allowing you to add brand new brake fluid. It is recommended to change the brake fluid each time the brake pads are replaced. nine0007
You may also need to bleed your ATV's brakes to get rid of trapped air. Air in a cylinder or brake line can make your brake lever soft as well as soft when you press it, seriously affecting braking performance.
Bleeding your ATV brakes is a relatively simple process that can be done at home with basic tools. There are 3 methods: manual method, vacuum method using a brake bleeder, and reverse bleed method. nine0004

You need to jack up your ATV and remove the wheels before you can bleed the brakes. Theoretically, it is possible to bleed the brakes without removing the wheels, but this is much more difficult. Removing the wheels makes it easier to access the bleeder valve and is therefore recommended. nine0007
You need to add new brake fluid because the old fluid is leaving the system.
Reservoir cover secured with 2 hex head screws. Be careful when you remove it as string stripping is easy to do. .
If it has been a while since you last removed the screw, you may need an impact screwdriver. Find the correct bit and then press it gently with the driver. Hopefully this will remove any corrosion and open up the screw a bit. nine0007
Luckily, the foot pedal reservoir is usually a swivel cap that can be made by hand.
Brake fluid must be kept clean, so any exposure to debris, dirt, or even water must be kept to a minimum.
You must ensure that the brake fluid level in the reservoir is kept above the minimum during the bleeding procedure. nine0004 During operation, it may be necessary to refill the tank several times.
It is best to replace the caps at this stage. You don't have to, and you can bleed your brakes uncoated, but you're much more likely to get brake fluid everywhere.
You will either pump the brake rod or the pedal, depending on which system you are bleeding. Inflate carefully if you risk and also go capless! nine0007
You must keep the lever activated by hand or by using a spring clip. Basically, you just need to keep it energized while you bleed.
It is much easier to start with the outlet valve as far away from the fluid tank as possible.
The valves will definitely hit the top of the brake caliper and also open by turning counterclockwise about half a turn. If you did everything right, the brake fluid should start to flow out of the pump. nine0007
When the brake rod is more than three-quarters of its total stroke, close the release valve.
It is very important not to overtighten the valve as the threads can easily come off.
Repeat these steps until there are no air bubbles in the brake fluid exiting the bleeder valve. Be prepared to do this for some time if there is a lot of air in the brake lines. nine0007
Repeat for all wheels. Remember that some bikes only have one brake caliper for the rear brakes - they will be combined into one.
The brake fluid needs to be topped up to the maximum mark. This may hit the evaluation sensor on the side of the storage tank inside. Some have a sensor at the top that changes color depending on whether the level is low or high.
If you are unsure, contact your manufacturer for more information.
Make sure the clean and dry cover and seals are installed correctly and that the screws are not overtightened.
Now you can change wheels like everyone else!
Although this method is a bit more complicated, it is still a very easy and cheap way to bleed the brakes and can also remove more air. nine0007
Some versions of hydraulic brake bleeders have a manual vacuum pump. Additionally, there will be a one-way valve to keep fluid in one direction. Other models are connected to a compressor to obtain the same vacuum. nine0007
Follow the same steps for the manual method until the brakes are bleeding. Stop right here.
You currently need to get an 8mm wrench to be ready to use.
Connect the brake fluid hydraulic pump to the outlet valve. For best results, it is best to follow the manufacturer's directions.
Turn on the pump and then turn the outlet valve half a turn. The air bubbles should get along with the liquid and fall into the container.
You need to pay attention to the level in the reservoir, as the pump can immediately drain it if you don't pay attention.
If your level starts to drop, you will need to re-tighten the valve and also turn off the pump. Pour additional fluid into the tank, turn on the pump again and also loosen the outlet valve. nine0007
Continue pumping until the brake fluid flows in a steady stream - no splashing as this means air bubbles - and until it is clear or slightly amber.
Tighten the bleed valve and then turn off the pump tool.
Repeat this process for all brakes you wish to bleed.
When you are done, make sure you top up the brake fluid reservoirs so that the fluid is at the maximum line. nine0007
If you don't want to buy an expensive bleed tool, another quick way to remove trapped air and old oil is to cancel the bleed.
Bleeding works in the opposite way to normal bleeding. Instead of pushing the old brake fluid out of the reservoir and draining it through the outlet valve, new brake fluid is added through the outlet valve and the old brake fluid is sucked out of the reservoir. nine0007
Not only is re-priming easier and faster (especially because you don't need a pump brake lever), but it can sometimes be better to remove trapped air pockets.
You will need 2 syringes, 5/16" clear tubing, a Phillips screwdriver and an 8mm wrench. Here is the step by step process.
 If there is someone else nearby, ask them to drain more brake fluid from the expansion tank. If you're alone, hang the syringe from something like tape or string to keep it upright, then draw brake fluid from the reservoir.
There are 2 reasons to bleed your ATV brakes:

The smallest air bubble in the brake system can cause function problems and also make the brake soft or soft. This is a huge safety issue and all air must be purged from the system immediately. You need to pump your brakes. nine0007
Air will not enter the brake system during normal use. You must find the problem and fix it. It is best to do this before you bleed the brakes, otherwise you will have to bleed again.
Air can get into the brake system if it is not closed. Look for any loose brake lines and also repair them according to the manufacturer's instructions.
Replacing or disassembling any component connected to the brake line may introduce air into the system. You may find that you need to bleed your brakes after service, especially if the brake caliper has been removed. nine0007
Because brake fluid is hygroscopic, it will absorb water as long as it stays in your ATV's brake system. Direct exposure to heat will certainly further break down the brake fluid, minimizing its effectiveness and also limiting the power of your brakes. Any type of fluid that is near a brake caliper will by far be the most susceptible to thermal degeneration due to the high friction near the disc when damaged. nine0007
Healthy or new, quality brake fluid will be somewhere between completely clear and clear with a brownish yellow color. Any brake fluid that looks more like cola or coffee is long overdue for replacement. Replace it ASAP!
Because bad brake fluid can negatively affect the performance of your brakes, it's important to change it on a regular basis. As a general rule, you should change the brake fluid every time you change the brake pads. nine0007
Bleeding your ATV's brakes is really important to keep them functioning properly.
You can use the manual method of bleeding your ATV brakes to easily change the brake fluid or eliminate air bubbles.
If you have a lot of air in your fluid after this process, you may need to try again using a vacuum pump to remove the brake fluid faster and also with more pressure. This will draw more air out of the brake system. nine0007
How to bleed motorcycle brakes? Best Guide 2022
Rodney L. Herron
Rodney L. is a technical writer and product consultant with over a decade of experience in the automotive industry. Rodney is a fan of high performance machines that run fast and loud and is an expert in all things custom. His numerous articles and reviews are available in our knowledge base. Whether something is wrong with your bike or you are building a custom bike, you can trust Rodney's experience. nine0007
Every self-respecting motorist knows at least a dozen ways to use a good jack. And the fact that with its help they change the wheels is understandable. One of the most reliable designs of jacks remains hydraulic, and it has become available to a wide mass of motorists not so long ago. The fact is that the industry before that produced only heavy-duty hydraulic jacks, which could only be used stationary or transported in trucks. For passenger transport, these mechanisms were simply unsuitable. Large weight, dimensions and a large initial lifting level made their use possible only in boxes and at special service stations. nine0007
Contents:
Now the situation has changed a lot and there are a lot more jacks with hydraulics, and they have become different both in part constructively and in size and load capacity. Now everyone can choose a jack in their weight category and according to their needs. Now you do not need to buy a huge five-ton mechanism in order to raise the front of a small Daewoo. Such small models are compact, lightweight, fit in the trunk and can serve as a small press and a whole bunch of other jobs. nine0007
There are many types of hydraulic jacks, but if our favorite and only one breaks down, we absolutely do not care what you can buy in stores:
The principle of operation is the same for everyone, and do-it-yourself repair of a hydraulic jack must be carried out on the basis of knowledge of its fundamental design, regardless of brand and load capacity. nine0007
Any hydraulic jack has a working fluid, oil, which has a very low compression ratio. For uninterrupted and stable operation of the hydraulic mechanism, periodic fluid replacement and system cleaning are required.
Depending on the load class, the jack can have a two- or three-stage telescopic rod design. Often jacks are equipped with threaded extensions that allow you to adjust the initial lifting height. nine0007
Working hydraulic part consists of:
It is quite easy to deal with all this economy and we will start with the causes of a malfunction in the hydraulic part of the device.
The first cause of hydraulic failure is damage to the plunger mirrors and the working cylinder. In this case, the device does not hold pressure, the oil easily flows from the working chamber to the over-piston chamber, so such a jack simply either does not work or does not hold the load well. Damage to mirrors occurs due to the negligence of the owner. Firstly, the jack cannot be stored and transported horizontally if the manufacturer has not provided for this possibility. The result is leaked working fluid, airing of the hydraulic system, and where there is air, there is corrosion. nine0007
Secondly, when corrosion occurs on the mirrors of the working surfaces of the jack, the cuffs and seals wear out instantly - rubber is not iron. As a result of this history, even more foreign debris, cuff wear products, corrosion products appear in the oil, which leads to clogging of the oil passages and valves. Therefore, it is necessary to replace the fluid and flush the hydraulic system.
Repair of hydraulics comes down to draining the old fluid, completely disassembling the jack and replacing seals and cuffs. There is nothing complicated about this, since the jack does not require any complex adjustments, only diagnostics, maintenance and, if necessary, replacement. And all sealing elements and cuffs, without exception, are subject to replacement. We strongly recommend that you do not go to workshops, and even more so do not look for original seals - it is practically useless. The fact is that almost all sizes of hydraulic jacks, more precisely, its seals, are standard and can be sold at any point dealing with consumables for tractor and automobile hydraulics. It will be three times cheaper, the main thing is to measure rubber parts or take them with you. nine0007
A rolling hydraulic jack differs from a bottle jack only in a more complex mechanical part and hydraulics, which is designed to work in a horizontal position. If it is completely disassembled, the hydraulic part will have very minor changes compared to the vertical jack. The mechanical part is repaired as problems arise, and they can be expressed in the wear of the lever-lift system, the wear of the hinges and joints, as well as in the adjustment of the support mechanism.