Don’t know how to break a tire bead by hand? No problem. We have you covered with all the information you will need in this step-by-step guide.
We break down the procedure from knowing what the tire bead is to successfully breaking it. Read on to save yourself from a trip to the auto shop!
The tire bead is a steel cable covered in rubber that holds the edge of the tire to the wheel. It prevents the tire from shifting out of position when it rolls.
When the wheels are fully inflated, the bead is secured in place within the grooves of the rubber by the air pressure inside.
A couple of reasons you might want to remove the bead yourself are saving money and keeping up the maintenance. Breaking down the bead helps keep the rubber surface clean because it allows you to remove any dirt or debris that would otherwise be locked in the surface.
A mechanic can do the removal but will charge you for a simple task easily done in your driveway. So, let’s learn how you can do it yourself.
Before you can get started on how to break a tire bead by hand, the first step is to position the tire on the ground.
You want the wheel to lay down flat on a hard surface. Working on concrete will be easier than on grass or dirt, where the surface may be uneven. You will need to release the air evenly before moving onto the following steps that will require you to have a good grip on the tire.
Releasing air from the tire will bring down the PSI or pounds per square inch, so the pressure against the wheel’s rim will decrease. This will make it easier to separate the bead from the rest of the rubber. In any other circumstance, you want to make sure your wheels are properly inflated.
One method is to rotate the cap on the valve stem counterclockwise to expose the metal pin located in the center of the valve. Use a screwdriver, a pair of needle-nose pliers, or a similar small tool to press down on the metal pin.
Once enough air has been released, lift the tool off the pin, and the wheel will stop deflating. Replace the cap when finished.
If you want to deflate the tire entirely, you can also unscrew the metal pin with a pair of needle-nose pliers. Air will escape much quicker.
Whichever method you choose, do not lose the cap for the valve stem or the metal pin. Keep them in a safe place until you are done.
The next step leading to the action of how to break a tire bead by hand is to prepare the area around the inner circle of the wheel. When the PSI is below the necessary level for keeping the bead secure, the rim will be easier to pull off. If the tire bead is stubborn, you may need to either deflate it some more or apply more pressure by standing on the tire as you pull it apart.
Since the bead is held firmly against the rim by steel cable and glue, you need to use a lot of force to break the connection. Applying an automotive lubricant along the edge of the rim will make it easier to slide the rubber out from around it. To prevent the metal from being scratched, you can tape it before adding the lubrication.
You want to push the rubber downward as hard as possible so the bead can pop out. Be careful to follow the seam to avoid damaging the metal rim. If you follow the prepping step above, the metal should be well protected.
The lining should be easy to grip and loosen until it can be pulled out from around the rim. The rim can also be removed without requiring additional tools or a machine. When the bead pops out, it will tear away from the rim.
Consider checking: How To Break Bead On ATV Tire
When learning how to break a tire bead by hand, realize that there’s a chance you can cause harm to yourself or the metal rim. Remember to stay safe and follow our step-by-step instructions.
If you ever have doubts, feel free to reach out to a certified mechanic.
Did you find this guide helpful? Then feel free to check out:
How To Set The Bead On A Tire
Getting trash and rubbish inside tires happens quite a lot, especially with vehicle owners having many off-road trips. To be more specific, the trash will make its way onto and into the tire. And this is the reason why we need to break a tire bead.
Tire bead is the innermost diameter of the tire that connects with the wheel rim. Most people think that breaking a tire bead is common knowledge for every driver. However, not that many car owners know how to break a tire bead. As long as the bead stays intact, there is no gap to form between the rim and the outer edge of the tire. Basically, there is no way to fix the tire from the inside, which is another reason to learn how to break a tire bead. In this article, our car experts will tell you what tool you need to break the tire, as well as how to do it.
Bead BreakersBefore getting to know how to break a tire bead, it is essential to acknowledge your best tool. Bead breaker is the car tool with the purpose of separating tires from their rims. Different types of bead breakers have different ways of using. So let’s jump right into answering the question “how to break a bead on a tire“:
This bead breaker uses a plier-type tool in order to apply force between the bead and the rim’s lip. The tool has a spike to perform this task. To be more precise, this spike imposes a force on the bead and the sidewall of the tire to separate them. Therefore, it weakens and removes their connection. This plier type mechanism is amazingly effective and can get the job done very fast. However, it has its disadvantages. The spike is like a double-edge knife that might leave scratches on the surface and on the wheels themselves. Not to mention, this plier type mechanism is very heavy and big, which requires your full body weight in order to get the results.
Shoe and Lever MechanismJust like the name said, the shoe and lever mechanism has a shoe-shaped tool which can apply pressure on the sidewall of the tire. In order to break the connection between the bead and the rim, car owners must push the sidewall. This is, without a doubt, the most popular bead breaker among all, since it works amazingly well on motorcycle tires, new passenger vehicle tires, as well as trailers’ tires. The benefits of this bead breakers are quite a lot: First of all, it is very low cost, so anyone can purchase one for their vehicle. Second of all, the way to use it is quite simple and easy to follow. Last of all, it is made for passenger cars’ tires.
On the other hand, it does not work very well with old and hard-to-change tires. Since the shoe and lever mechanism is also large and bulky, this breaker can only be used on some particular types of tires.
Clamp and Ram MechanismLast but not least, the quickest and most efficient break beads of all time: Clamp and Ram Mechanism. If the first two mechanisms cannot solve the problem with difficult-to-replace tires, this bead breaker can deal with all of them. In order to make it work, this machine uses a pointed foot tool with the purpose of exploiting the space between the bead and the rim’s lip.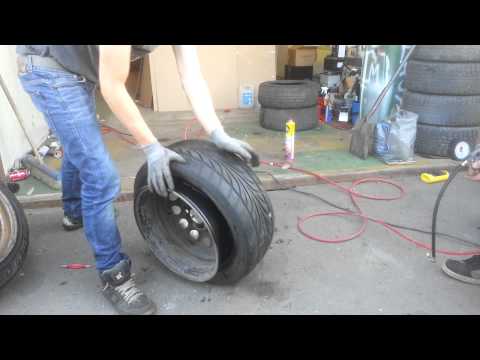 Not to mention, this bead breaker also has a padded clamp. The part can go inside the sidewall with little effort. Long story short, not only this machine works with all types of tires with minimal human effort, it also causes no harm to the sidewall or to the tires. However, it is quite costly.
Knowing that you are already familiar with all the tools, let’s answer the question of “How to break a Tire Bead?”. In order to perform this task, car owners need to follow these steps:
Step 1: Prepare the ToolNo warrior goes barehand into the war. Here is the tool list that you need:
In order to start breaking tire bead, car owners need to be taken off the valve core to release air pressure out. This step needs to perform before and during the first stages.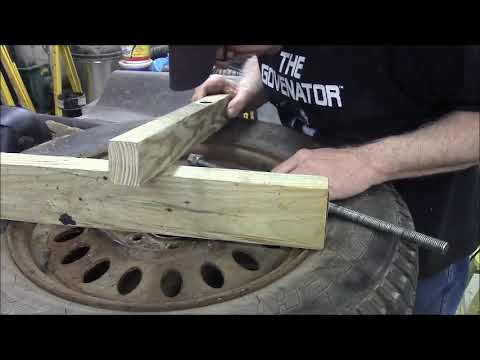
When the valve core is removed, car owners need to put the wheel under the brace. By performing this, the air will be pushed out and we can easily take the wheel off the rim. Just remember to wait until all the air pressure is lost in order to remove the wheel. A little tip to check the tire is to press your hands against the tire’s surface.
Step 3: Place Tire on a SurfaceIn this step, car owners need to lay the tire on a hard surface. After that, you should position the breaker bar between the rim and tire. Before proceeding to the following step, it is suggested to check if the tapered edge of the breaker bar is aimed toward the tire, not the rim.
Also, a solid surface is the necessary factor in this step, since it is capable of handling the pressure you are going to apply on.
SEE MORE
Inner Tire Wear: Causes And Fixes
Must Have Tools For Garage: A Comprehensive List
The next step of “How to break a tire bead” is to slide the breaker bar between the rim and the tire.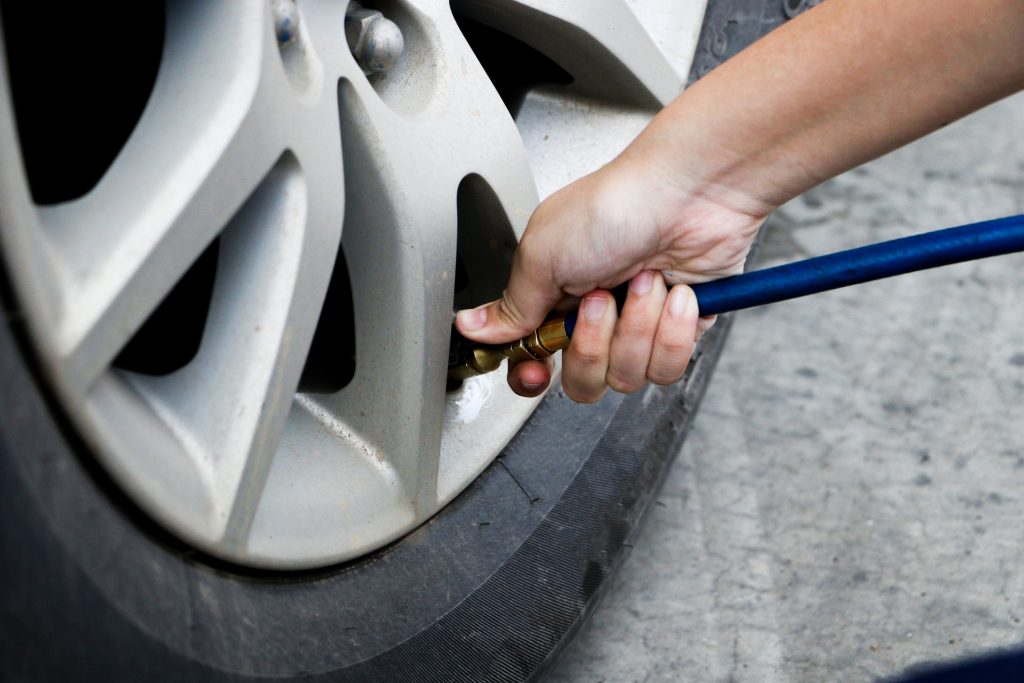 It is essential to check if the pointed edge of the breaker bar points away from the tire’s rim. The reason for this is that the edge is highly sharp and might create scratches inside. For that reason, car owners might want to aim the bar to the tire, not the rim.
When the breaker is already steadying in the distance between the rim and the tire, it is time to hit it with a hammer with the purpose of breaking tire bead. Wait, we are not telling you to destroy the tire! The purpose of doing this is to drive the breaker inside. So keep hitting it and pushing the breaker bar toward the ground until the bead is broken and we can tell by a small pop sound.
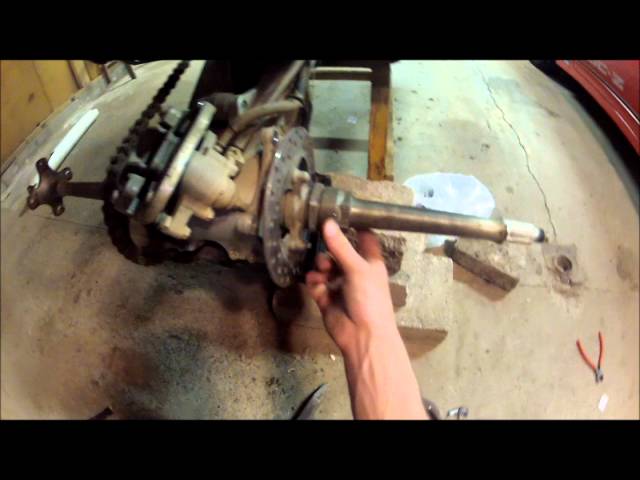
Just take time with this, breaking a tire bead is no joke (Photo Source: bendpak)Step 6: Rotate Around the Tire’s InsideLast step of how to break a tire bead is to remove the tire of the rim. Car owners are recommended to rotate the breaker around the tire’s inside while continuing hammering from above. Keep doing that until the tire is off the rim, then turn around and do the same with the opposite side of the tire.
Many people might be wondering, why do drivers need to learn how to break a tire bead? One of the reasons is that the process is simple to follow, even with beginning car owners. All drivers need is thirty minutes and this instruction. Another reason that it provides a great help in cleaning up debris and dirt inside the tire. By breaking the bead, vehicle owners can remove the rubbish inside and reduce the future problems. The last reason is to save the cost of paying a car repairman, since you can remove the tire from its rim by yourself.
If a tire is damaged, a spare wheel must be fitted. The replacement job is not difficult, but many drivers make a number of mistakes. This leads to injury during replacement, possibly the occurrence of emergencies in the future.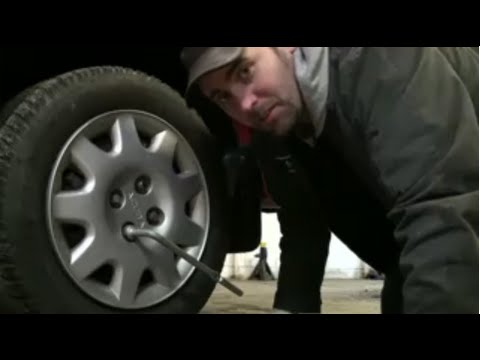 We will analyze the process of installing a new wheel in more detail.
Before you change the wheel, you need to choose the right place. It is advisable to choose a platform with a hard surface. This will allow you to optimally place the jack. If this is not possible, you can put a wide board under the jack.
The ground must be level. It is not recommended to change the wheel on slopes or in the presence of a pronounced slope. A slope can cause the vehicle to fall off the jack, roll, or roll over.
Be sure to place wheel chocks under the wheels. It is advisable to carry specialized stops in the trunk. If they are not there, you can use a brick, or other similar object. During operation, the spare wheel should lie under the threshold, this will protect your car in case of a fall from the jack, then we put the removed wheel there until the work is completed.
The car must be put on the handbrake. This will prevent rolling. If it is necessary to change a wheel on the rear axle, additionally engage first gear.
Before removing the wheel, the tool must be prepared. Usually enough jack and balloon wrench. A socket wrench is used as a balloon. Most passenger cars have bolts or nuts for 19. But, just in case, you should make sure that in some cases there may be options for 17 or 21.
It is now standard to use bolts as fasteners. They are erroneously called wheel studs. But, on SUVs, light and heavy trucks, you can find fasteners using nuts that are screwed onto studs coming out of the hub.
It is impossible to say which method is more reliable. Usually, the manufacturer chooses the mounting option based on the technical features of the car.
Drivers often use decorative wheel caps. Removing them is often not easy, they are made of plastic, they easily crack with inaccurate movement. You need to understand how to remove them correctly.
As a result, the cap should remain in our hands.
The next step may be to unscrew the secret bolts. To avoid theft of wheels, bolts with special heads are often used. To unscrew them, it is enough to use the adapter, which usually comes with the locks.
But what to do if the adapter is lost. In fact, you can unscrew the bolt, but you have to tinker. If you are replacing at a car service, you can ask to weld a regular nut onto a lock.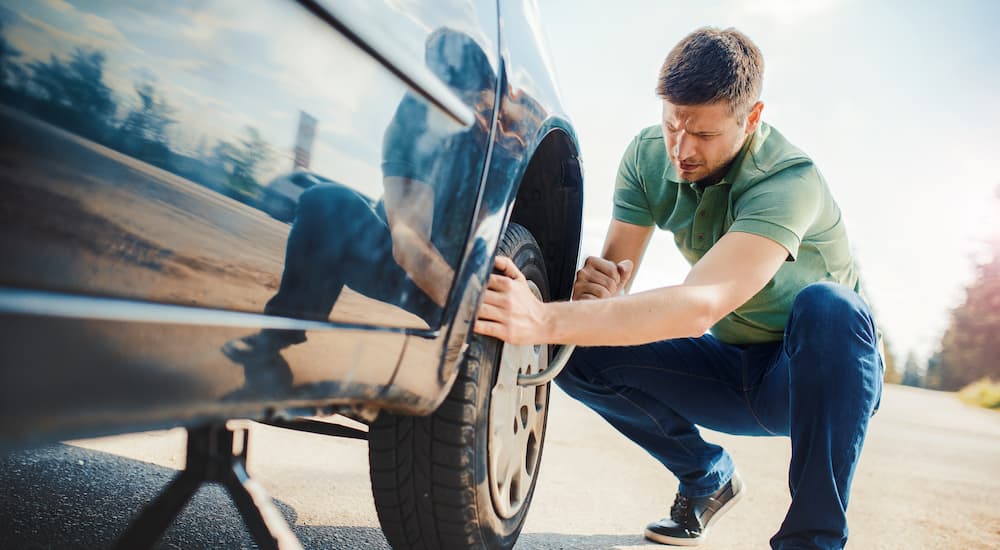 On the road you will have to use a different method.
For this you will need a jack, hammer, pliers. We tighten the bolts without secrets as much as possible. We hang the wheel, and inflict several strong blows on the secret. We lower the jack, unscrew all the bolts, and raise the wheel again. We take the tire with both hands and pull it on ourselves several times. Lower the jack and tighten the remaining bolts.
Repeat the process 3-5 times. Usually this is enough, and the secret can be unscrewed with pliers.
It is important to have a suitable jack. There are several varieties of jacks, we will consider only three types that are easiest to carry in the trunk.
 It is considered insufficiently stable.
 The important point is the correct installation of the jack. If you put it wrong, you can hush up the threshold. This will lead to the need for body repairs.
All passenger cars have a special platform near each fender - "jacking", it is equipped with a special ledge in the form of a rib. This rib must fit into the notch in the jack.
Sometimes on older vehicles “the jack is missing or corroded. In this case, you can take a board 25-50 mm thick and up to the middle of the body, it is inserted between the jack and the body.
Place the jack on a hard and non-slip surface. If you have to raise the car on a primer, it is better to put a plank under the jack.
Often you have to change the wheel on the side of the road, it usually has a sandy surface, just in case, take a small plank or plywood with you.
Raise the wheel until it is completely off the ground. It is enough to achieve a separation of 1-2 cm.
Removing the wheel yourself is not a problem. But, you need to do it right. Let's analyze the process in detail.
If the wheel is stuck and won't come off, gently tap on the edge.

Installing the wheel with your own hands is also not difficult. To put the wheel in place, just follow these steps.
At this point, we can assume that the wheel has been replaced.
After 5-10 kilometers, check the tightness of the bolts.
The decorative cap is easy to install. It is enough to press it against the disk until it clicks. In order not to lose the cap, we fix the part on the disk with plastic ties.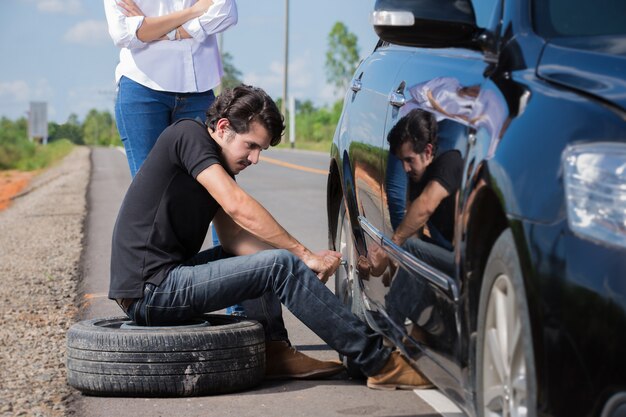
You can change the wheel yourself, the main thing is to know the basic rules and nuances. This skill is useful to every motorist.
The availability of tire shops has allowed the vast majority of drivers to do without the knowledge and skills of self-beading car tires. But for some, this skill can help in a number of situations. Not everywhere there are tire shops, not all wheels allow movement after a puncture, and someone can get into a difficult financial situation when the opportunity to save money on visiting a workshop would be useful. 9Ol000
The procedure itself, with experience and some physical capabilities, will not be difficult.
Theoretically, all tires are divided into tube and tubeless. In the first type, a chamber is also embedded in the tire, which actually ensures tightness.
With high-quality and precise manufacturing of tires and rims from modern materials and proven technologies, the need for a chamber is eliminated, and with it the extra mass of the wheel assembly, which is unsprung, that is, especially harmful to the properties of the car.
Read: Why drivers put tubes in tubeless tires and how to do it
Accordingly, any car owner will have to deal exclusively with tubeless tires. There are exceptions when the tire, due to age and minor damage, as well as due to corrosion of the disk, ceases to hold air.
Sealants do not always help, so in order not to throw away a tire with a still deep tread and preserved sidewalls, a tube is put into the wheel. This is rare, but it still happens.
Wheels for tube and tubeless tires are also different. They differ in the size of the hole for the valve, as well as in the presence of a special annular protrusion on the rim shelf - khampa in the case of a tubeless version.
It prevents the wheel from breaking apart on the move if there is some loss of pressure. No hump will help from complete depressurization, the tire will be torn off the disk.
The suddenness of a puncture event, and the scarcity of repair shops along the roads in the old days, led to the emergence of many folk methods for dismantling a tire in order to replace the tube or apply a patch to it.
Tubeless tires are also puncture-repairable, for which there are appropriate first aid kits. There are also those in which there is no need for disassembly. But for a reliable repair, the tire is still better to remove.
Continuation: How to repair a tubeless tire yourself (harness set and repair kit)
There are two problems with dismantling. The first is to tear the edge of the tire off the rim shelf. There is a recess in the center, so the edge fits freely into it, and it sits on the shelf with a significant interference.
Especially on a wheel that looked like a lot, where metal corrosion and rubber degradation caused the tire to stick to the rim. The situation in the case of a tubeless tire is aggravated by the presence of a hump, the outer diameter of which exceeds the landing size of the tire, the bead will have to be dragged through it with force.
Second - move the edge of the tire over the edge of the disk. It is not easy enough, but in the presence of lubrication it is carried out with a pair of mounting blades. Or a roller fixture of an assembly machine.
The first problem is solved in various ways, differing in the nature of the application of the pull-off force.
When hitting, a lot of force is developed, but the situation is complicated by the elastic resistance of the tire. They hit the edge of the tire through a spacer in the form of a corner or other object that excludes rubber breaks.
The method is dangerous and not recommended for use.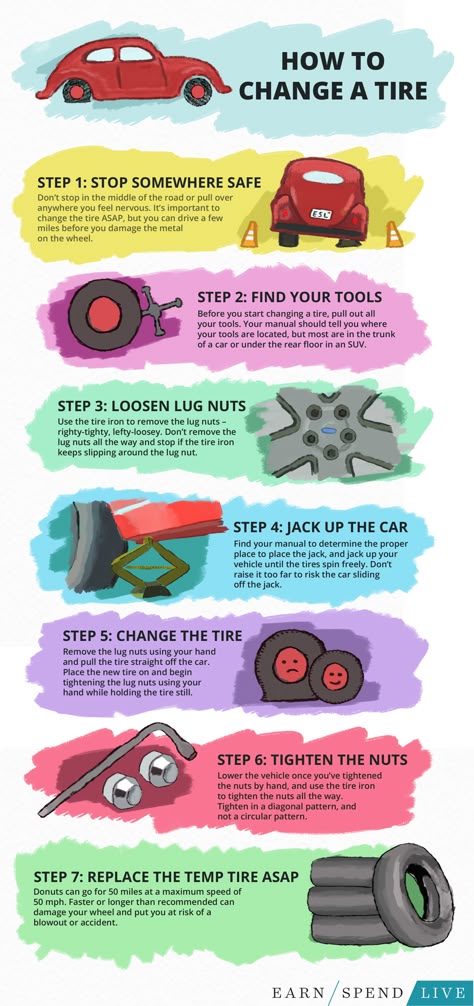 But many succeed in a hopeless situation.
The force is applied through the lever of one of the devices or a significant mass in the direction perpendicular to the plane of the wheel:
It is easiest and safest to have a dismantling tool in advance.
To make the job as easy as possible, you will need:
Even if the tire is completely flat, you must unscrew the spool from the valve, and a little pressure will still interfere.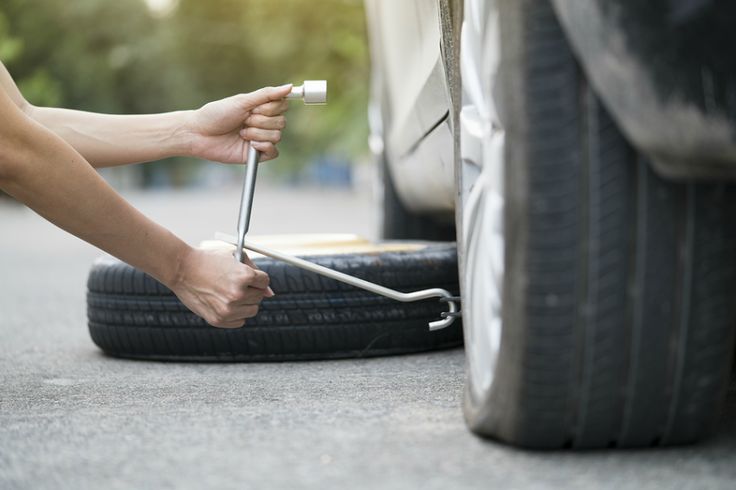
Gap between rim and tire is wetted with penetrating lubricant. Then a device is applied to the wheel and a gradual separation of the edge of the tire is made with its shift inward.
Don't do it in one motion, you could damage the tyre. Start on the opposite side of the valve.
After completely tearing off the edge and dragging it over the hump, everything is repeated from the opposite side of the wheel. The tire beads move to the middle of the disc, it is lubricated again.
Starting from the valve, the tire is dragged over the flange of the disc with two pry bars. The second edge is dragged in the same direction, it is necessary to act from the side of the disk.
Due to the lack of a hump, the process is easier. You just need to make sure that the camera does not get between the mount and the disk.
If it is not necessary to completely remove the tire, it is enough to remove the inner tube for repair after tearing off both beads and dragging the outer one.
If you don't use lubricant or soapy water, it is very difficult to drag the bead over the disc. The friction of dry rubber on metal will not allow this to be done, the risk of damaging the rubber increases.
In the impact method, the rubber with its elasticity sends a heavy hammer back with great energy, this is dangerous.
Read: How to unscrew the lock on the wheel if you lost the key
Even with a good tool, trying to tear off the bead in one motion will damage the inner cord of the tire. It is necessary to act in several steps around the circle.
Be especially careful with the edges of the cast alloy wheel.