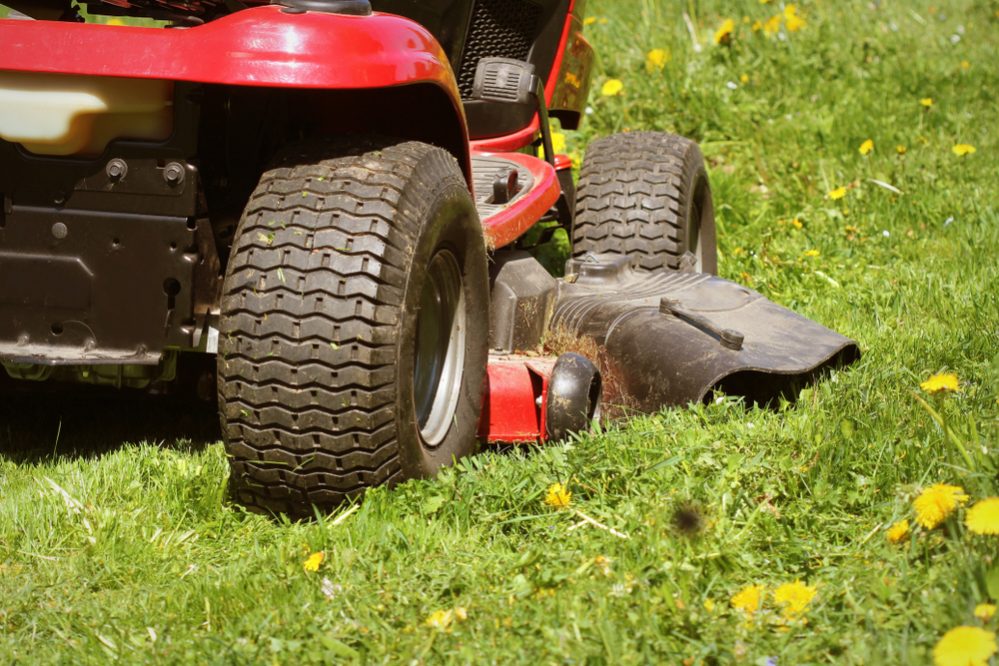
Getting a new ATV can be exciting. You’ve already planned out thrilling off-road adventures and you can hear the sound of the tires hitting the gravel in your head.
Unfortunately, you can’t simply start riding your ATV off the bat. Before your new ride is ready for regular riding, you’ll need to go through an early testing process known as “breaking in.” This easy process is crucial to your ATV’s life and performance, but many riders are impatient and skip it or rush through it. To avoid expensive, hazardous problems down the line, break in your vehicle with these simple steps.
When you first purchase a vehicle, its parts need a chance to warm up and get used to being used on the road together. “Breaking in” a vehicle refers to the process in which you run the vehicle on a light load or low power. The term is often used in reference to the engine, but any part of a vehicle can be broken in.
Check your vehicle’s user manual for more information about how your vehicle should be tested upon purchase.
READ MORE: Tips For First Time ATV Owners
Breaking in helps the vehicle’s engine smoothly get used to expanding and contracting, which will ensure that it is aligned properly. Otherwise, overworking an engine immediately after purchasing it can damage its cylinders, which creates many problems.
READ MORE: Common ATV Problems and How To Resolve Them
Warm It Up and Rev It Up
When you first begin breaking in your four-wheeler, you’ll want to give it a few minutes to warm up. This should take less than ten minutes, though it will ultimately depend on the engine’s size and the liquid’s ability to cool. In the future, it’s a good idea to do this whenever you ride your ATV.
Do a 20-Minute Active Engine Run
Once your quad is warmed up, let its engine run for 20 minutes. This is a crucial step, as you’ll be able to test out your vehicle’s basic ability to function. During the engine run, test out different throttle settings, going between idle and 70% throttle. Unless you notice any alarming mechanical issues, slowly increase the throttle, now testing out the 50% to 80% range. If everything is fine, continue on to running the vehicle as if it were being taken for a real ride.
Change the Oil and Filter
The work you’ve done up to this point has taken burrs and metal bits off of the piston rings, cylinder bores, and bearings they were attached too. As a result, these bits have contaminated the oil. The only way to deal with this is to change the oil.
It’s recommended that you install a new filter before filling up with new oil. Use conventional oil rather than synthetic oil. This will help continue the rest of the breaking-in process smoothly.
Don’t Go Too Hard, Too Fast
Taking it slow and steady is always a good approach to breaking in any type of vehicle. Overwhelming the engine can disrupt the process. Rather than trying to rush through the break-in period, consider running the vehicle and changing the oil over multiple trials, increasing the throttle and length each time.
Run Your Engine Normally
As you continue breaking in your four-wheeler, run the engine as you normally would on the road. This important step gives you the opportunity to test the vehicle’s proper functions in the manner that you can actually expect to ride with. Do this for at least five hours – you want to give your vehicle the chance to demonstrate any last-chance issues before you’re finished testing.
READ MORE: Features to Look For in a New ATV Purchase
Do a Second Oil and Filter Change
It’s important to change the oil multiple times to ensure that no debris is left in the fuel. Now that you’ve finished testing out your engine’s performance, it’s time to give it one last oil change.
This time, replace your oil with whatever kind of oil you plan on using permanently.
Enjoy As Normal
Now that you’ve completed breaking in your vehicle, you can ride confidently, knowing you’ve settled the engine in at an appropriate pace and cleaned out the oil filter of any debris. Now, there’s only one thing left to do: take your ATV on its first real ride.
These steps have ensured your safety and your vehicle’s functioning, and you should be ready to take on any terrain. Of course, ride safely, and regularly monitor your vehicle for any maintenance issues. Take care of your ATV, and it will take care of you.
Running a new ATV engine can be a nail-biting experience. It’s important to get it correct. The break-in period will affect how the engine performs throughout its life.
To break in a new ATV, follow your manufacturer’s break-in recommendations. A typical new or rebuilt engine break-in procedure is as follows:
1 Use regular engine oil for the break-in procedure
2 Check fluid levels
3 Warm engine
4 Check for leaks
5 Run engine up to 75% throttle in 2 and 3 gear for 30 minutes
6 Change oil and filter
7 Repeat 5 & 6, and the engine is run-in
In this post, you’ll learn how I break in a new engine, and I’ll explain why I do it this way.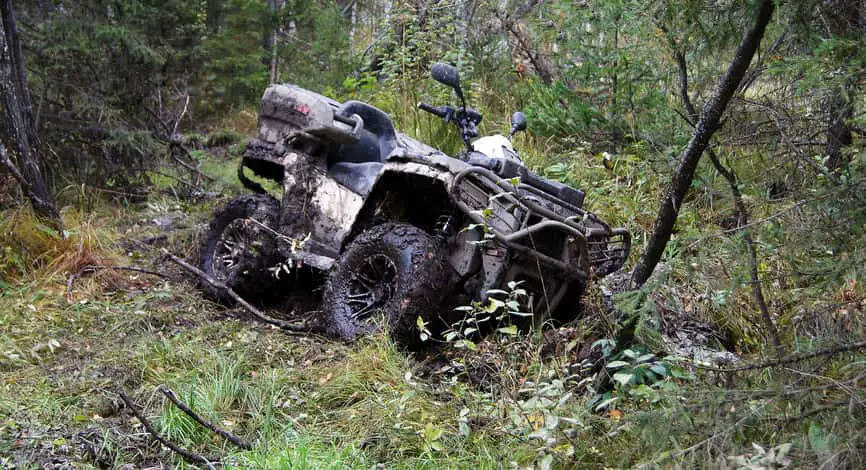
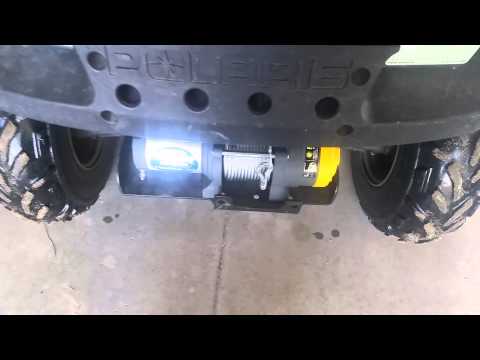
Getting a new set of wheels is an exciting time. These toys are expensive. You want to treat them right and have them for many trouble-free years.
When breaking in a new ATV, it’s the engine we’re concerned with. Most other components don’t need a break-in period.
I’ve been lucky enough to own a couple of new ATVs and a ton of used ones. I’ve rebuilt lots of engines, and in this guide, you’ll see how I break them in.
Page Contents
When engines are built, the cylinder is honed or crosshatched. That’s a system of polishing, if you like, the cylinder wall surface.
Crosshatching the bore creates an abrasive surface, and you’d think that counterproductive, but crosshatching is needed to help shape the new piston rings to the exact shape of the cylinder wall.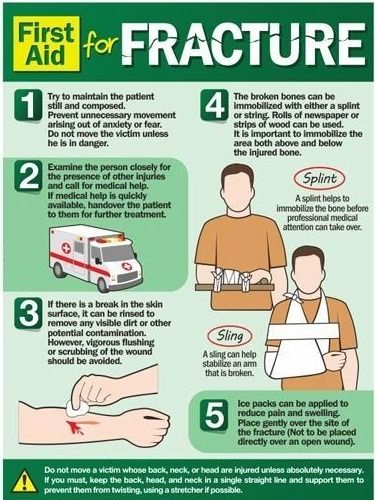
The better the cylinder and ring surfaces pair, the better she’ll perform over her lifetime. Your engine will be noticeable more:
The break-in starts with the oil. Synthetic and semi-synthetic oil is excellent, but that’s a problem when breaking in a new motor. We want the rings and crosshatched bore to make good contact. Without contact, the bedding won’t happen.
Synthetic oil is too slippy for break-in. If your engine has synthetic oil in from the factory, change it, run with regular petroleum-based oil, just for the break-in procedure.
Check the fluids, allow the engine to idle for a few minutes to warm up. Take this time to check for any leaks or loose components. When the engines warm, we’ll start the break-in procedure immediately.
You’ll need somewhere you won’t be impeded. It isn’t practical to run a break-in session where there’s traffic or pedestrians etc.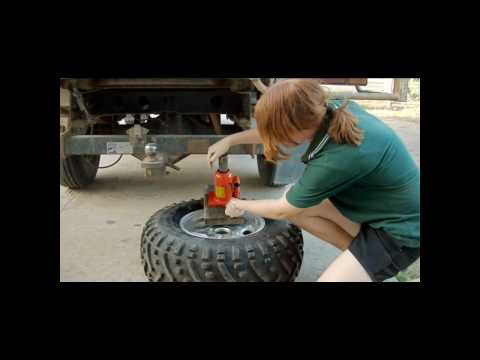 A quiet country road is ideal.
Run the bike at 75% throttle in 2 and 3 gear, varying the time spent at 75%. Allow the engine decelerate, again varying the time spent decelerating. Run this cycle for 30 minutes, keeping an eye on the temperature.
If the bike gets too hot, use good sense, run it in a higher gear and back off the throttle.
The break-in period doesn’t last long on a new engine. For most, the window is a few hours of running. After that, the opportunity is lost. The rings and cylinder are pretty much as mated as they’ll ever be.
Do you think 75% throttle is too much? Yea, I can see why you’d think that. I run at 75% because I want the piston rings pushed hard against the cylinder wall for as long as possible during the break-in window.
The higher rpm creates more ring cylinder wall pressure and, therefore, better pairing.
After 30 minutes run time, drop the oil and filter and replace again with non-synthetic petroleum-based oil.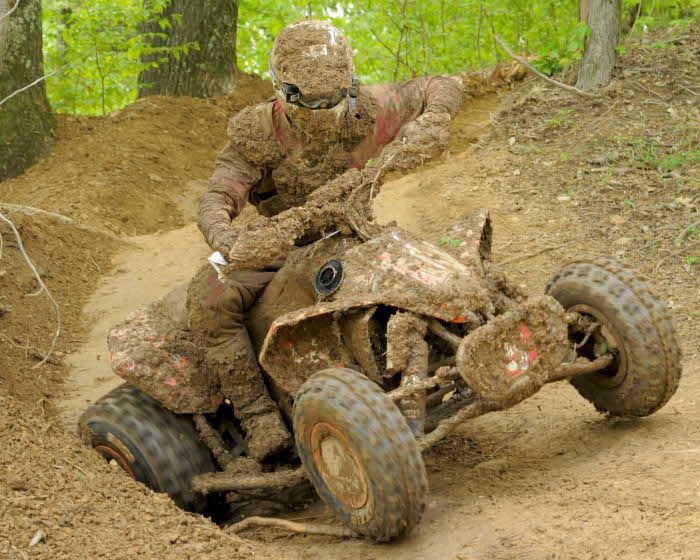 I’ll change the oil because at this stage risk of contaminants in the oil is high. The break-in sessions will cause fine metal particles to circulate the oil system.
Check all fluids and allow engine idle to operating temperature once again. Repeat the break-in drive cycle for another 30 minutes, as before.
After two-thirty-minute sessions, your engine is broken in. I changed the oil and filter again, but this time use the recommended grade oil. You may be semi or fully synthetic. I changed the oil again after about 8 hours of running time and from then as per your manual.
If your new ATV is CVT belt-driven, break-in is minimal. Most manufacturers will ask that you refrain from running at full throttle until the belt beds in. Overheating the belt can cause glazing and transmission slip.
That’s it, congratulations, and enjoy many years of trouble-free ownership.
You may find the following posts useful:
How often to service bike?
How often should I start an ATV?
Storing ATV outside
Stels ATVs have long conquered the expanses of Russian off-road. If you ask any quad rider what he likes most about this sport, you will most likely baffle him, it is so difficult to choose one from the whole host of sensations. Someone will remember the indescribable feeling of speed, someone likes riding in the mud, and someone loves to fly over the dunes. However, for many, jumping on a quad bike is the most exciting experience. ATV jumps vary from taking off a little on a random bump to flying off a springboard, but it's definitely one of those hard-to-forget-feelings, just as hard to forget any feeling of free-flying. After all, the heart stops even for those who simply watch the flight from the side.
However, in order for the thrills not to have tragic consequences, it is necessary to prepare not only yourself, but also your device before flying. How to ensure your safety when jumping?
Of course, you shouldn't do extreme sports without protective equipment, make sure that your body is protected as much as possible and at the same time the equipment must be of high quality to provide sufficient freedom of action. Try to get a complete set from boots to a helmet and goggles and be sure to protect your body well, because you will be in the air with a device weighing several centners, in case something goes wrong you will need reliable protection.
First of all, you need to remember the basics of jumping, which is that when taking off and landing, your front wheels should be slightly higher than the rear ones, and you need to keep the ATV in the air in such a position during the entire flight. Then the rear wheels will touch the ground on landing earlier than the front wheels, which will soften the impact when touching the ground. Landing on the front or all four wheels takes most of the impact on the ground, which is enough energy to throw you out of the saddle.
The second rule of extreme jumping is not to sit while jumping. You have to stand in the ATV, or at least raise yourself in the saddle, only then your legs will act as an additional shock absorber, helping to soften the impact. Otherwise, having taken a hit on the fulcrum, you can easily fly out of the saddle at the moment when, after compression, the shock absorbers are again unclenched. Allow the craft to move under you in flight, and by lifting yourself off the seat, you will have more freedom to move your body and balance, which will allow you to adjust the angle of the entire craft-racer system.
There are two ways to achieve the desired angle, controlling the position of the body and using the accelerator. When approaching the liftoff point, lean back to lighten the load on the front wheels, control the throttle smoothly, preventing the ATV from tilting forward after the liftoff. If you understand that the speed for the jump is too high, slow down slightly, and just before the takeoff, release the brakes and squeeze the gas. It is important to choose the right acceleration so that it is not too large and at the same time too small. In general, the choice is determined by many parameters and is usually selected individually by the rider for his ATV. That is why you can move on to ski jumping only after preliminary training on small jumps. This is especially important if you are riding this ATV for the first time, before going into sharp turns, experiment on small obstacles.
When jumping on a quad bike, you may find that not everything goes as it was originally intended, and you usually notice this when you take off from the ground. Your ski jump might actually be steeper than you thought, you might yank the handlebars too hard or add too much throttle and the quad will become vertical in the air. In this case, begin to shift your body weight forward by pushing down on the handlebars to lower the front wheels down. Release the gas and apply the rear brakes. Oddly enough, they can help you even if the wheels are no longer touching the ground. The fact is, stopping the rotation of the rear wheels causes inertia to lower the front wheels down. In order not to cut off the engine, do not forget about the traction when braking in the air. If you land with your front wheels up, slow down, shift your body weight forward, and be prepared for a sharp rudder jolt. One of the dangers in this case is to fly forward and get under the wheels of your own ATV.
If the rear wheels are up, shift the weight back and press the gas, this is one of the most dangerous situations that should be avoided as much as possible. However, if you do not get confused, you will be able to level the ATV in the air.
Remember that while jumping on an ATV is similar to jumping on a motorcycle, one of the main differences is the need to watch four wheels instead of two. Do not allow the ATV to skew, otherwise you run the risk of simply breaking the rear axle when landing. Remember that the wheels should touch the ground at the same time, if you feel the ATV lean to one side, you need to shift the weight to the opposite leg and try to straighten it in the air - this is another reason to stand rather than sit in the saddle when jumping.
Moscow:
1st Varshavsky proezd, 2s8
+7 499 500-97-34 Call me back
Page not found at given address.